How To Create Online Classes Report from Raveendra Choudary
Myclassboard started empowering students to attend live online classes(conducted by their school teachers) and learn from the convenience of their home.
To create the online class in MCB,
Step 1: Log in to MCB with Login Credentials.
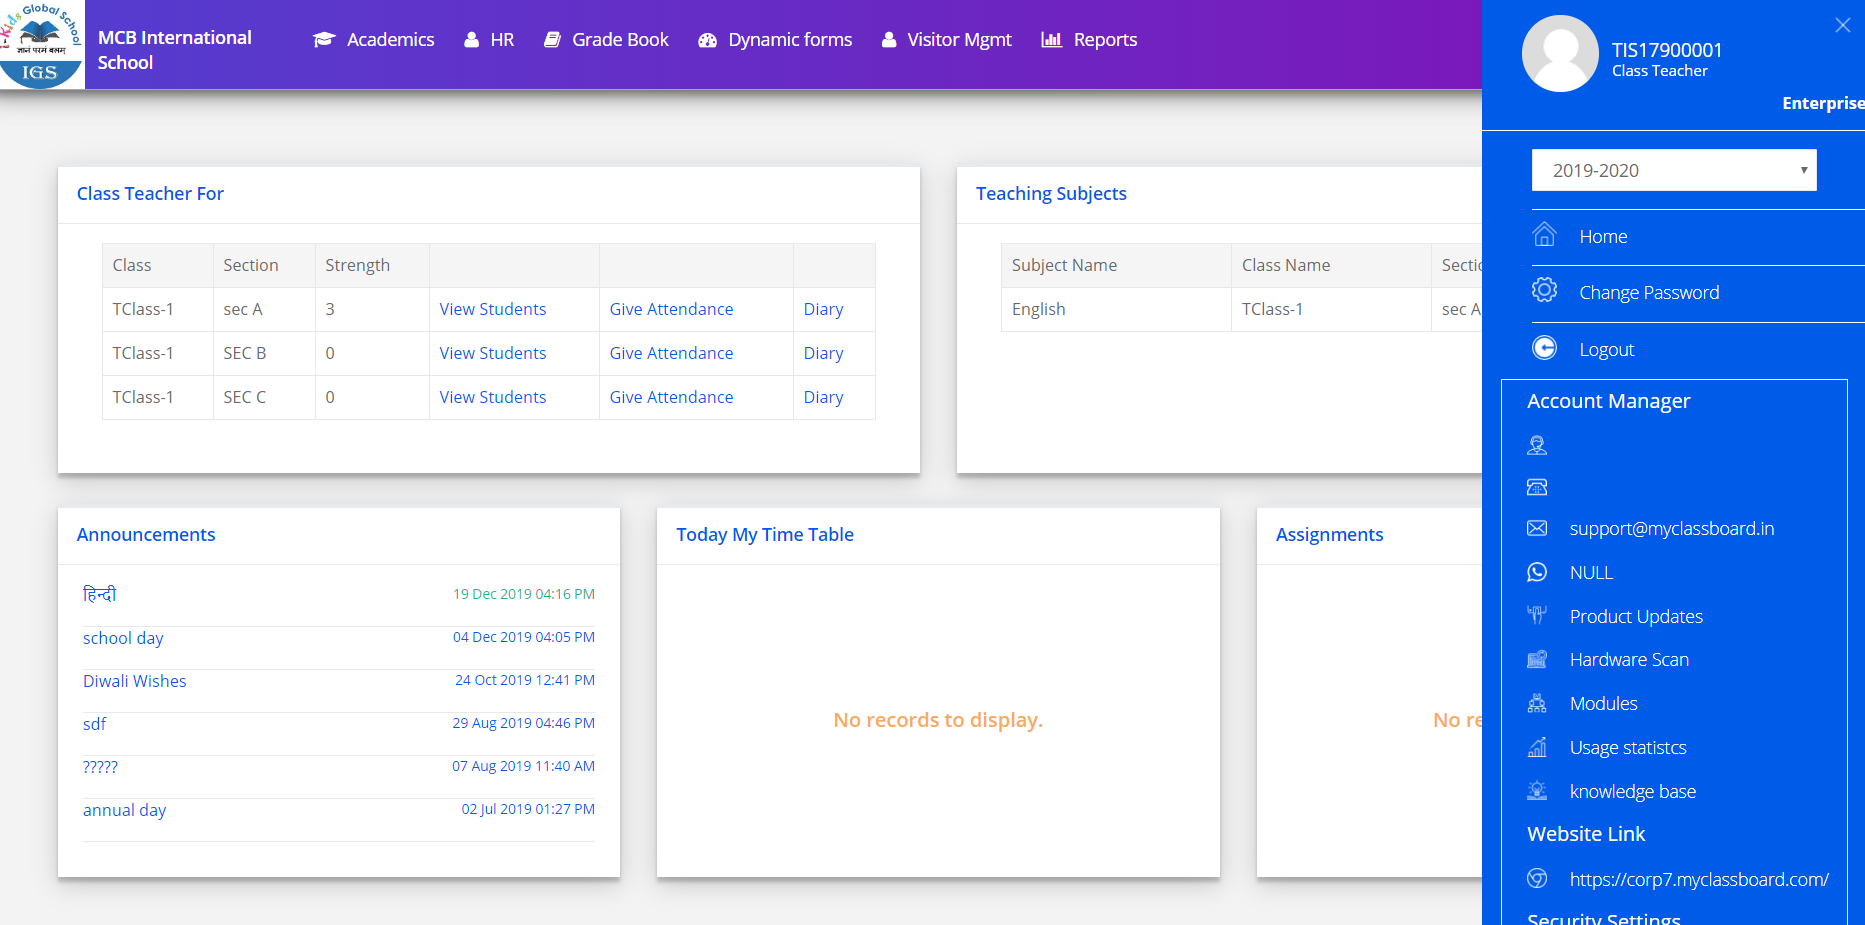
Step 2: Click on the Communication module by clicking on the Home option next to the profile picture.
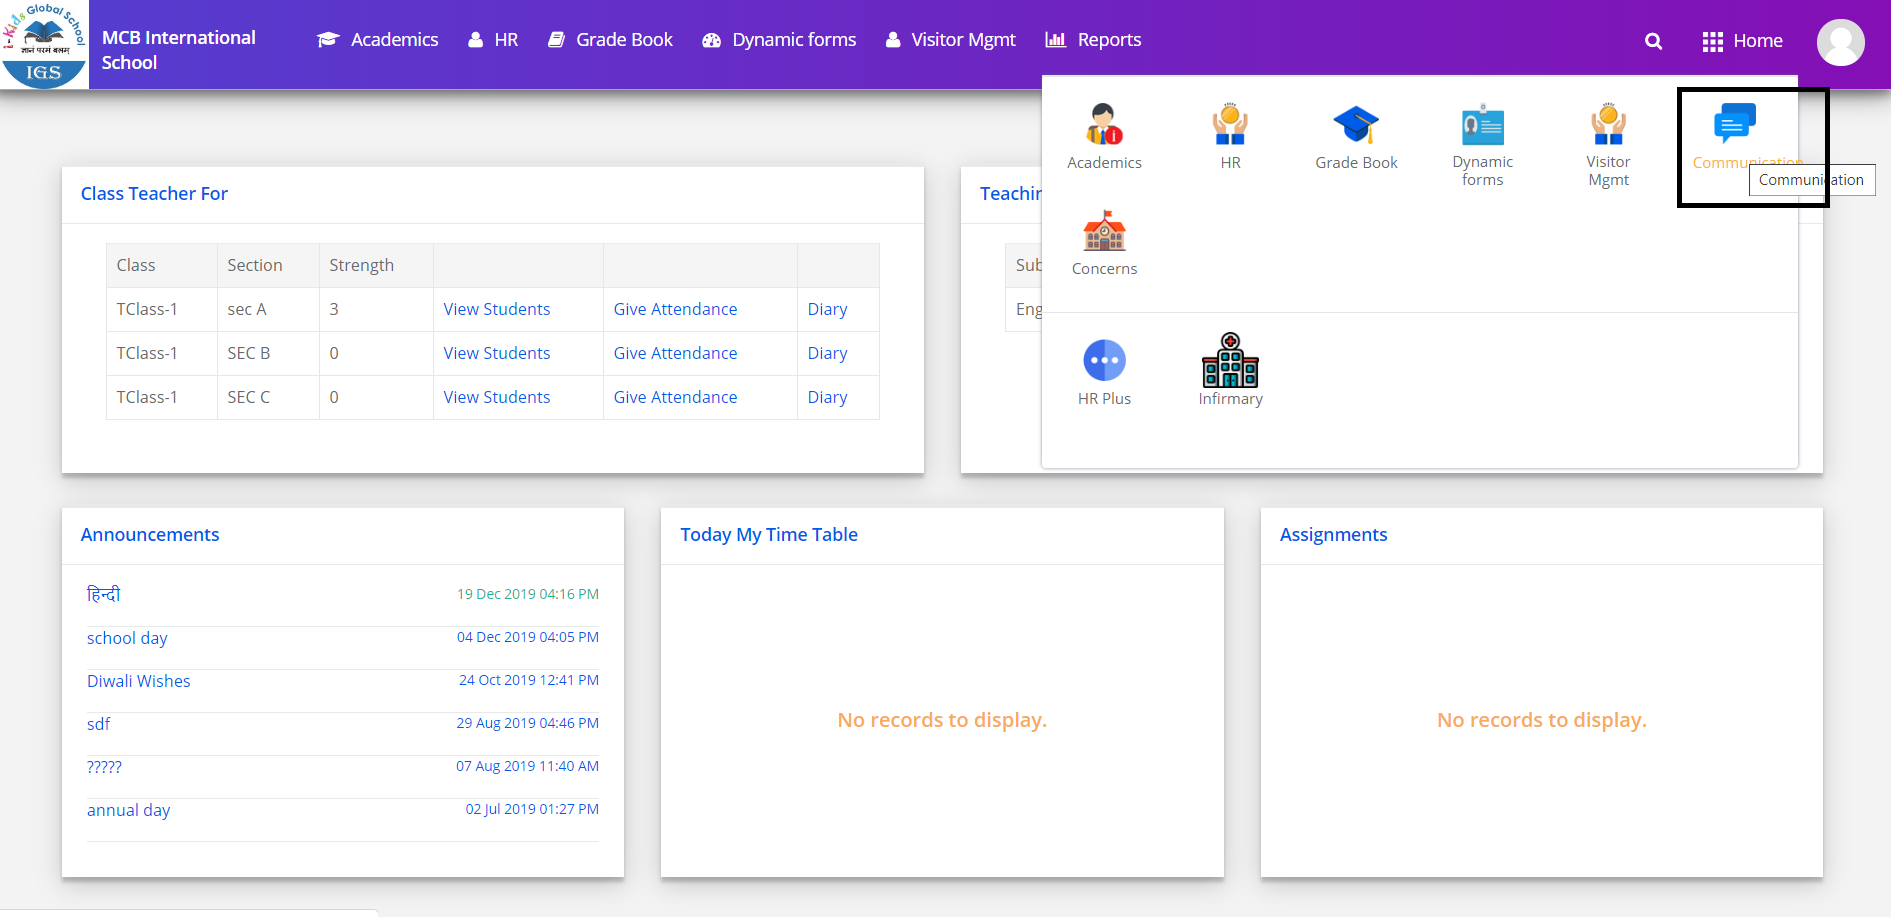
Step 3: Click on the “Online Classes” link under the communication menu.
Step 4: To create online class, click on create Online Classes option which on the top right corner of the screen.
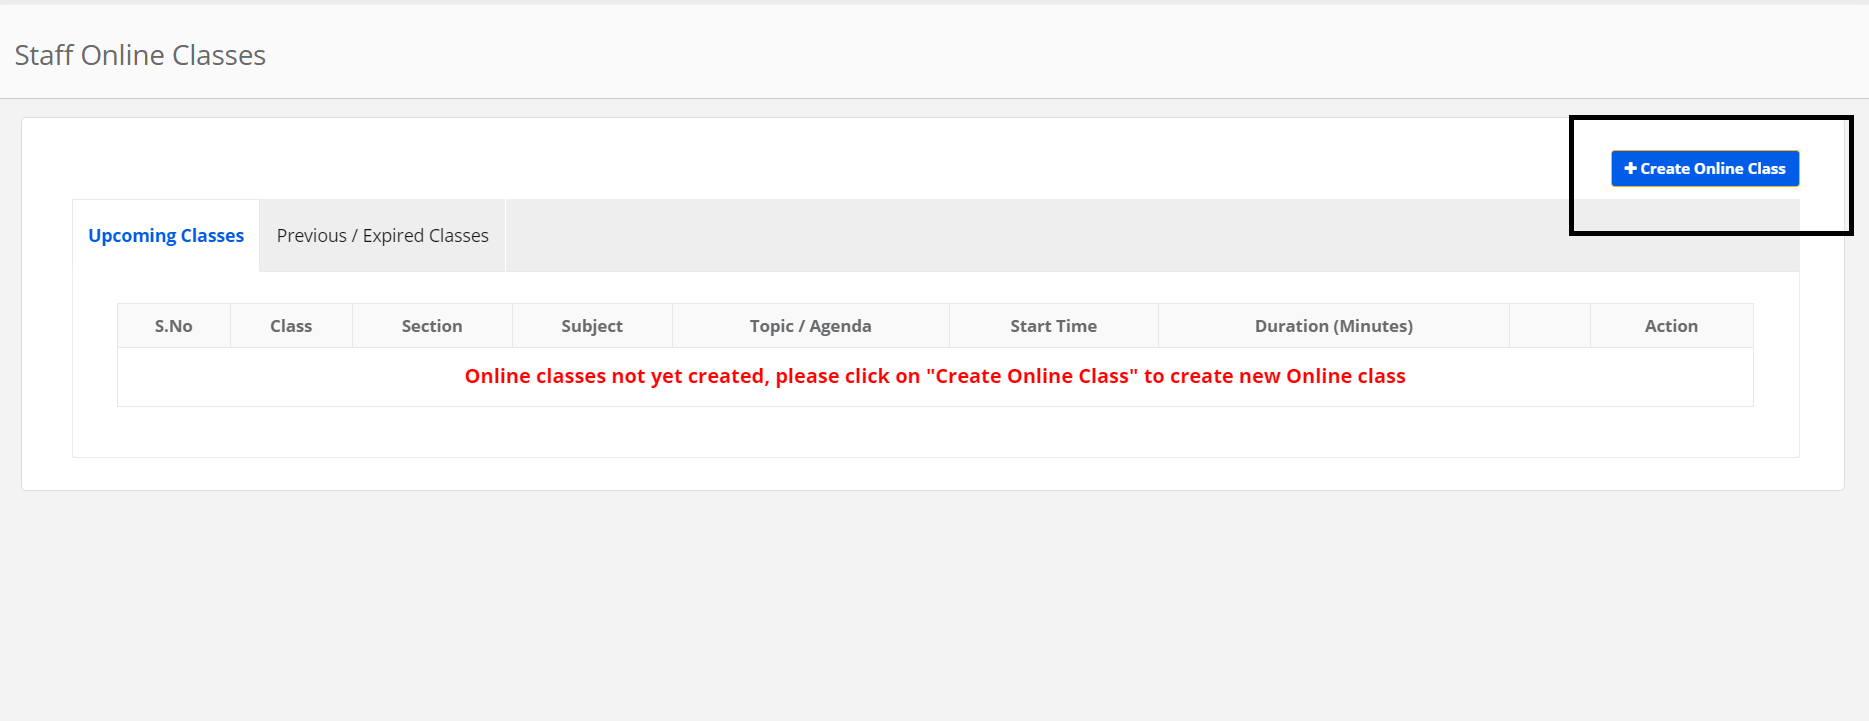
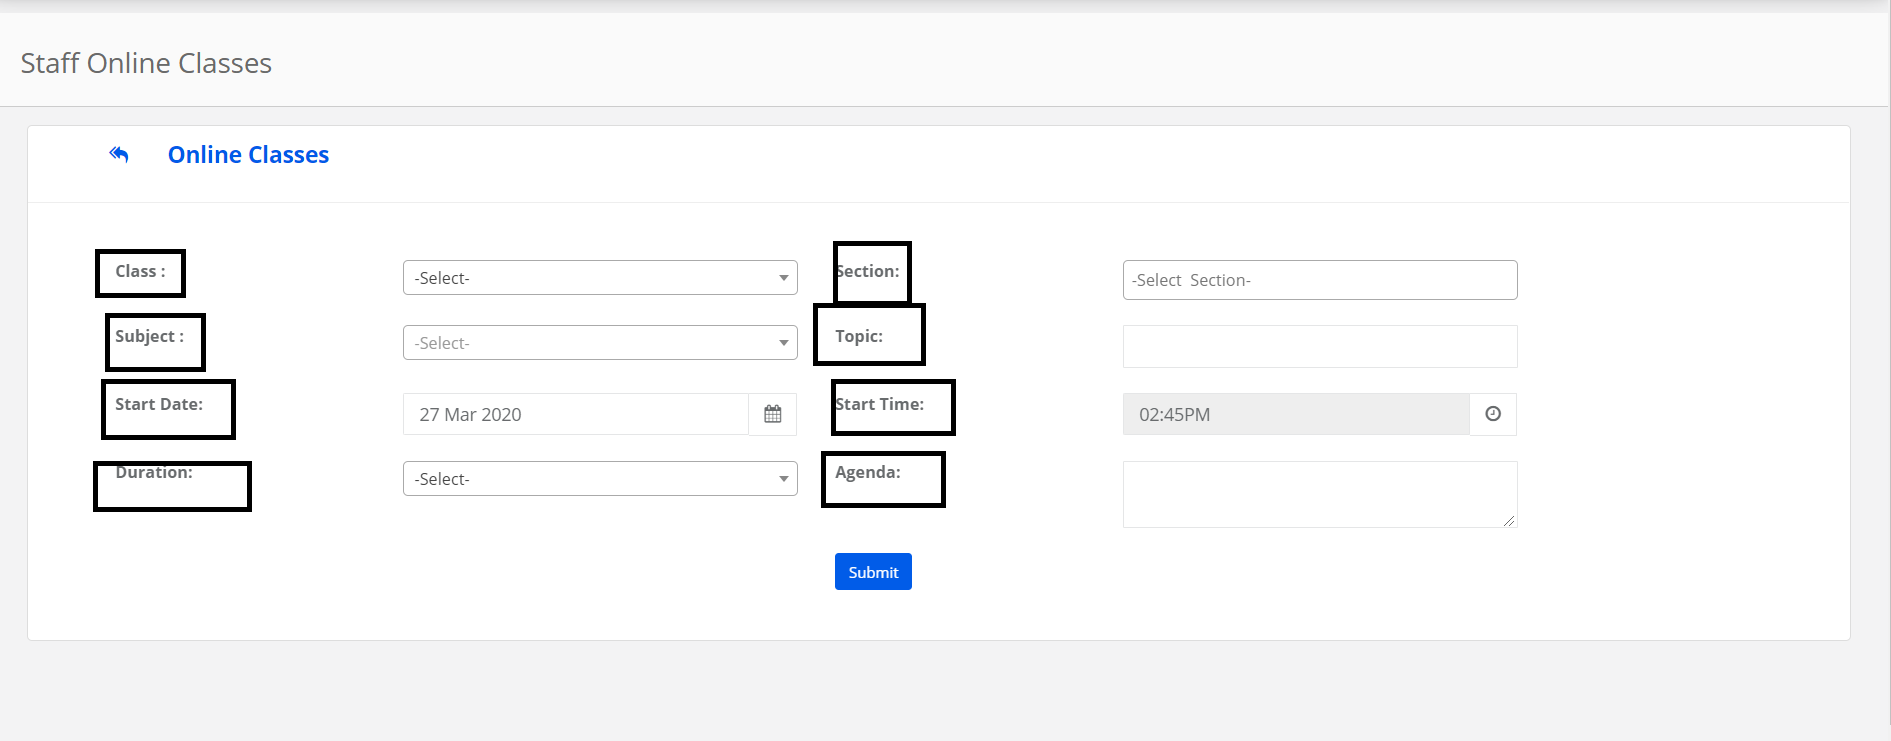
Step 5: You will be redirected to create the online classes page.
Select the Class, Section, Choose the Subjects and enter the Topic.
Choose the Date, Time & duration of the Online class, enter the agenda & click on Submit to save the Online Class.
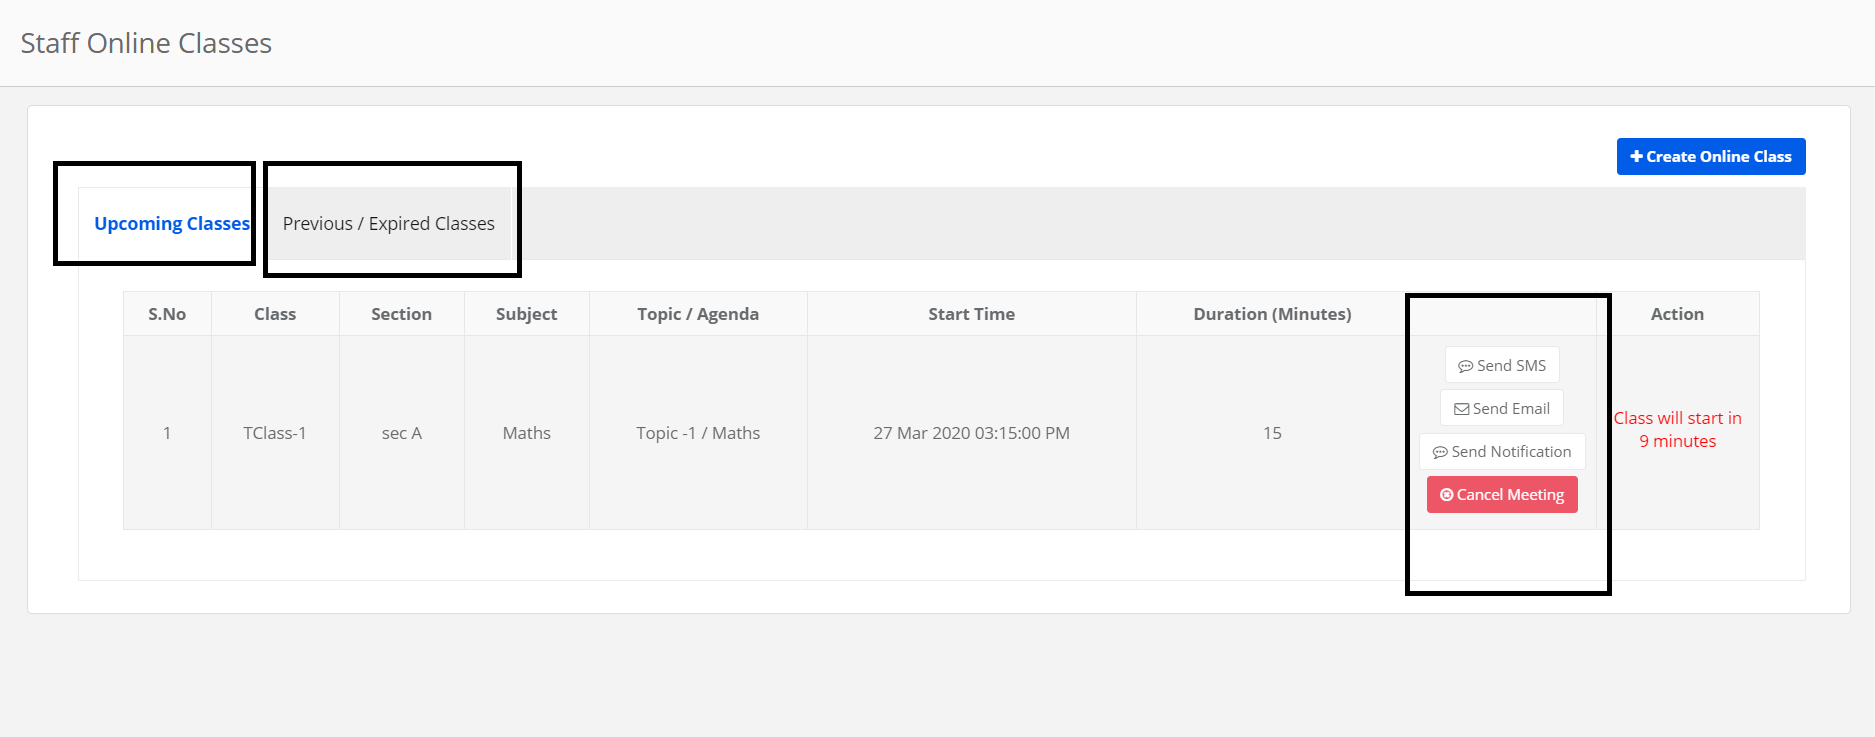
Step 6: You may check the online Class dashboard showing Upcoming Classes & Pervious/ Expired Classes
Under the Upcoming classes, against each session, you will have options to send the SMS, Email, Mobile App Notifications for the students to notify about the Online Classes.
If needed, you can also Cancel the Scheduled Meeting.
You can find the Status of the Online Classes (To Start / Class will start in time ) under the Action which is based on Time & Duration.
You can view the Previous or expired Online session details under Previous/expired Classes
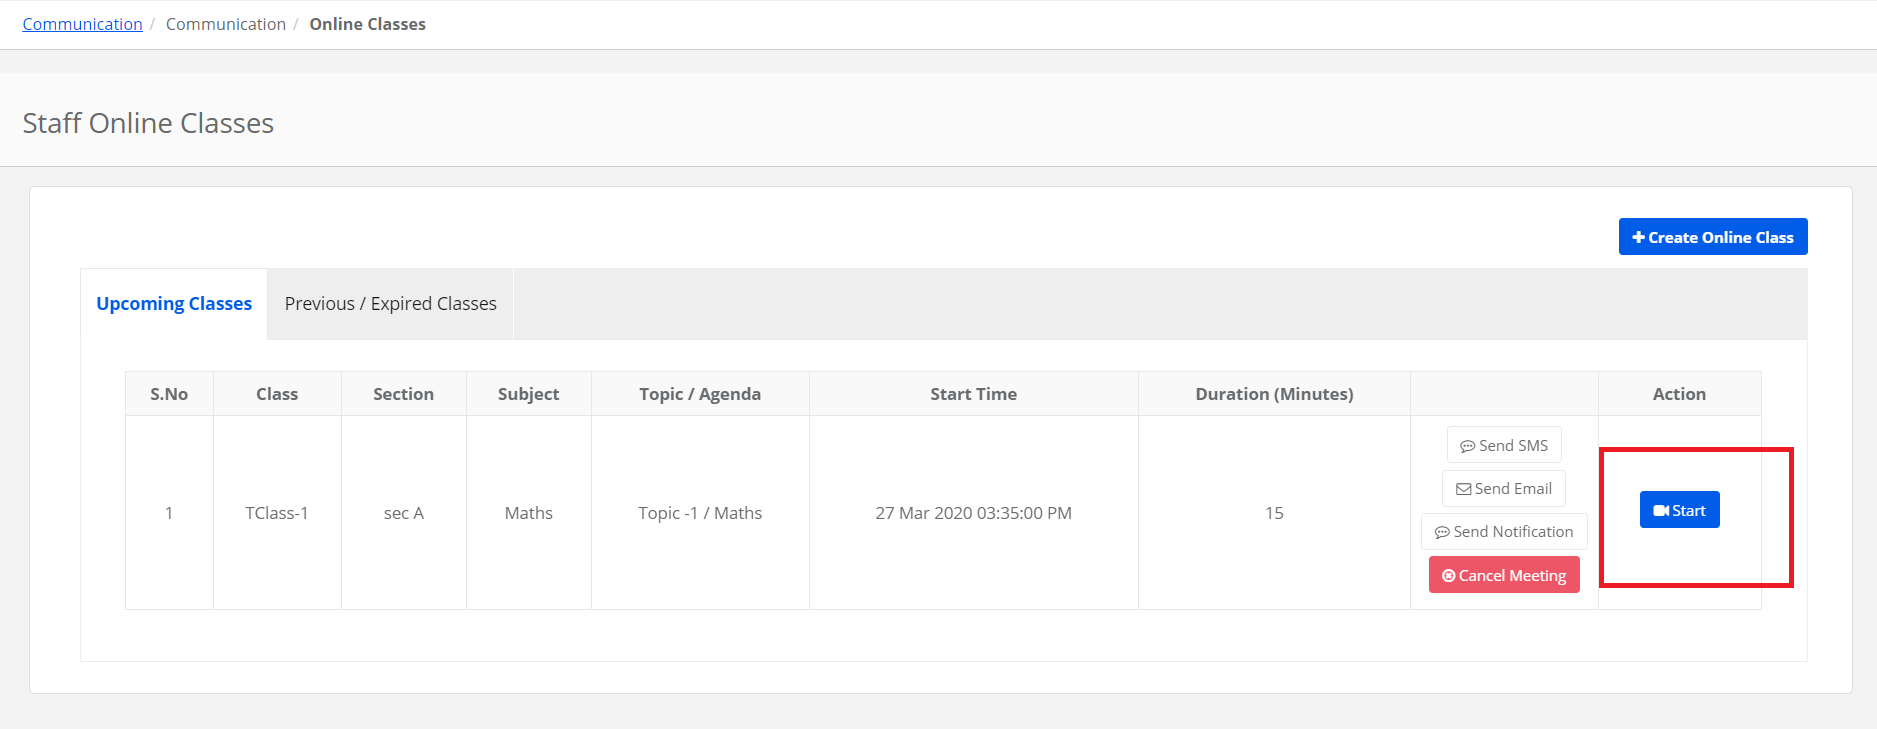
Step 7: Click on the Start button to start the Online session
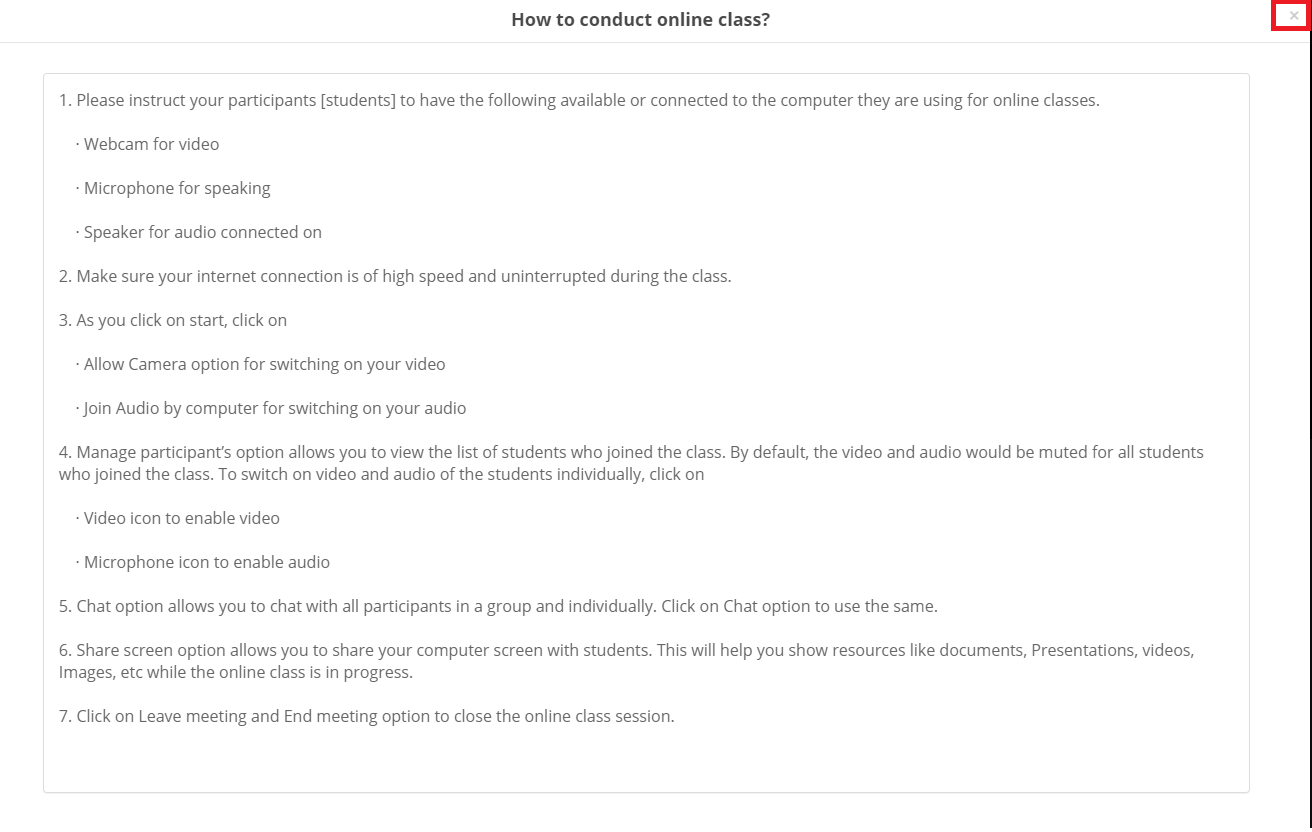
Step 8: Read the instructions given in the pop window. Click in cross mark to close it.
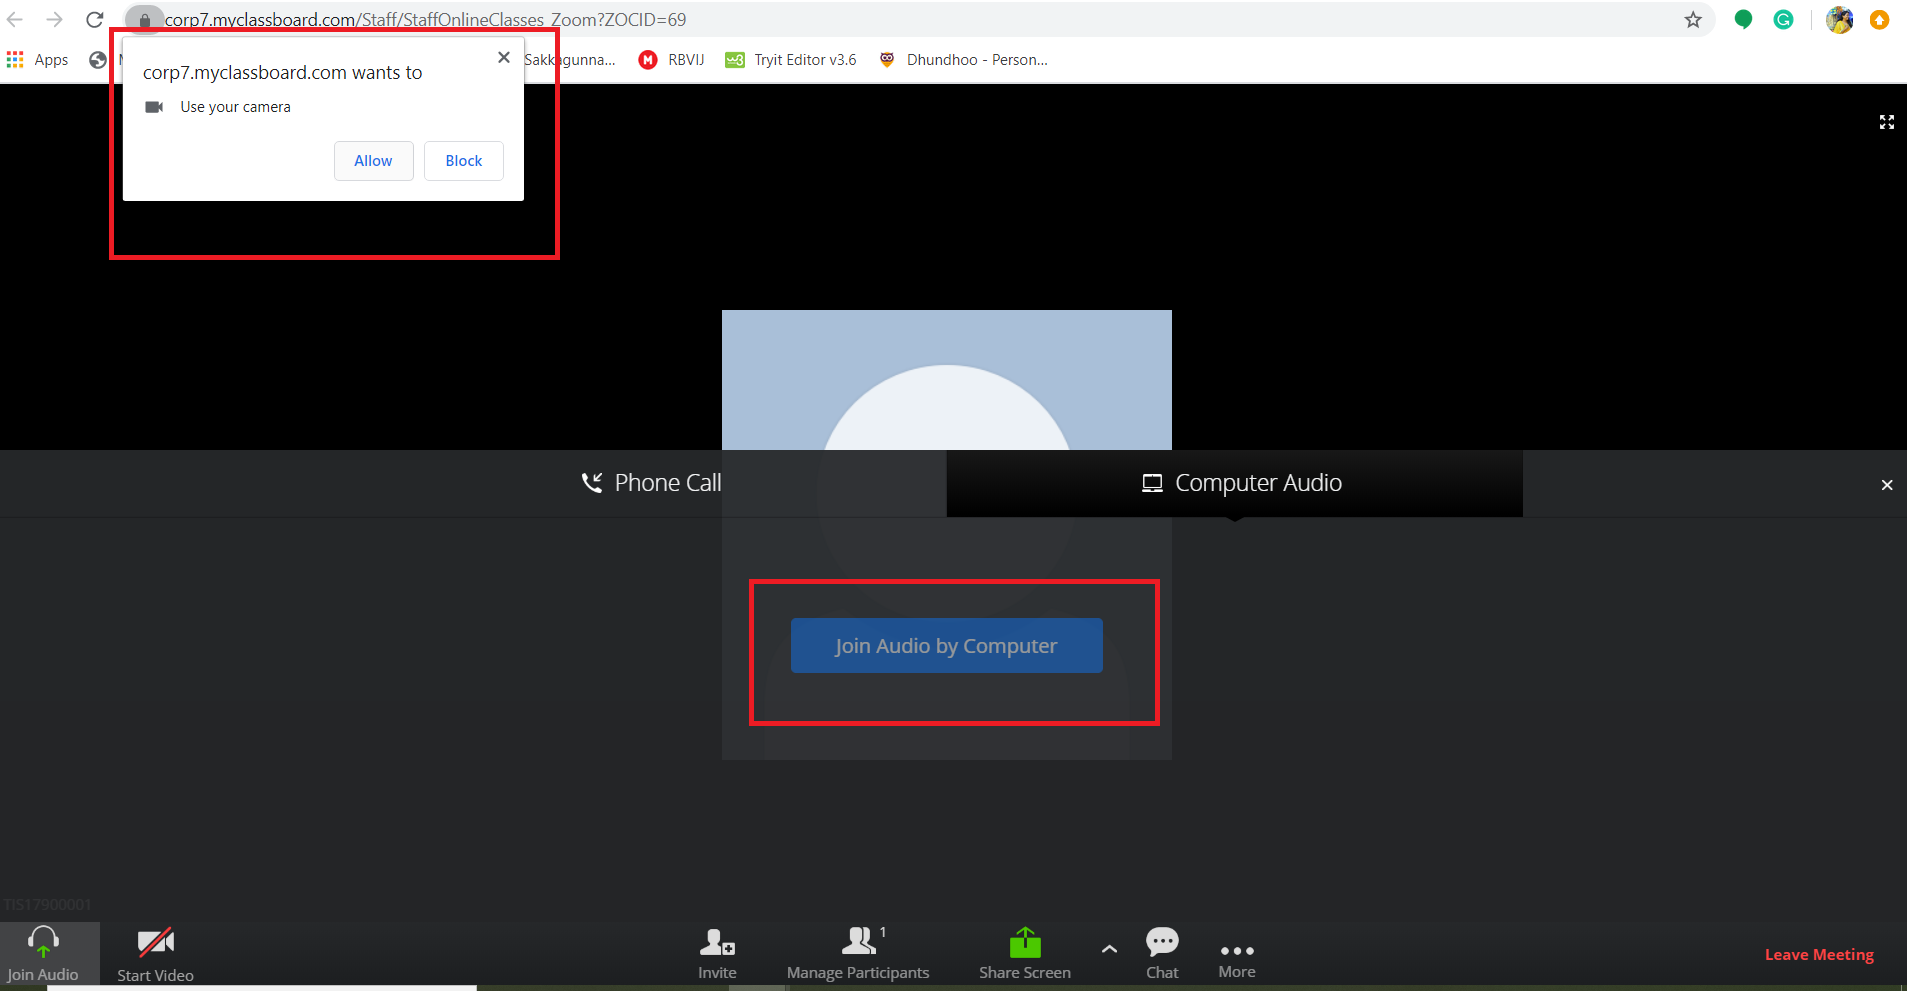
Step 9: Click on Allow to enable Camera & Join audio by computer for enabling audio.
Here’s a list of icons with a clear explanation
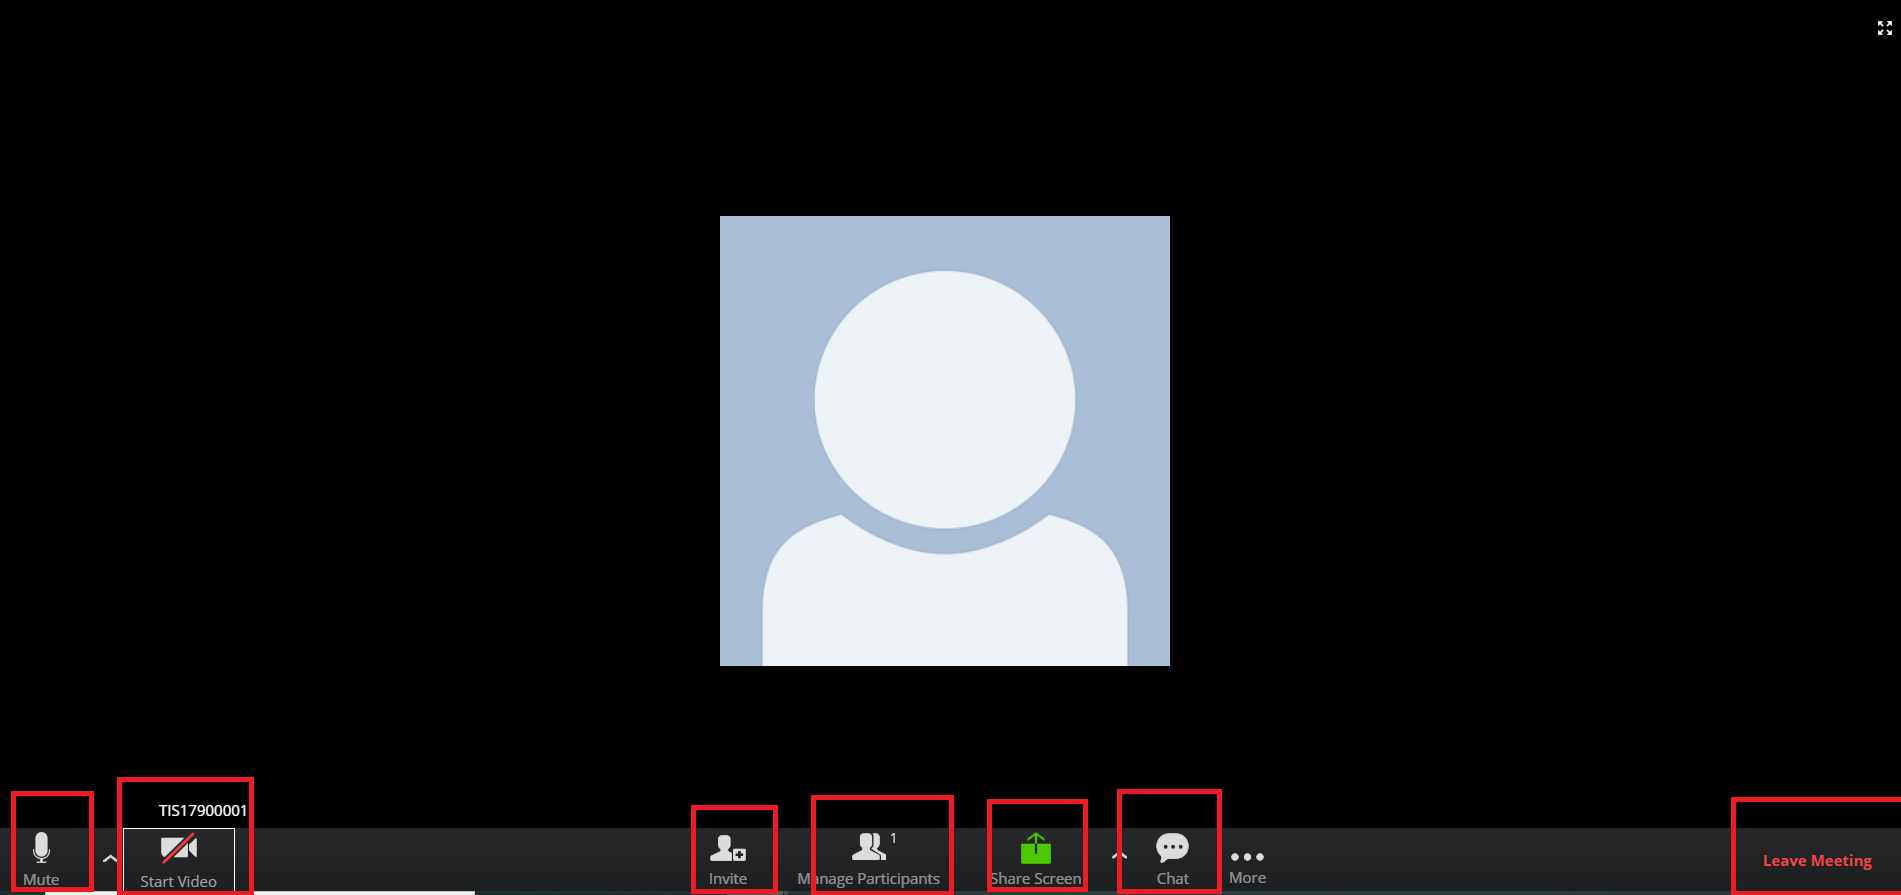
Mute: To allow / Block the Audio
Video: To allow/ Block the Video
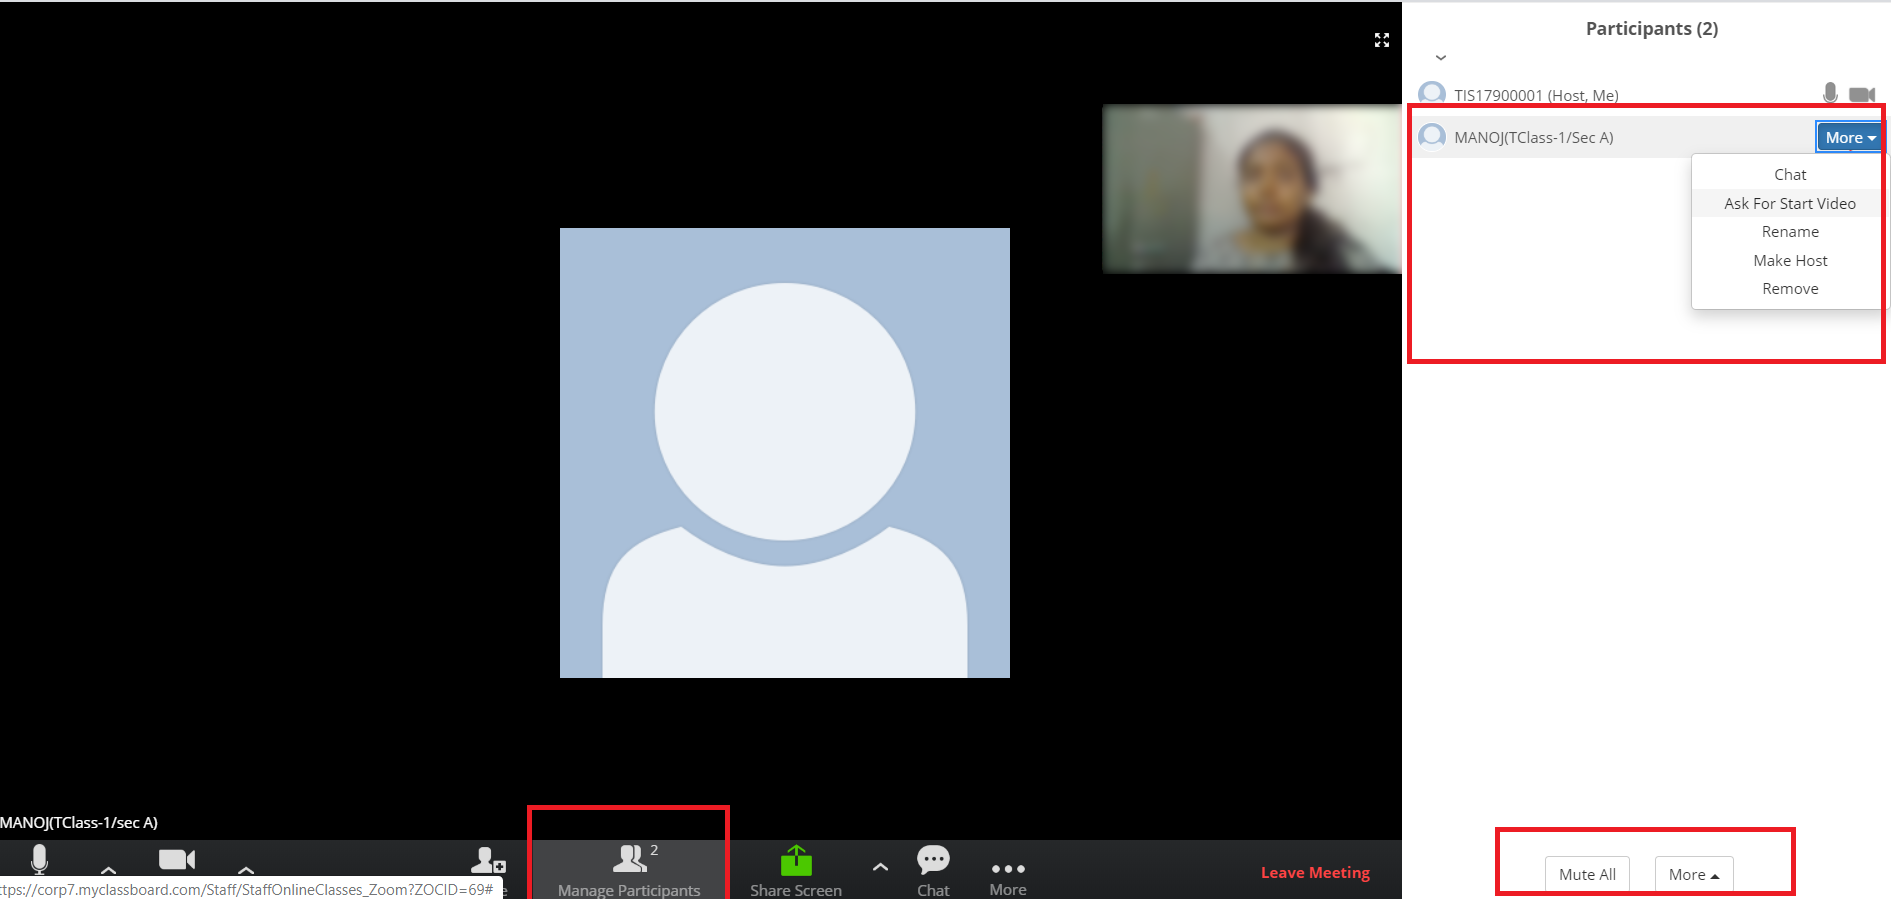
Manage Participants: Here you can view the list of participants joined for online classes
You may chat with the participant, to start the video, You can Rename or Make host or you can remove the participant. Click on muteAll for not allowing the Audios of the participants
Share Screen: Share screen option allows you to share your computer screen with students. This will help you show resources like documents, Presentations, Videos, Images, etc while the online class is in progress.
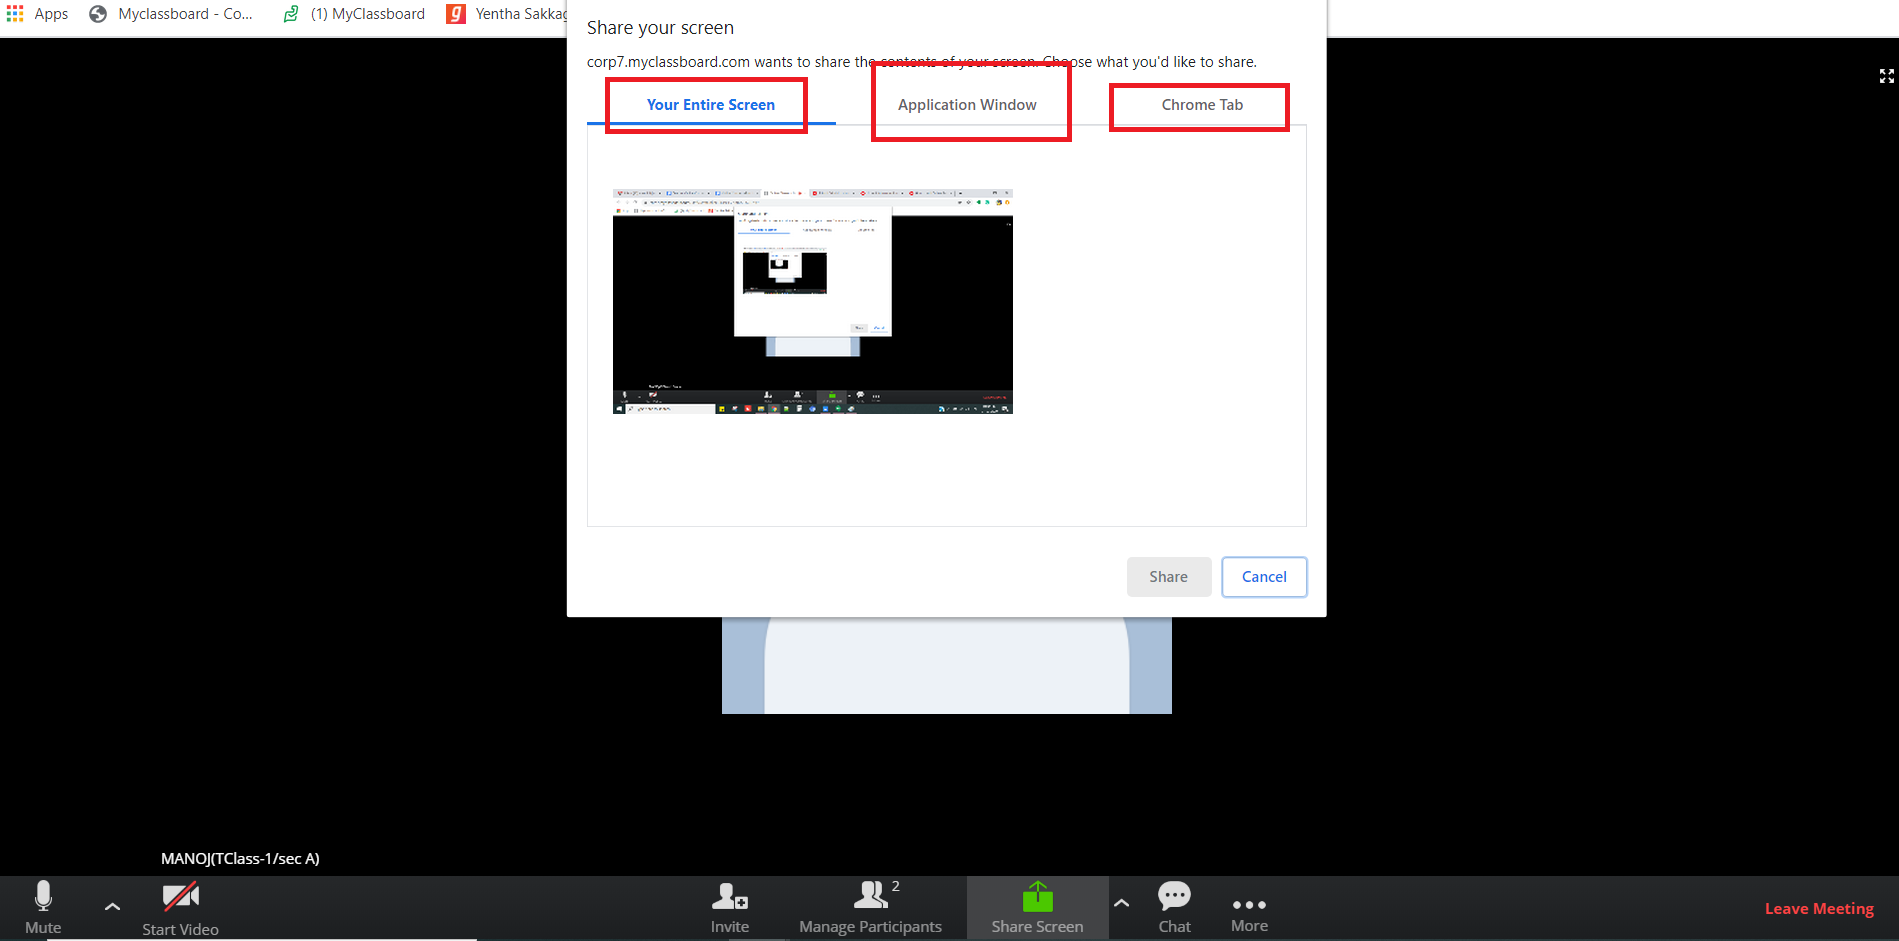
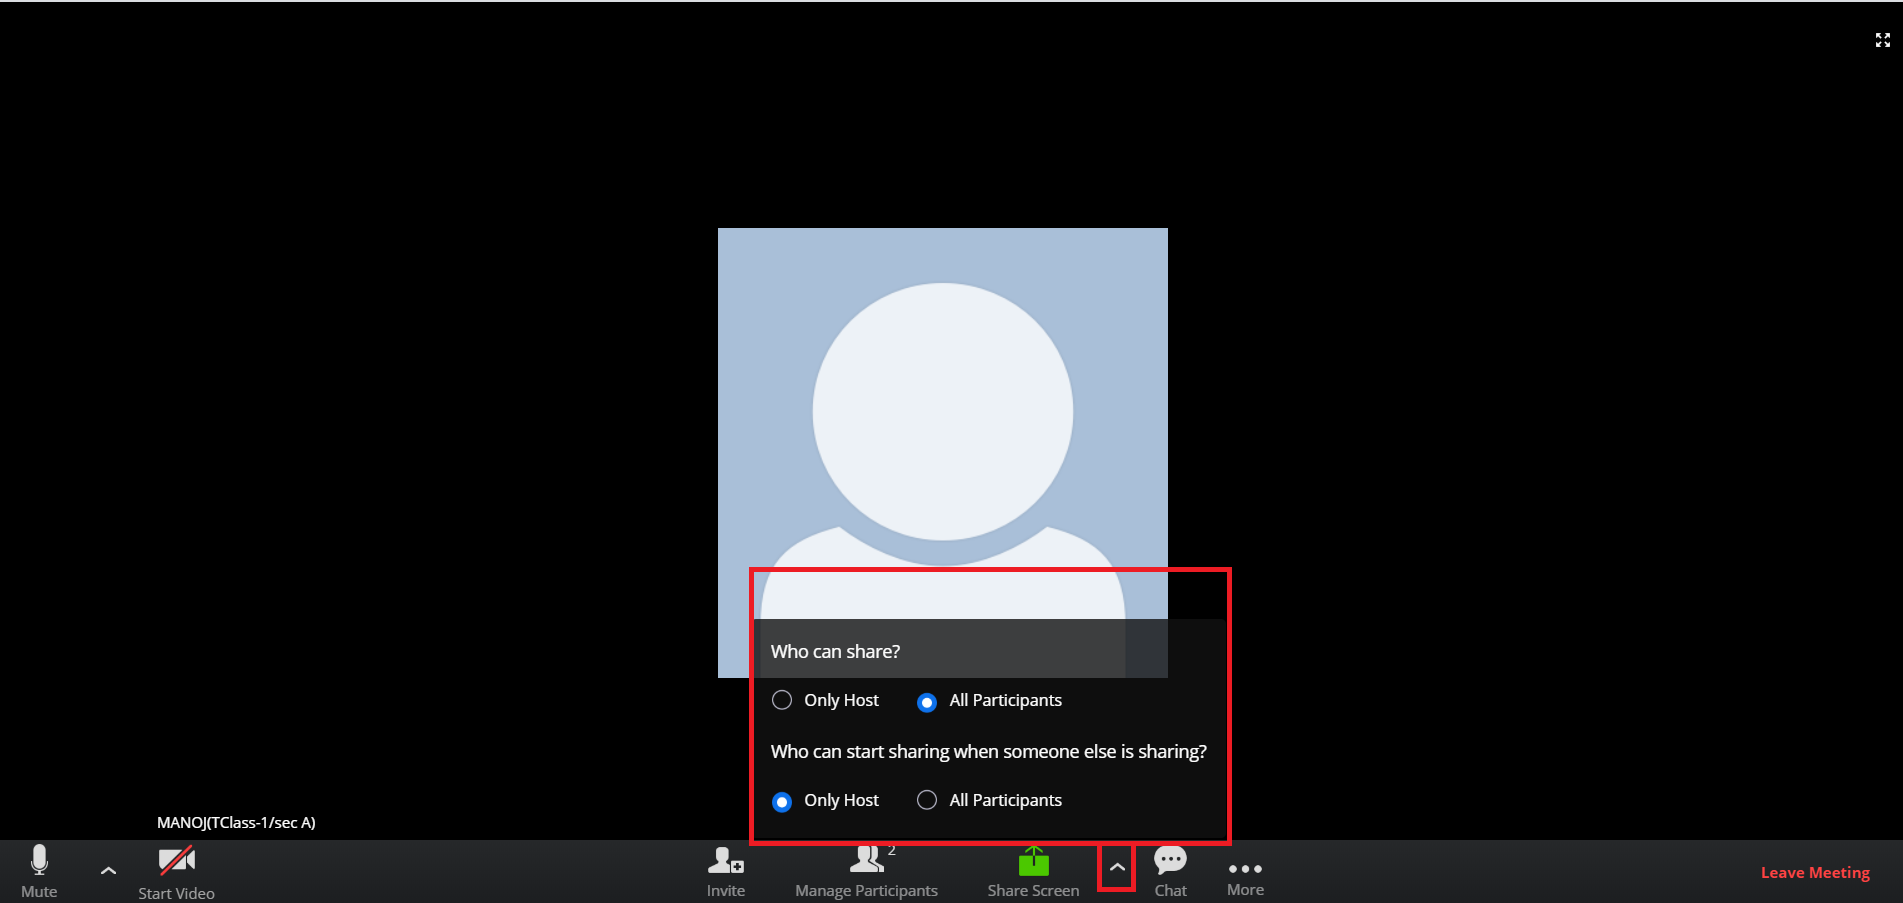
Also, we are giving the option to set who can share (Only host / All Participants) & Who can start sharing when someone else is sharing (Only host / All Participants)
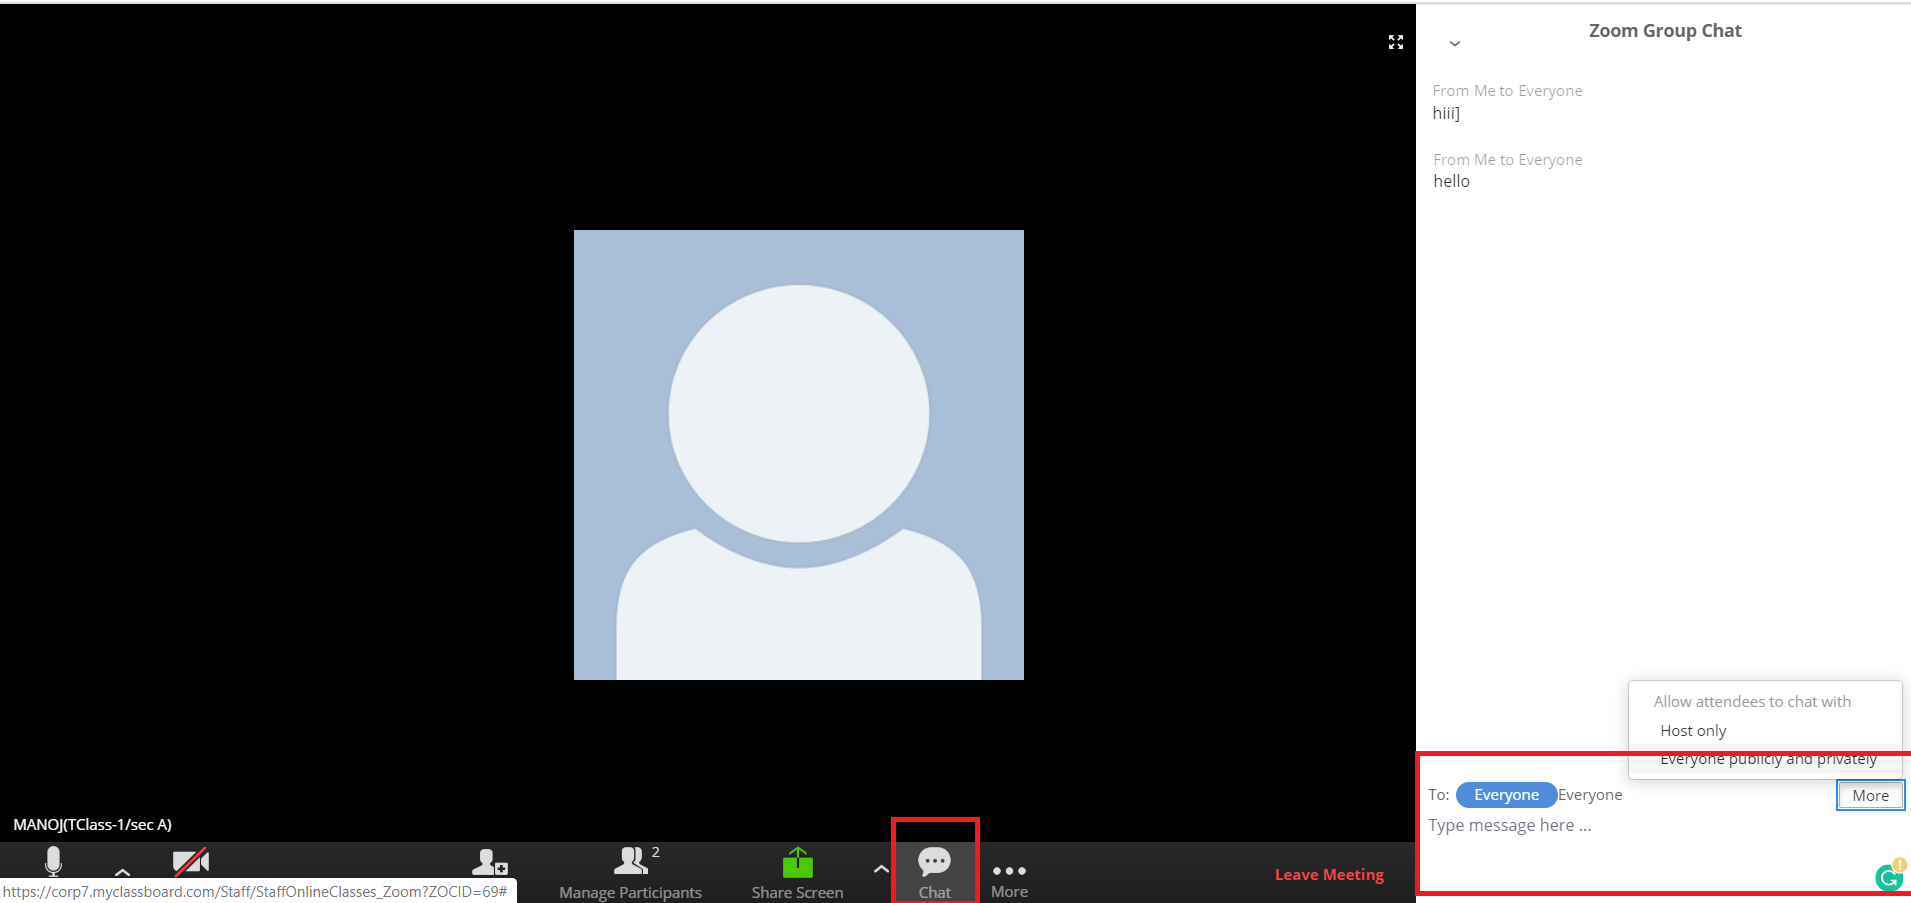
Chat: Chat option allows you to chat with all participants in a group and individually.
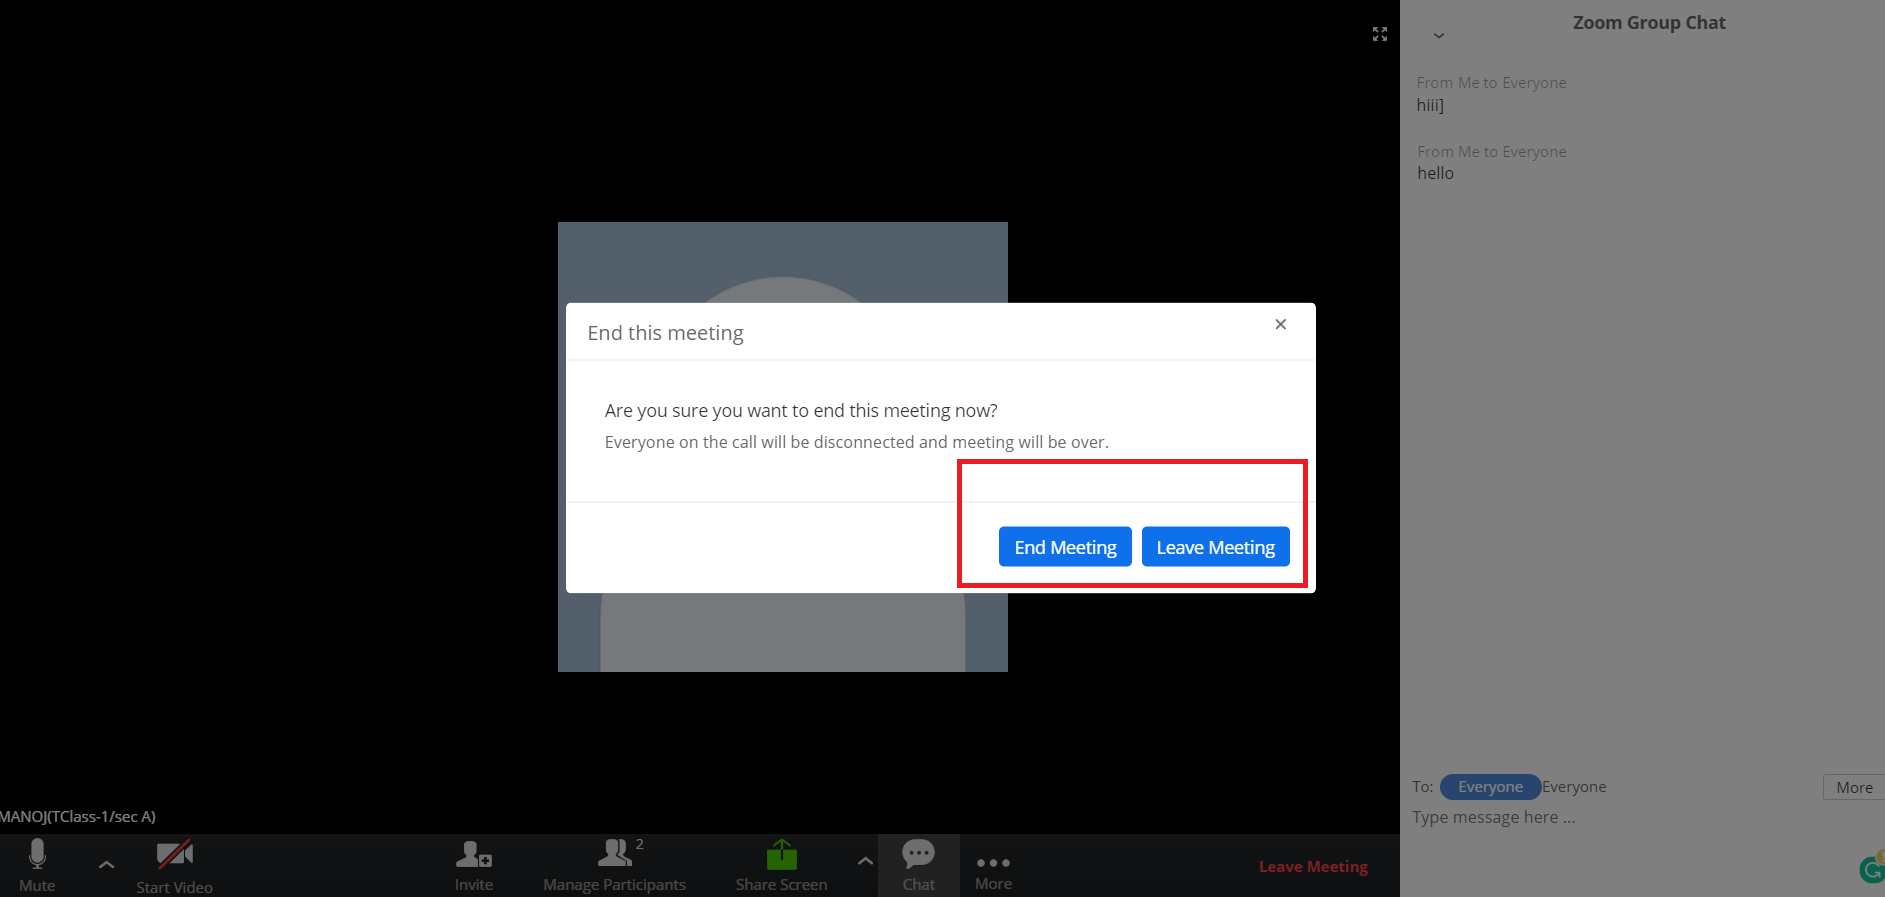
Step 9: Click on Leave meeting and End meeting option to close the online class session.