How to mark period wise Attendance?

Period wise Attendance: Period wise attendance works based on the day wise time table set for a specific section. The subject teachers can mark the attendance for the period they conducted the classes. The branch principal and System admin can also update the period wise attendance form their logins. Once the attendance is saved from the subject teacher login, the edit option for them is available only for the current day. Later, the edit option will not be available for the subject teachers. In case of an edit is required, they have to either request principal or system admin for the same.

Please follow the below procedure to update the period wise attendance:

Step 1: Login with subject teacher credentials

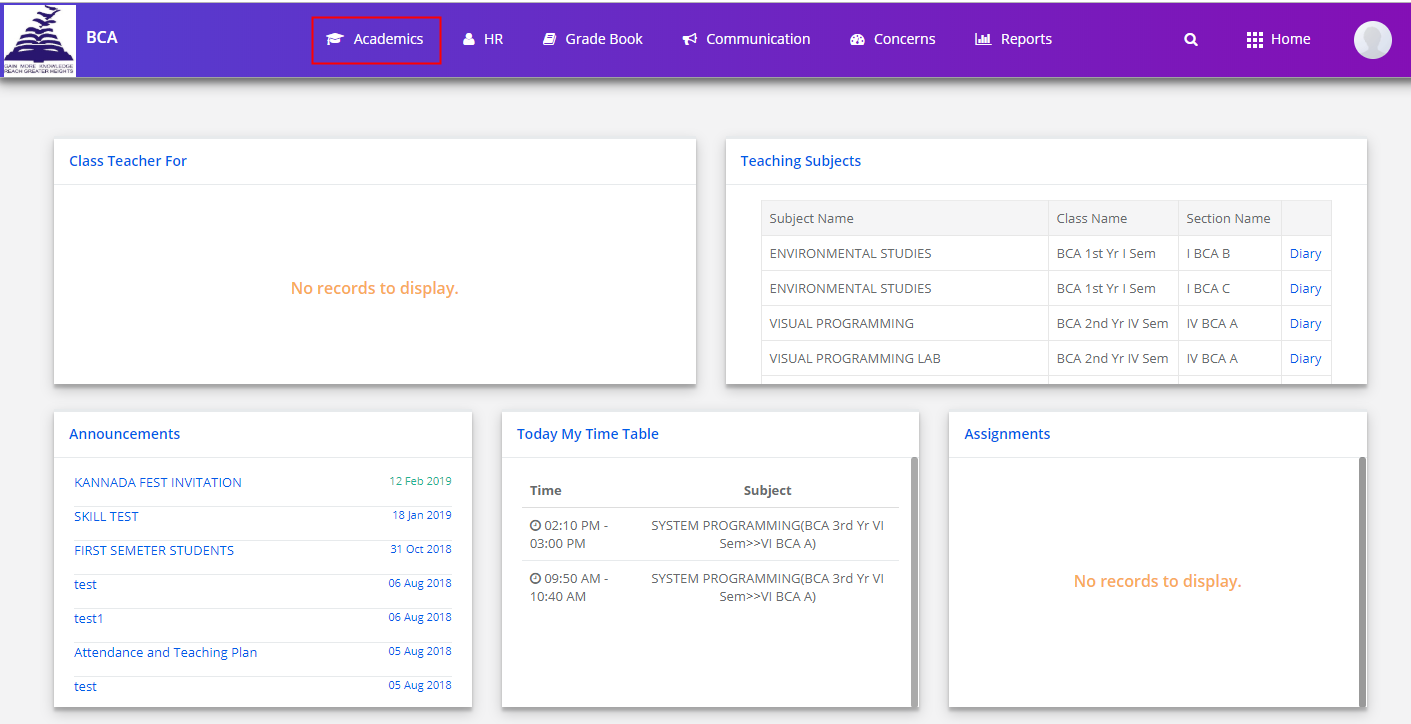
Step 2: Click on Academics on the menu bar

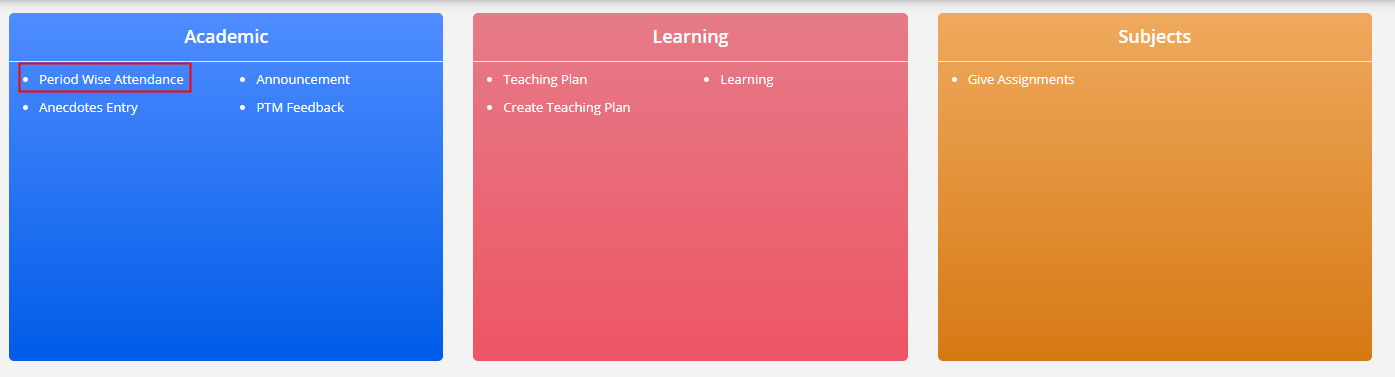
Step 3: Click on Period wise attendance from the dashboard.

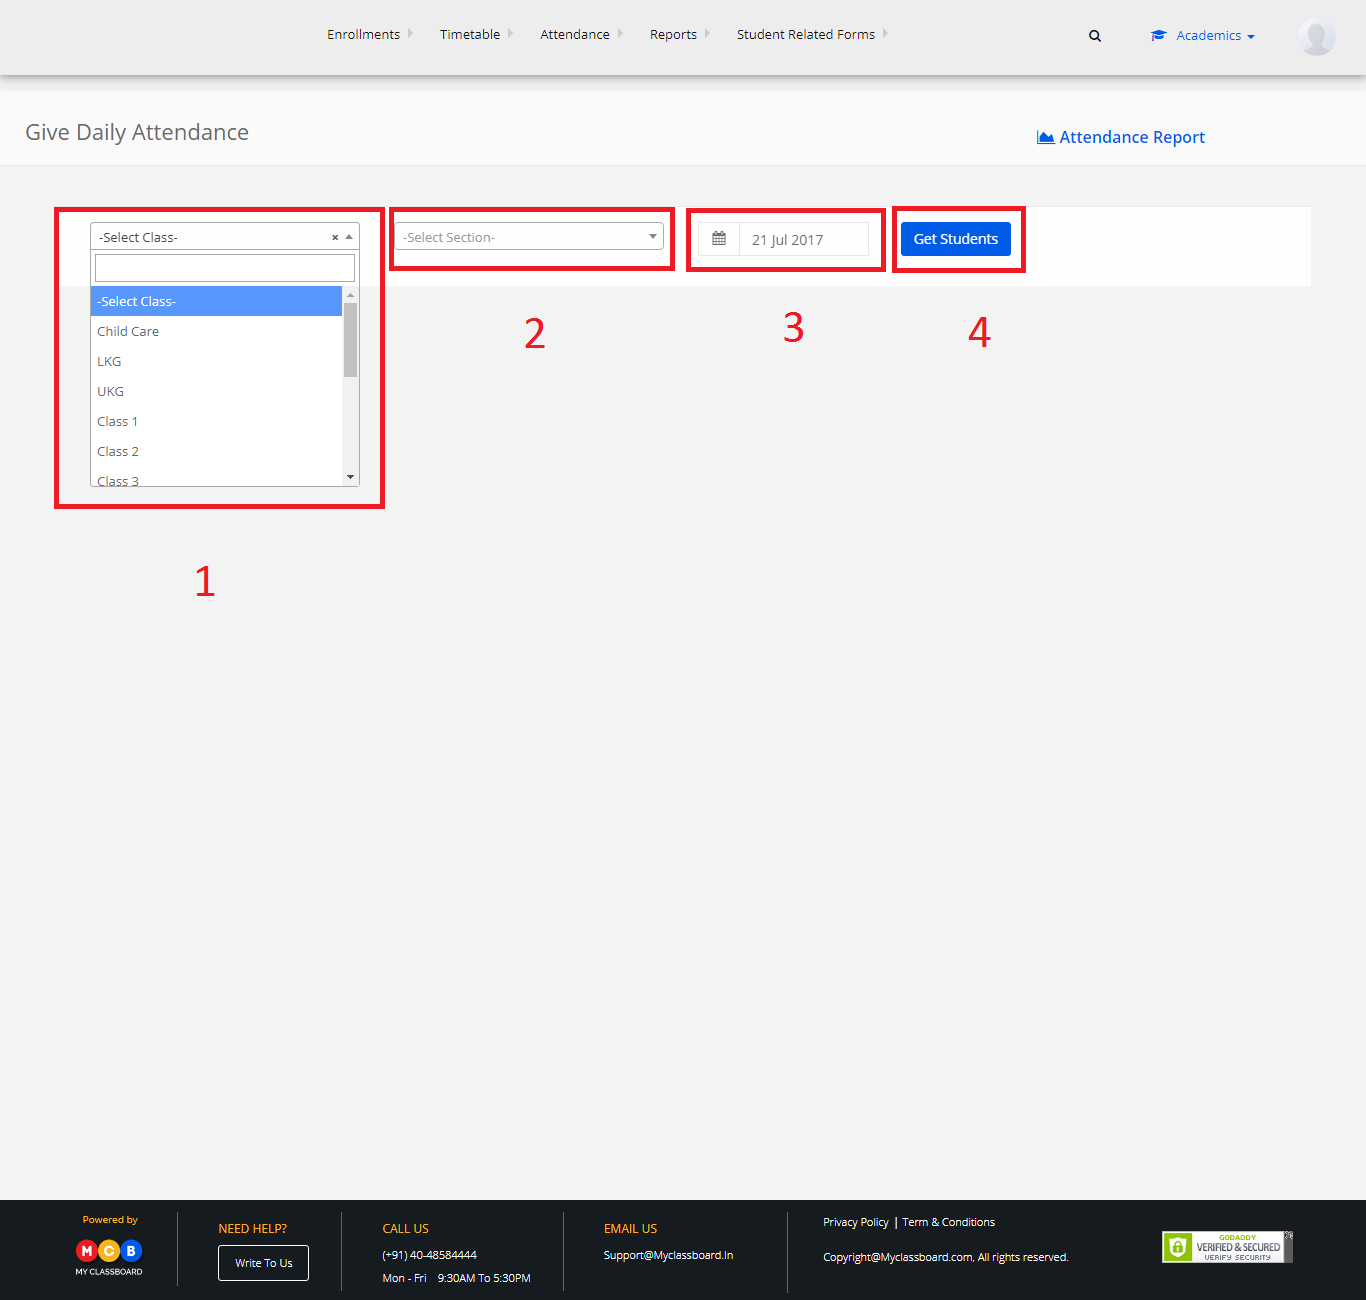
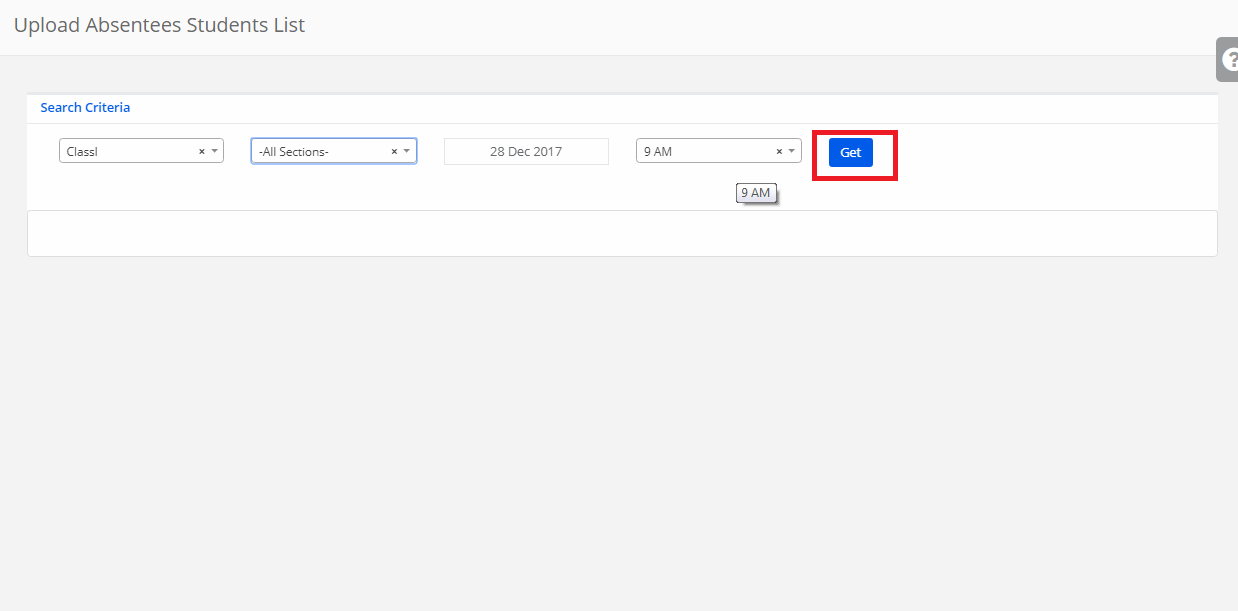
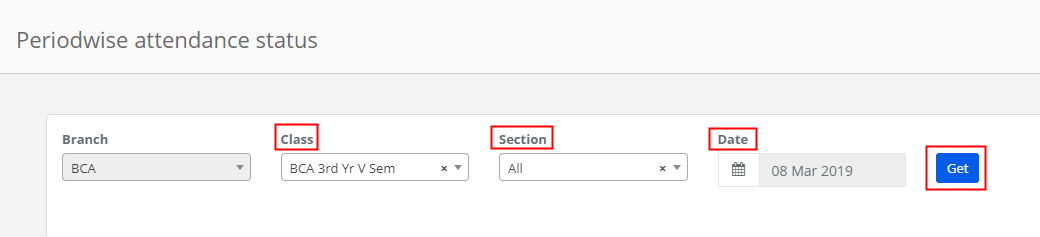
Step 4: Choose class, Section, date and click on Get

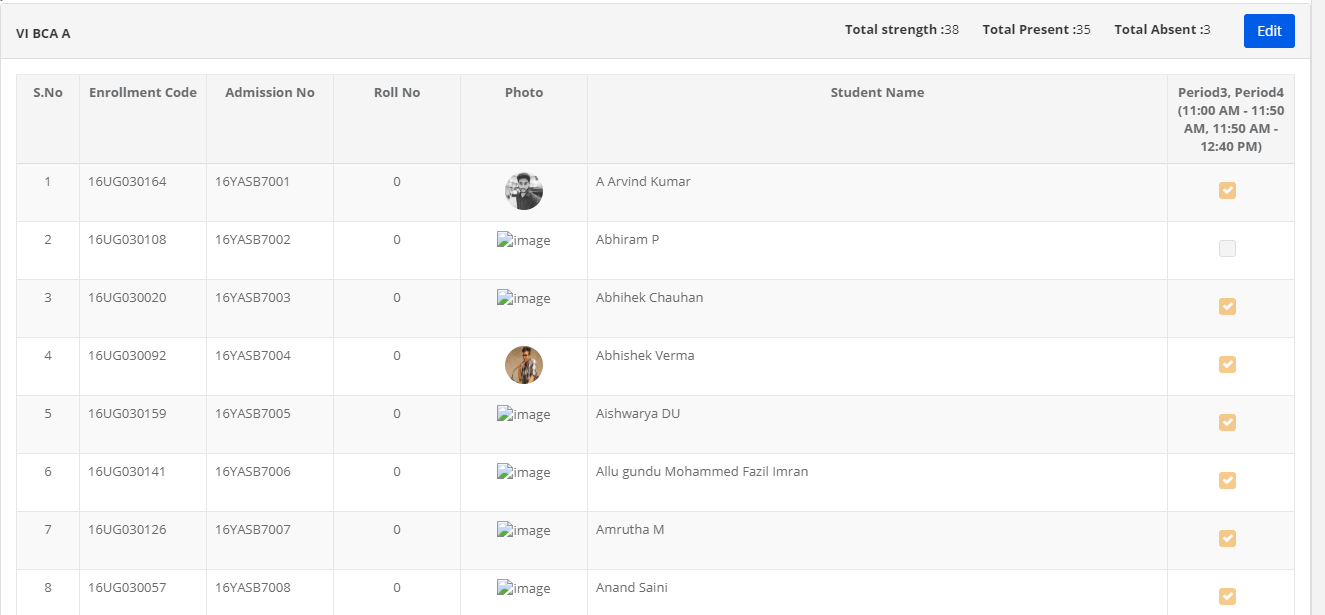
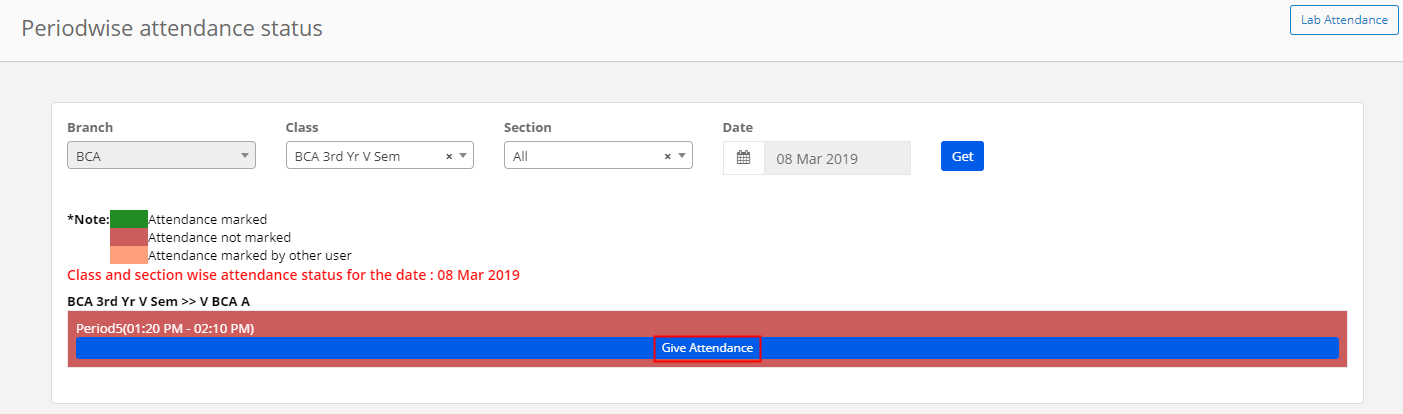
Step 5: It will list the periods for which the attendance needs to be marked. These periods are listed as per the time table scheduled. Click on Give Attendance.

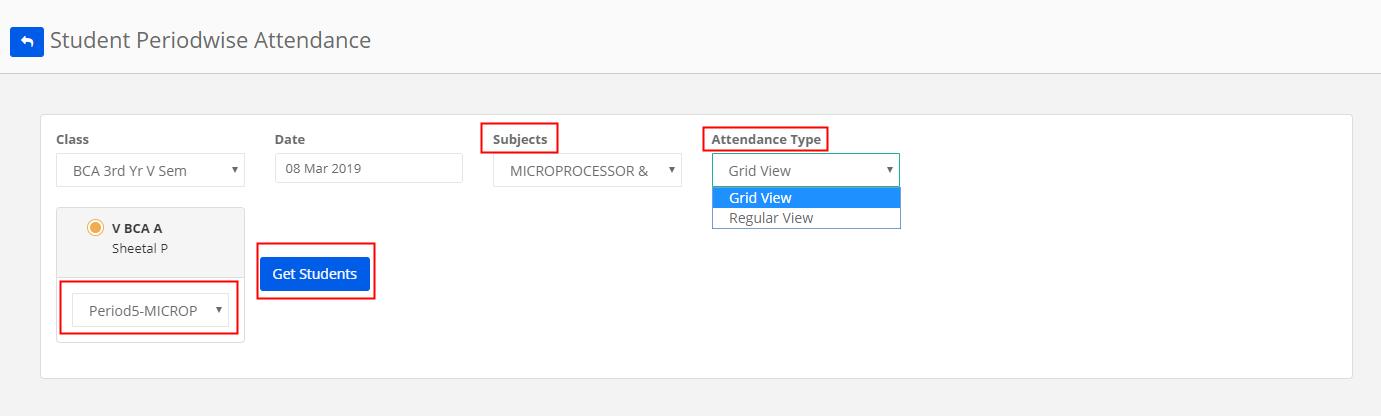
Step 6: Choose the subject and attendance display type, Period and click on Get Students.

If the subject is a language subject and is scheduled as a common class across the sections, the checkbox will be enabled to select multiple sections to facilitate all students list to mark the attendance at a time.

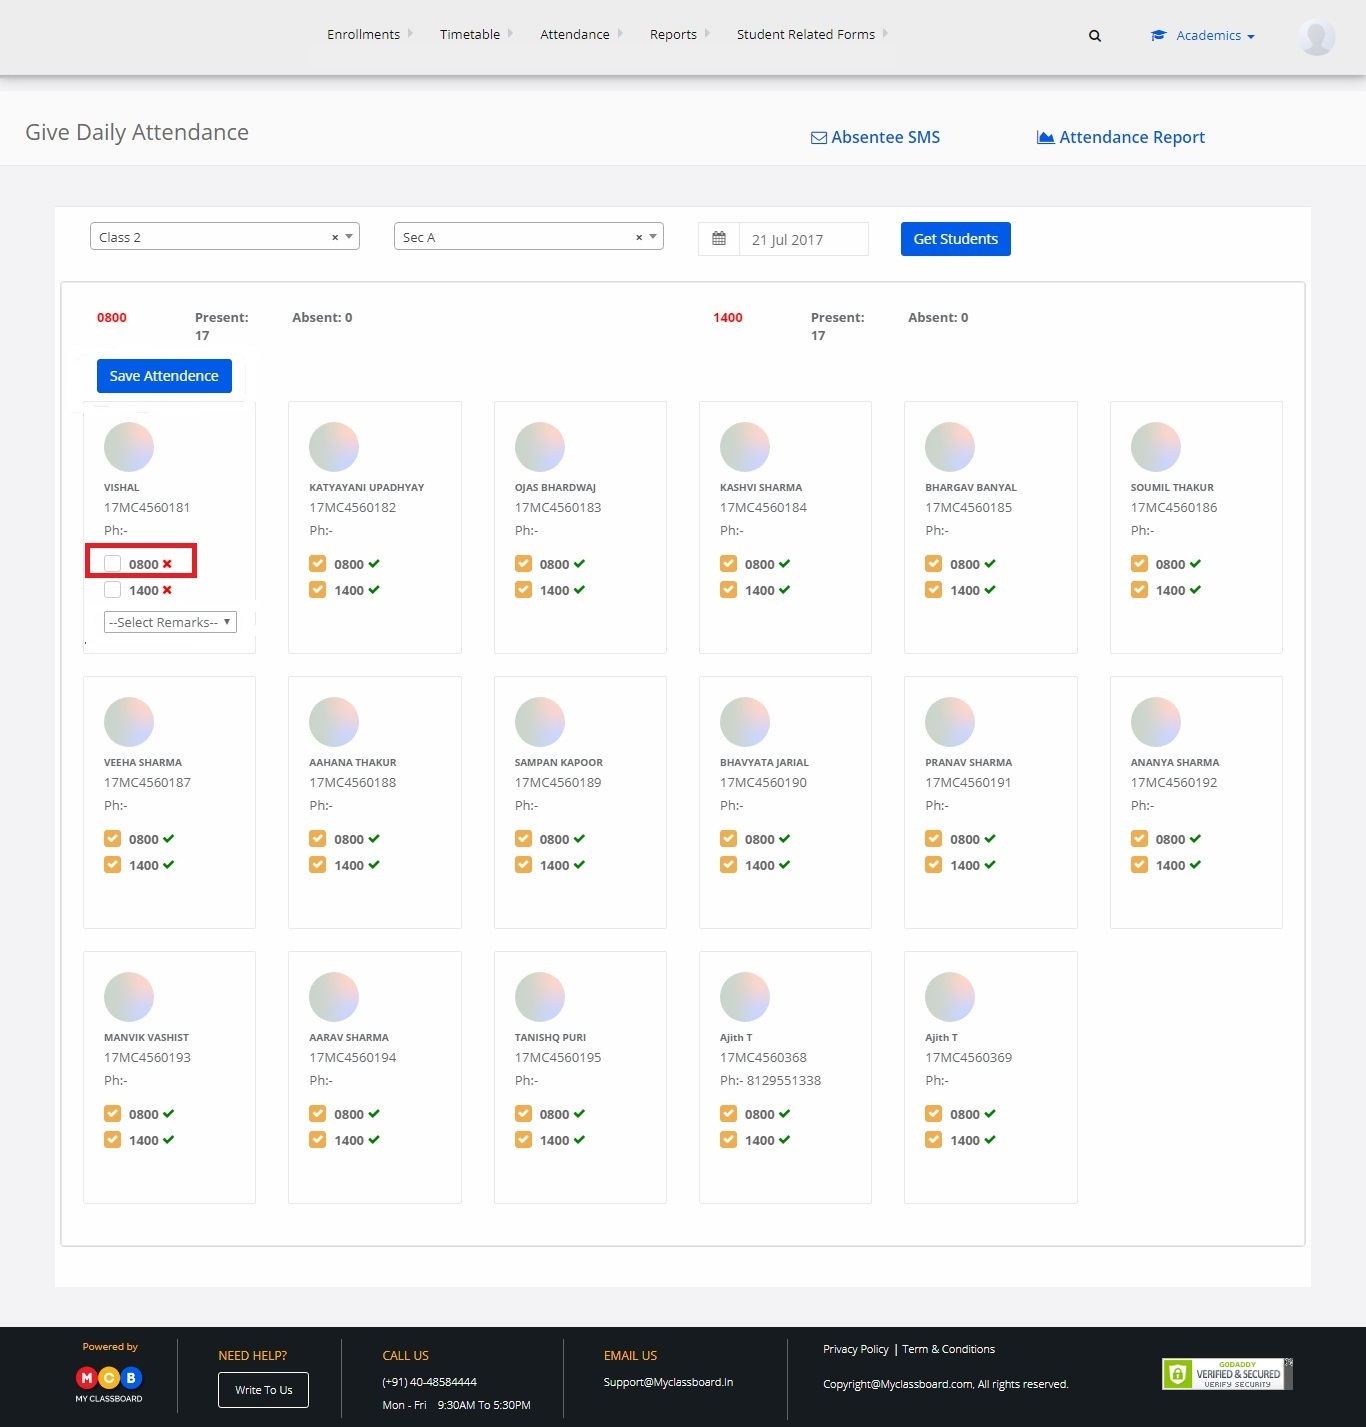
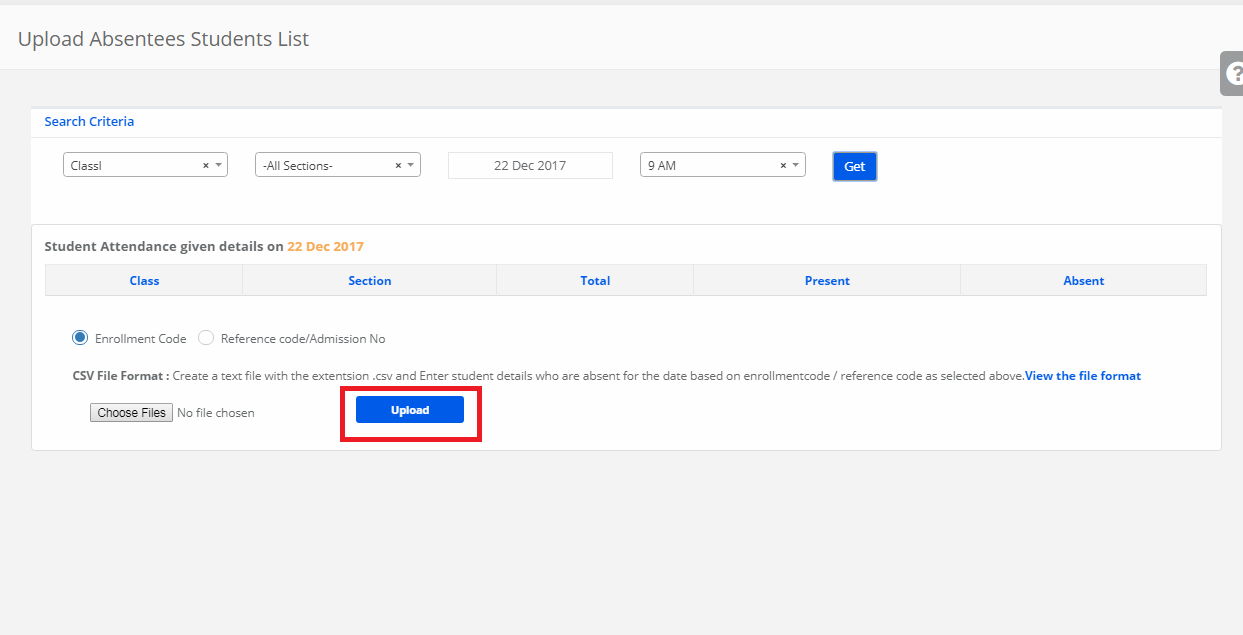
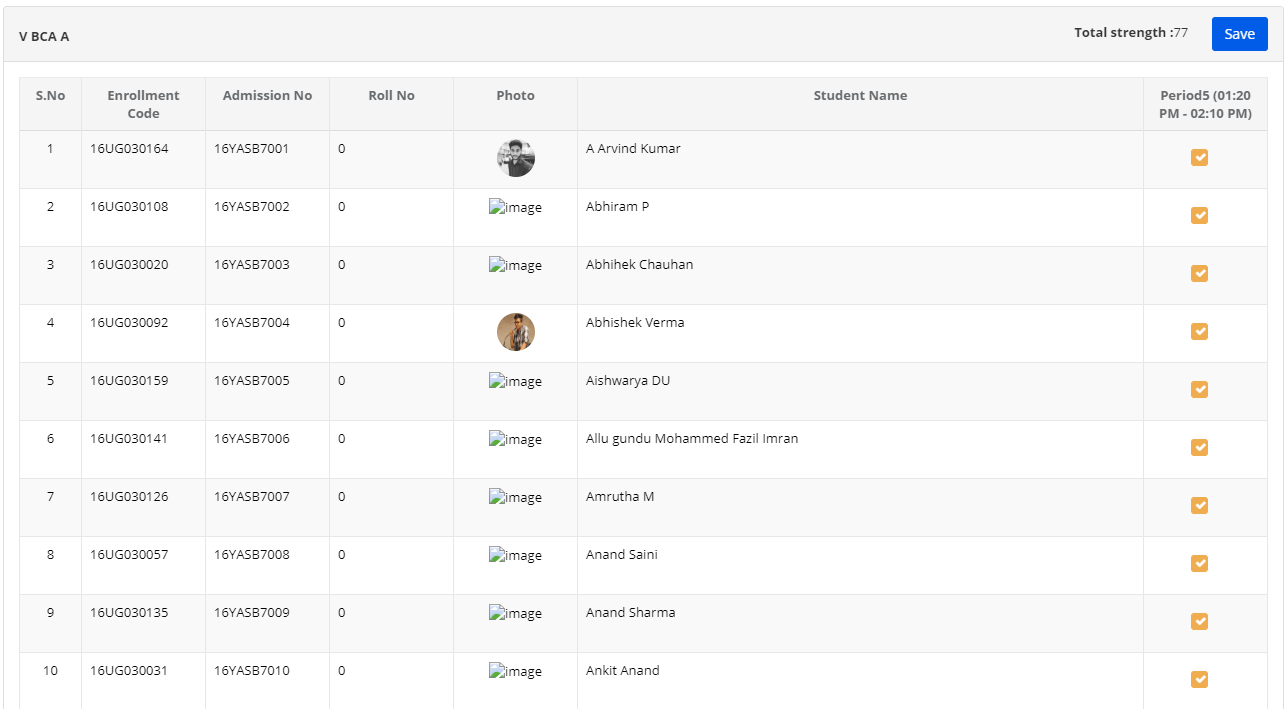
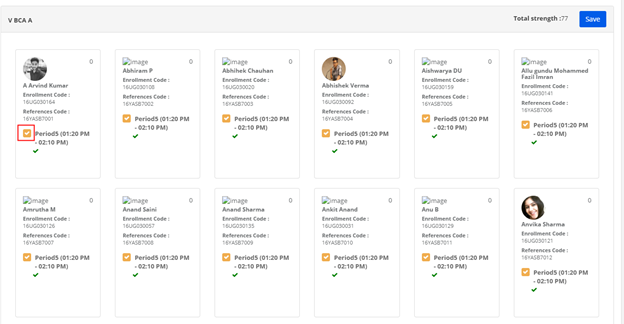
Step 7: To mark present, let the checkbox be selected. To marks absent, pls unselect the checkbox against the student and click on the Save button once you mark the attendance for all students.

Grid View:

Regular View:

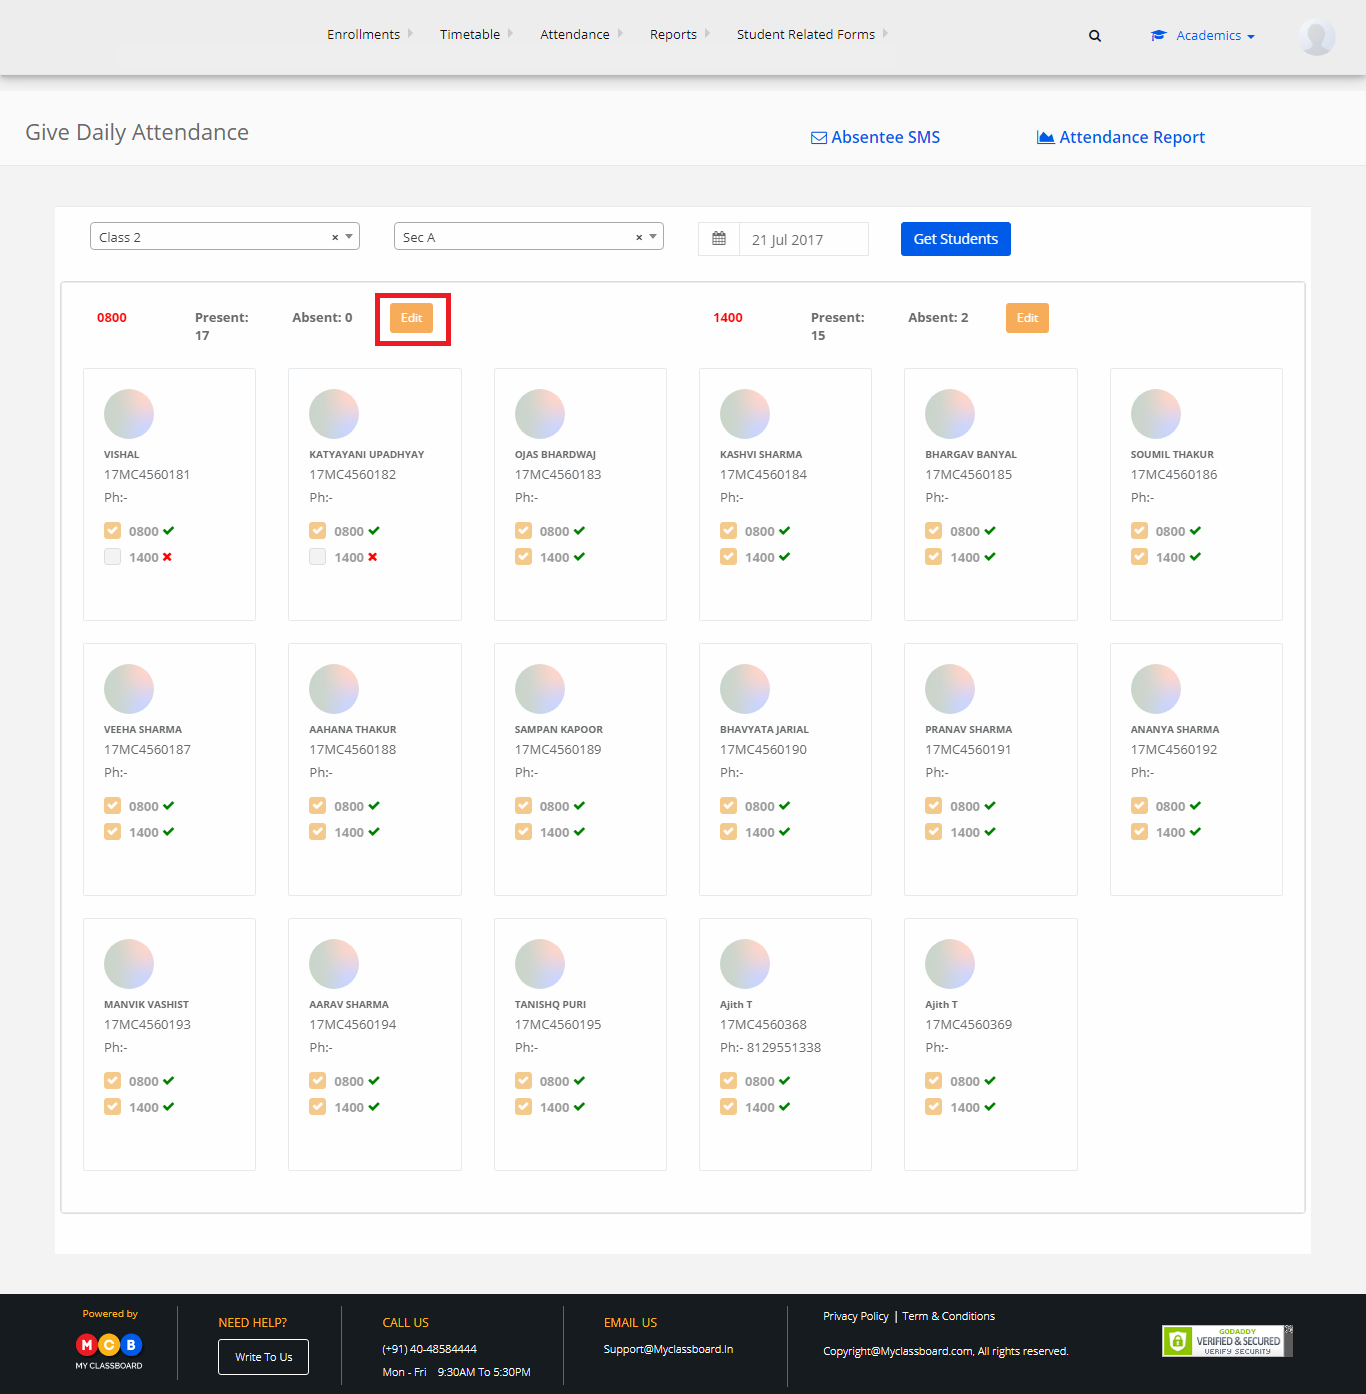
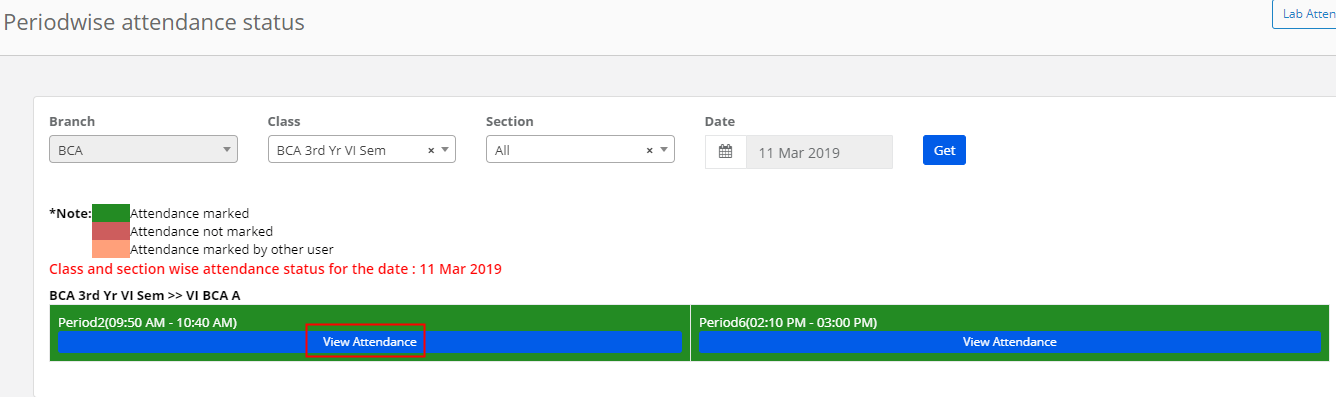
Step 8: Once the attendance is marked, you will get the option to view the attendance. To view the attendance, click on View attendance tab under the period.

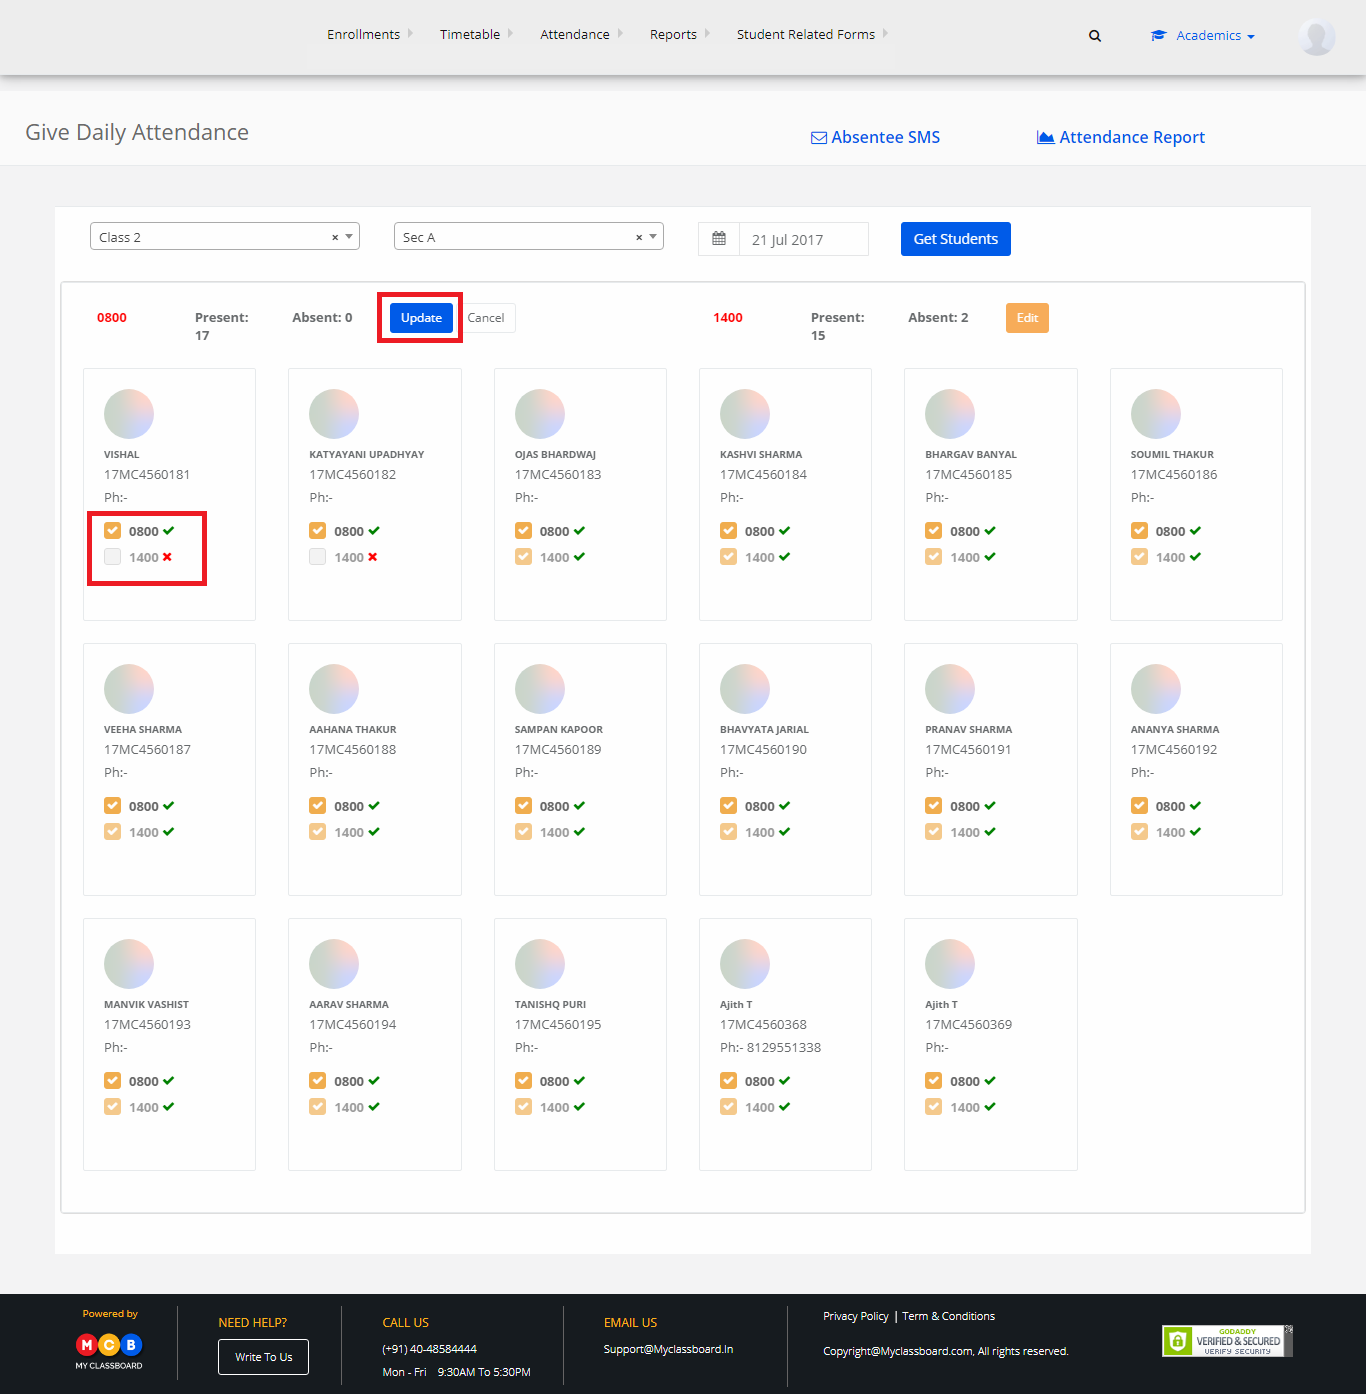
Step 9: To Edit the attendance, Click on the EDIT button and make the necessary changes and update.

Please note that the EDIT option is available for the teachers only for the current date. Later, to make any changes in the attendance, teachers have to contact either principal or system admin.

How to create a lab timetable?

1. Create subjects as Practical subjects.
2. Mark Lab period in the time table
3. Create practical groups under students groups and assign students to the groups.
4. Click on Lab icon [highlighted] to get the list the lab subjects for the periods saved as a lab in the time table.
5. Then the lab time table is set. The teachers who are assigned to the lab subjects will be able to mark the attendance when you do steps 1 to 3.

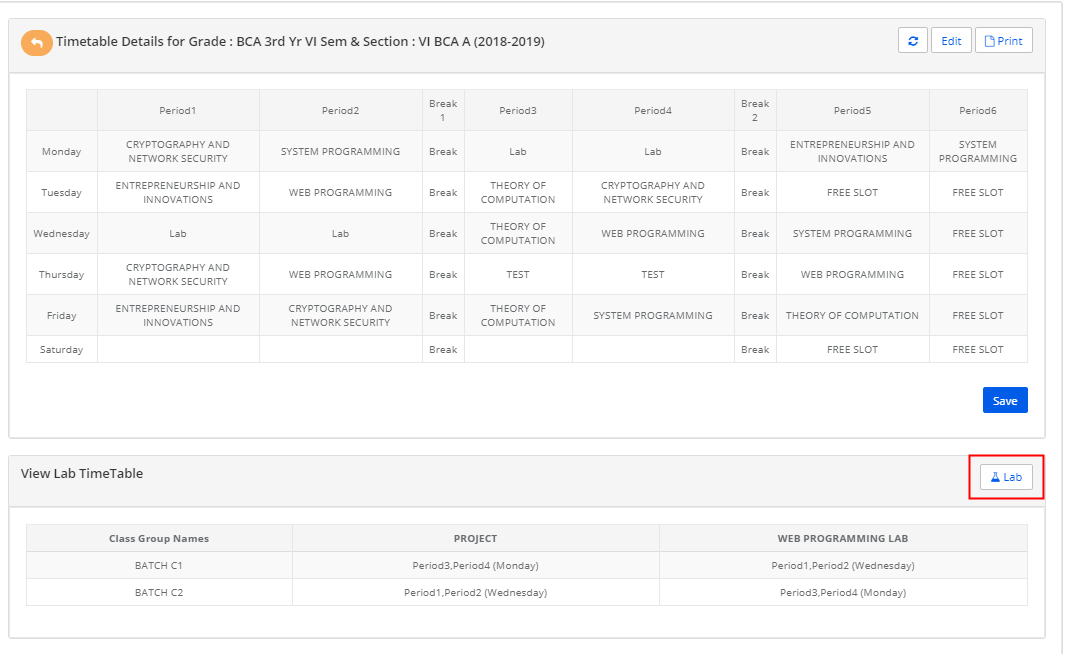
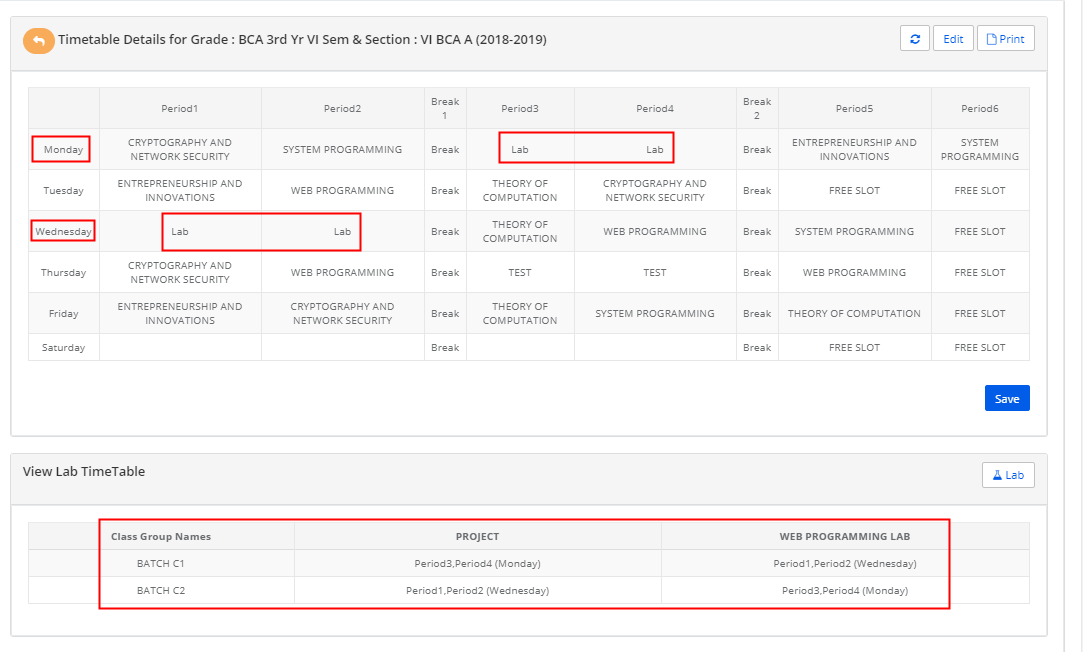
Please note highlighted periods in the time table and lab time table.

How to Update Lab Attendance?

Lab Attendance: Lab attendance can be marked when a subject is created under Practical subject, students are grouped as per batches of the lab, the lab is assigned as a period in the timetable as described in How to create a lab timetable.
Please follow the steps below to mark the attendance from the teacher login:

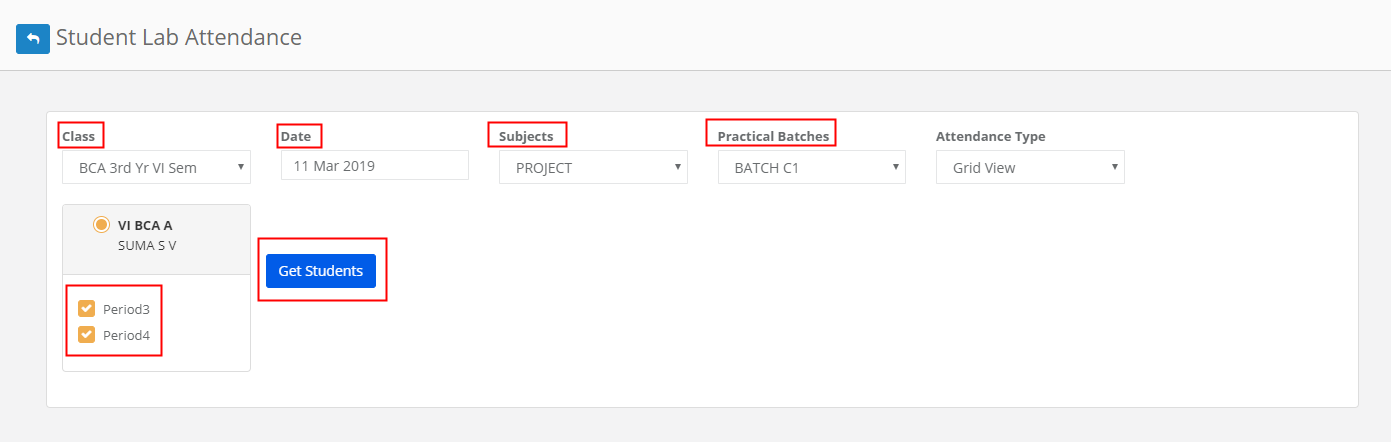
Step 10: As you log in to staff access, Click on Lab attendance tab in Period wise attendance link.

Step 11: Choose Class, date, subject, batch, periods and click on Get Students to get the students list.

Step 12: Mark the students’ attendance for the lab session and click on Save / Update.

How to give student Monthly attendance?

Step 1: Login to MCB with Login Credentials.

Step 2: Select Academics on the dashboard and you will be directed to the Academics page.

Step 3: Click on “Attendance” on the top bar and select “Monthly Attendance”.

Step 4: Select the class & section & Month then click on GET. We will get the Students Data. Enter Total Working days & Present days count & then click on Save attendance. Monthly attendance report is updated successfully.

How to give attendance to students?

Step 1: Login to MCB with Principal login credentials.

Or if you’re already logged in with Admin login credentials you can change the access level to User Level.

Change Access Level

Step 2: Click on the “User Profile” icon on the right-hand top corner.

Step 3: Select “Change Access Level”.

Step 4: Select the User Type as “Principal”.

You’re now in the Principal Level Access. Now select any branch.

Step 7: Select “Academics” option on the top bar of the Principal Level Access Dashboard. You’ll be directed to the “Academics” page.

Step 8: Select “Attendance” on the top bar and choose “Give Attendance”.

Step 9: Select Class, Section, Date and click on “Get Attendance”.

Step 10: List of the students for morning and afternoon sessions are displayed here.

Step 11: To give attendance, click on the check box for morning/afternoon sessions.

Step 12: For marking absent you give remarks under the checkbox.

Step 13: After marking the attendance, click on “Save”.

To Edit the attendance

To edit the attendance for morning/afternoon sessions, click on the “Edit” option beside.

Step 14: Select the checkbox for students and click on update. The changes are updated successfully.

How to Update Monthly Attendance?

Step 1: Login to MCB with System Admin credentials and switch to the new version.

Step 2: Change Access Level – Click on the “User Profile” icon on the right-hand top corner.

Step 3: Select “Change Access Level”.

Step 4: Select the User Type as “Principal”.

Step 5: Select Principal against the respective branch.

Step 6: Click on “Academics” on the top bar of the dashboard.

Step 7: Select “Attendance” and choose “Monthly attendance” under it.

Step 8: Select Class/ section, Month and click on Get

Step 9: Add no. of present days and click on Save.

To Generate Monthly Attendance report

Step 10: Go back to “Academic” dashboard page.

Step 11: Select “Reports” on the top bar and choose “Monthly Attendance Reports” under it.

Step 12: Select Class&Section, Month and click on “Get”.

Step 13: The attendance report for that month is displayed. You can export the same to excel by choosing the “Excel” option.

How to create Attendance Timings ?

Step 1: Login to MCB with Principal login Credentials.

Step 2: Select Academics on the top bar of the dashboard

Step 3: Select Attendance and choose “Attendance Timings”.

Step 4: Click on Create.

Step 5: Give Timing, Start Time, End Time and Check on Active Box and then Click on Save.

Step 6: The Timings Saved Successfully.

How to Upload Student Absentees?

Step 1: Login to MCB with Principal login Credentials.

Step 2: Select Academics on the top bar of the dashboard.

Step 3: Select Attendance and choose “Upload Student Absentees”.

Step 4: Select Class, Section, Date and Session.

Step 5: After selecting required Class Click on Get.

Step 6: Select Enrollment Code and download file format and fill the enrollments of students who are absent and then click upload.