Create Assessment
Creation of staff assessment and assessment level settings are to be created by the system admin.
To create the assessment form and grading scale, pls follow the steps below.
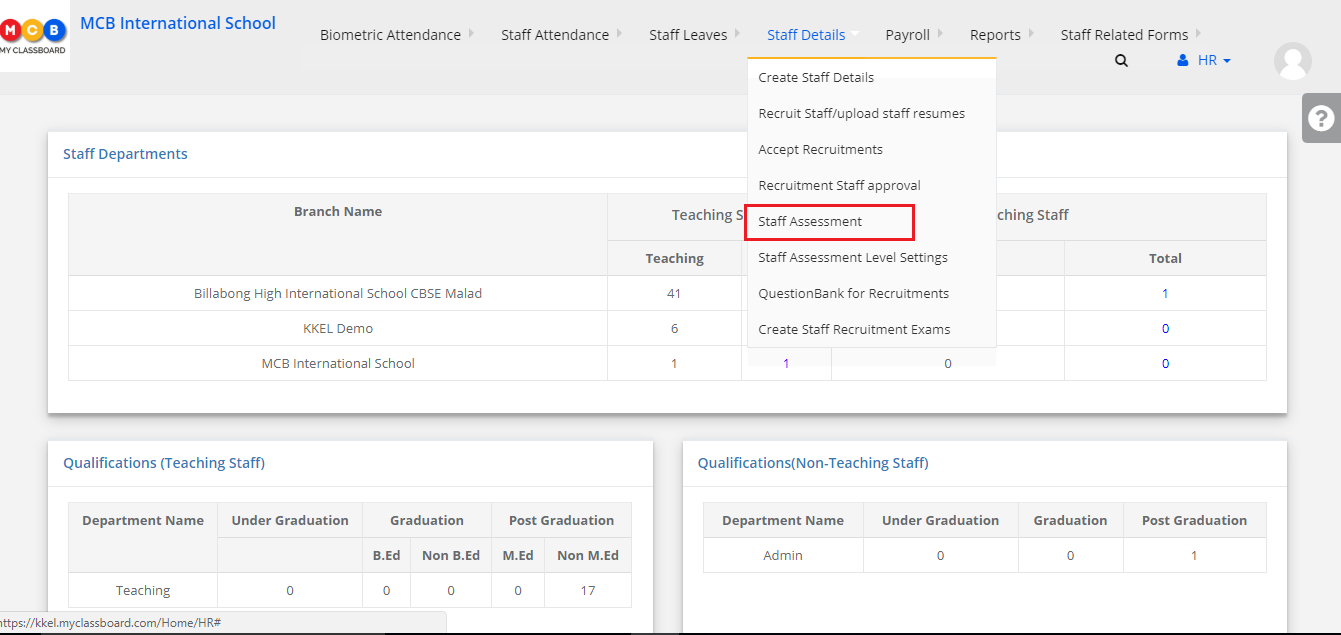
Step 1: Login to MCB with system admin level access and click on HR module on the menu bar. Choose Staff Assessment.
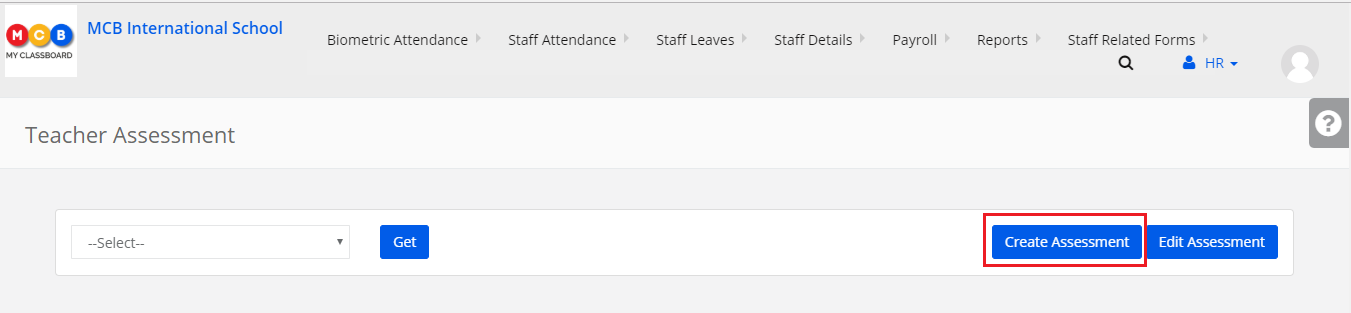
Step 2: To create an assessment, click on create assessment tab
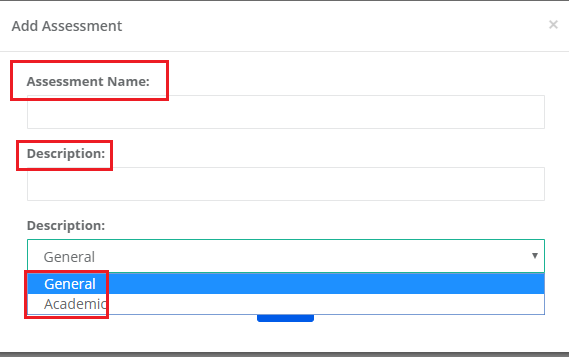
Step 3: Give Assessment Name, Description and choose type of form.
General: When staff performance has to be assessed in non-academic areas [not against the subject], the assessment form needs to be created in “General” type.
Academic: When staff performance has to be assessed against the subject that the teacher teaches, the assessment form needs to be created in “Academic” type. Click on save button.
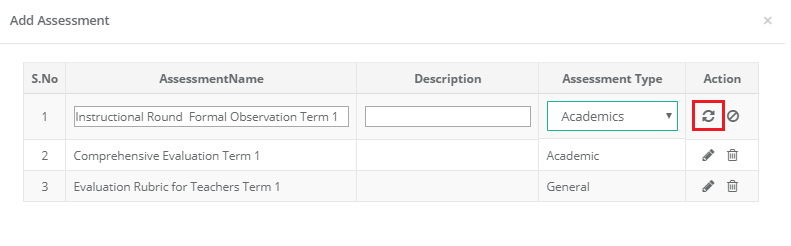
Step 4: To edit the assessment name, click on the edit icon
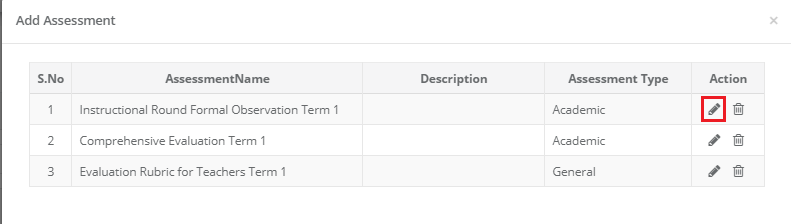
Step 5: Make the changes requires and click on save. [highlighted below].
Step 6: To delete the assessment, click on the delete icon. [Highlighted below].

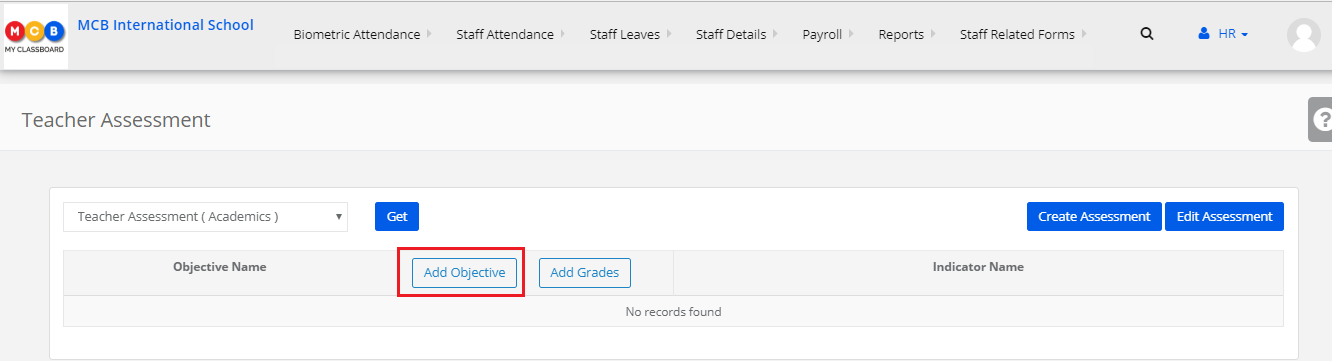
Step 7: To add the assessment objectives and indicators, choose the assessment name and click Get.

Step 8: Click on Add objective
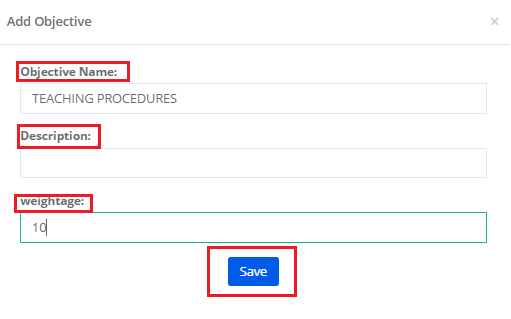
Step 9: Give Objective name, Description, and weightage. Click on Save button to save the objective.
Weightage: Weightage of the objective helps the school admin to analyze teacher’s performance in the category through assessment report.
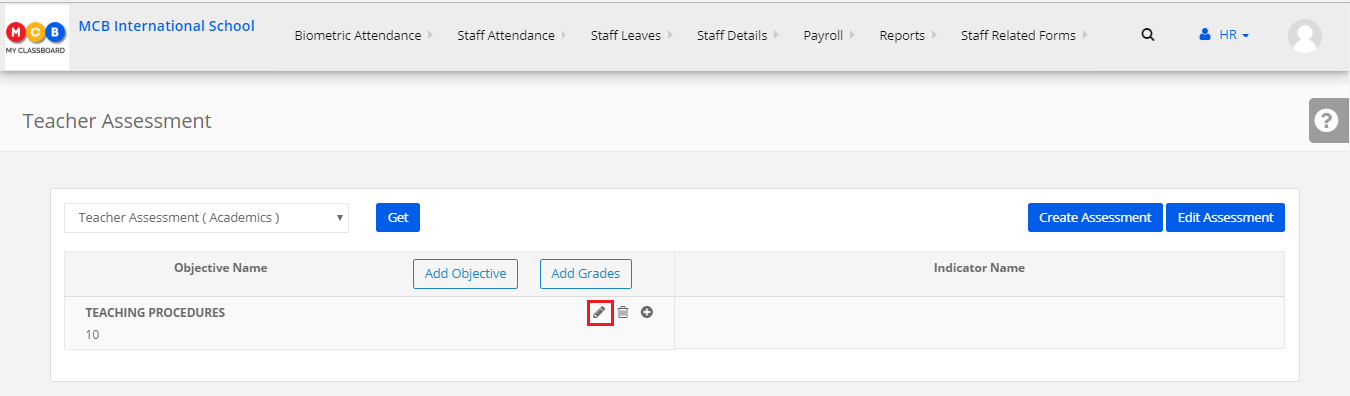
Step 10: To edit the objective name, click on edit icon [highlighted below]
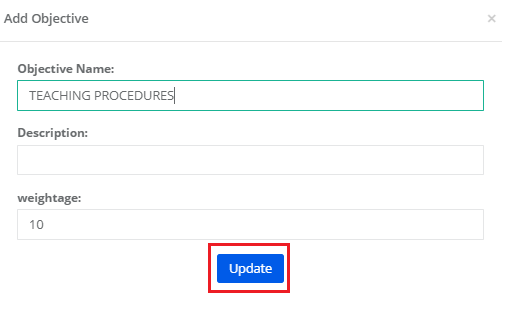
Step 11: Edit the details required and click on Update.
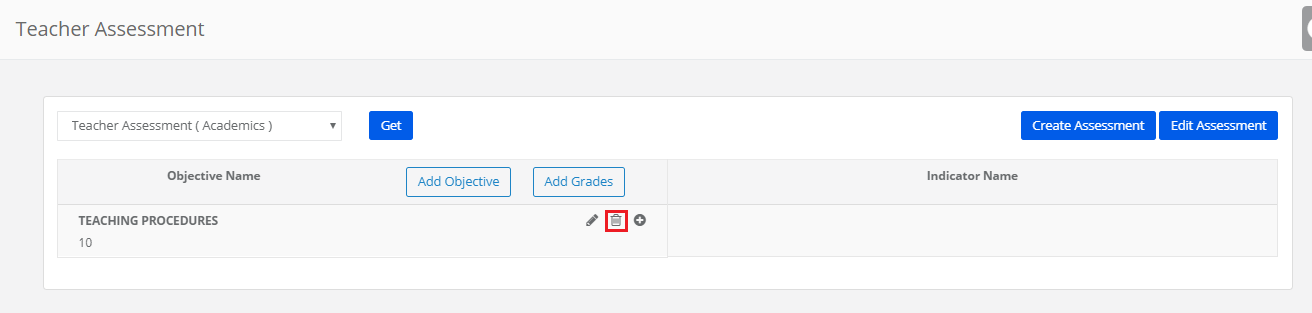
Step 12: To delete the Objective, click on delete icon [highlighted below]
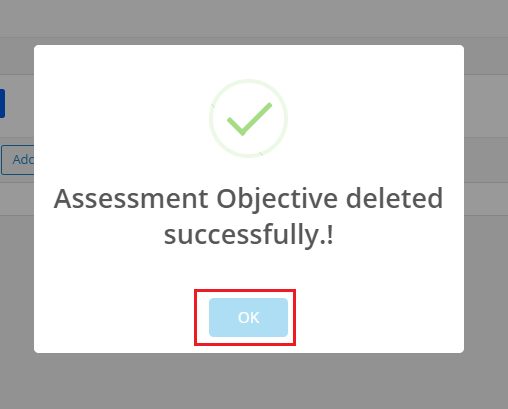
Step 13: Click OK to confirm the deletion.
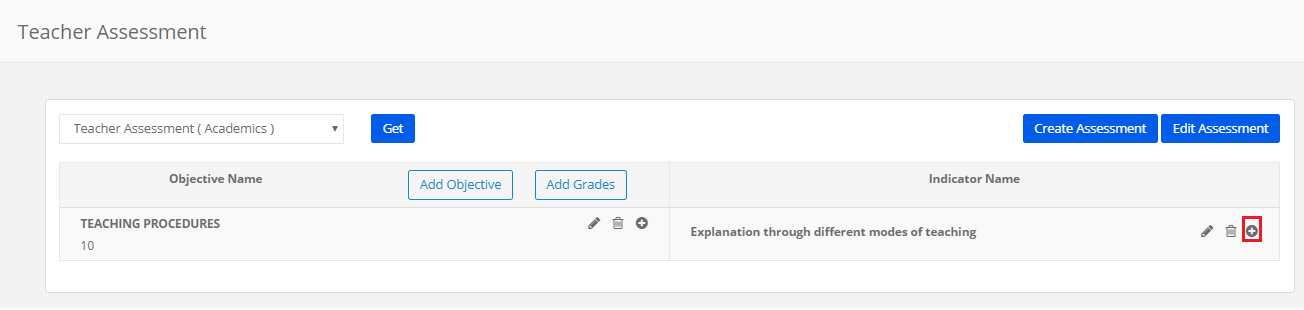
Staff assessment area can be further elaborated by adding the indicators for the objective to assess the teacher at a micro level specifically.
To add an indicator for objective:
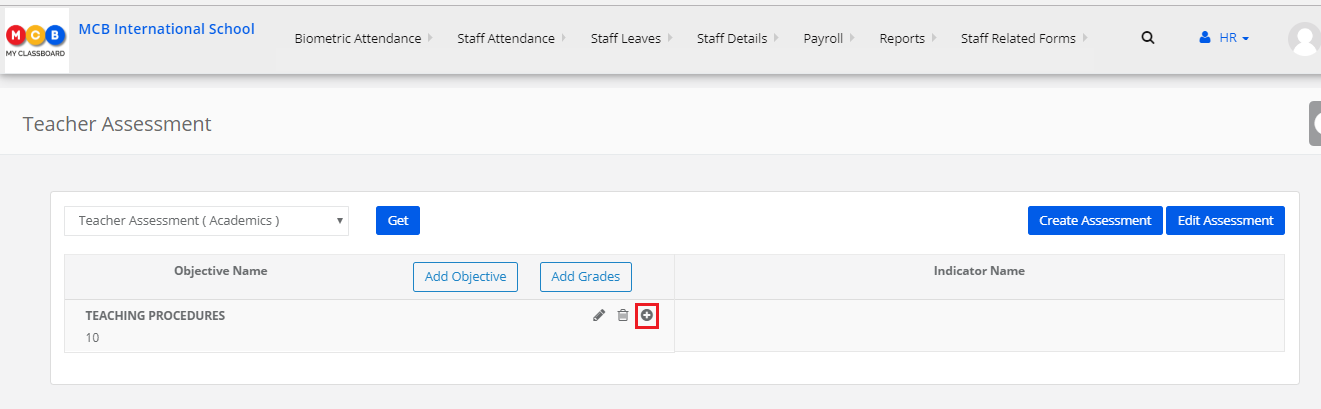
Step 14: Click on “+” sign to add the indicator.
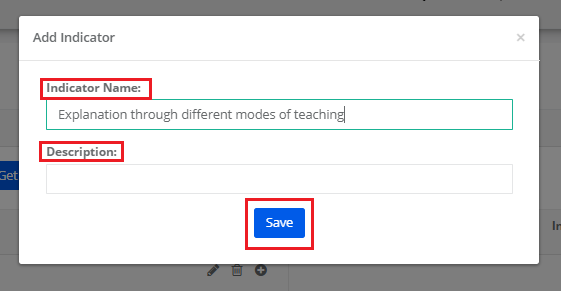
Step 15: Give Indicator Name, Description and click on Save
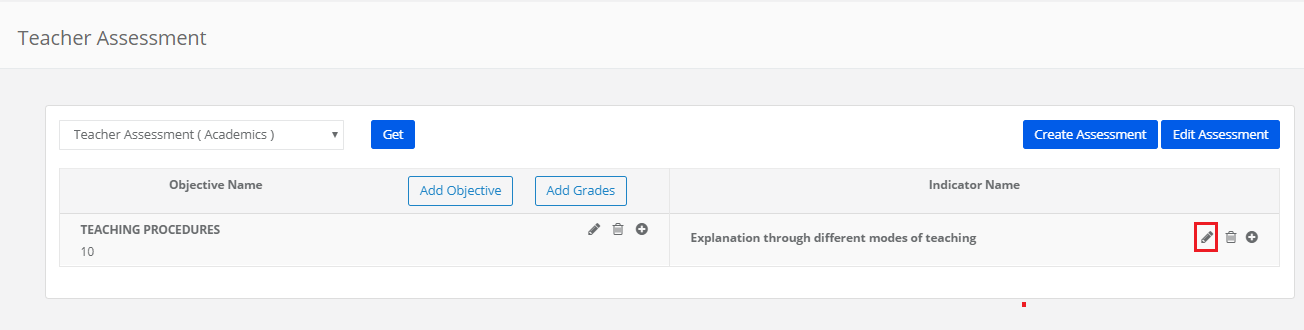
Step 16: To edit the indicator, click on edit icon [highlighted]
Step 17: Make changes in the required fields and click on update.
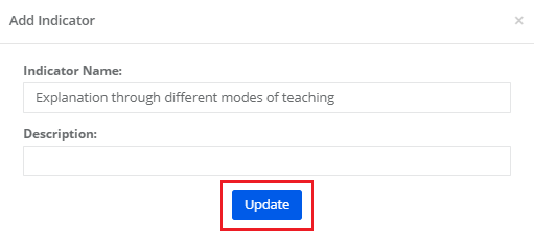
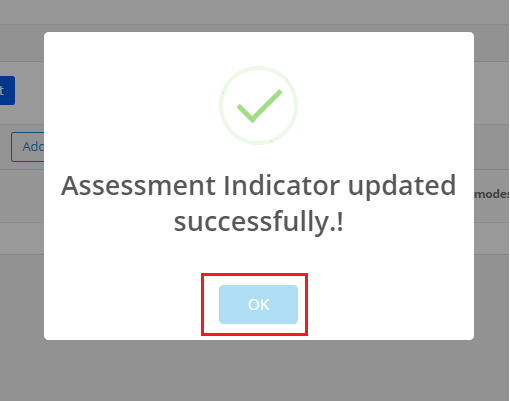
Step 18: Click ok to confirm the updation.
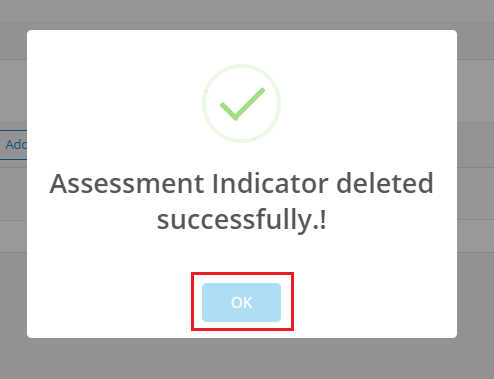
Step 19: Delete the indicator, click on delete icon [highlighted]

Step 20: Click OK to confirm the deletion
Creating Grading scale for the assessment:
School can grade the teachers against the objective or indicators.
Step 21: To assess against the objectives, create a grading scale at the link highlighted below
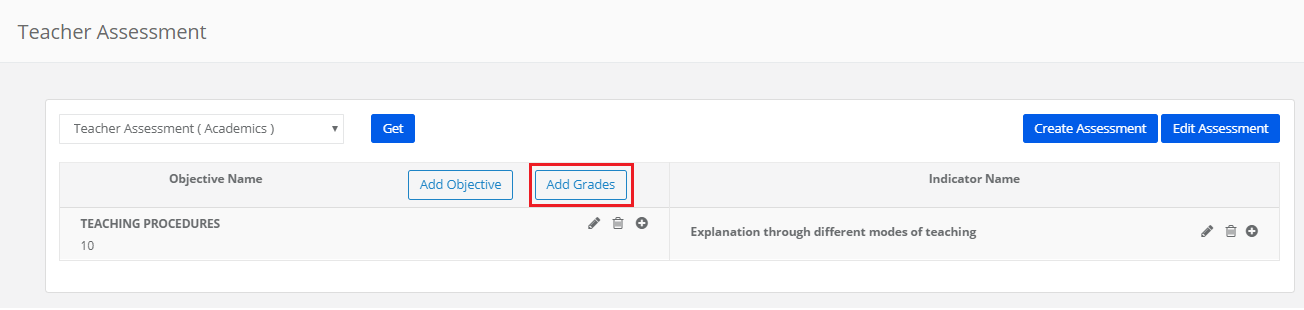
Step 22: To assess against the indicators, create a grading scale at the link highlighted below
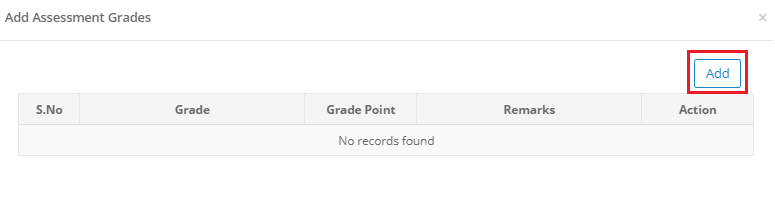
Step 23: To add grades, go to grades tab and click on Add
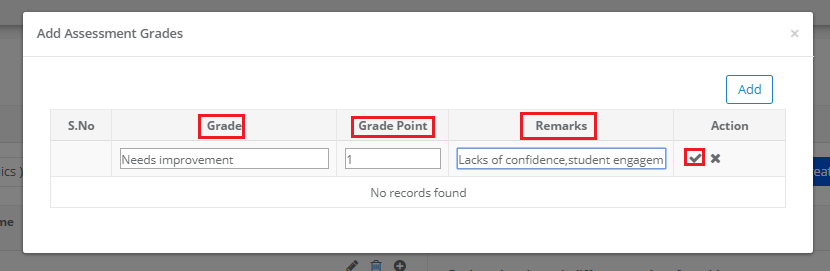
Step 24: Enter Grade, Grade Point, Remarks and click tick icon to save the grade
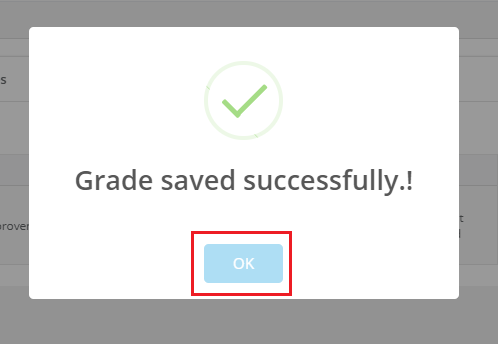
Step 25: Click OK
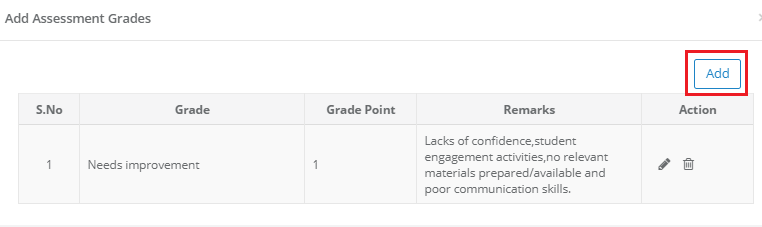
Step 26: Click on Add to add another grade to the scale and follow the procedure given at steps 24 & 25.
Assessment level Settings
Staff Assessment can be done at the following levels.
1. Self-Assessment
2. Peer Assessment
3. Next Level as per designation [tier 1 designation]
4. Next Level as per designation [tier 2 designation]
5. Next Level as per designation [tier 3 designation]
6. Principal
7. Zonal Head
As per the organization’s assessment flow, system admin has to make the settings.
Note: Please make sure the designation tiers are saved as per the people who are taking the assessment at Next Level.
You can set tier to designation by following this path: HR module – Staff details – Manage designation – edit designation – choose tier from the dropdown and save.
Please note the following parameters in the assessment level settings:
1. Sequence number: This is to determine how many levels a staff has to be assessed by people at different levels. It includes the following levels
a. Self-Assessment
b. Peer Assessment
c. Next Level as per designation [tier 1 designation]
d. Next Level as per designation [tier 2 designation]
e. Next Level as per designation [tier 3 designation]
f. Principal
g. Zonal Head
2. Assessment level name: This is to name the assessment of each level.
3. Assessment by: This is to define who has to take the assessment such as self, peer, next level (level 1 designations, level 2 designation, level 3 designation), Principal and zonal head.
4. Confidentiality: This is to define who can have access to view the assessment given. It includes “ Only next level, Everyone and None”.
a. Only next level – this will enable the view of assessment given only to the next level as per the levels set at sequence number.
b. Everyone – this will enable the view of assessment given to everybody who is involved in the assessment i.e. people at all levels can view the assessment given.
c. None – this will disable the view of assessment for everybody.
5. Assessment Type: This is to define the sequence of assessment. It includes Sequential and parallel.
a. Sequential – this is to allow people to take assessment only after the previous level assessment is done.
b. Parallel – This is to allow people to take assessment any time irrespective of the assessment completion status by the previous level.
Example: In a school, the assessment is being taken by the following people
1. Self
2. Peer
3. Coordinator
4. HOD
5. HM
6. Principal
Then, designations and assessment level settings are to be done as follows.
Designation settings:
1. Self – Assessment – no setting is required in designation since it is not a designation.
2. Peer Assessment – no setting is required in designation since it is not a designation
3. Coordinator – Coordinator designation needs to be mapped to tier 1.
4. HOD – HOD designation needs to be mapped to tier 2.
5. HM –designation needs to be mapped to tier 3.
6. Principal – no setting is required in designation since MCB identifies principal designation as high authority at a branch level. Hence by default principal will have access to the take assessment for all staff in his/her branch.
Level Settings:
1. Level 1 – Self Assessment
2. Level 2 – Peer Assessment
3. Level 3 – Coordinator Assessment [ NEXT LEVEL] [ tier 1]
4. Level 4 – HOD Assessment [ NEXT LEVEL] [ tier 2]
5. Level 5 – HM Assessment [ NEXT LEVEL] [ tier 3]
6. Level 7 – Principal Assessment
To add assessment level, pls follow the steps below
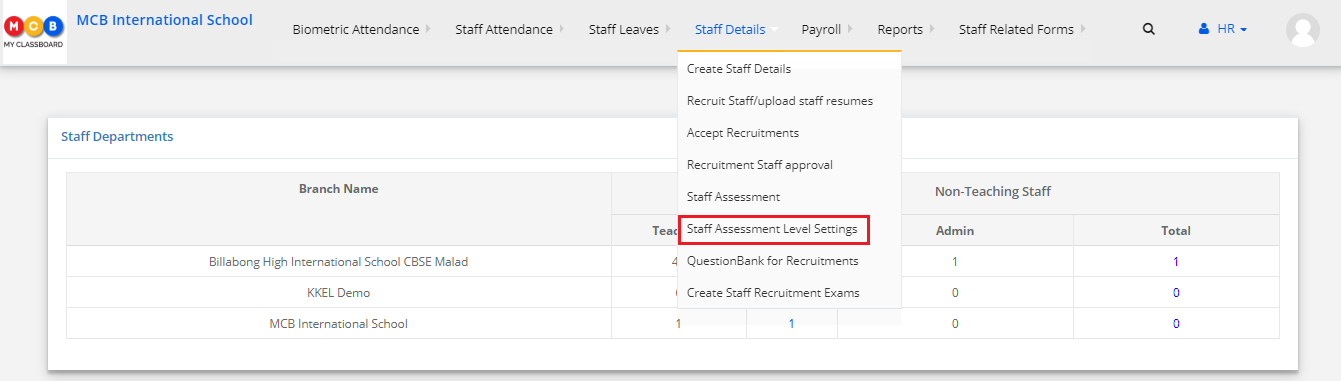
Step 1: Go to the HR module and click Staff assessment level settings link
Step 2: Click on “+” SIGN to add assessment level

Step 3: Add a level name, choose Assessment By, Confidentiality, Assessment Type and click Add button to save the level setting.
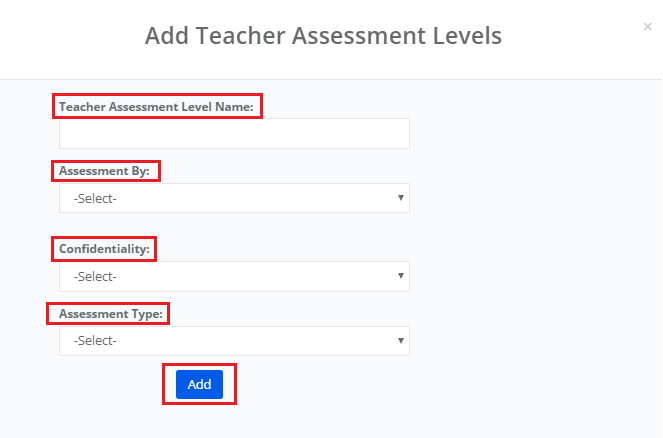
Step 4: Repeat the step 3 to add more levels depending on the assessment structure of your organization.
Take Assessment
Depending on the settings made at the assessment levels, respective staff can login and take the assessment. To take the assessment, pls follow the steps below.
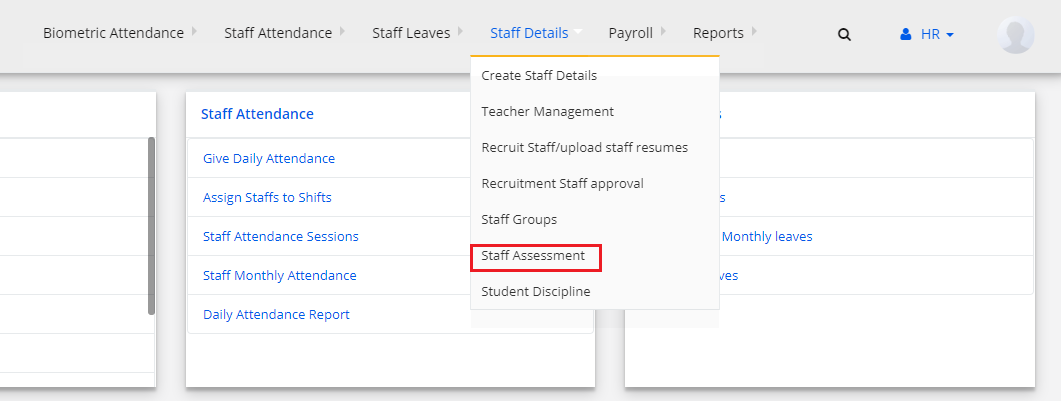
Step 1: Login, Go to HR and chose Staff Assessment under staff details menu.
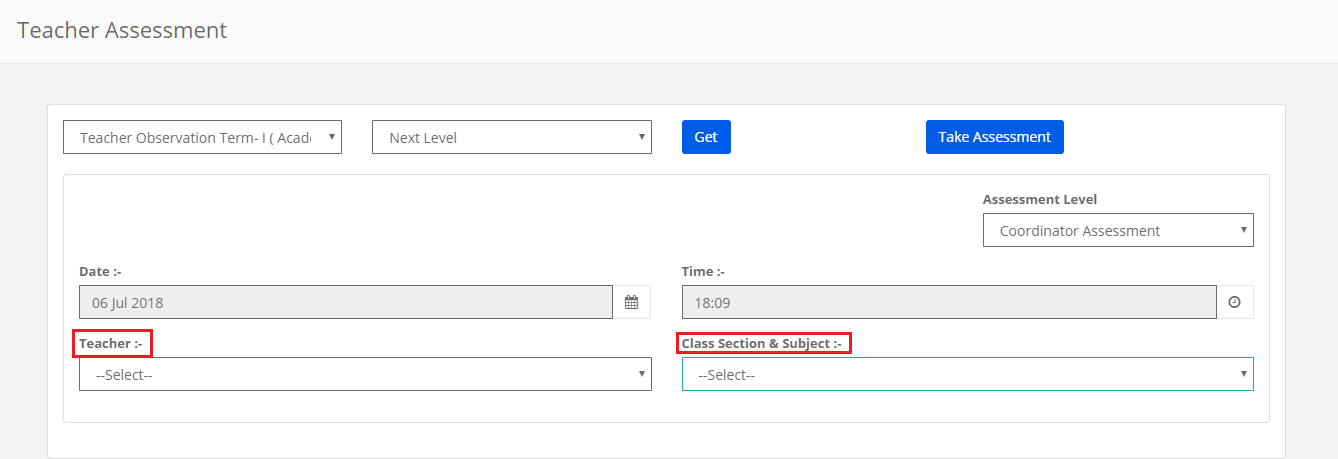
Step 2: Choose the assessment name and level from the drop-down and click on take assessment to start the assessment. Get option shows you the details of the assessment taken by the staff.

Step 3: Choose the teacher for whom assessment needs to be taken and subject for which assessment is being taken.
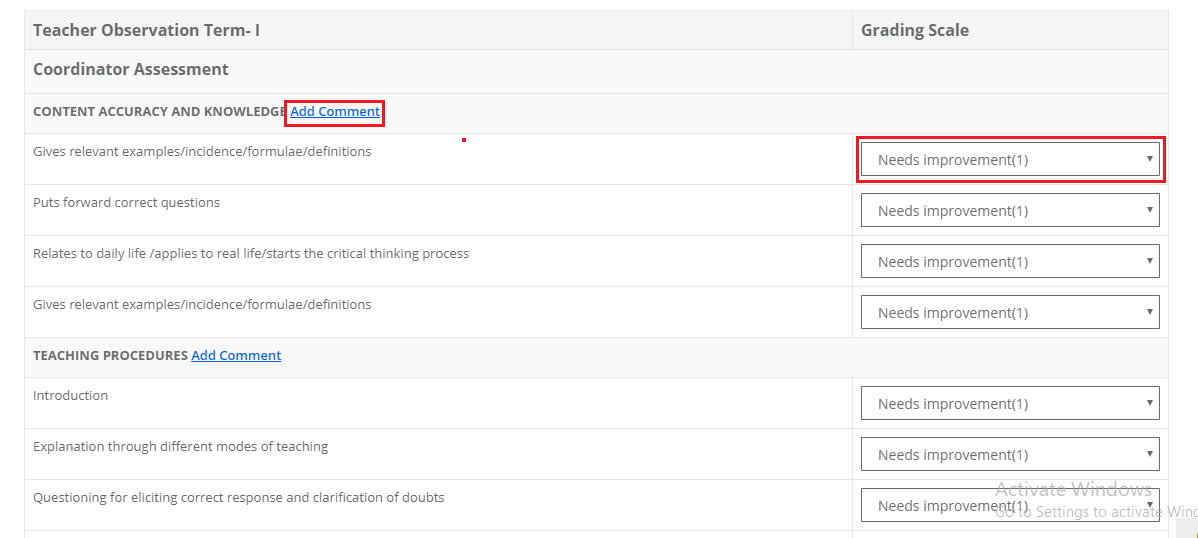
Step 4: Chose the grades/grade point against each indicator. Add comment option will allow you to add feedback or observations against the objective.
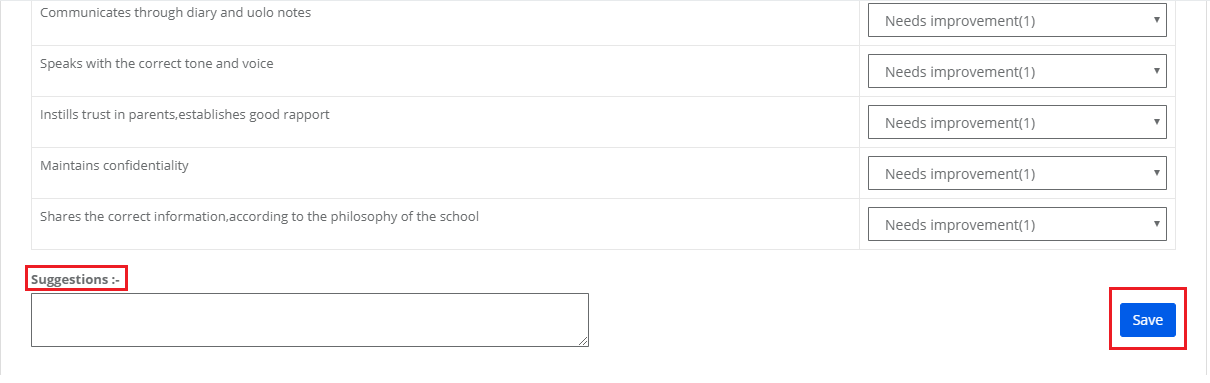
Step 5: Add suggestions or feedback on overall assessment and click on Save button to save the assessment.
Staff Assessment Report
Staff Assessment Report can be generated at System Admin Login.
To view the report Please follow the steps below
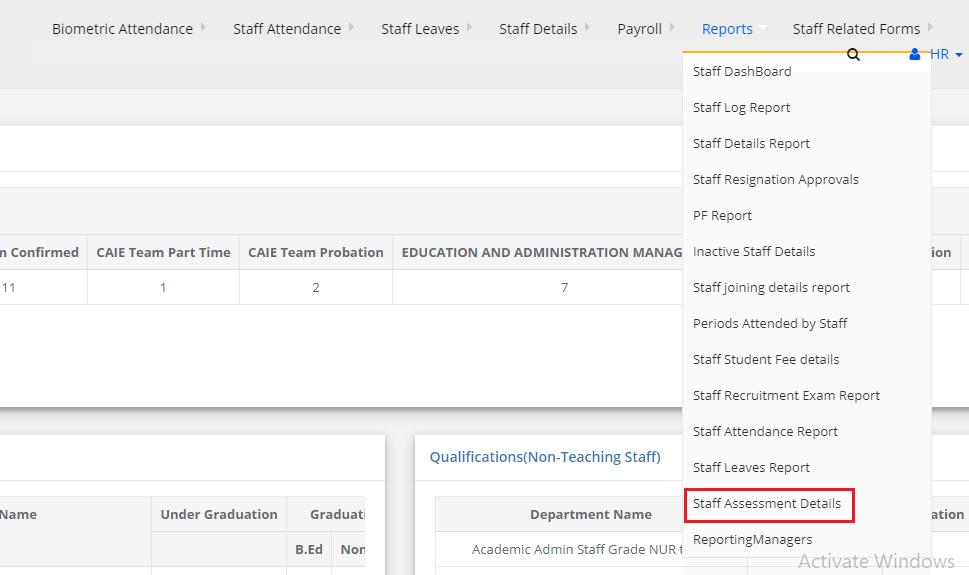
Step 1: Login, go to HR module, Choose Staff Assessment Details under Reports menu.
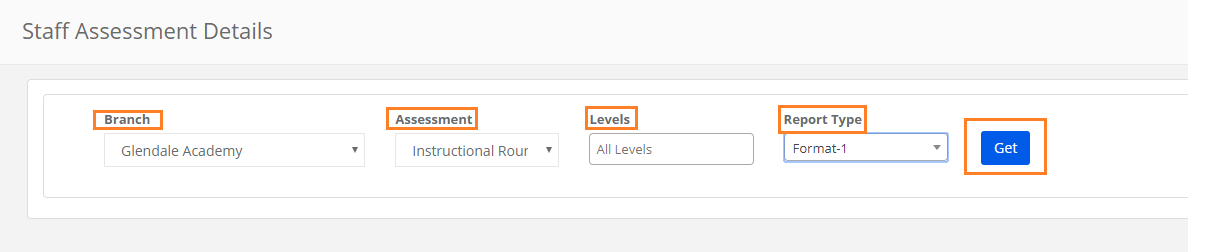
Step 2: Choose Branch, assessment name, levels [all, selected level], Report type [Format 1 or Format 2] and click on Get.
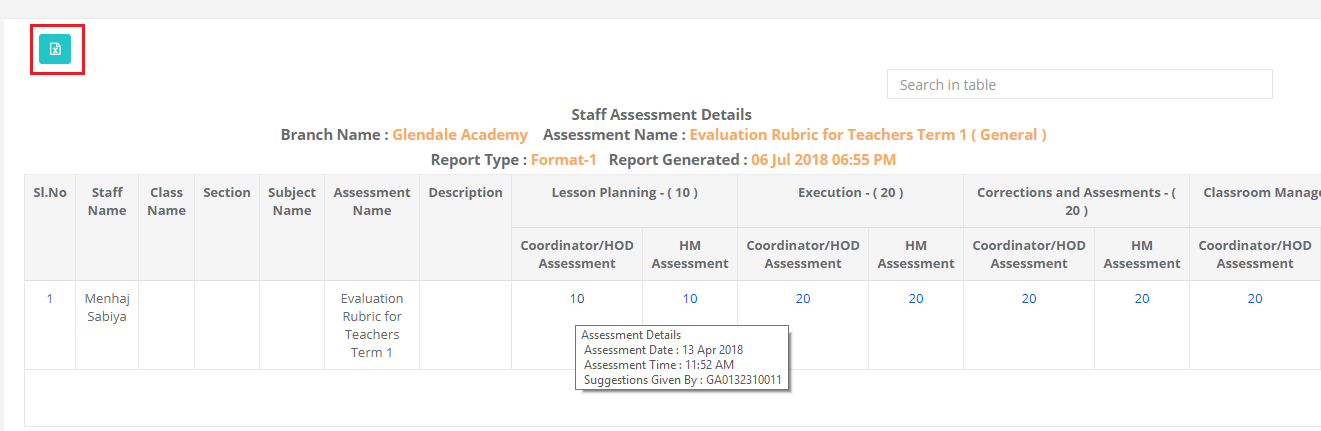
Format 1: This format shows the report as per the objective weightage.
Step 3: When you mouse hover on the number it shows details like the assessment date, time and taken by whom. You can export the report by clicking on the Excel icon which in the top left of the corner.
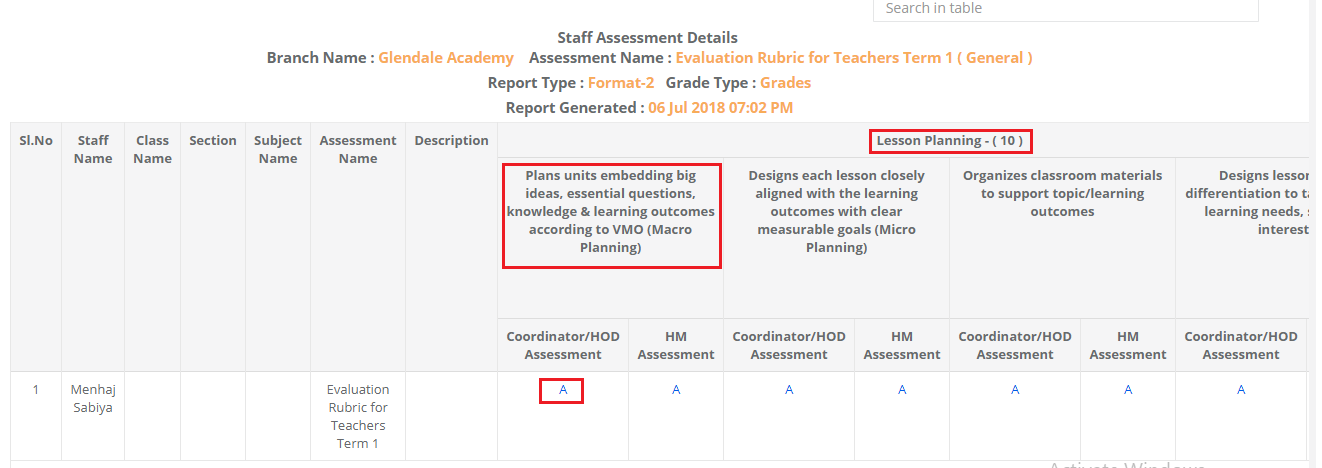
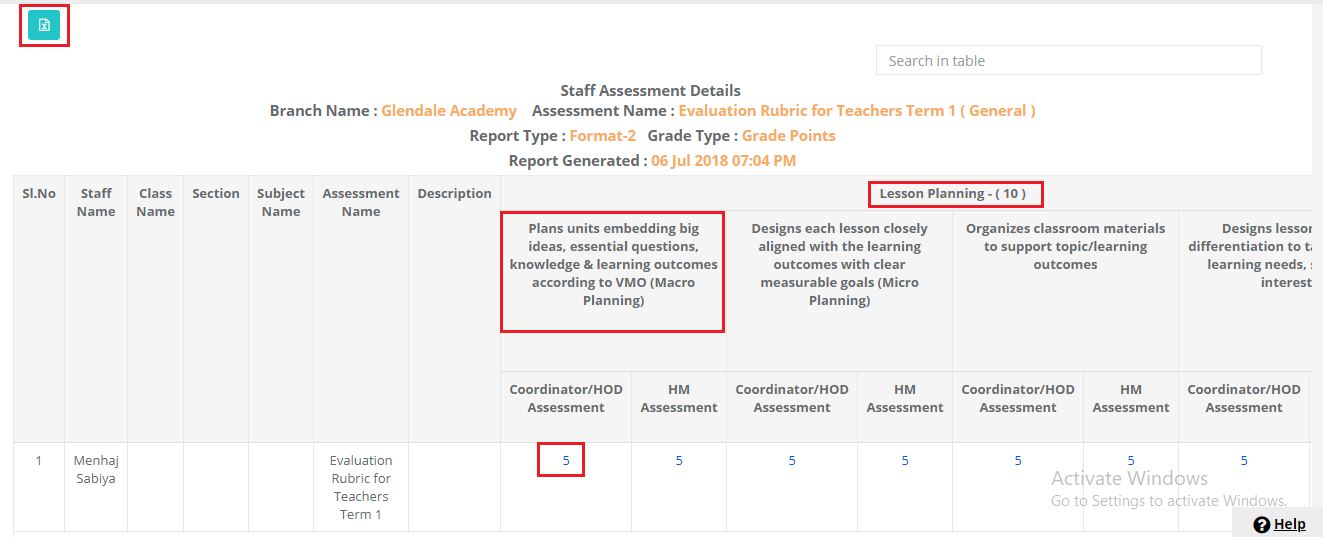
Format 2: This format shows you the indicator wise grade or grade point.
Step 4: To generate the report in format 2, choose Branch, assessment name, levels [all, selected level], Report type as Format 2, display type [Grades or Grade Points] and click on Get.

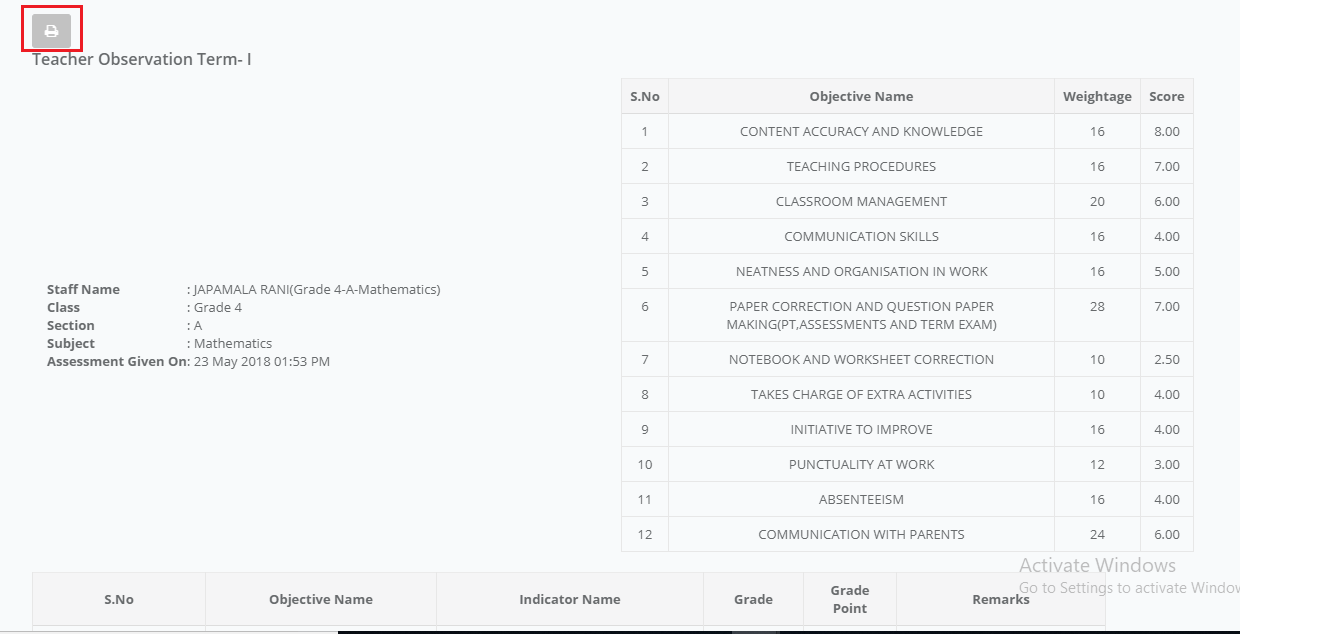
Step 5: Report with grades will show as follows. Note the objective and indicators under the objective and grades given for the staff.
Step 6: Report with grade points will show as follows. Note the objective and indicators under the objective and grades given for the staff. You can export the reports by clicking on the Excel icon which is at the top left corner.
View individual Staff Assessment Report
Step 1: Login and go to staff assessment. Choose the assessment and click Get. It gives you the list of people for whom the assessment is given. Click on View icon [ highlighted below]
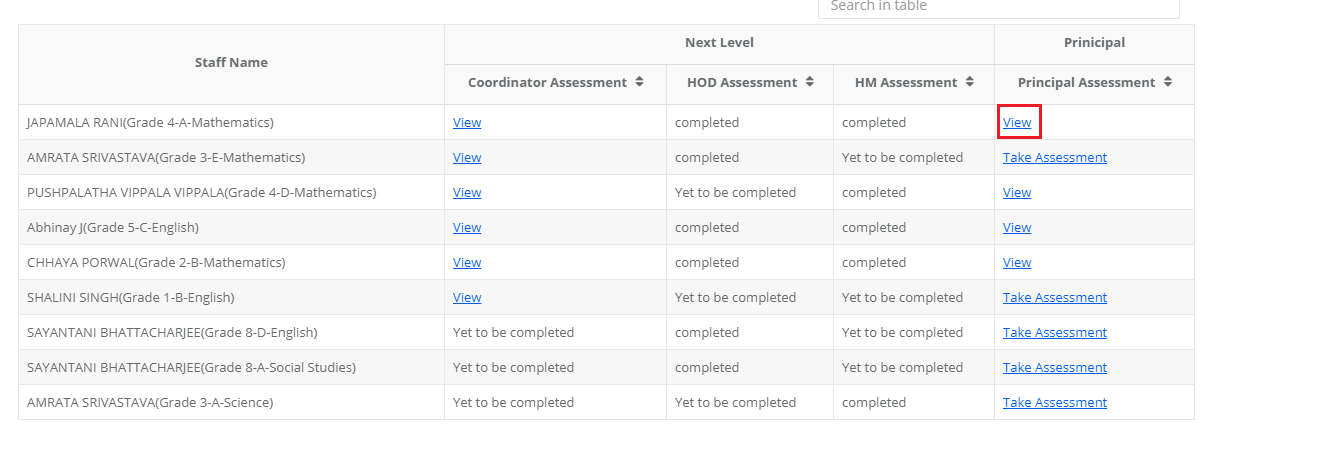
Step 2: it will generate a comprehensive report on the assessment given to the staff.
You can print the report by clicking on excel export icon which is placed at the top left corner.