These guidelines have been written as a training manual for all our ardent clients for the educational experience. This training manual is a self-study tool and major focus on this user manual complements training without involving the support team in person. We believe and wish, this user manual is of much help to you saving your precious time.
To log in to the portal kindly enter the respective URL.
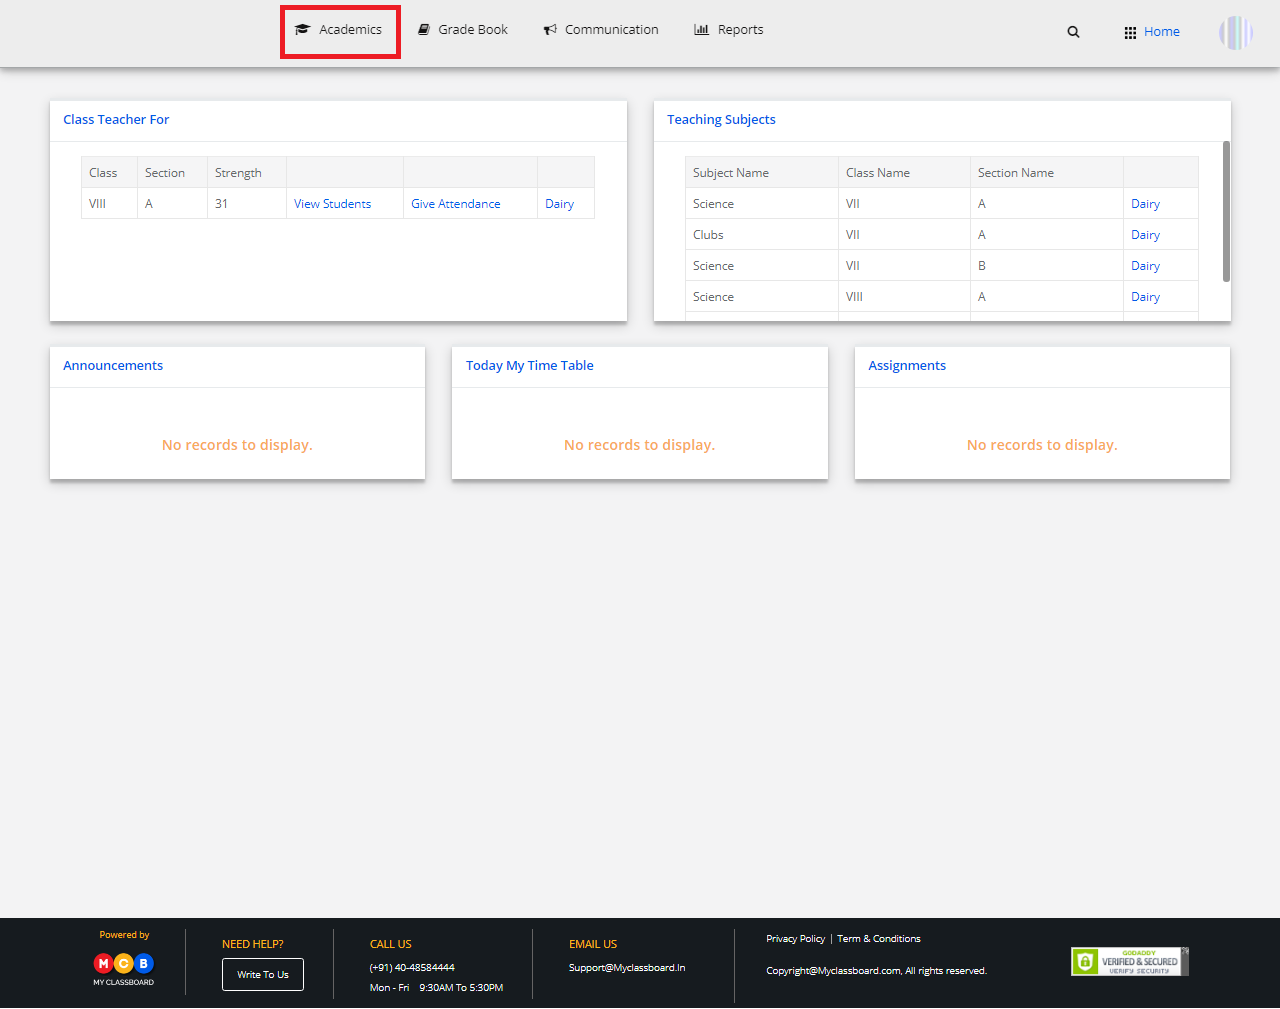
Stage 1: Login to MCB with Class Teacher Login Credentials.
Stage 2: Academics
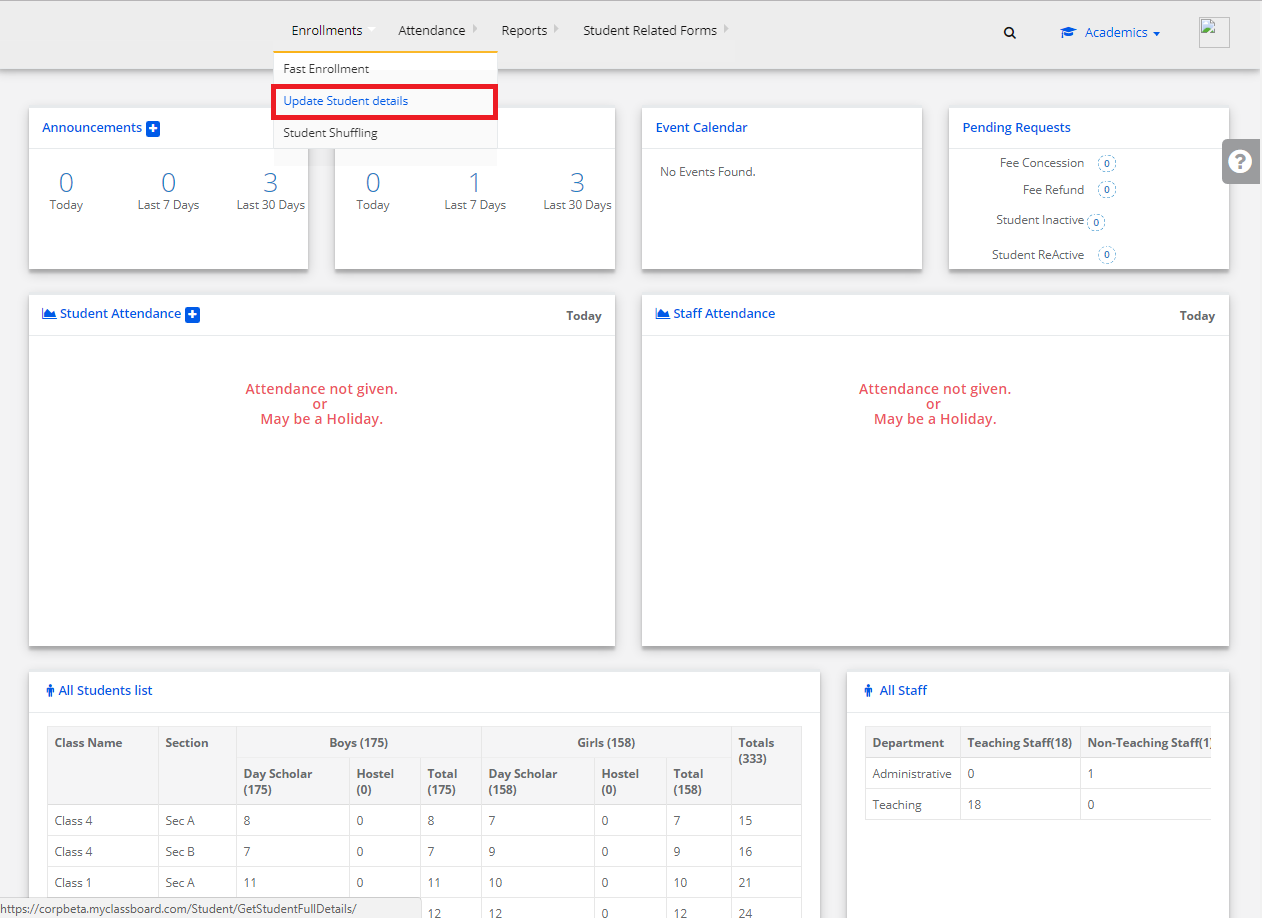
1) Update Student Details
Step 1: Select Academics on the top bar of the dashboard.
Step 2: Select Enrollments and choose “Update Student Details”.
Step 3: Select Class on the top right corner of the page and click on “Get”.
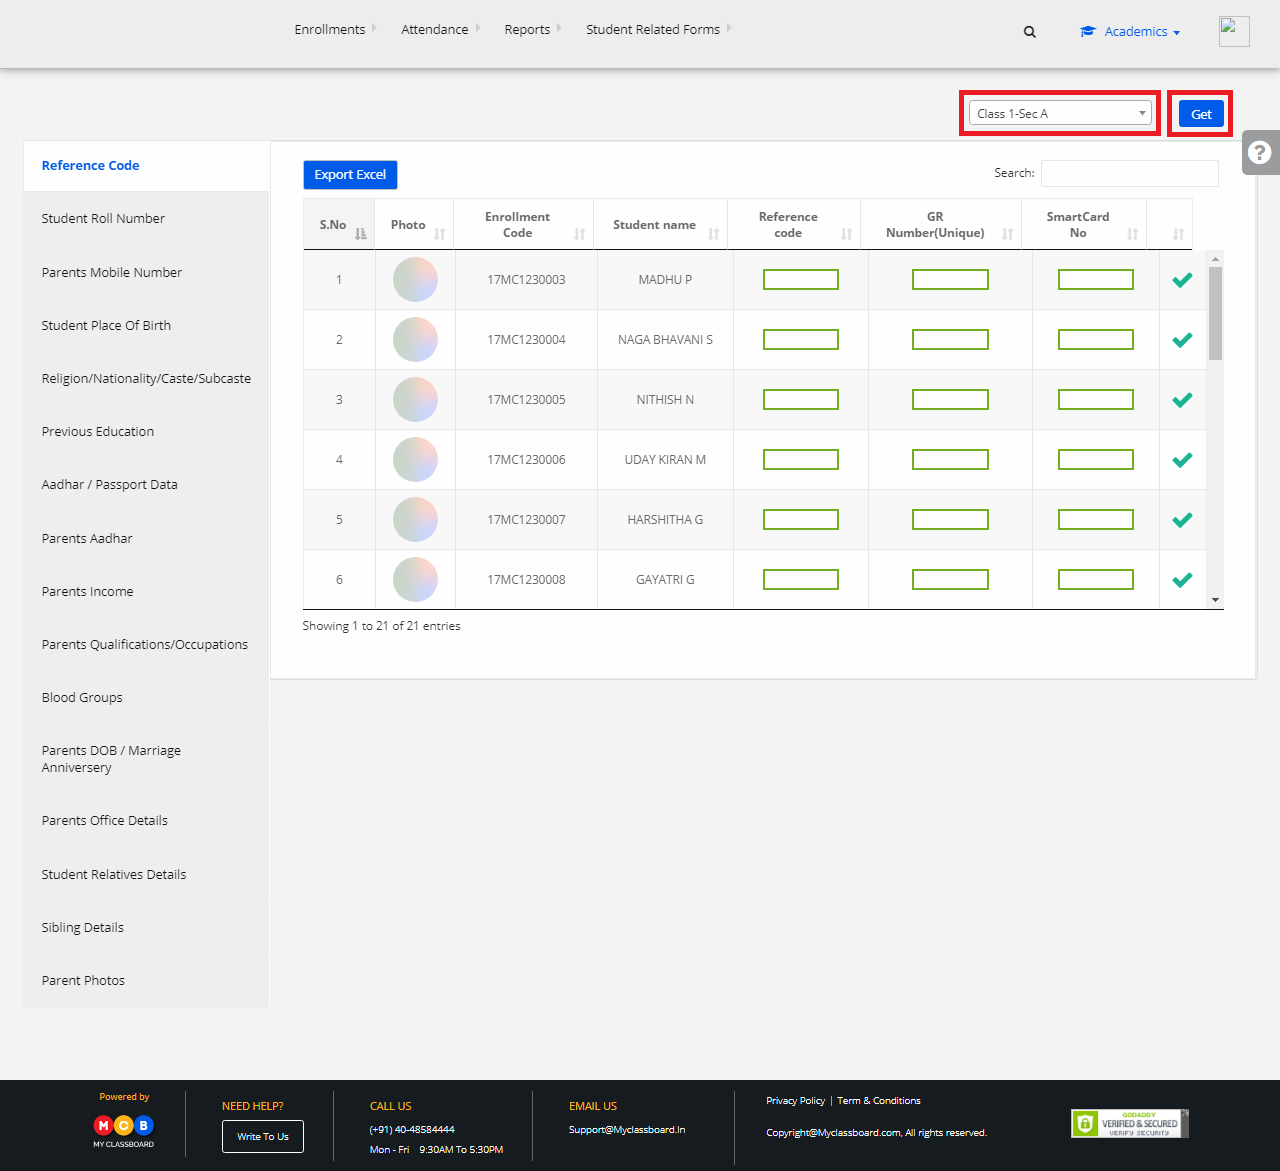
Step 4: To update Reference Code, select “Reference Code” on the left pane. Select the student, enter the “Reference Code” and click on “Save” button.

Step 5: To update Student Roll Number, select “Student Roll Number” on the left pane. Select the student, enter the Roll Number and click on “Save” button.

Step 6: To update Parents Mobile Number, select “Parents Mobile Number” on the left pane. Select any student, enter the Mobile Number and click on “Save” button.

Step 7: To update Student’s Place Of Birth, select “Student Place Of Birth” on the left pane. Select the student, enter the details and click on “Save” button.

Step 8: To update the details in bulk, select “Browse(.csv only)” to choose the file and click on “Validate and Upload” to upload the chosen file.

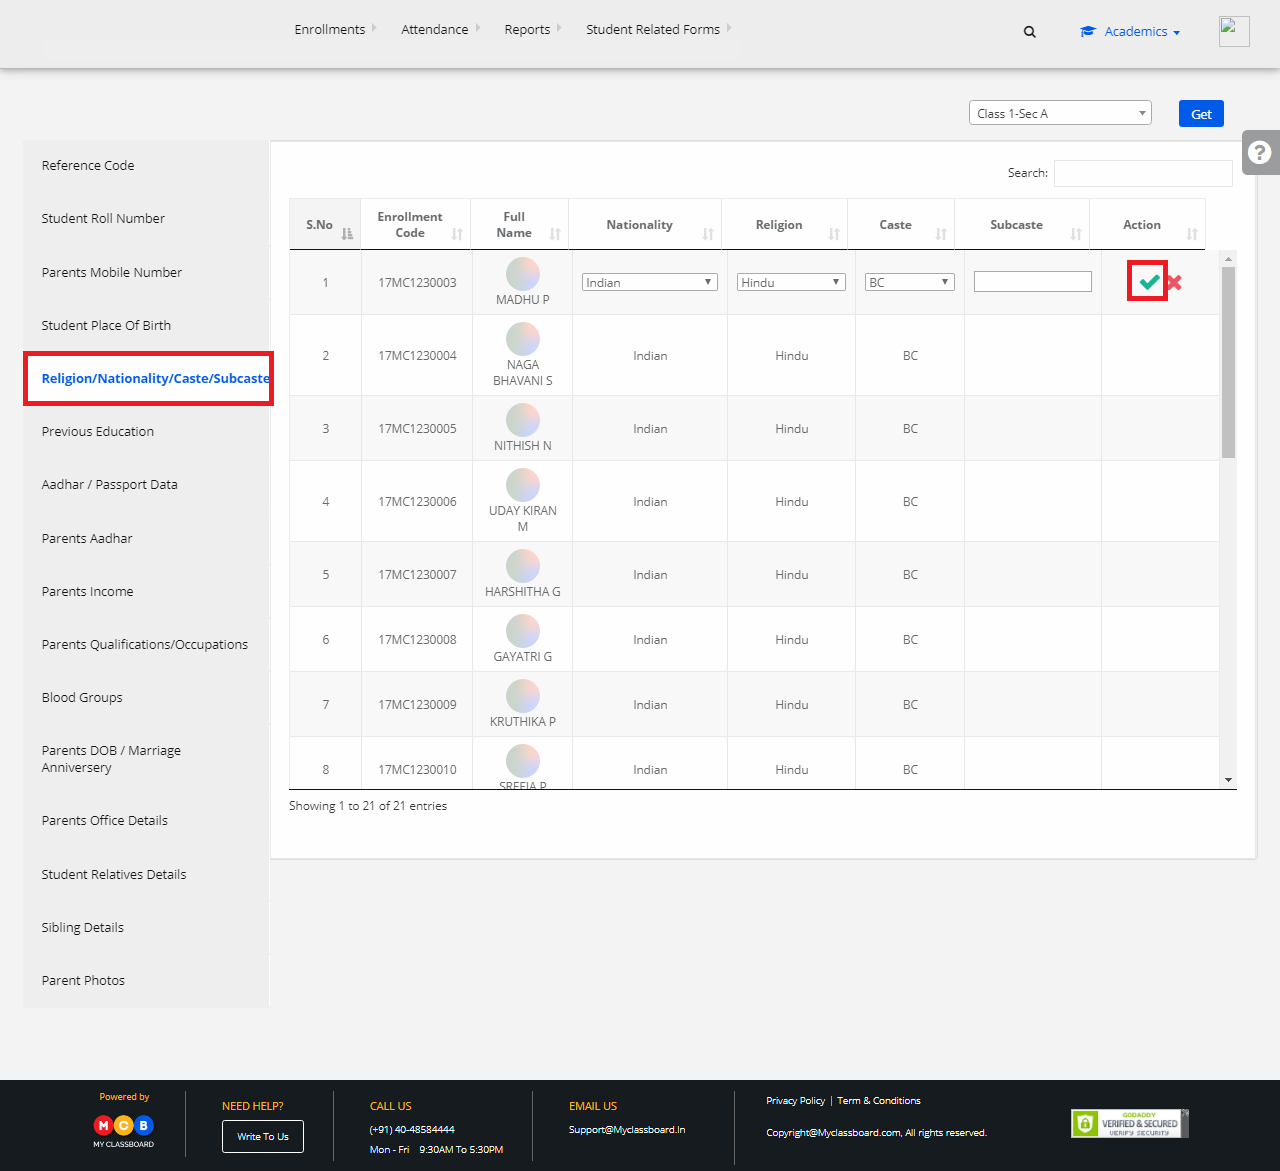
Step 9: To update Religion/Nationality/Caste/Sub caste, select “Religion/Nationality/Caste/Subcaste” on the left pane. Select the student, enter the details and click on “Save” button.
Step 10: To update Previous Education, select “Previous Education” on the left pane. Select any student, enter the details and click on “Save” button.

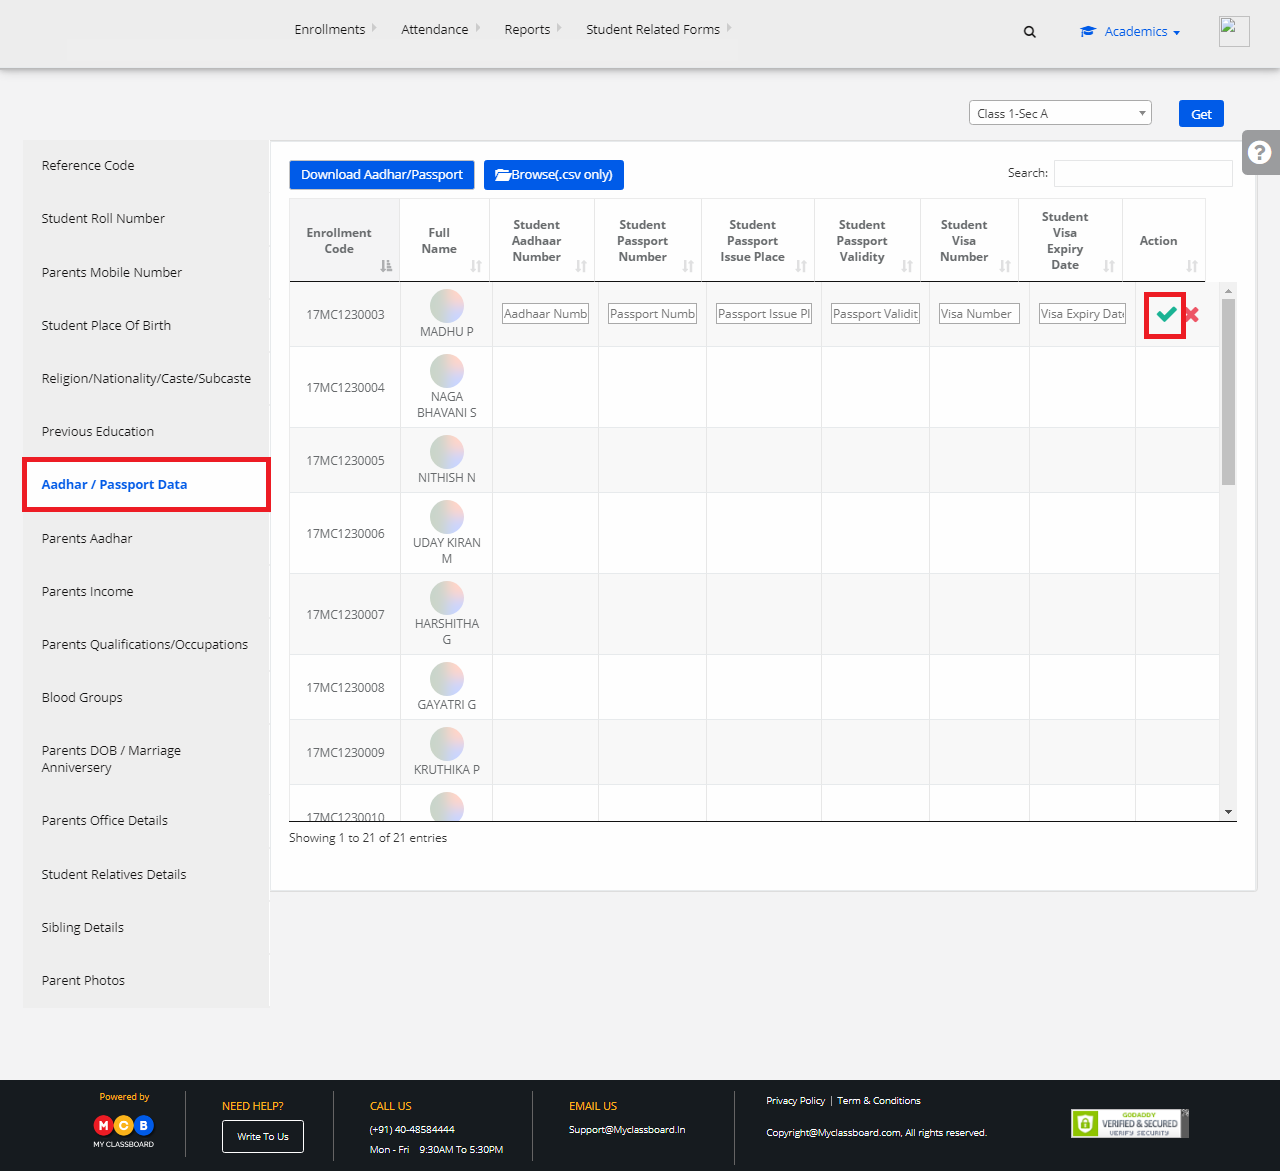
Step 11: To update Aadhar/Passport Data, select “Aadhar/Passport Data” on the left pane. Select the student, enter the details and click on “Save” button.
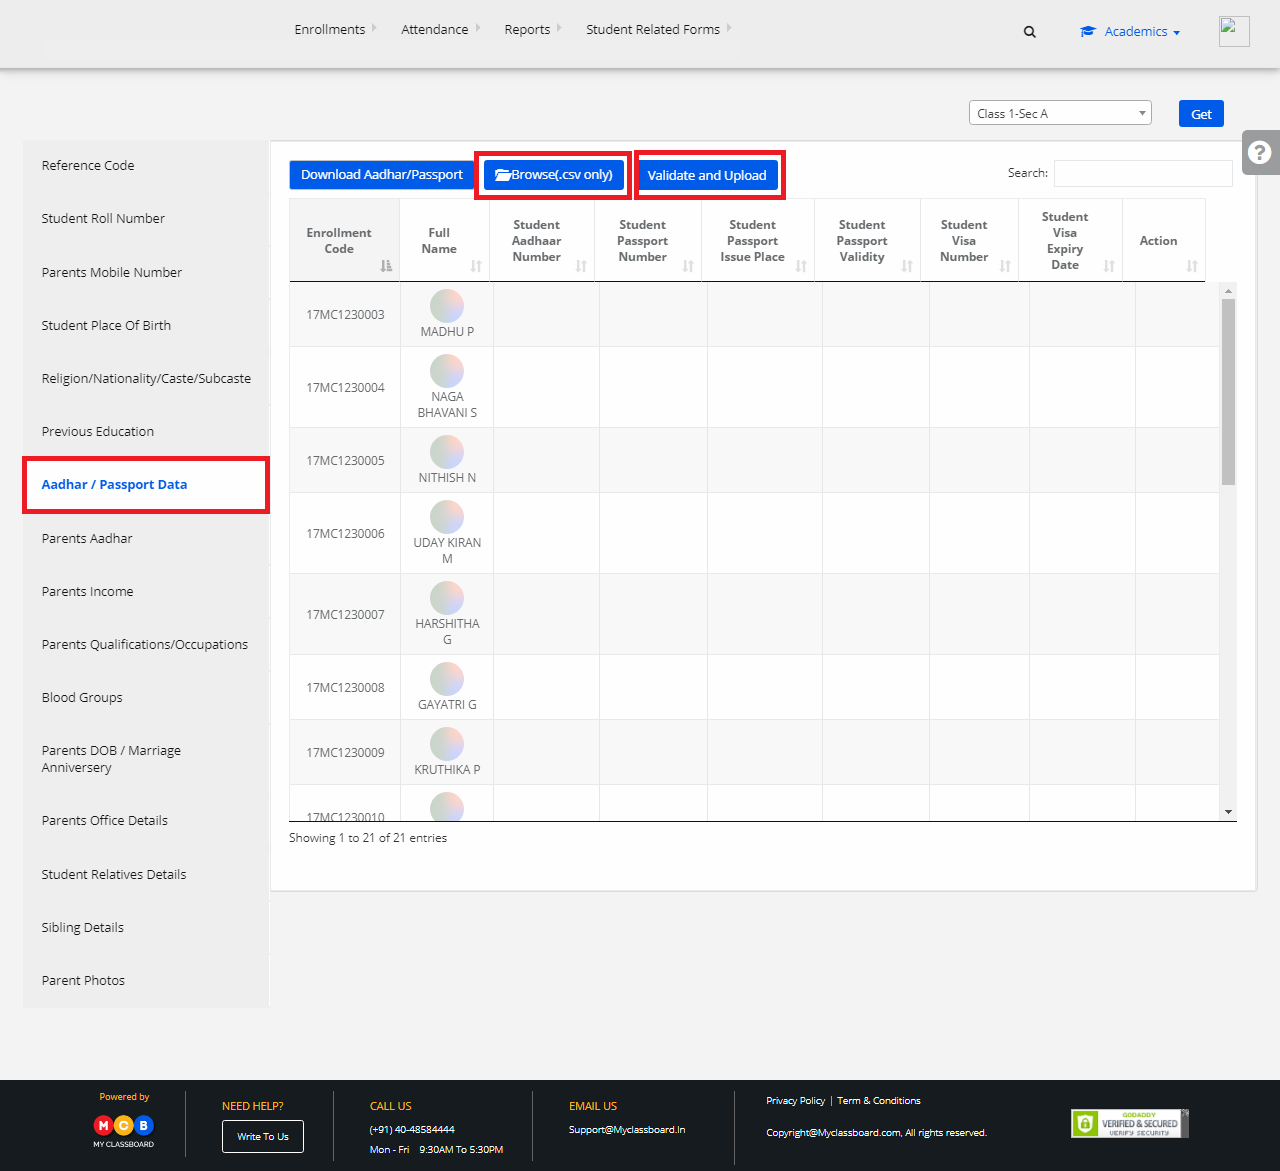
Step 12: To update the details in bulk, select “Browse(.csv only)” to choose the file and click on “Validate and Upload” to upload the chosen file.
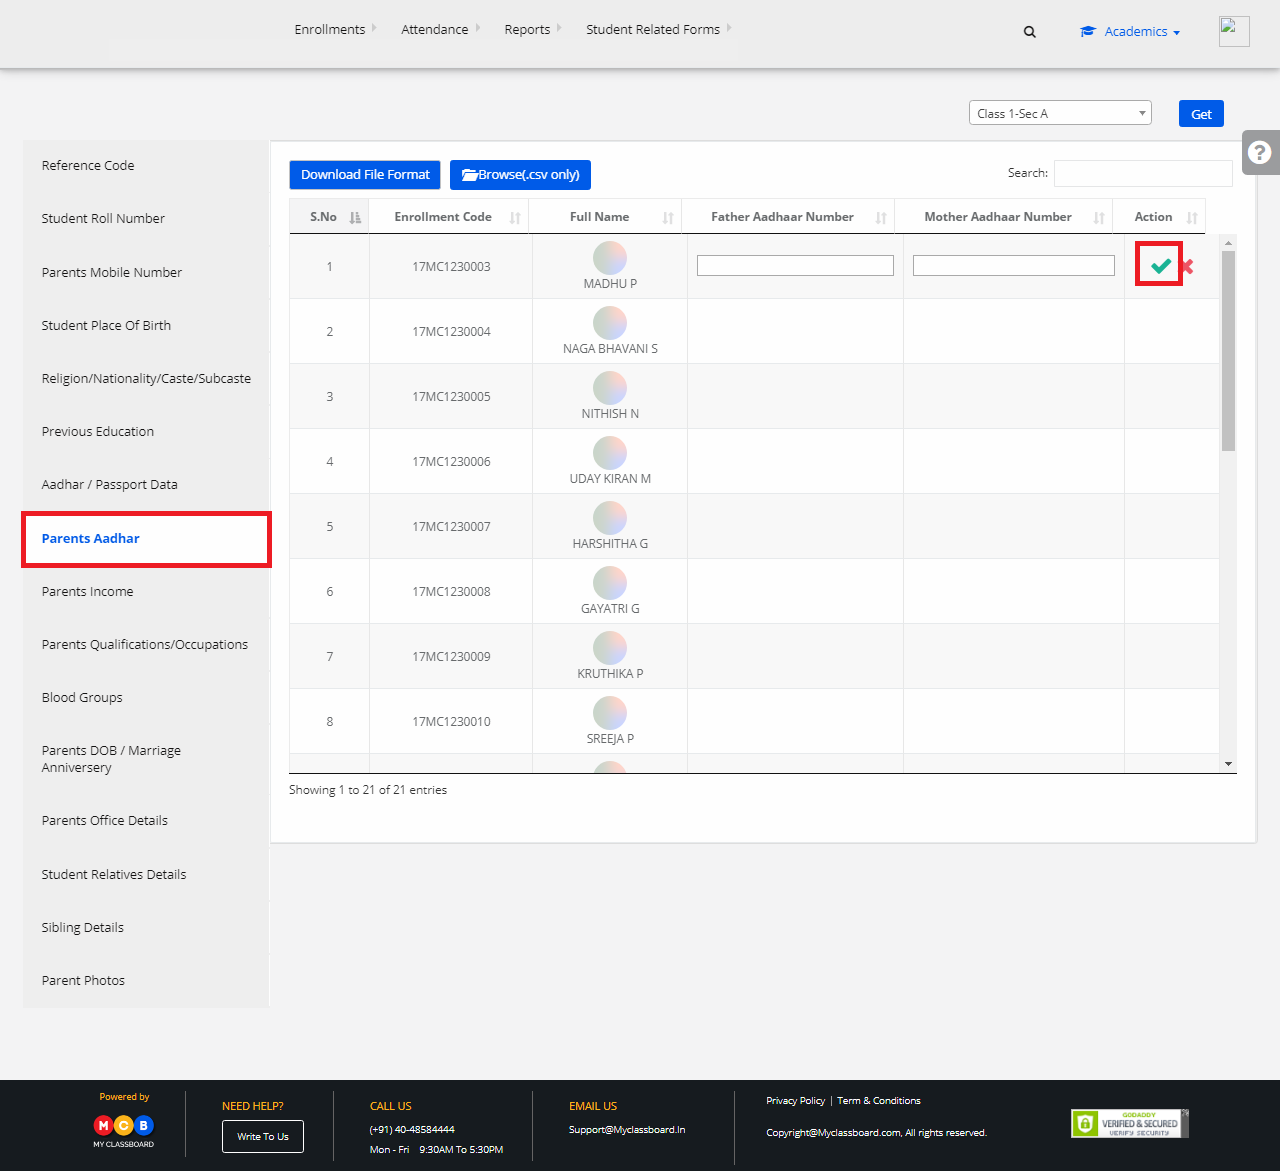
Step 13: To update Aadhar details of parents, select “Parents Aadhar” on the left pane. Select any student, enter the details and click on “Save” button.
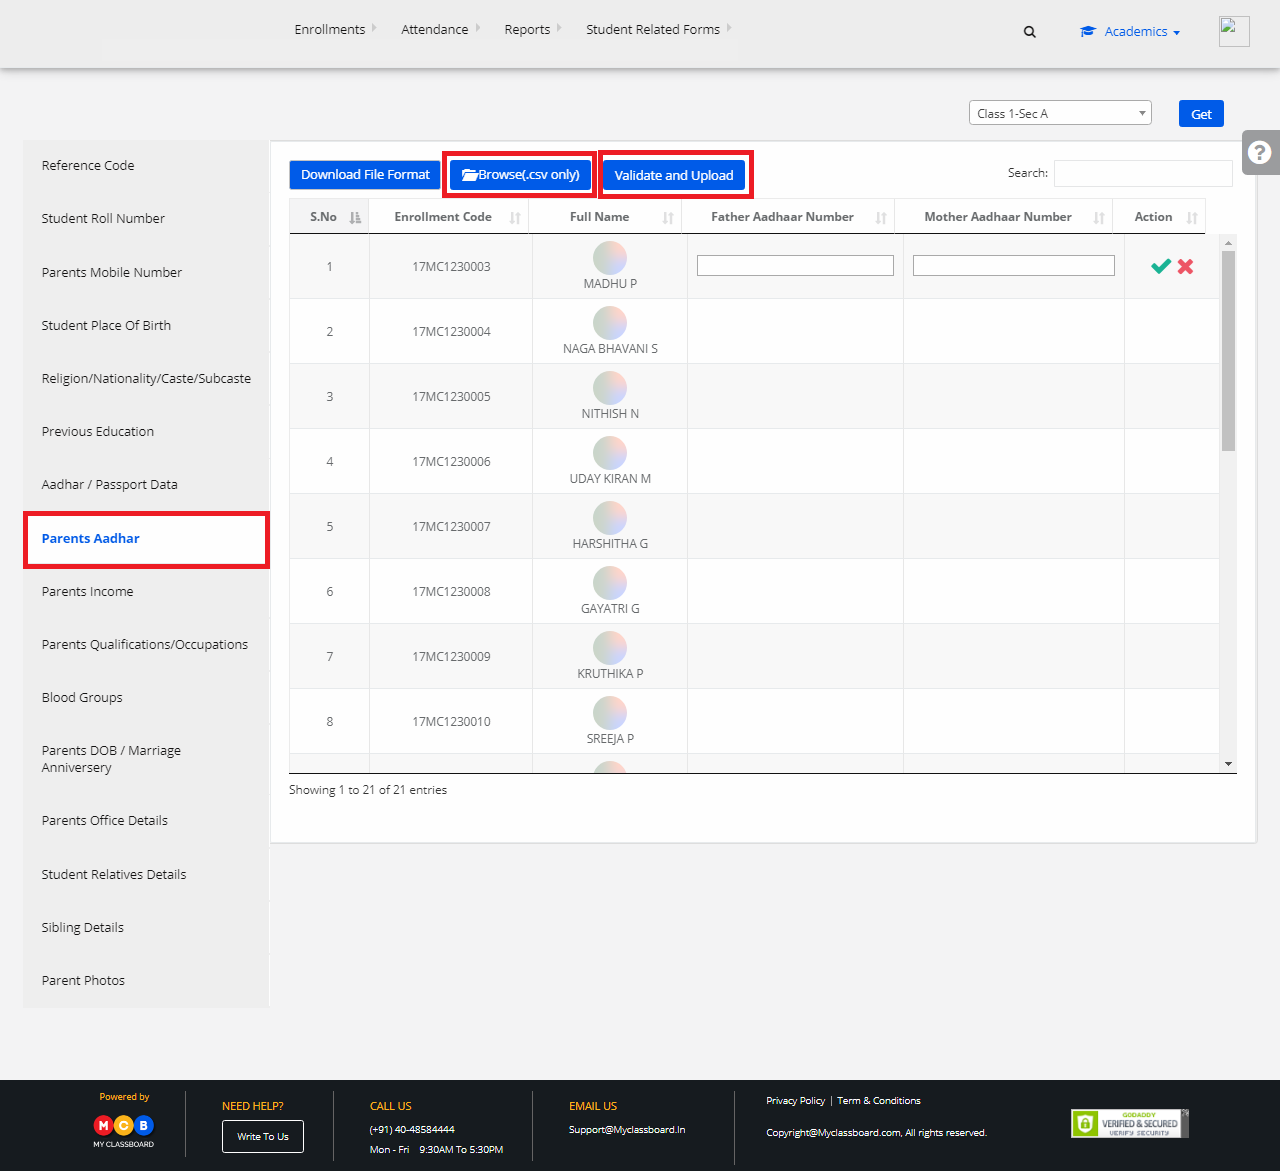
Step 14: To update the details in bulk, select “Browse(.csv only)” to choose the file and click on “Validate and Upload” to upload the chosen file.
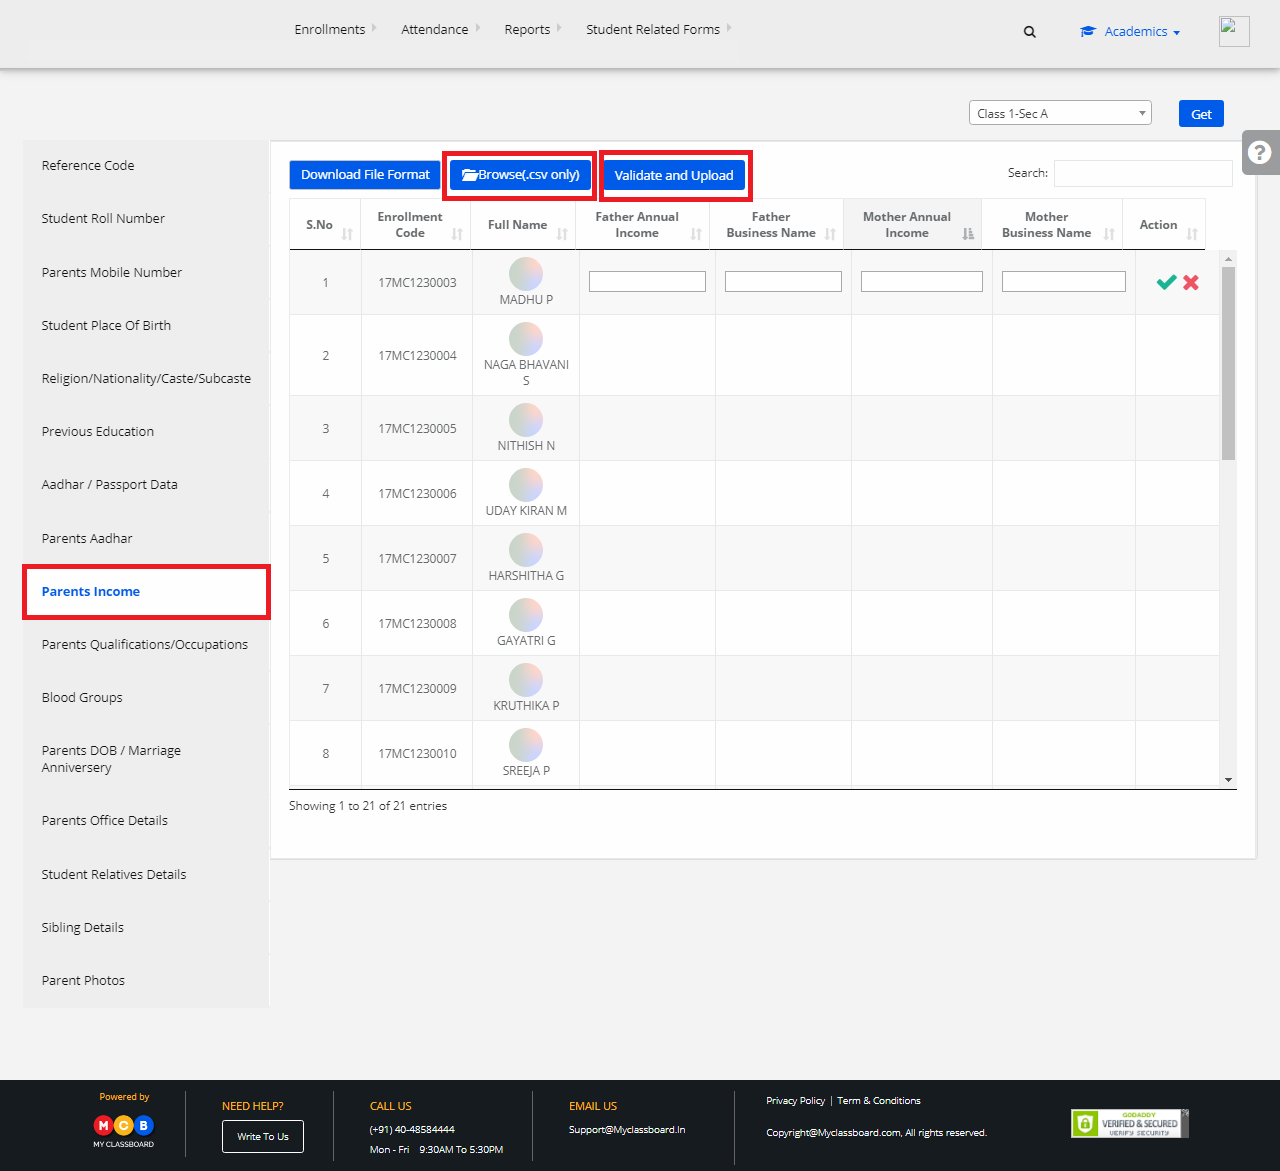
Step 15: To update the Parents Income, select “Parents Income” on the left pane. Select the student, enter the details and click on “Save” button.

Step 16: To update the details in bulk, select “Browse(.csv only)” to choose the file and click on “Validate and Upload” to upload the chosen file.
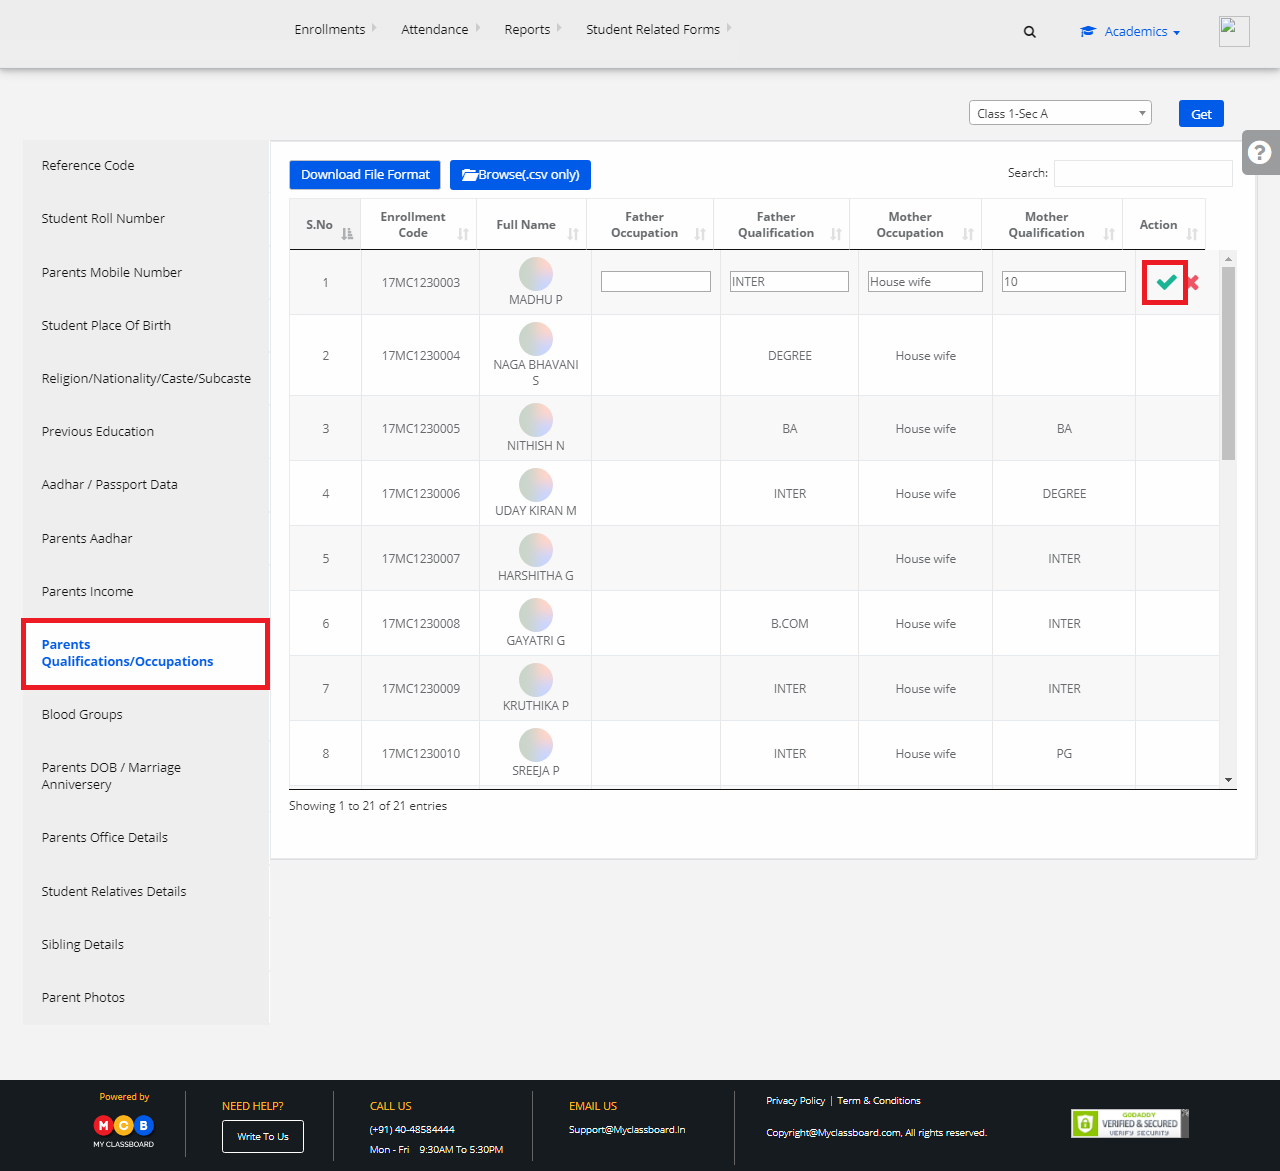
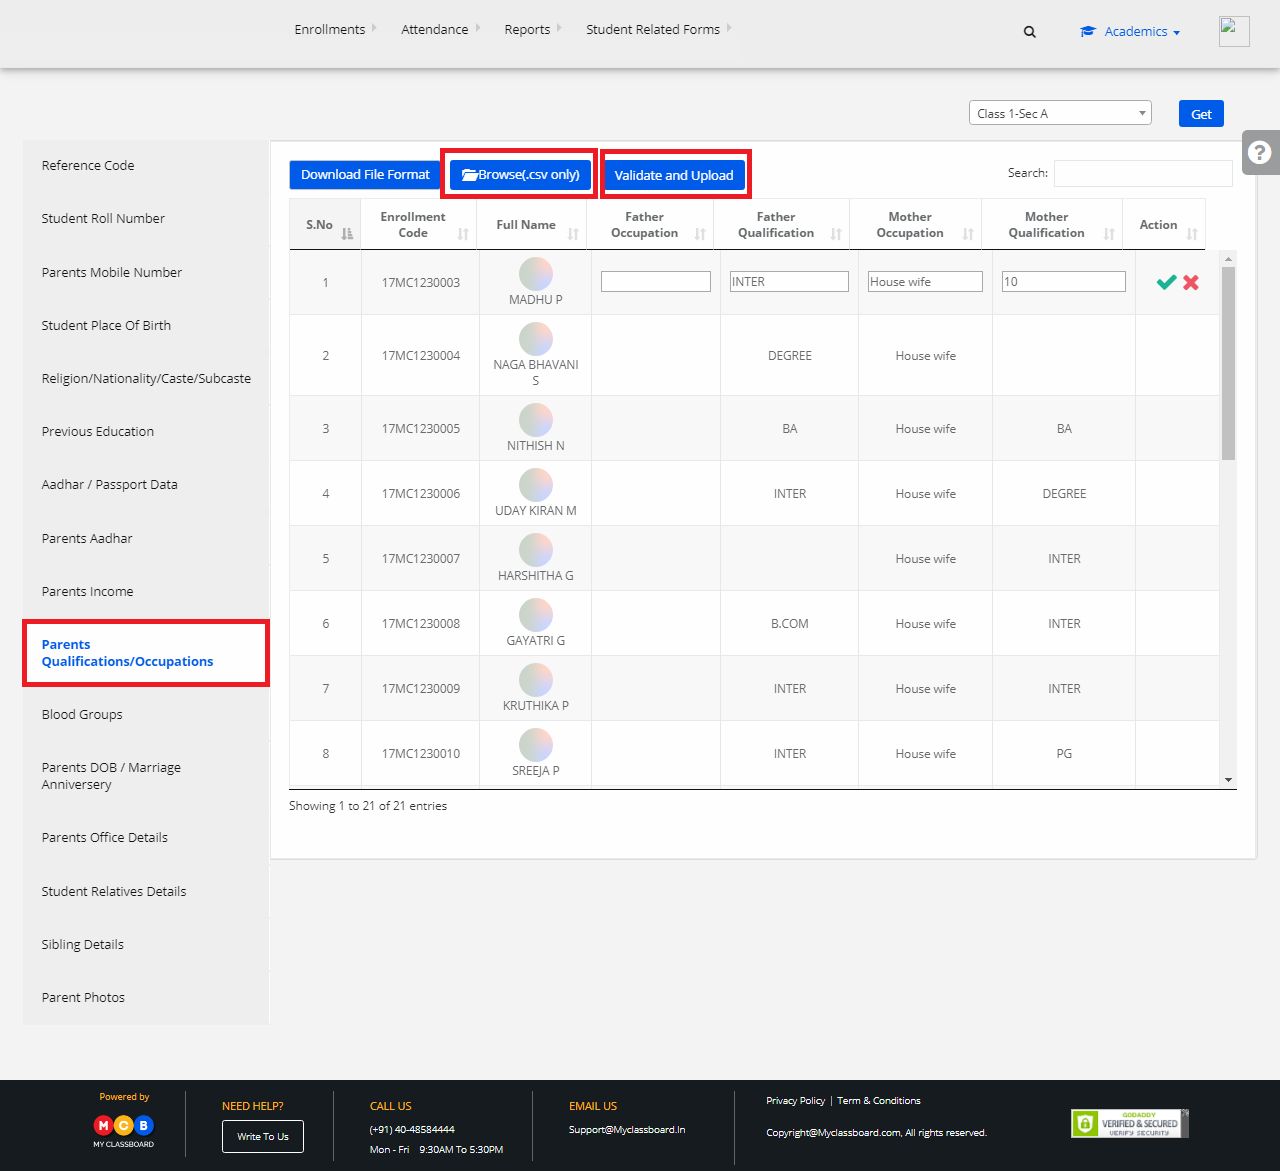
Step 17: To update Parents Qualifications and Occupations, select “Parents Qualifications/Occupations” on the left pane. Select any student, enter the details and click on “Save” button.
Step 18: To update the details in bulk, select “Browse(.csv only)” to choose the file and click on “Validate and Upload” to upload the chosen file.
Step 19: To update the Blood Group details, select “Blood Groups” on the left pane. Select the student, enter the details and click on “Save” button.

Step 20: To update Parents DOB/Marriage Anniversary details, select “Parents DOB/Marriage Anniversary” on the left pane. Select any student, enter the details and click on “Save” button.
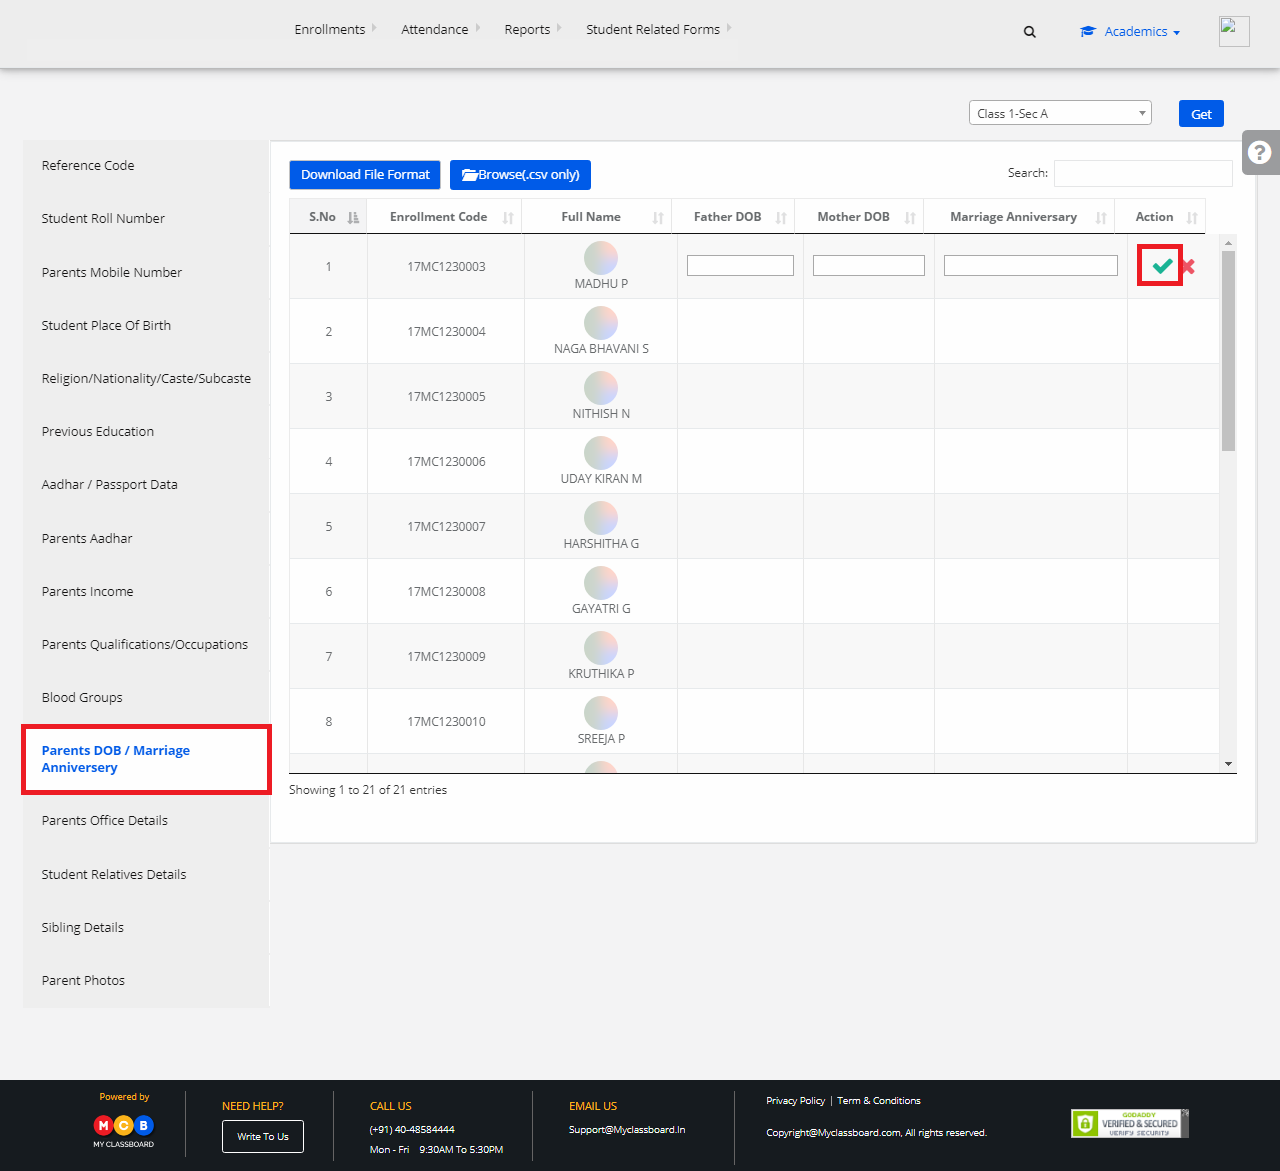
Step 21: To update the details in bulk, select “Browse(.csv only)” to choose the file and click on “Validate and Upload” to upload the chosen file.

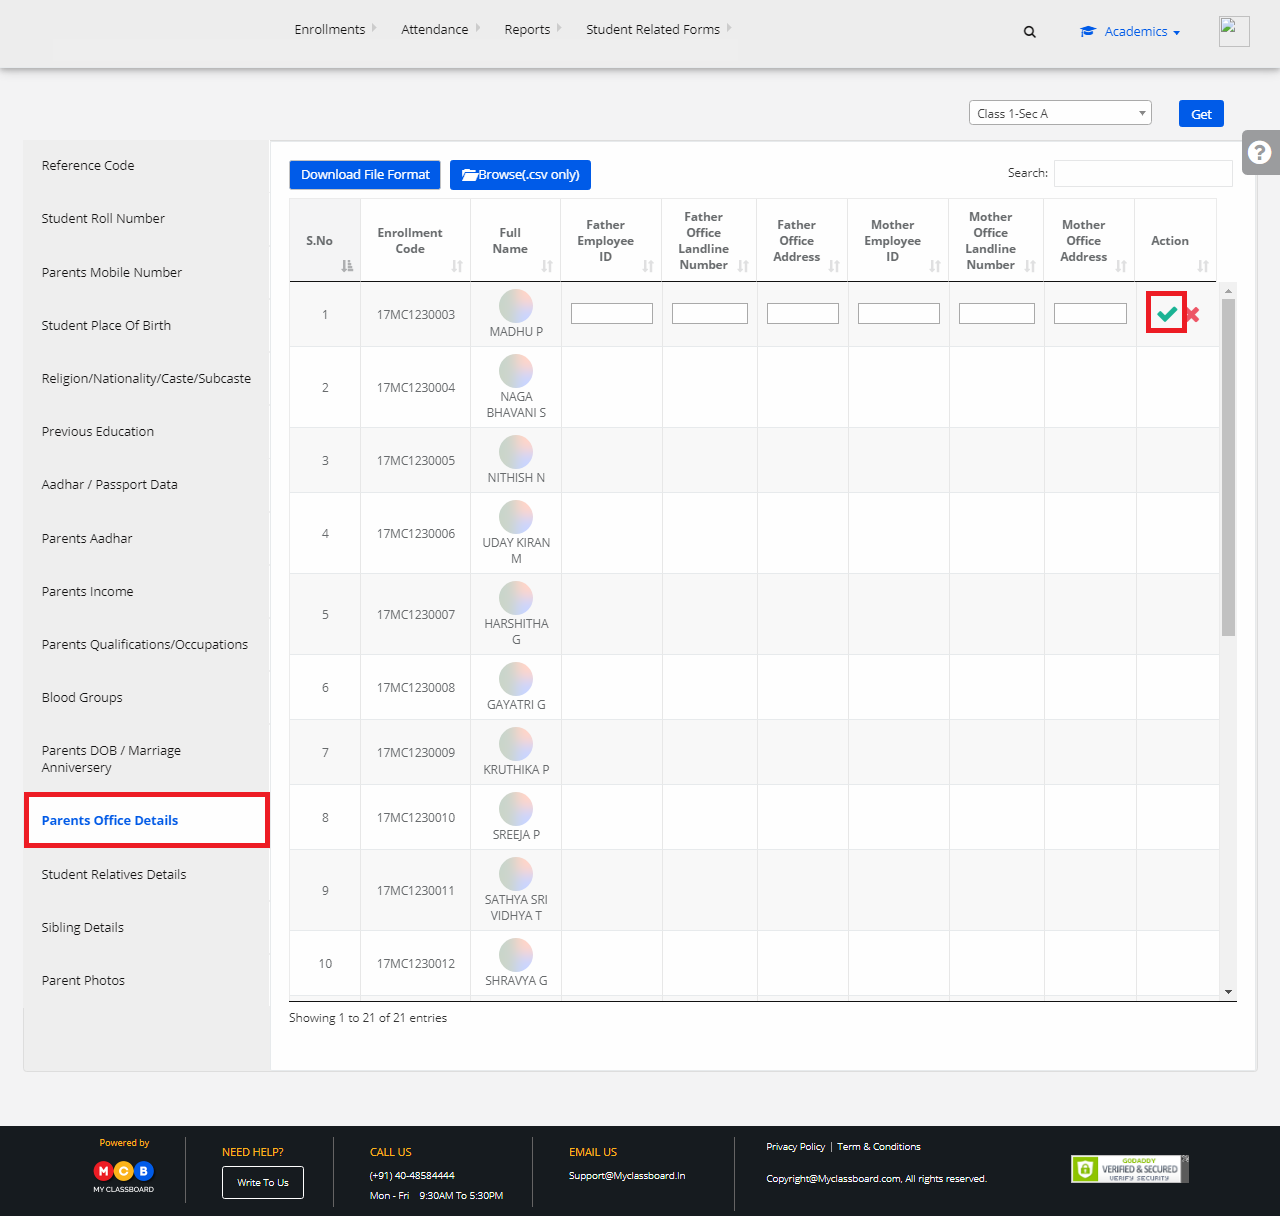
Step 22: To update Parents Office Details, select “Parents Office Details” on the left pane. Select the student, enter the details and click on “Save” button.
Step 23: To update the details in bulk, select “Browse(.csv only)” to choose the file and click on “Validate and Upload” to upload the chosen file.

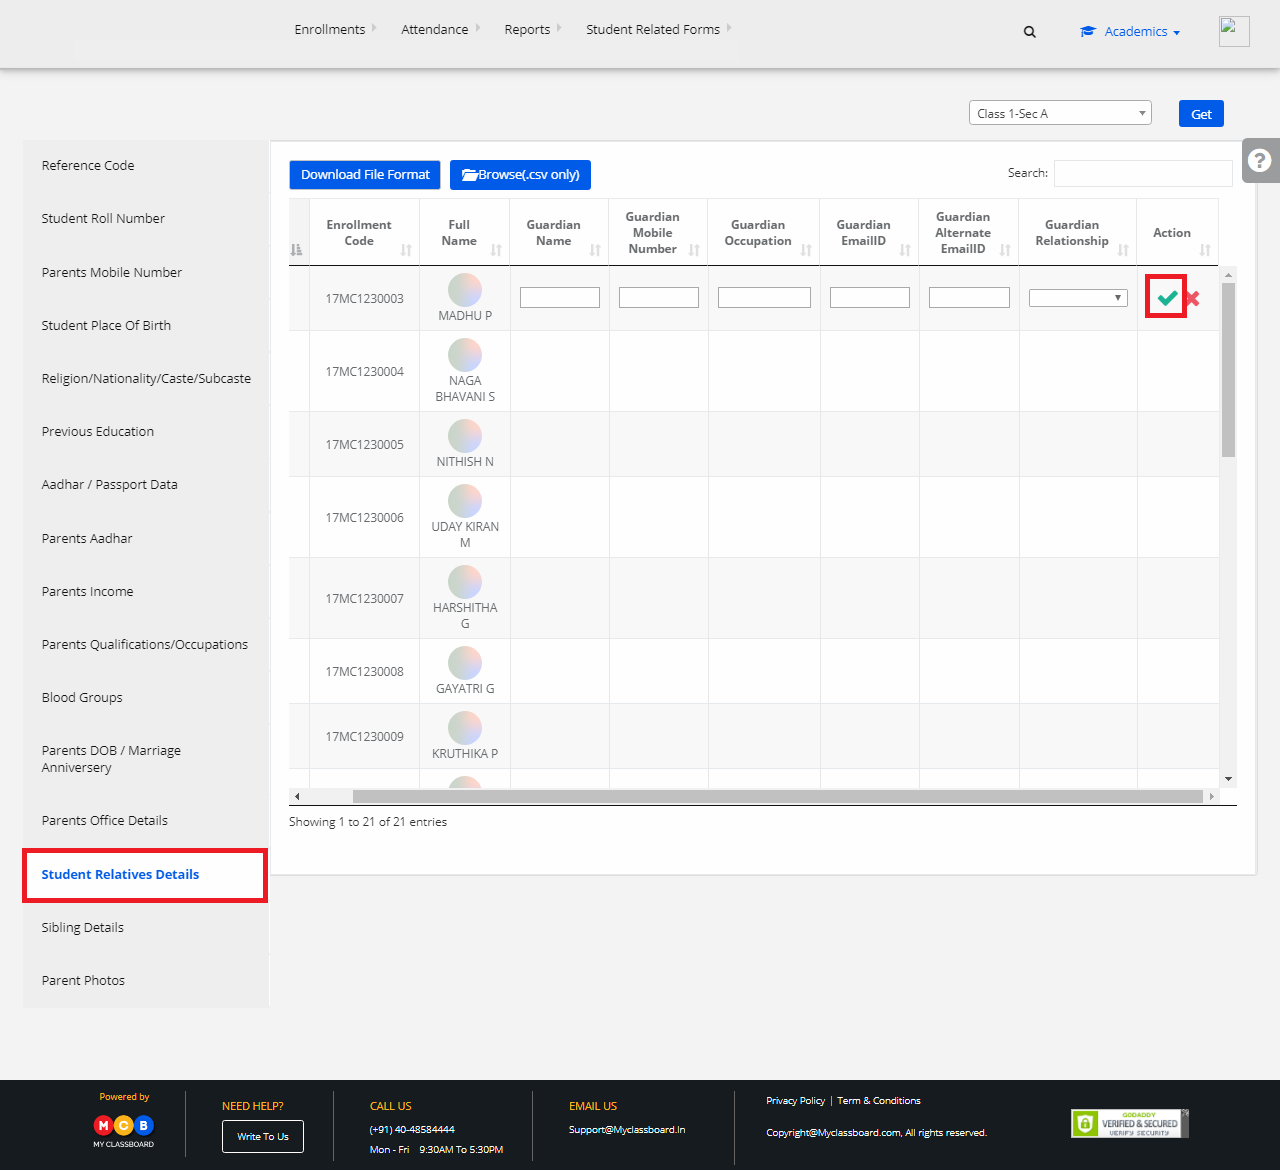
Step 24: To update Student Relatives Details, select “Student Relatives Details” on the left pane. Select any student, enter the details and click on “Save” button.
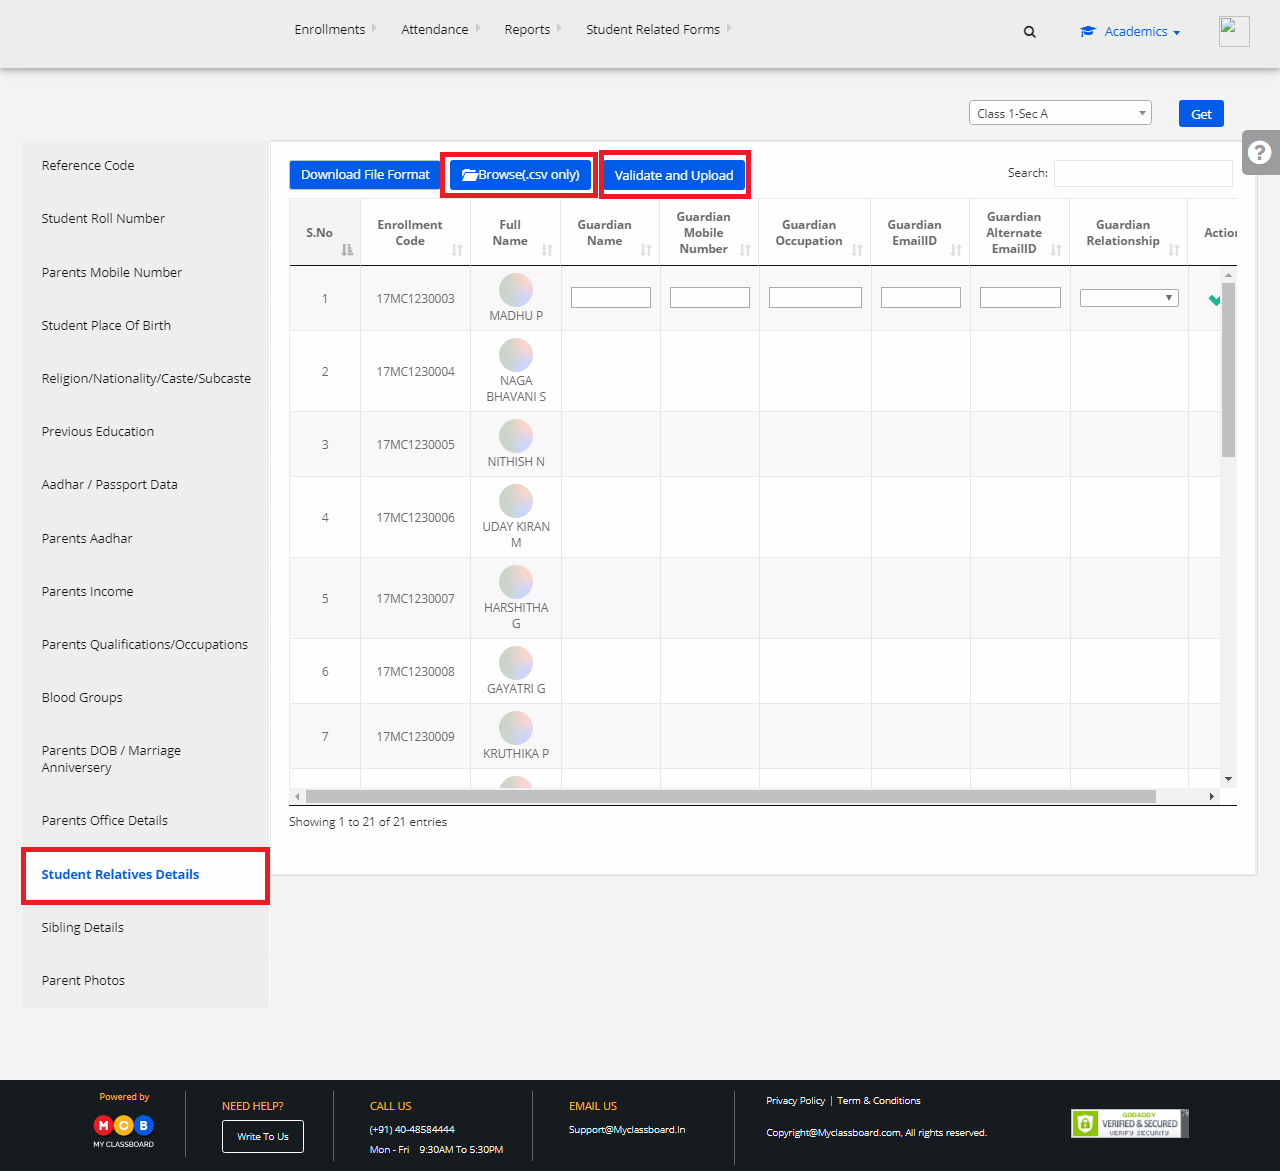
Step 25: To update the details in bulk, select “Browse(.csv only)” to choose the file and click on “Validate and Upload” to upload the chosen file.
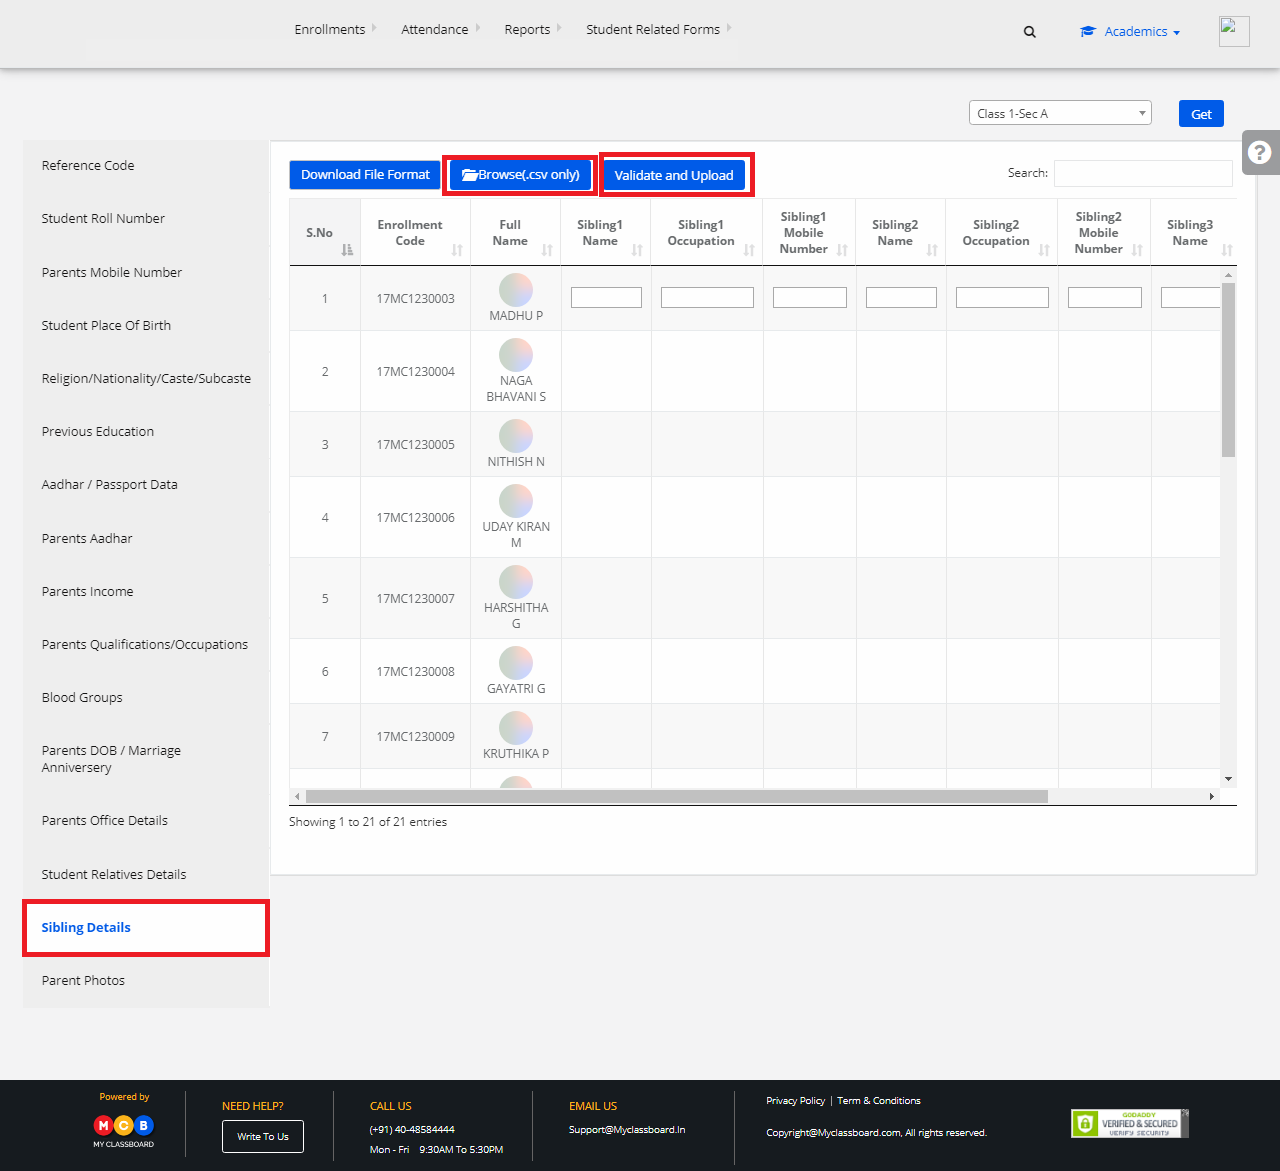
Step 26: To update Sibling Details, select “Sibling Details” on the left pane. Select the student, enter the details and click on “Save” button.

Step 27: To update the details in bulk, select “Browse(.csv only)” to choose the file and click on “Validate and Upload” to upload the chosen file.
Step 28: To upload Parent Photos, select “Parent Photos” on the left pane. Select any student and click on the Parent Photo icon.

Step 29: Click on “Browse” to upload the photo and then click on “Save”.

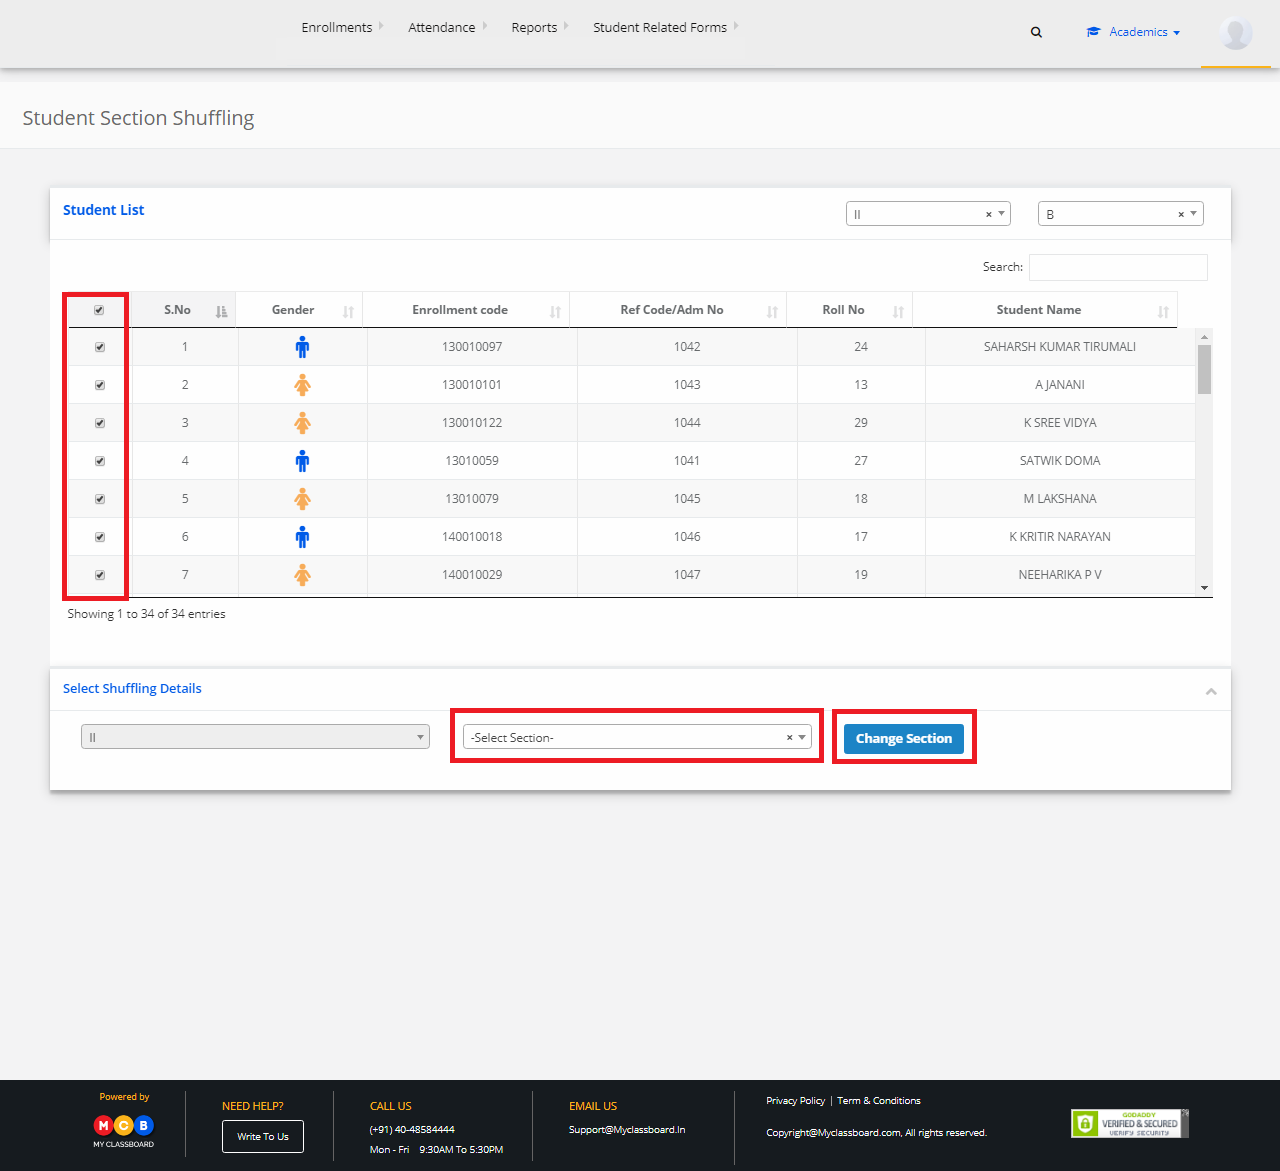
2) Student Shuffling
Step 1: Select Enrollments on the top bar and choose “Student Shuffling”.

Step 2: Select Class and Section to get the students’ list.

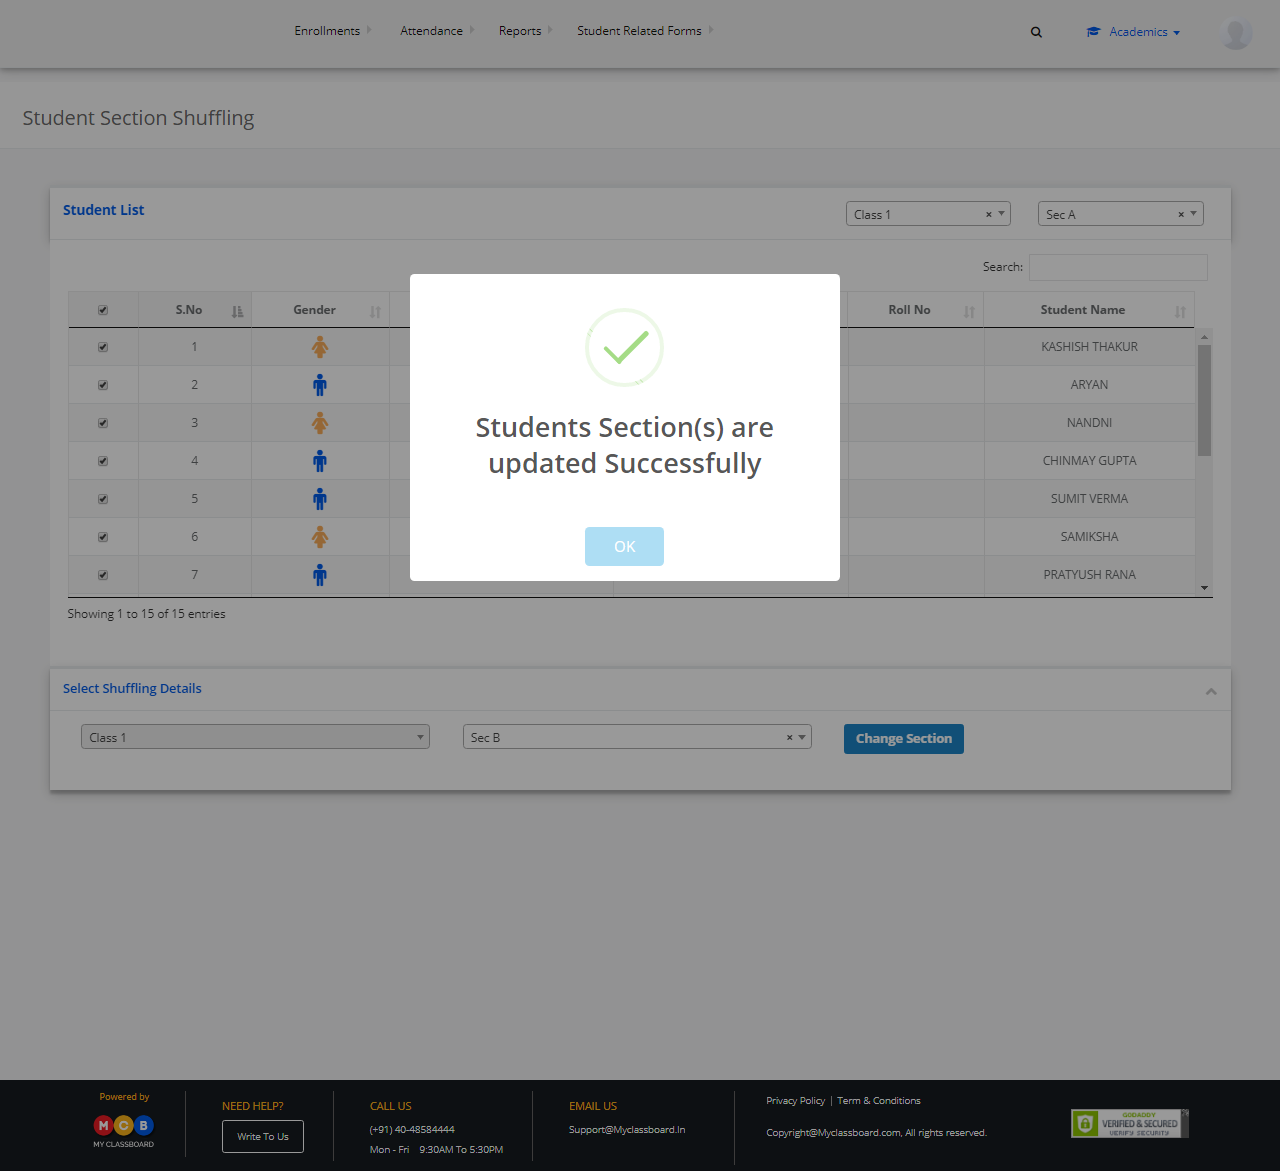
Step 3: Select students by marking the checkbox, select “Section” to change(shuffle) the students to that respective section and finally click on “Change Section”.
Step 4: The students shuffling between the sections is updated successfully.
3) Attendance
To Give Attendance
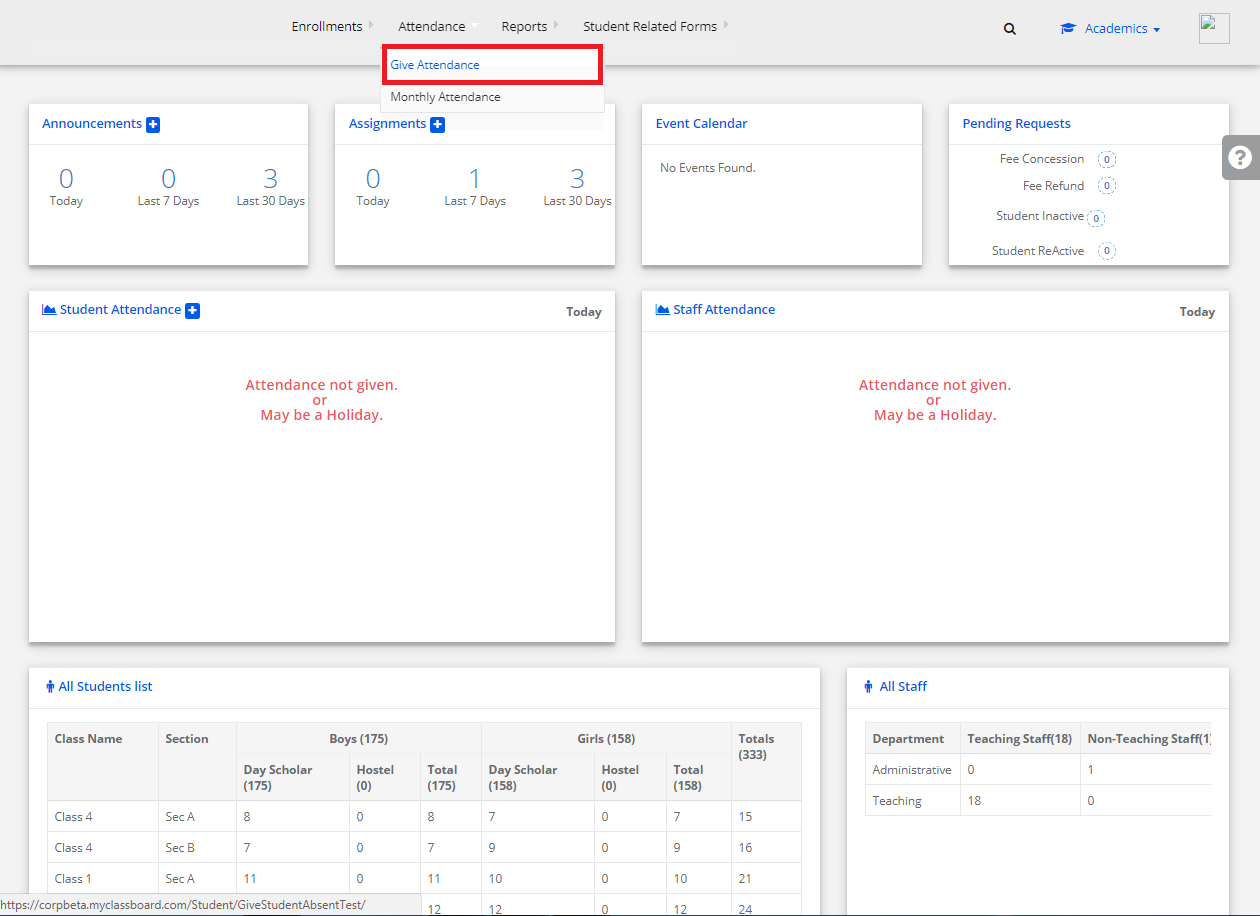
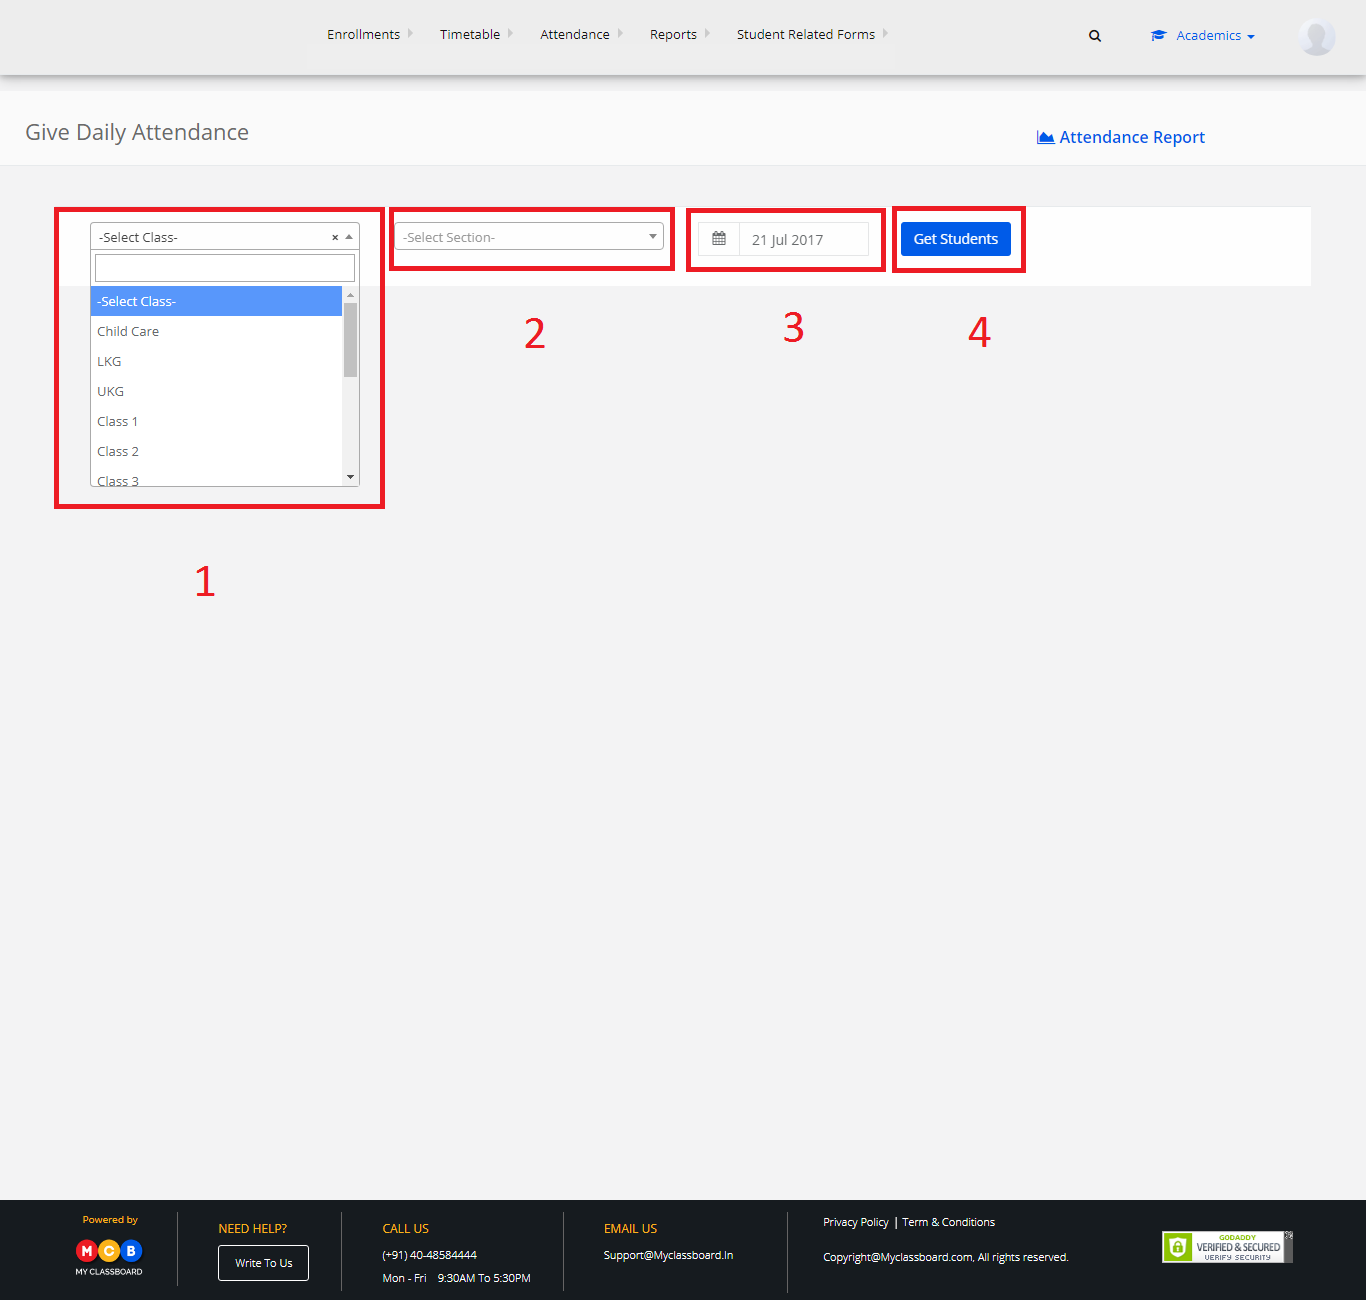
Step 1: Select Attendance at the top bar and click on “Give Attendance”.
Step 2: Select Class, Section, Date and click on “Get Students”.
Step 3: List of the students for morning and afternoon sessions is displayed here.
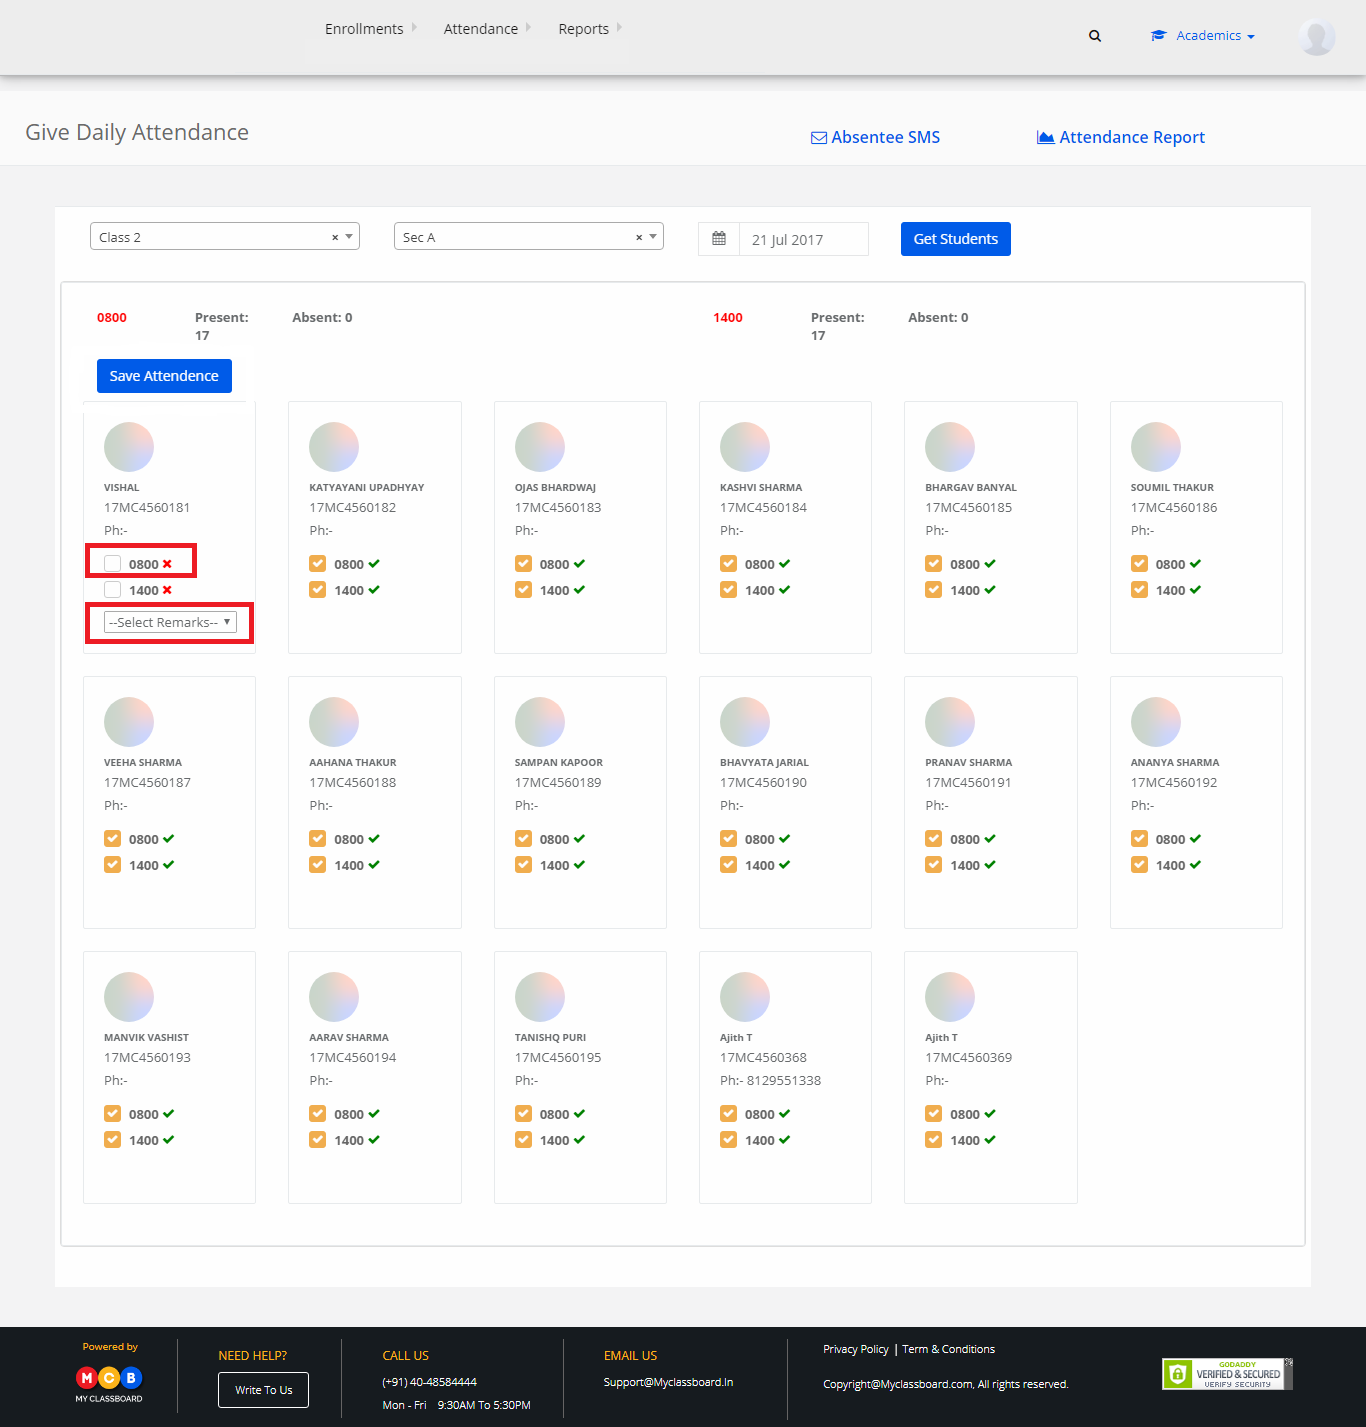
Step 4: To mark attendance, click on the check box for morning/afternoon sessions respectively.
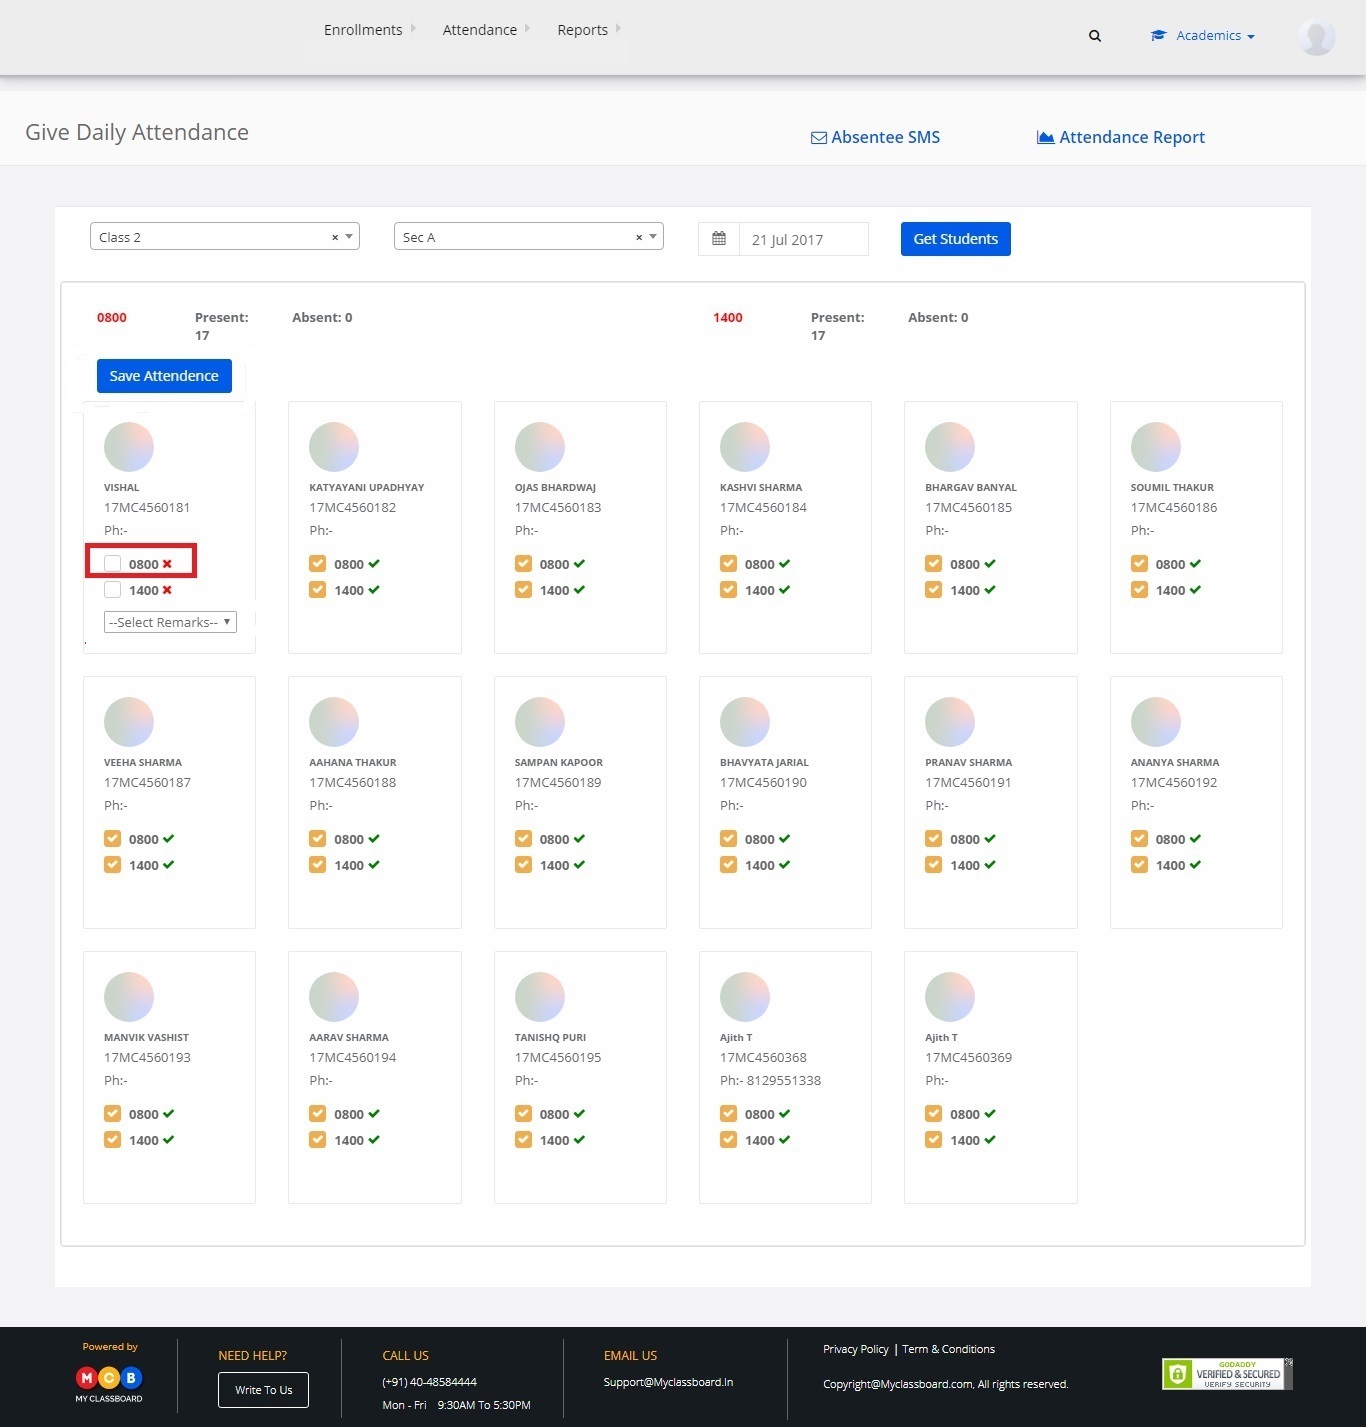
Step 5: When marking absent to any student, there is a “Remarks” tab under the checkbox to enter remarks.
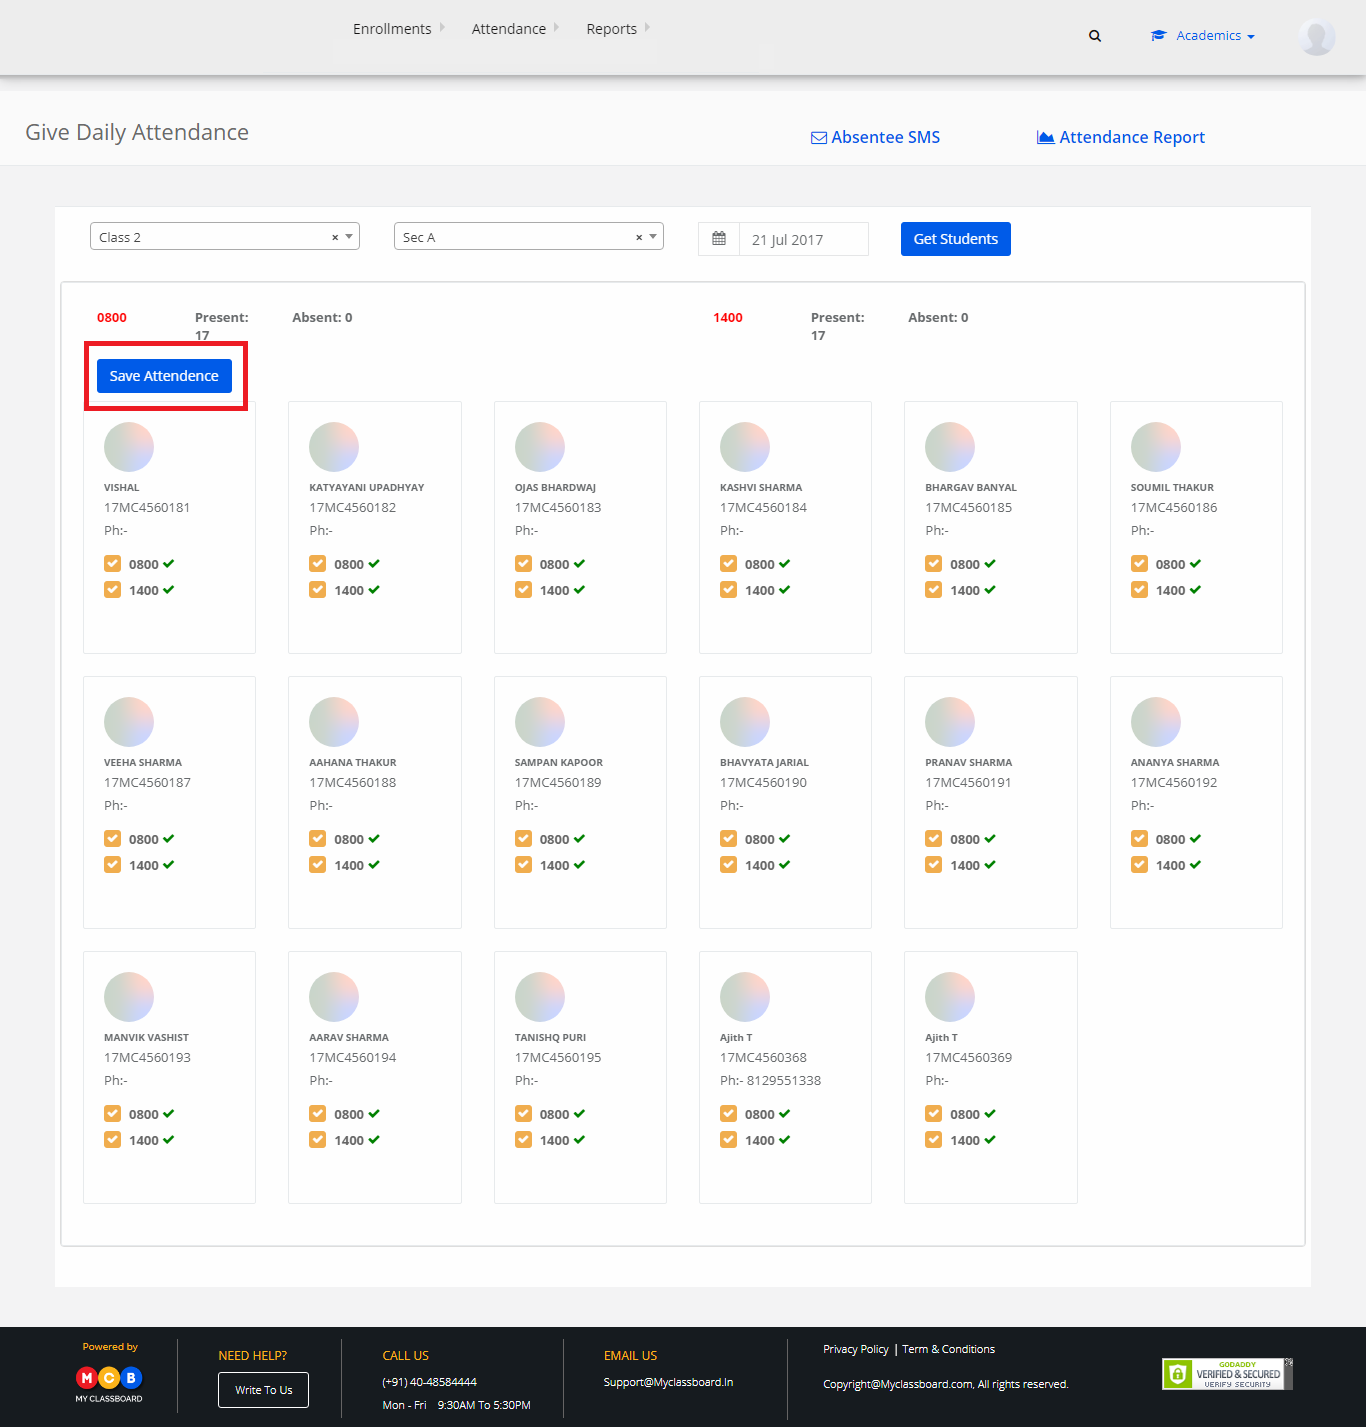
Step 6: After marking the attendance, click on “Save Attendance”.
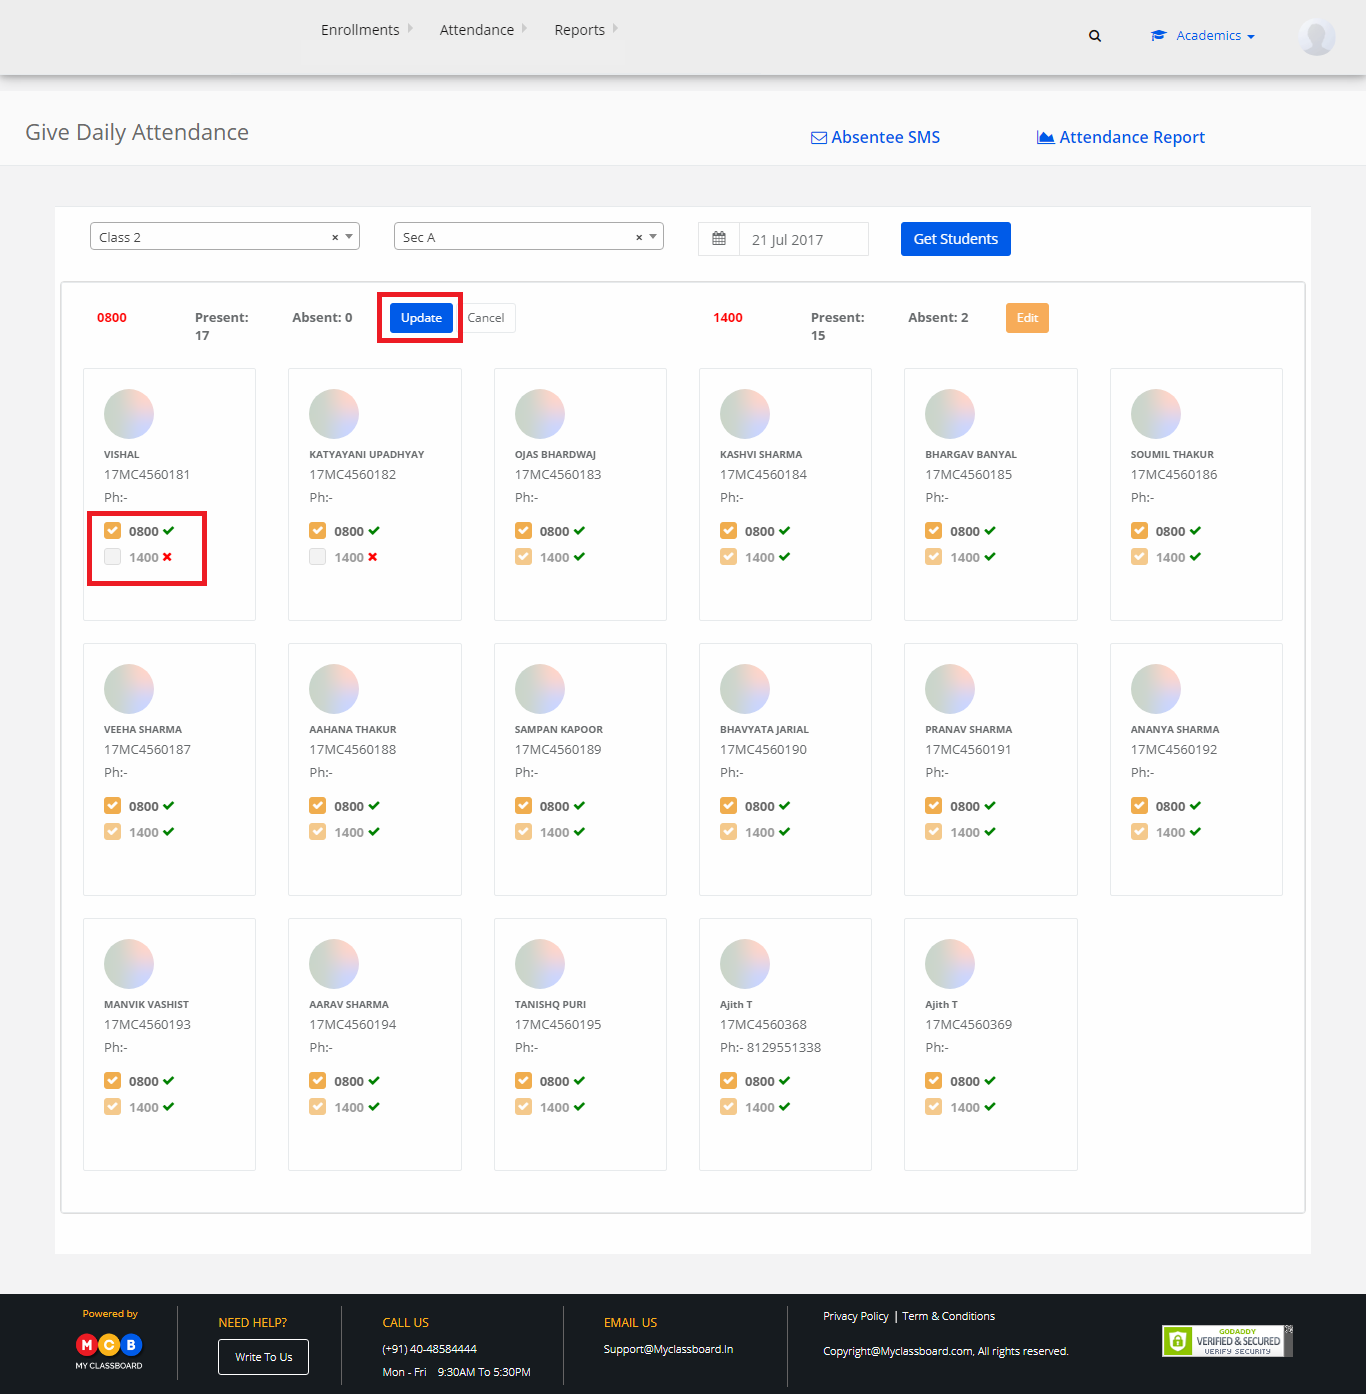
To Edit Attendance
To edit the attendance for morning/afternoon sessions, click on the “Edit” option available.
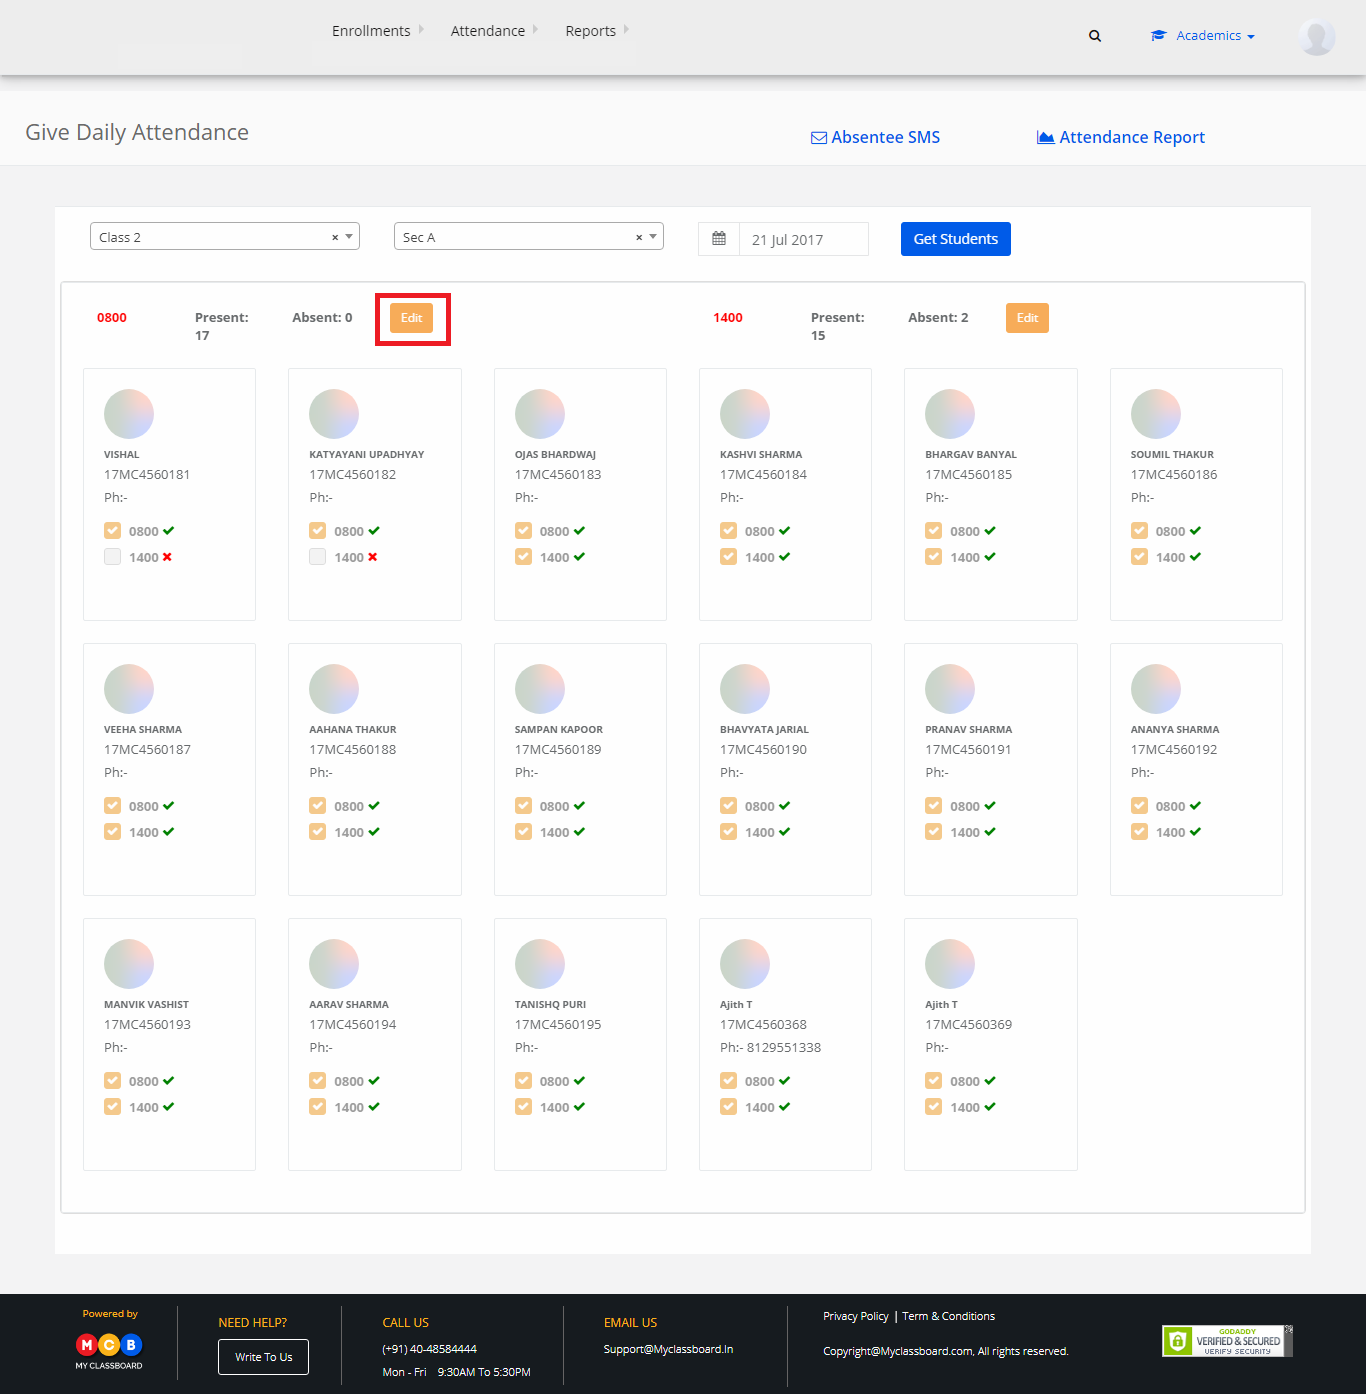
Step 7: Select the check box against the students and click on update. The changes are updated successfully.
Send SMS to Absent Students
Step 1: Click on “Absentee SMS” to send SMS to absent students.
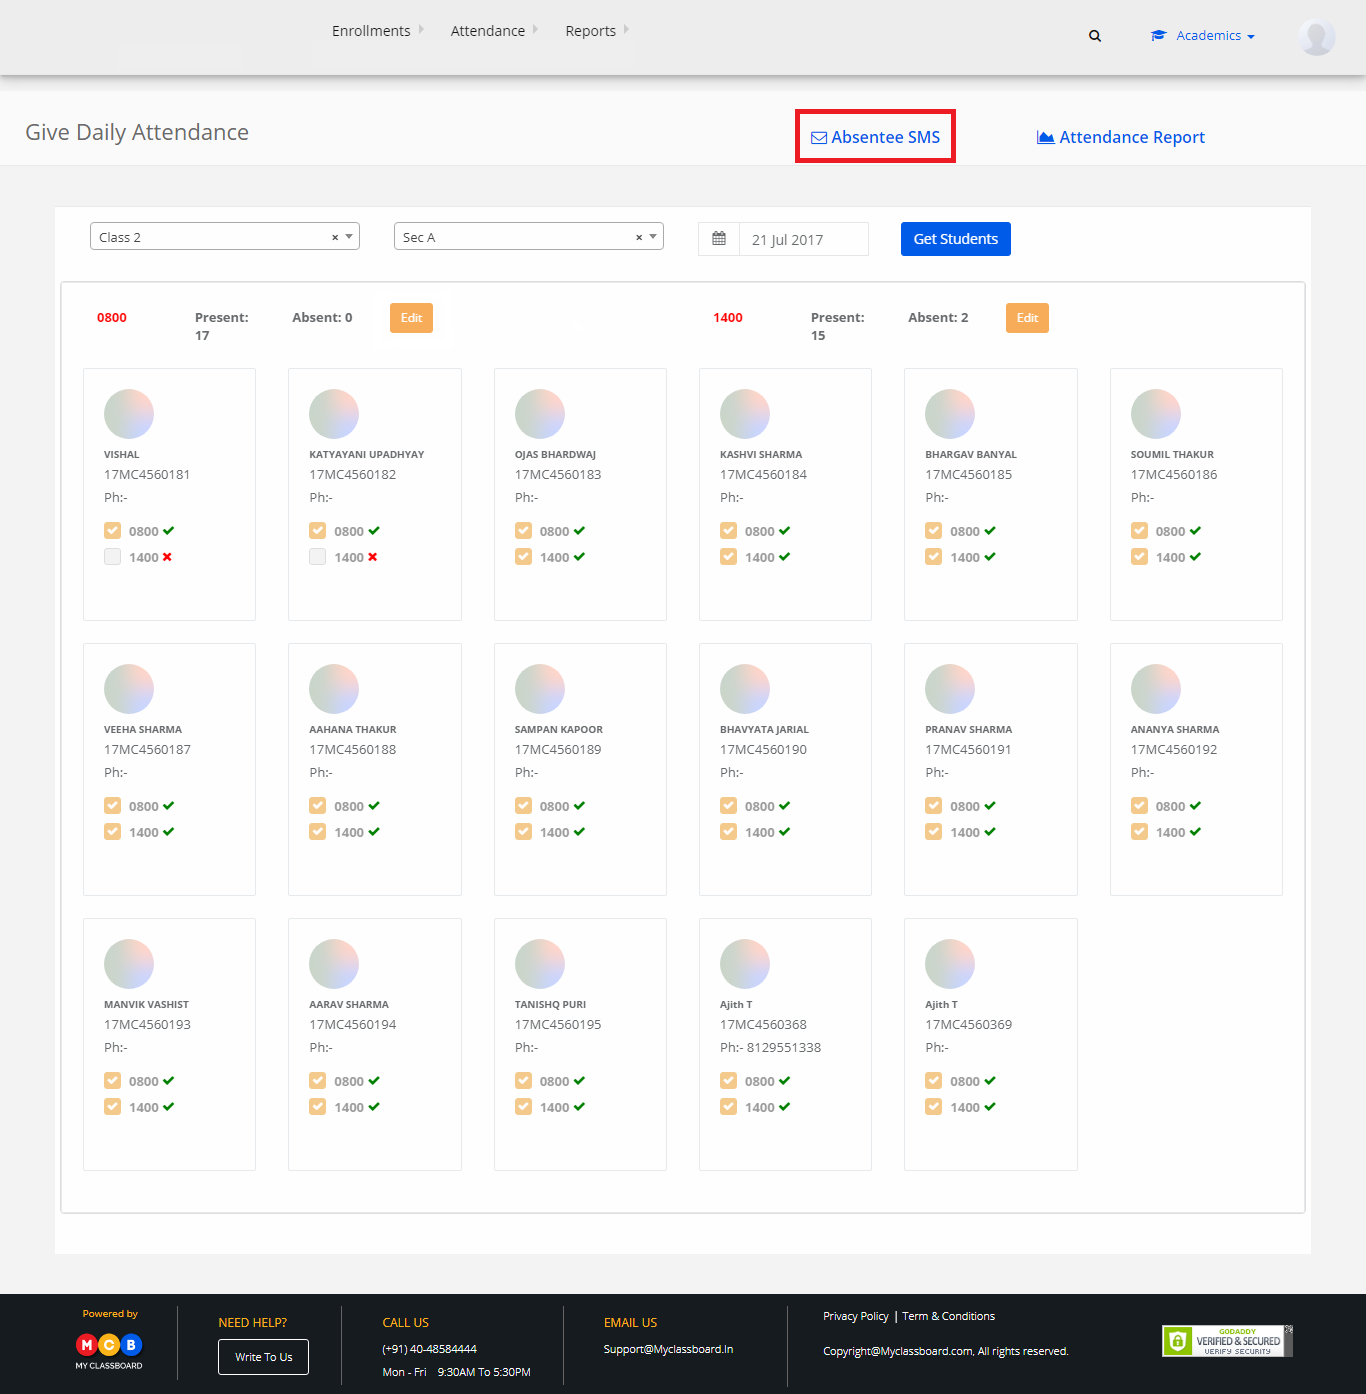
Step 2: Select “All” to send SMS to all students and then click on “Send SMS”. The SMS is sent successfully.

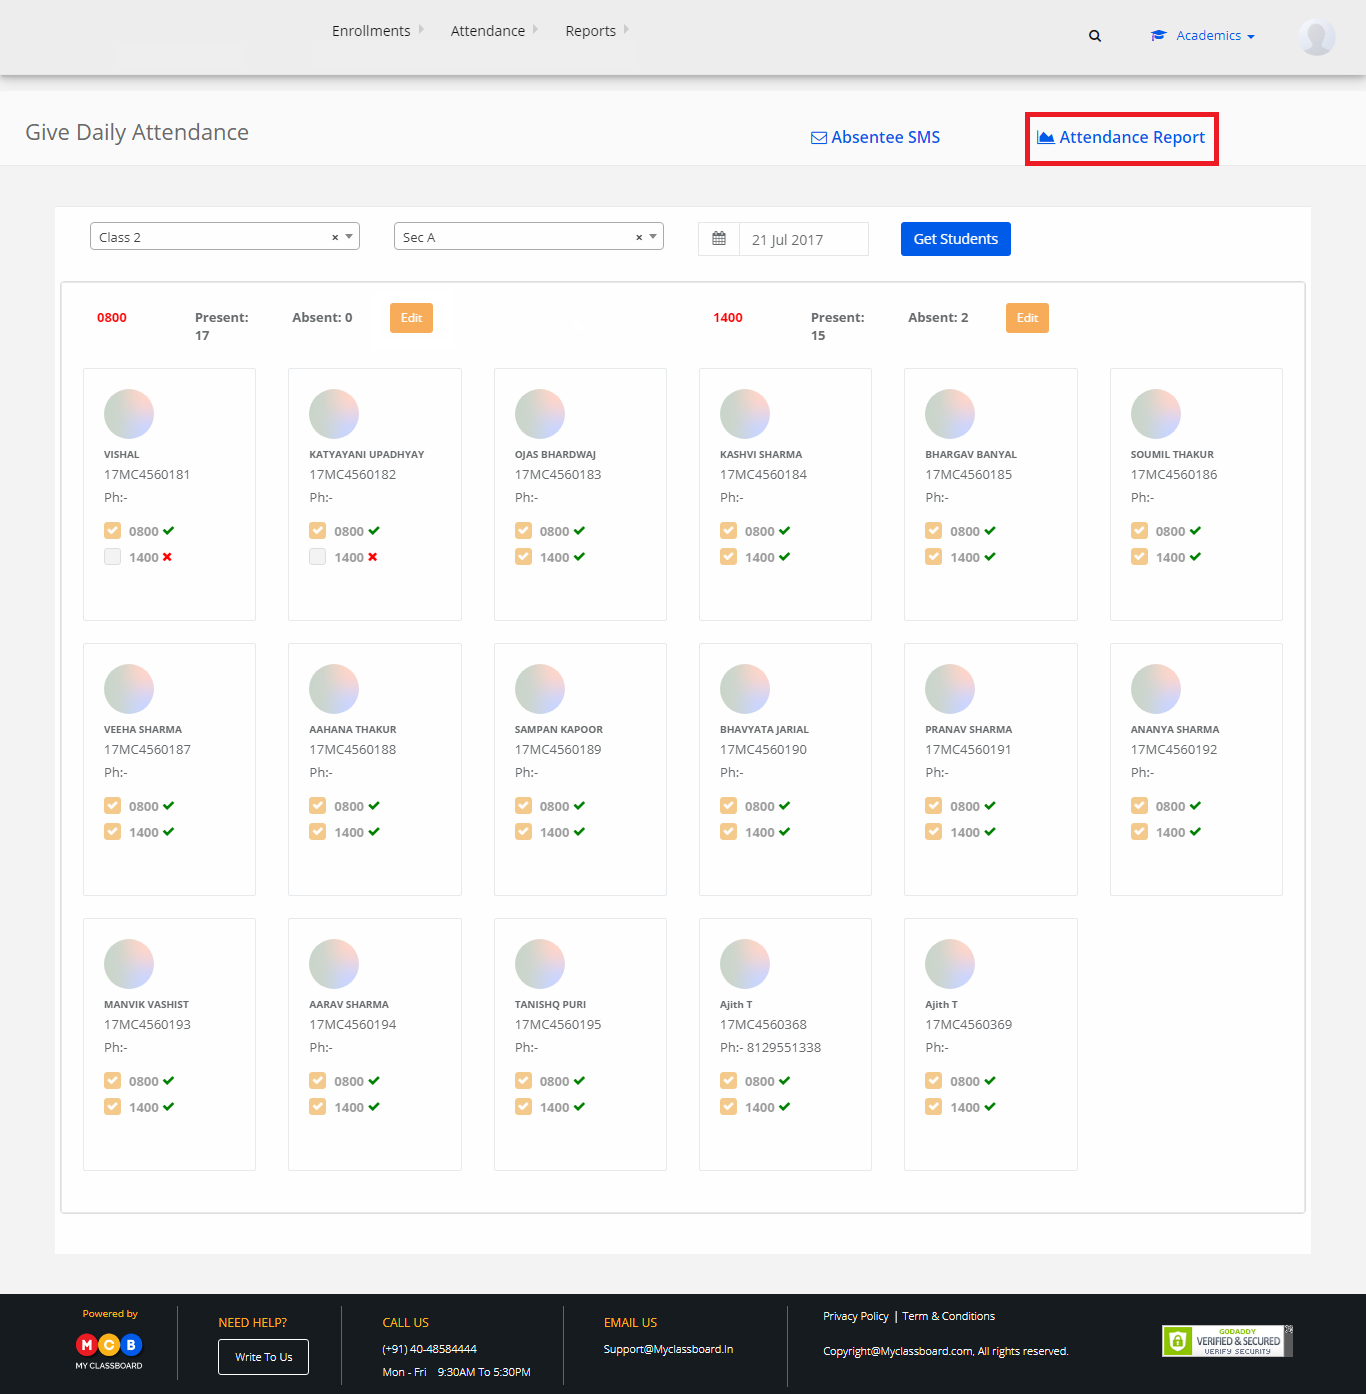
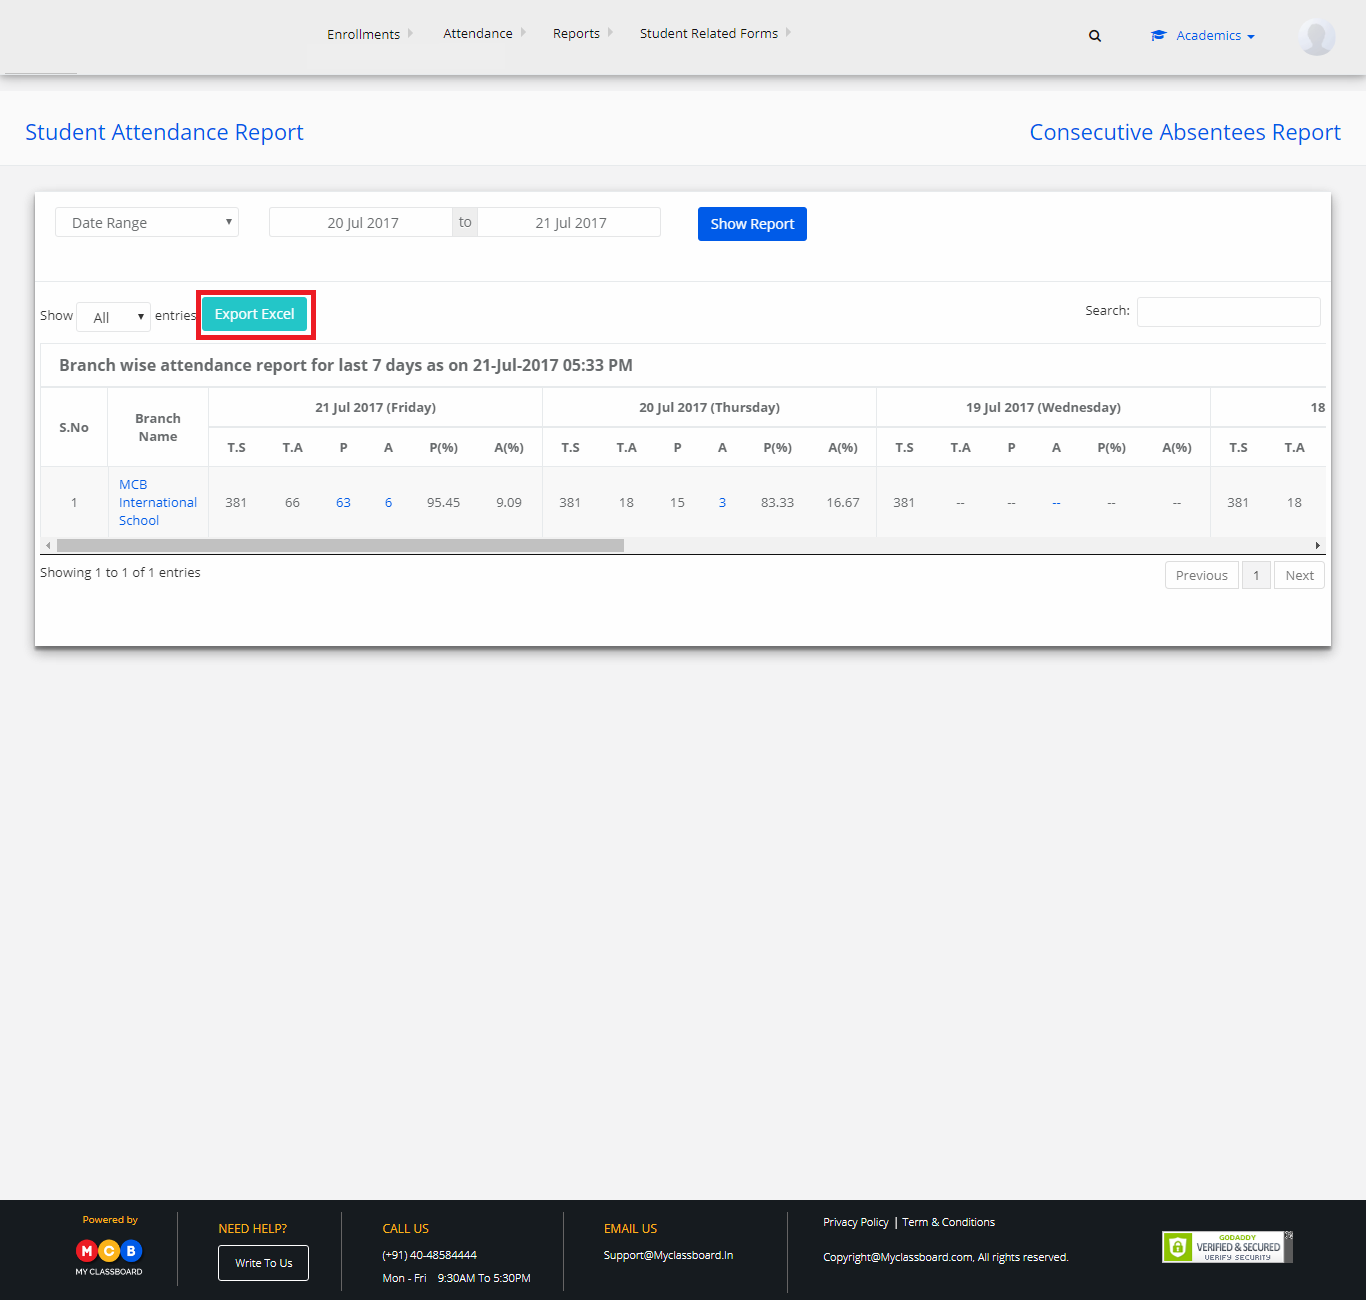
View or Generate Attendance Report
Step 1: Click on “Attendance Report” to view the attendance report.
Step 2: Select the period for attendance reports like Today, Last 7 Days, Last 30 Days, Date Range. (In date Range – select From Date and To Date).

Step 3: After choosing the required option, click on “Show Report”.
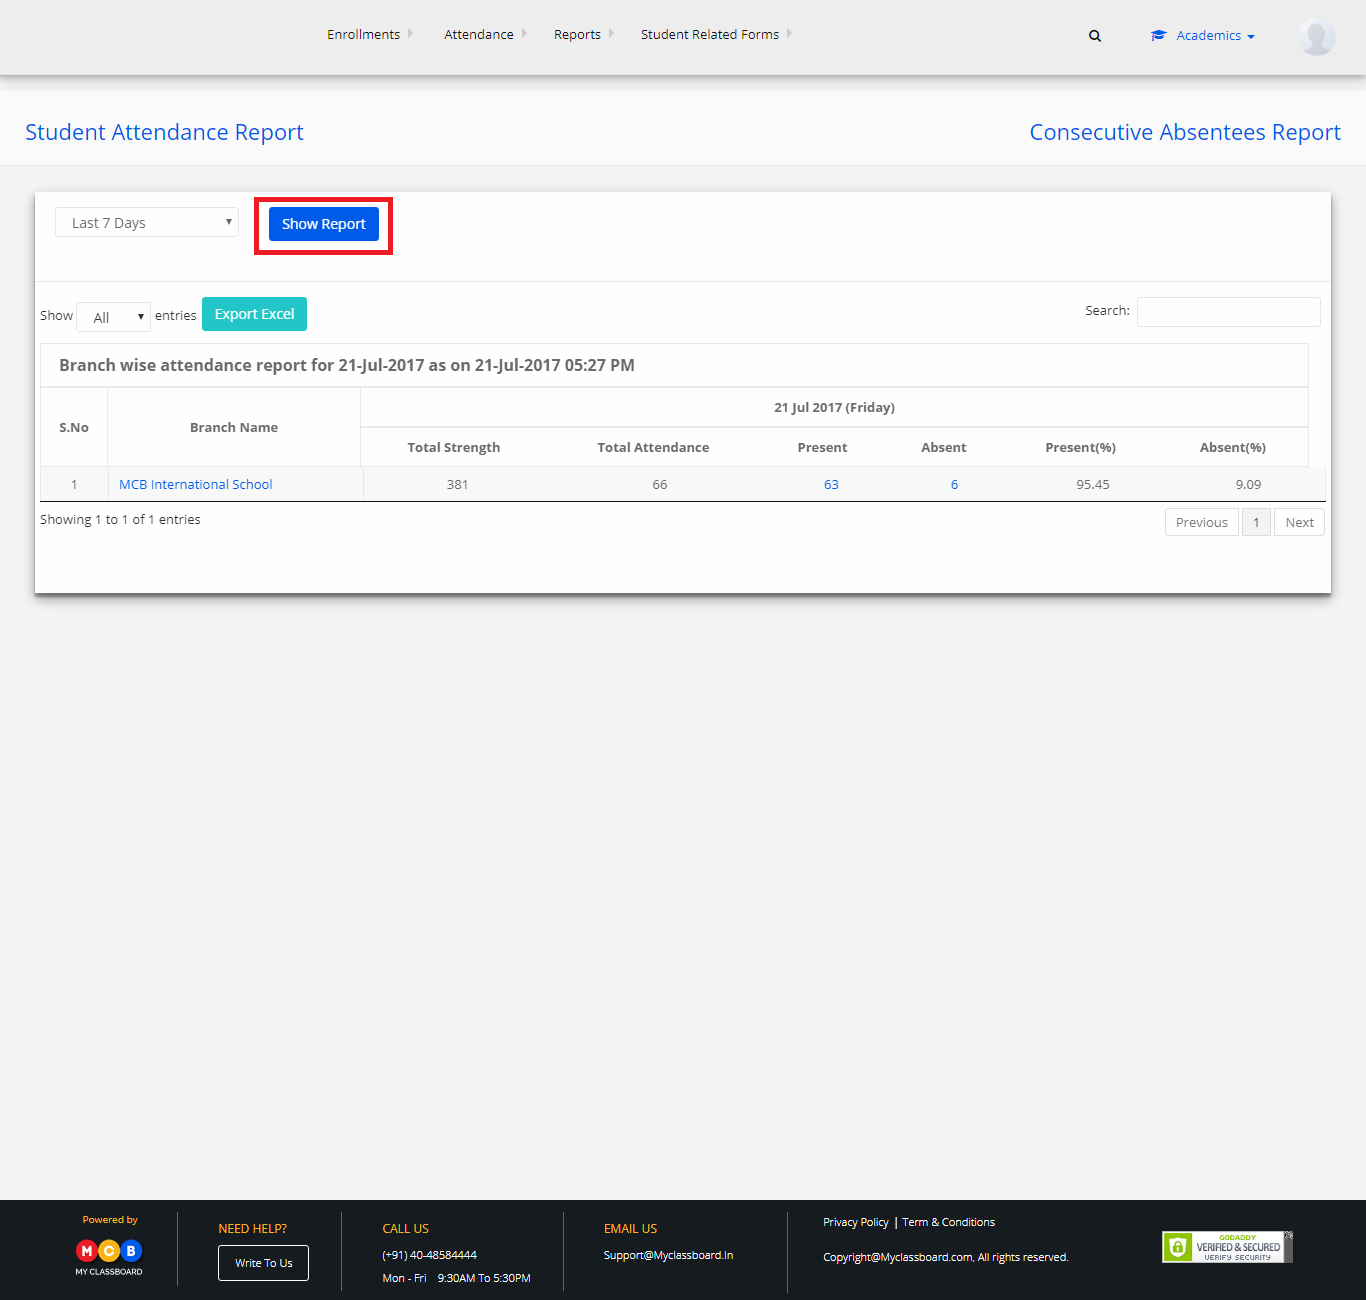
Step 4: The report is displayed. You may export the same to excel by clicking on the “Export Excel” option.
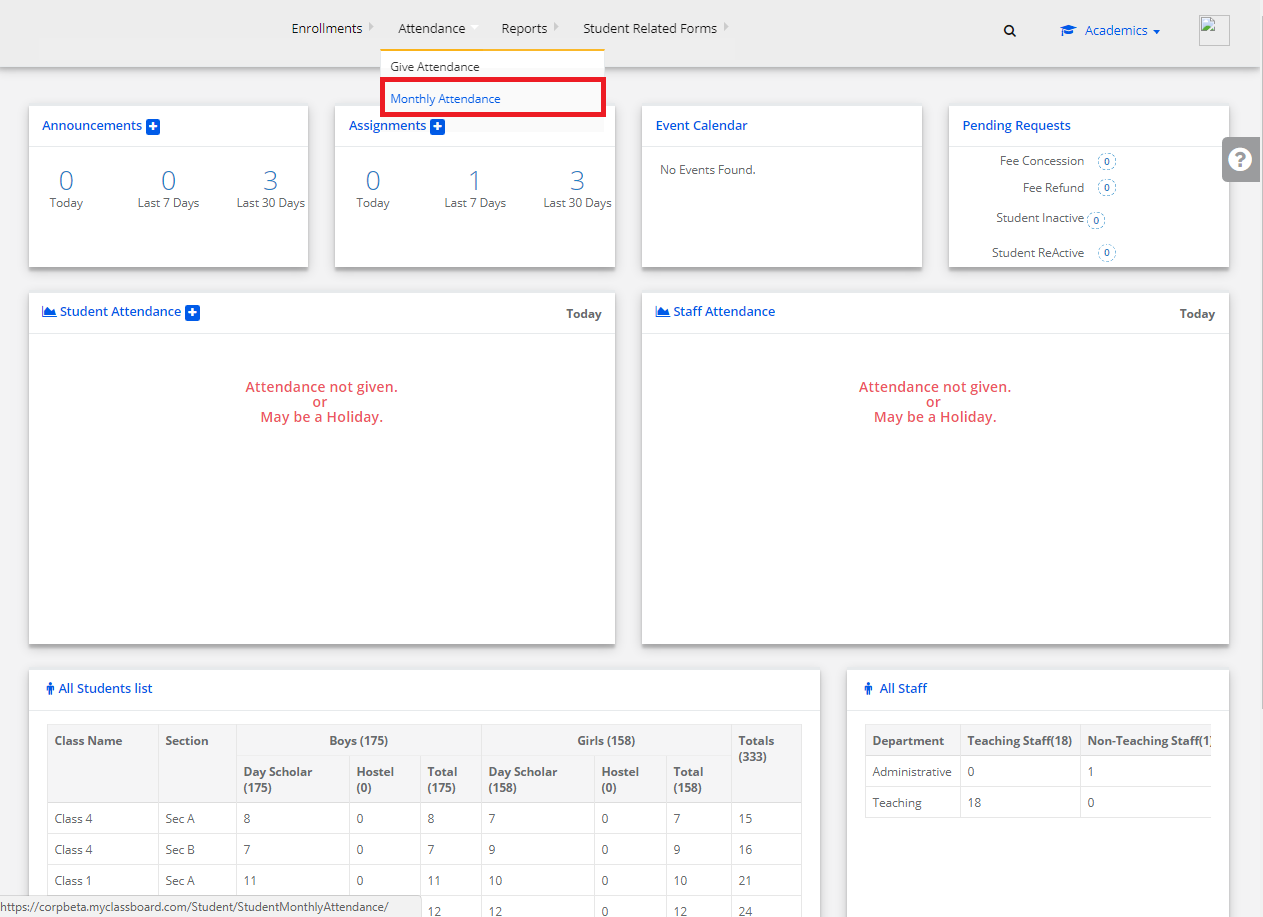
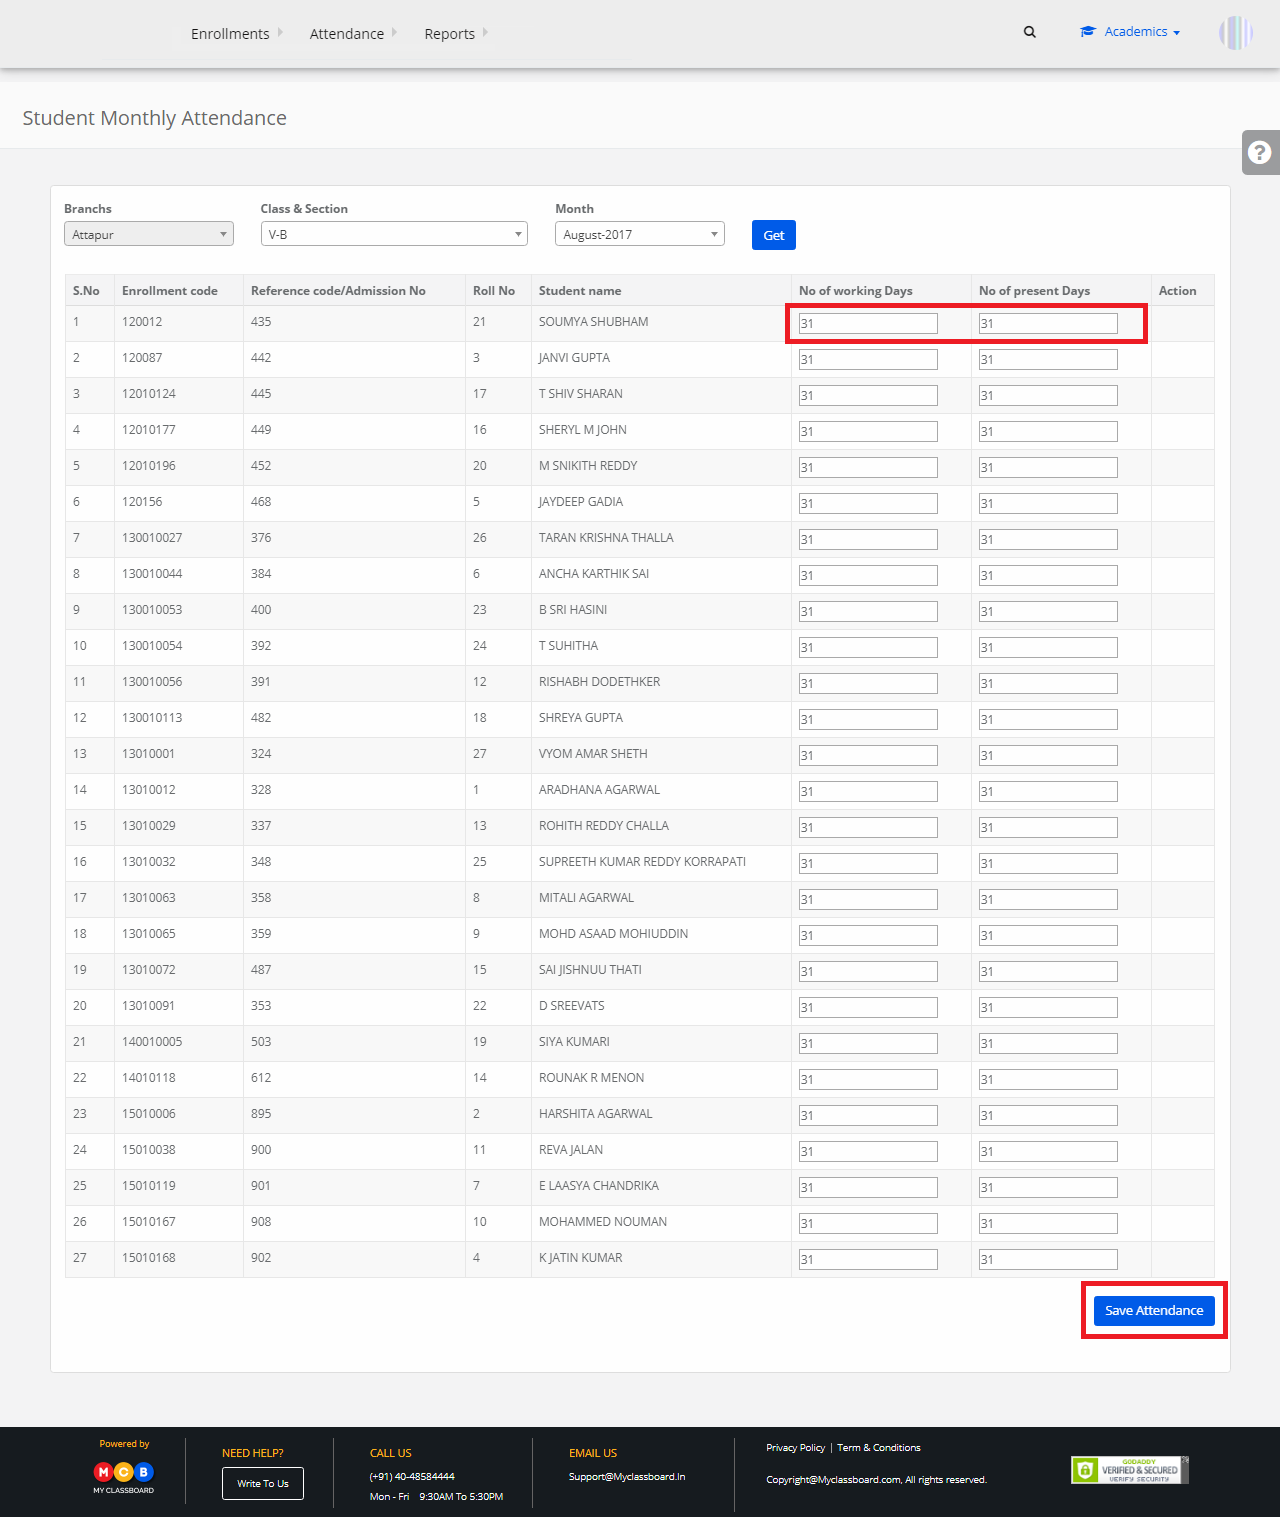
Update Monthly Attendance
Step 1: Select Attendance on the top bar and click on “Monthly Attendance
Step 2: Select Class & Section, Month and click on “Get”.

Step 3: Update the no. of working days and present days. Upon updating, click on “Save Attendance”.
Stage 3: Gradebook
Step 1: Select “Gradebook” on the top bar of the dashboard. You’ll be directed to the Gradebook page.
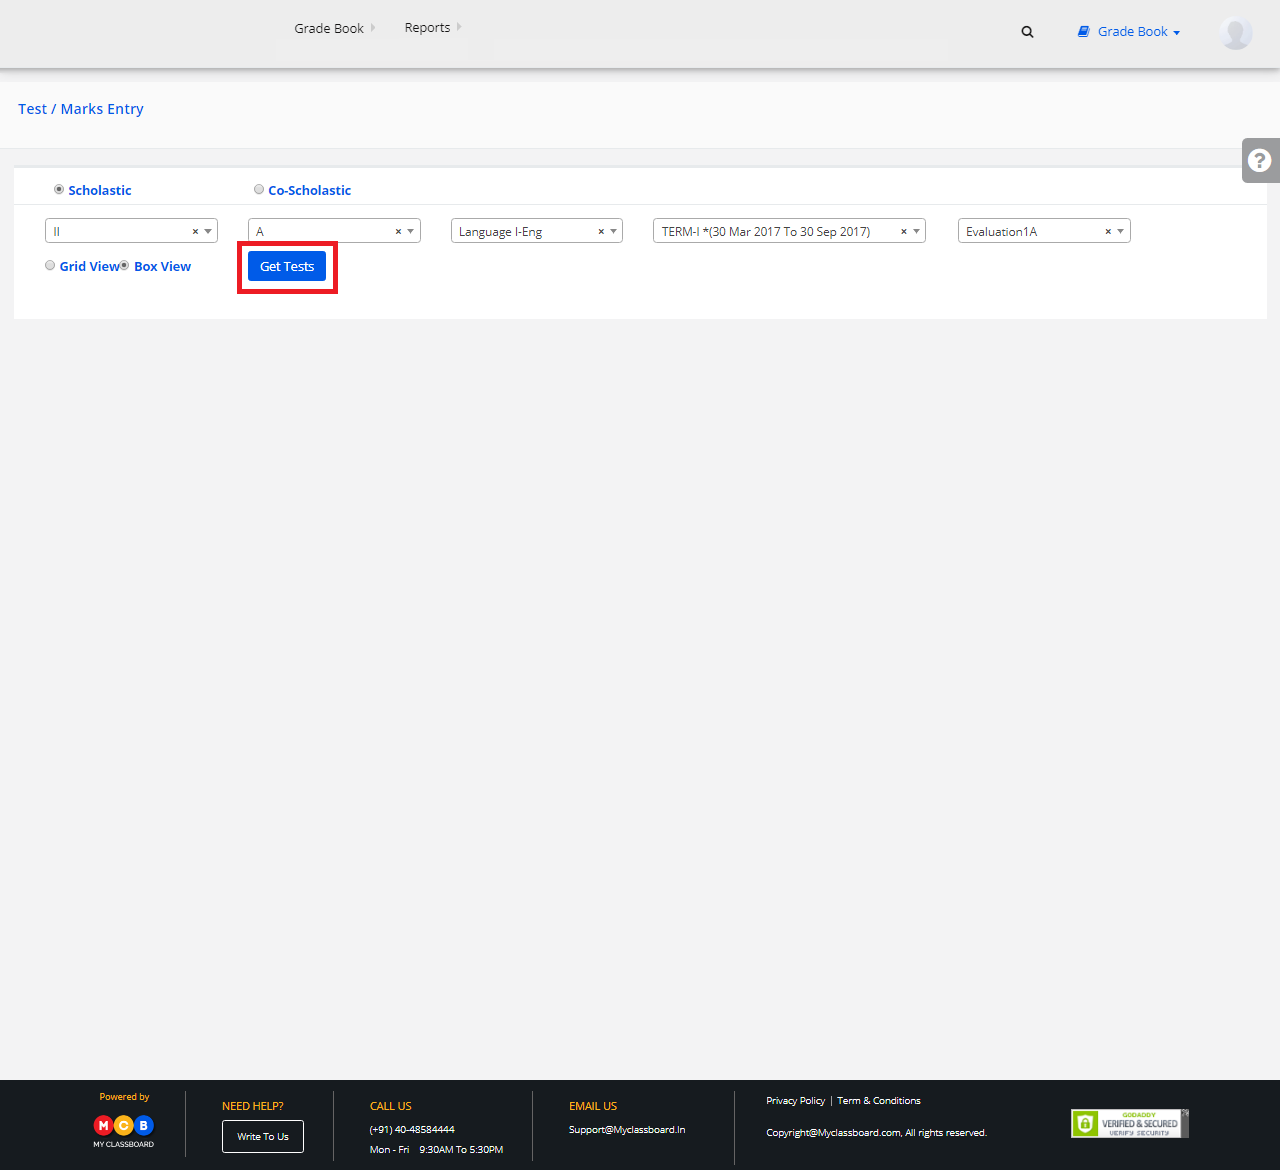
1) Test/Marks Entry
Step 1: Select “Gradebook” on the top bar and click on “Test/Marks Entry”.
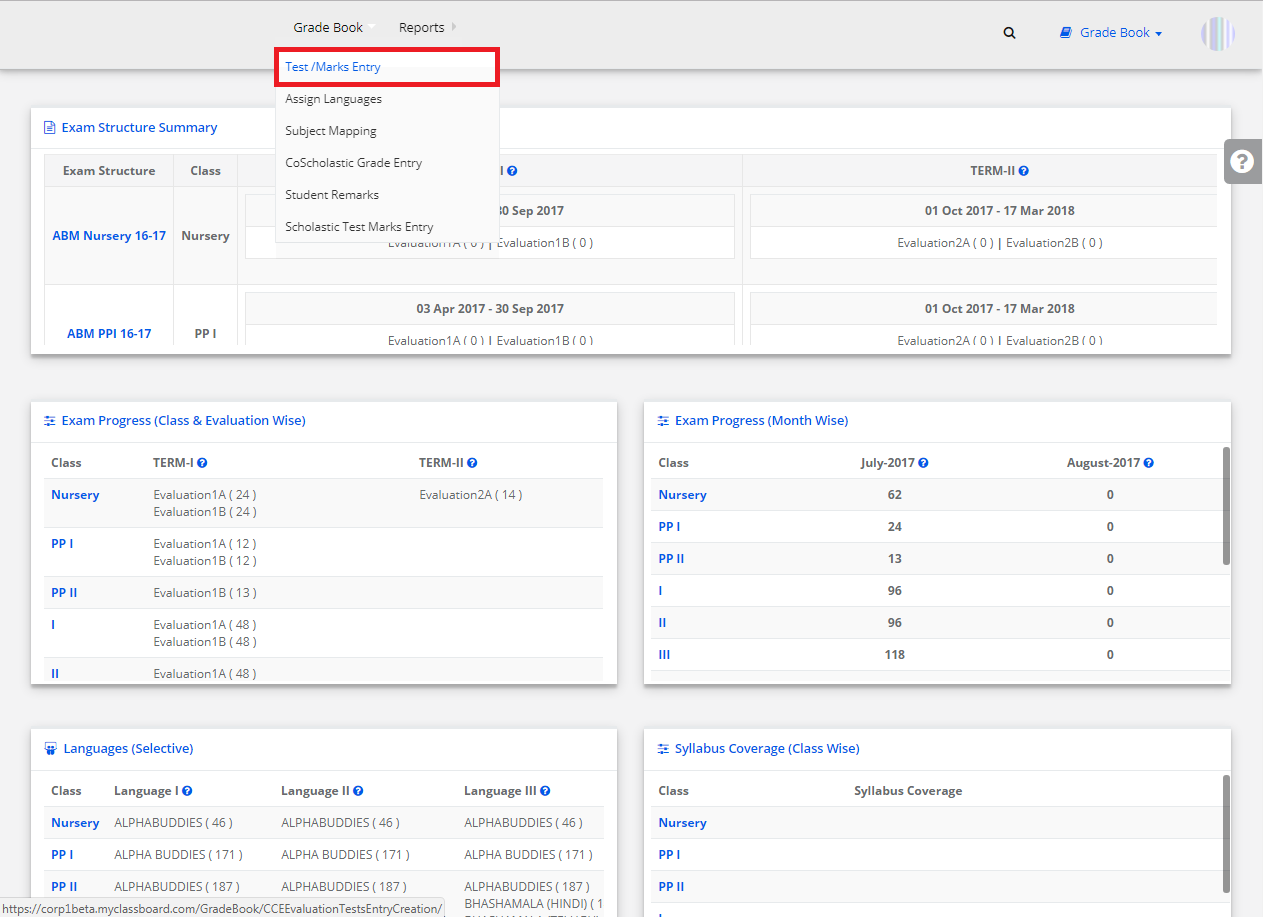
Step 2: Select Scholastic/Co-Scholastic ——> Select Class, Section, Subject, Term, Evaluation and click on “Get Tests”.
Step 3: Click on the “Add” symbol and you’ll be directed to a “Test Creation Page”.
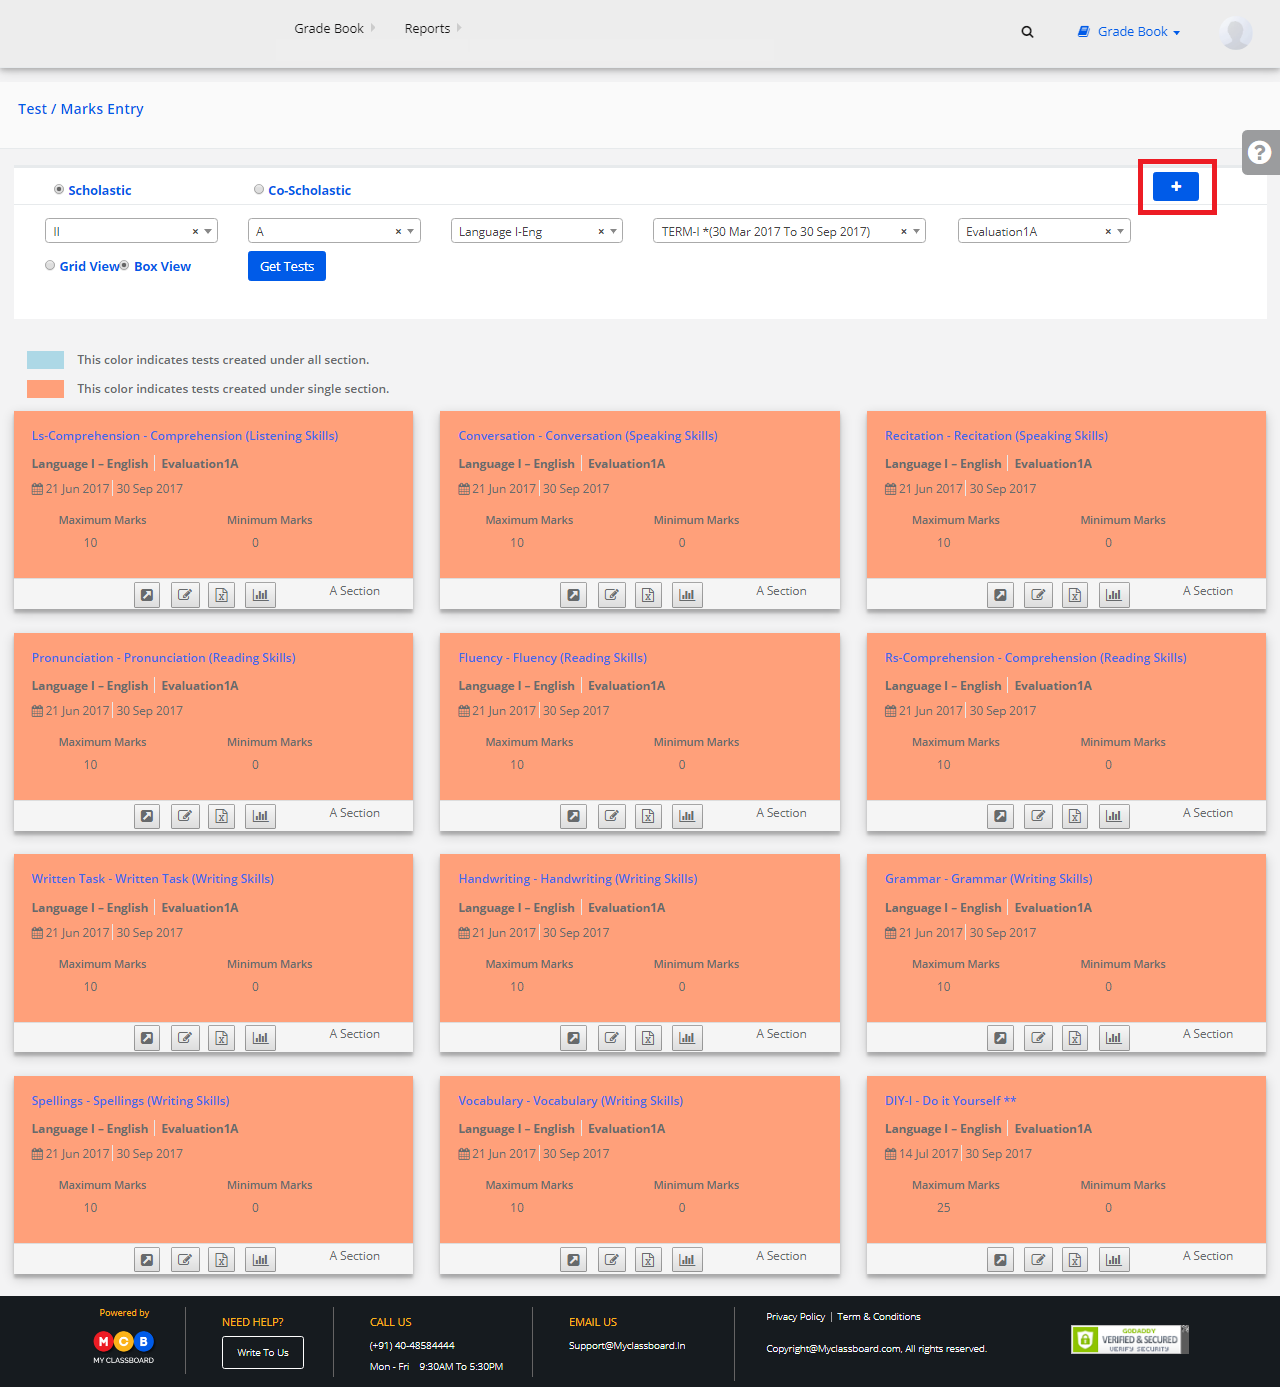
Step 4: Enter the required details here and click on “Save”. The Test is created successfully.

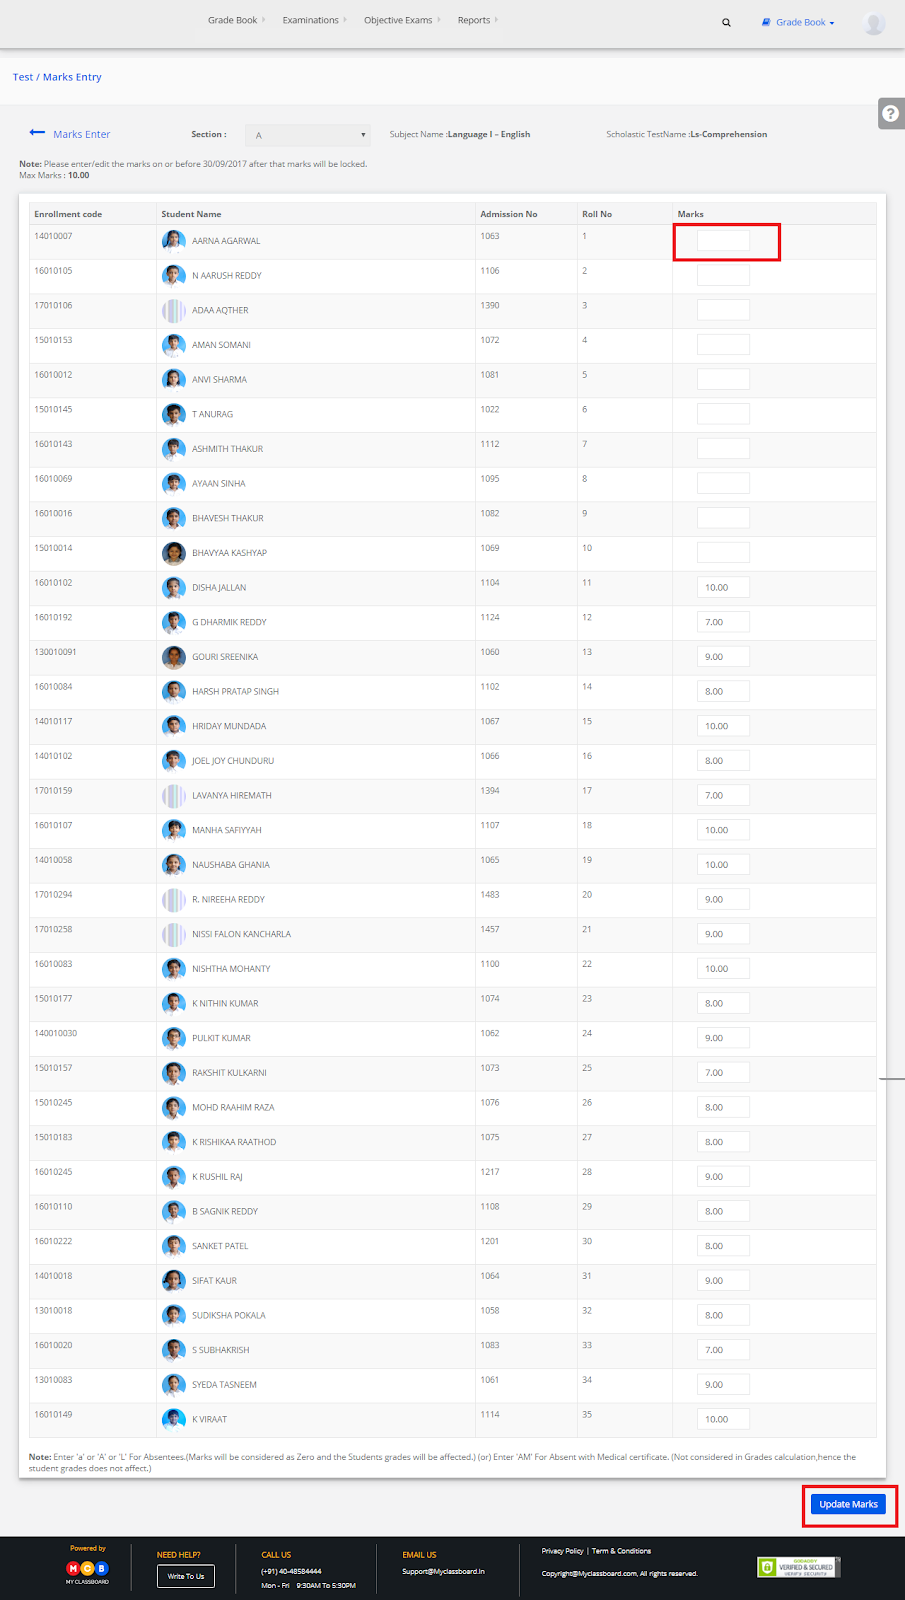
Marks Entry
After the test creation, click on any of the tests created to upload the marks.
Step 5: Select any Test and click on “Marks Entry”.

Step 6: Enter the marks of students individually here and click on “Update Marks”. The marks are updated.
Bulk Entry of Marks
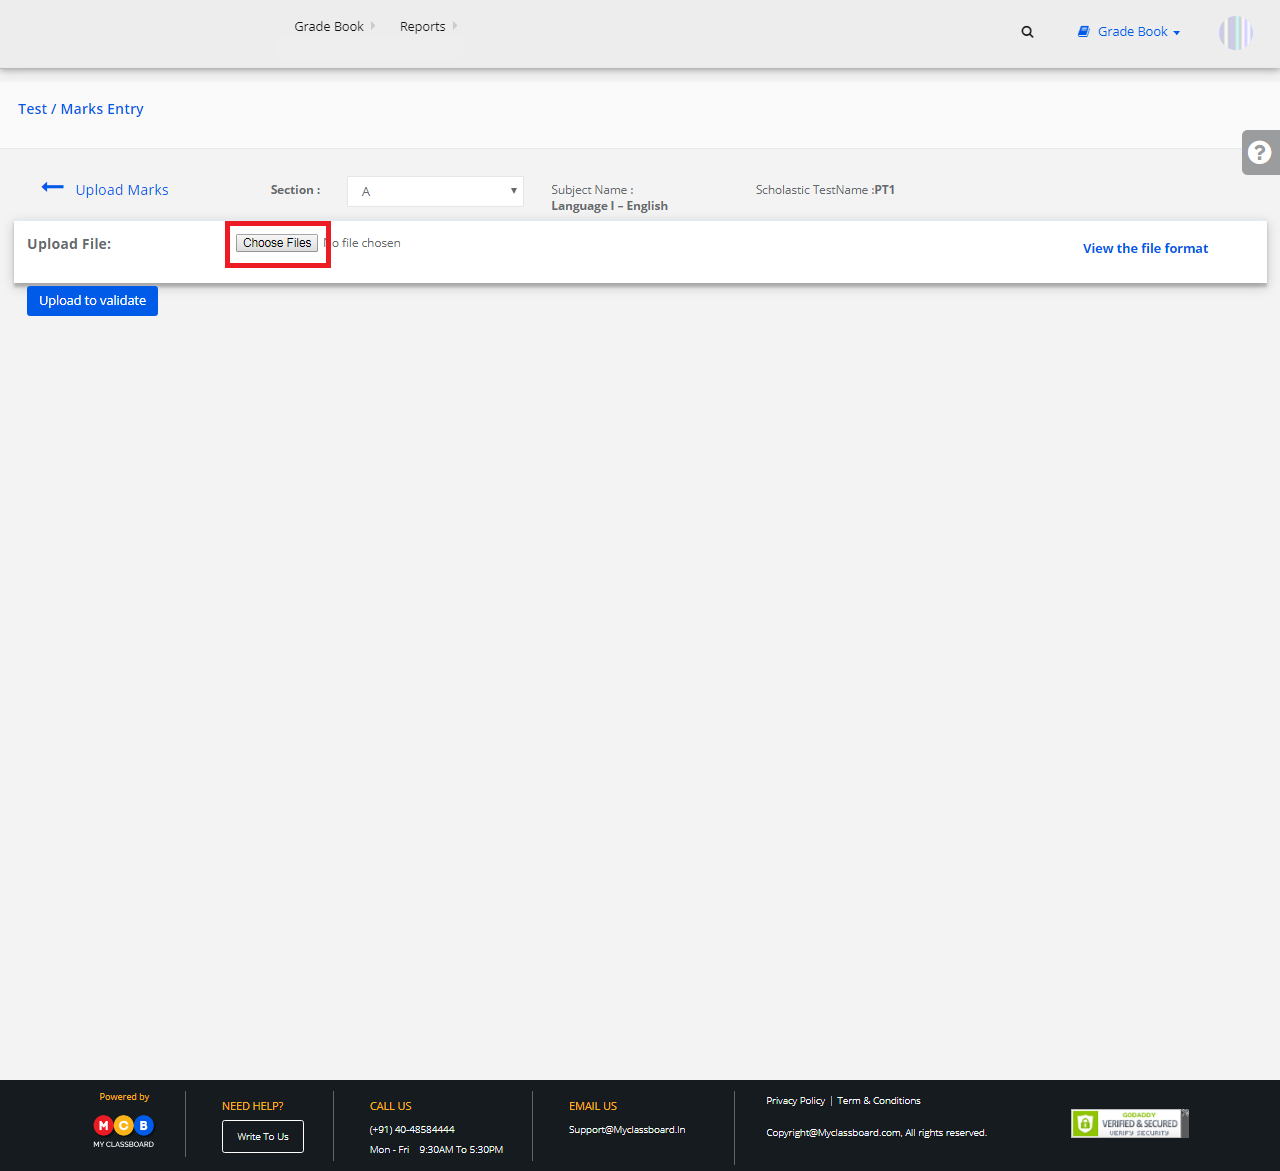
Step 7: Click on “Upload Marks”.
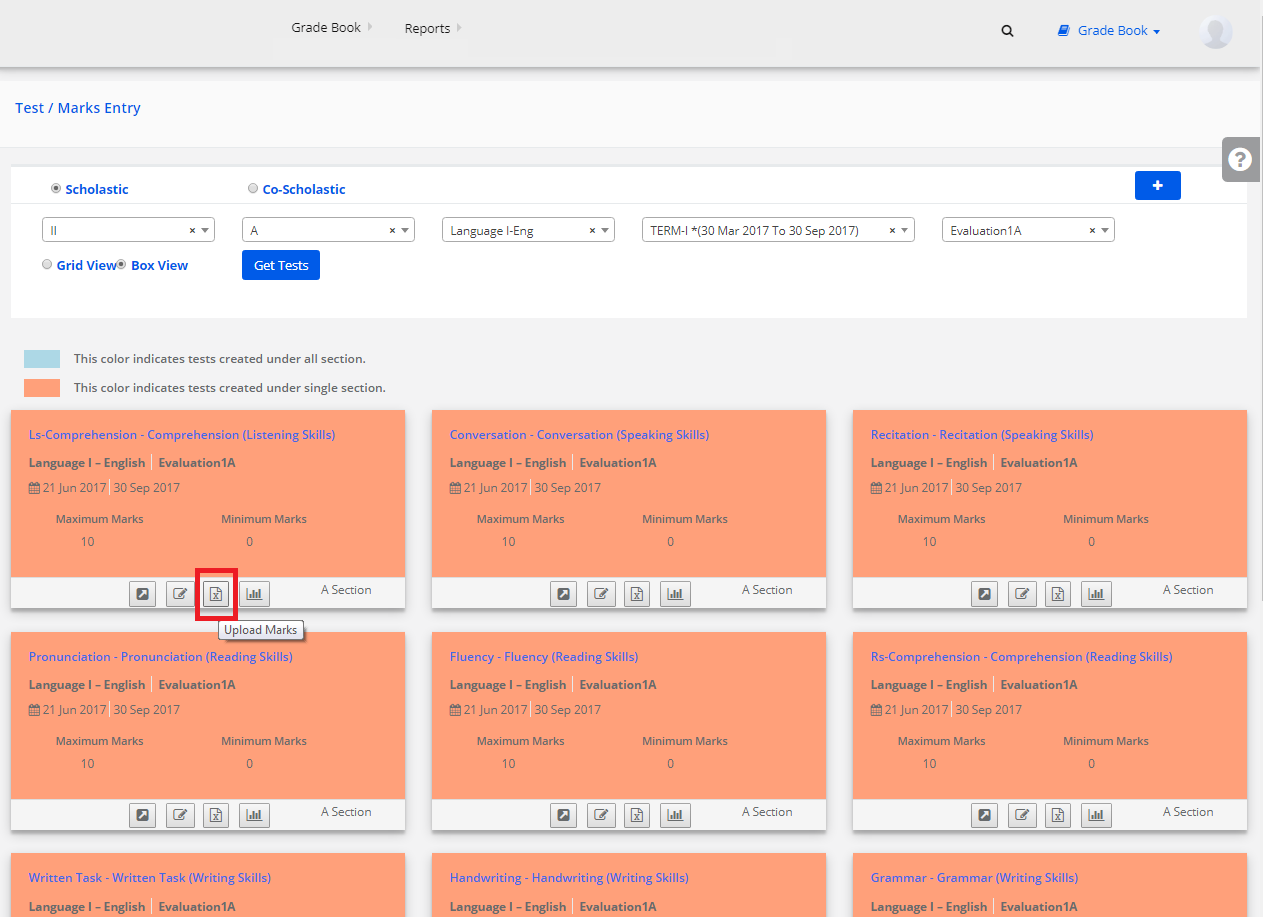
Step 8: Choose File ——> Upload to Validate.
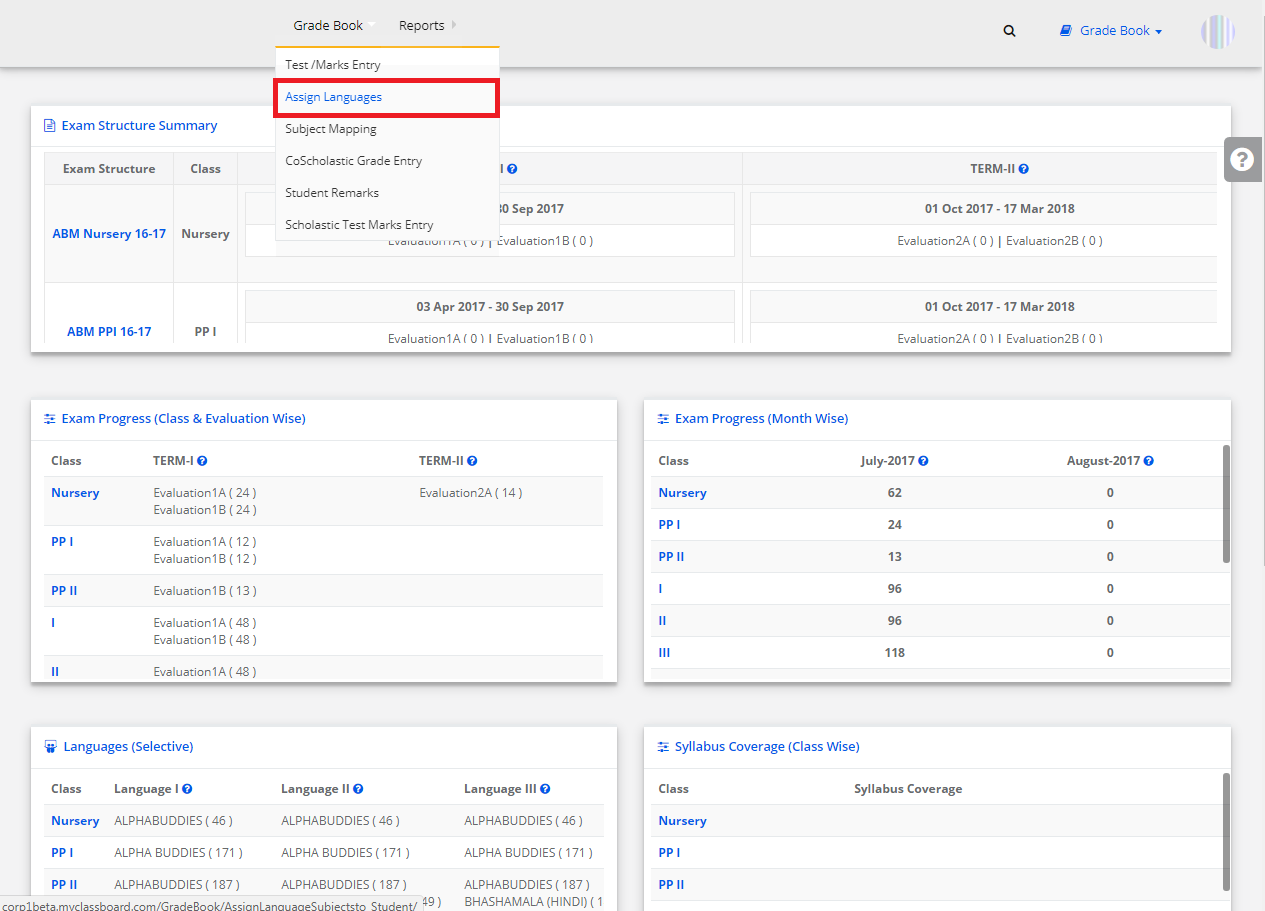
2) Assign Languages
Step 1: Click on “Gradebook” on the top bar and select “Assign Languages”.
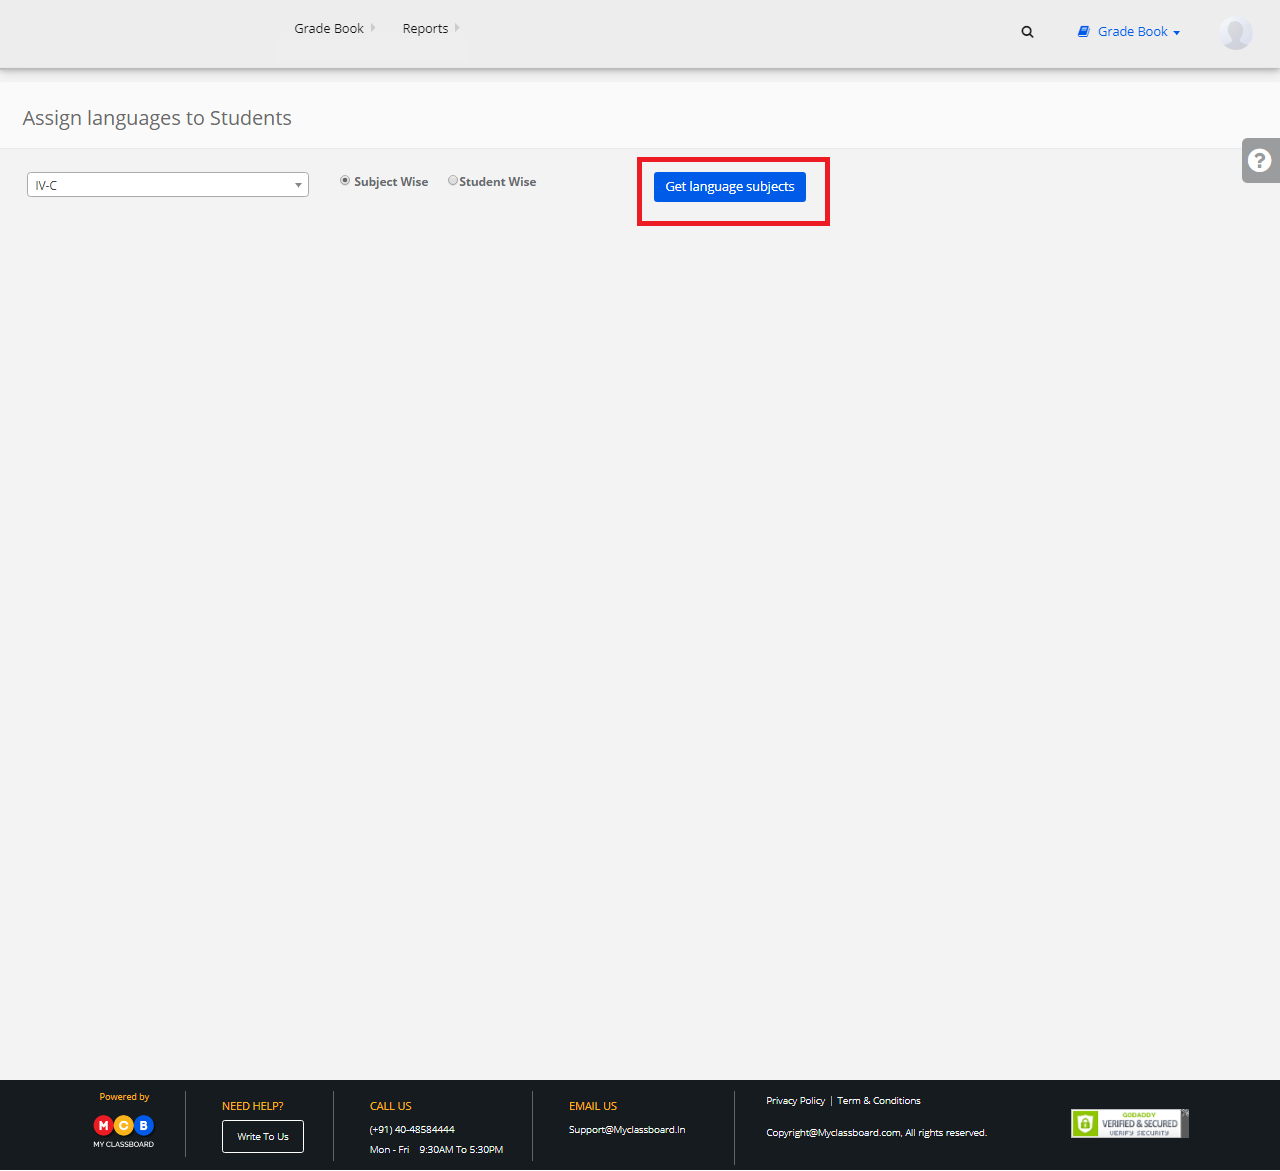
Step 2: Select Class and click on “Get Language Subjects”.
Step 3: Choose any Language and click on “Assign/Unassign Subjects(Manually)”.

Step 4: Select the students by marking the check box and click on “Assign/Unassign Subjects to Students”.
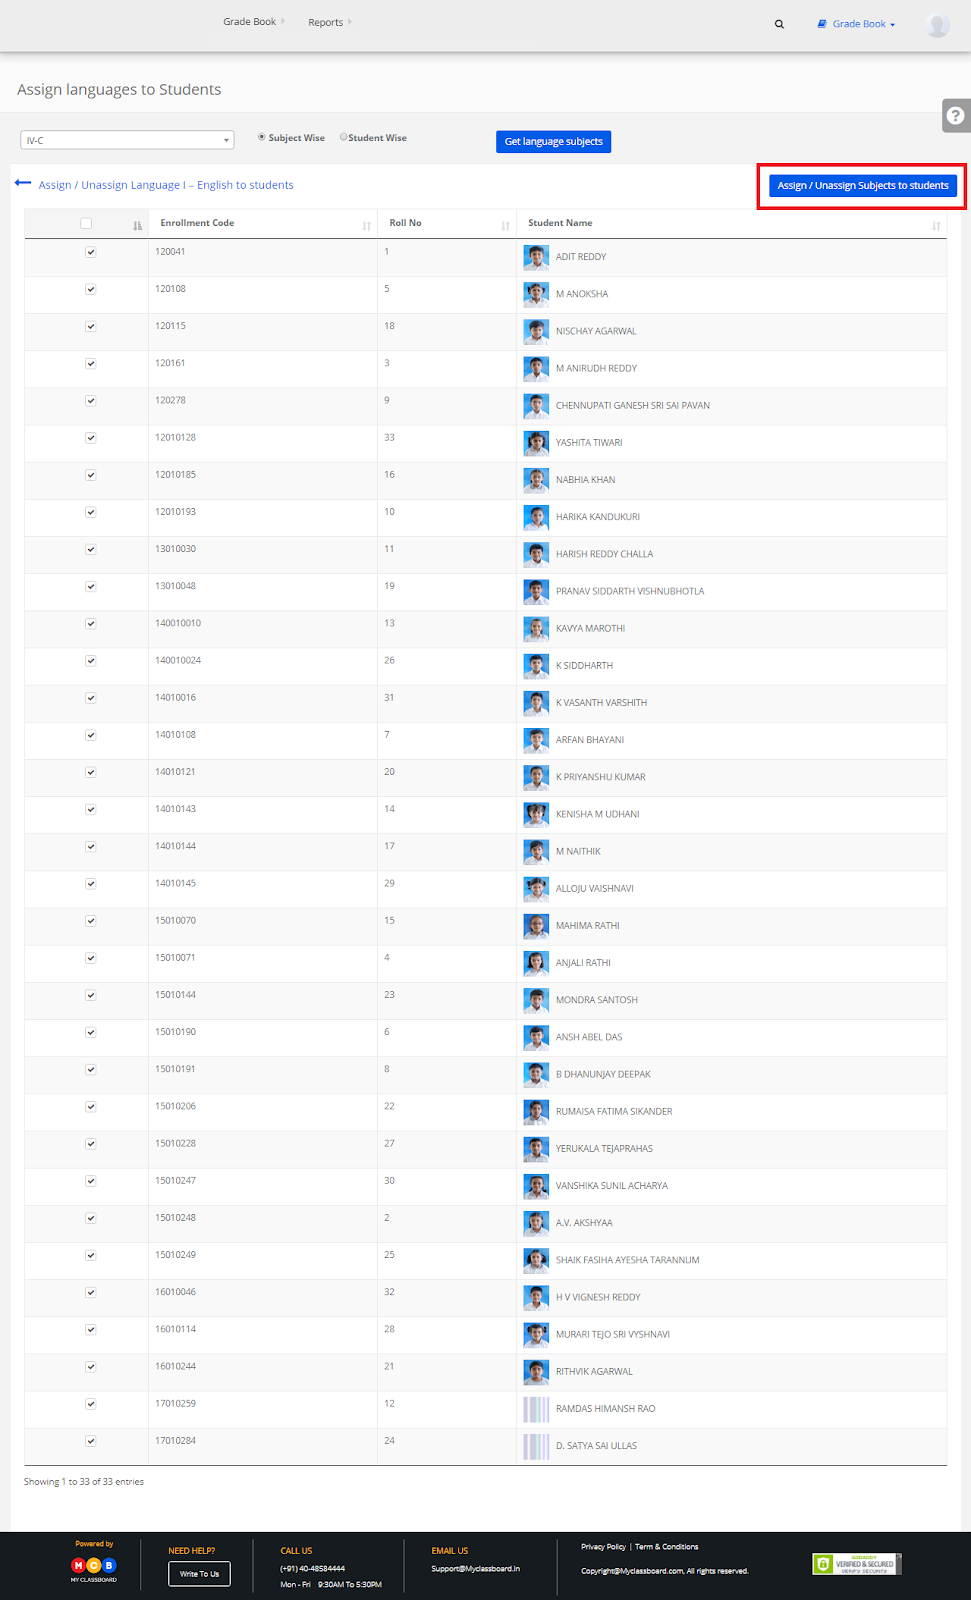
The respective Language is assigned to the students.
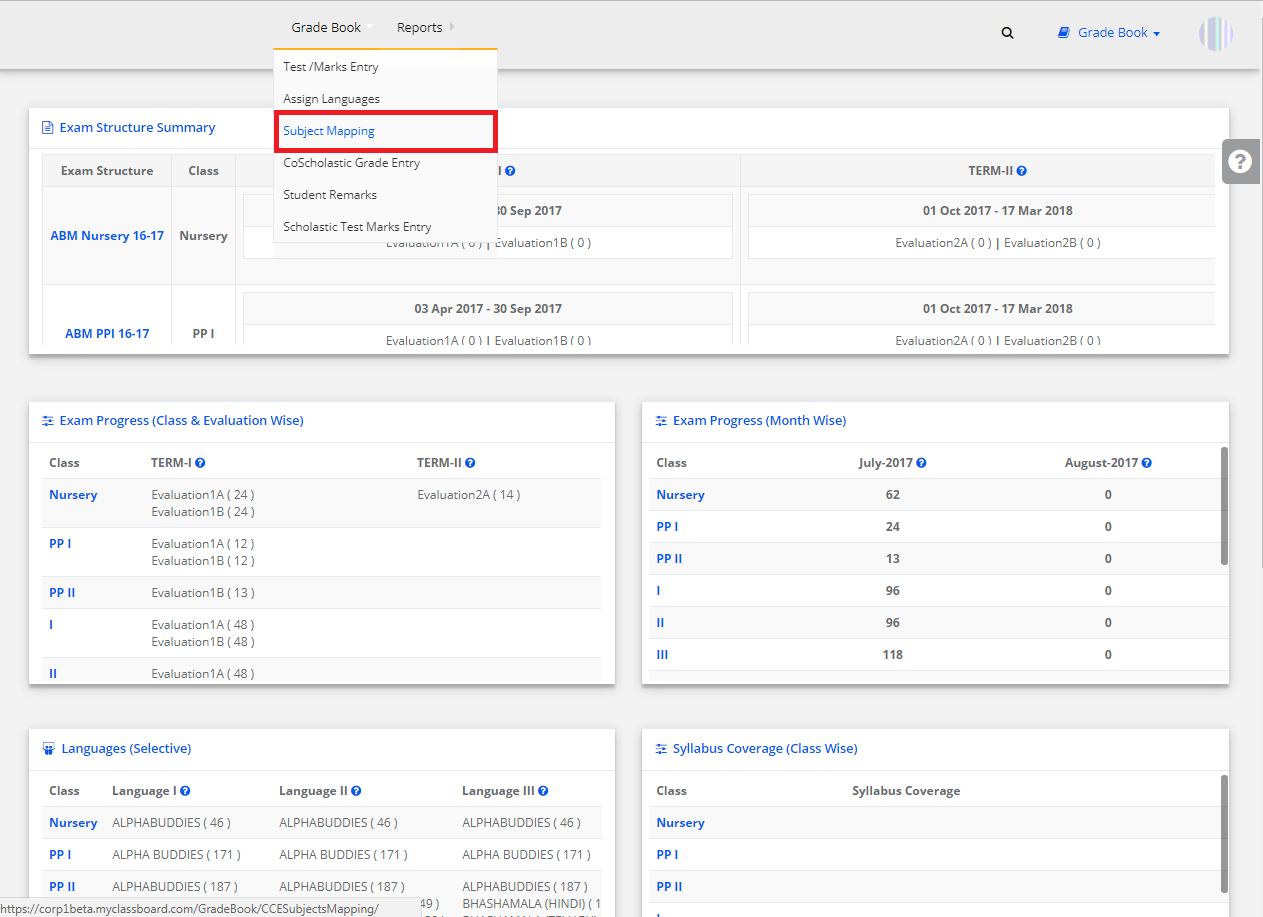
3) Subjects Mapping
Step 1: Click on “Gradebook” on the top bar and select “Subject Mapping”.
Step 2: Select Class from the list of classes in the left pane.
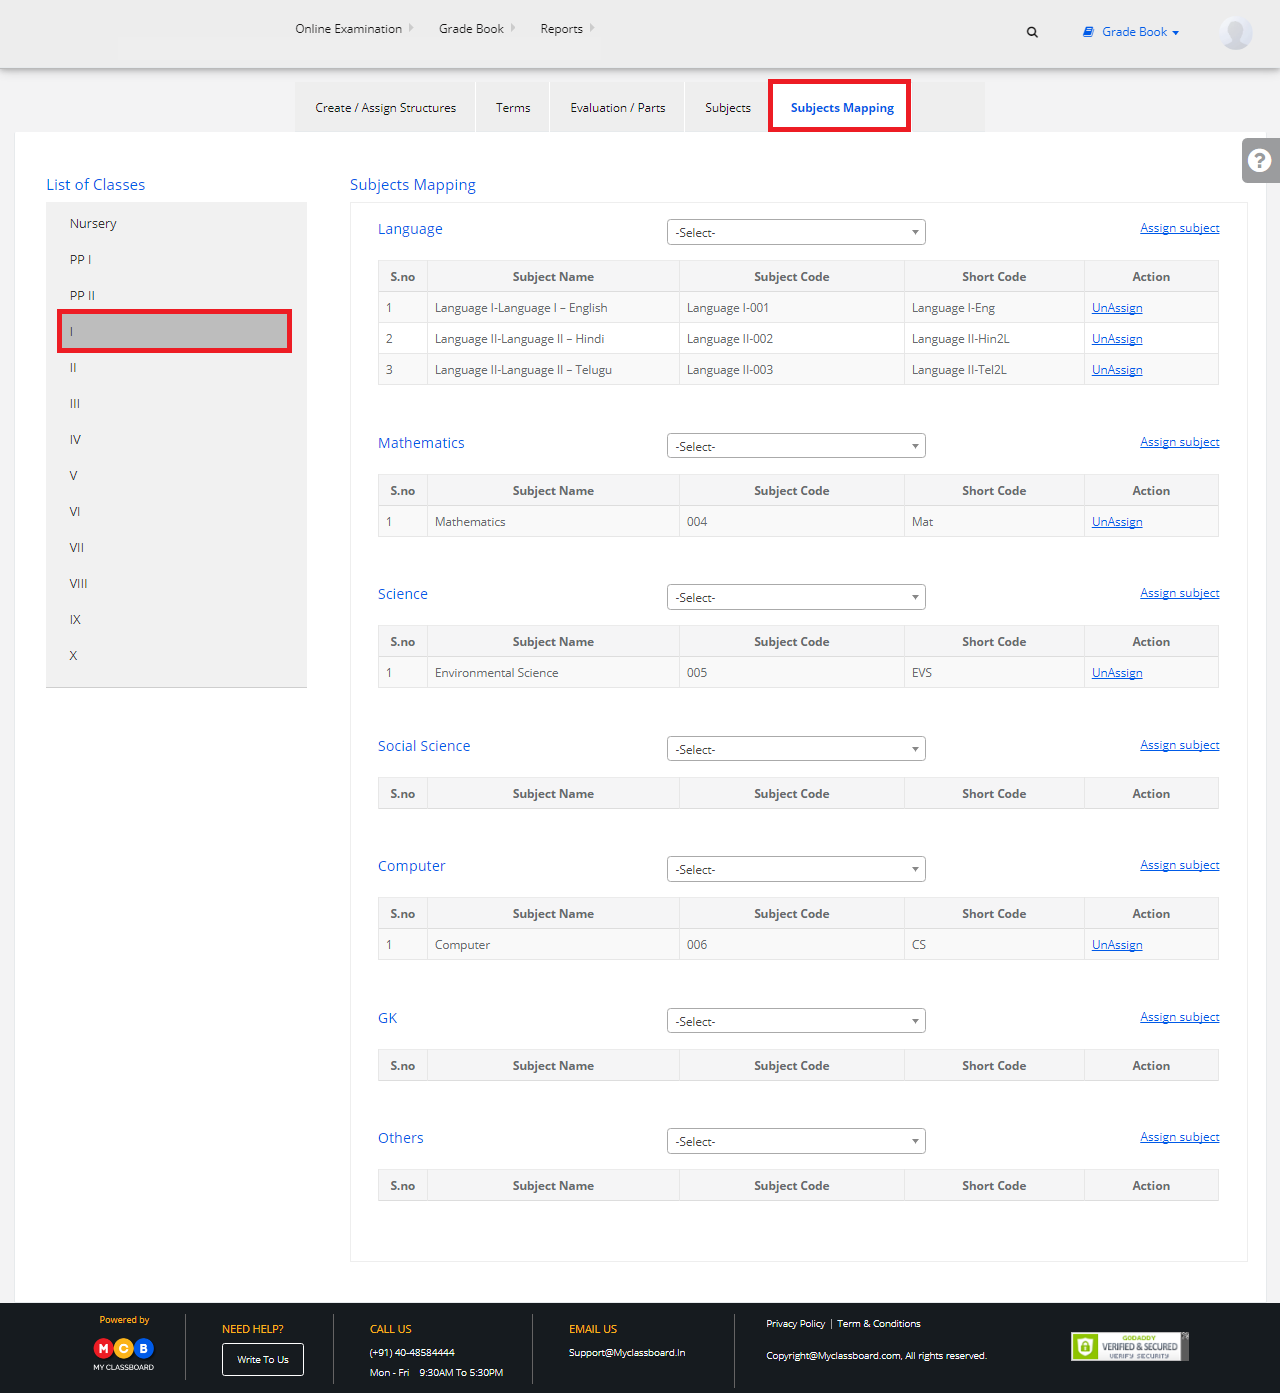
Step 3: Under “Language” section, select any subject from the mentioned list and click on “Assign Subject” to assign the same.

Step 4: To un-assign, the subjects, click on the un-assign option shown beside each subject.

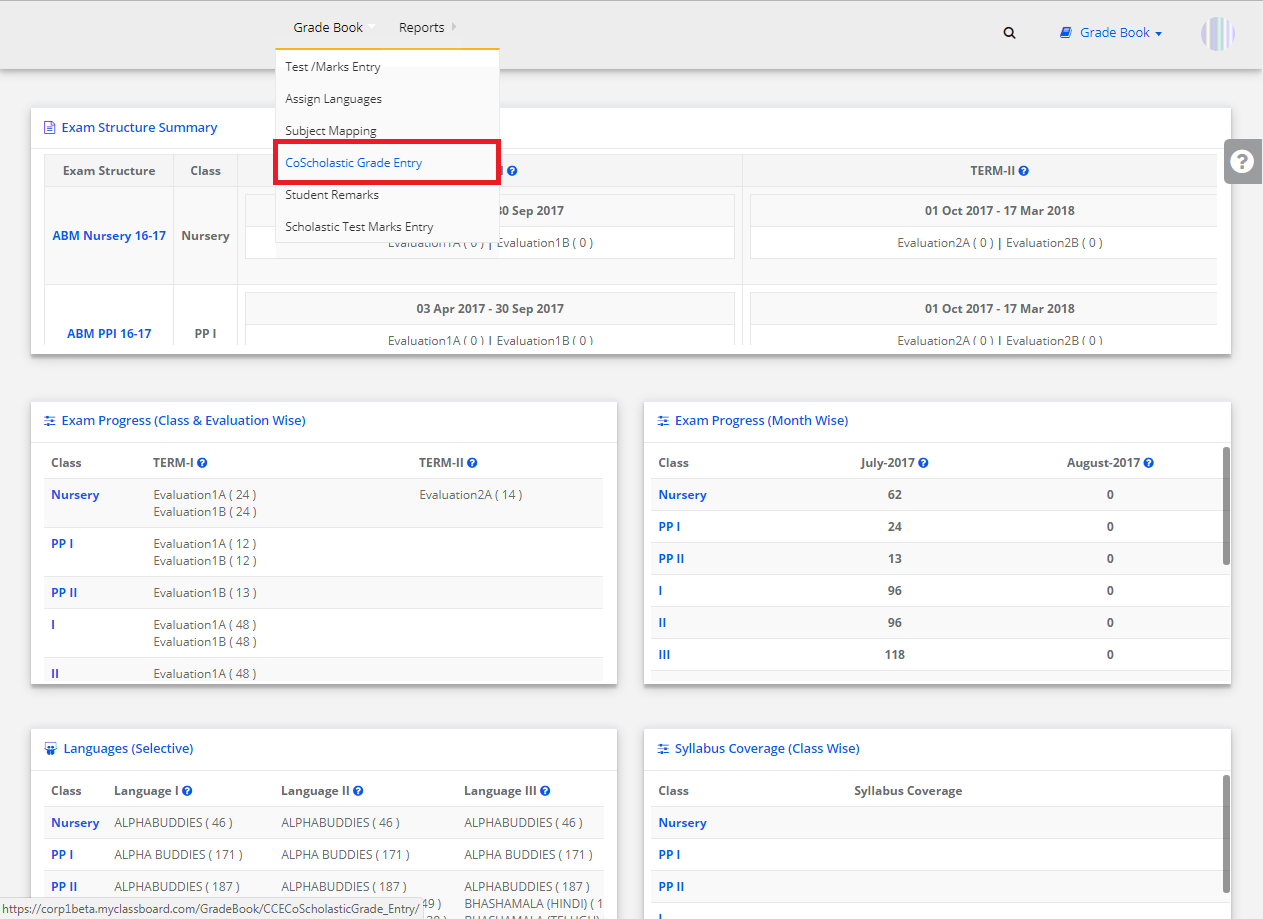
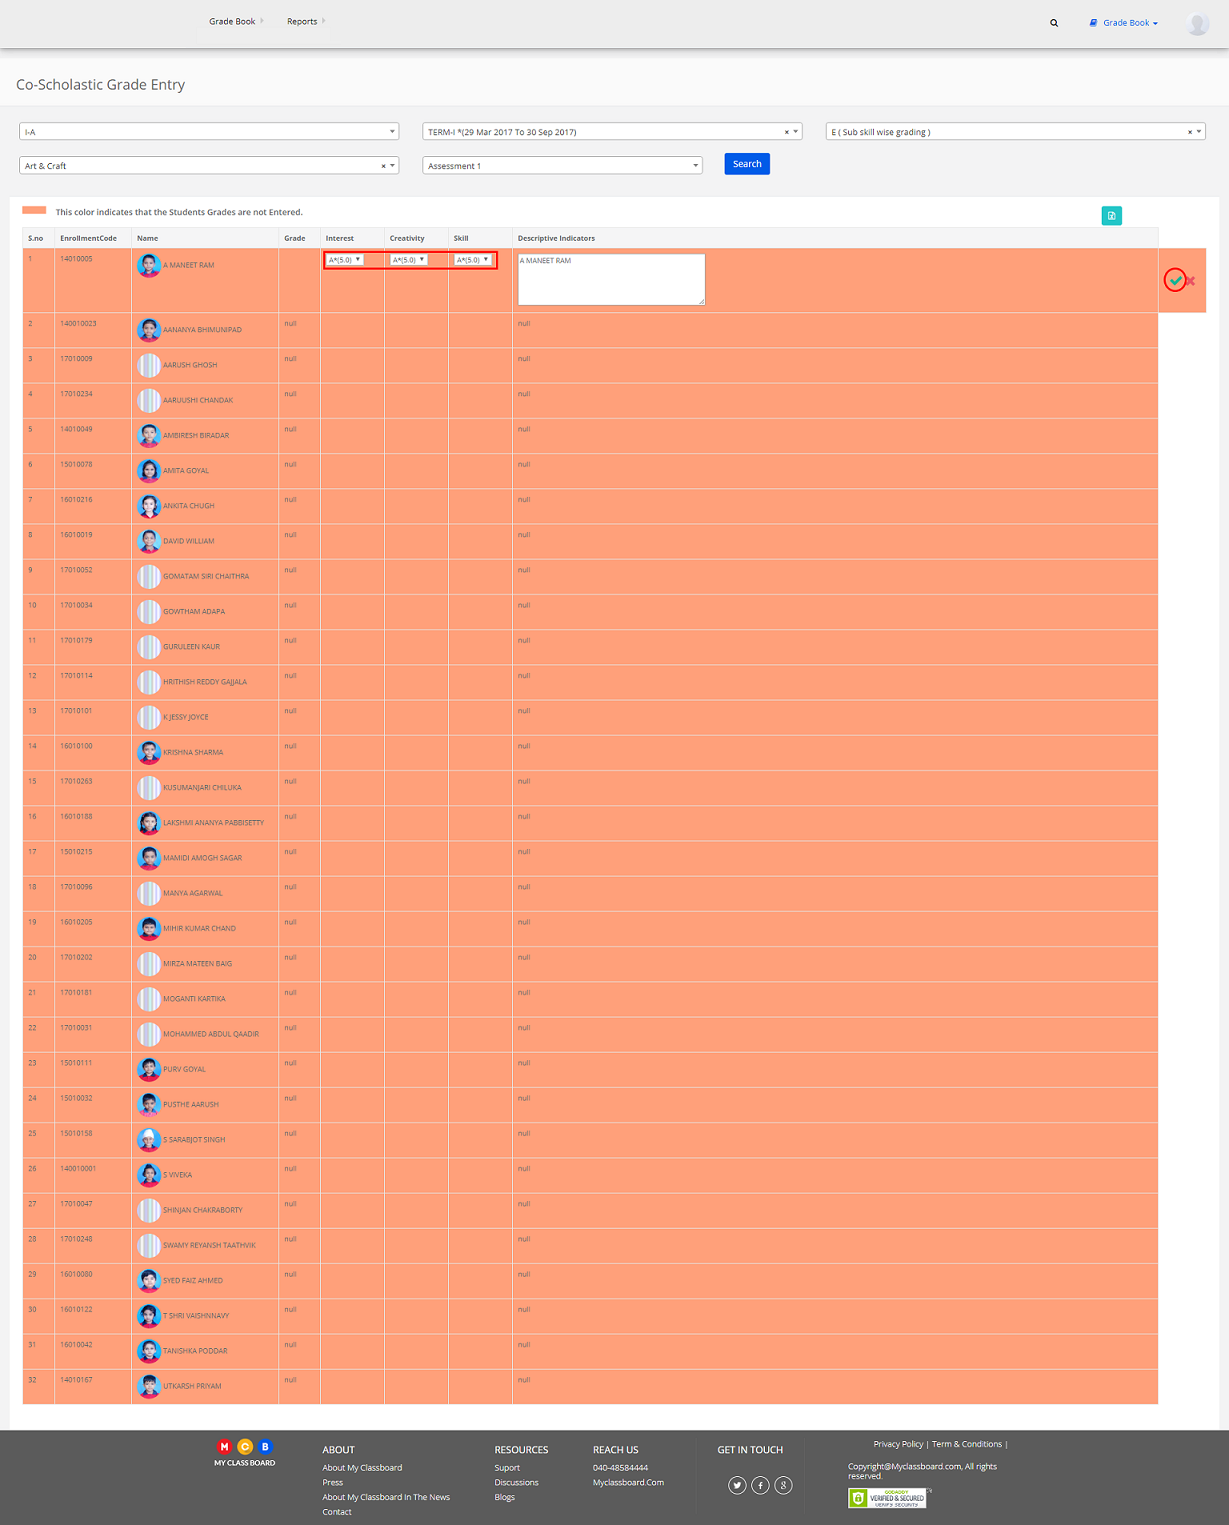
4) Co-Scholastic Grade Entry
Step 1: Click on “Gradebook” on the top bar and select “Co-Scholastic Grade Entry”.
Step 2: Select Class, Term, Co-Scholastic Part, Co-Scholastic Skill wise, Test and click on “Search”.
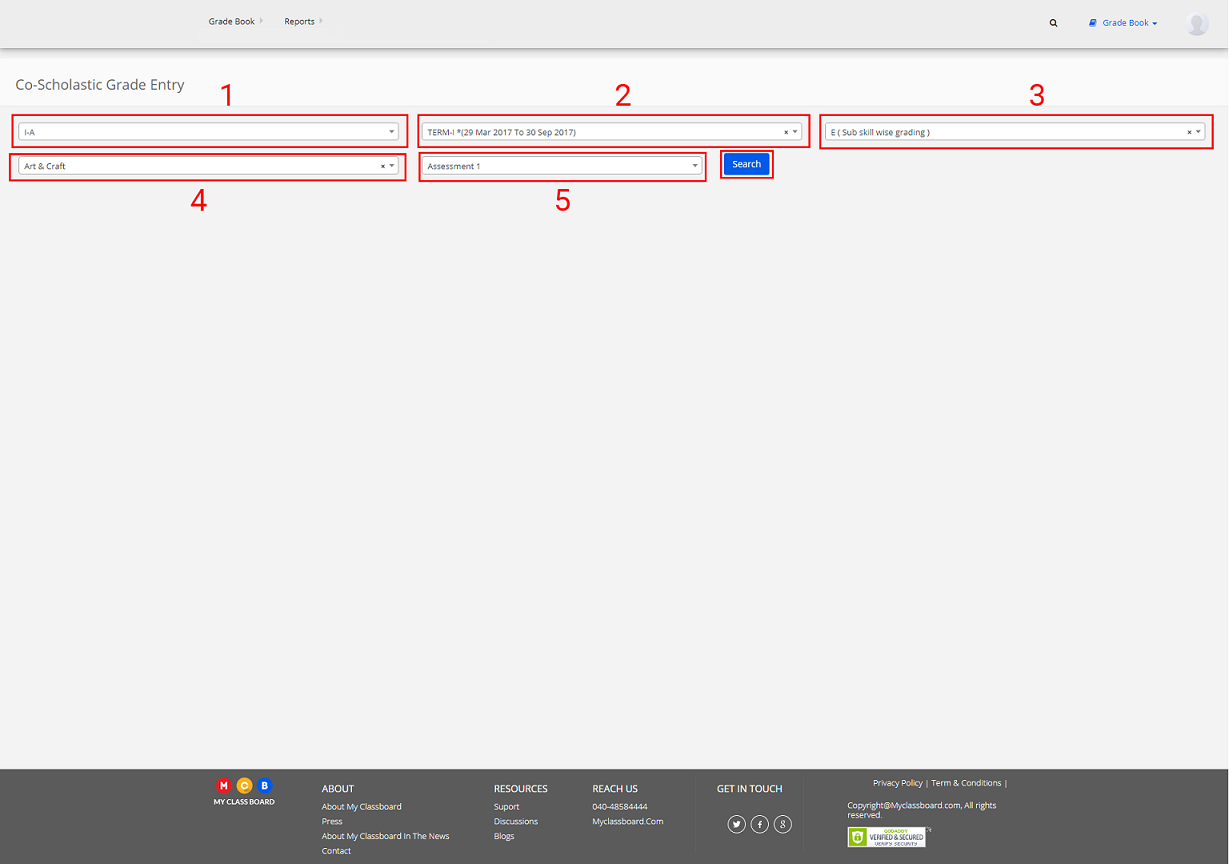
Step 3: Select the Students, enter the grade individually and click on Save.
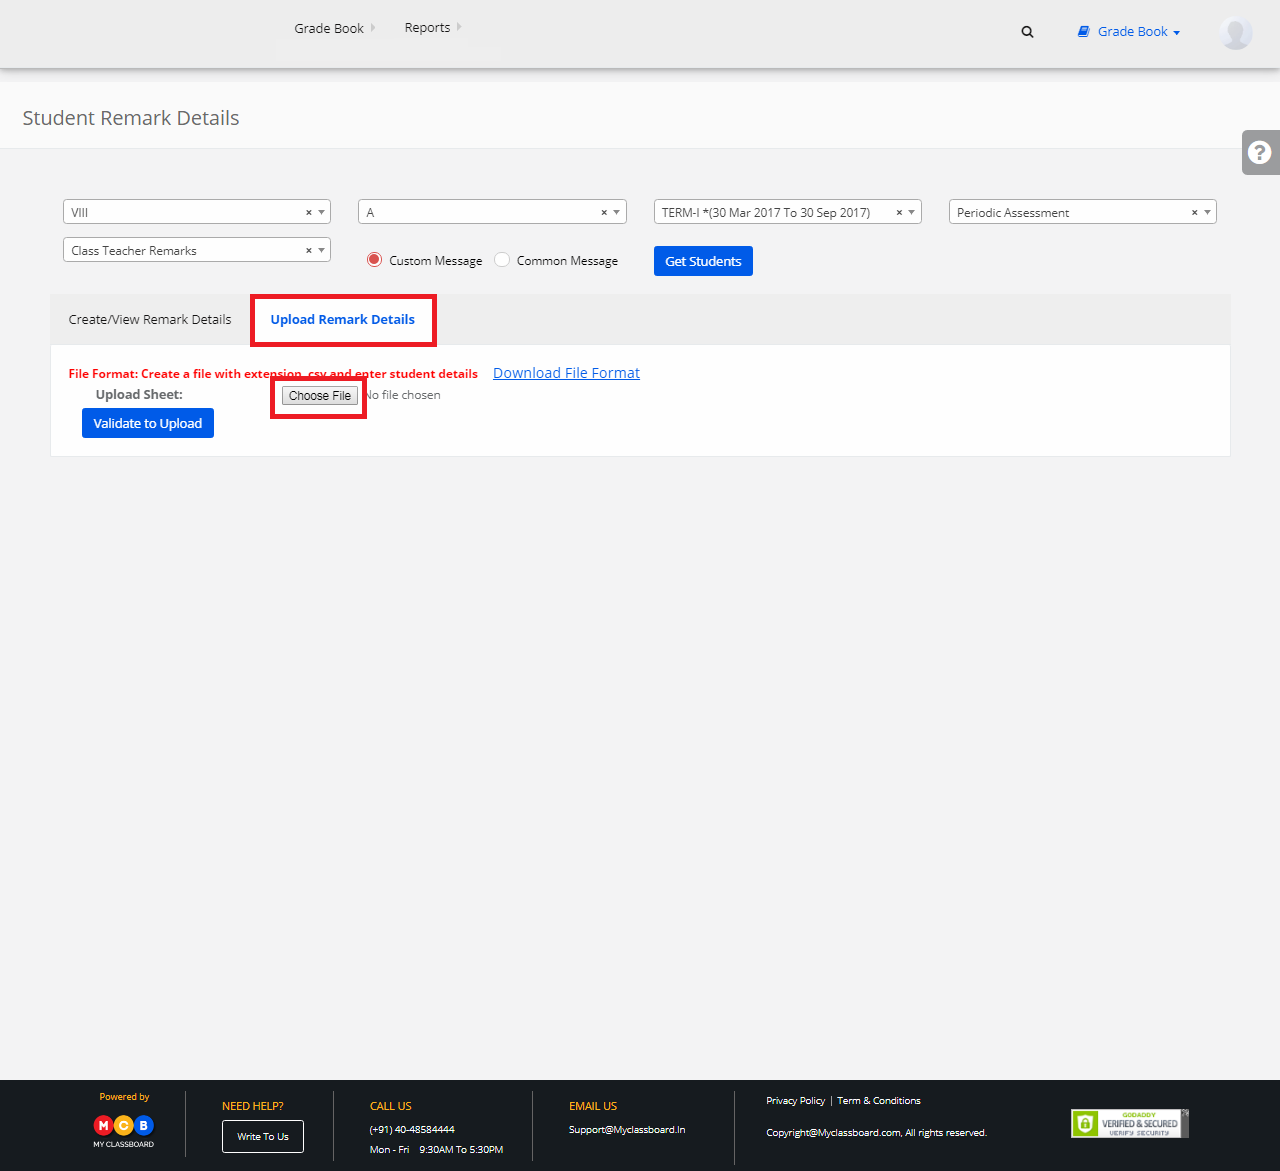
5) Student Remarks
Step 1: Click on “Gradebook” on the top bar and select “Student Remarks”.

Step 2: Select Class, Section, Term, Evaluation, Subject, Custom/Common message and click on “Get Students”.

Step 3: Select “Create/View Remark Details”. Now select any Student, enter the remarks individually and click on Save.

Step 4: If you want to upload the remarks in bulk, simply select “Upload Remark Details”. Click on “Choose File” to upload a “.csv” file format ——> “Validate to Upload”.
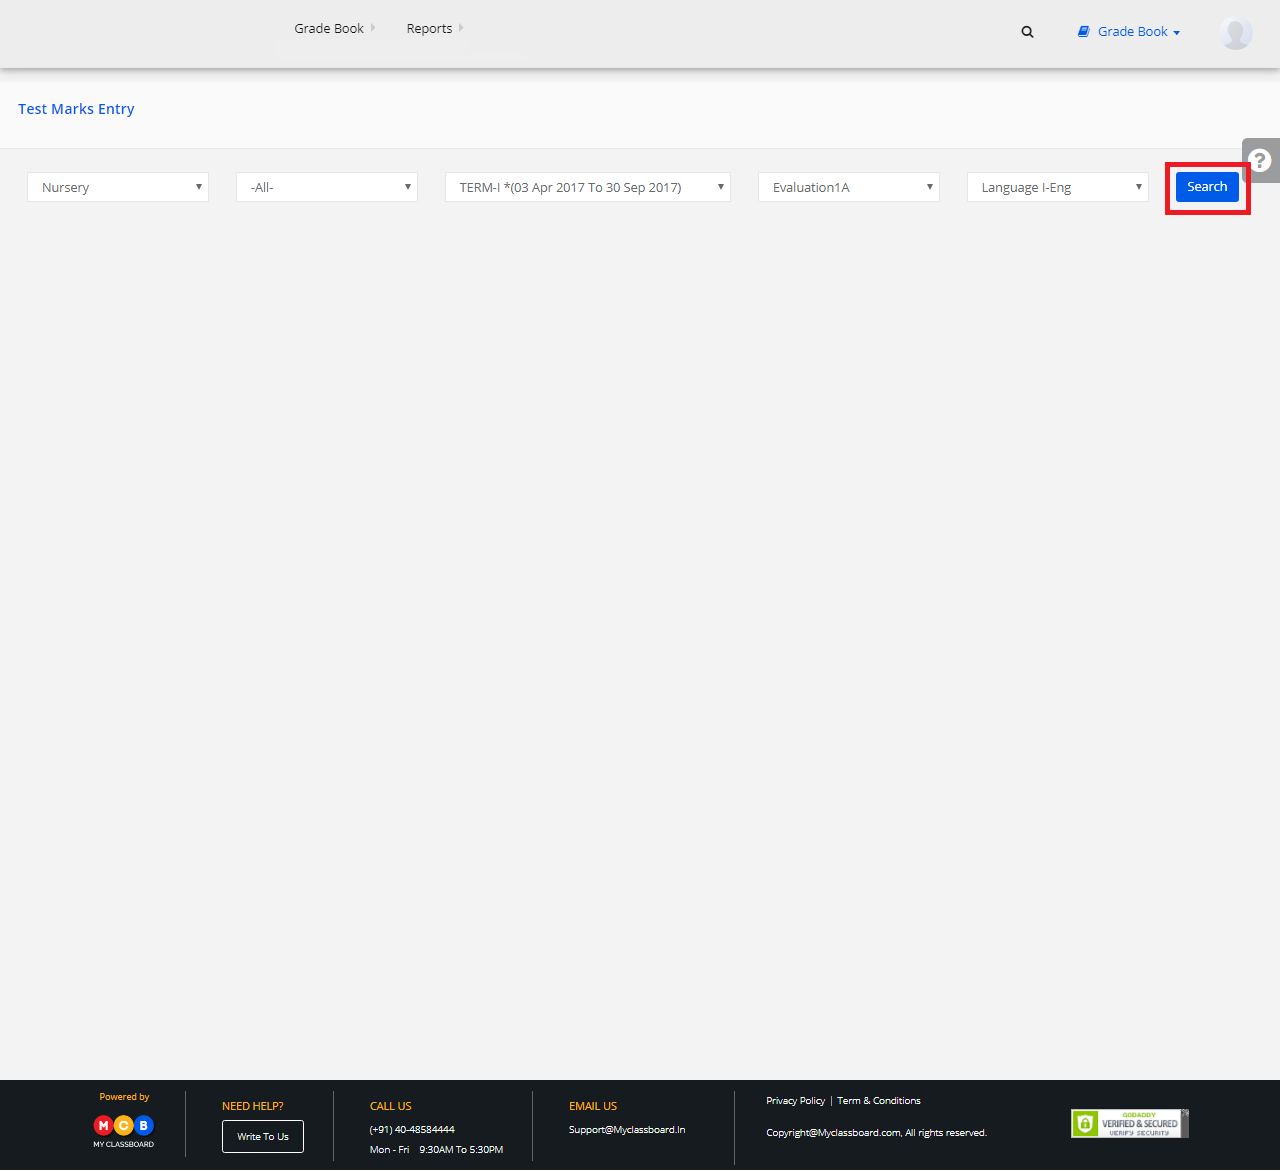
6) Scholastic Test Marks Entry
Step 1: Click on “Gradebook” on the top bar and select “Scholastic Test Marks Entry”.

Step 2: Select Class, Section, Term, Evaluation and Subject. Upon selection, click on “Search”.
Step 3: Select any Test and click on “Enter Marks”.

Step 4: To enter the marks manually, select “Click Here To Get Student List To Enter Marks Manually”.

Step 5: Enter the marks of students individually here and click on “Save” button.

Stage 4: Communication
Step 1: Select “Communication” on the top bar of the dashboard. You’ll be directed to the Communication page.
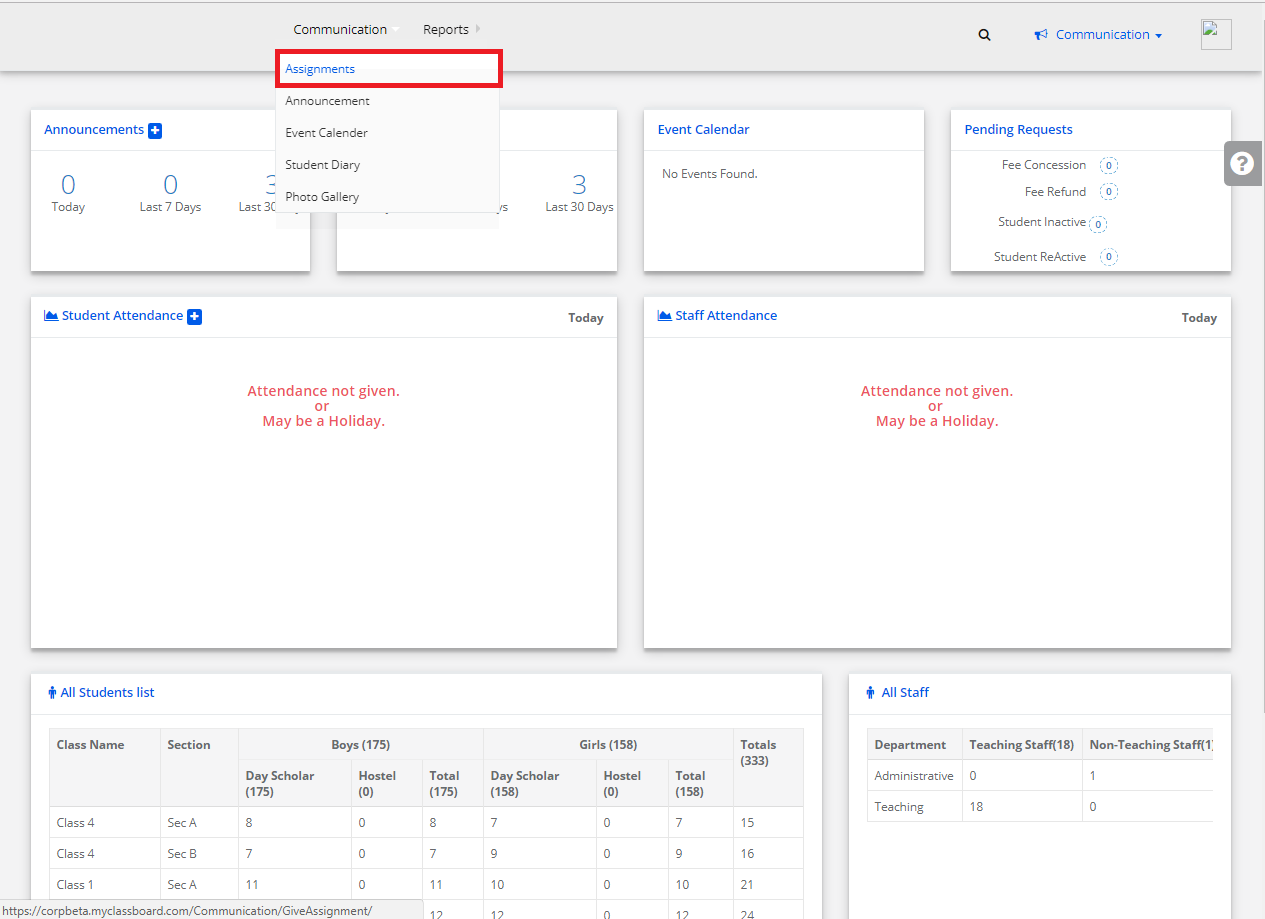
1) Assignments
Step 1: Select “Communication” on the top bar and click on “Assignments”
Step 2: Select the required options like Class, Section, Subject and click on “+”.

Step 3: Enter the necessary information and click on “Save”.
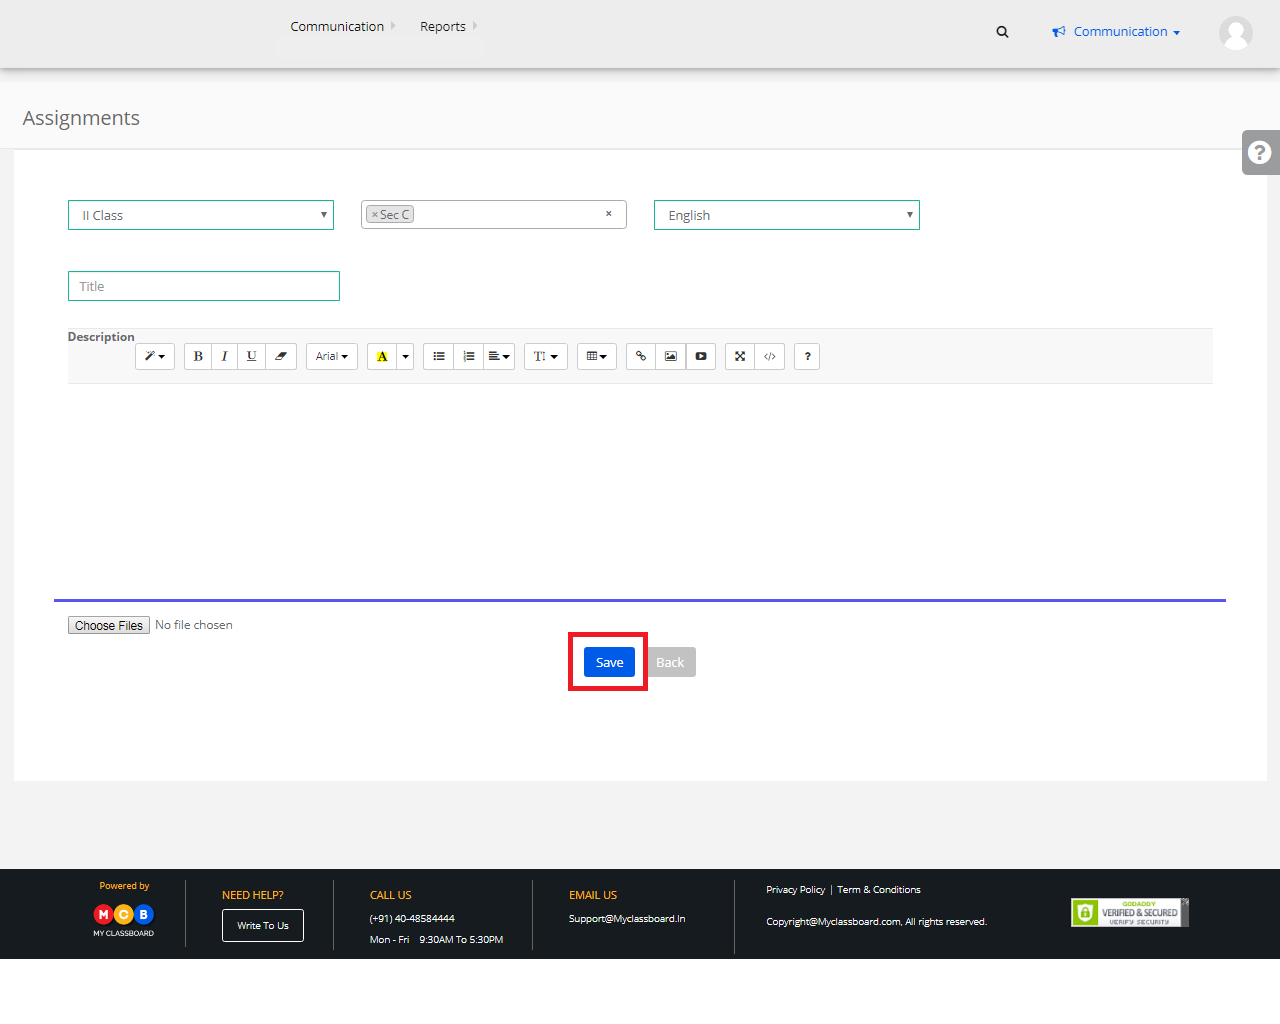
Step 4: To add an attachment, click on “Choose Files” to upload the attachment and then click on “Save”.

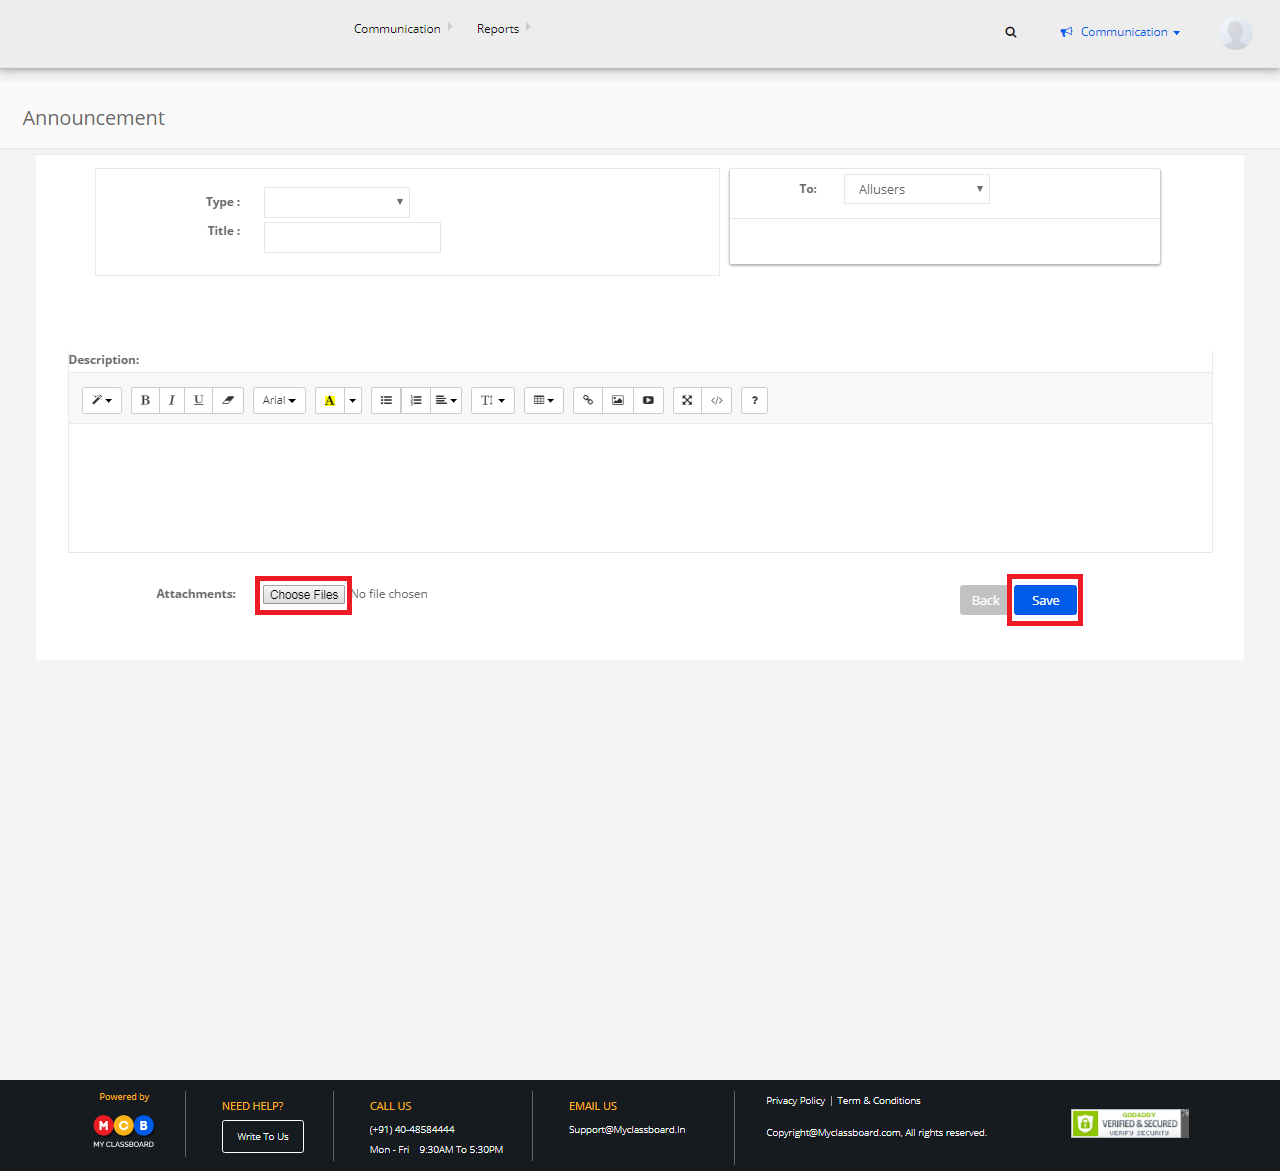
2) Announcement
Step 1: Click on “Communication” on the top bar and select “Announcements”.
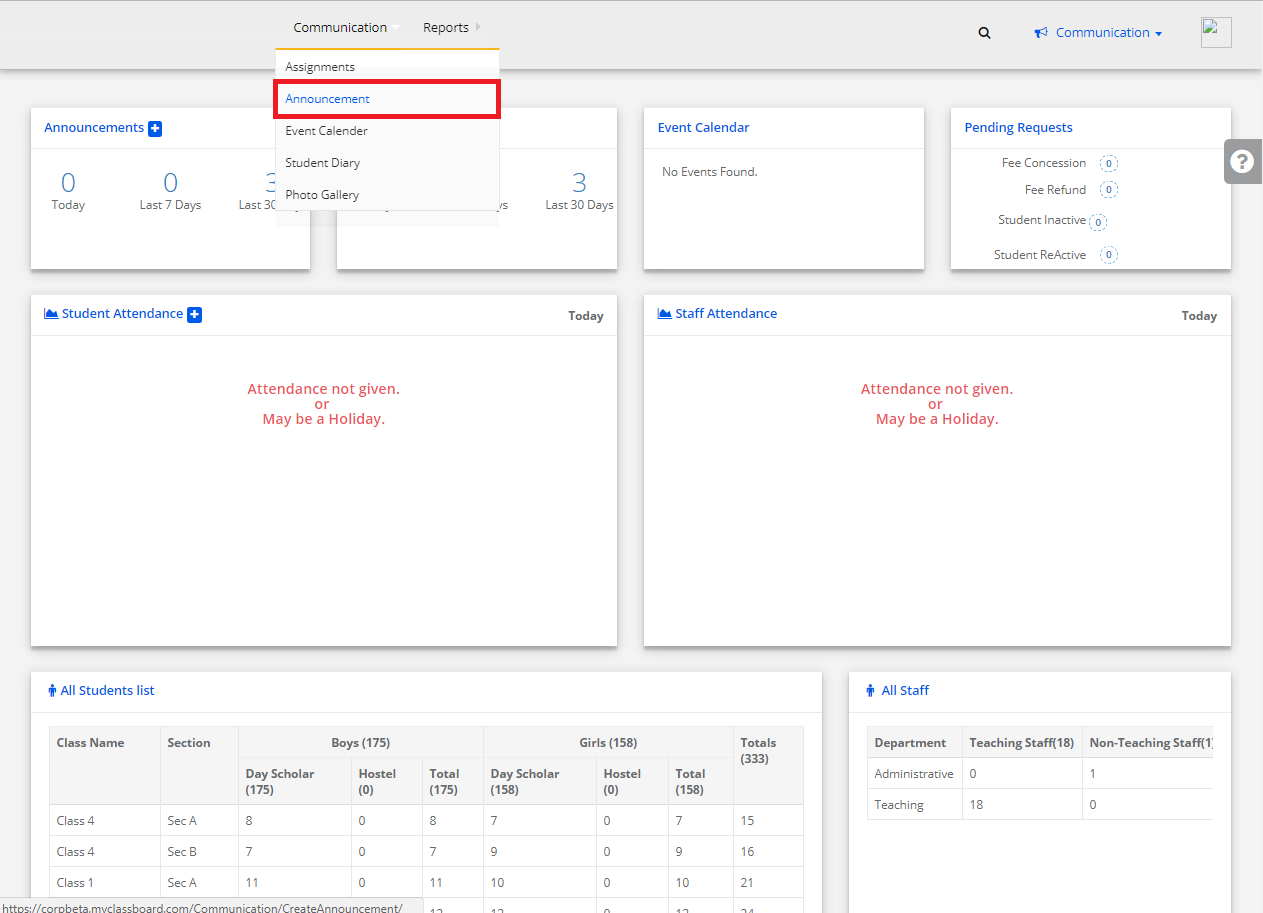
Step 2: Click on “+” symbol to “Create Announcements”.

Step 3: You can also select the users here by choosing any of the options like “All users or Staff or Parents/Students”.
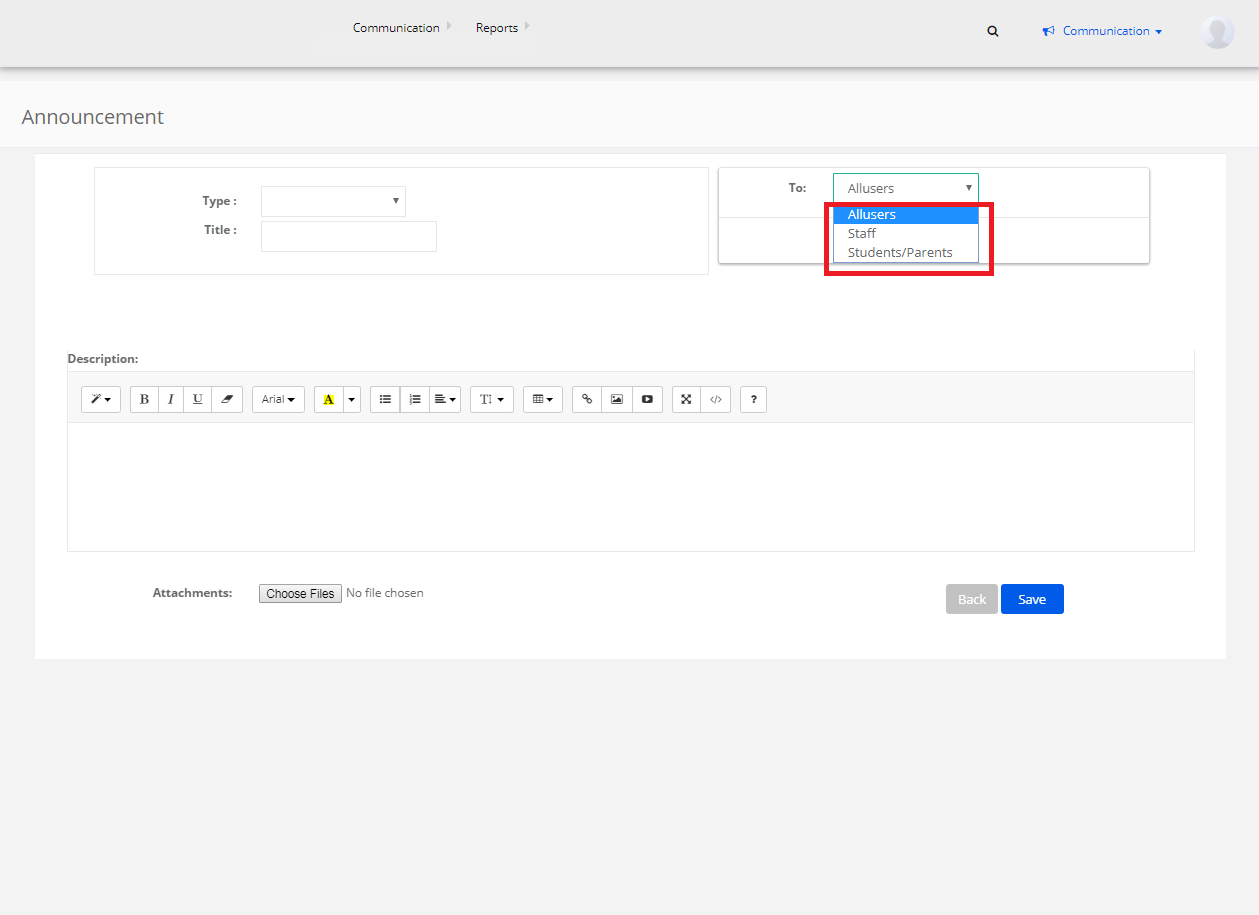
Step 4: Enter the information and Click on “Save”. The announcement is created and shared.
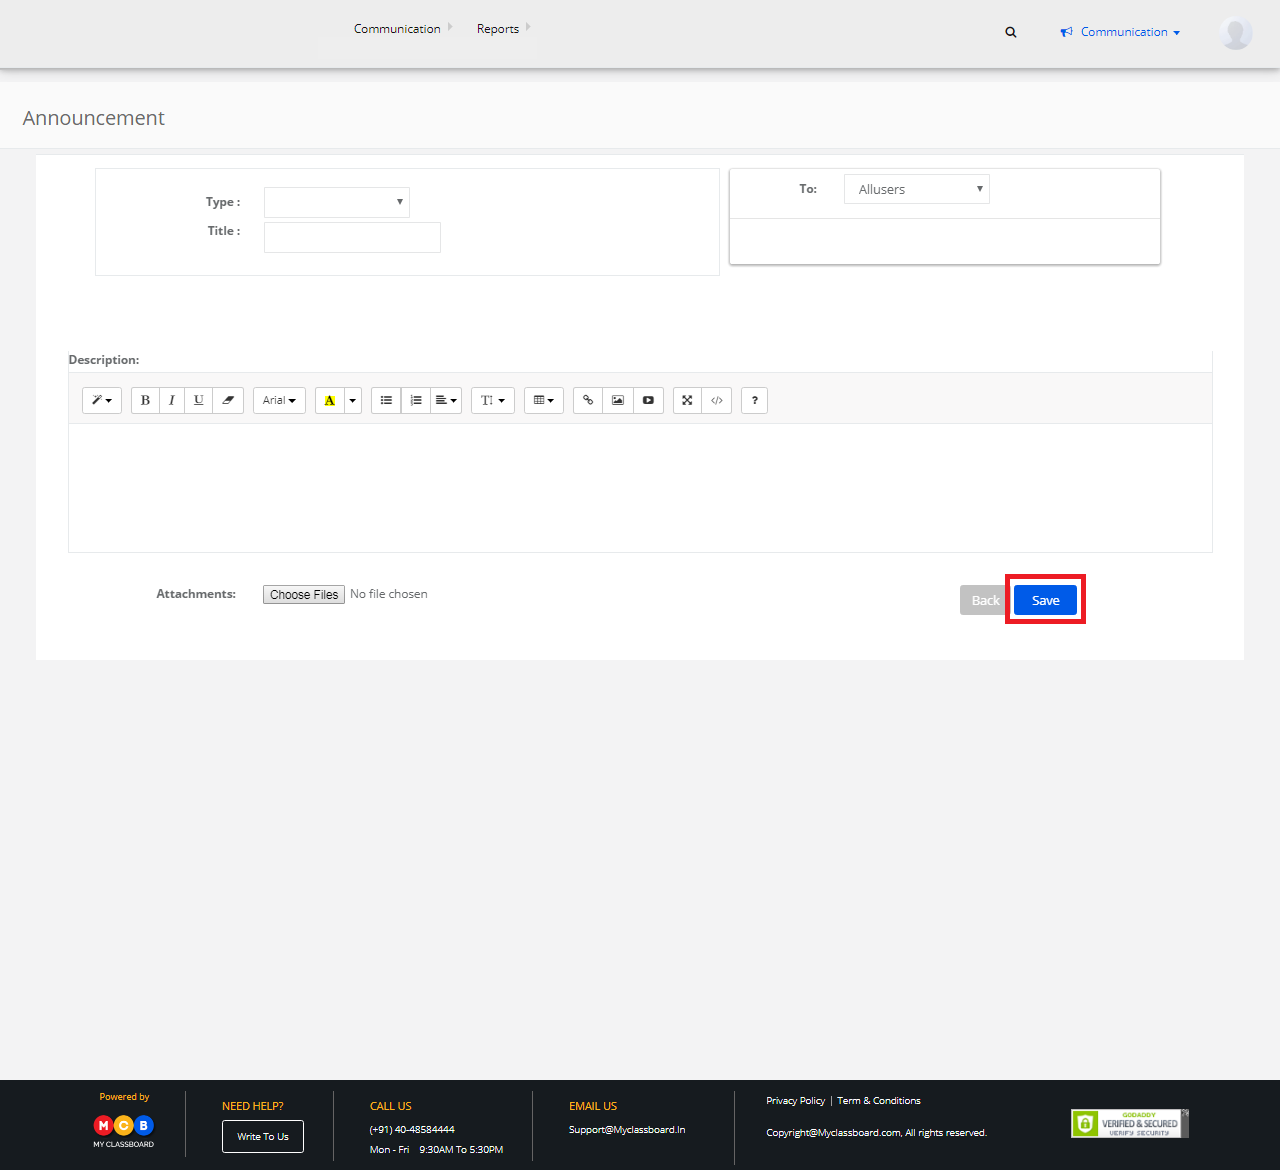
Add attachments
Step 5: If you want to share any documents with the Announcements, the same can be done by simply clicking the Upload option. Upload attachments, documents, pdf files, word files etc. to post and click “Save”. The attachments are posted in the Announcement.
Delete an Announcement
Step 1: Go back to “Communication” Dashboard ——> Announcements.
Step 2: To delete, select an announcement that was created by you and click on the “Delete” option shown on the right.

Step 3: Click on delete and the Announcement is successfully deleted.
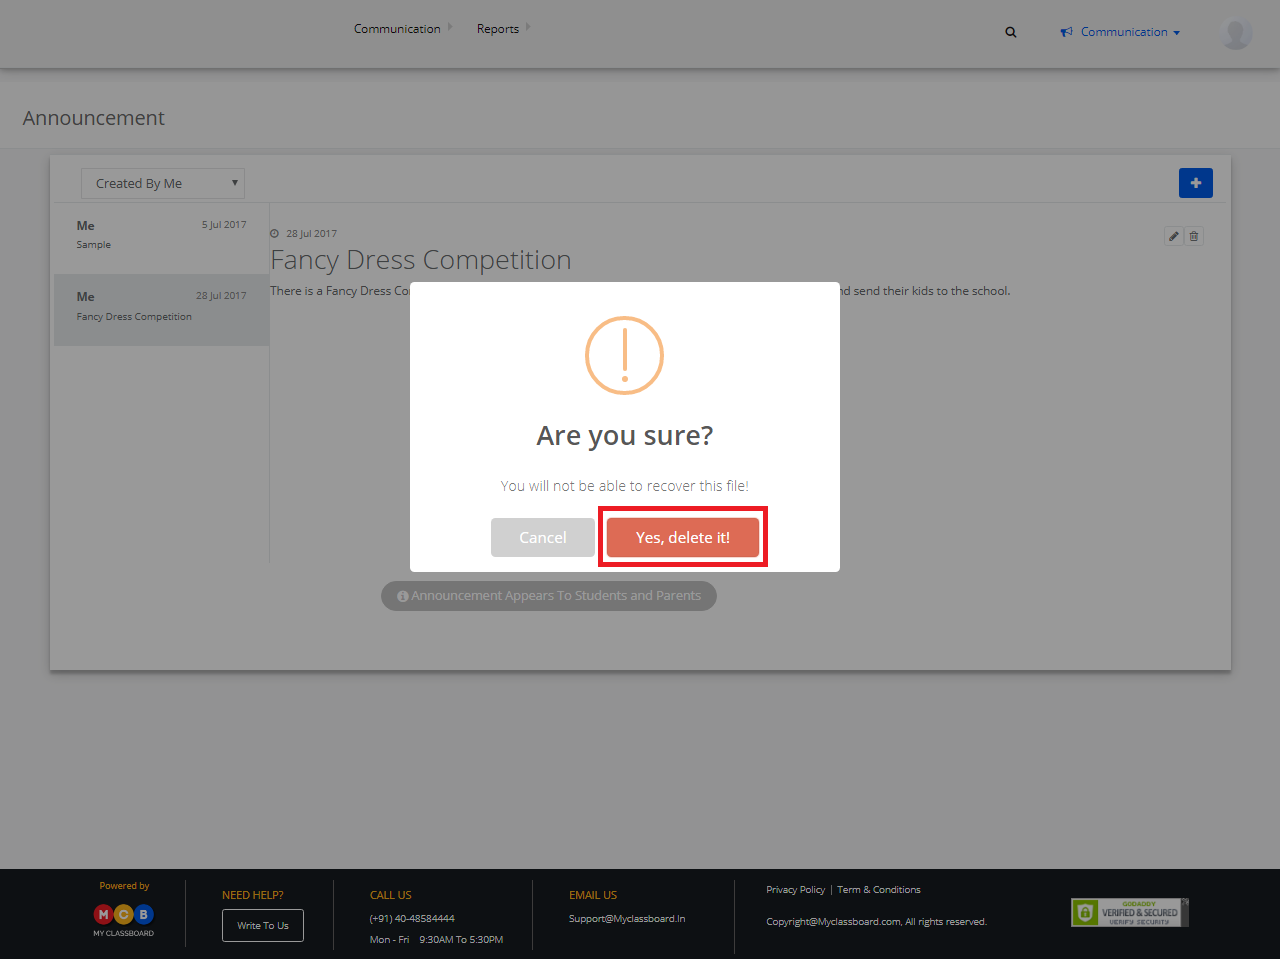
Note: You can only delete those announcements that were created by you.
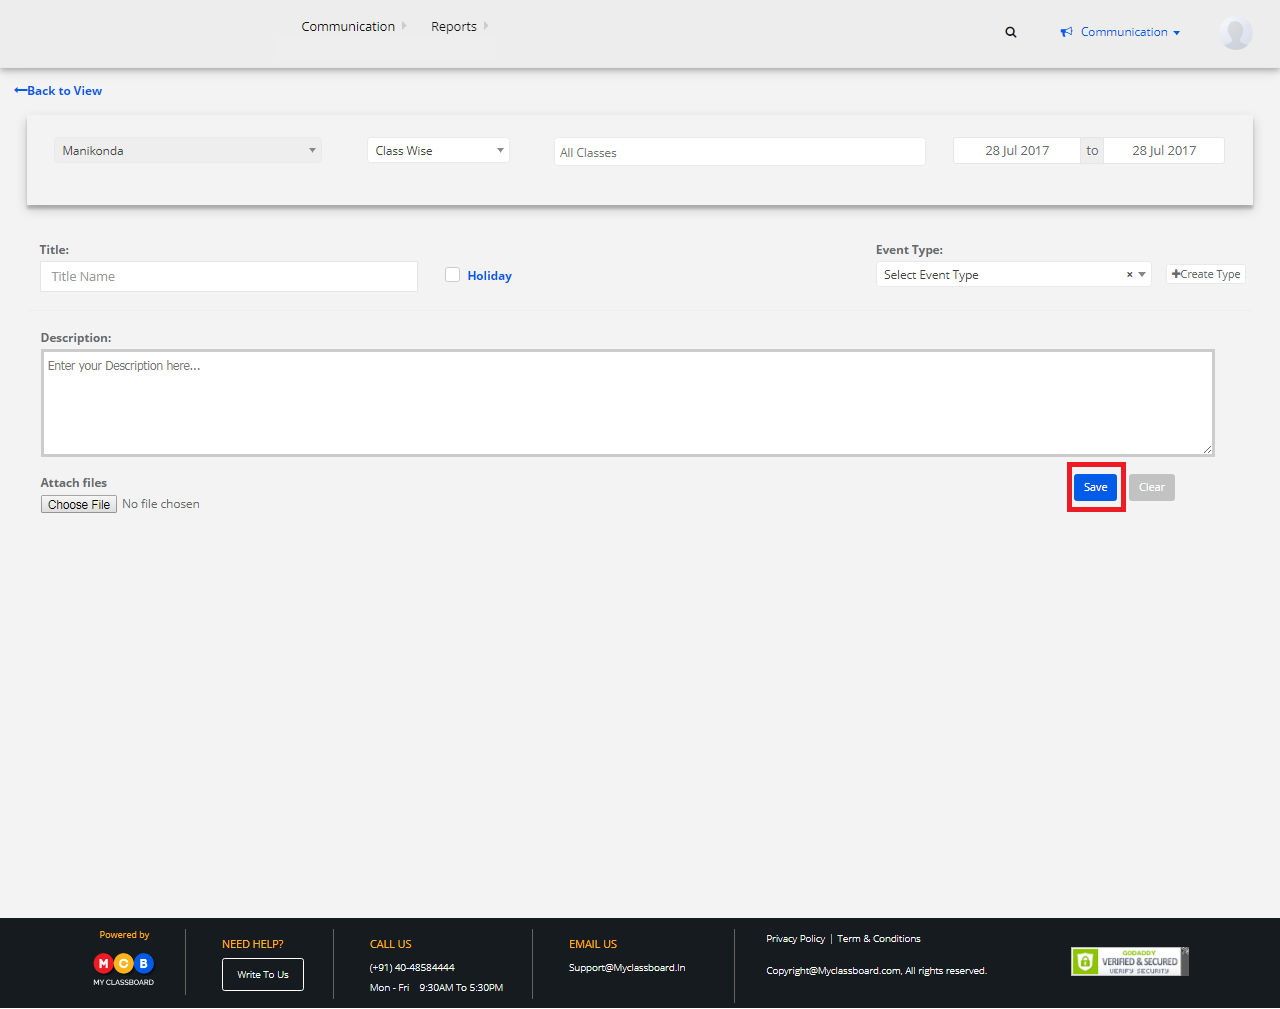
3) Event Calendar
Step 1: Click on “Communication” on the top bar and select “Event Calendar”.

Step 2: Select “Create Event” on the top right corner of the page.

Step 3: Select a date to add a new event. Add the event title, Select if is a holiday, Event type(To add event type, select “Create event” —> Add event —> Save).
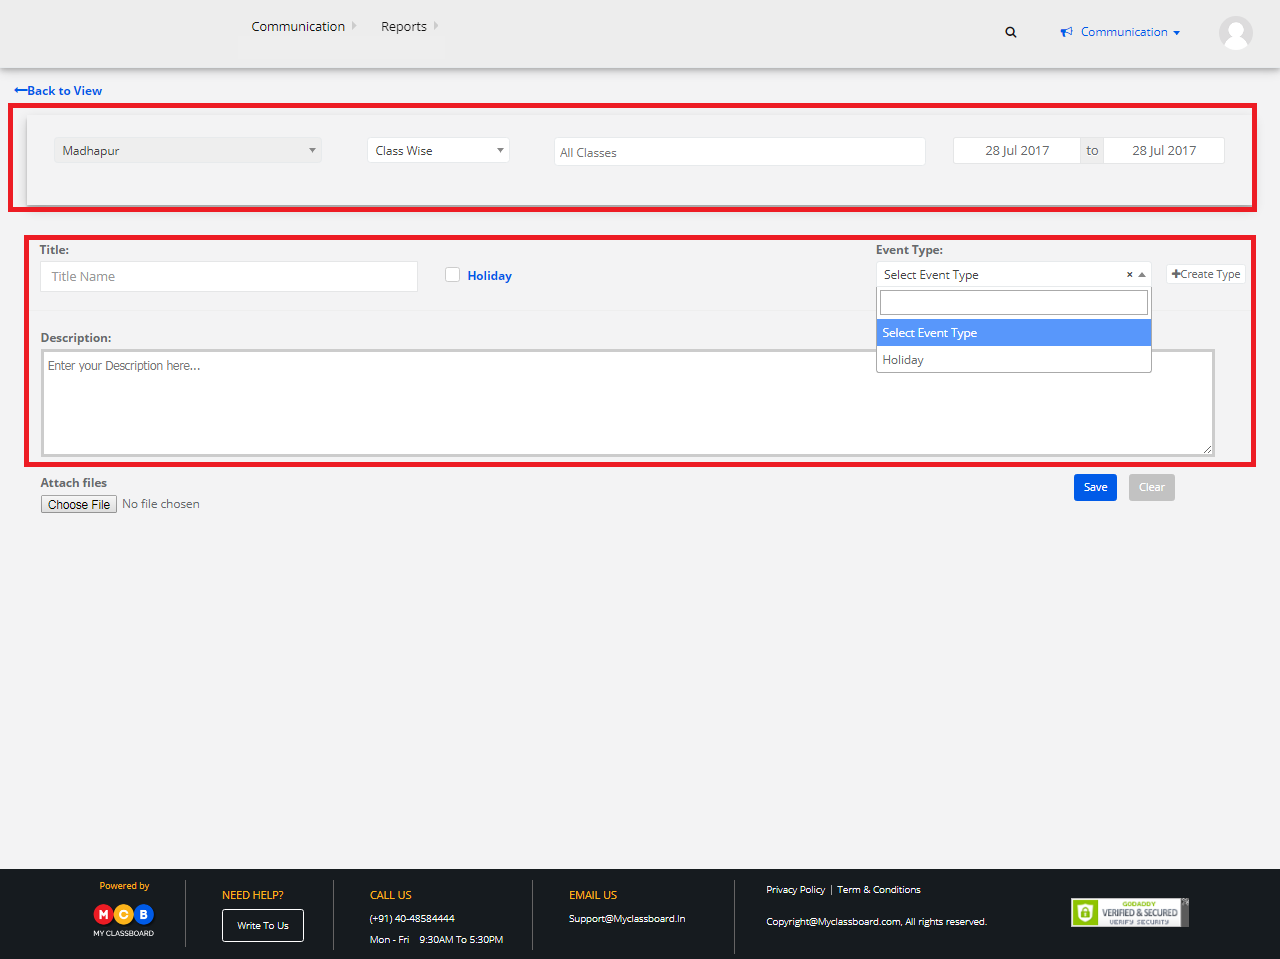
Step 4: After entering all the details, click on “Save”. Your event is created and added to the Calendar.
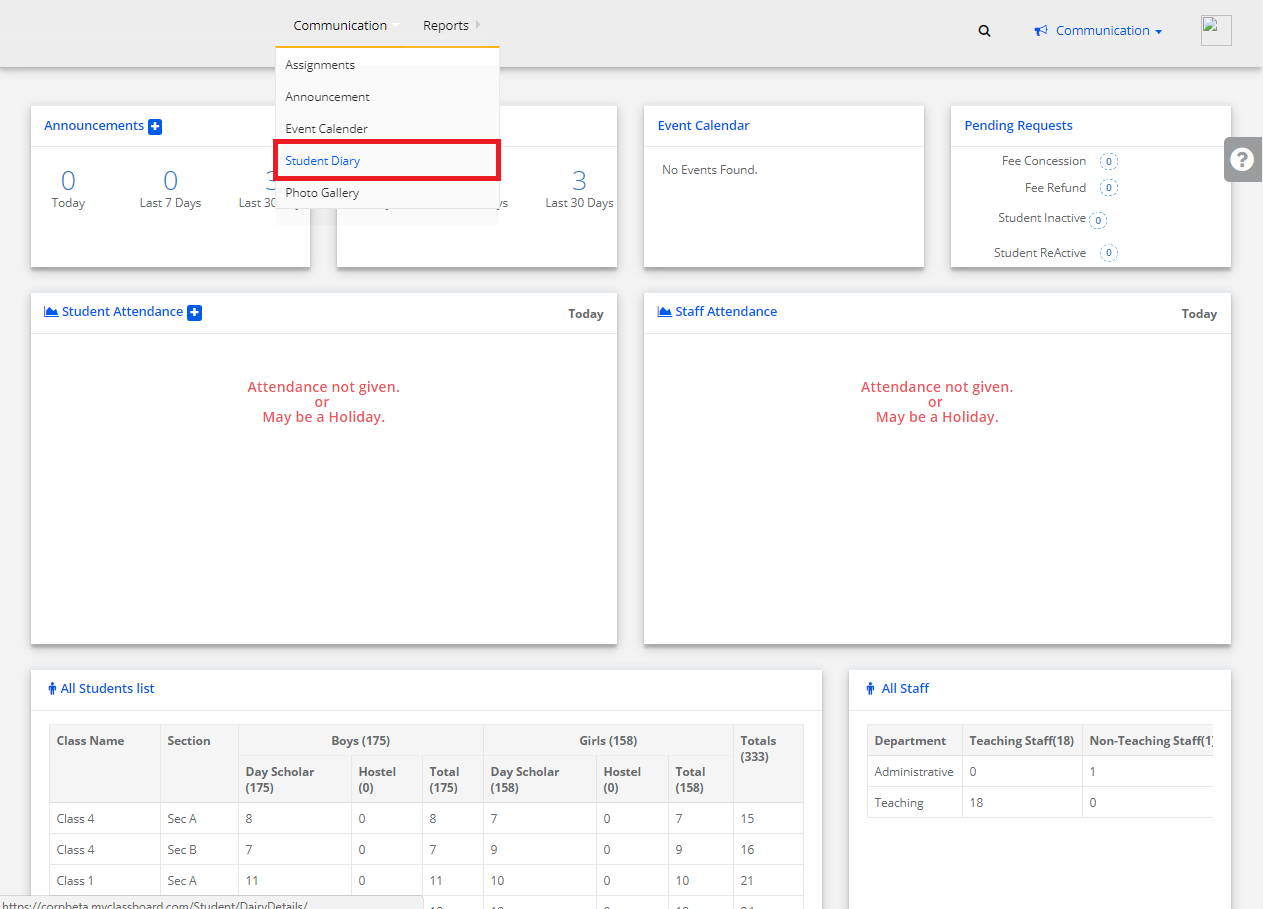
4) Student Diary
Step 1: Click on “Communication” on the top bar and select “Student Diary”.
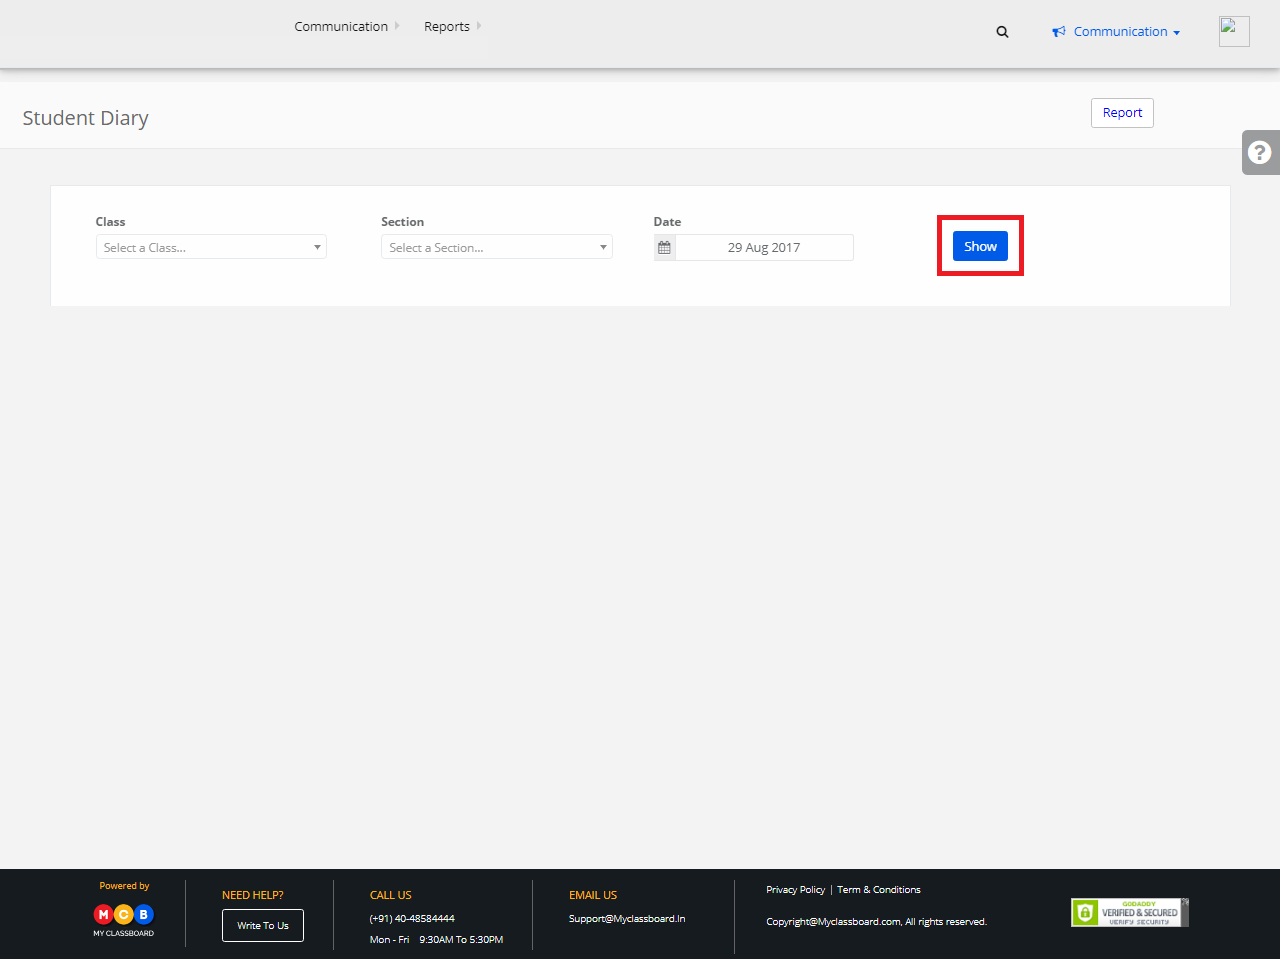
Step 2: Select the required options and click on “Show”.
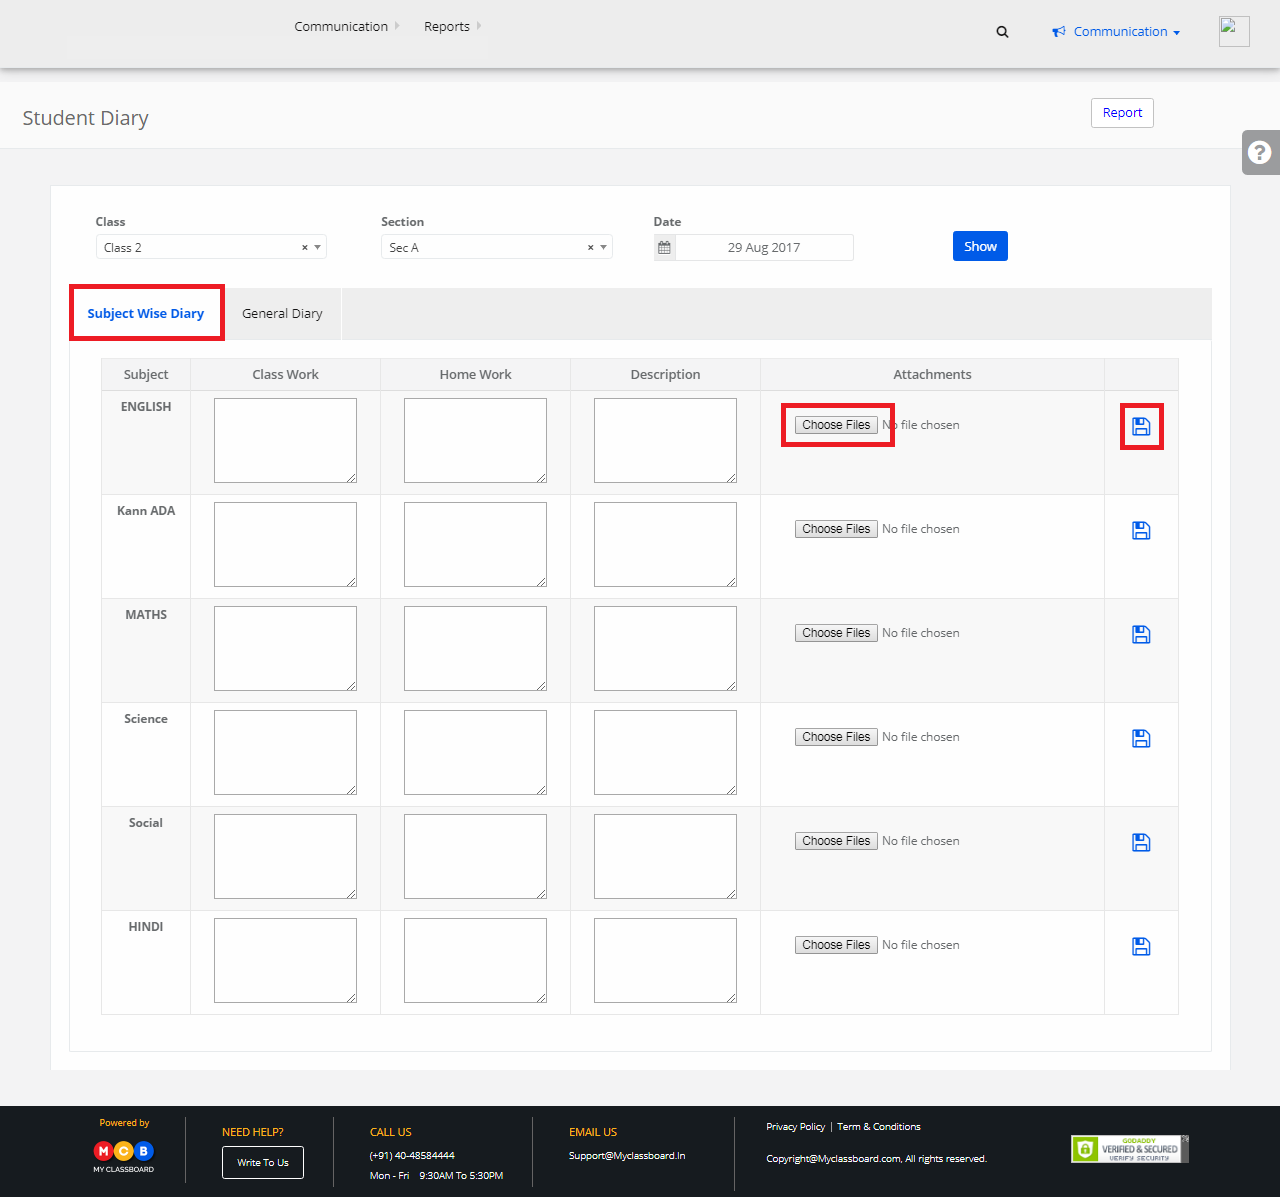
Step 3: Select Subject Wise Diary, choose a subject and enter the classwork/homework and click on “Add Record”.

Step 4: To add an attachment, click on “Choose Files” and then click on “Add Record”.
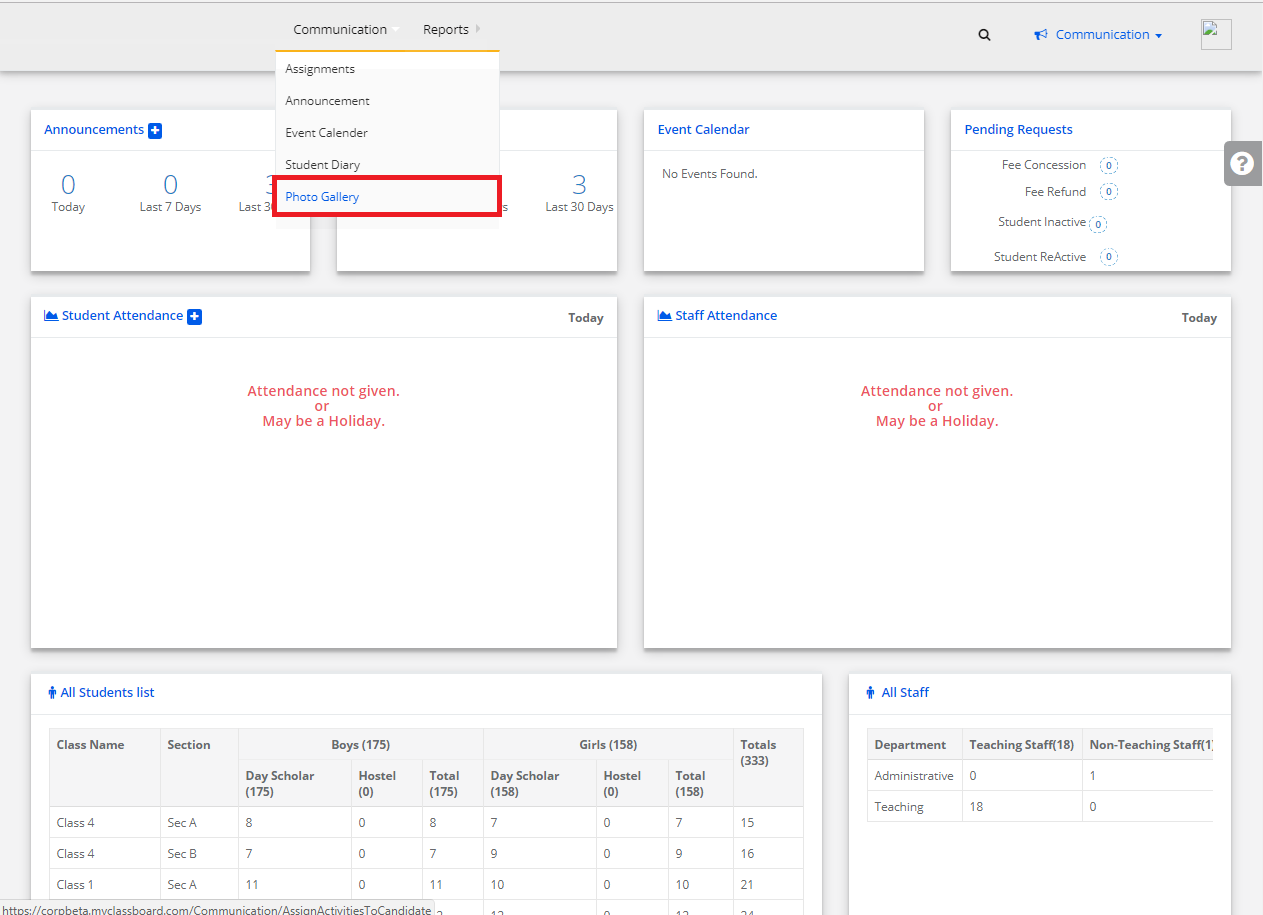
5) Photo Gallery
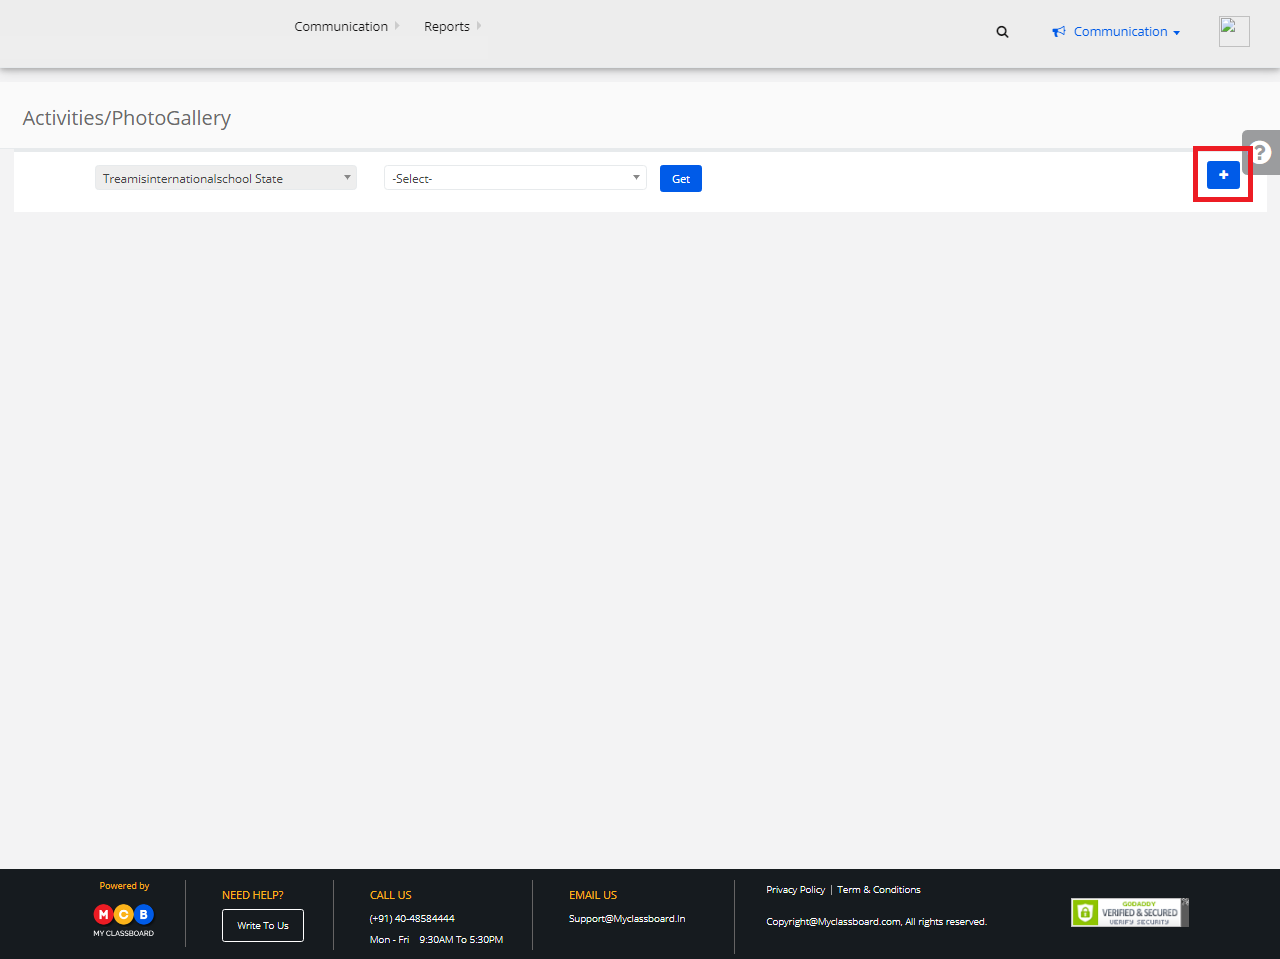
Step 1: Click on “Communication” on the top bar and select “Photo Gallery”.
Step 2: Click on the “Add” Symbol to upload photos.
Step 3: Select the required options and click on “Choose Files”.

Step 4: After uploading click on “Save”.
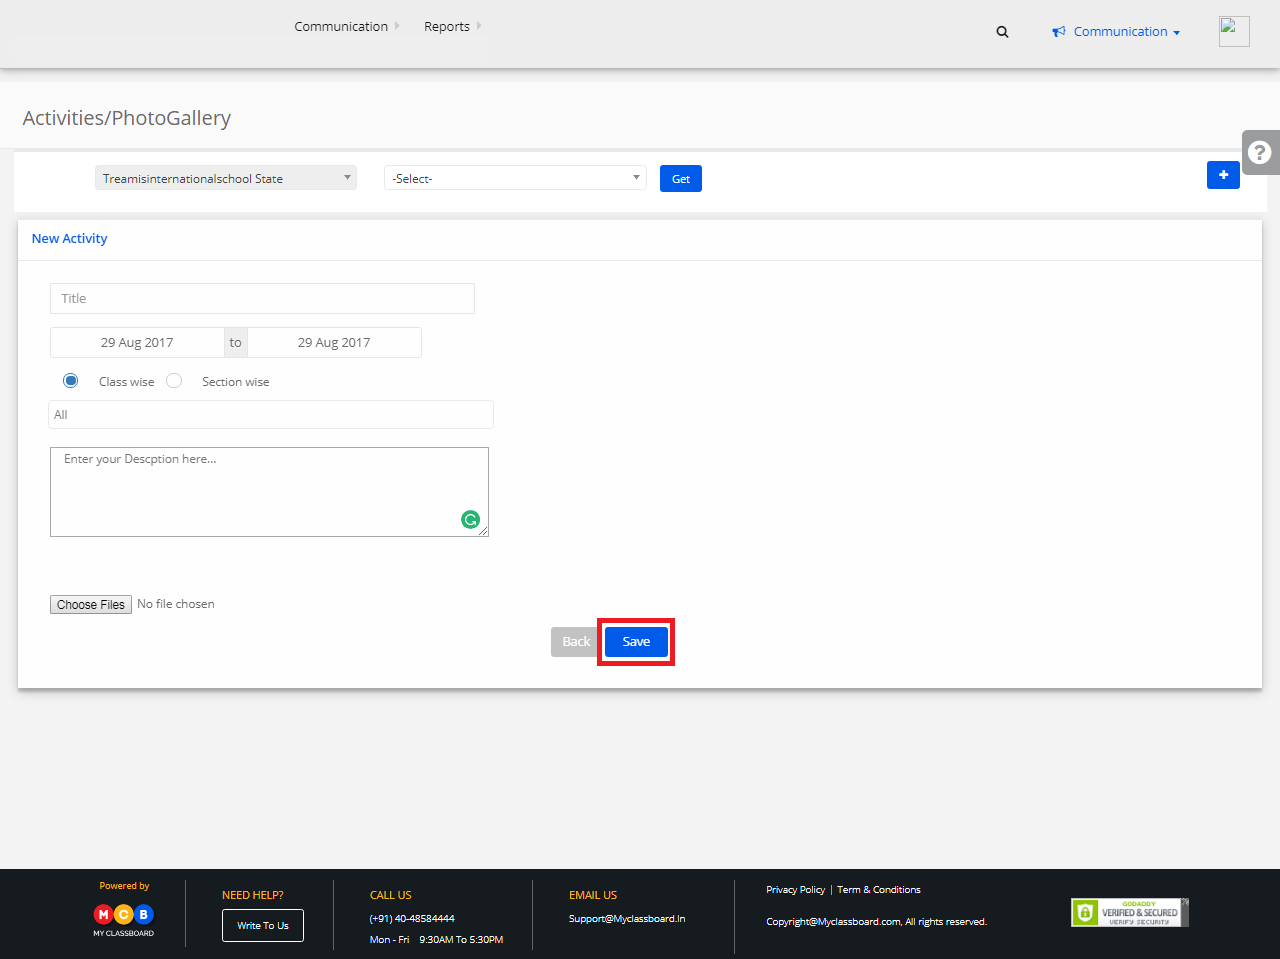
The photos are added to the Gallery.