How to Create Online Assignments? from Raveendra Choudary
There are two types of Assignments available each one aiming different purpose.
1. Offline Assignment 2. Online Assignment
Offline Assignment: Offline Assignment allows you to Post the assignment along with the attachment. You can tag chapter and topic in which the assignment is given. You can set the deadline for the assignment and allot max marks to the assignment. Students can log in and download the assignment and submit it offline in the classroom. Once the teacher evaluates the assignment, she/he can record marks of each student for the assignment.
Online Assignment: Online Assignment allows you to compose the assignment from the question bank, allot max marks and the due date for the same. Once the due date is crossed, the assignment is seen as Due date expired and students will not be able to attempt the assignment.
Please note that the only the descriptive questions are accepted to create the assignment. You can also directly compose the question and set the word limit. It will add as a new question in the question bank for future use.
Once the assignment is created, the student can complete the assignment online as per the word limit set and submit for evaluation.
A teacher can log in to her account, check how many students have submitted the assignment, evaluate the assignment submitted by the student and give marks for the same.
Create Offline Assignment:
Step 1: Login to MCB with Login Credentials, Change the access level to branch.
Step 2: Select Communication on the dashboard and you will be directed to the Communication page.

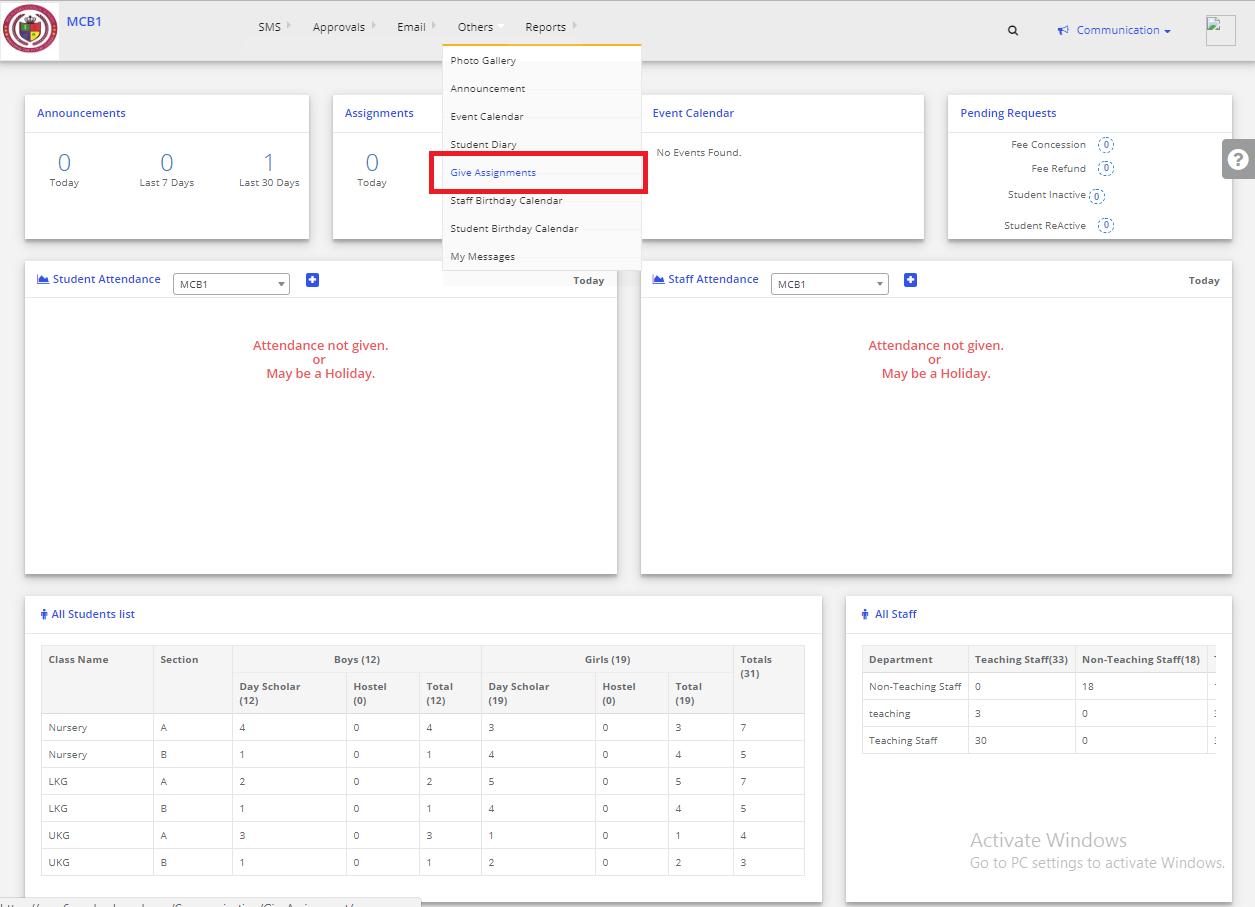
Step 3: Click on “Others” on the top bar and select “Give Assignments”.
Step 4: Click on “Add Assignments”
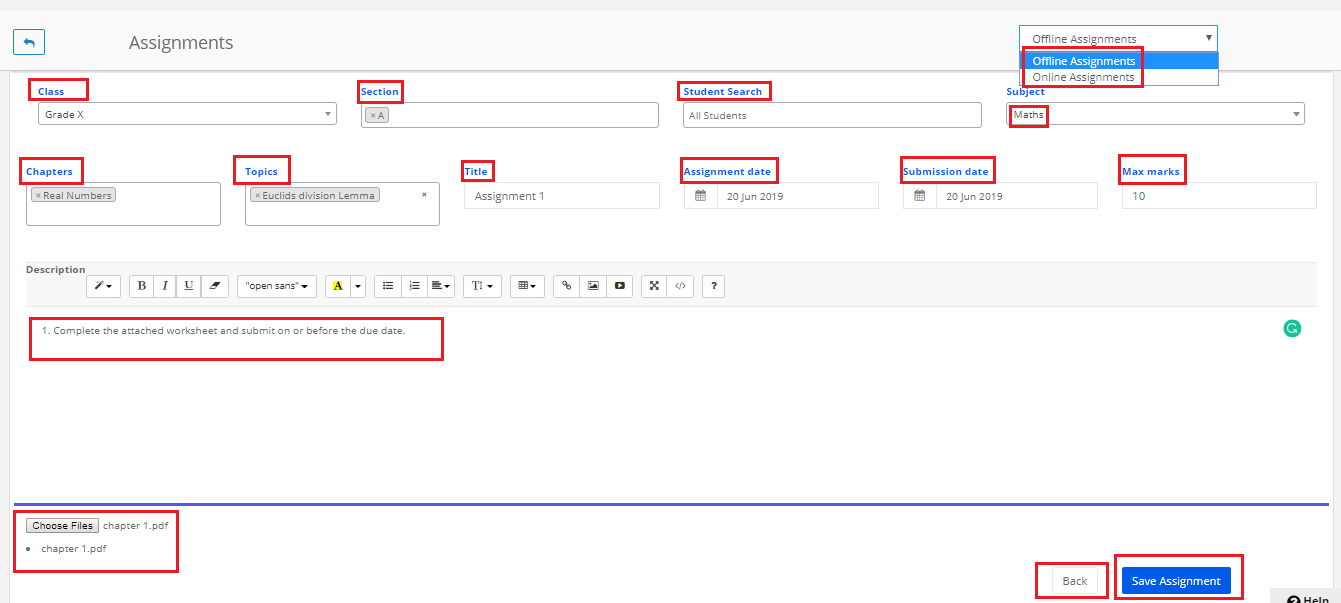
Step 5: Choose the Assignment type as Offline Assignment, Class, All Sections or specific sections, All students or specific students, Subject for which you would like to give an assignment, Tag Chapters, and Topics in which you are giving the assignment. Enter the Assignment title, choose Assignment date and Submission date. Enter Max. Marks, Assignment description, attach files if any and click on Save Assignment. Click on the Back button to cancel the assignment creation.

To check the saved Assignments,
Step 6: Select the class, section & subject then click on Get activities, you will get the saved Assignment.

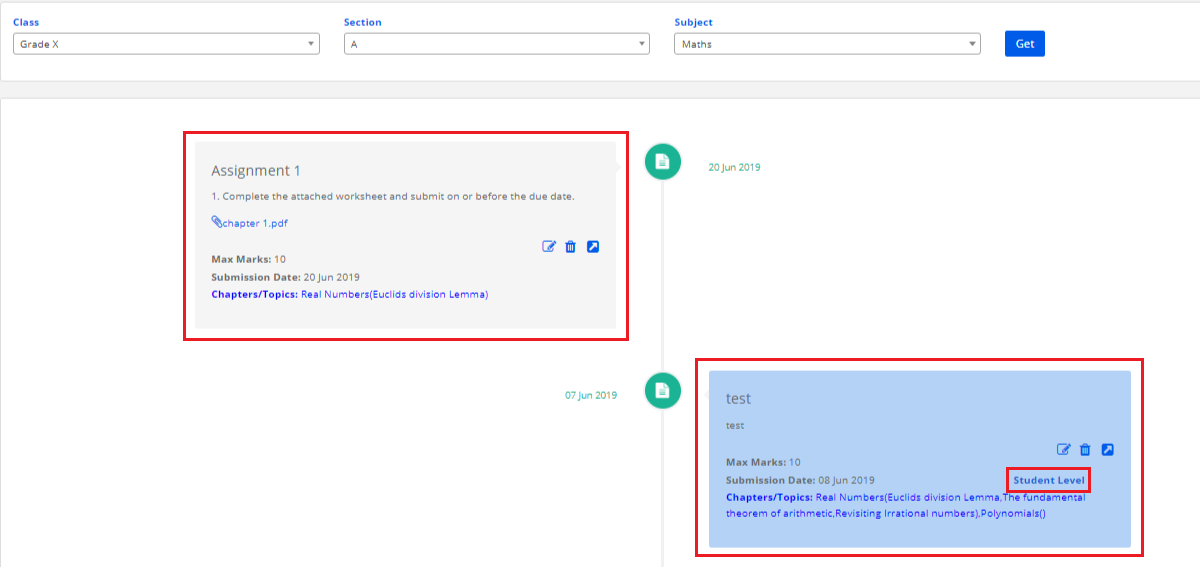
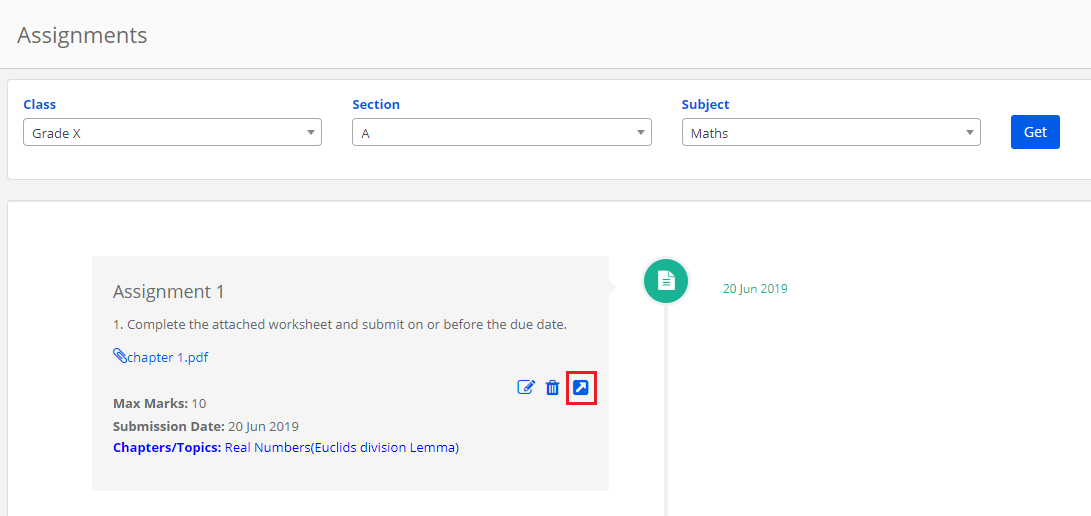
Step 7: The assignments created for the subject are listed date wise. Please note that the assignment created for all students in the Grey color box and the assignment created for a specific student is shown in Blue color box. Find the assignment details within the box.
To edit the saved Assignments,
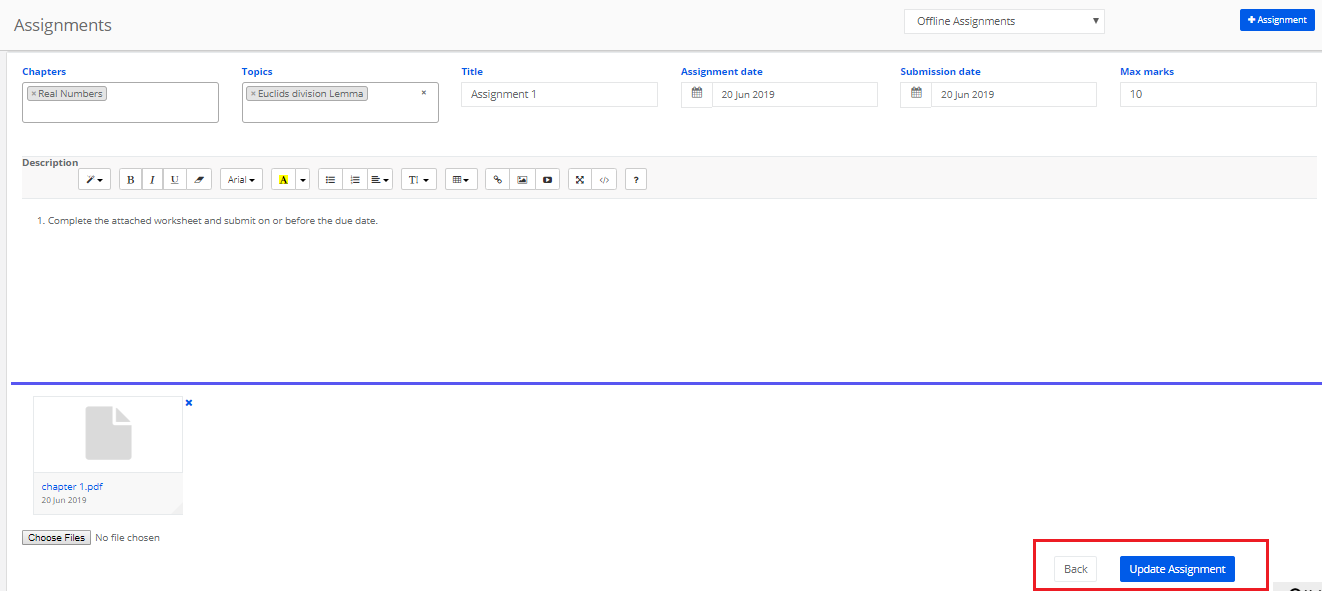
Step 8: Click on Edit icon to edit the assignment.

Step 9: Make the necessary corrections and click on update assignment to save the changes or Back button to cancel the changes.
To edit the delete the Assignment,
Step 10: Click on delete icon and confirm the deletion by clicking on Yes. If you click on No, assignment deletion will be canceled.

To enter marks,
Step 11: Click on Arrow mark.
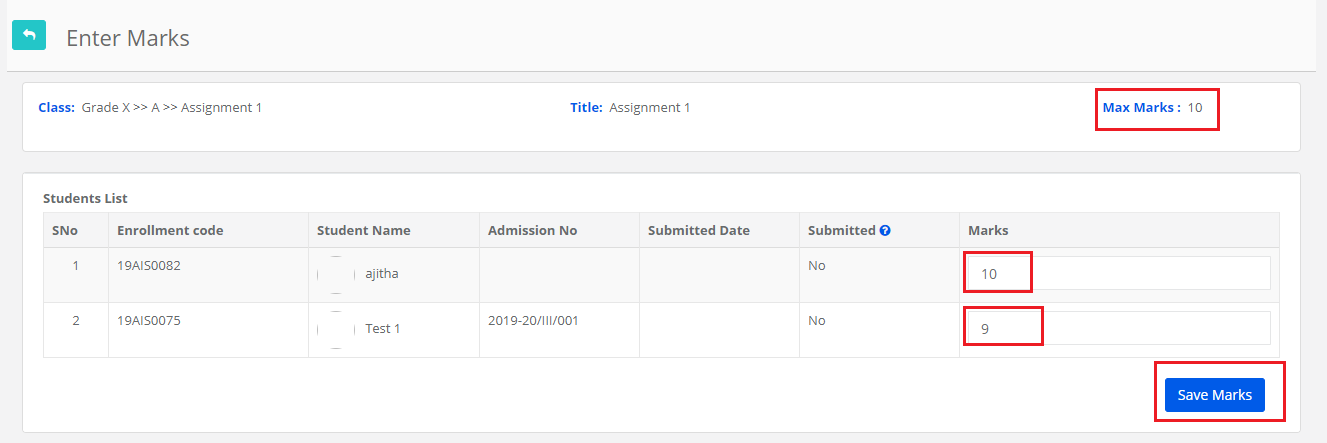
Step 12: Enter marks and click on Save. Please make sure that marks are not greater than the max marks set for the assignment.
Create Online Assignment:
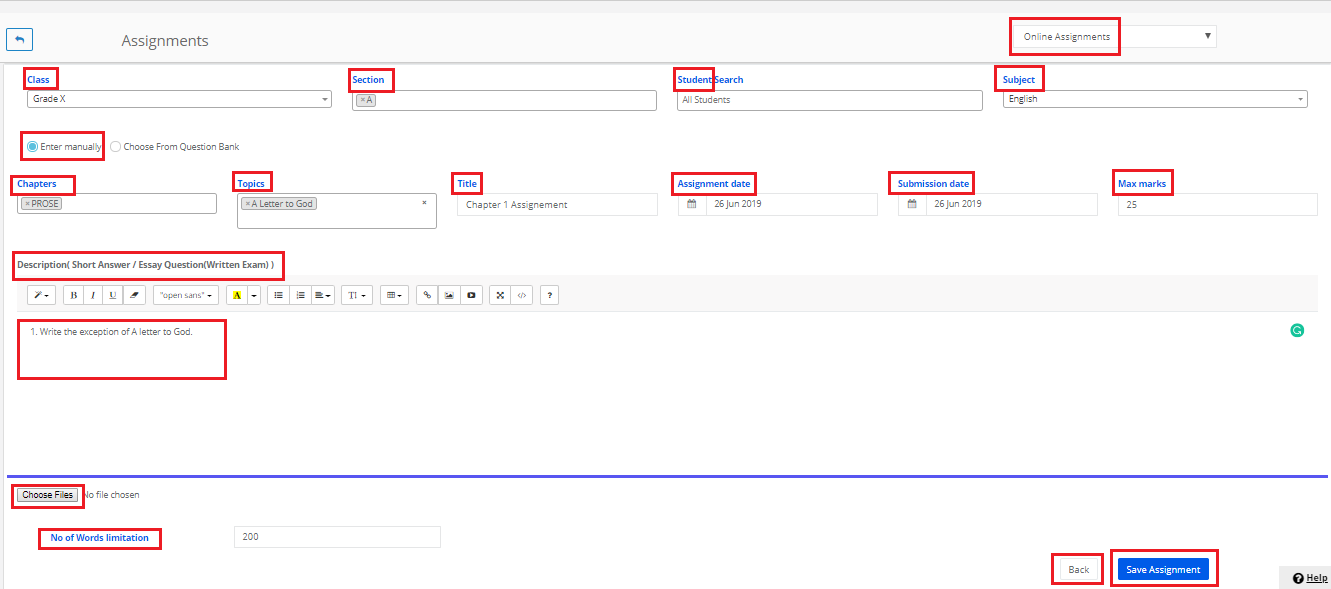
Step 13: Choose the Assignment type as Online Assignment, Class, All Sections or specific sections, All students or specific students, Subject for which you would like to give an assignment, Choose enter manually option to enter a question, Tag Chapters, and Topics in which you are giving the assignment. Enter the Assignment title, choose Assignment date and Submission date. Enter Max. Marks, Assignment description, attach files if any, enter word limit for the student to write the answer and click on Save Assignment. Click on the Back button to cancel the assignment creation.
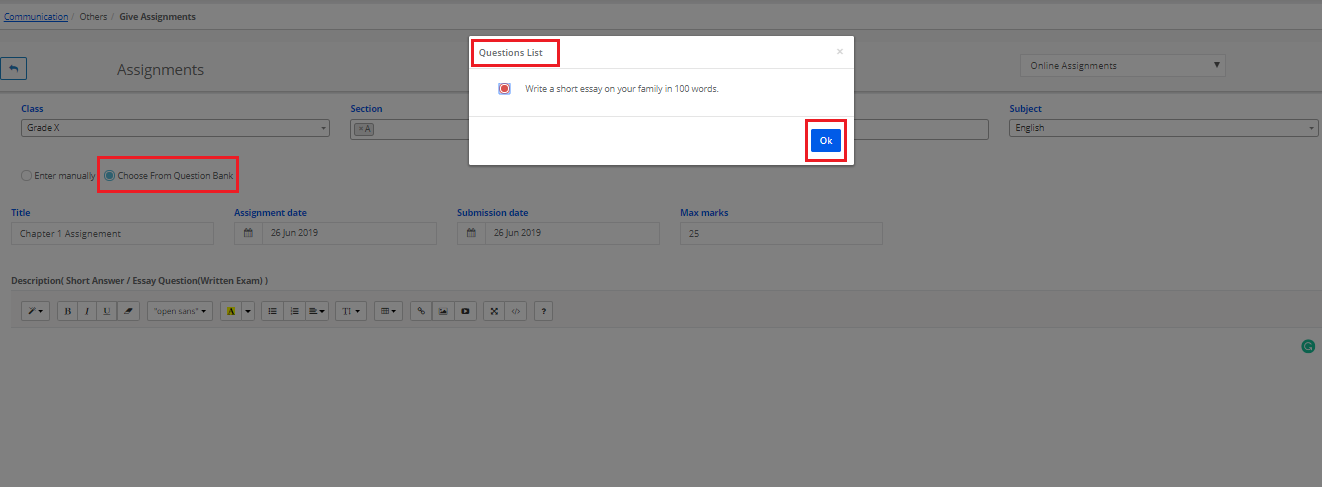
If you want to choose a question from the question bank, it will list the questions available in the question bank for the subject. Choose the question and click on Ok. Please note that the questions created under descriptive/essay type only would list here for creating an assignment.
To check the saved Assignments,
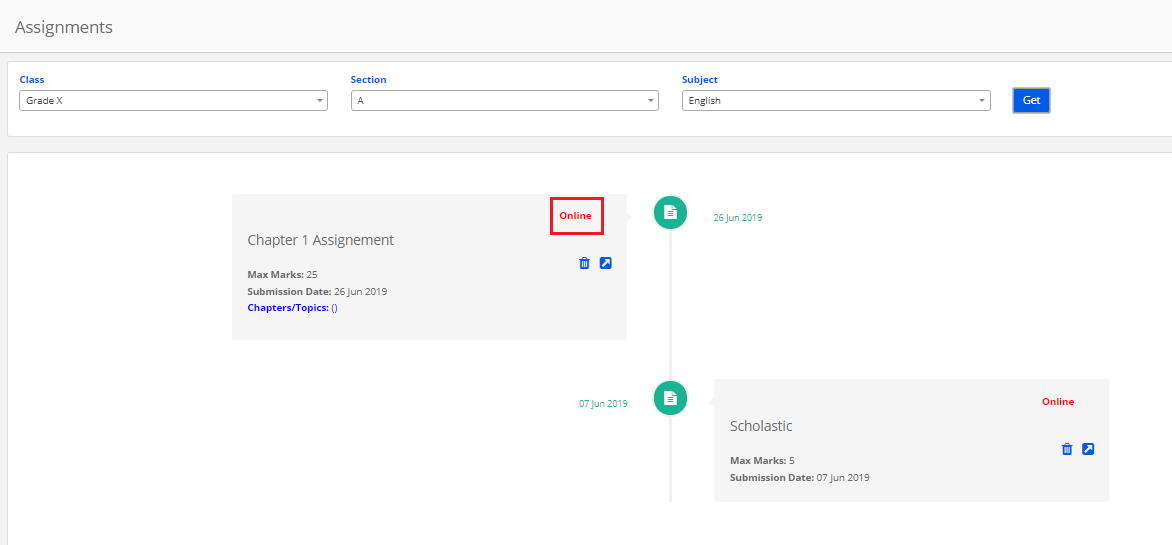
Step 14: Select the class, section & subject then click on Get activities, you will get the saved Assignment.

Step 15: The assignments created for the subject are listed date wise. Please note that the assignment created for all students in the Grey color box and the assignment created for a specific student is shown in Blue color box. Find the assignment details within the box. The assignment created as Online Assignment would be labeled as Online in the box.
Please note that the edit option for online assignment is not available. If you need any change in the assignment, you need to delete the assignment before any student attempts it.
To delete the assignment,
Step 16: Click on Delete icon and confirm the message

To enter Marks,
Step 17: Click on Arrow mark.

Step 18: Click on Yes to view the assignment submitted by a student.
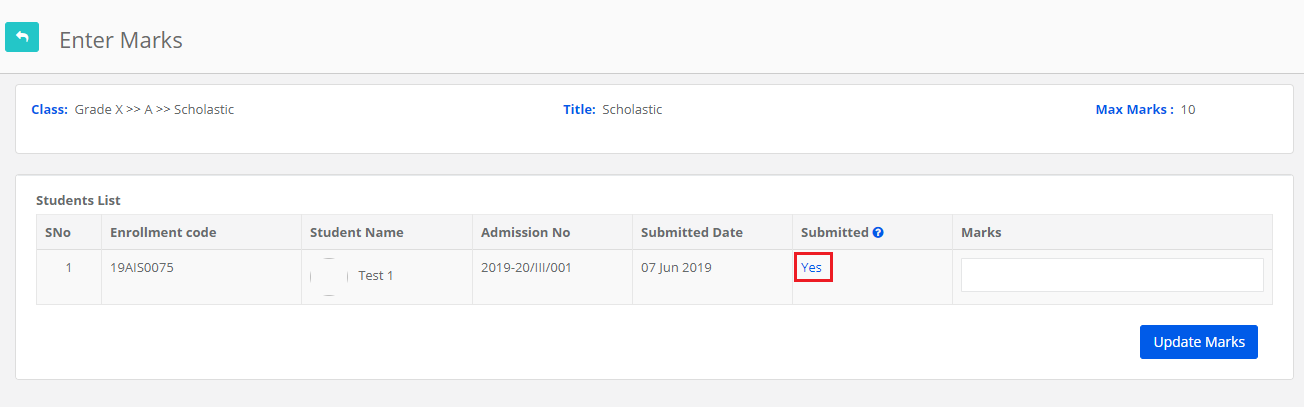
Step 19: Enter marks and click on Save. Please make sure that marks are not greater than the max marks set for the assignment.
