Staff forms are used for collecting the specific data of staff from their login or saving the data of staff from school admins login depending on the visibility settings.
Create Form:
Create form option is available in system admin login only. Once the form is created it is available for all branches users and parents [if it is activated for them].
Step 1: Login to MCB with system admin Login Credentials.
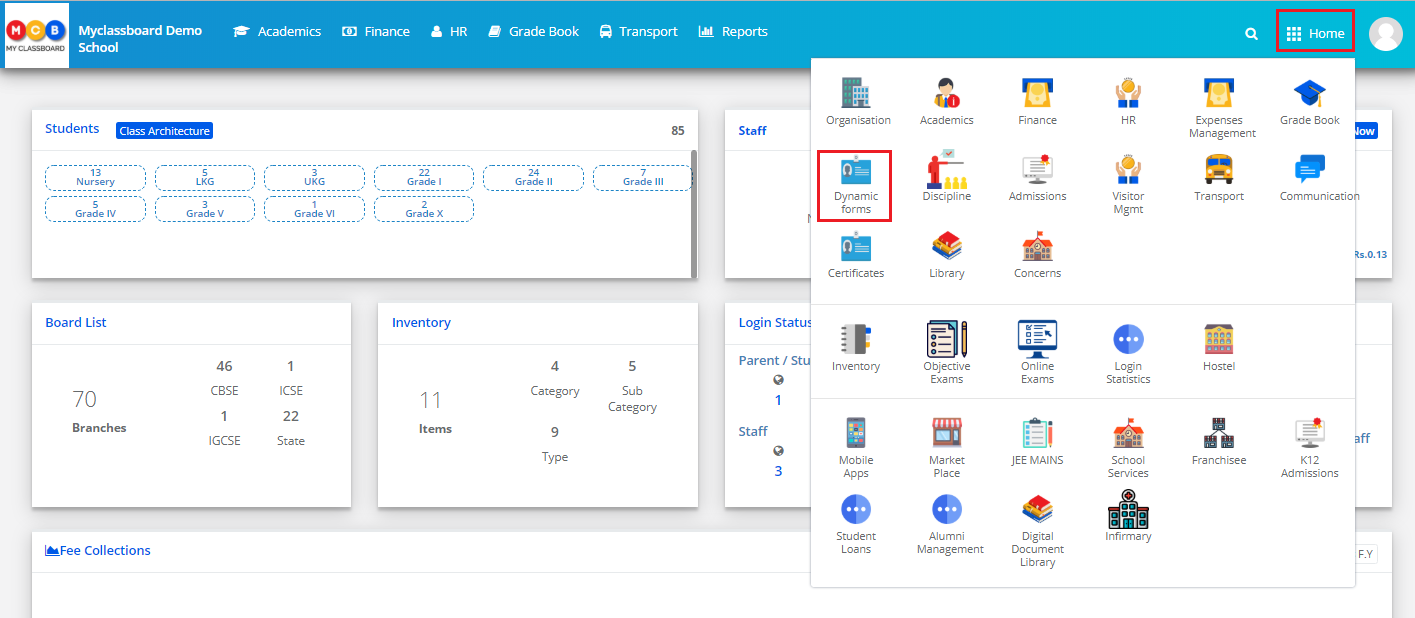
Step 2: Click on Dynamic forms module by clicking on the Home next to the profile picture.
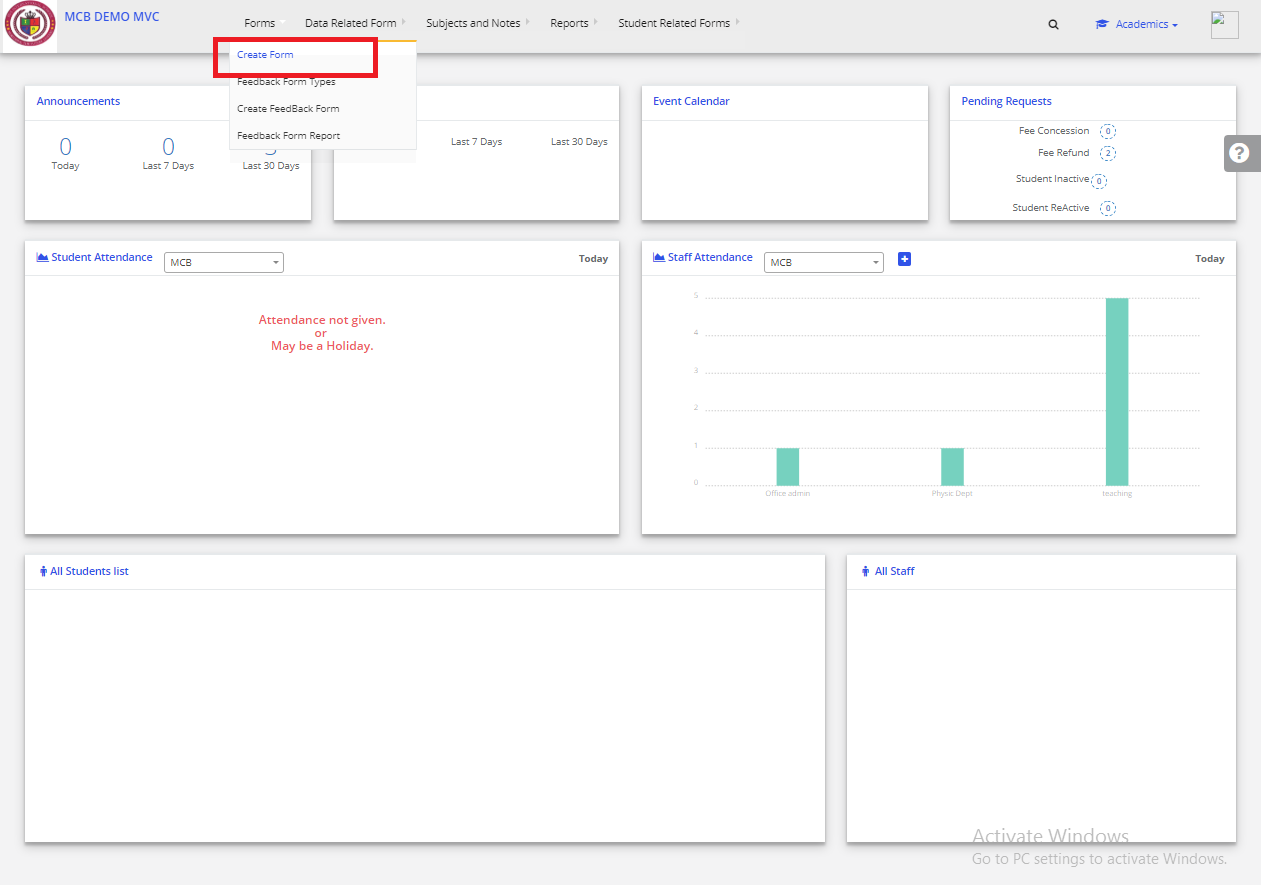
Step 3: Click on “Forms Menu” on the top bar and select “Create Forms option”.
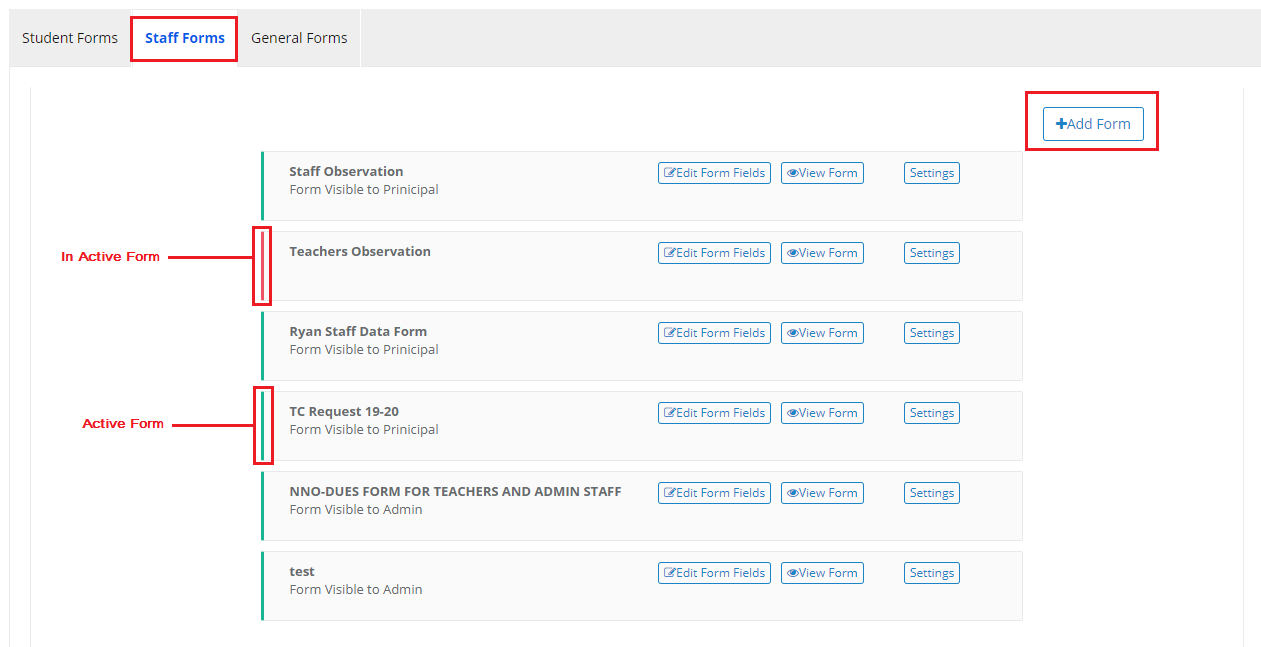
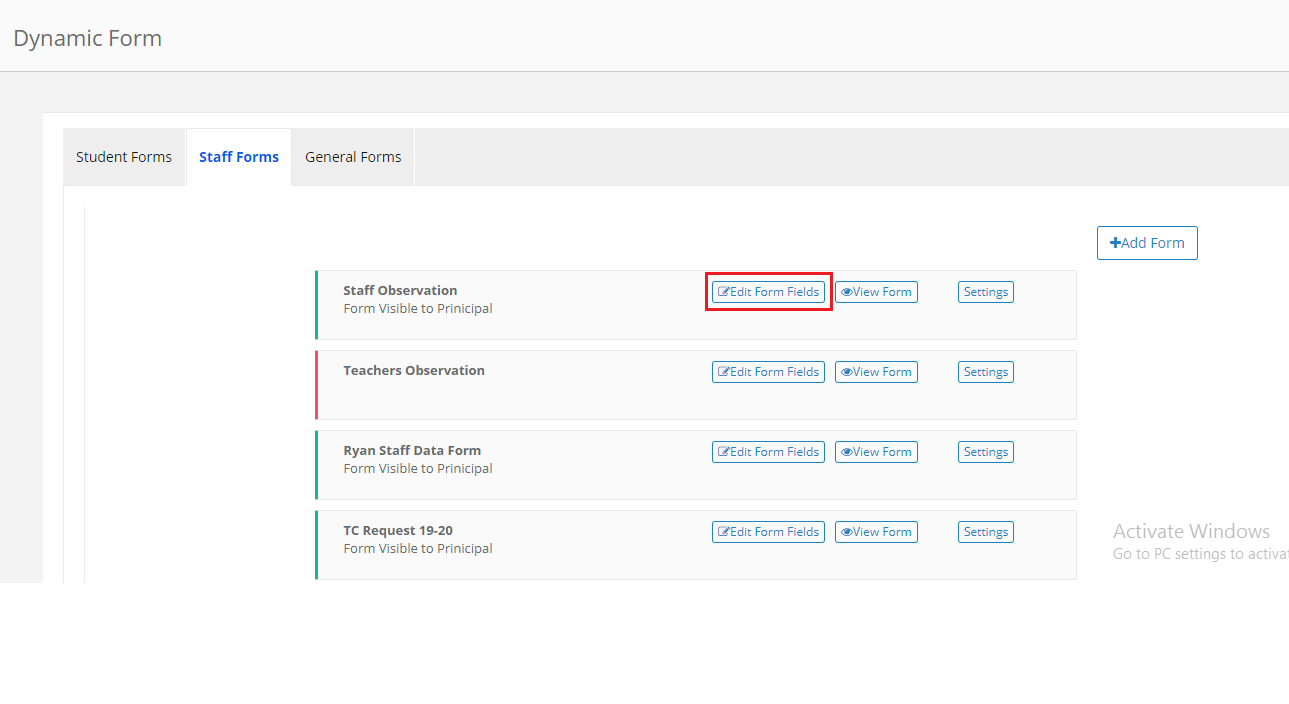
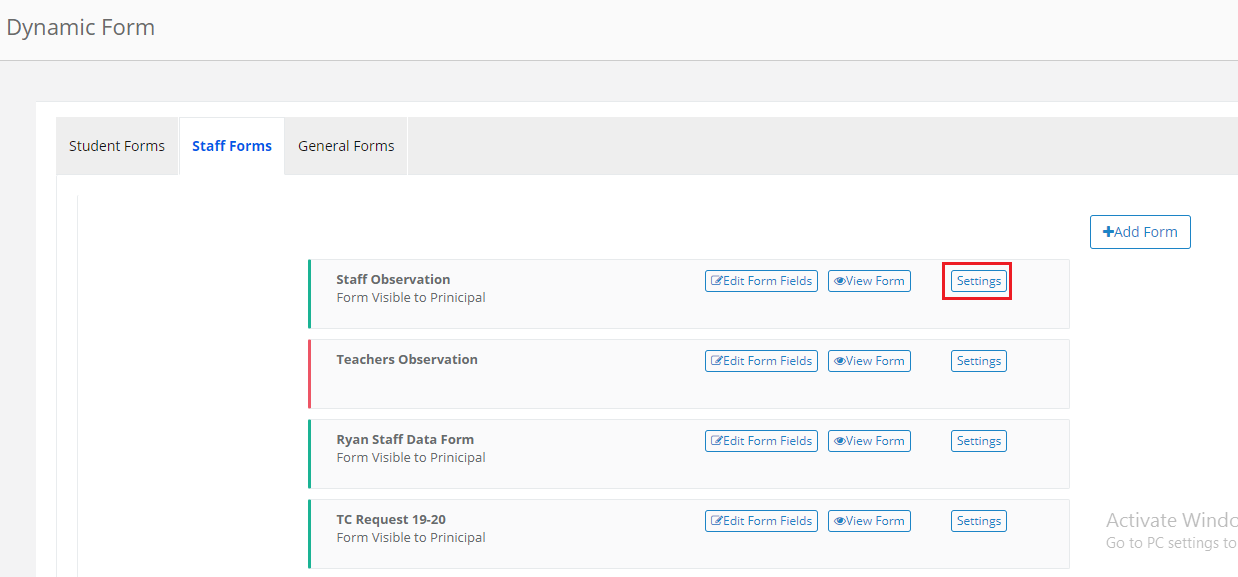
Step 4: The forms which are available are listed.
The red color against the form indicates that the form is in an inactive state. The green color indicates that the form is an inactive state.
Edit Form Fields: This option lets you edit the fields of the form.
View Form: View form option shows you how the form would look like while entering the data.
Settings: This option lets you make the settings for the form.
Add a form: This option lets you create a new form.
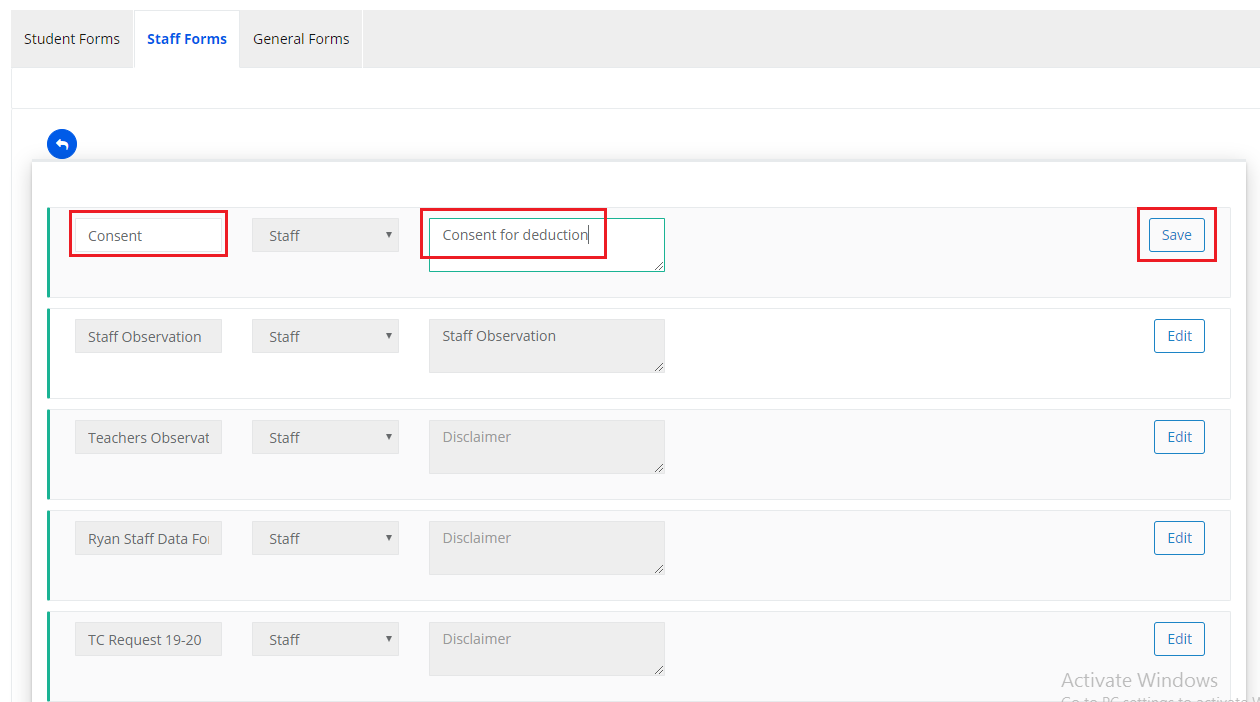
Step 5: To create a new form, click on Add Forms Option, Give Form name, Disclaimer and Click on Save
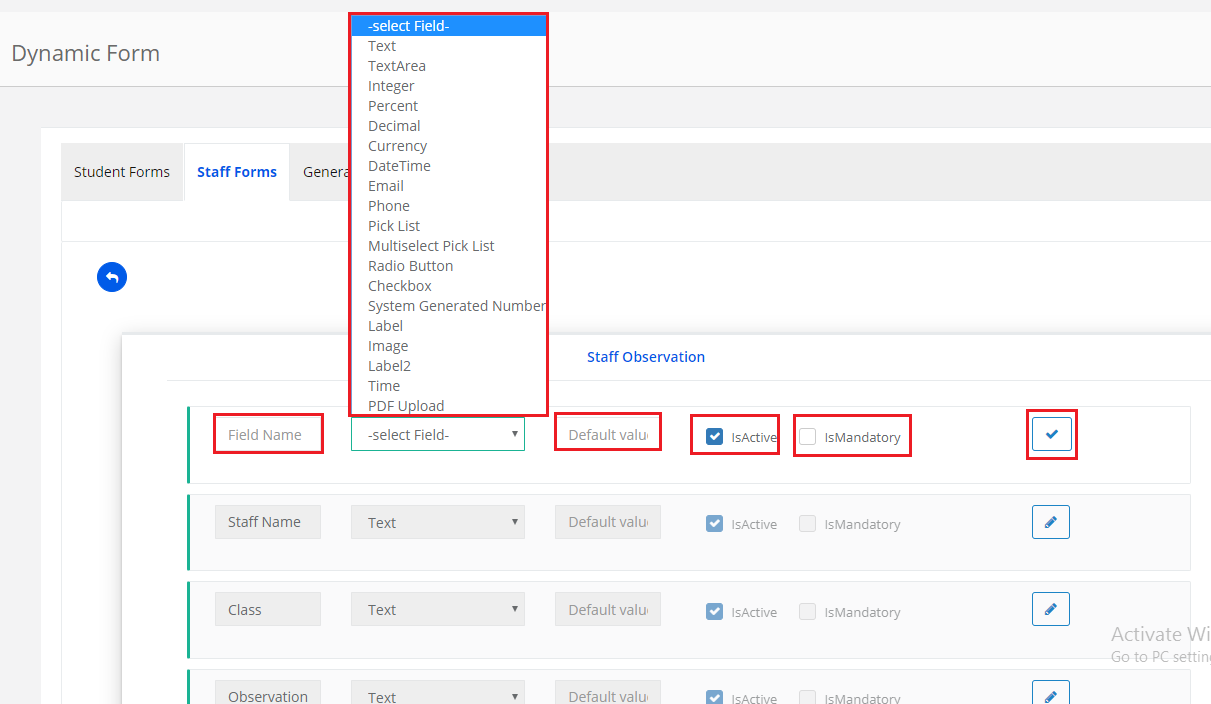
Step 6: To add the fields to the form click on the edit form fields. Enter the data in the field name, Select the Appropriate field types & then click on save.
Step 7: Add the field name, choose the data type, enter the default value if any, keep the field active by checking active checkbox, Check Mandatory if the field needs to be entered mandatory. Click on Tick mark to Save the field.
Please note the functions of the field types as follows:
Text: Accepts text that can contain any type of characters, i.e. numbers, special characters, plain text, etc.
Text Area: This is similar to a Single Line text field and can contain any type of character, but with more text area. Appropriate for entering comments or to store addresses.
Integers: Accepts numbers only.
Percent: Accepts data with percentage.
Decimal: Accepts Decimal Numbers only.
Currency: Accepts numbers in currency.
Date and Time: Accept date-time values.
Email: Accepts Email id with @ symbol and domain extension.
Phone: Accepts a 10 digit mobile number.
System Generated Number: TO generate numbers in a sequence automatically.
Label: Use this field to display text in your Form. It will not be used to accept any entries. Rather, it’s just to display information to the User.: Accepts a 10 digit mobile number.
Picklist: Creates drop-down with the specified options.
Radio Button: To select a single value from the options given.
CheckBox: To select multiple options from the options given.
Label: Use this field to display text in your Form. It will not be used to accept any entries. Rather, it’s just to display information to the User.
Image: Accepts Image files upload
PDF Upload: Accepts PDF files upload
Time: Accepts Time
Is Active option enables the field activities in the form? When it is unchecked the field will be hidden in the form.
Is Mandatory option makes the field mandatory to save the form? Without inputting data into the field the form will not be saved.
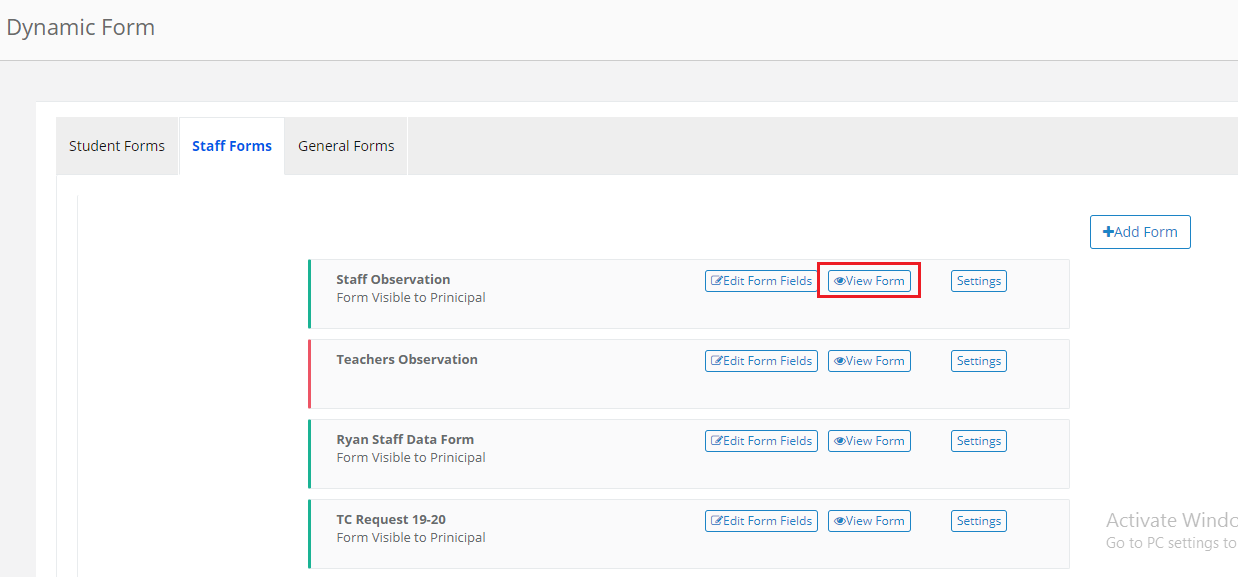
Step 8: To view the form with the fields that are created in the form, Click on View form option against the form name.
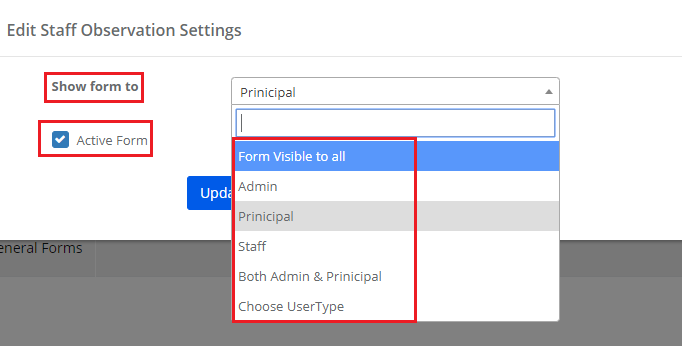
Step 9: To make the settings for a form, click on the Settings option against the form name.
Step 10: You can make the following settings for a form.
Show Form to: Give access to the form for filling the data to all system admin, Staff and Principal or individually by selecting the respective role.
Active Form: You can keep the form Active by checking this option. When this is not selected, the form is made inactive and is not available for any user.
Enable the form in Parent portal: The form is made available for the parent to fill the data when this option is selected.
How can a school admin fill the form?
Step 11: School admin can fill the form from two screens in this login if the form access is given.
1. Search for staff screen
2. HR module
Step 12: To fill the form by searching a student, enter the student name/enrollment code in the search field and click on forms tab upon reflecting the student data.
Step 13: Choose the form name from the drop-down and click on the +Add New button.
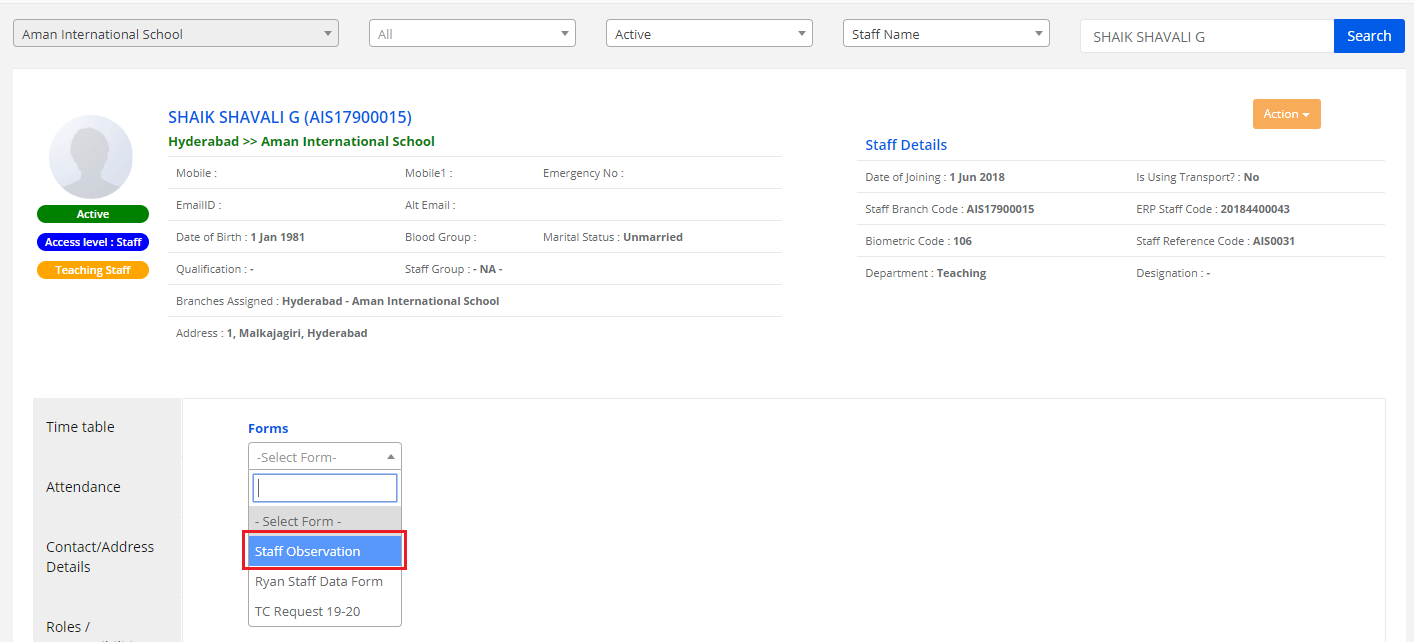
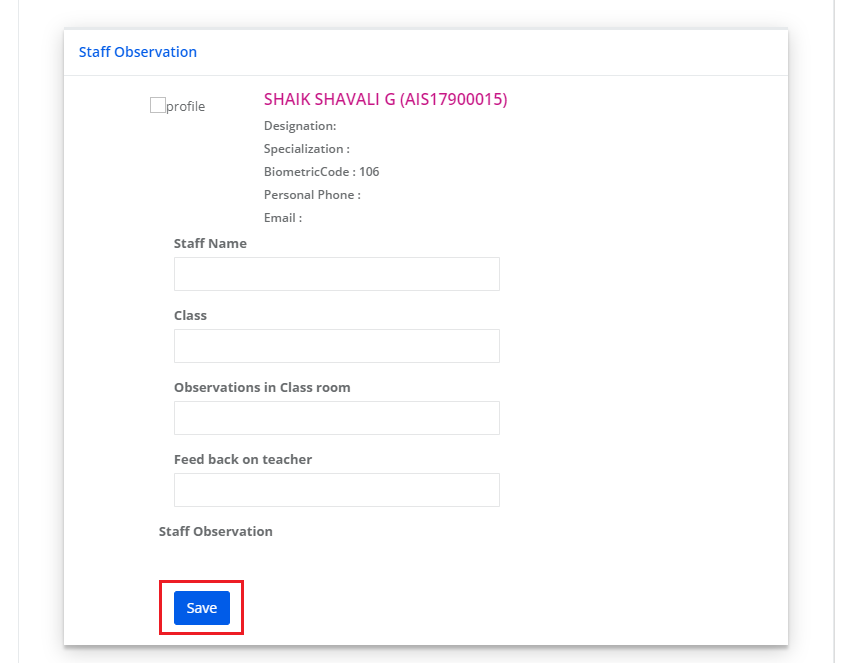
Step 14: Fill the form and click on the Save button.
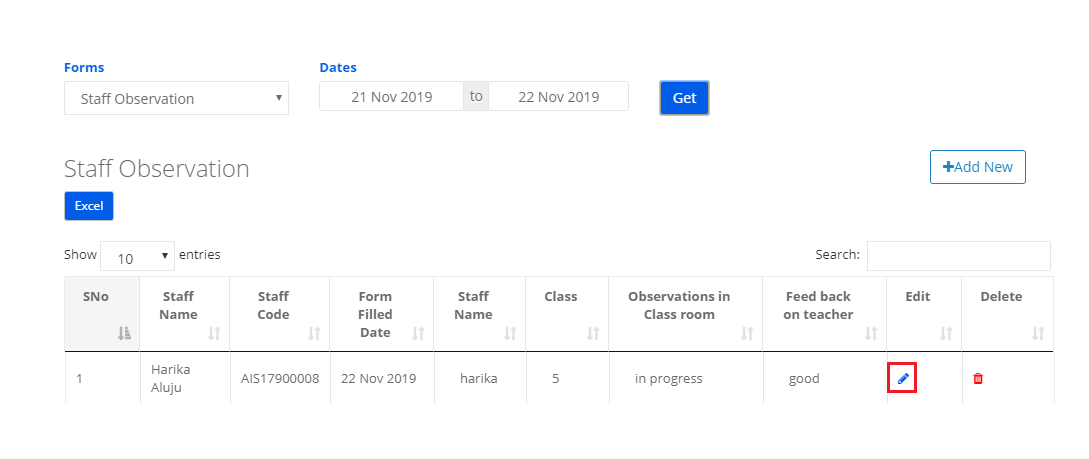
Step 15: To Edit the record, click on Edit icon.
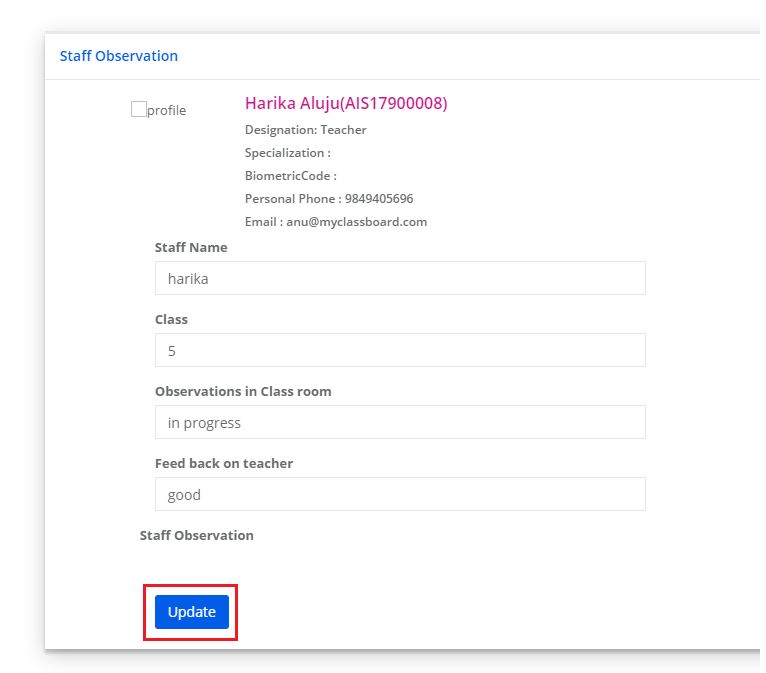
Step 16: Make the changes required and click on the Update button to save the changes.
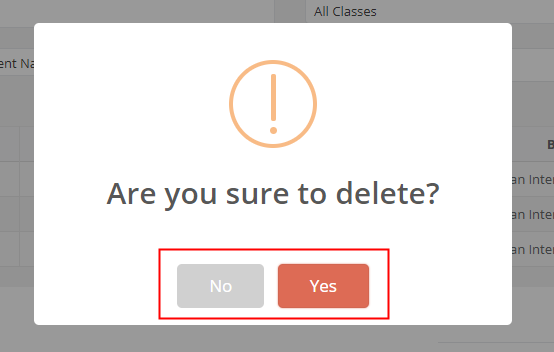
Step 17: To delete the record, click on the delete icon.

Step 18: Click on Yes to confirm the deletion or No to revert.
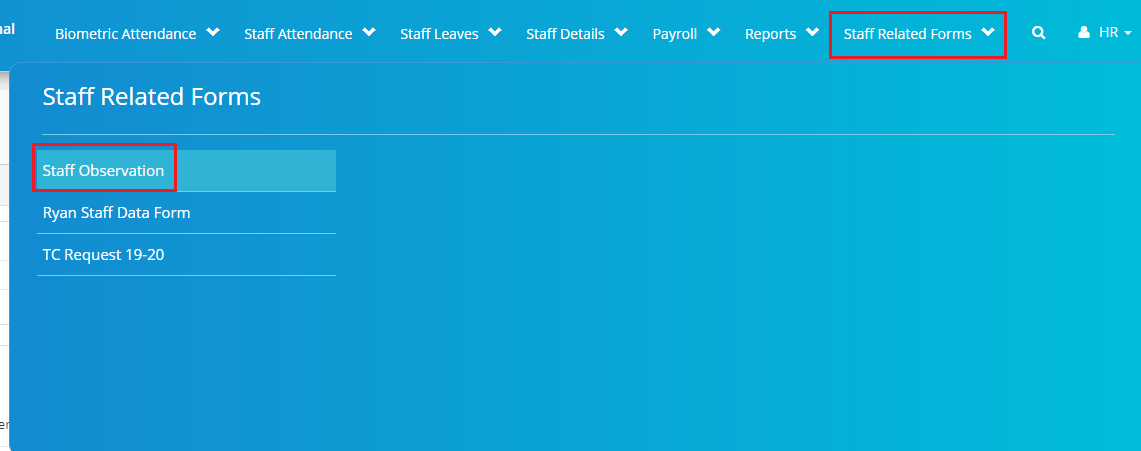
Step 19: To fill the form from Report, Go to HR module, click on the form name under Staff Related Forms Menu.
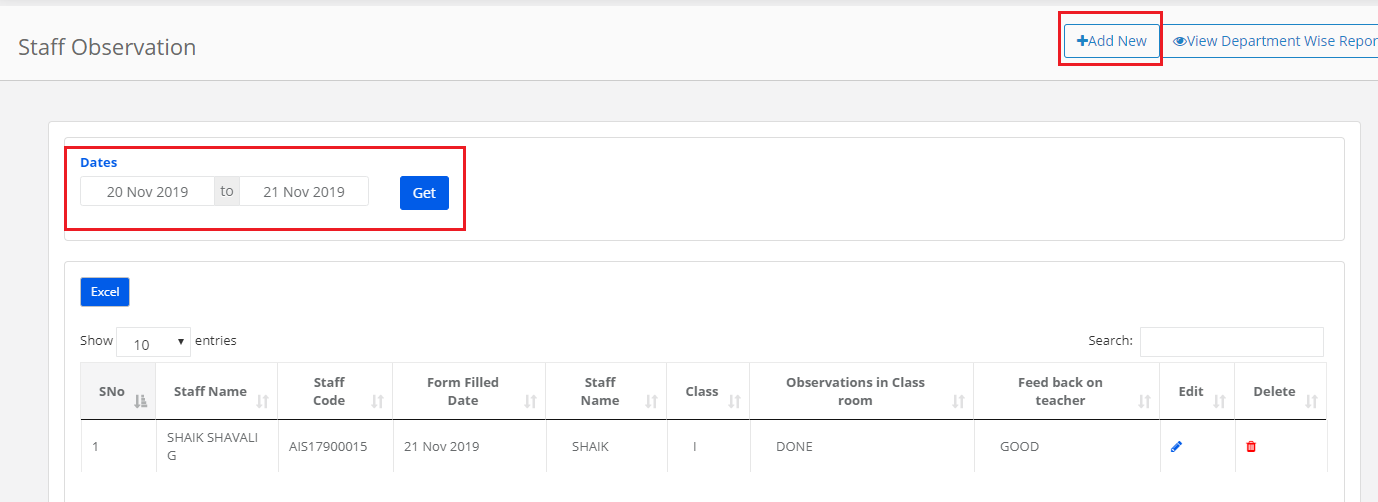
Step 20: It will list the records that are already added in the form. Click on Add New button to fill the form.
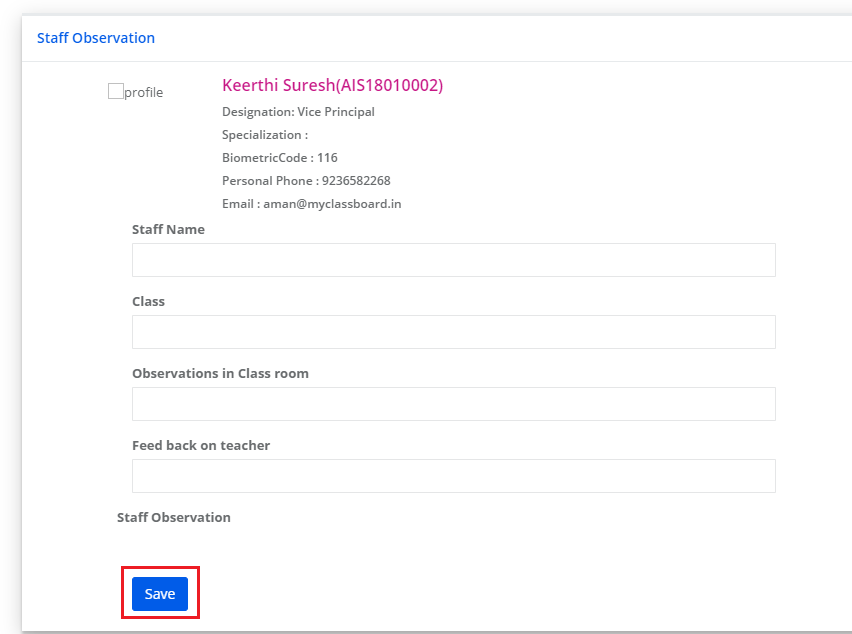
Step 21: Search for the Staff for whom you would like to fill the form.
Step 22: Fill the form and click on the Save button.
Step 23: As you save the form, the list shows for whom the data is filled.
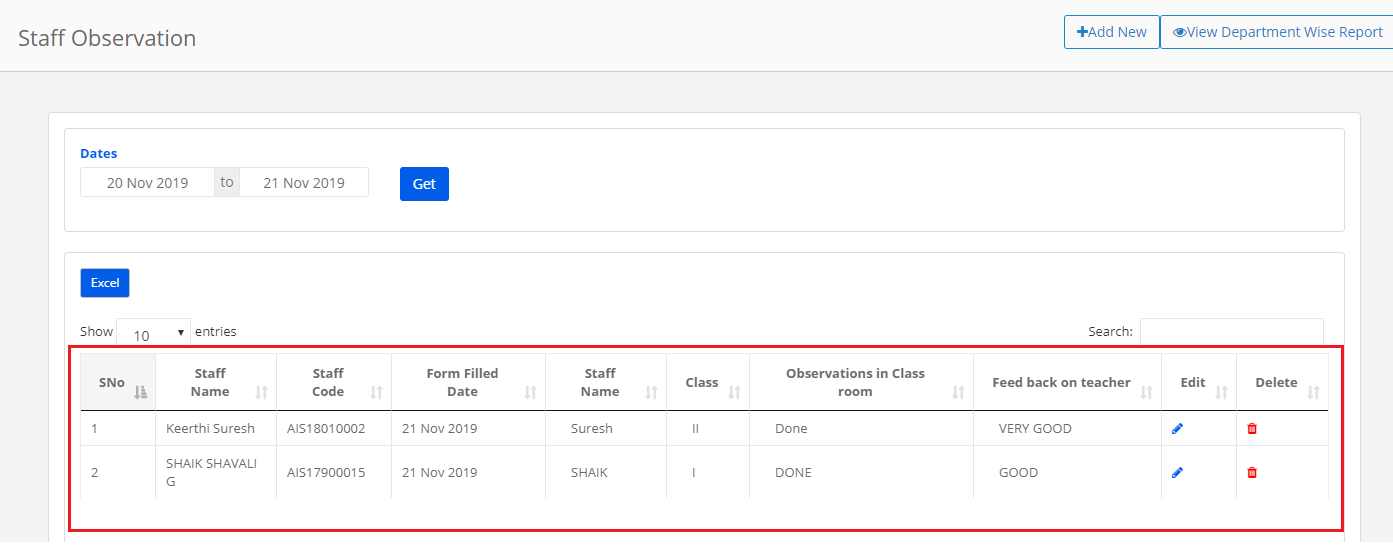
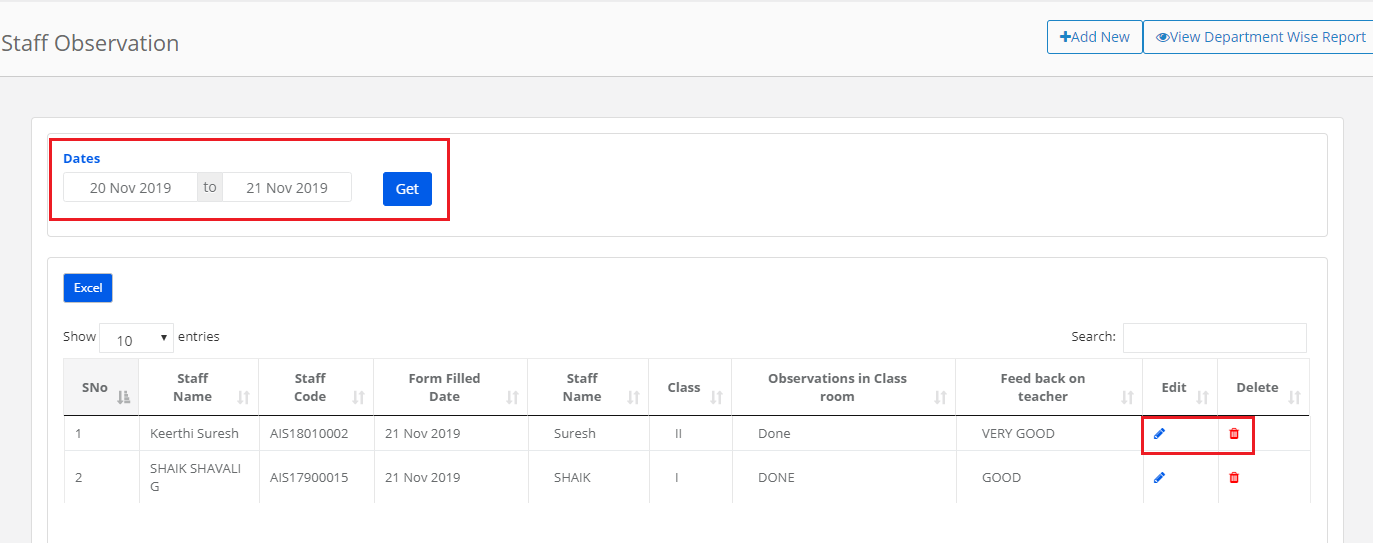
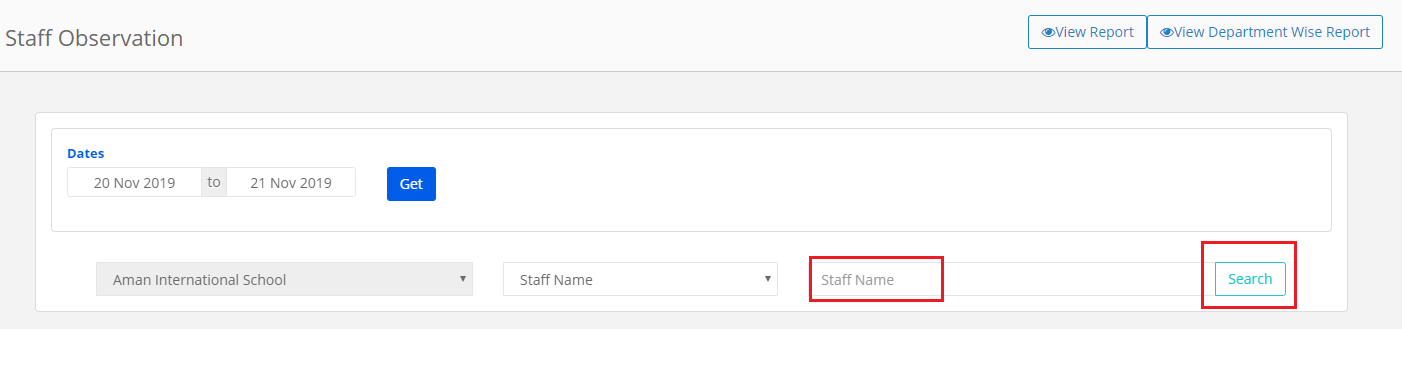
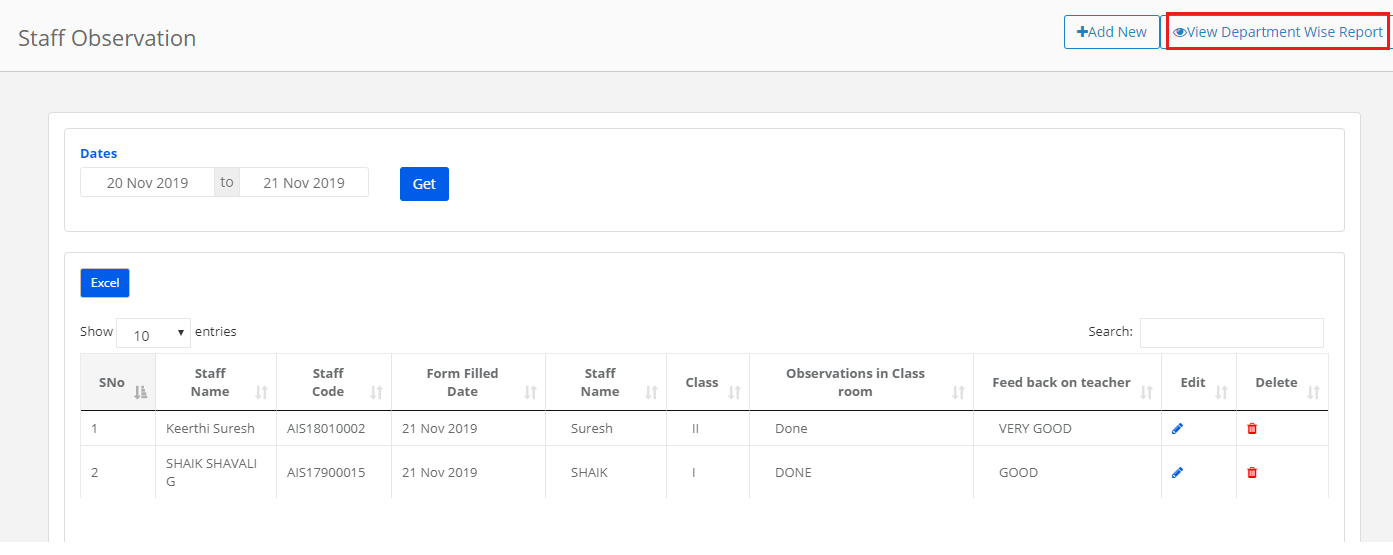
Step 24: To view the department wise report, Click on View Department Wise Report Button.
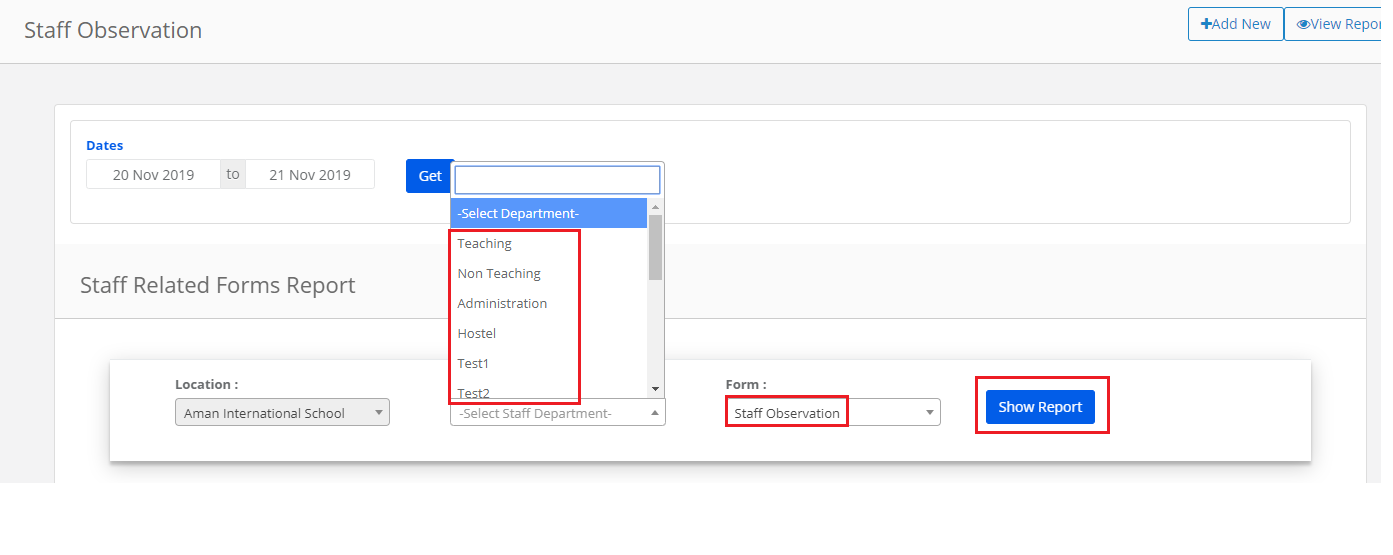
Step 25: Choose the department name, form name and click on the Show Report button.
Step 26: The list shows the records saved for the form. You can export the report to excel by clicking on the excel icon which is on the top left corner of the report.
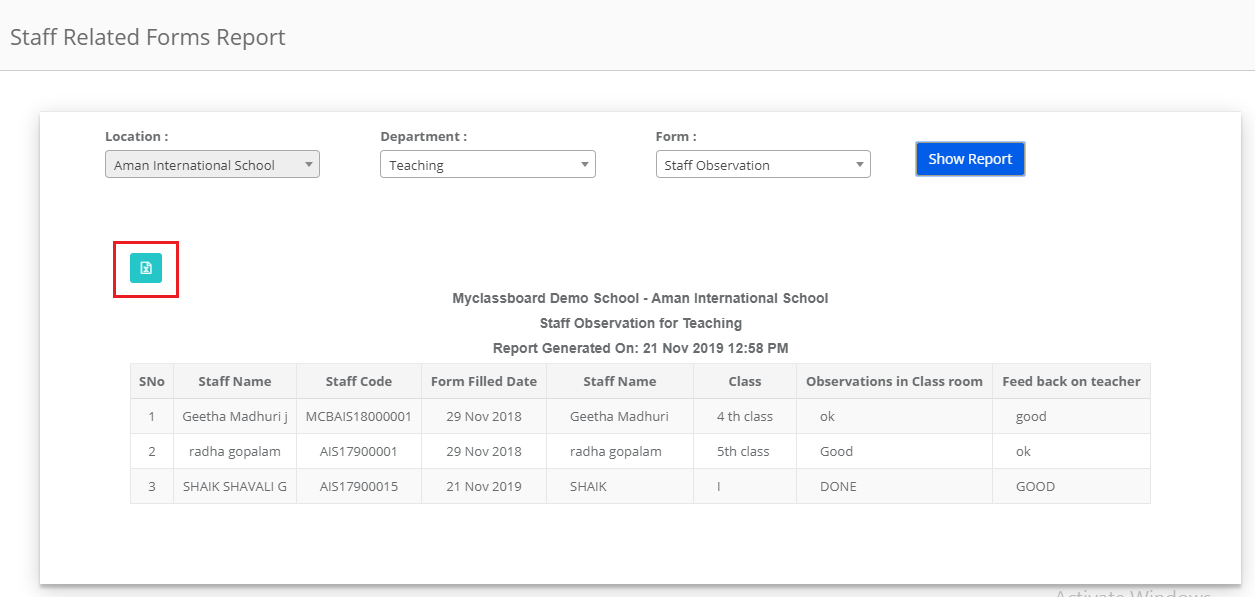
Step 27: You can edit or delete the records by clicking on the respective icons against the record. You may choose the dates range and filter records.