Step 1: Login to MCB.
Step 2: Click on the “Search” button on the top bar of the dashboard to search for the student.

Step 3: Enter the required criteria here and click on “Search”.

Step 4: In the search result page, click on “Action” button and select “Make Payment” in the drop down.

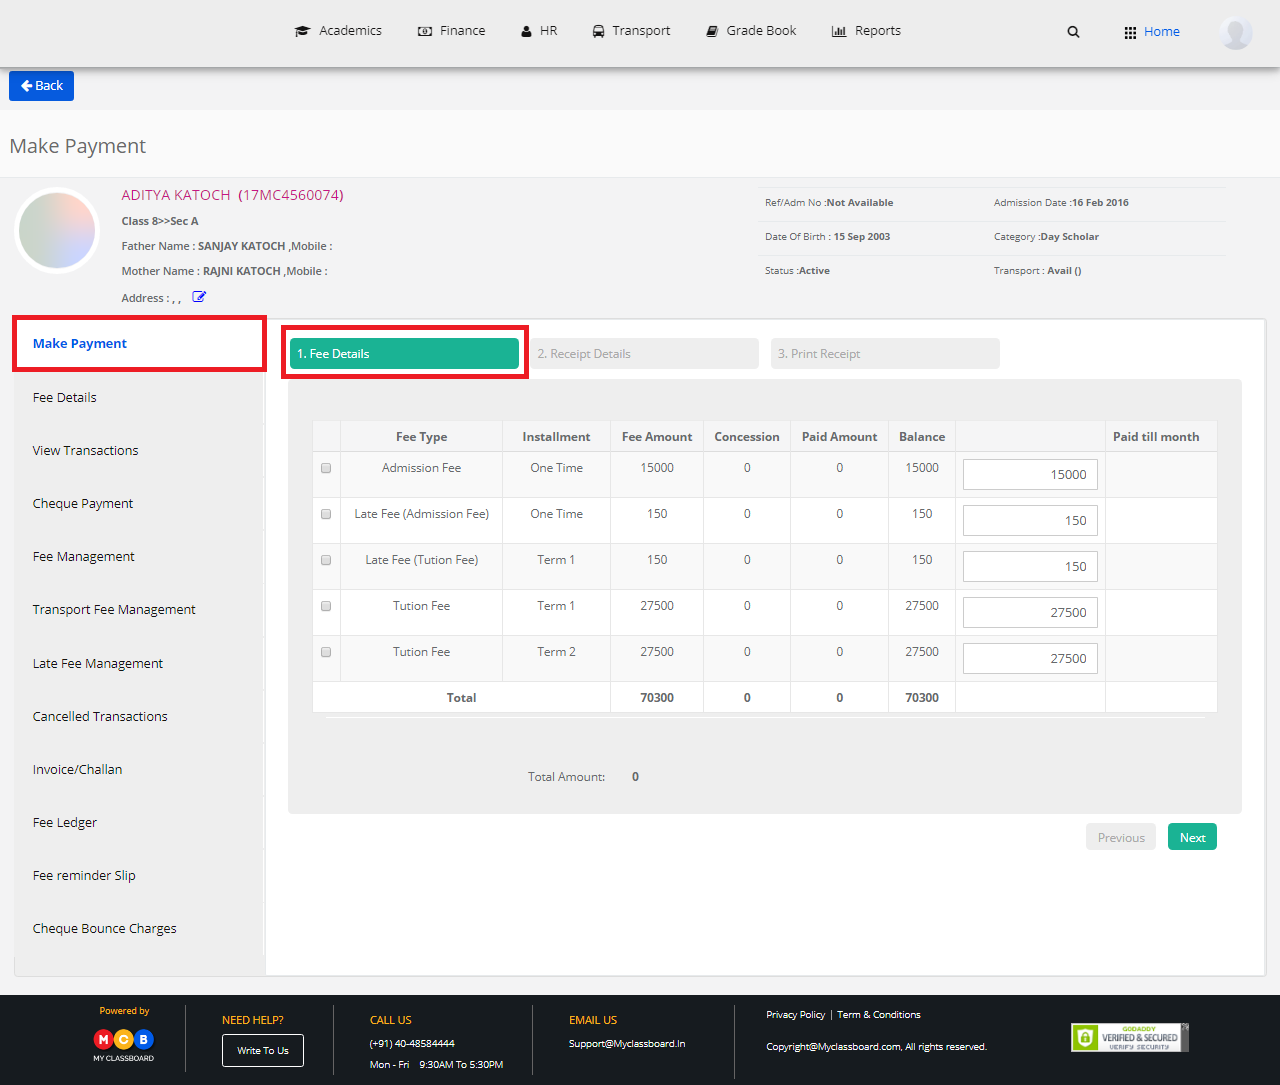
Step 5: Select “Make Payment” in the left pane of the page and click on “Fee Details”. Mark the checkbox against the fee details and click on next.
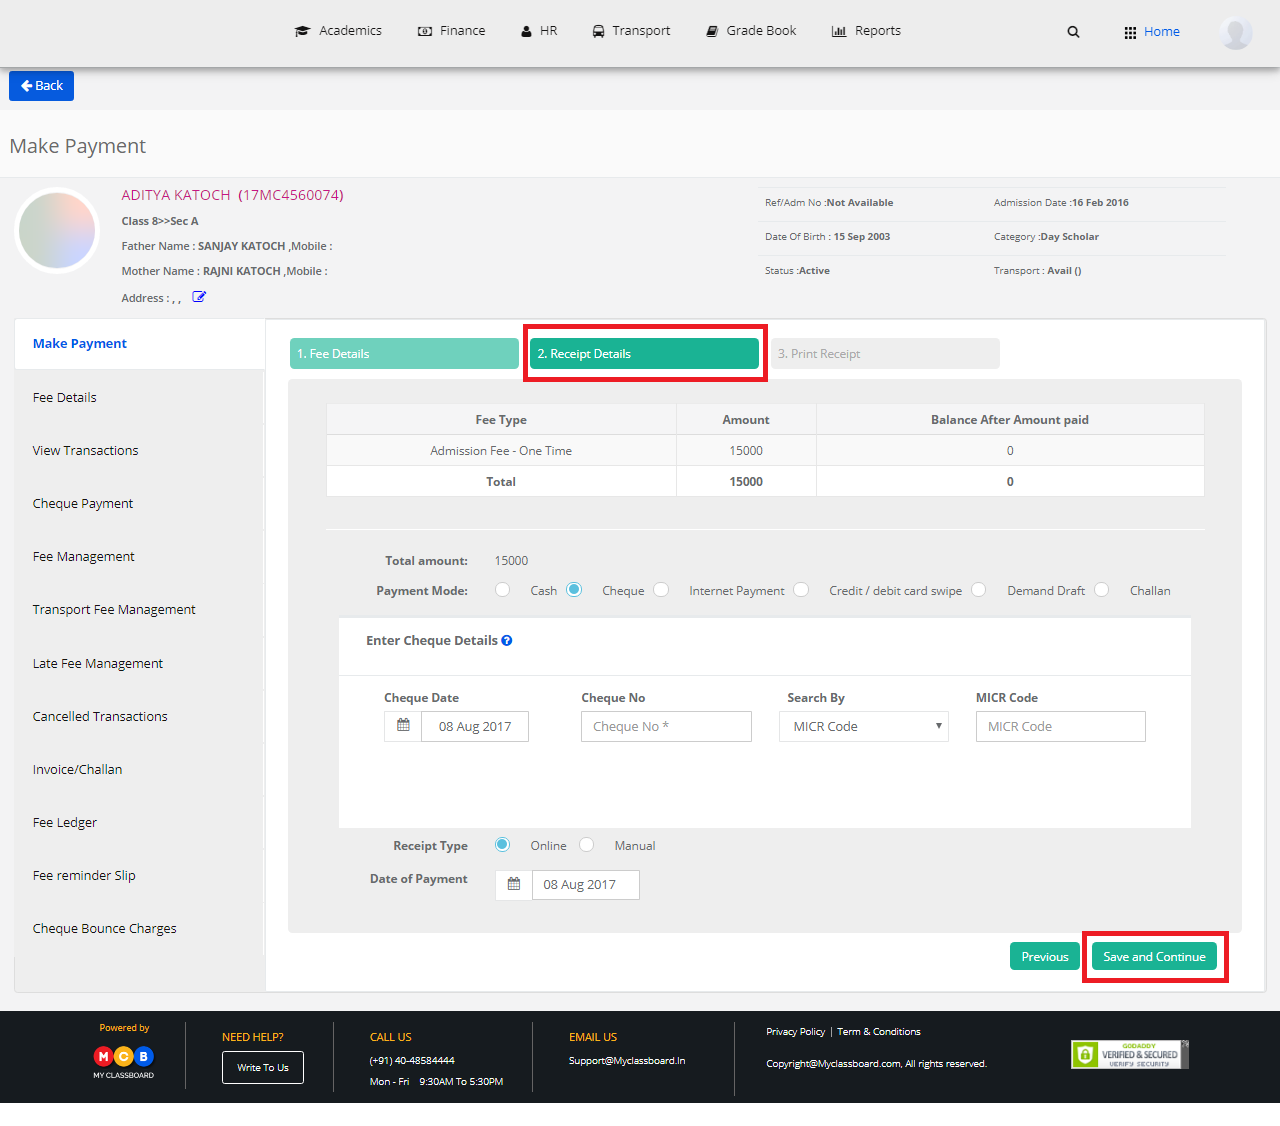
Step 6: Select the mode of payment, enter the details and click on “Save and Continue” to generate the receipt details.
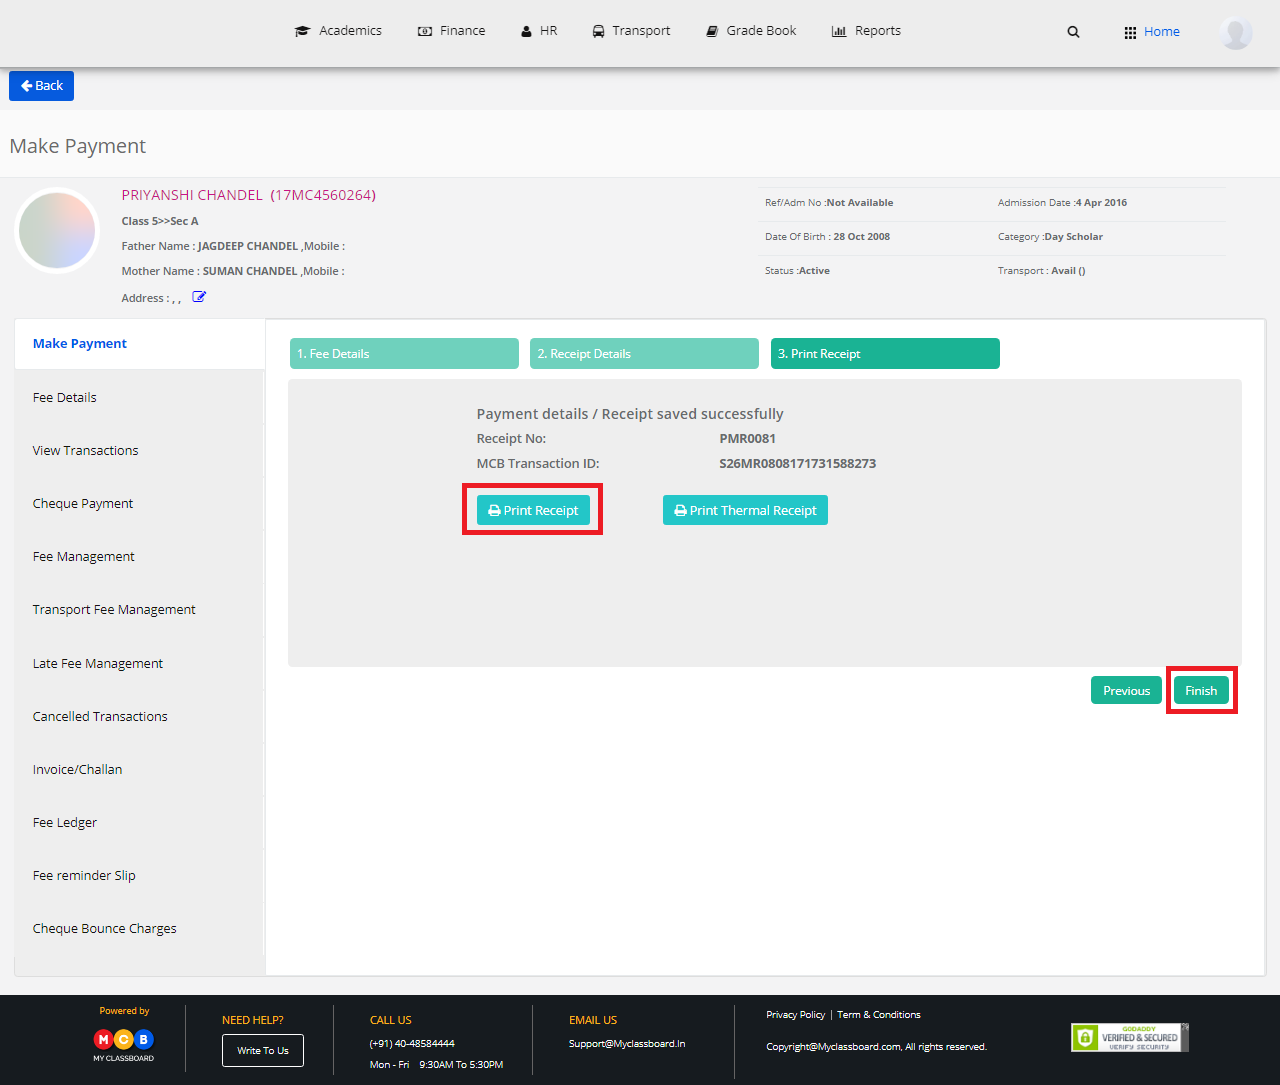
Step 7: Click on “Print” option to take a printout of the generated fee receipt.
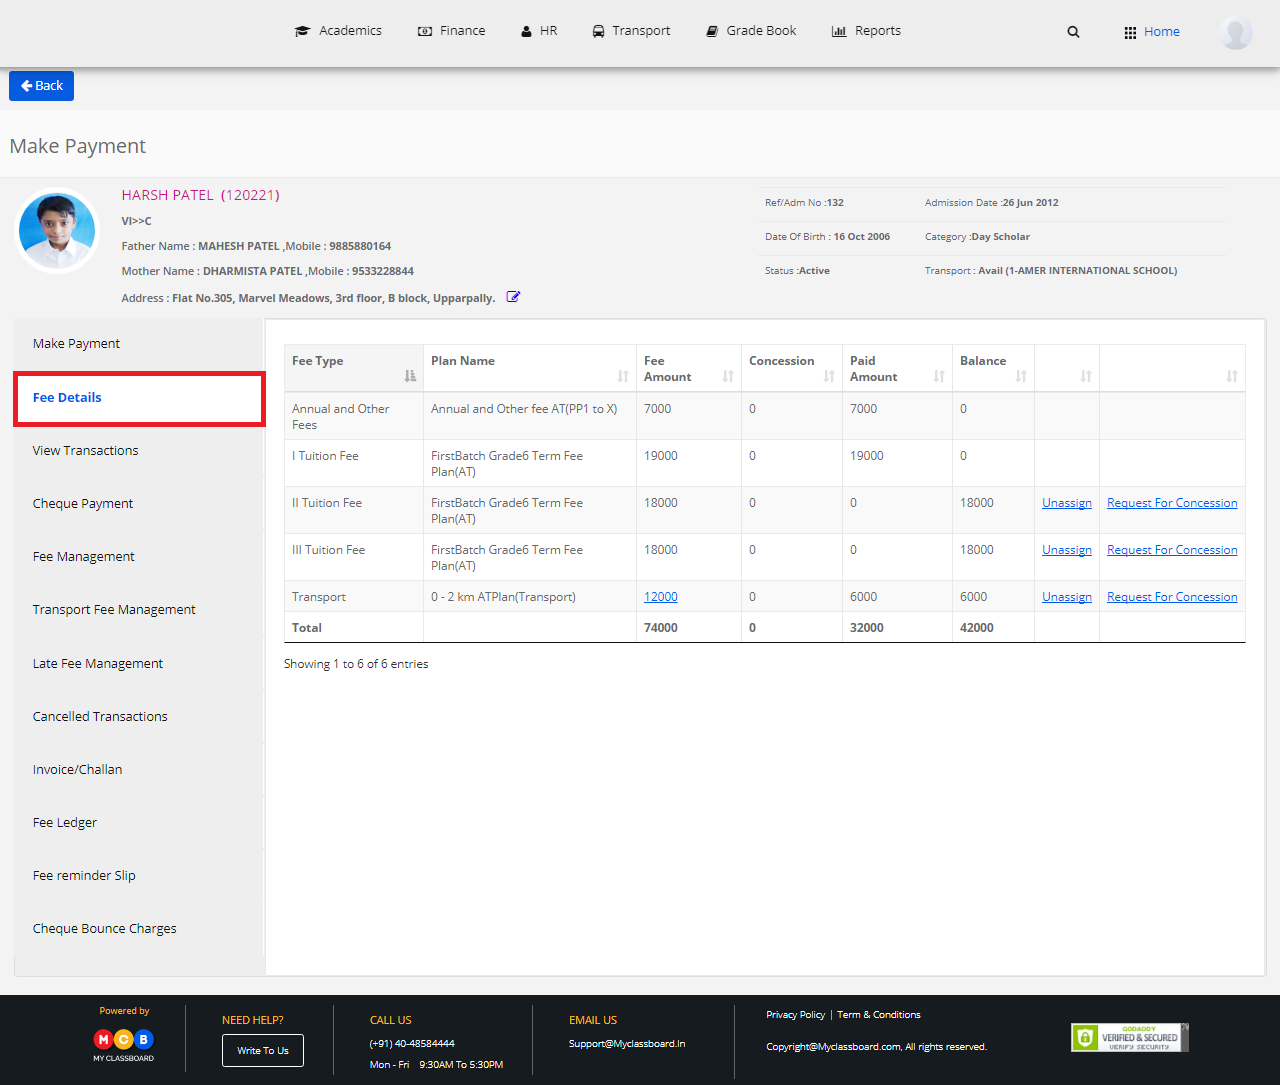
Step 8: To view the fee details, click on the “Fee Details” option on the left pane.
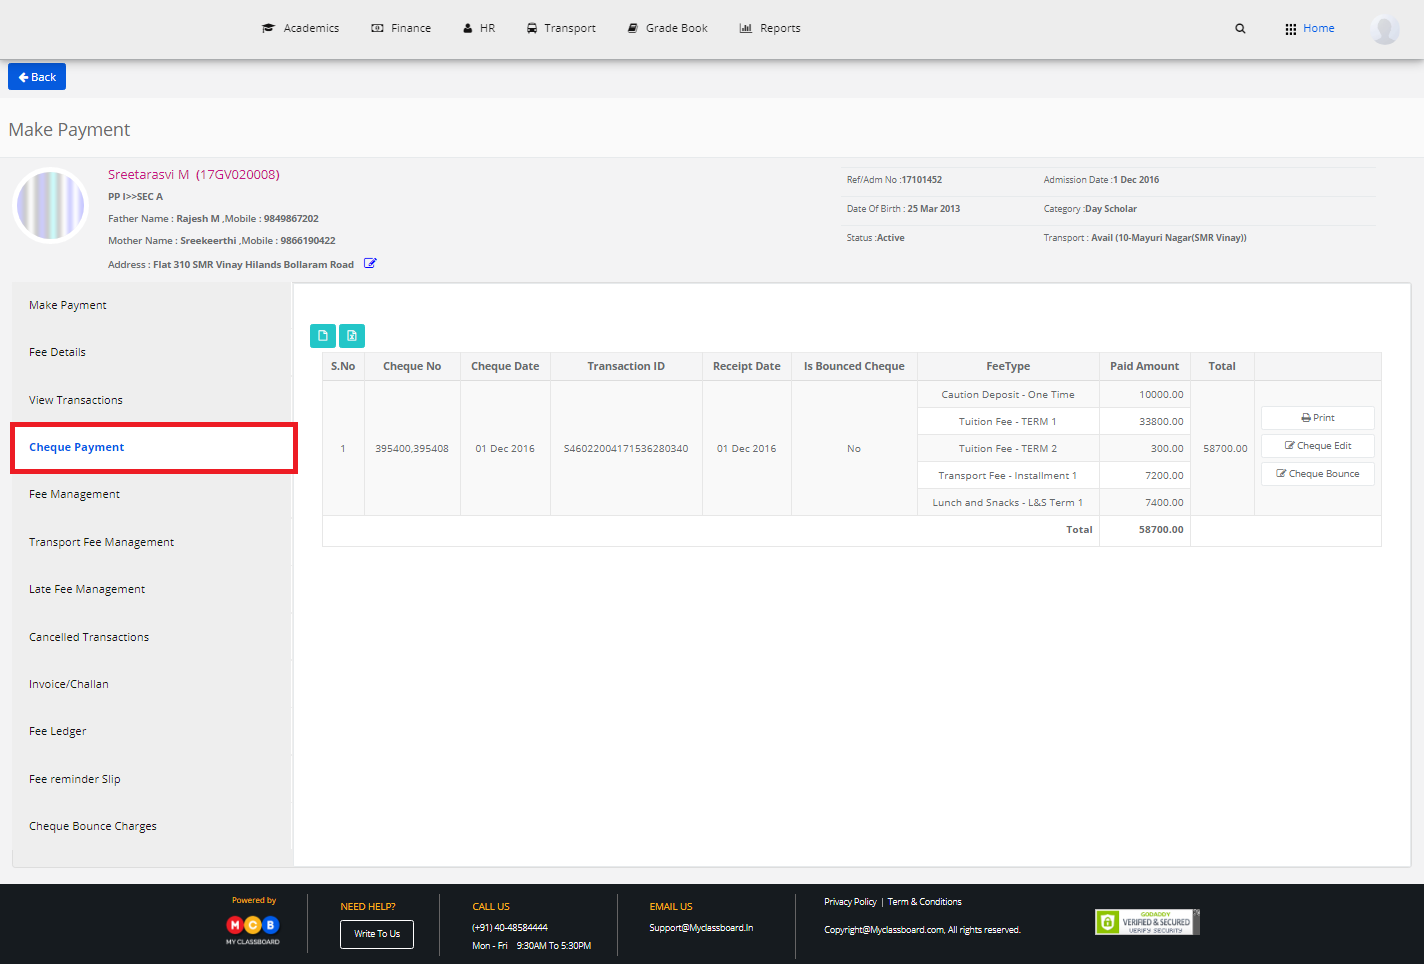
Step 9: To view cheque payment details, select “Cheque Payment”.
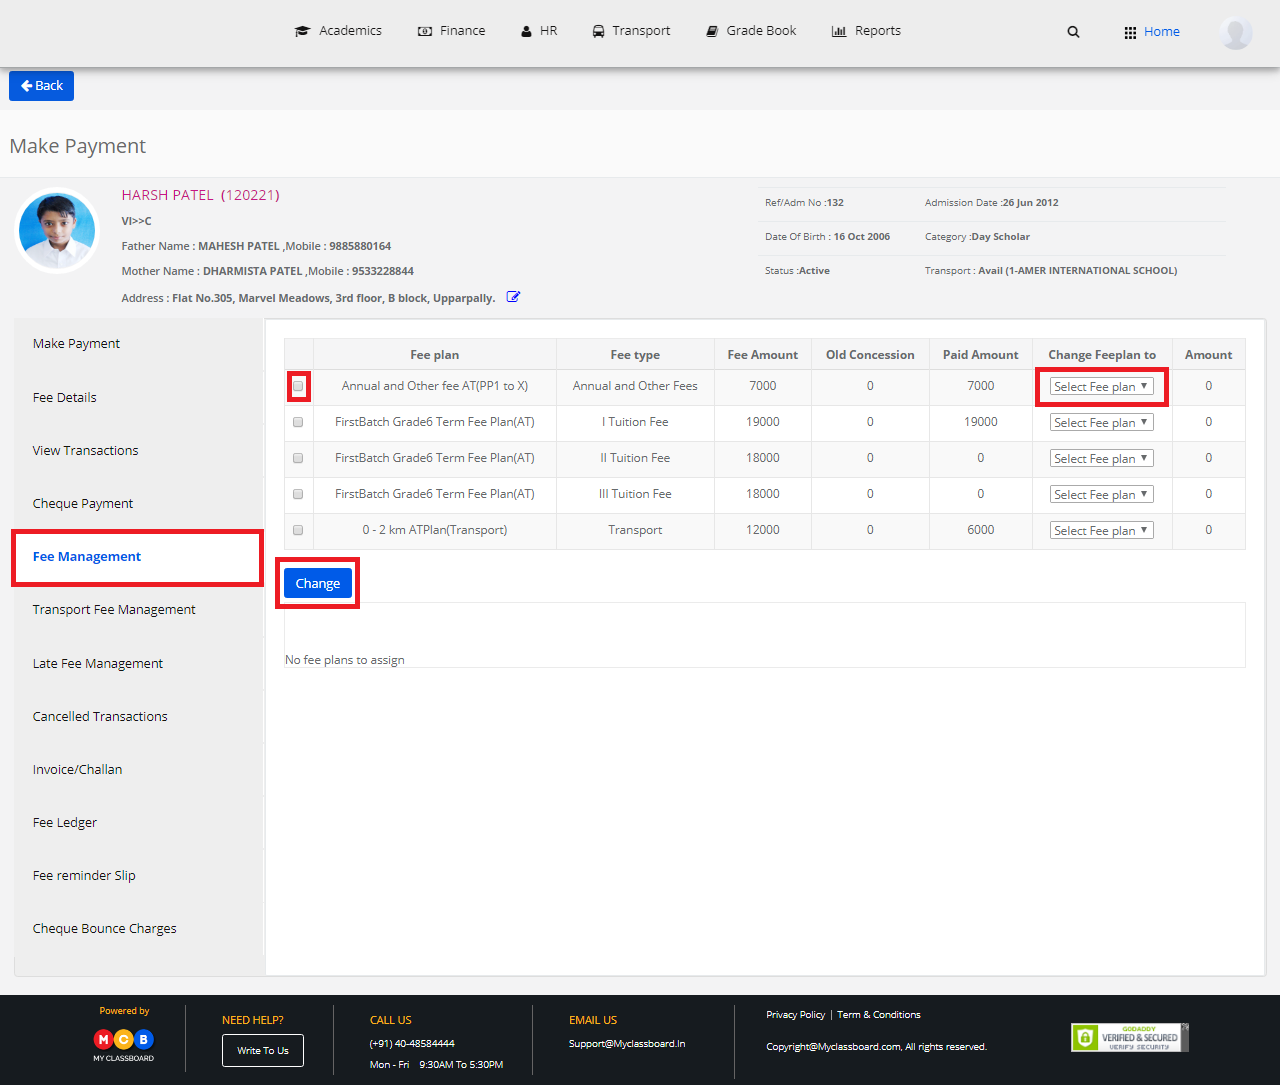
Step 10: To change fee plans of the student, select “Fee “Management”. Mark the check box against any fee plan, select fee plan under “Change Fee Plan to” and then click on “Change”.
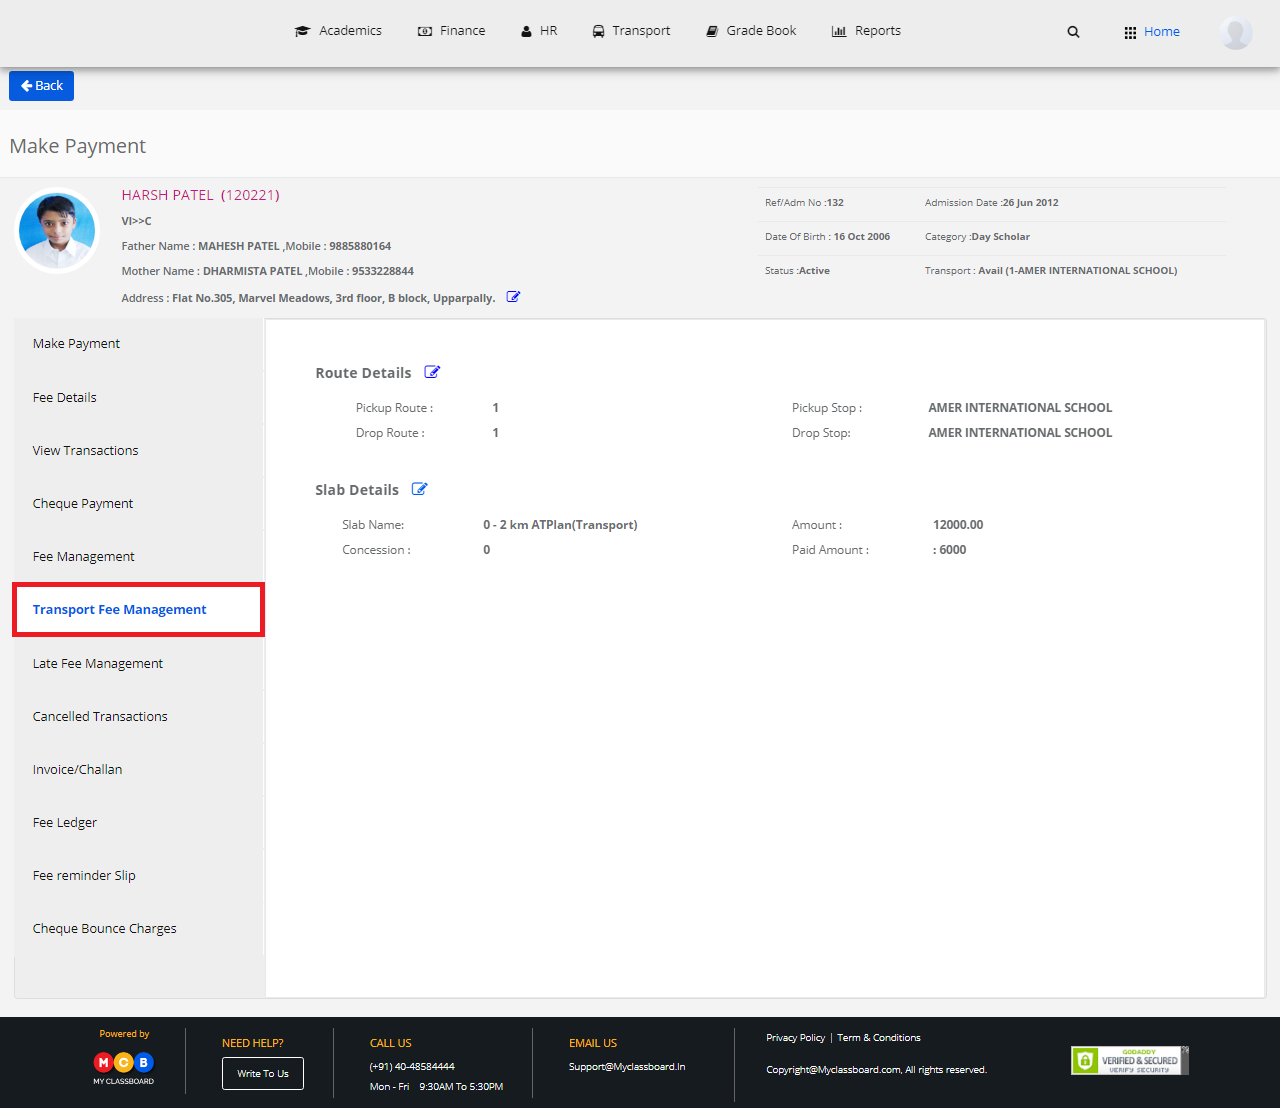
Step 11: To view transport fee details, click on “Transport Fee Management”.
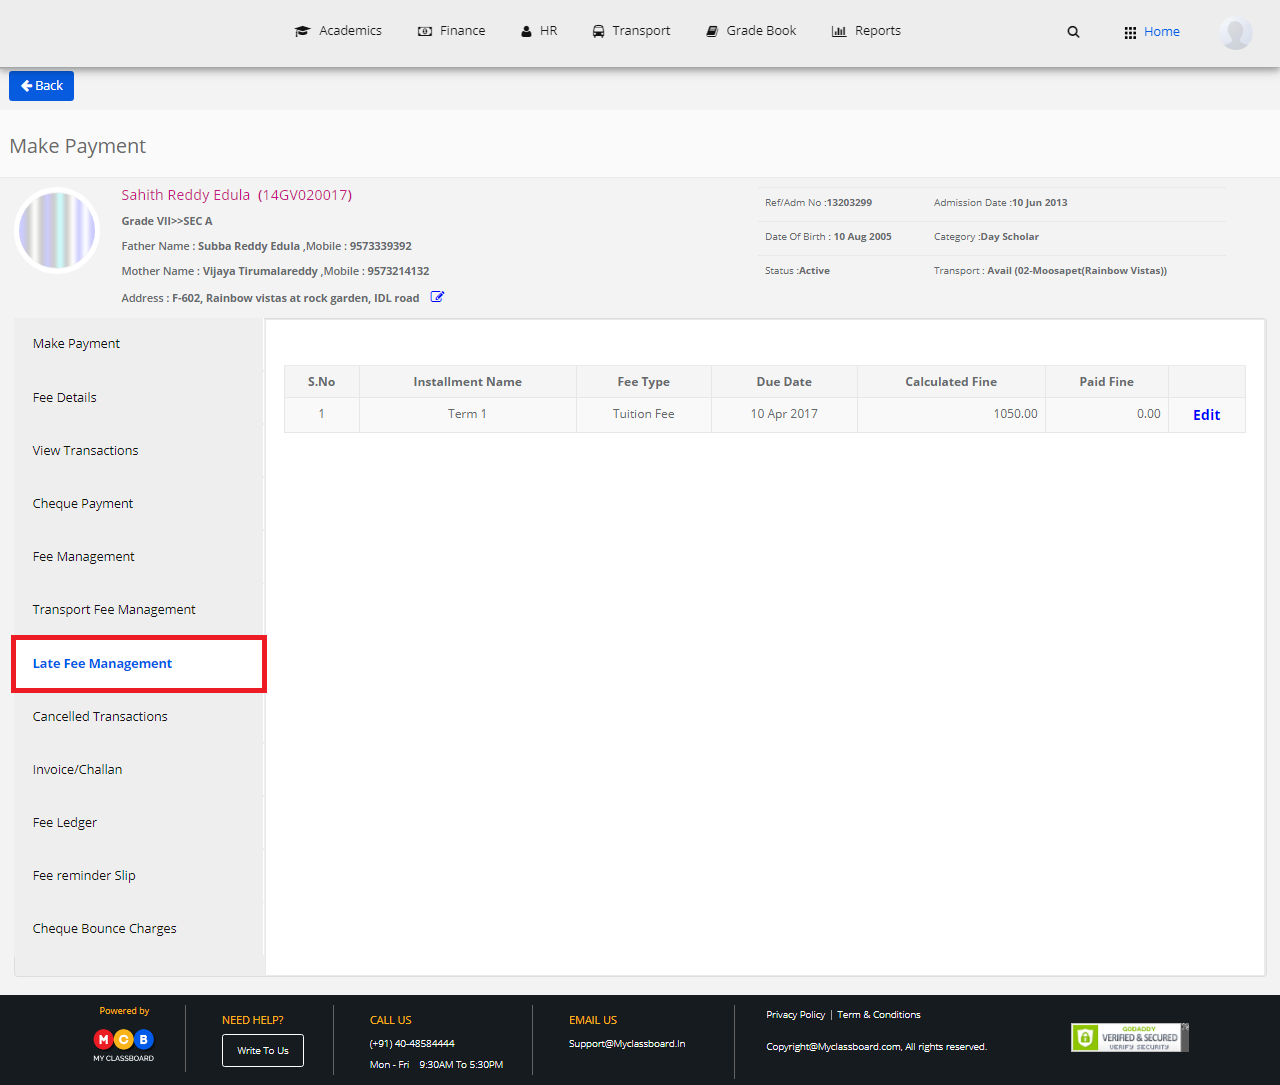
Step 12: To view late fee details, click on “Late Fee Management”. To edit the details, click on the “Edit” option to the right.
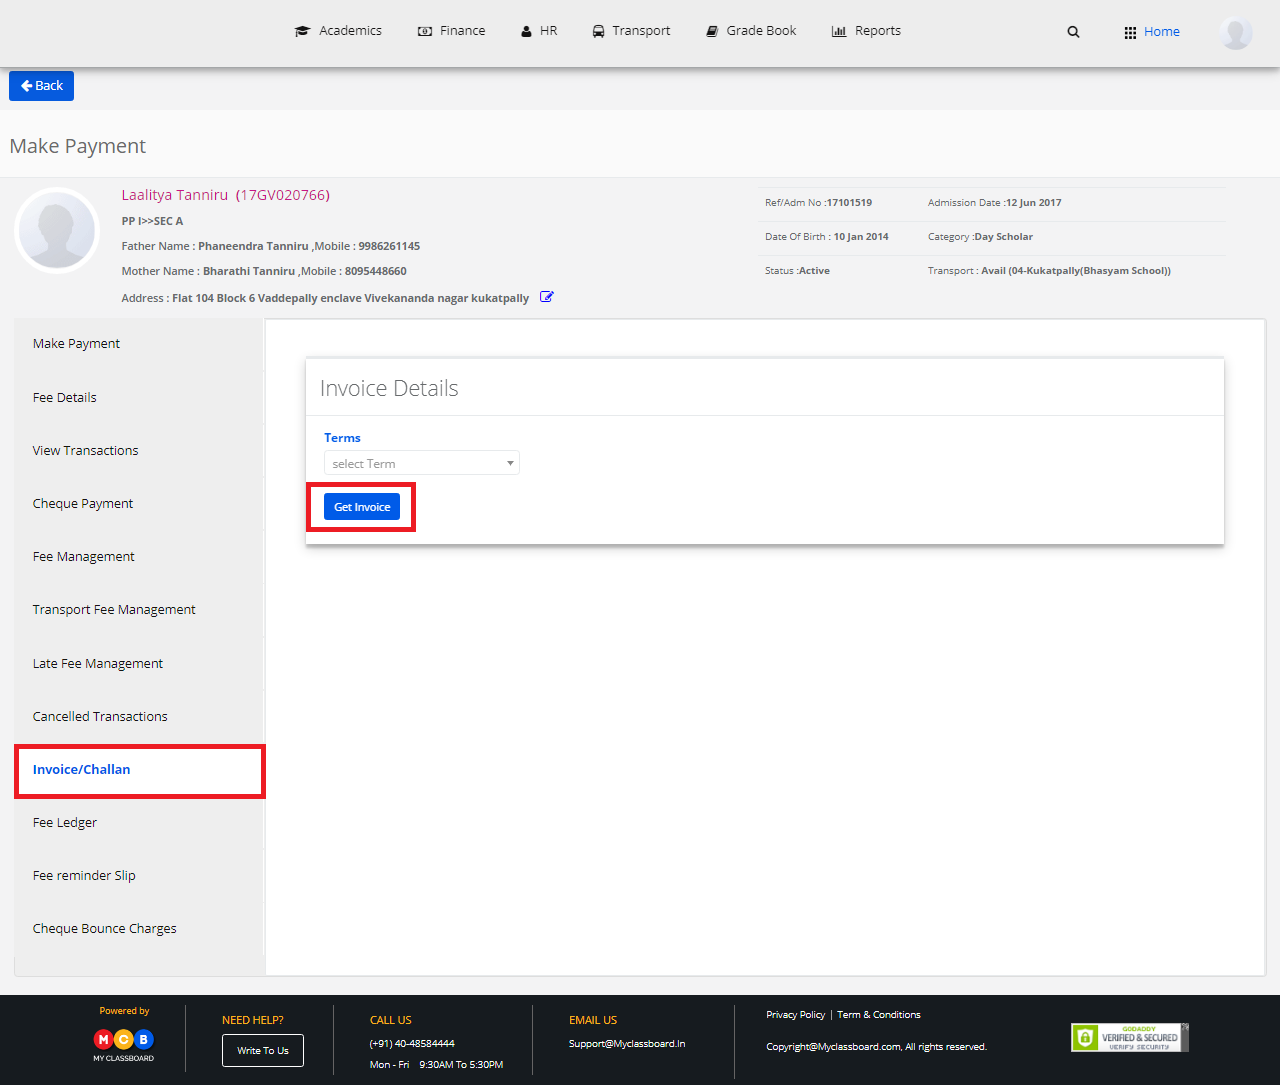
Step 13: To get Invoice/challan, click on “Invoice/Challan”. Select “Term” and click on “Get Invoice”.
Step 14: Take a print out of the challan by clicking on the “Print option”.

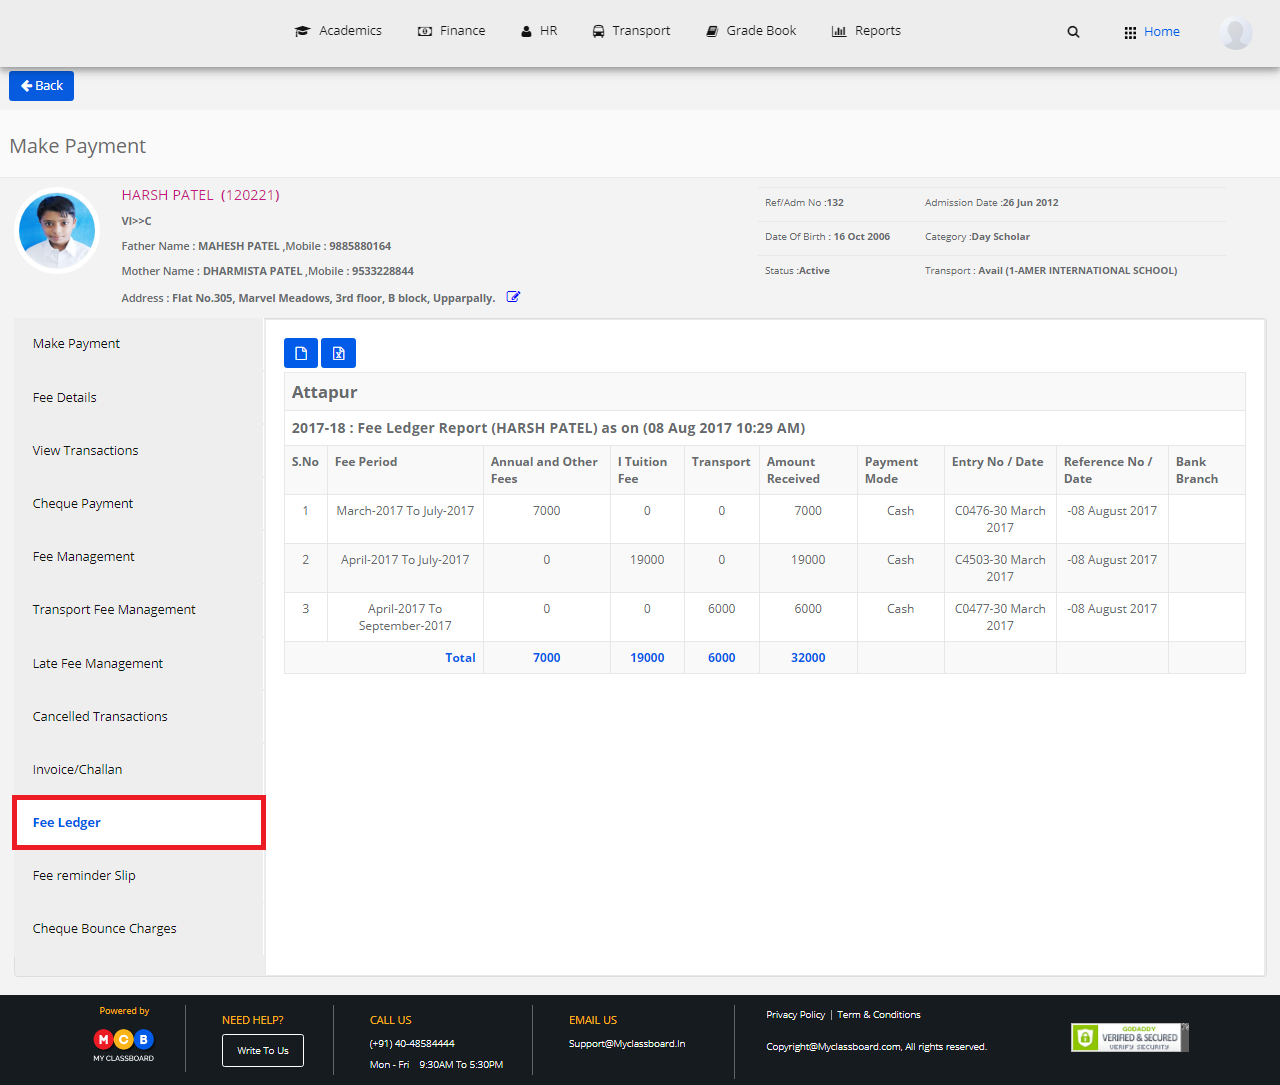
Step 15: To view fee ledger details, click on “Fee Ledger”.