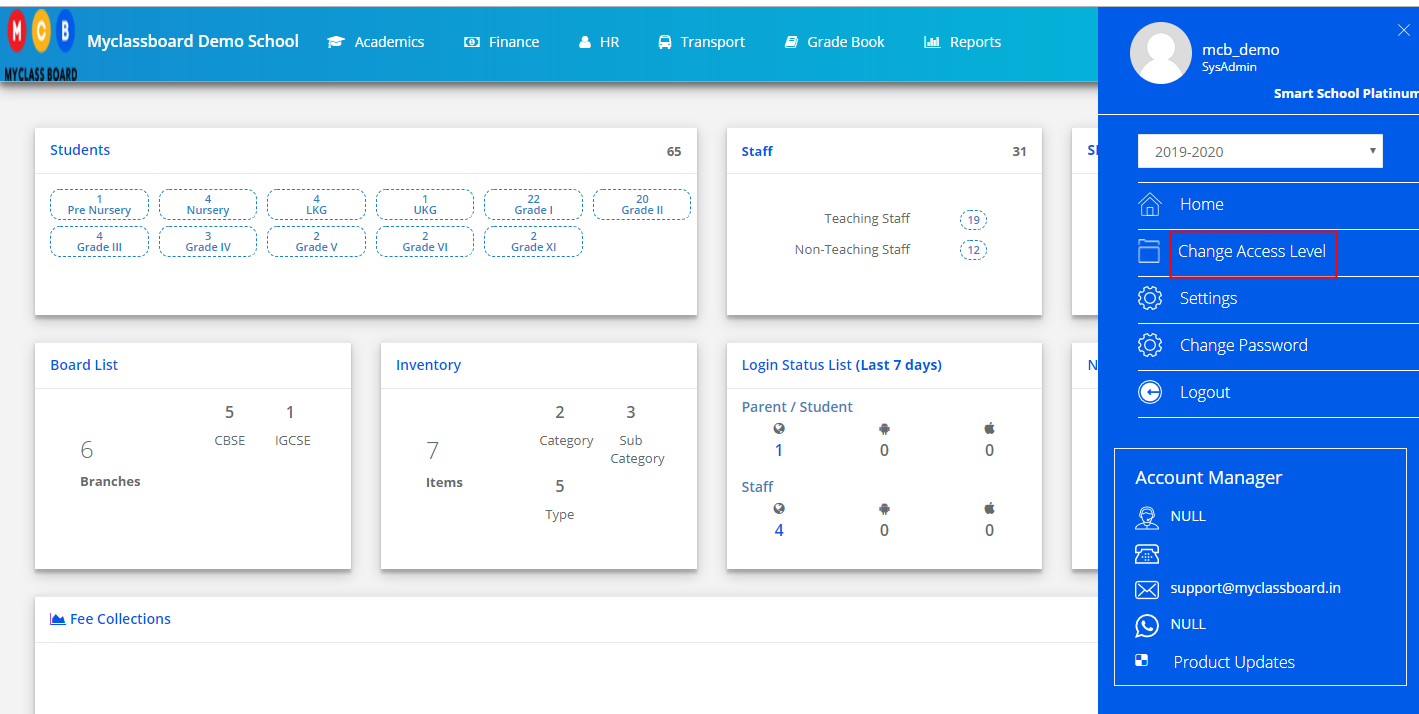
Step 1: Login to MCB and Switch to branch level by clicking on Change access level on the right panel as you click on the user profile picture.
Step 2: Click on the user type against the branch name.

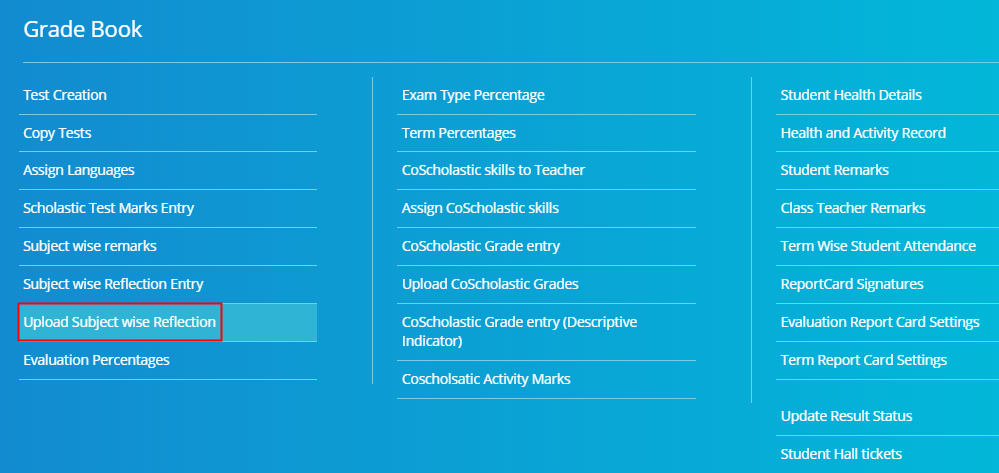
Step 3: Click on the Gradebook on the top menu bar.

Step 4: Choose Upload Subject wise Reflections option under Grade Book menu.
Reflection type-wise:
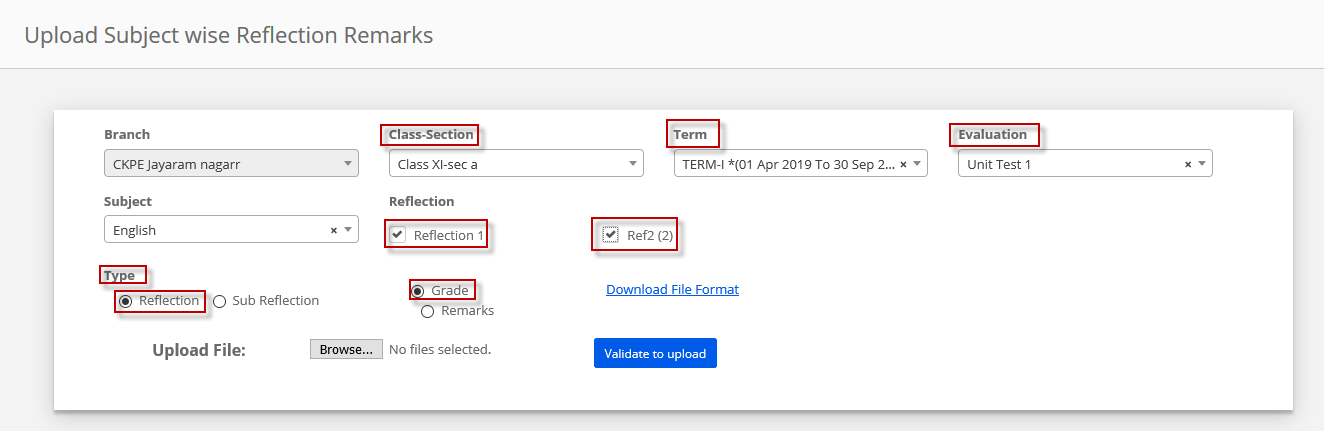
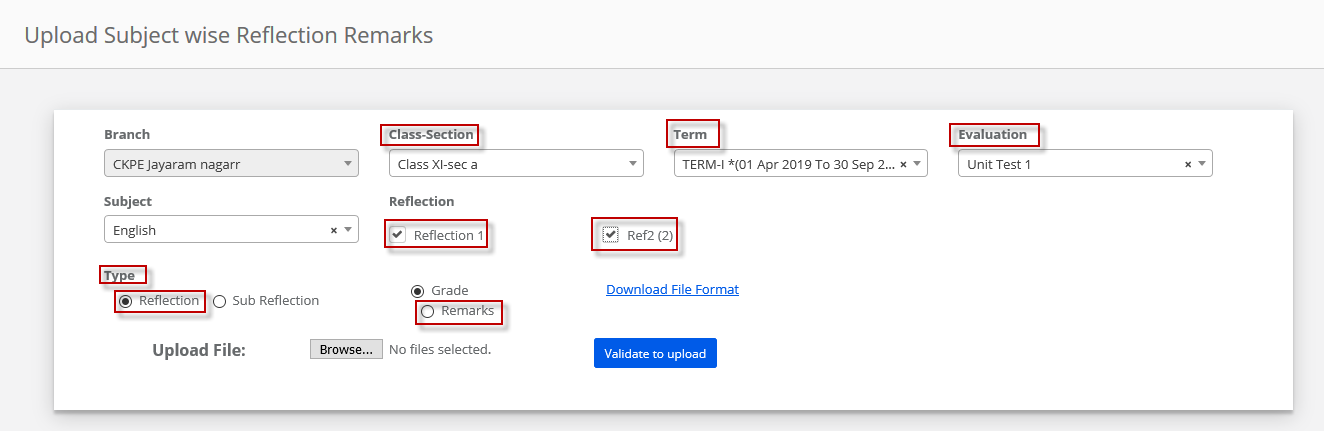
Step 5: To upload Grade for a reflection type, Choose Grade & Section, Term, Evaluation Name, Subject, Reflection types for which you would like to upload the remarks, Type as Reflection, Grade option and click on the download file format. Enter the remarks against the student and save the file as it is in .CSV format.
Step 6: To upload the grades for a Reflection, Enter grades in the file and save the file without changing the format.
Choose Grade & Section, Term, Evaluation Name, Subject, Reflection types for which you would like to upload the remarks, Type as Reflection, Grade option. Now,
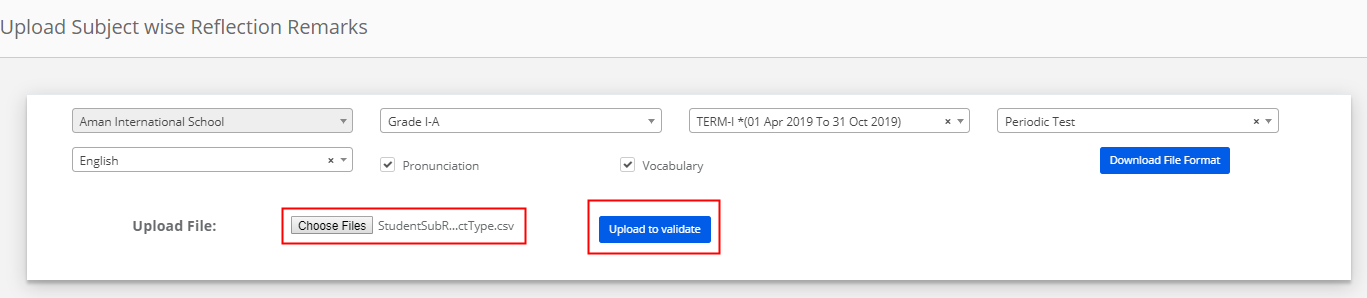
Choose the file from your computer and click on Validate to upload button.
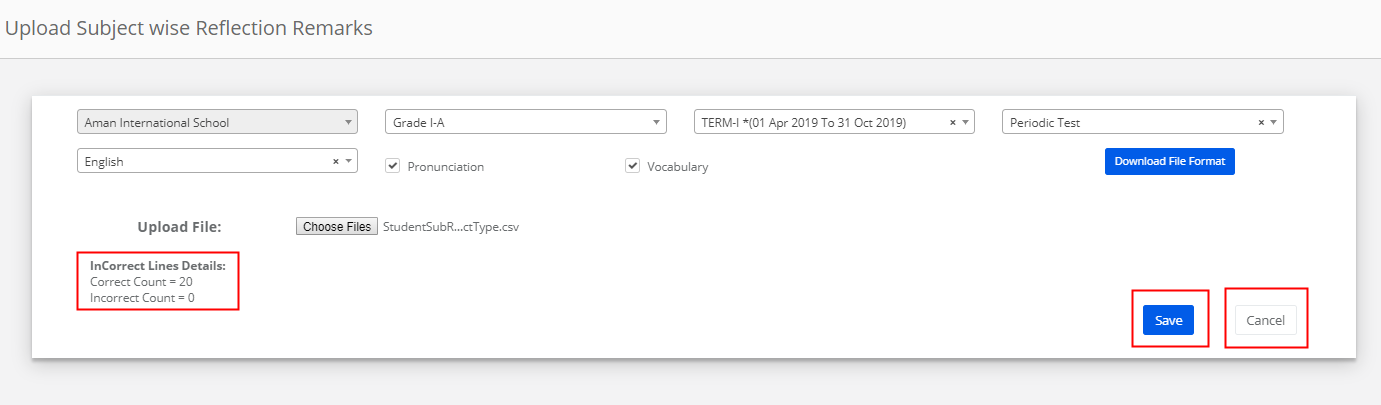
Step 7: Check the message displayed after validation. If the records you entered are matching with the correct count. Click on Save to save the remarks or Cancel to cancel the upload.
Please note that, if the validation message shows incorrect records, when you save the file, only the records which are correct will be uploaded. The incorrect records will not be uploaded.

Step 8: To upload Remarks for a reflection type, Choose Grade & Section, Term, Evaluation Name, Subject, Reflection types for which you would like to upload the remarks, Type as Reflection, Remarks option and click on the download file format.
Enter the remarks against the student and save the file as it is in .CSV format.
Step 9: To upload the remarks for a Reflection, Enter remarks in the file and save the file without changing the format.
Choose Grade & Section, Term, Evaluation Name, Subject, Reflection types for which you would like to upload the remarks, Type as Reflection, Remarks option. Now,
Choose the file from your computer and click on Validate to upload button.

Step 10: Check the message displayed after validation. If the records you entered are matching with the correct count. Click on Save to save the remarks or Cancel to cancel the upload.
Please note that, if the validation message shows incorrect records, when you save the file, only the records which are correct will be uploaded. The incorrect records will not be uploaded.

Sub Reflection type-wise:
Step 11: To upload Grade for a Sub Reflection type, Choose Grade & Section, Term, Evaluation Name, Subject, Reflection types for which you would like to upload the remarks, Type as Sub Reflection, Grade option and click on the download file format.
Enter the remarks against the student and save the file as it is in .CSV format.

Step 12: To upload the grades for a Sub Reflection, Enter grades in the file and save the file without changing the format.
Choose Grade & Section, Term, Evaluation Name, Subject, Reflection types for which you would like to upload the remarks, Type as Sub Reflection, Grade option. Now,
Choose the file from your computer and click on Validate to upload button.

Step 13: Check the message displayed after validation. If the records you entered are matching with the correct count. Click on Save to save the remarks or Cancel to cancel the upload.
Please note that, if the validation message shows incorrect records, when you save the file, only the records which are correct will be uploaded. The incorrect records will not be uploaded.

Step 14: To upload Remarks for a Sub reflection type, Choose Grade & Section, Term, Evaluation Name, Subject, Reflection types for which you would like to upload the remarks, Type as Sub Reflection, Remarks option and click on the download file format.
Enter the remarks against the student and save the file as it is in .CSV format.

Step 15: To upload the remarks for a Sub Reflection, Enter remarks in the file and save the file without changing the format.
Choose Grade & Section, Term, Evaluation Name, Subject, Reflection types for which you would like to upload the remarks, Type as Sub Reflection, Remarks option. Now,
Choose the file from your computer and click on Validate to upload button.

Step 16: Check the message displayed after validation. If the records you entered are matching with the correct count. Click on Save to save the remarks or Cancel to cancel the upload.
Please note that, if the validation message shows incorrect records, when you save the file, only the records which are correct will be uploaded. The incorrect records will not be uploaded.