MyClassboard brings a sophisticated, paperless Visitor Management Solution that secures the school premises for the safety of students, staff, visitors and other members.
Manage visitors details along with photos, vehicle details, generate pass though OTP validation and record check in and out time.
Visitor details report gives you comprehensive details in a given date range or month wise.
You can generate the following types of passes:
1. Visitor Slips for Parent Visitors and Outside Visitors
2. Gate passes for students and staff
Email communication is enabled for the following people to keep them informed about the details of the people who are leaving the campus.
1. Student gate pass information will be mailed to point of contact.
2. Staff gate pass information will be mailed to the principal.
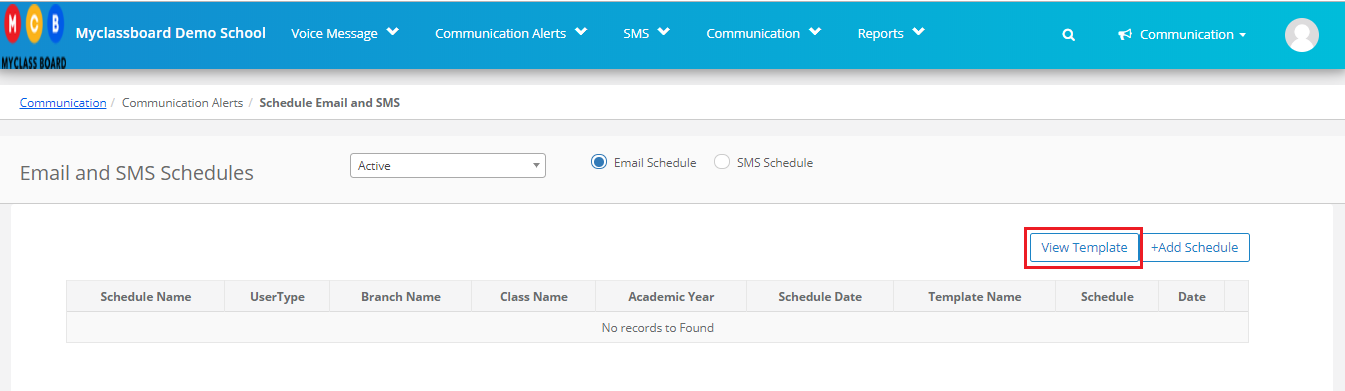
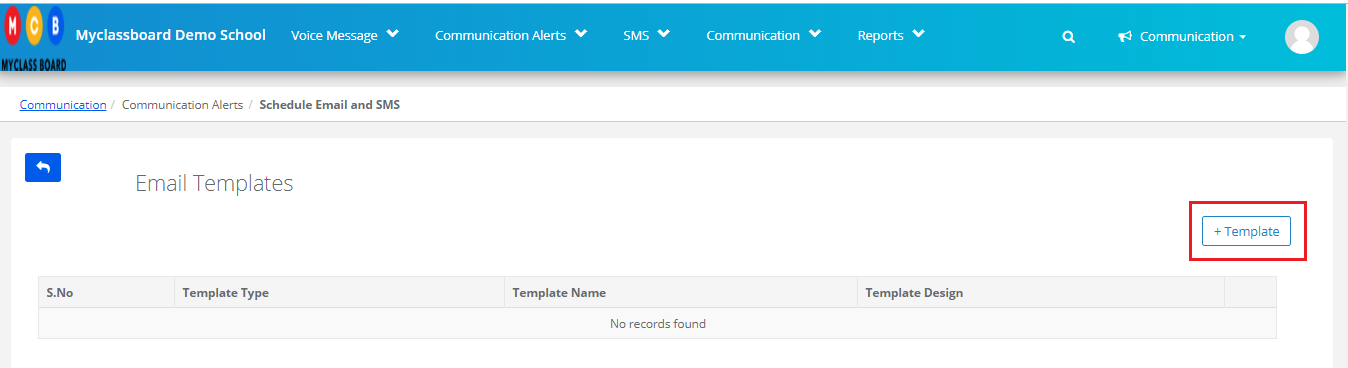
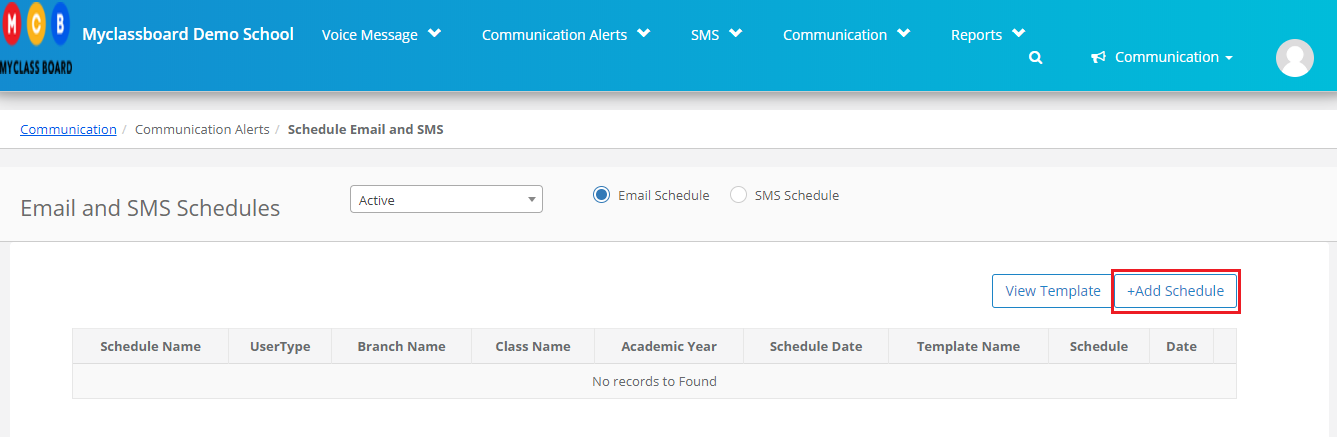
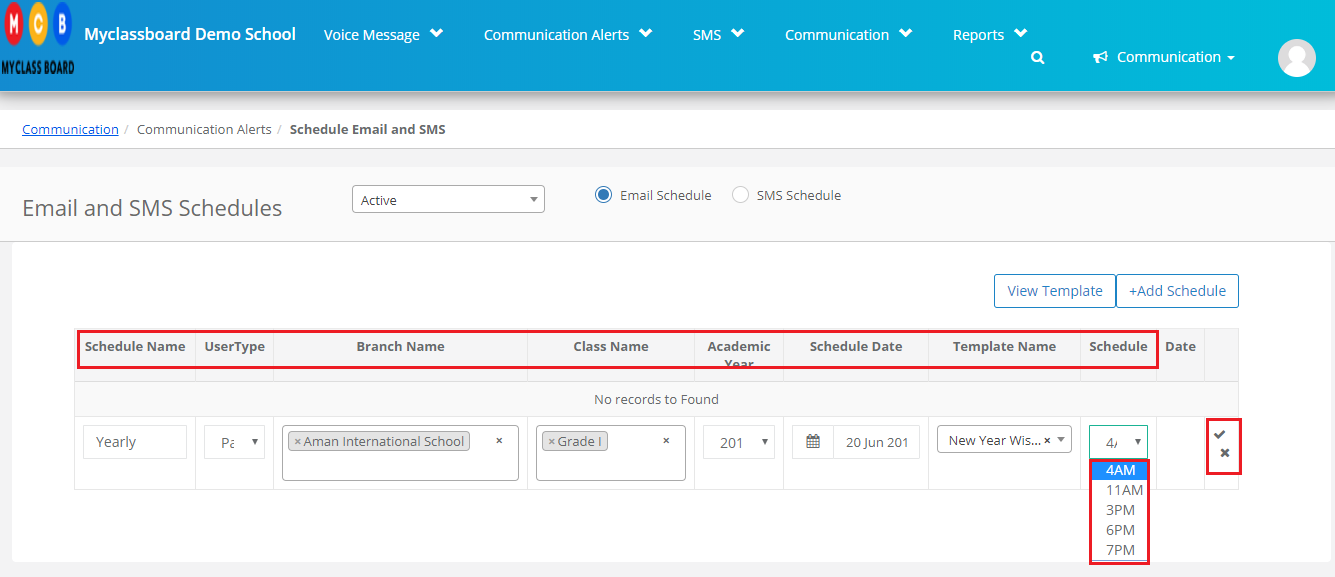
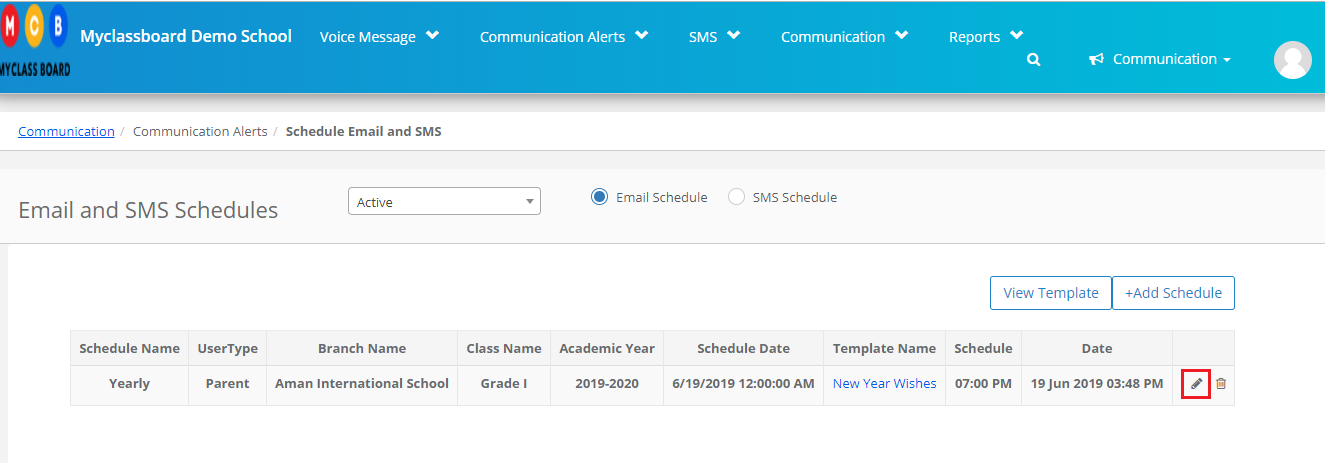
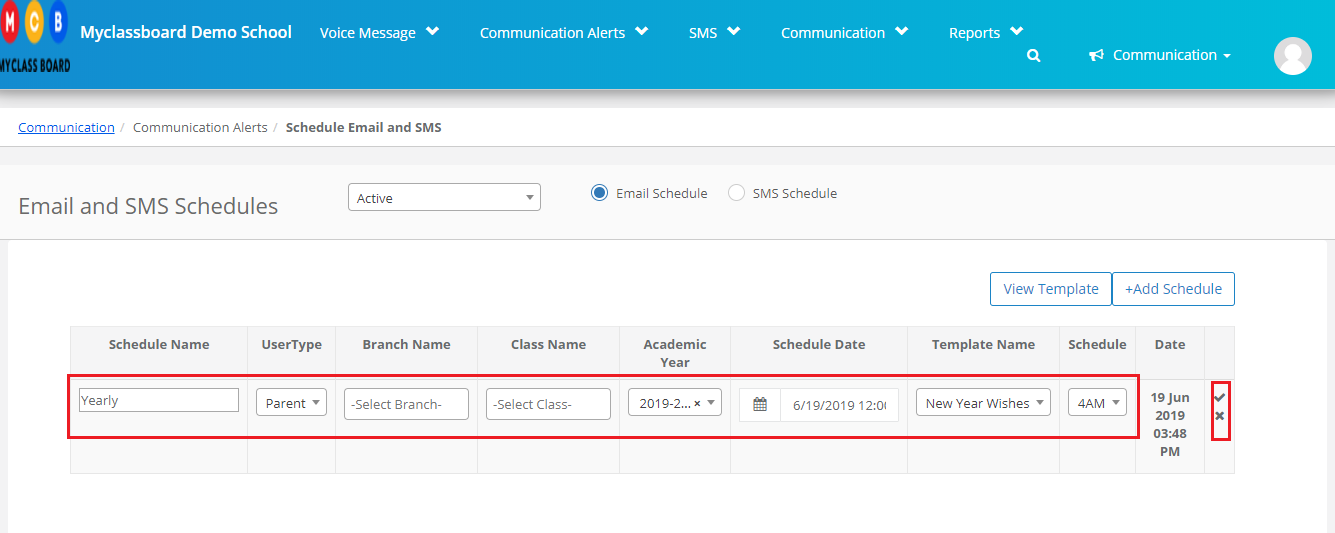
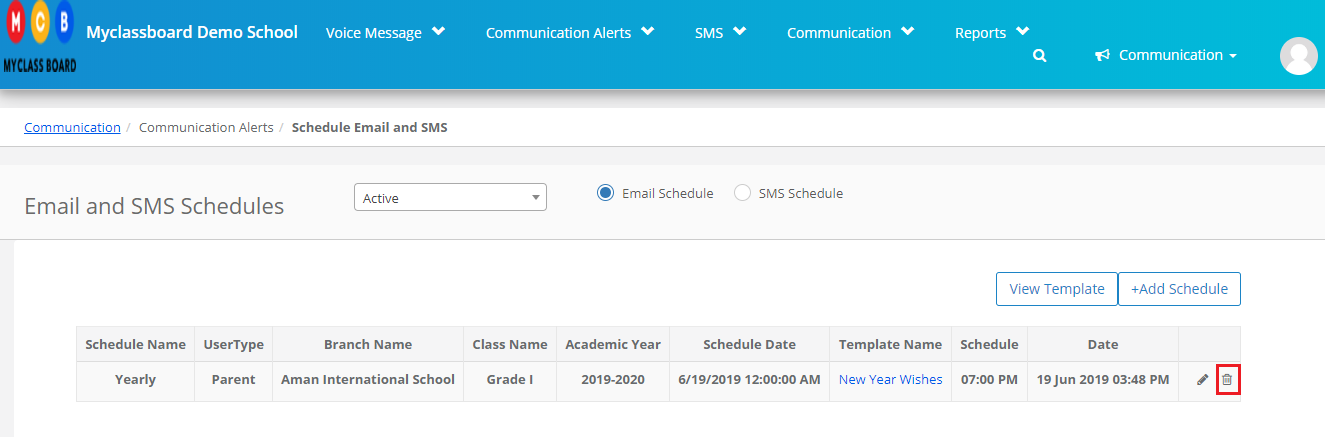
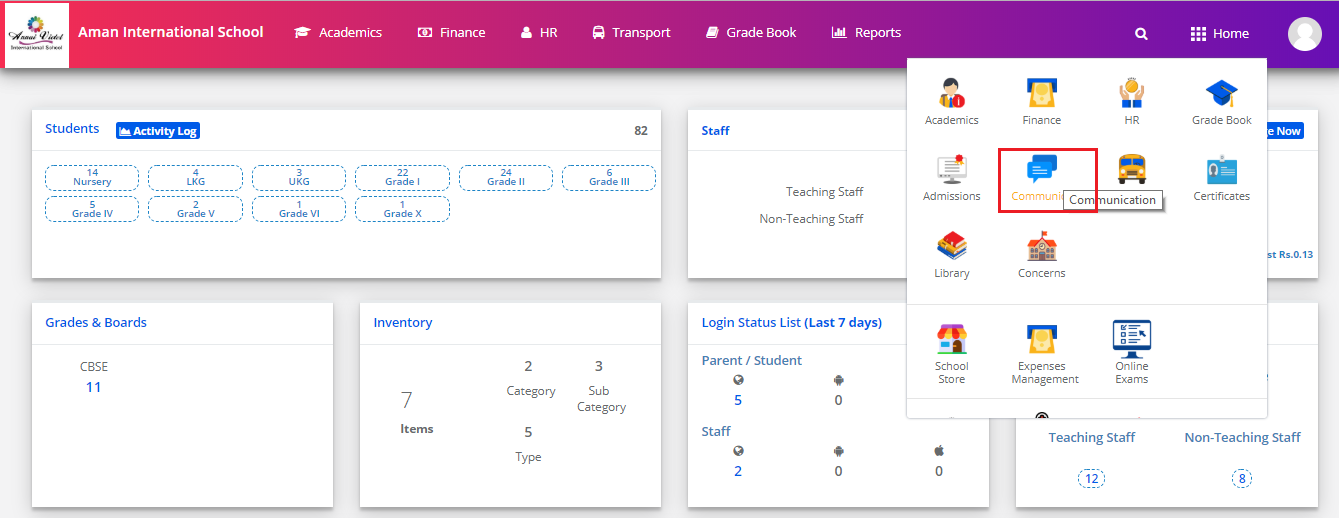
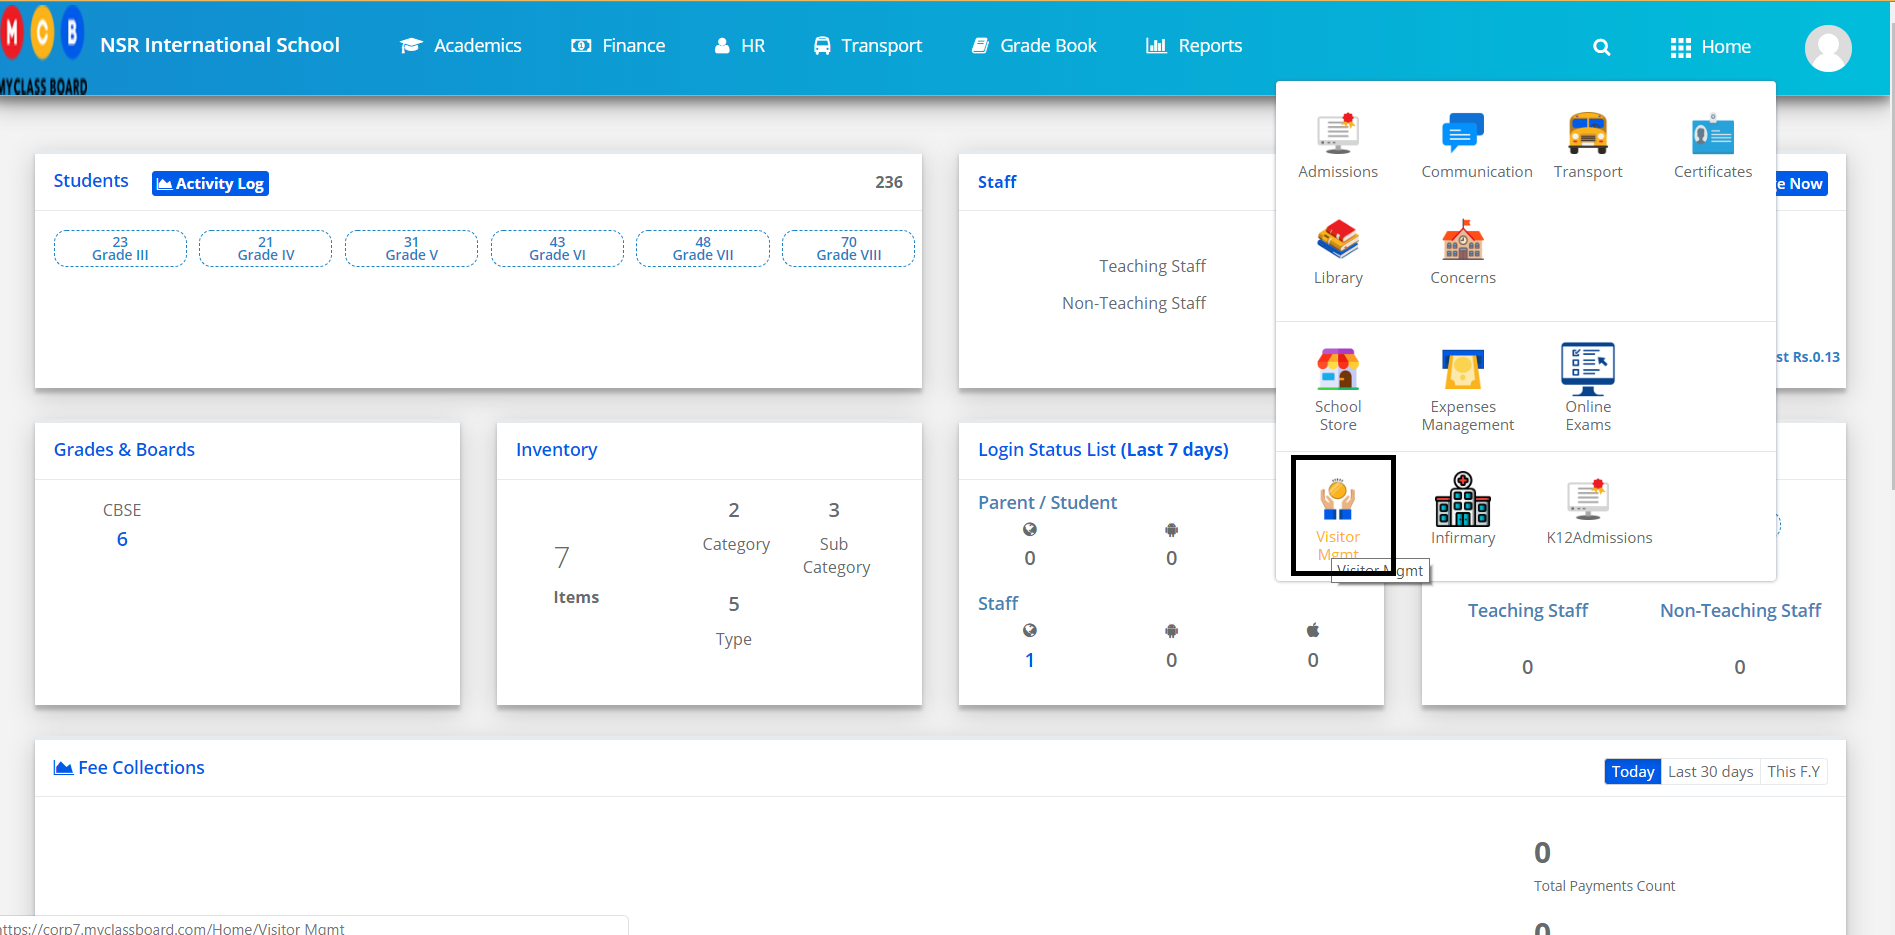
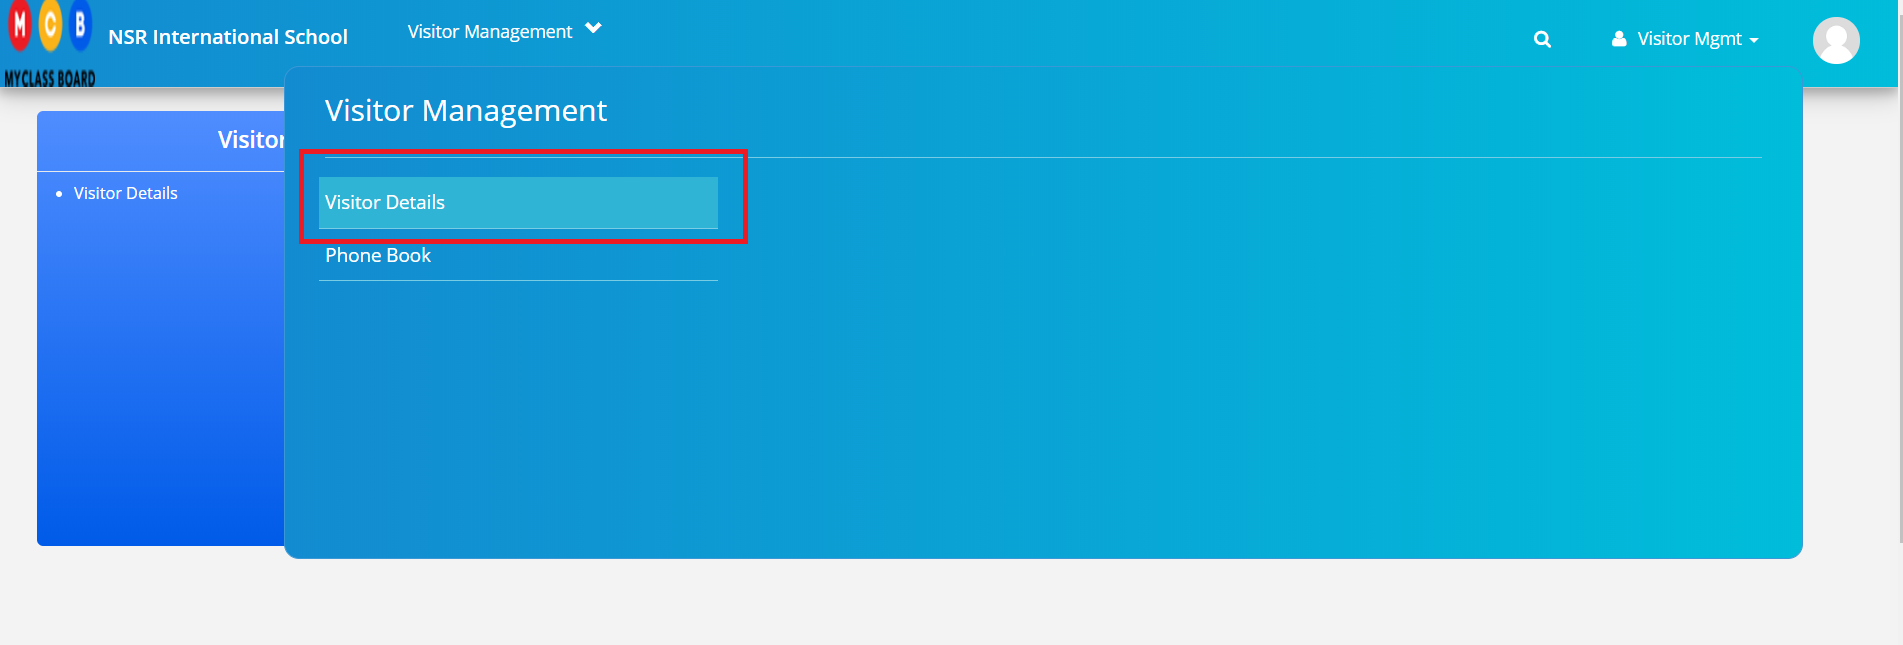
To use MCB Visitor management, please follow the steps below:
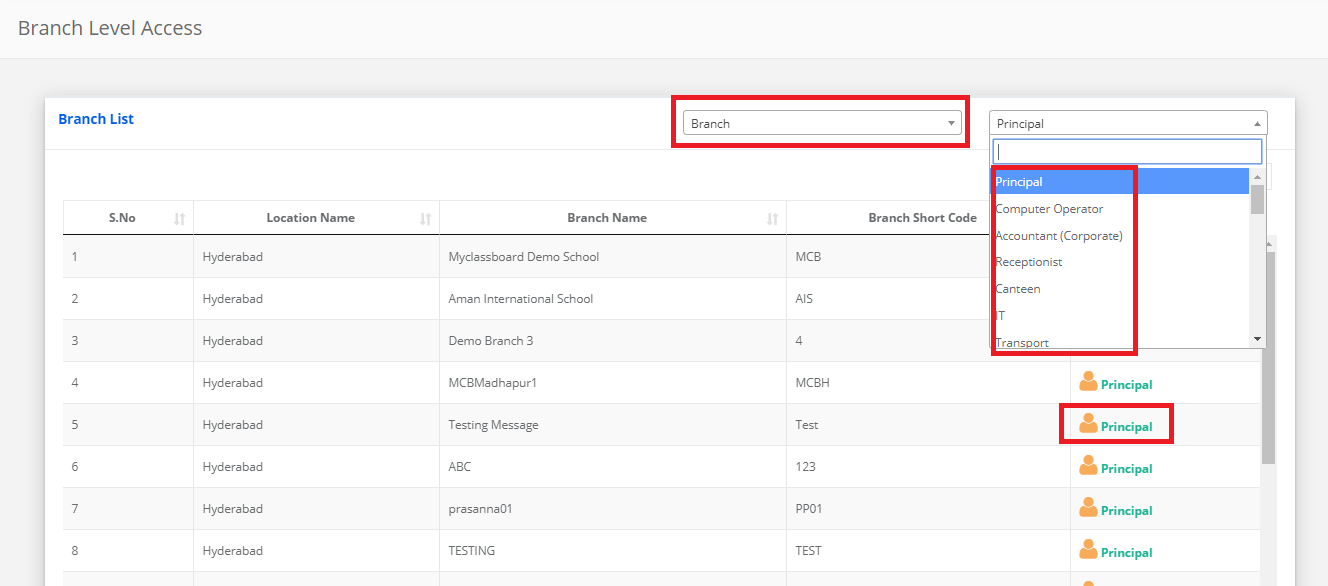
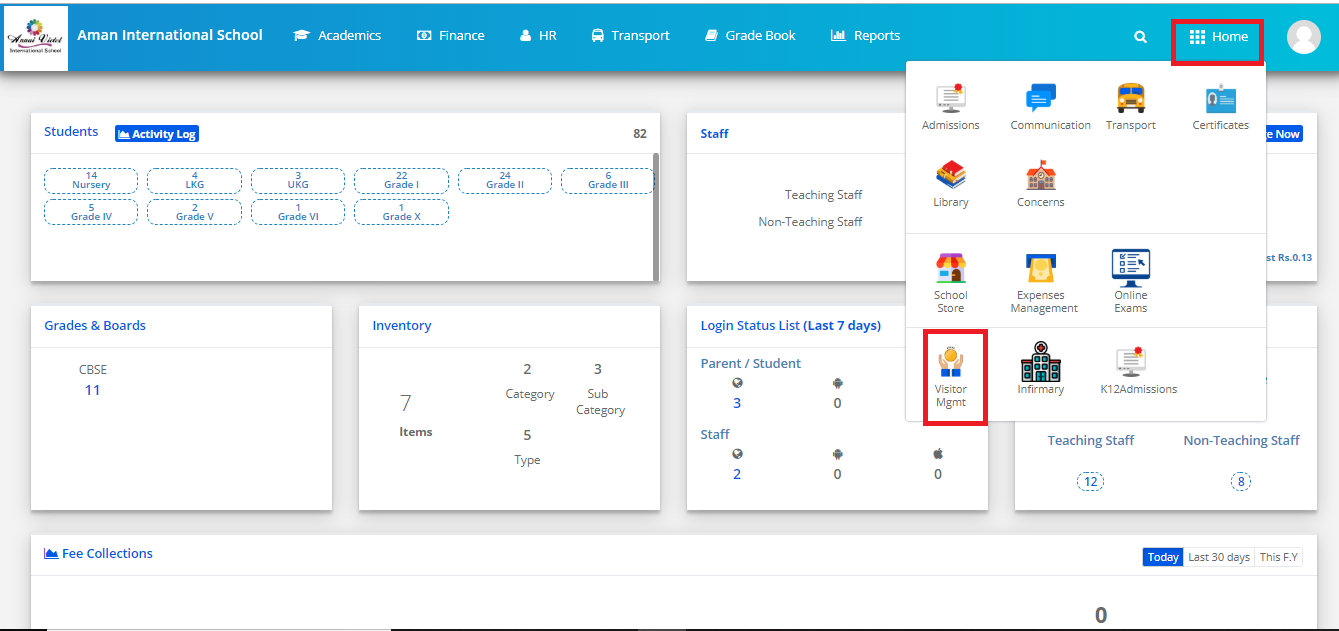
Step 1: Login to MCB, switch to branch level and choose Visitor Management module.
Step 2: Choose visitor details page from Visitor Management menu
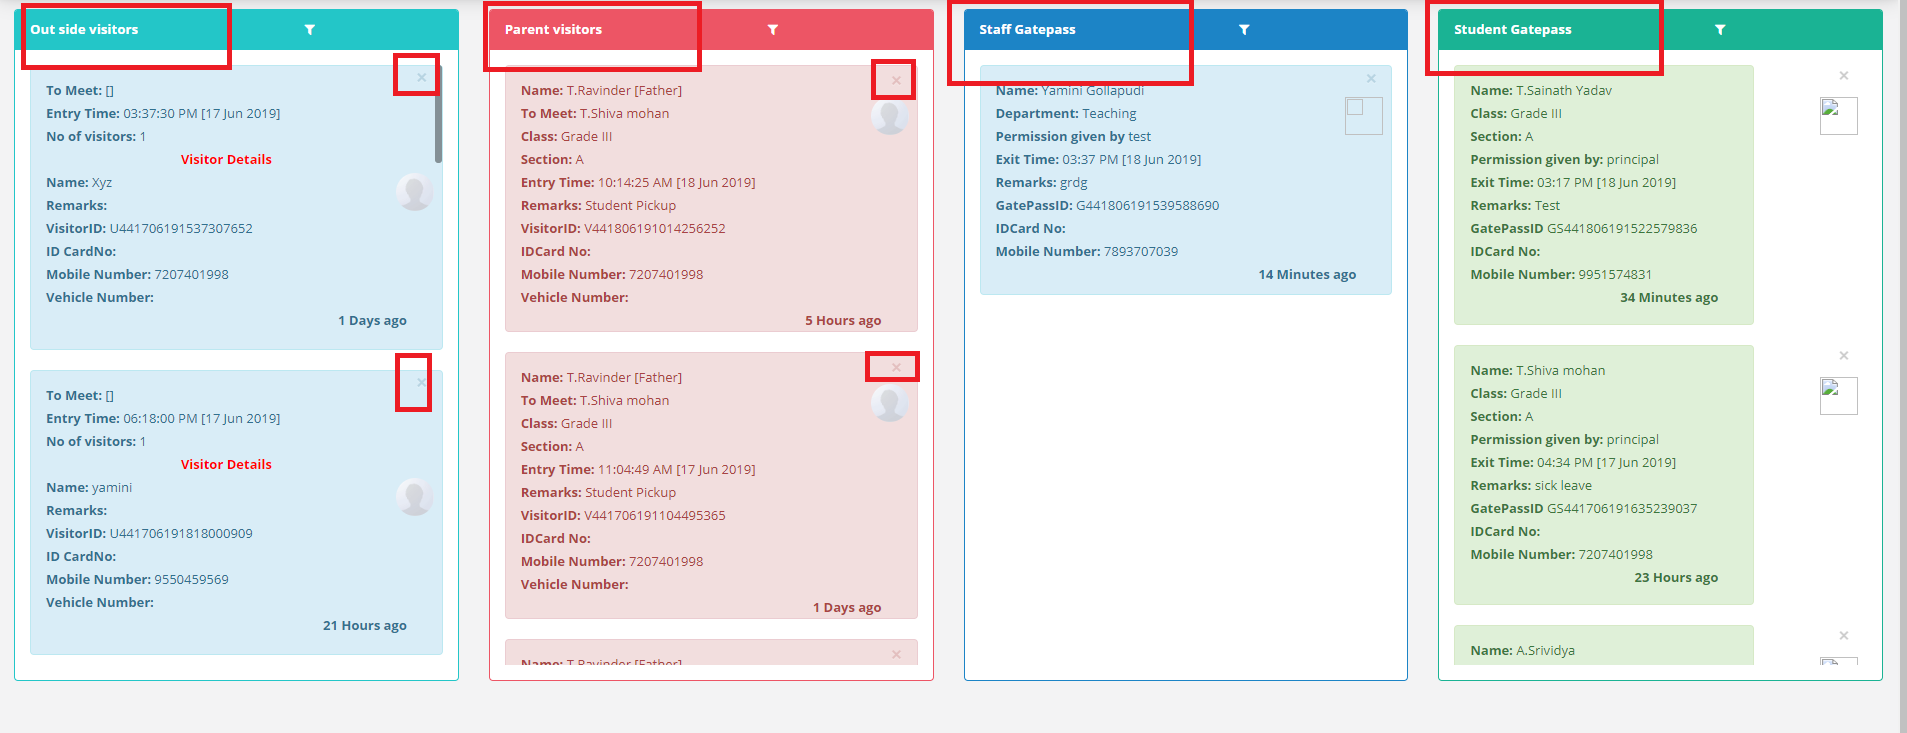
You can issue gate pass for parent visitors, outside visitors, students, and staff.
1. Parent Visitors:
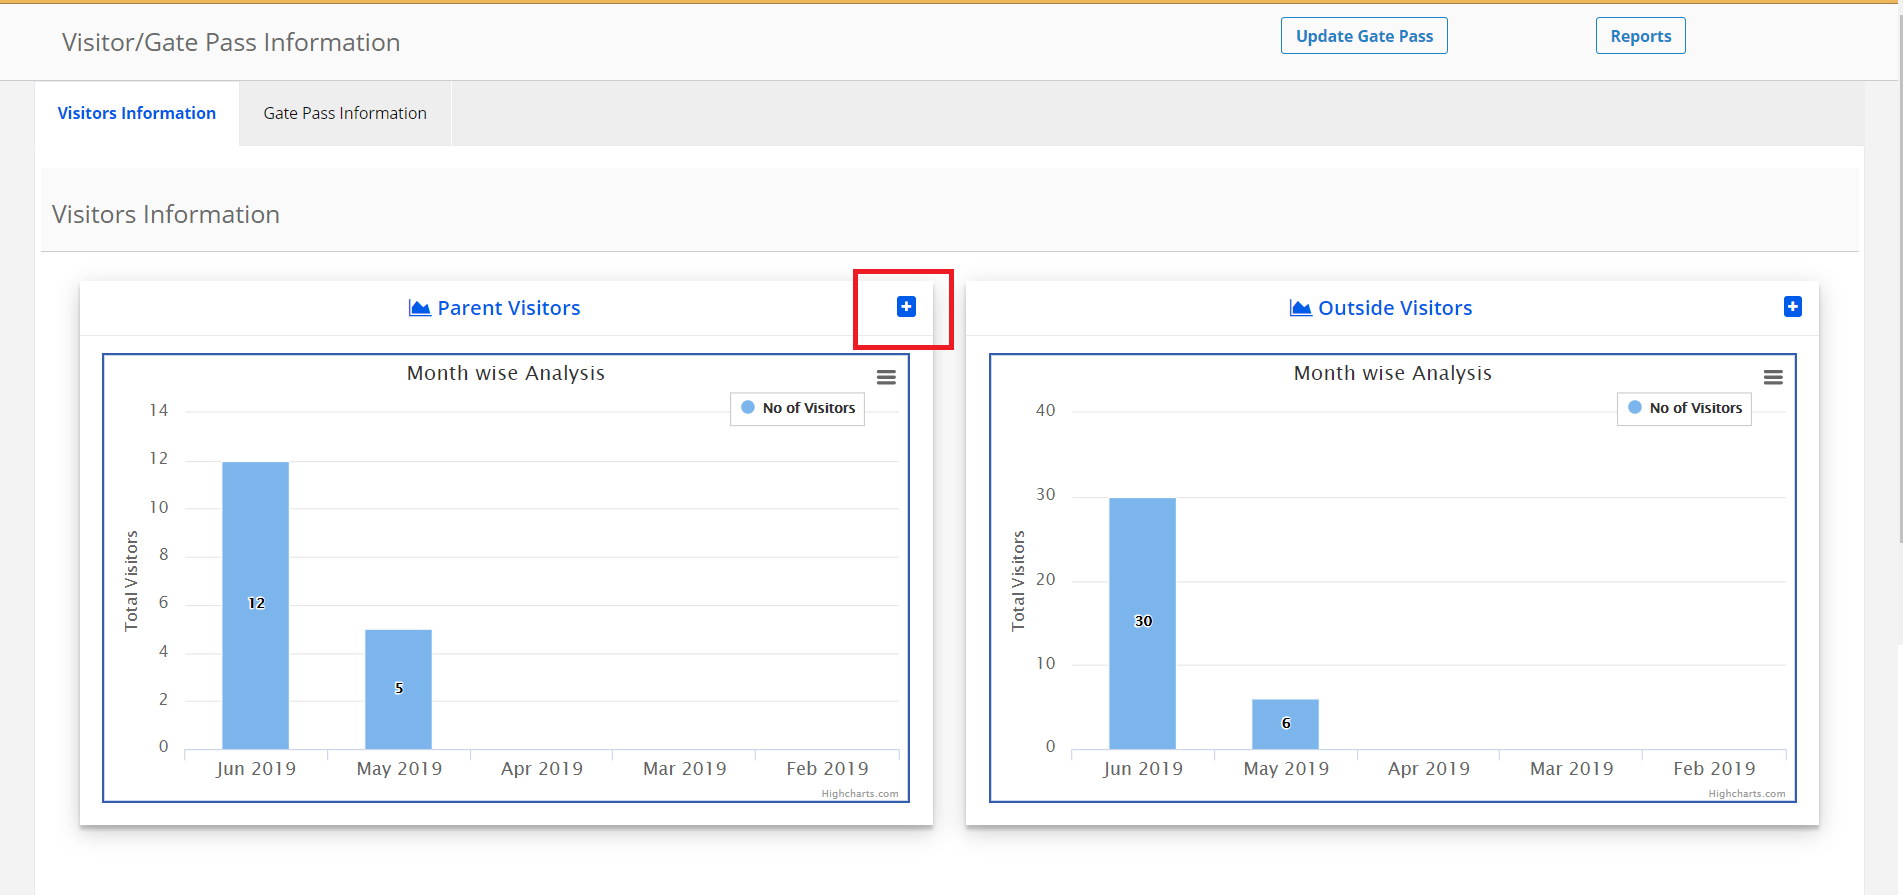
Step 3: To issue gate pass for parent visitors, click on “+” sign as highlighted below
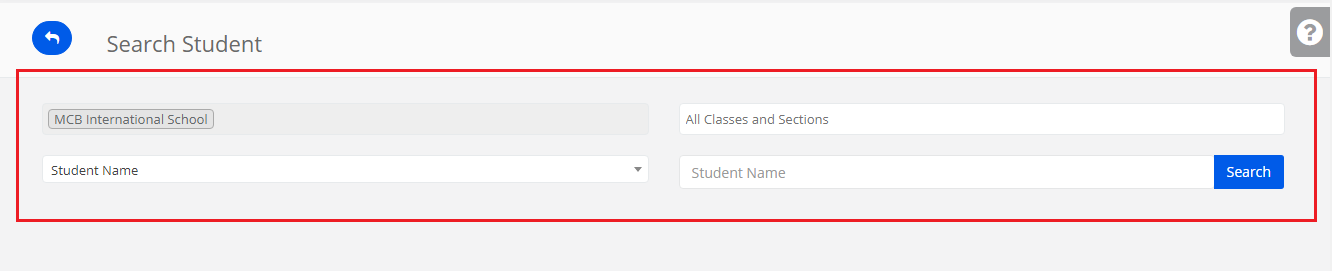
Step 4: Choose class & Section and enter student name and click on search
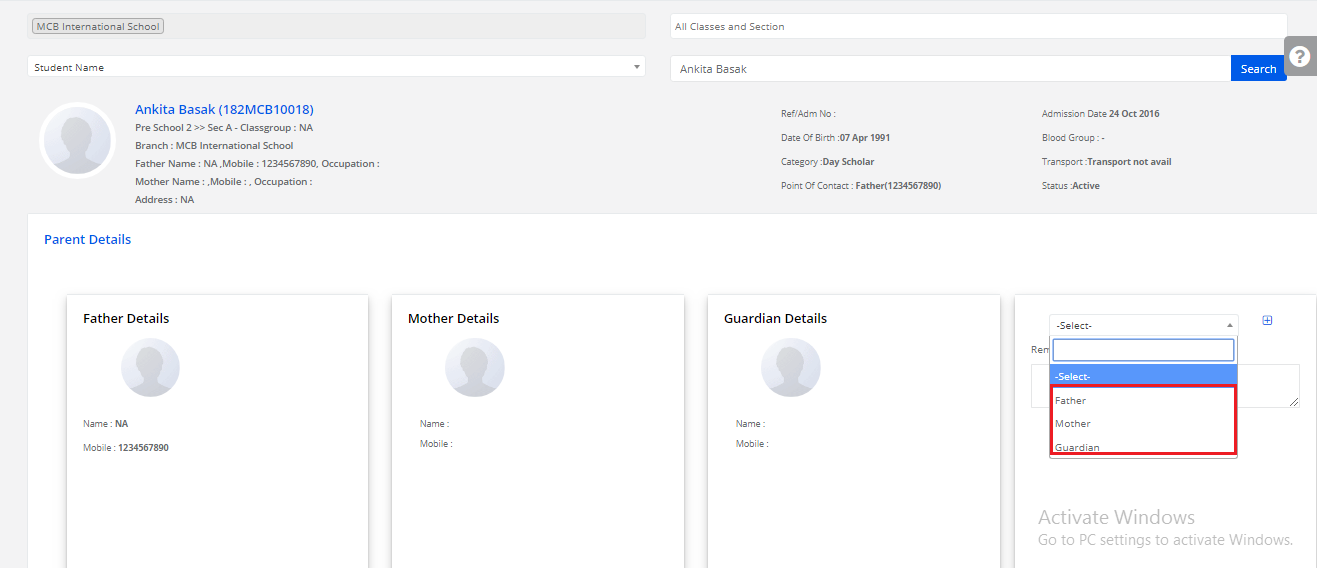
Step 5: Choose who is visiting the campus (Father, Mother, Guardian).
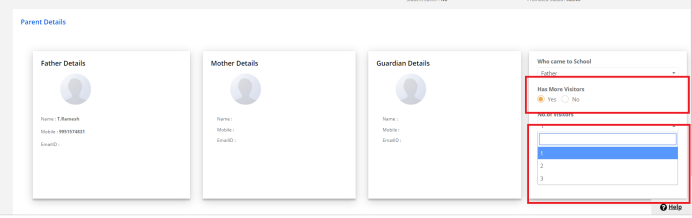
Step 6: To add more visitors in case any other people are visiting the campus along with Father/mother/Guardian and choose the number based on the visitors from the drop down.
Step 7: Enter the name of the visitors and their mobile number in Visitor Info. To Capture the images, click on take snapshot and upload the image.
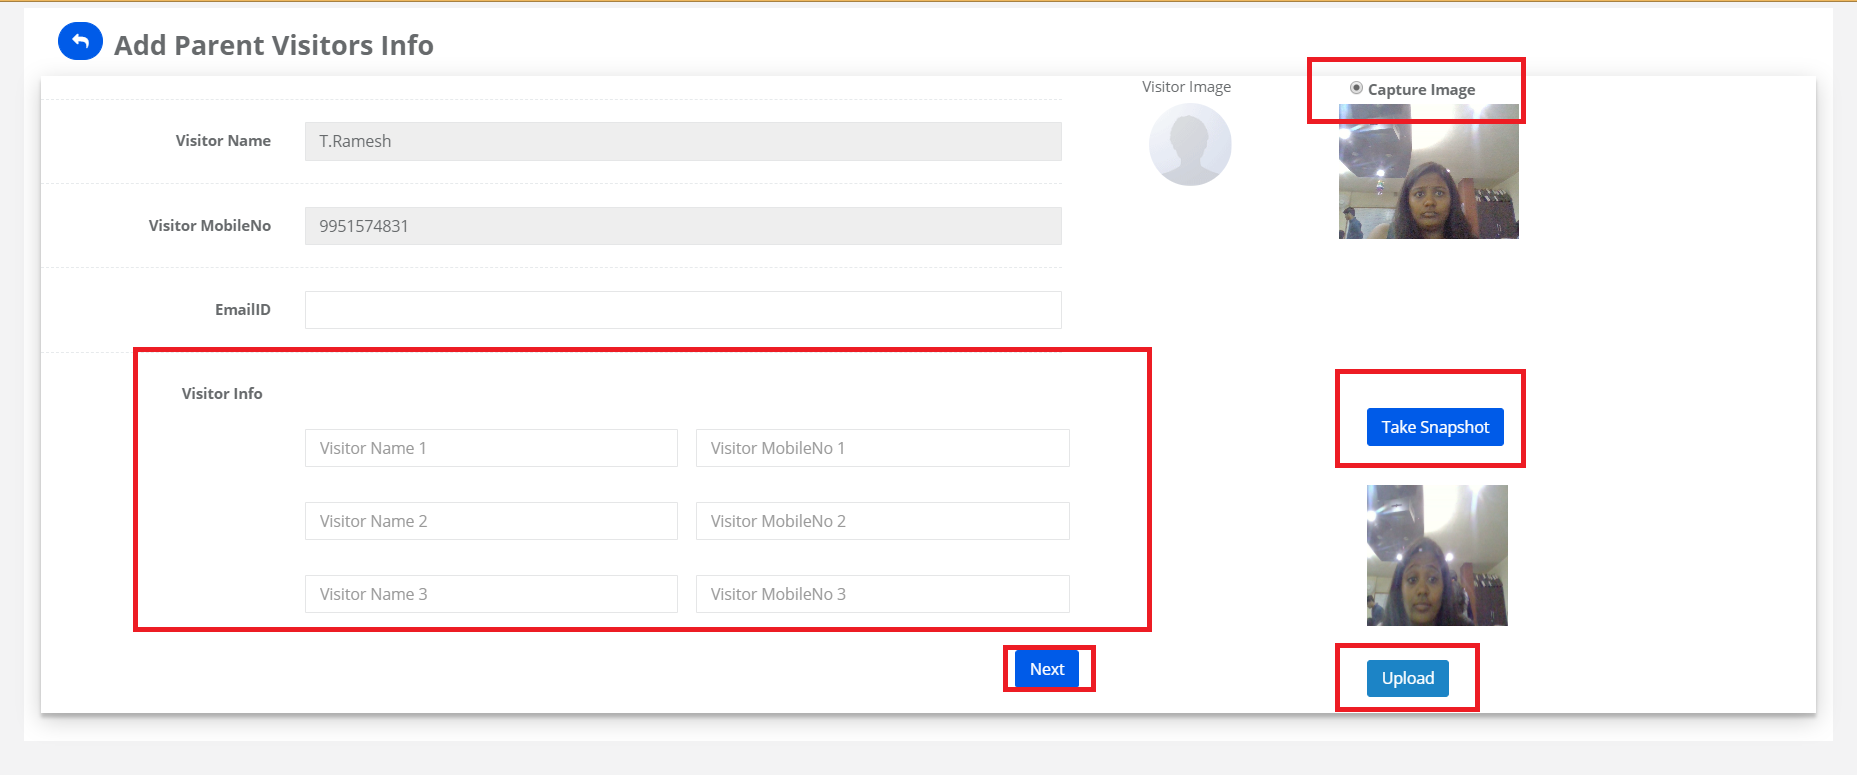
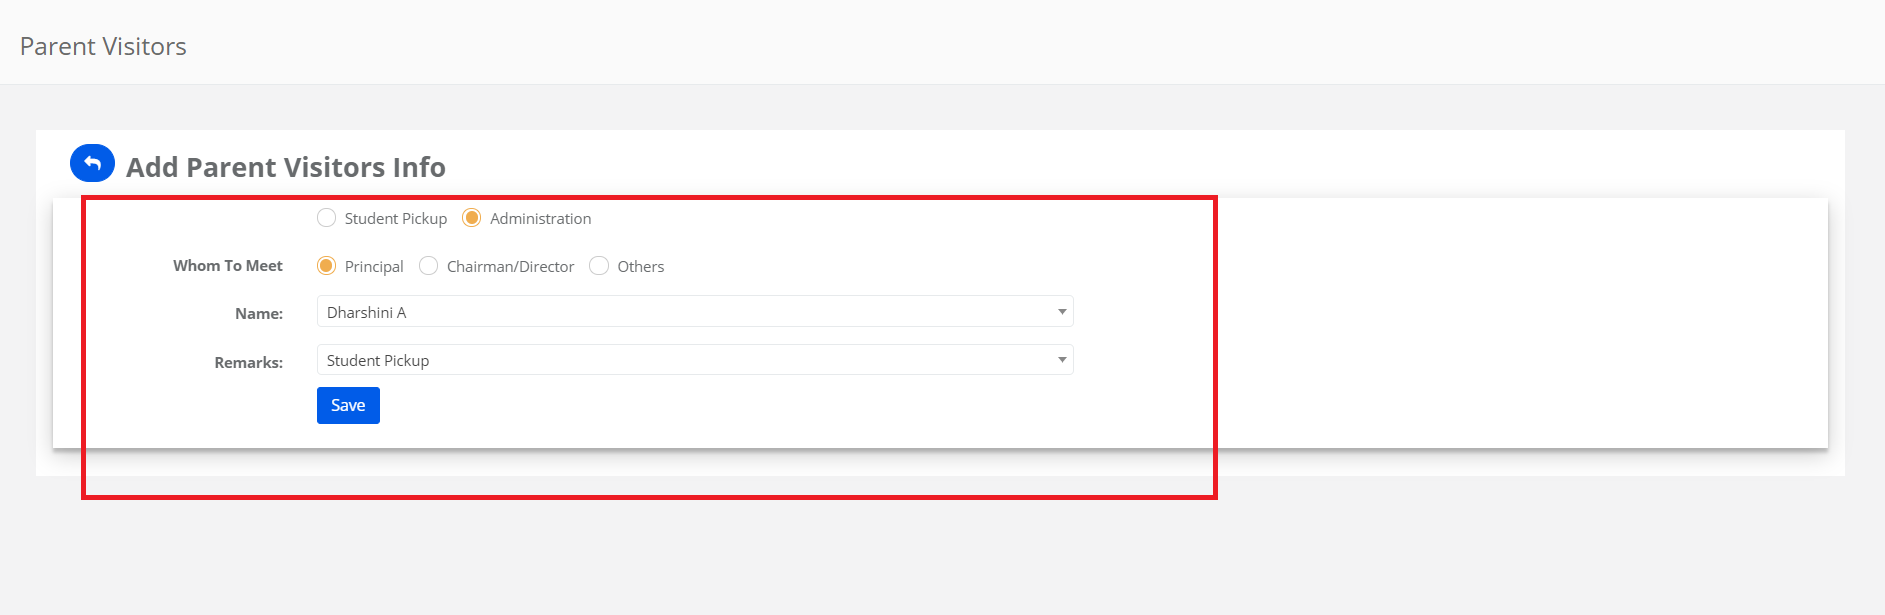
Step 8: Choose the required option either Student pick up or to meet Administration
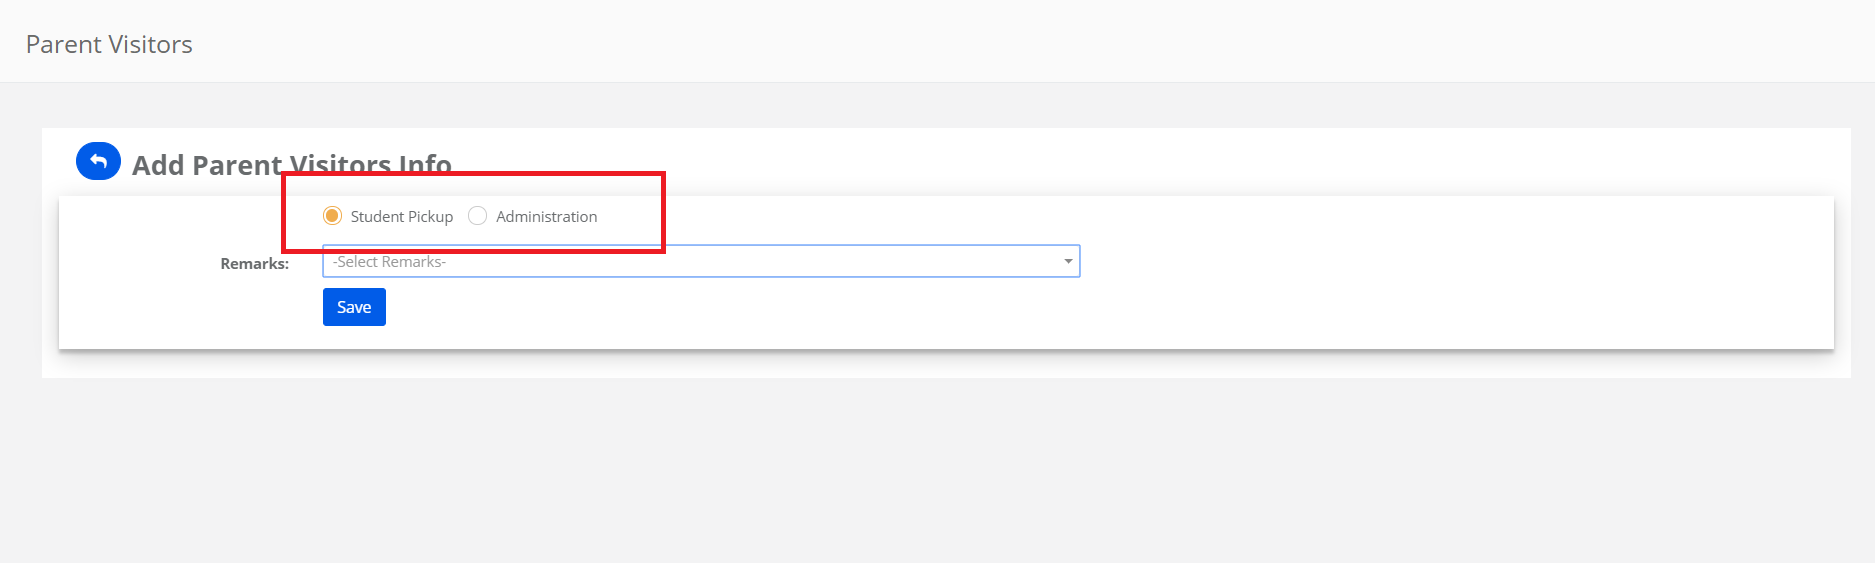
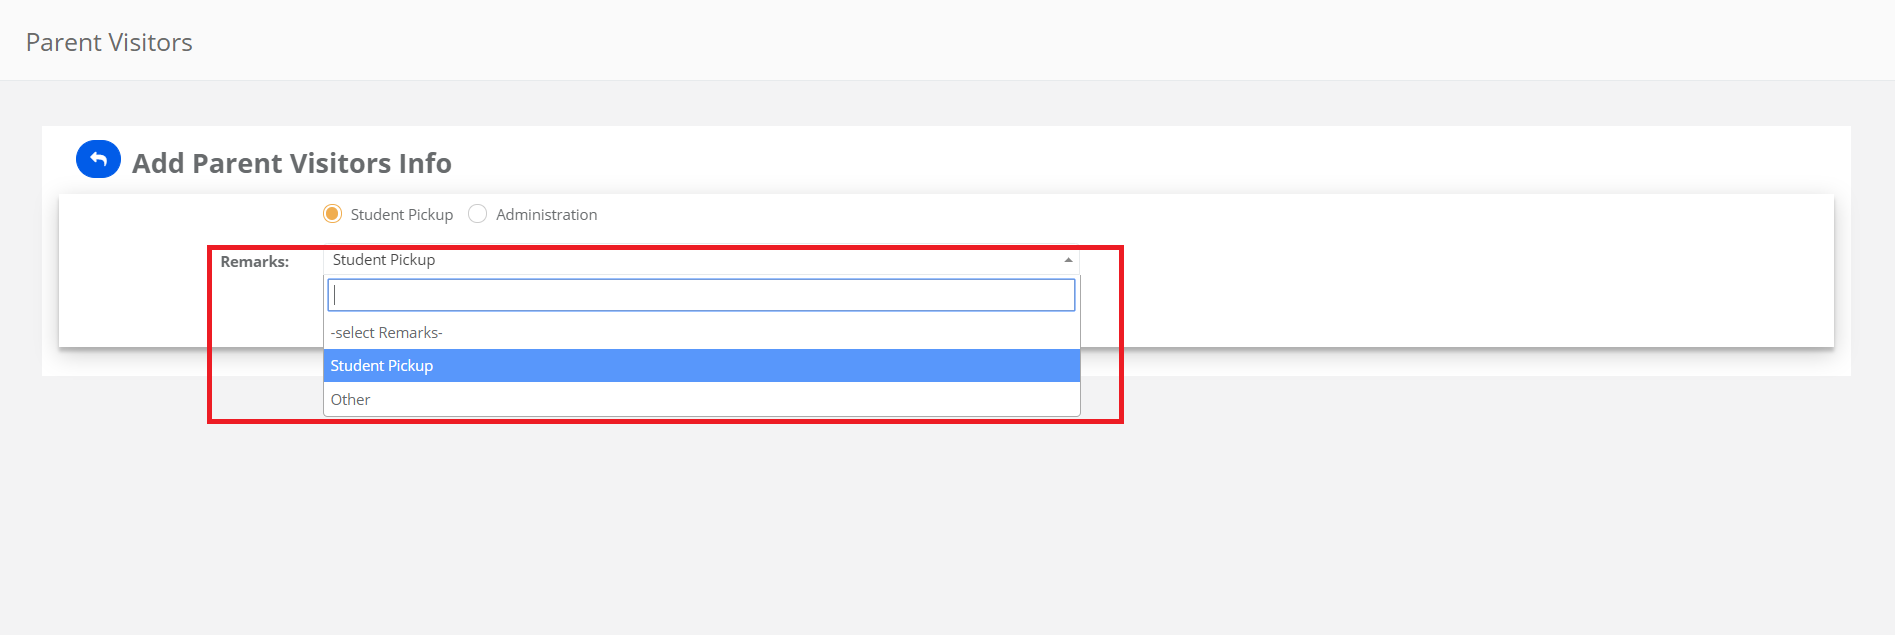
Step 9: To the student Pick up, Choose the Remarks and save
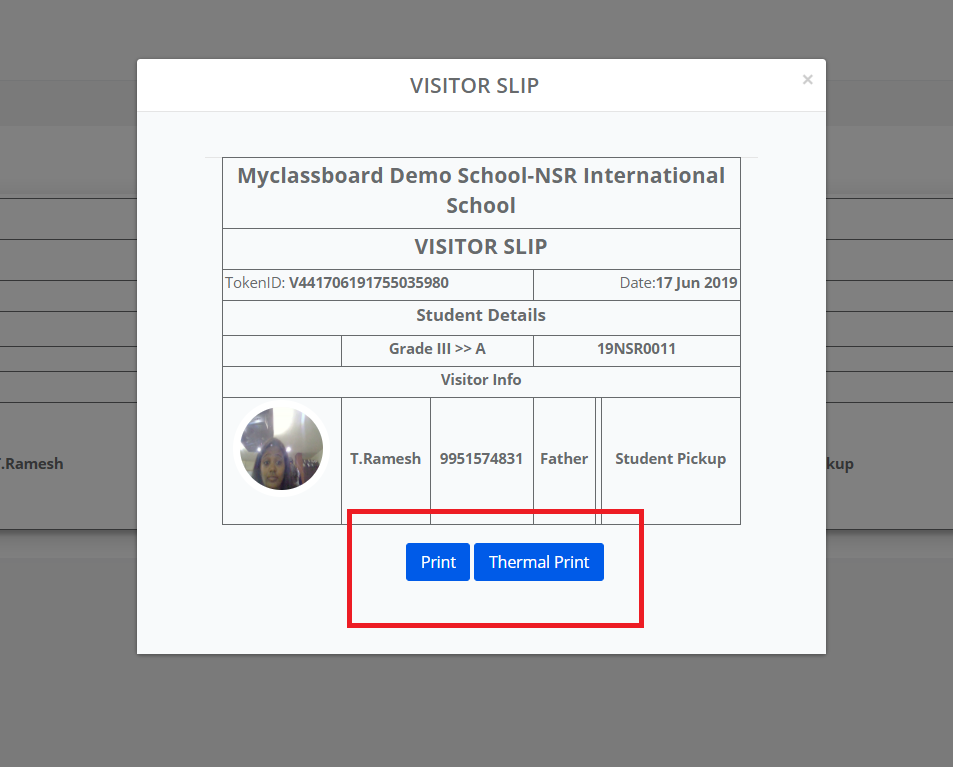
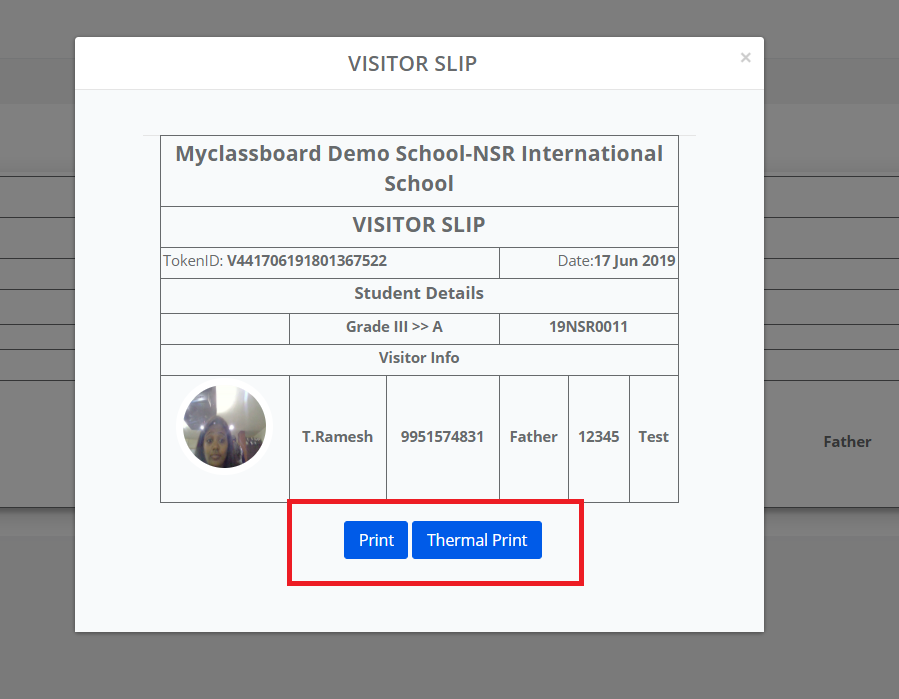
Step 10: Click on the print button to print the parent slip.
Step 11: To meet the Administration, Choose to whom to meet, Select the name and remarks and save. We will notify the user through Email.
Step 12: Click on the print button to print the Parent slip.
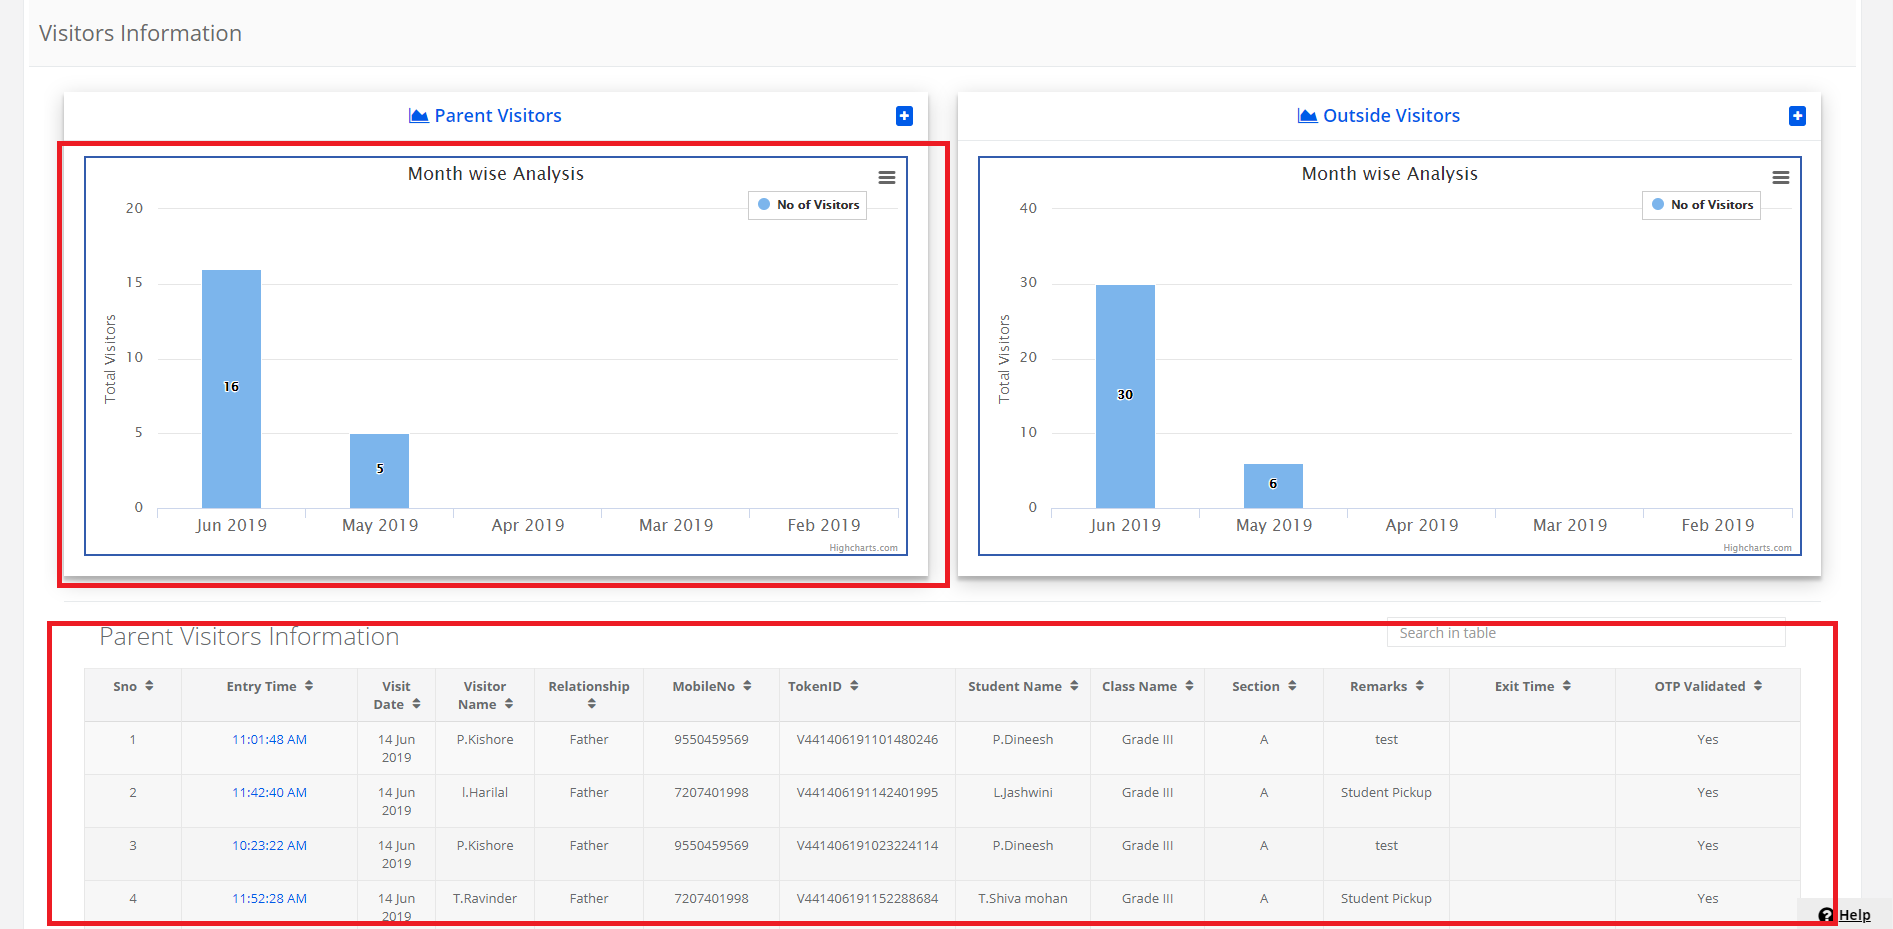
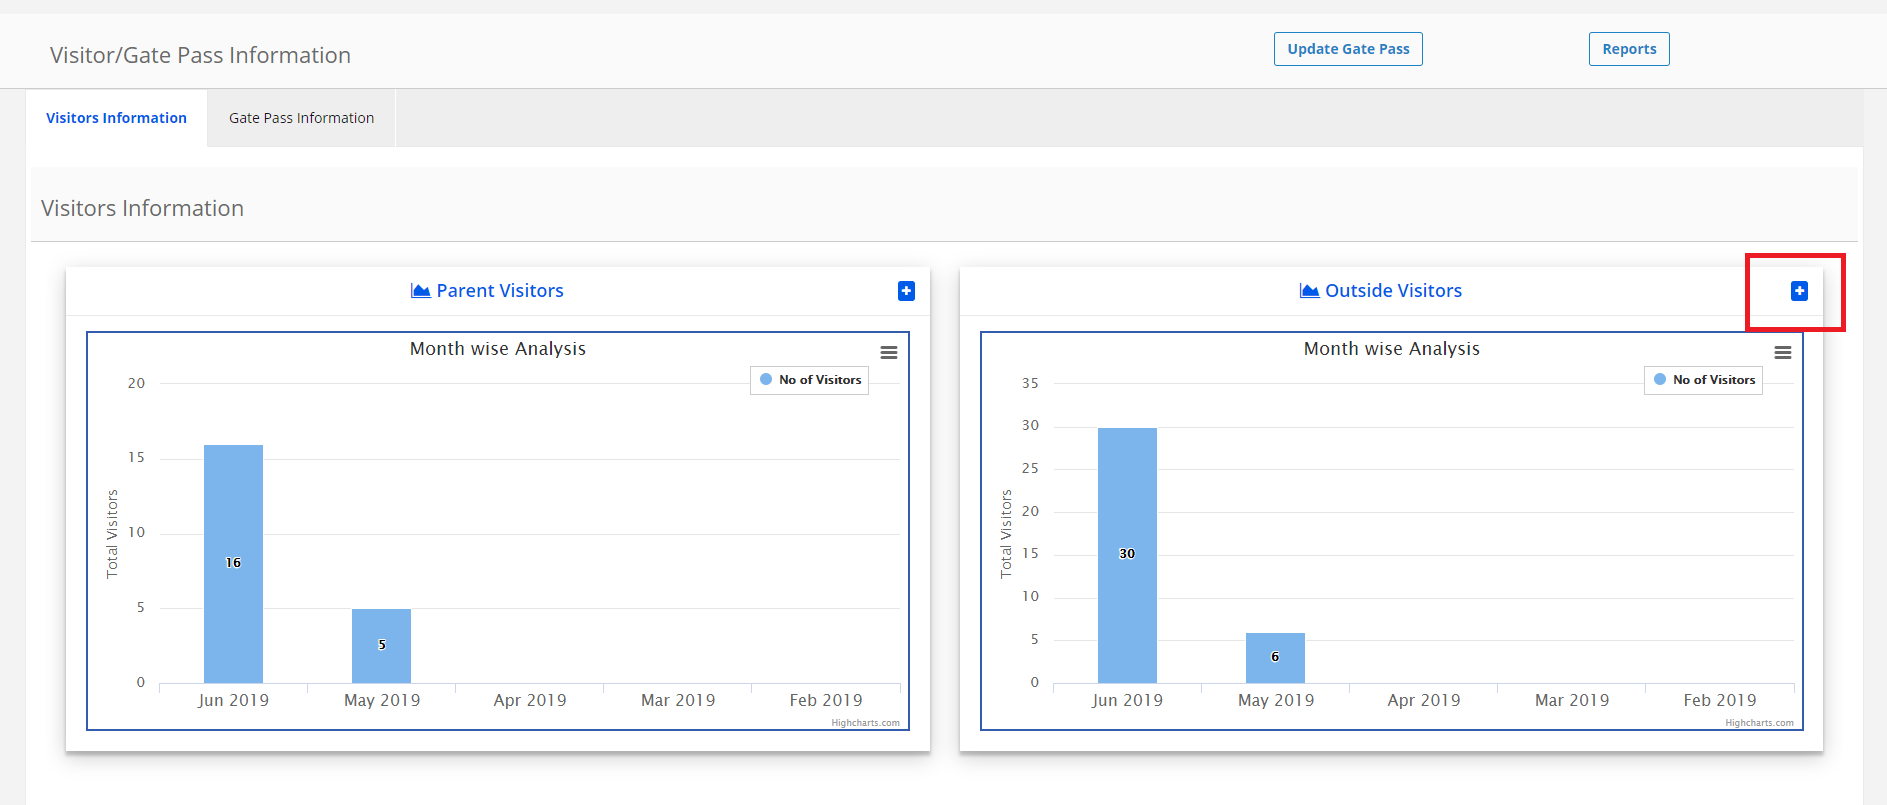
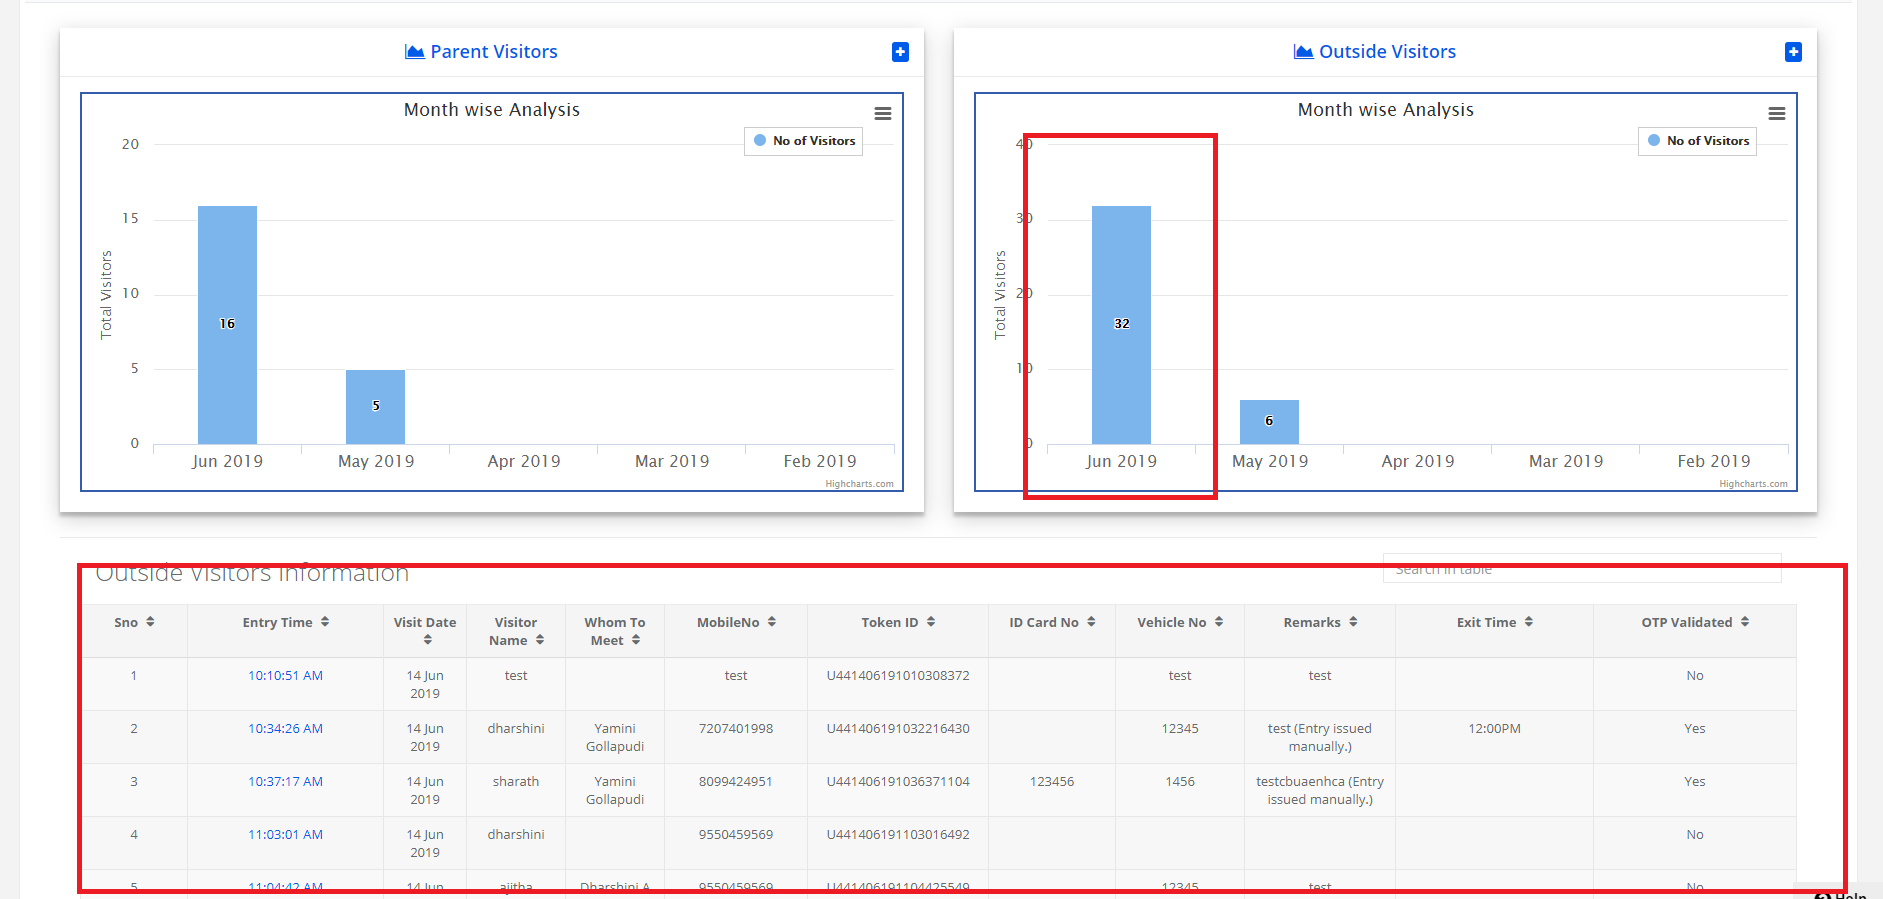
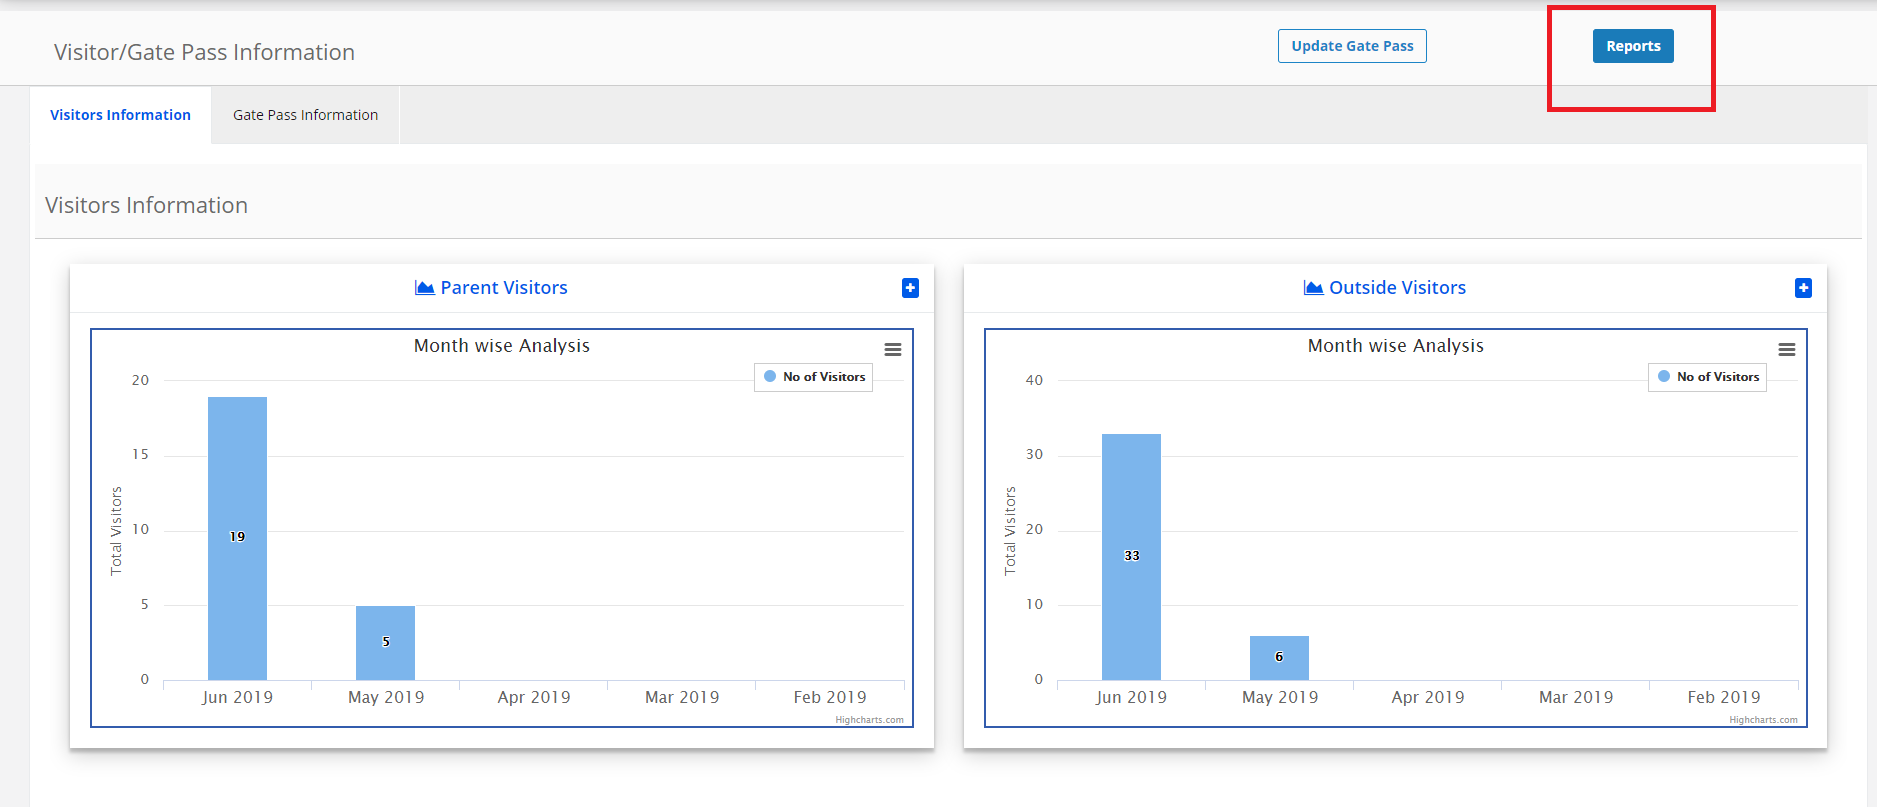
Step 13: The visitor information dashboard shows you month wise count of the number of visitor slips generated. To get the details, click on the number displaying on the graph.
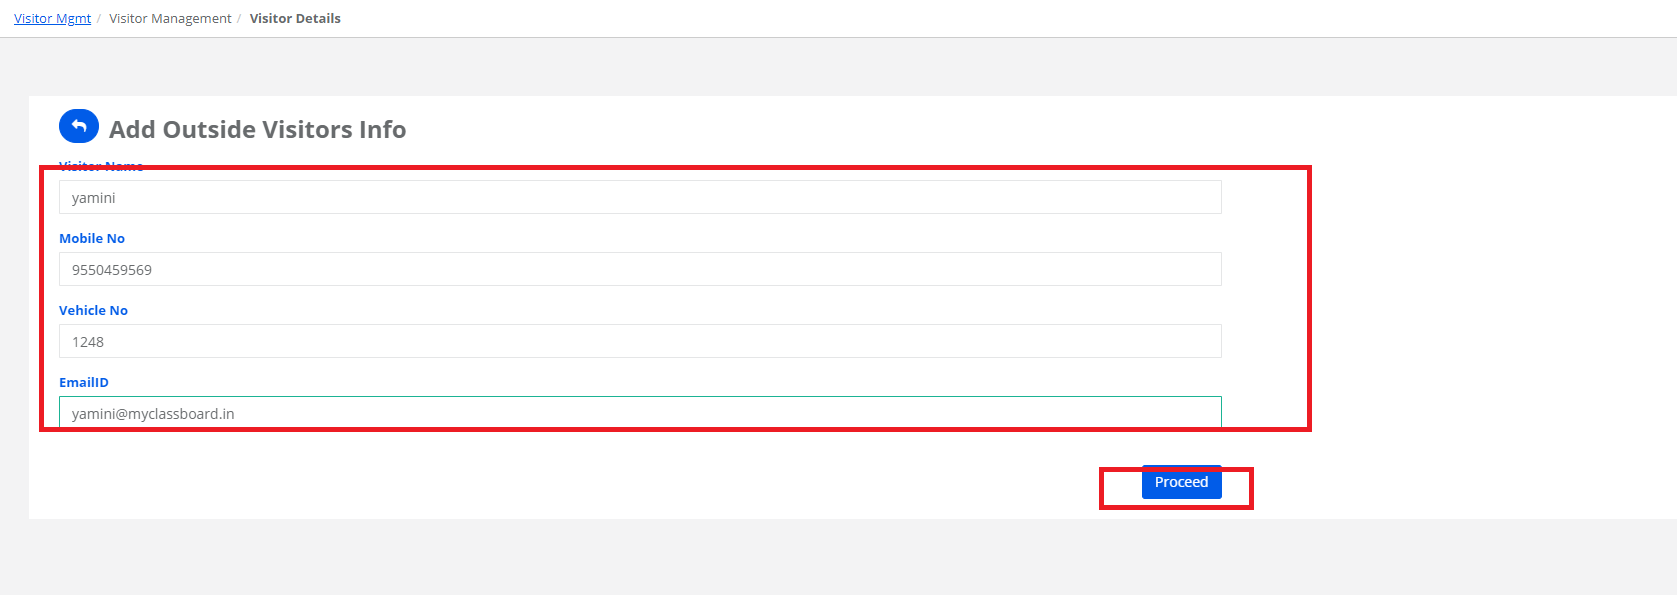
2.Outside Visitors:
Step 1: To issue gate pass for Outside visitors, click on “+” sign as highlighted below
Step 2: Enter the Visitor name, mobile number, Vehicle Number & email id in Outside Visitors Info.
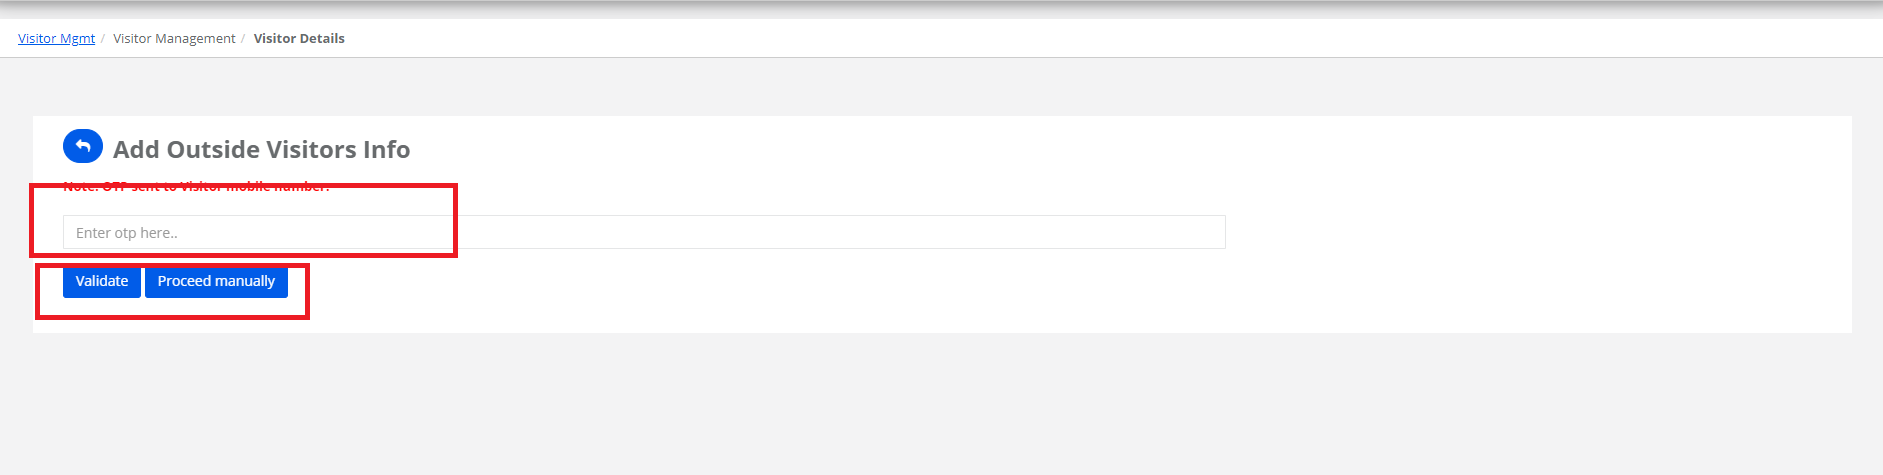
Step 3: Opt sent to the Registered email id & Mobile number.Enter the OTP to verified
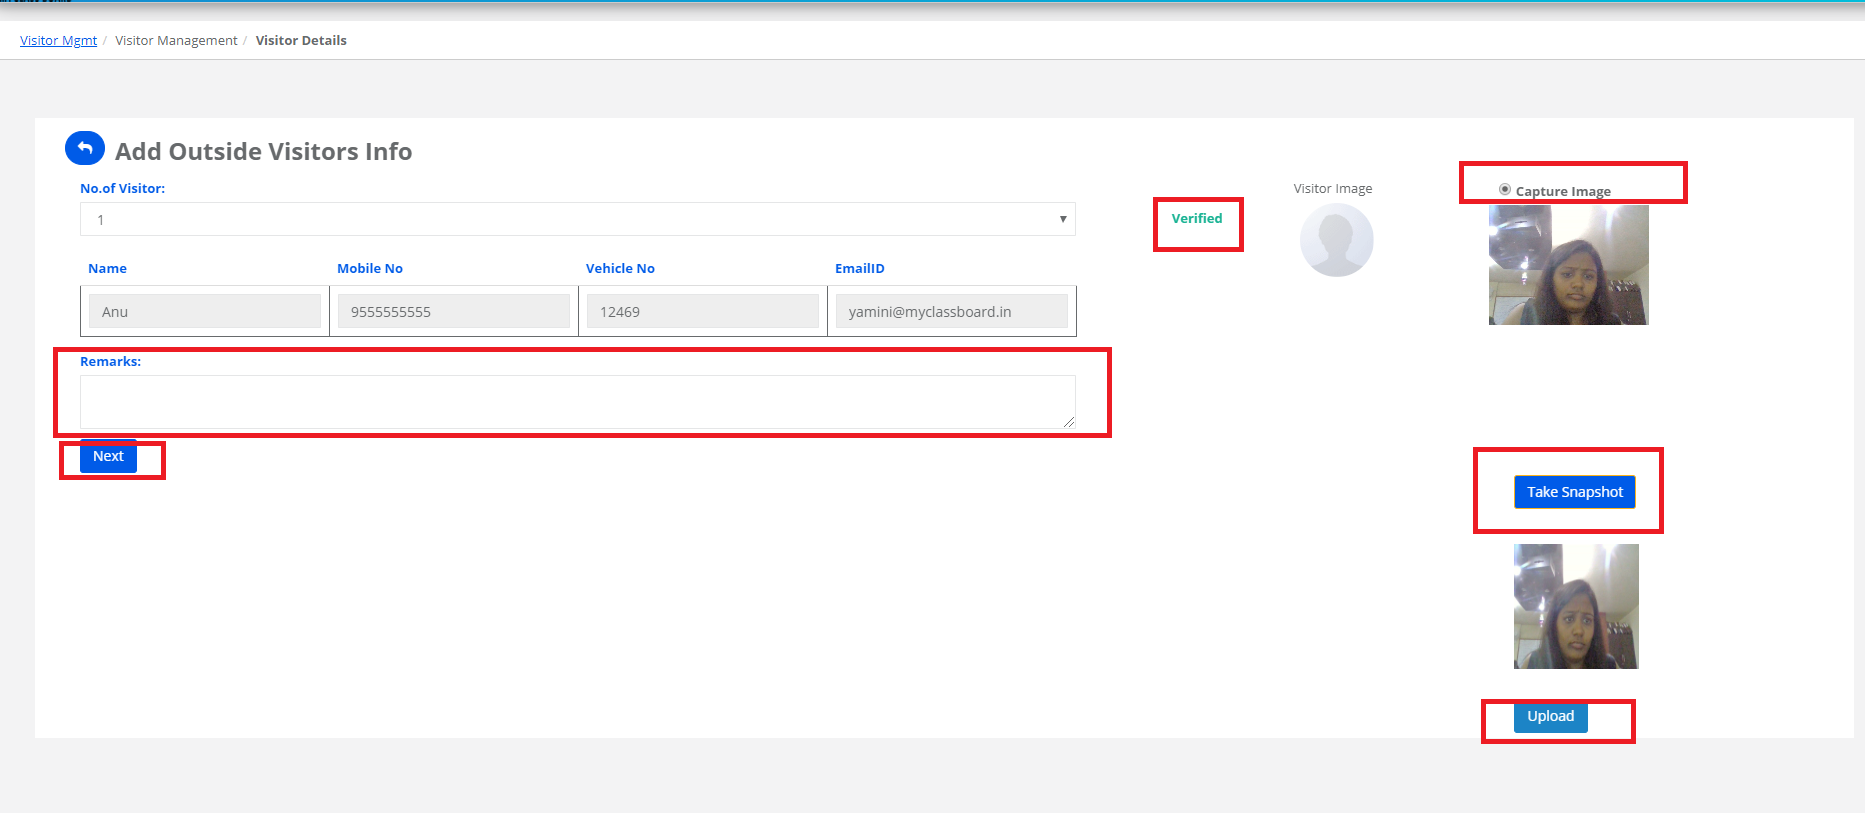
Step 4: You see the Status of the Visitor Whether it is Verified or not. To Capture the images, click on take snapshot and upload the image. Enter the remarks and click on Next.
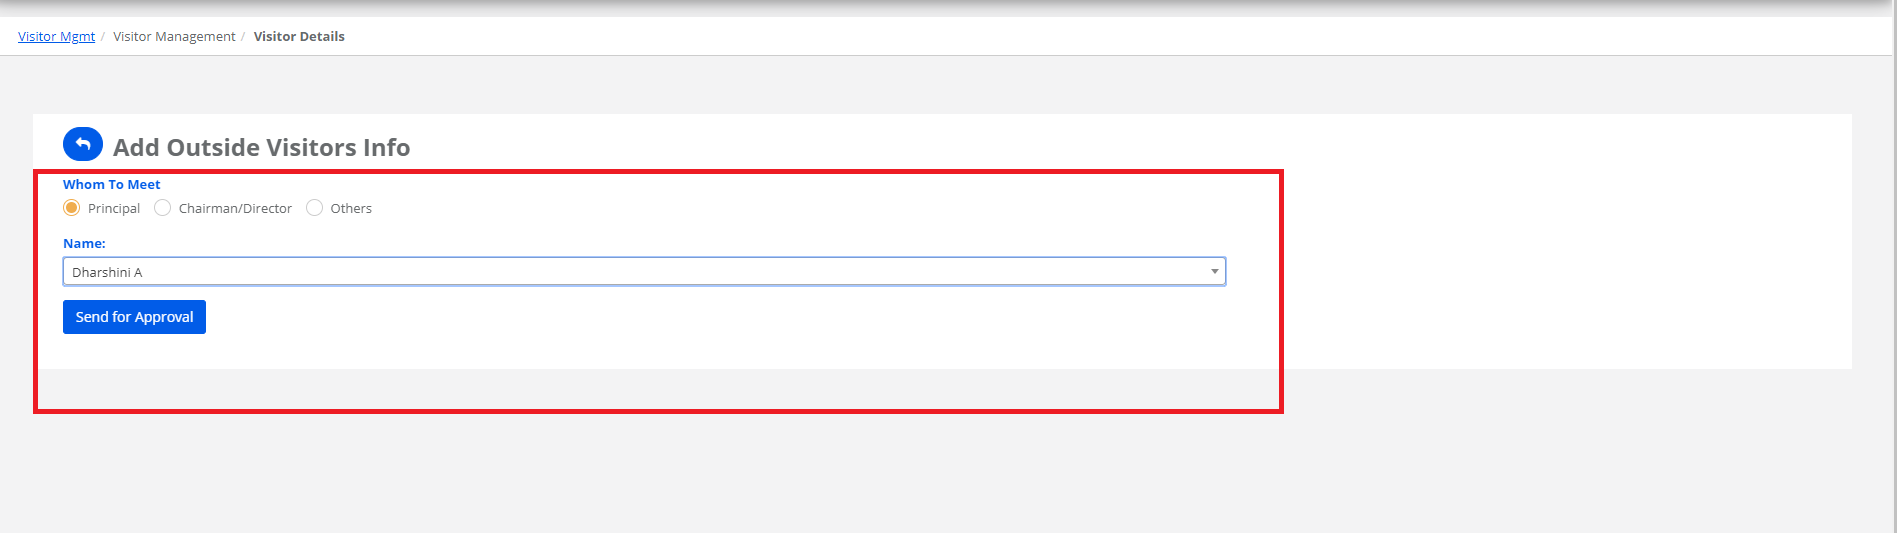
Step 5: Choose the option here to whom to meet & click on Send for approval.
Step 6: Mobile app notification sent for approval to the user to get the status to know the visitor is allowed/denied or Proceed manually with your Approval
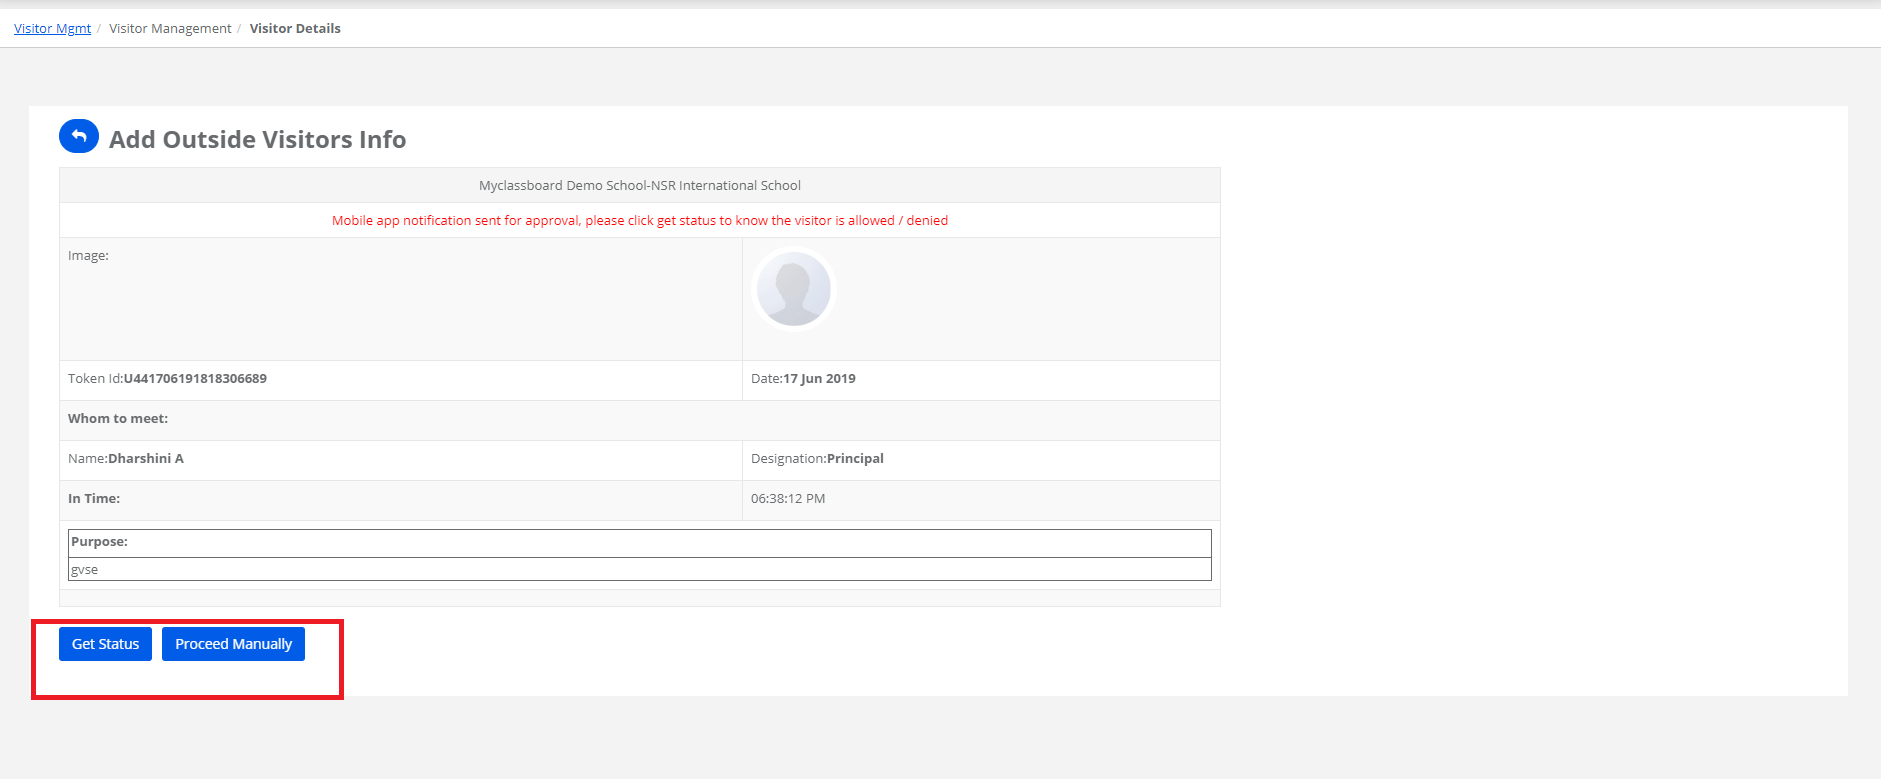
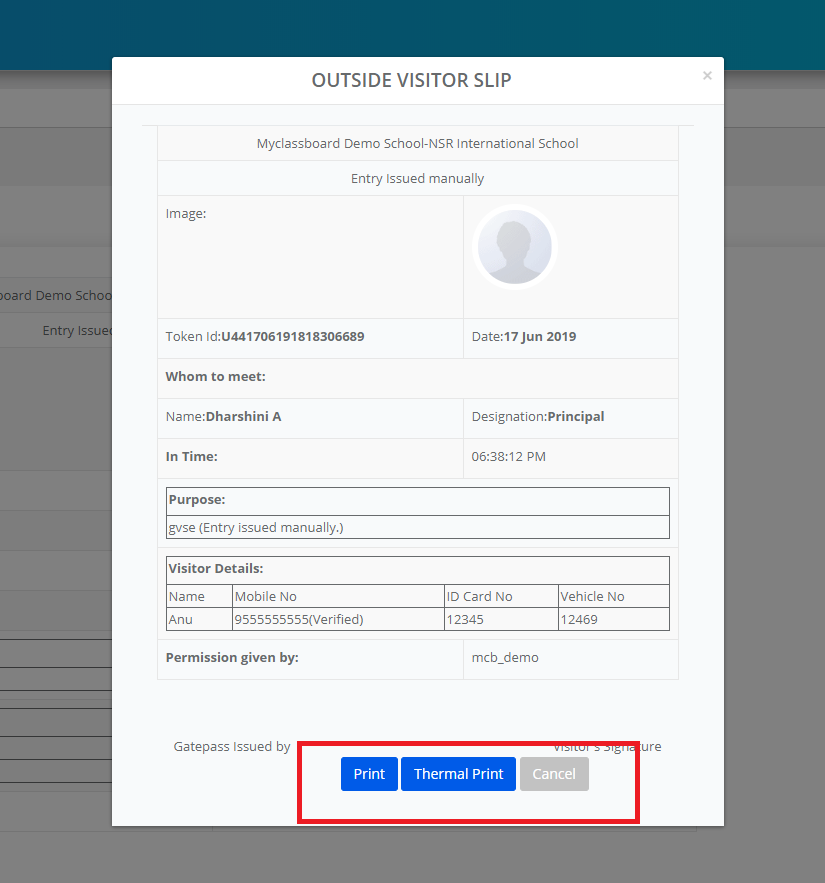
Step 7: Enter the ID card number given to the visitor and Save.

Step 8: Click on the print button to print the visitor slip.
Step 9: The visitor information dashboard shows you month wise count of the number of visitor slips generated. To get the details, click on the number displaying on the graph.
3.Student Gate Pass
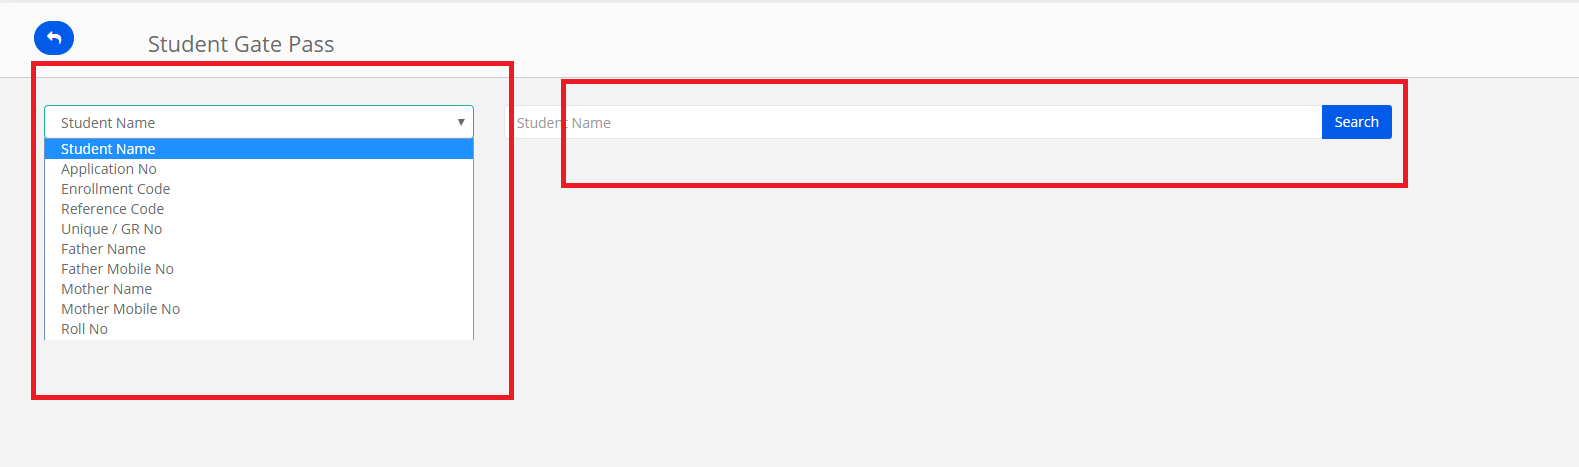
Step 1: To issue the gate pass for students go to gate pass information tab, click on “+ sign against the student gate pass
Step 2: Search the student by choosing the option based on the information you have and click on the search button.
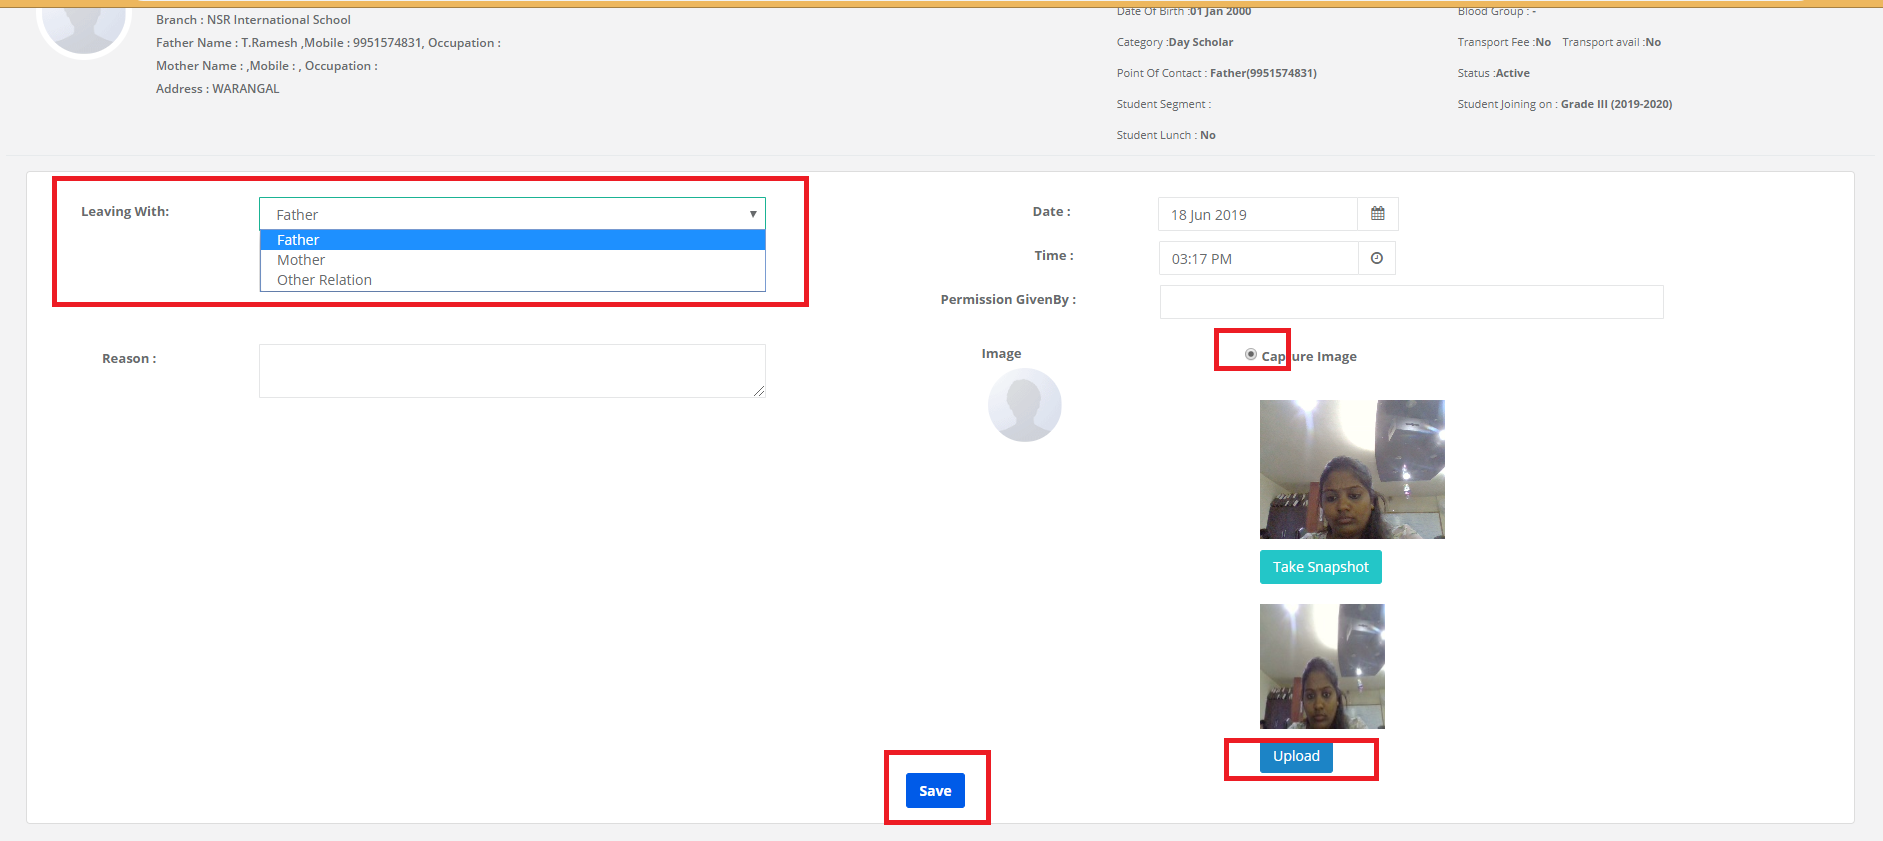
Step 3: Fill in the details
1. Choose the person who the student is leaving with from the drop down
2. Enter the reason
3. Permission was given by
4. capture the image, take snapshot and upload
5. Click on save
Note: The point of contact will receive an email when a gate pass is generated with the details of the people their child is going with.
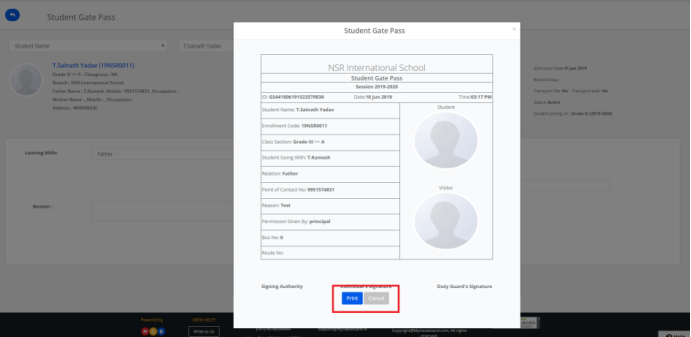
Step 4: Click on the print button to print the Student gate pass.
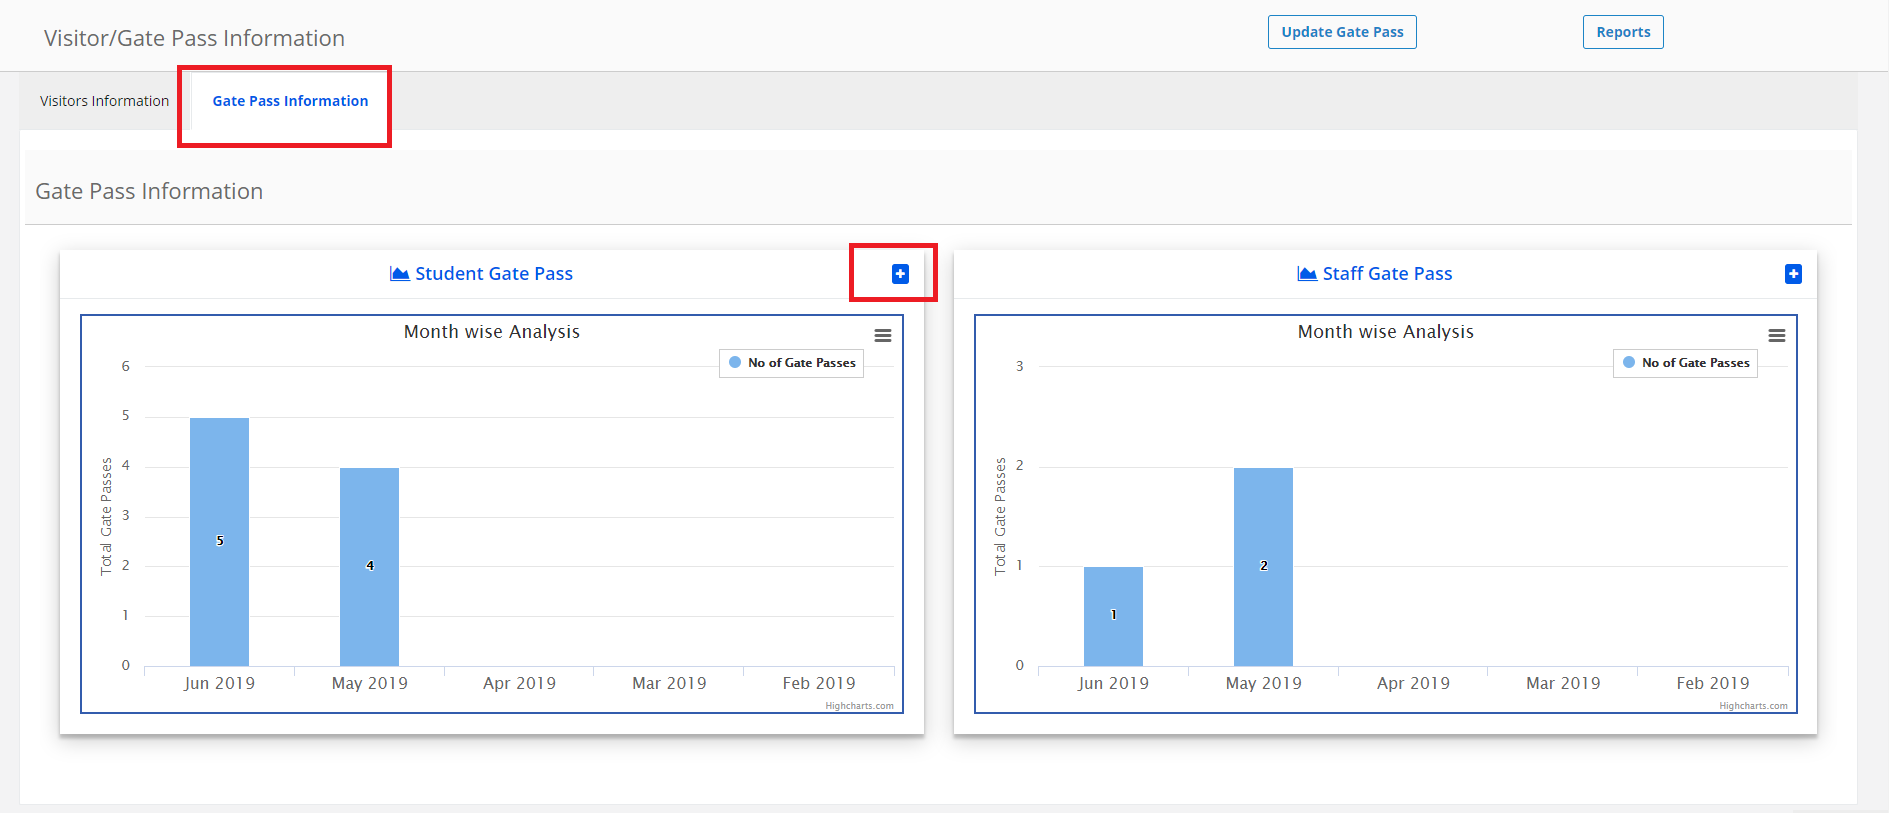
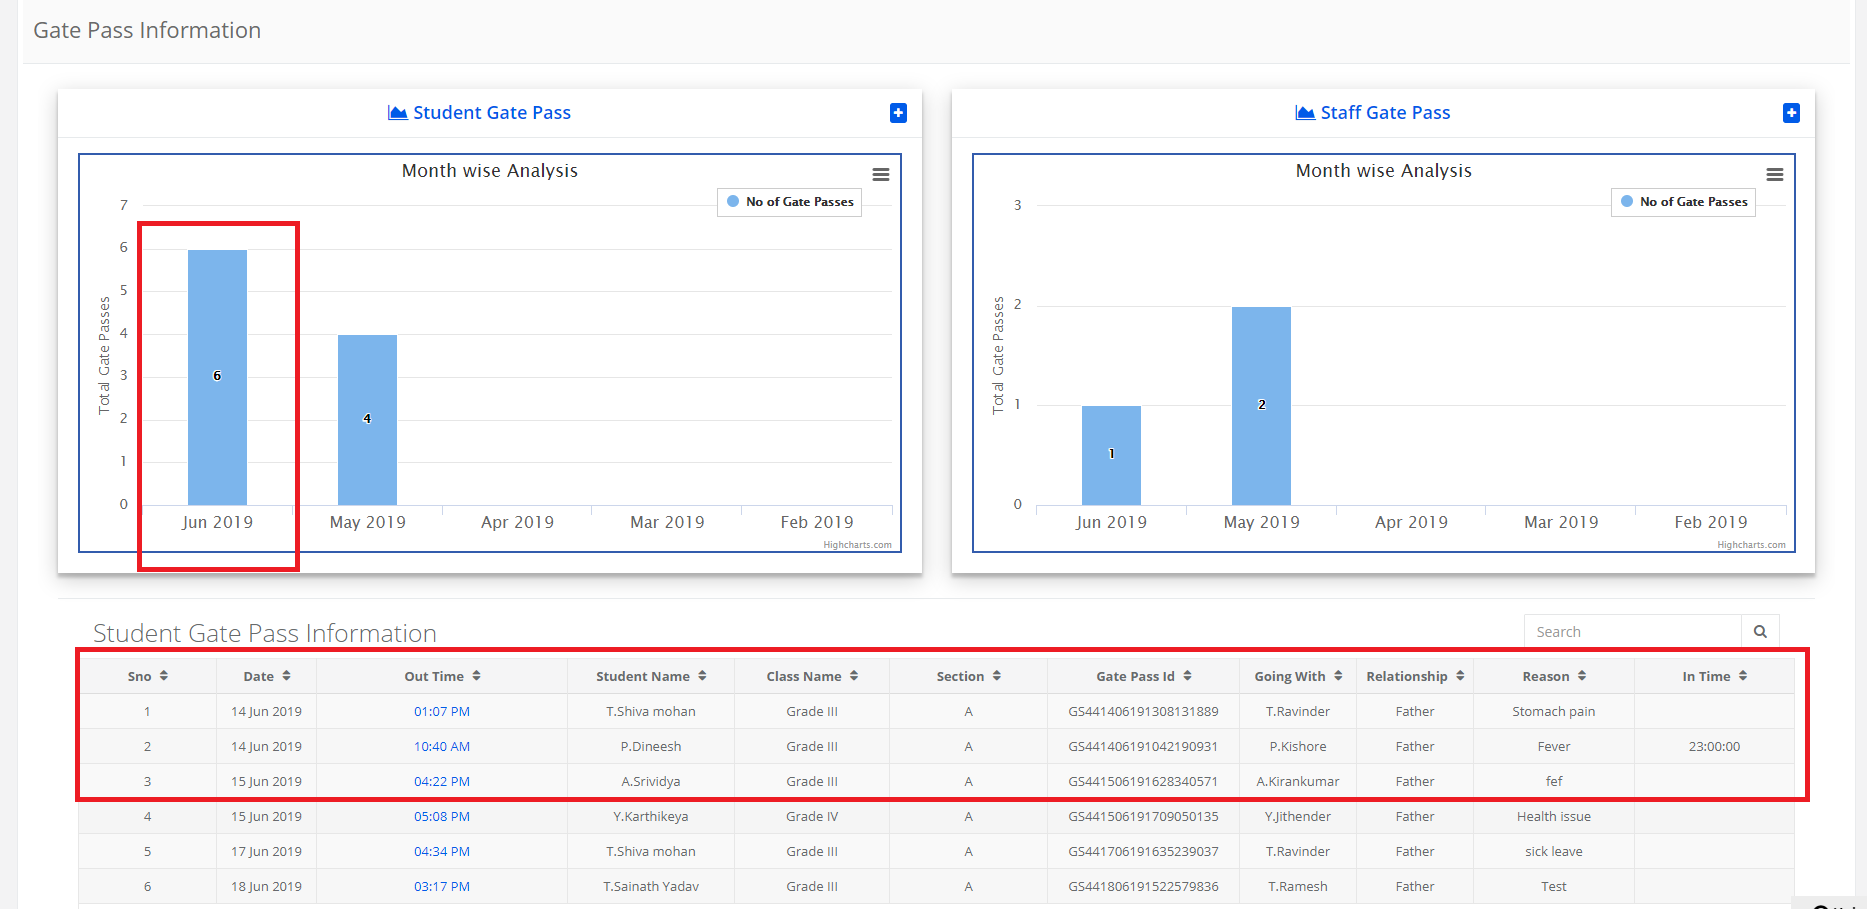
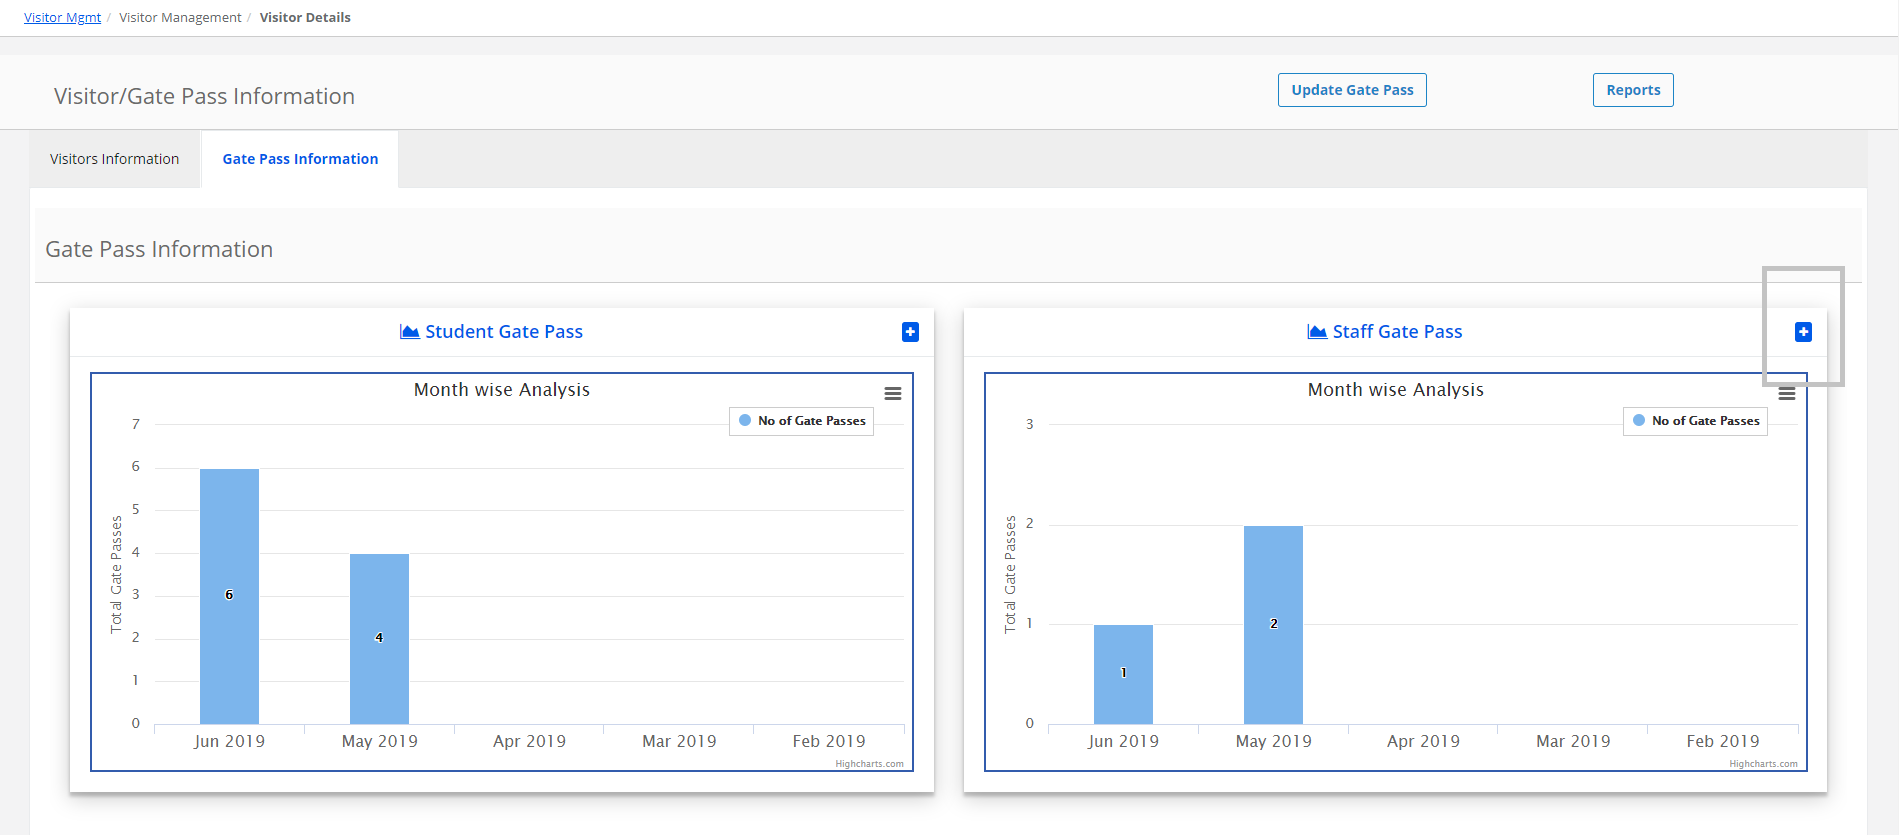
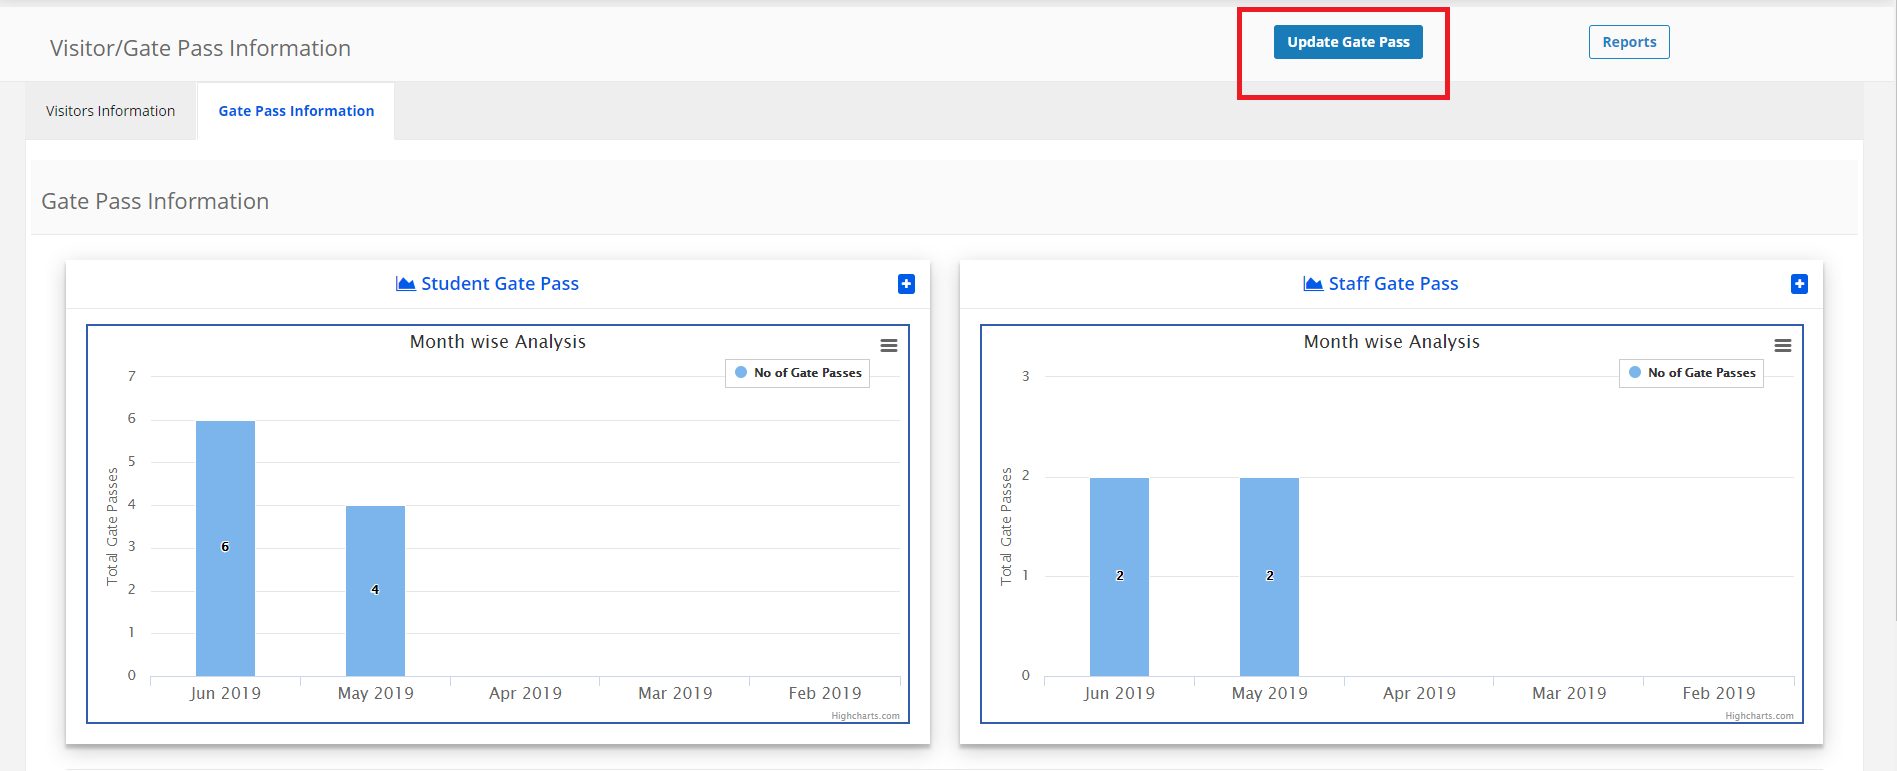
Step 5: The Gate pass information dashboard shows you month wise count of the number of gate passes generated. To get the details, click on the number displaying on the graph.
Staff Gate Pass
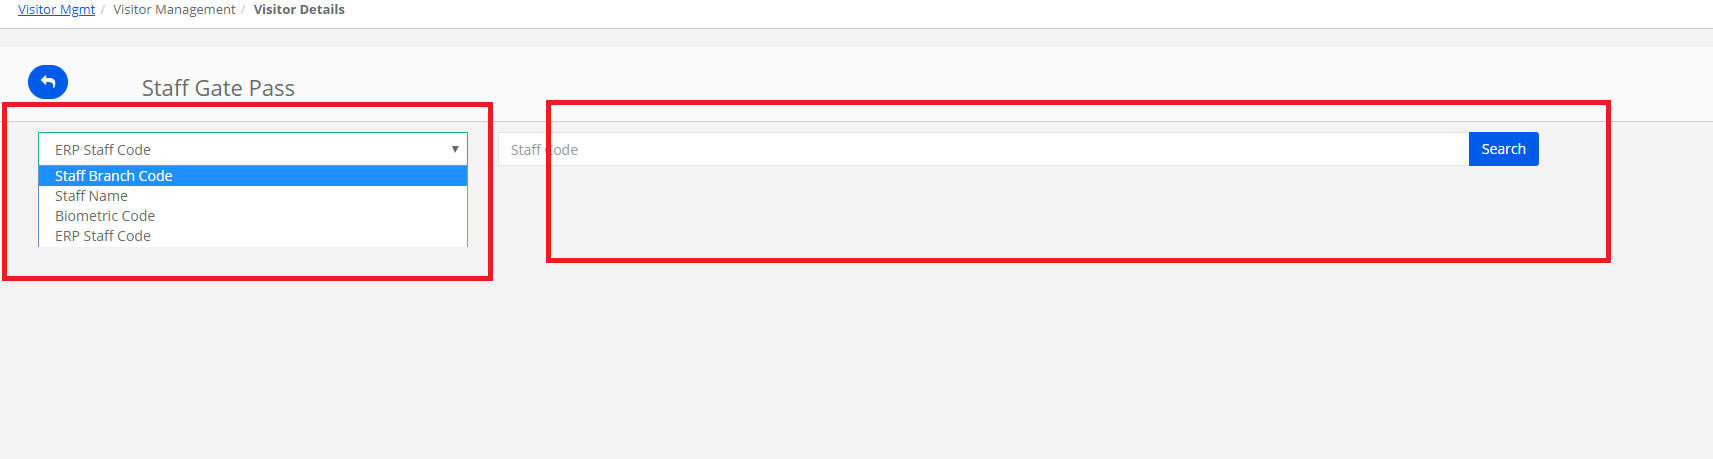
Step 1: To issue gate pass for staff, go to gate pass information tab, click on “+ sign against the staff gate pass
Step 2: Search the staff by choosing the option based on the information you have and click on the search button.
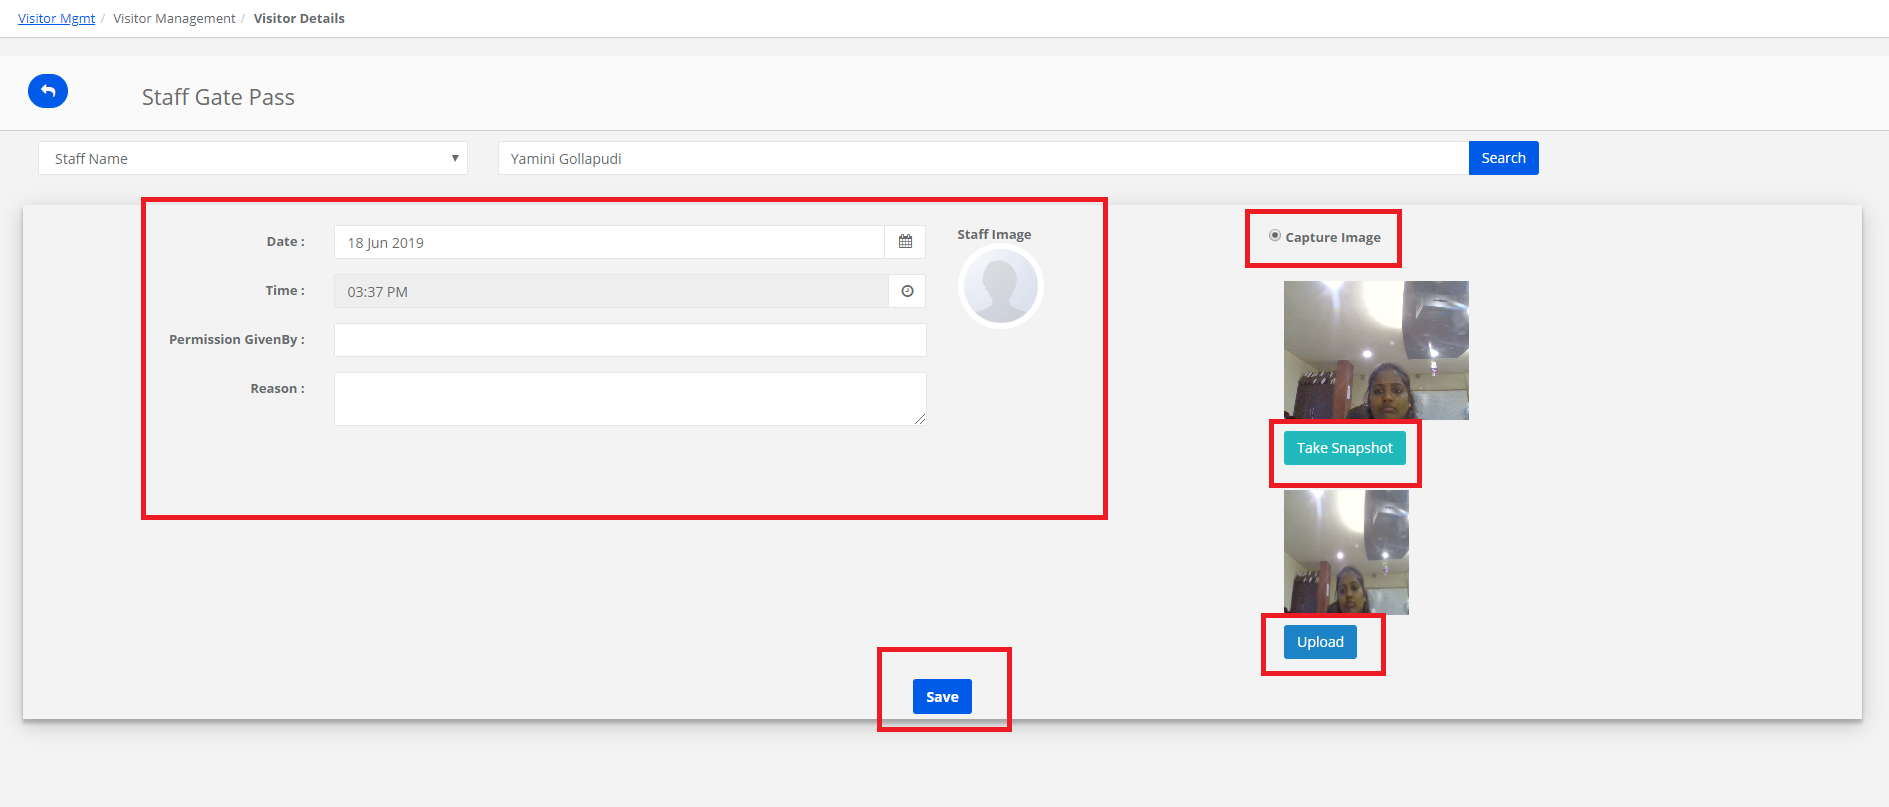
Step 3: Fill in the details
1. Enter permission given by
2. Remarks
3. Capture image, take snapshot and upload
4. Click on Save
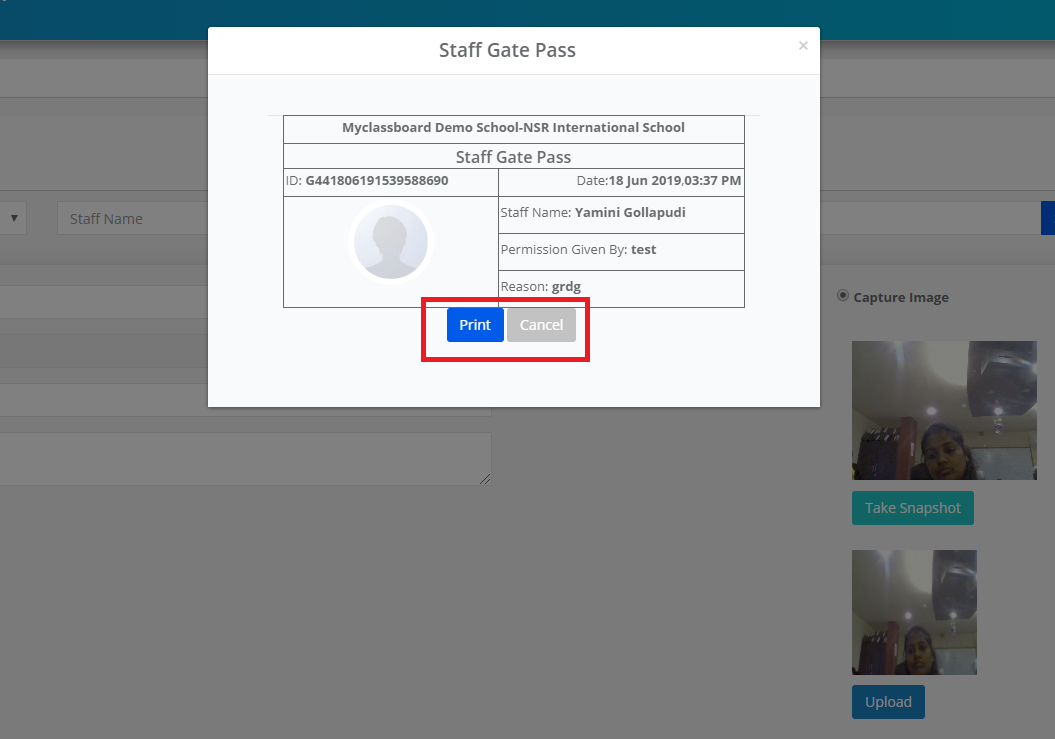
Note: The principal of the branch will receive an email when a gate pass is generated with the details of the staff.
Step 4: Click on OK to generate the gate pass.
Step 5: The Gate pass information dashboard shows you month wise count of the number of gate passes generated. To get the details, click on the number displaying on the graph.
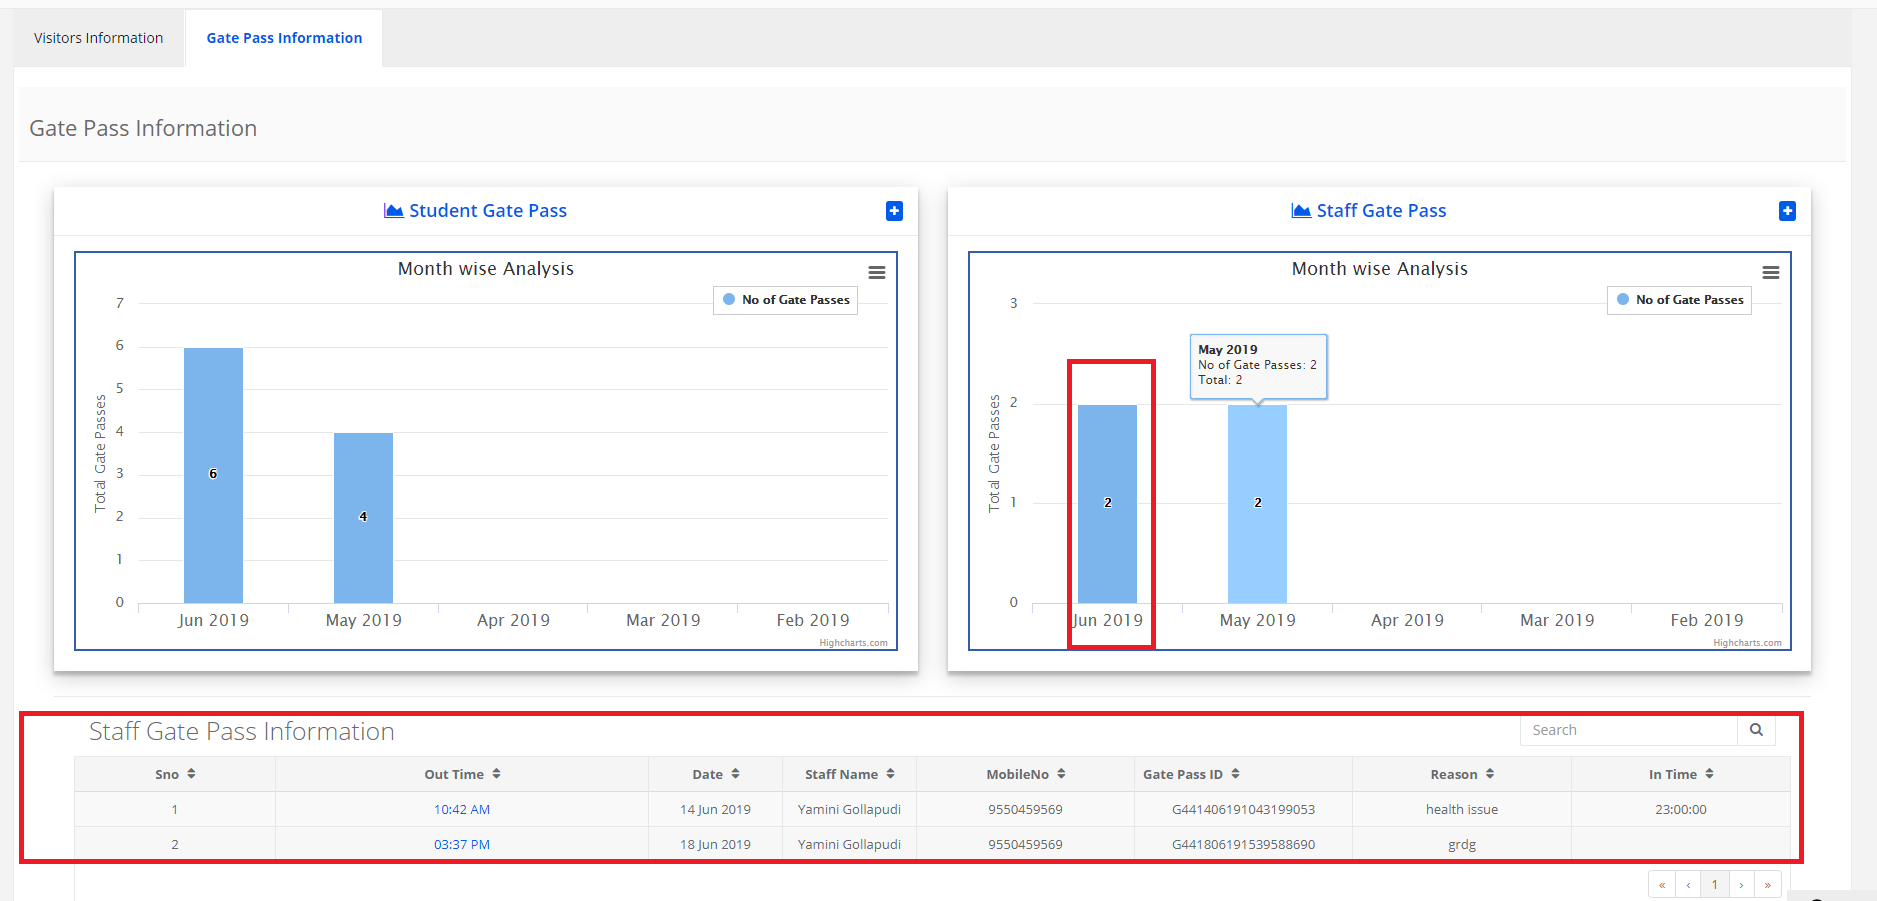
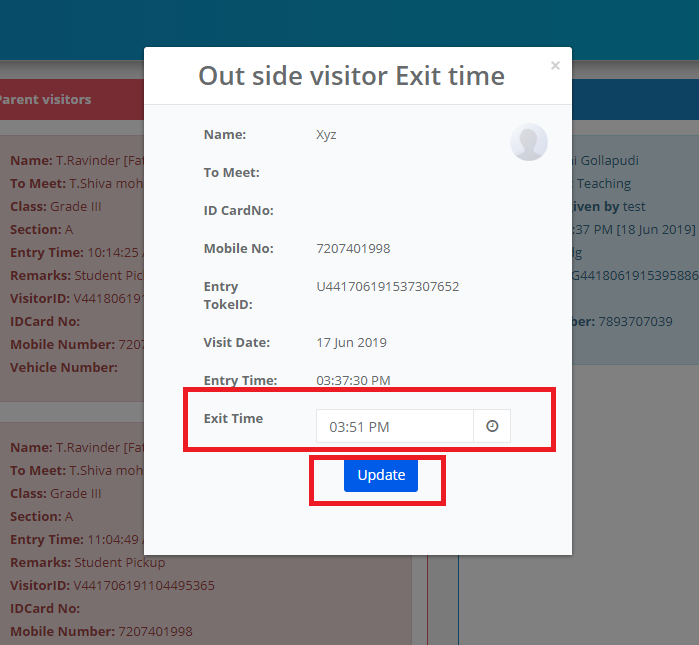
Record Exit Time:
Step 1: To record the exit time of visitor slips or gate passes, click on “update gate pass” option
Step 2: Update the Time for which you want to update by clicking on (X) icon
Step 3: update the time as follows and click on Save.
Note: For visitors slips, you will have the option to record the exit time. And for gate passes, you will have the option to record In time.
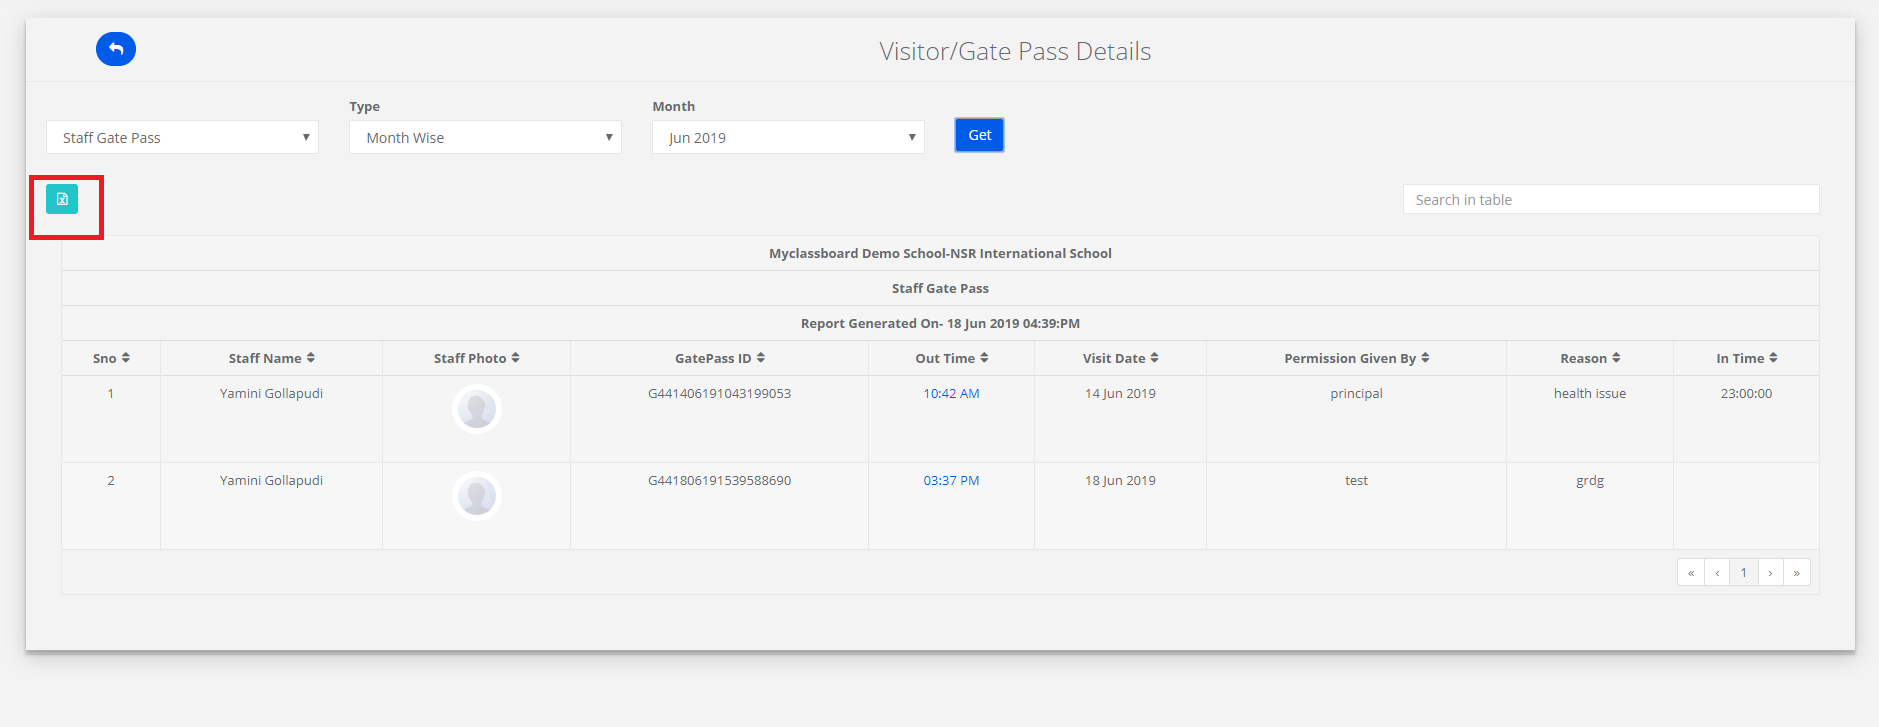
How to generate the Visitor/Gate Pass Reports?
You can generate the report of Visitor slips and gate passes in the given date range and month wise.
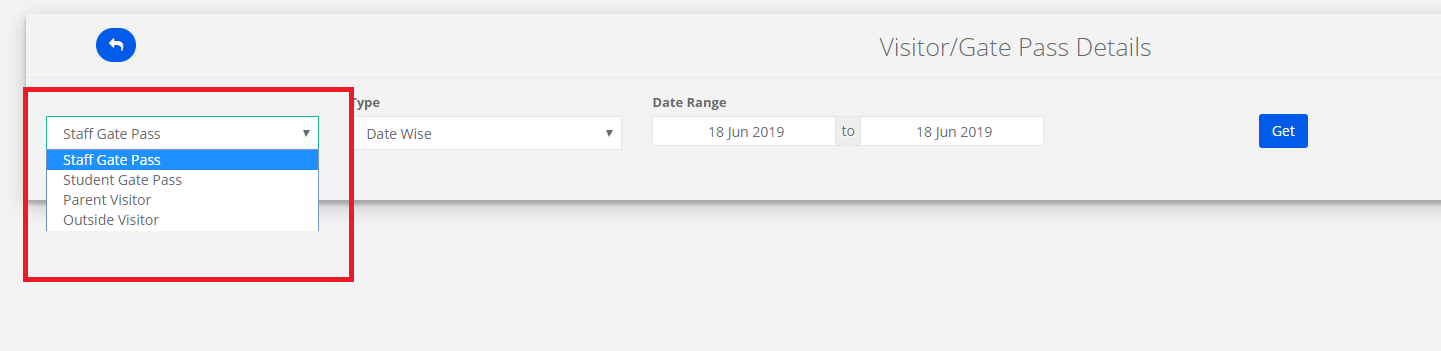
Step 1: Click on Reports option as highlighted below.
Step 2: Select pass type from the drop-down as per your choice.
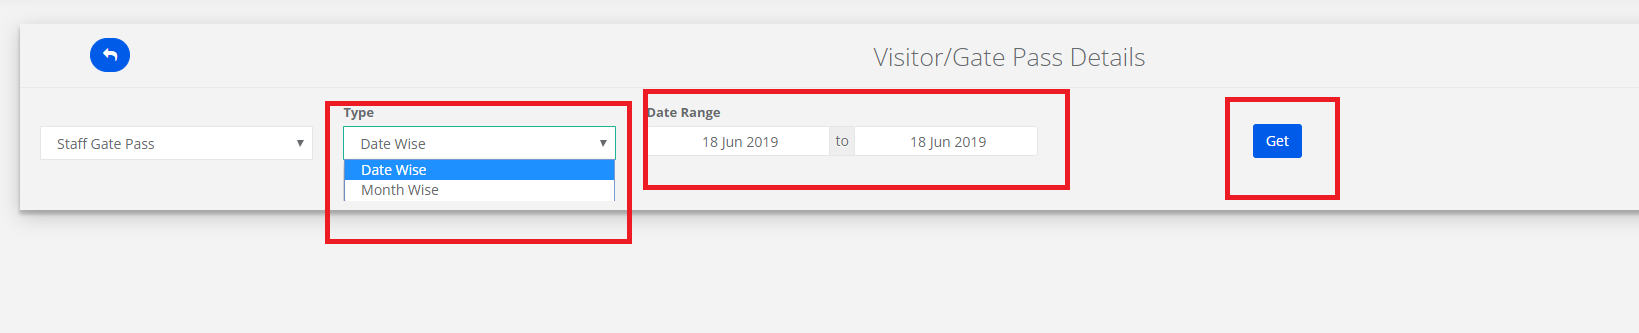
Step 3: Choose date wise or month wise as per your requirement from the drop down.
If you need date wise, choose date wise and set the date range and click on Get to generate the report.
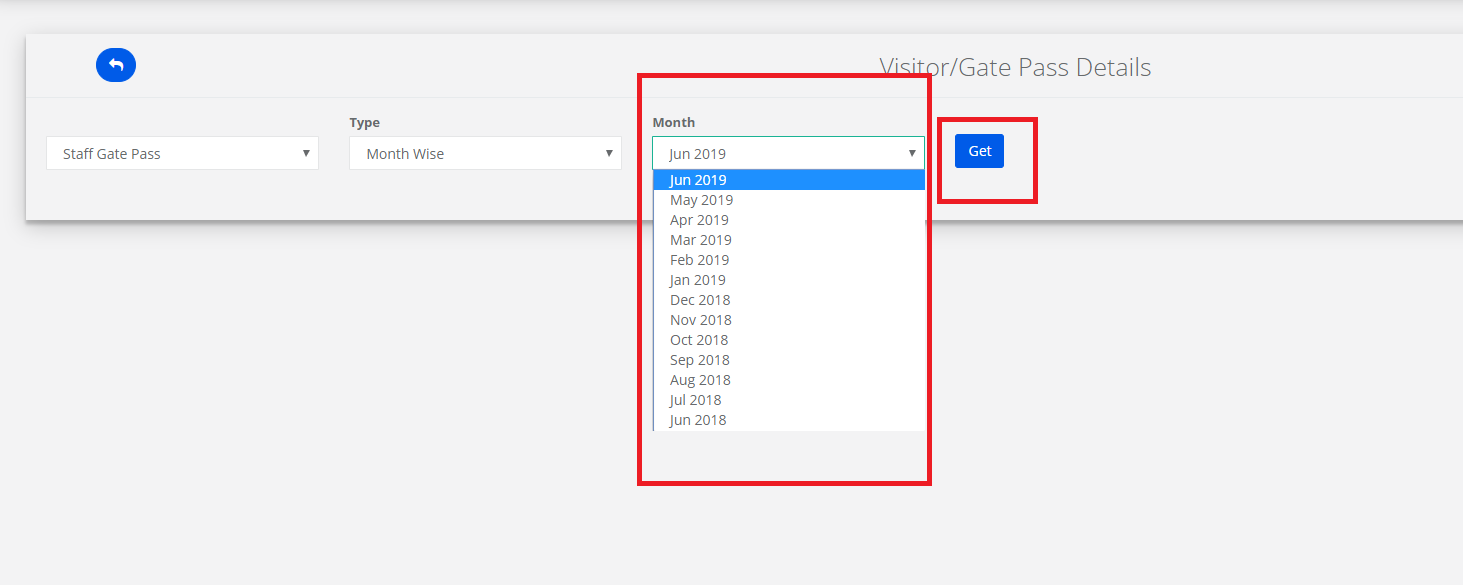
Step 4: if you need the report month wise, choose month wise, select the month and click on Get.
Step 5: You can export the report to excel by clicking on the icon as shown below