How can a teacher create topic in a learning league? How can a student view posts and comment on it?

How Can A Teacher Create Topics in Learning League from Raveendra Choudary

How Can A Student View & Comment On Posts in Learning League from Raveendra Choudary

Creating a topic in teacher login:

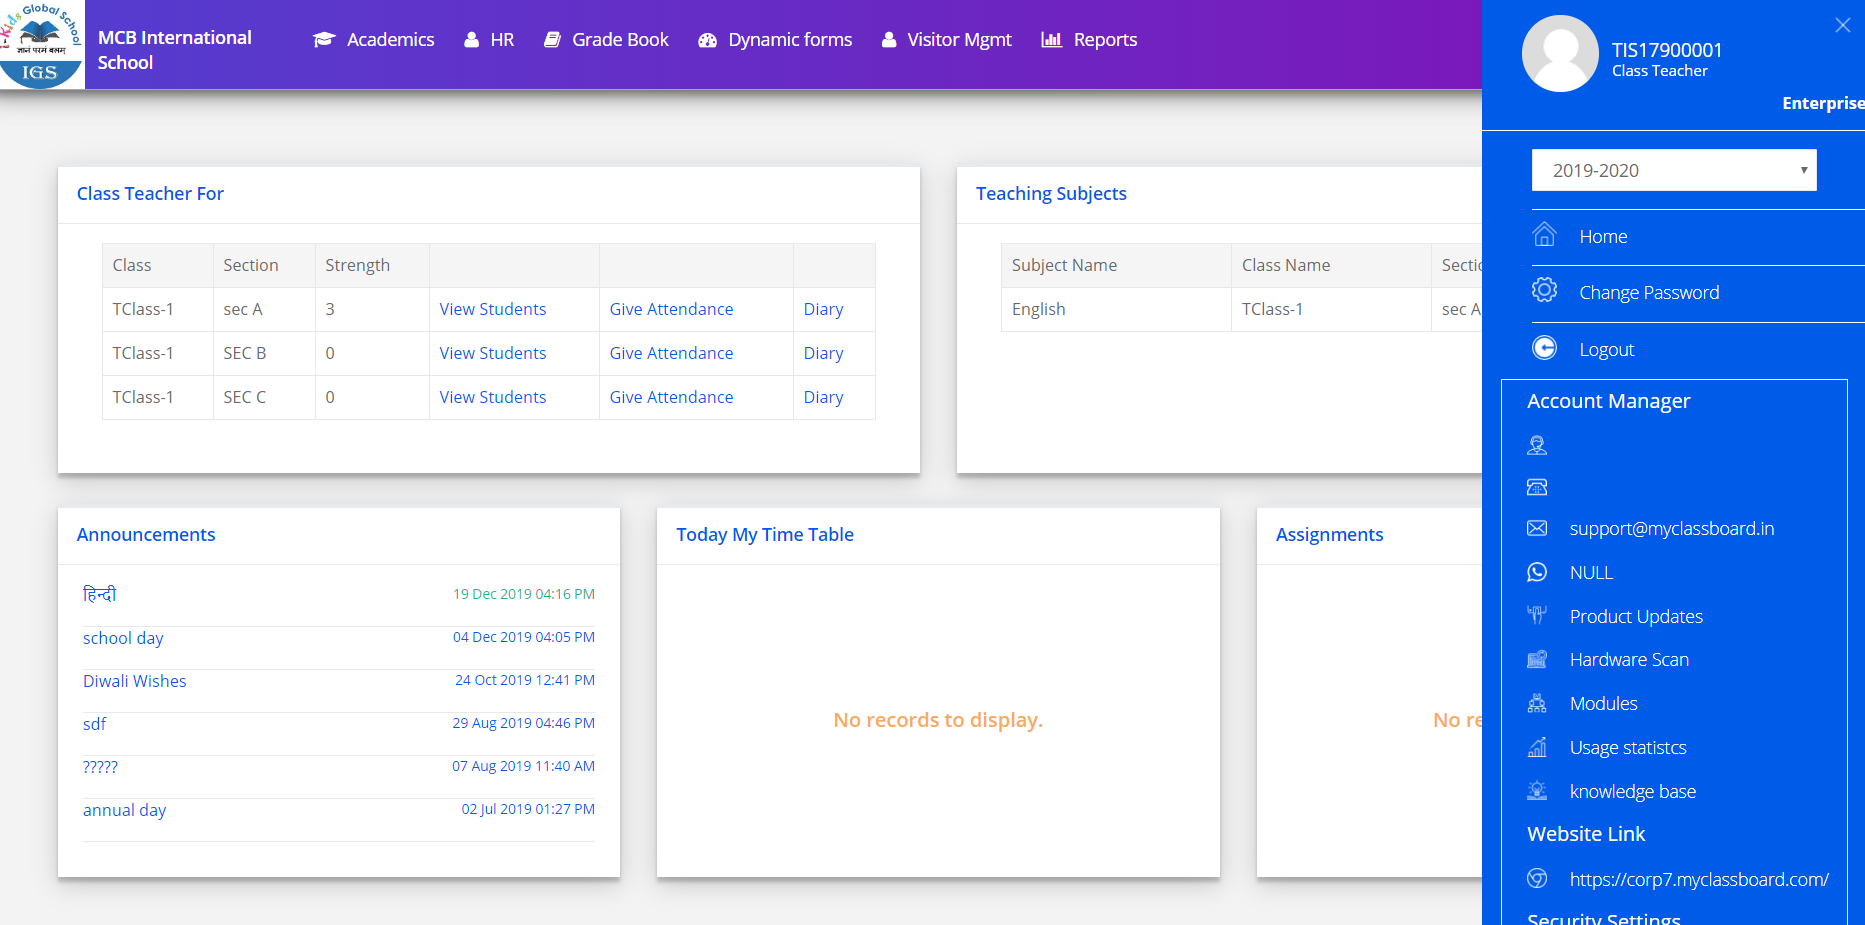
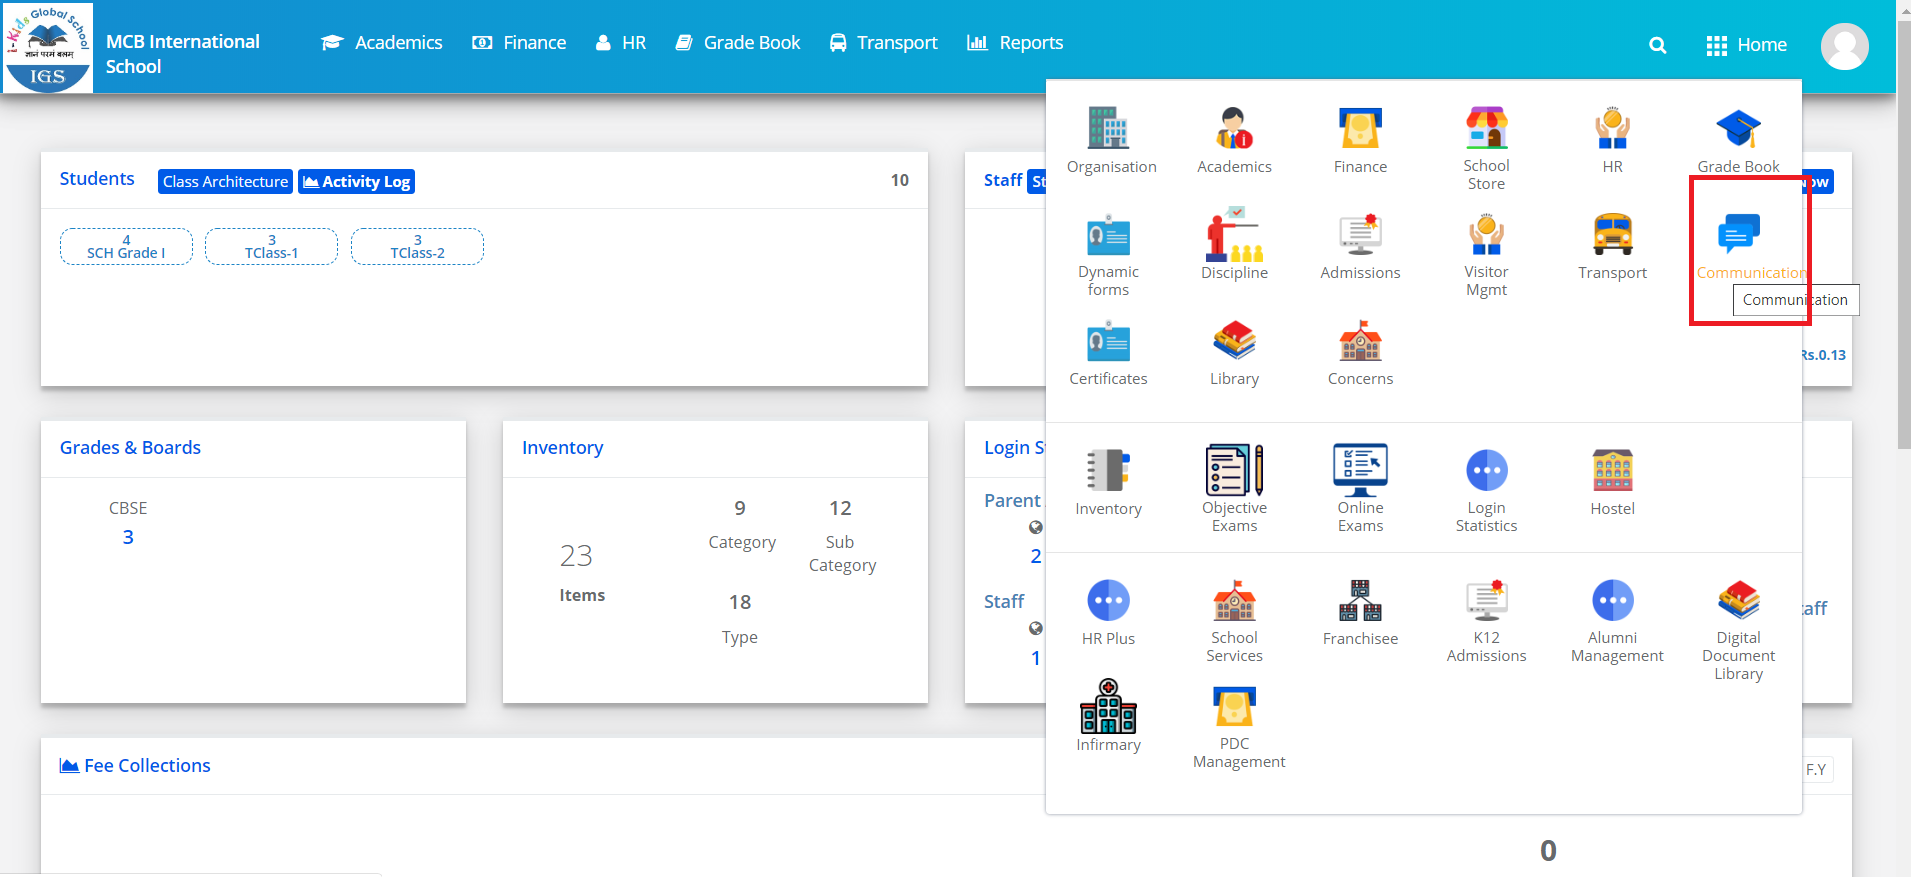
Step 1: Log in to Class teacher/Staff access with the help of credentials. Visit the Communication module.

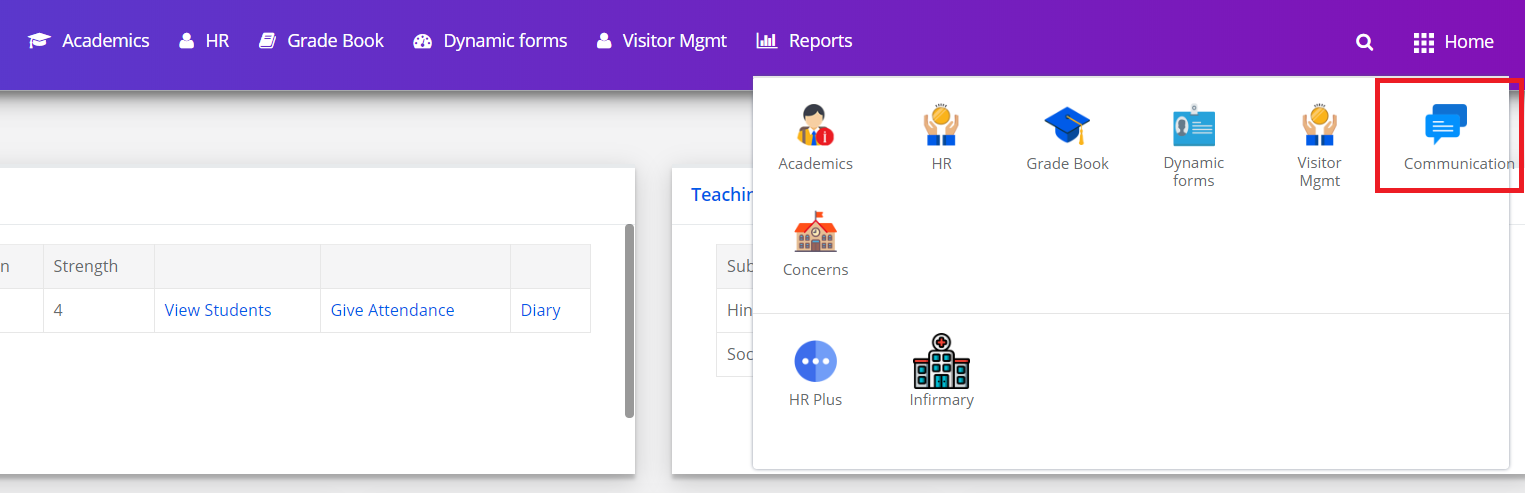
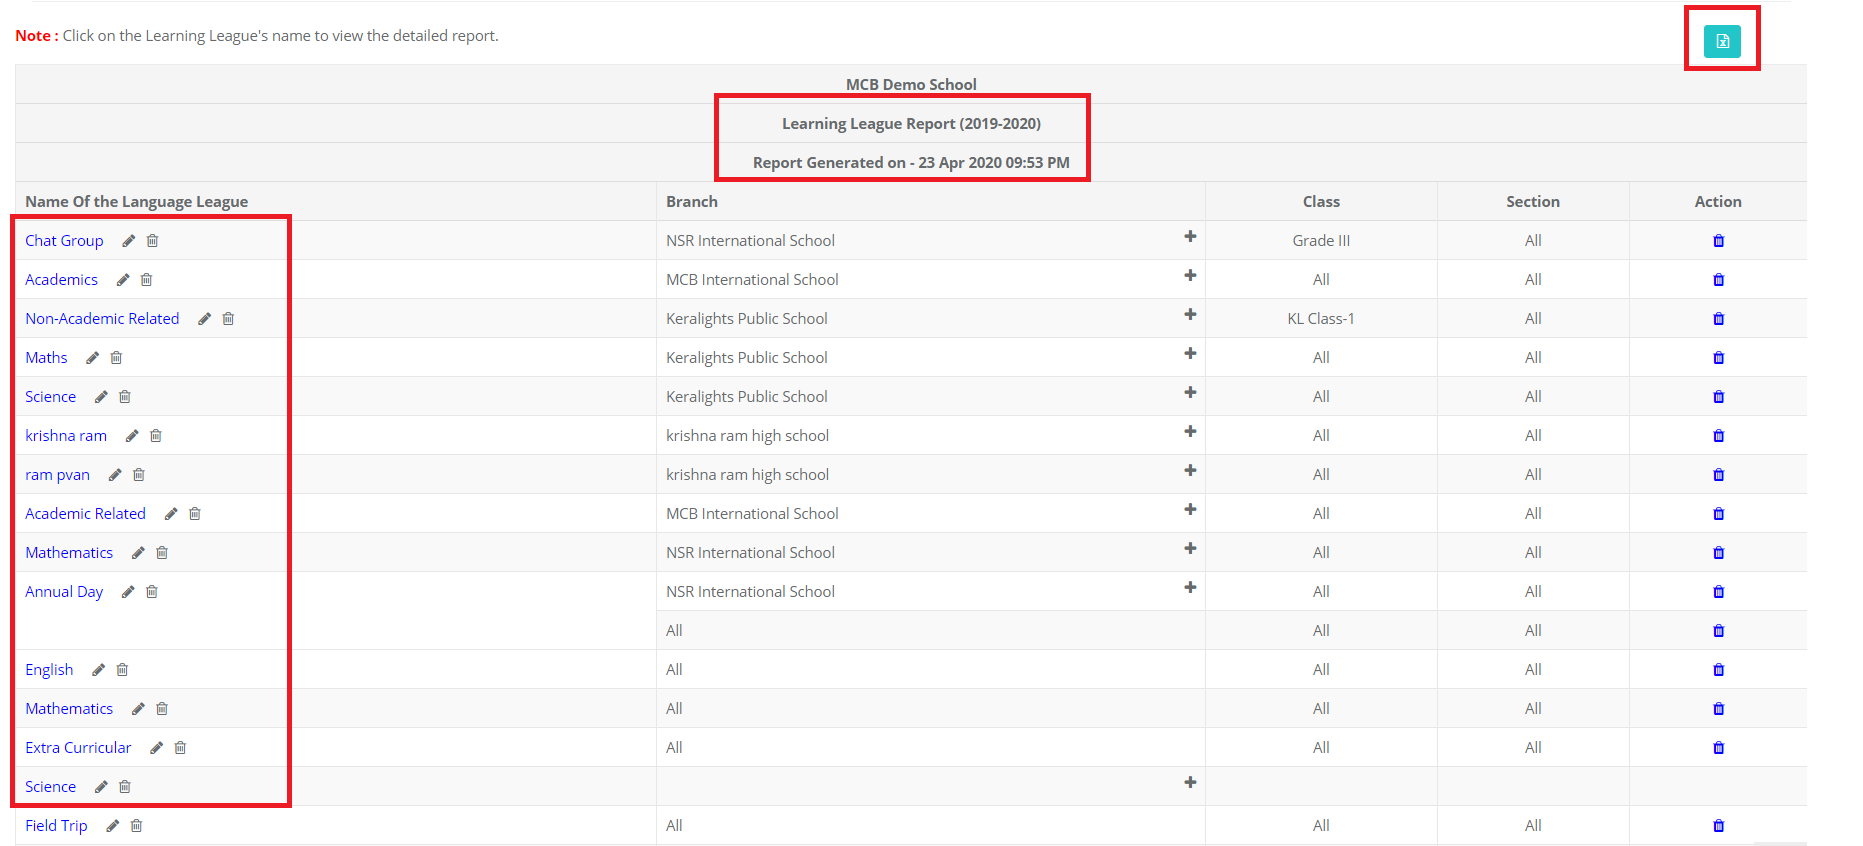
Step 2: Click on the Learning League option under the Communication menu.

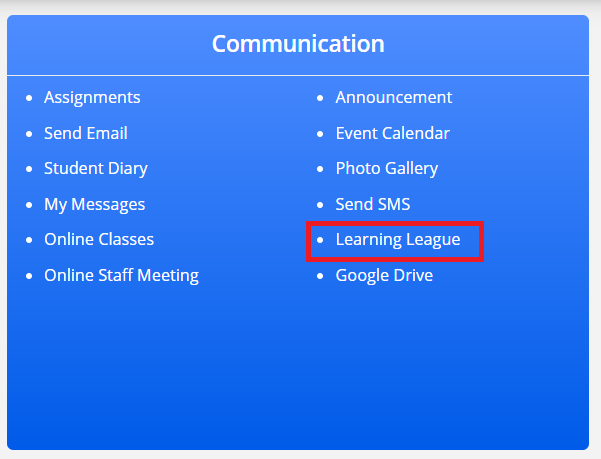
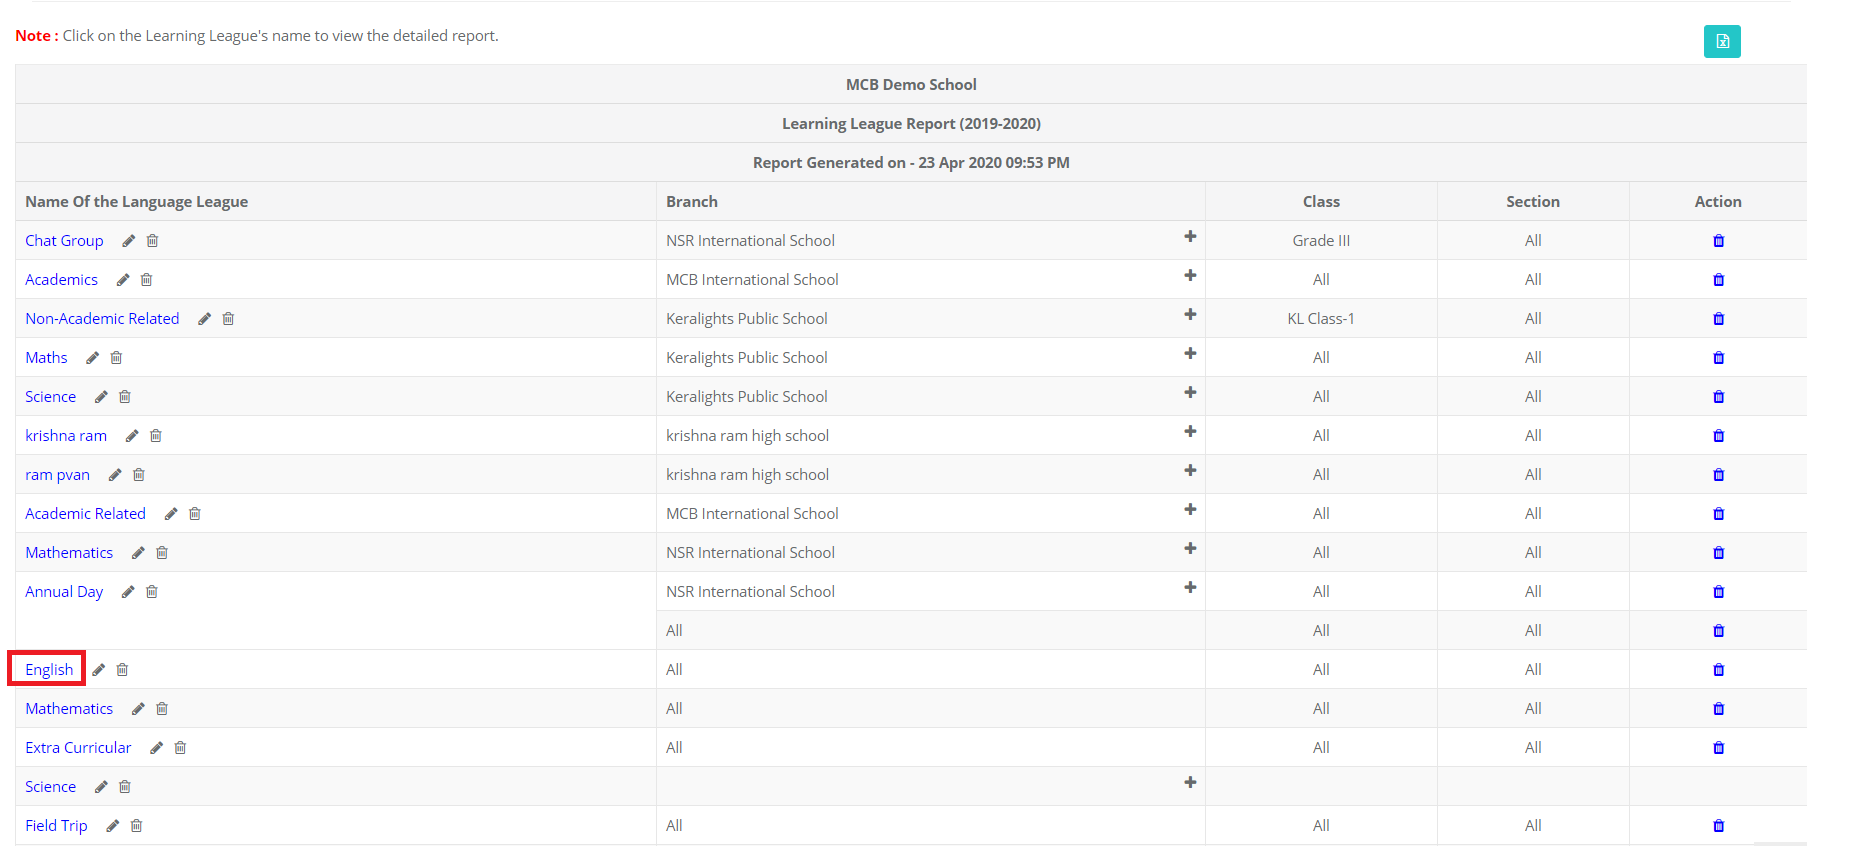
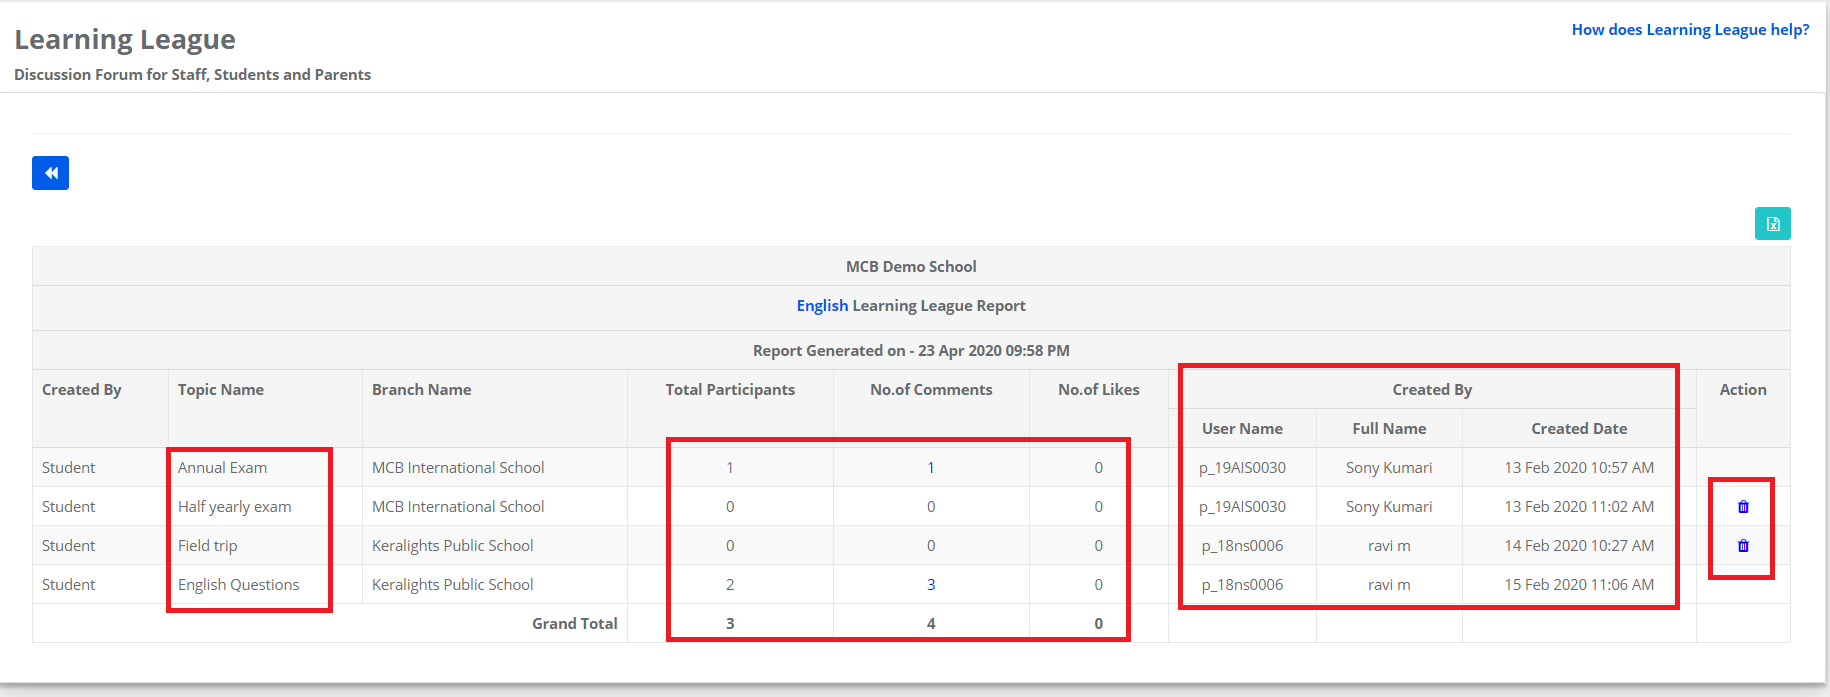
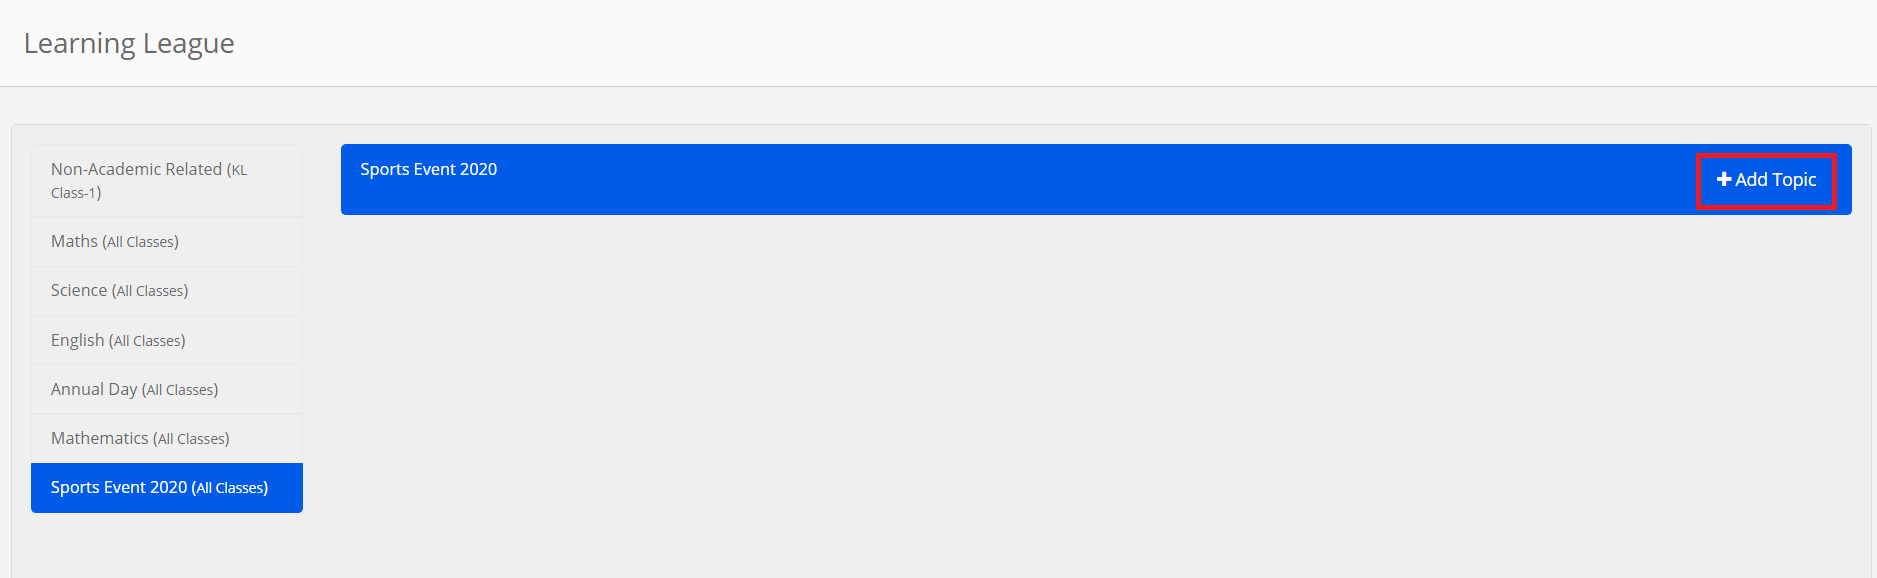
Step 3: It will list the available Learning Leagues. Click on the Learning league in which you would like to create the topic.

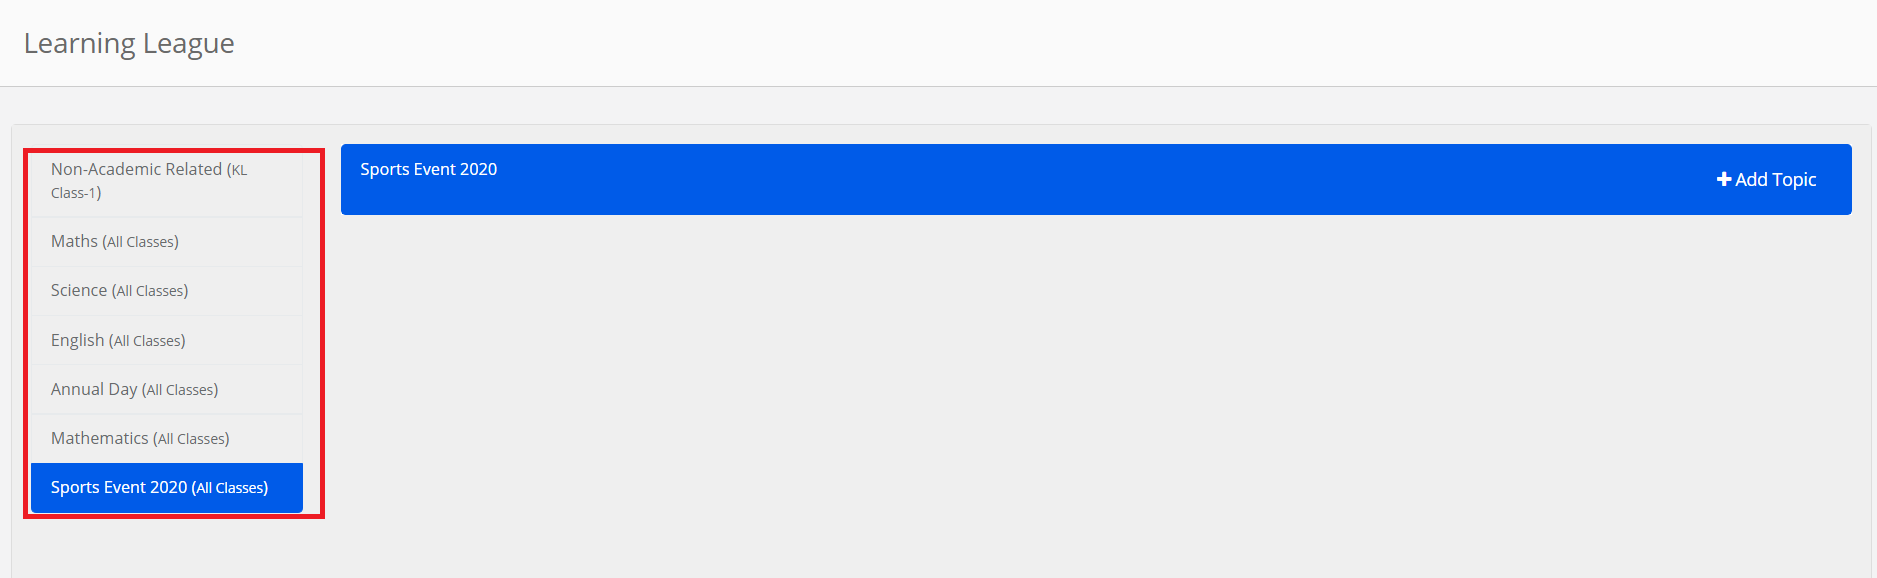
Step 4: Click on Add Topic Option to create the topic.

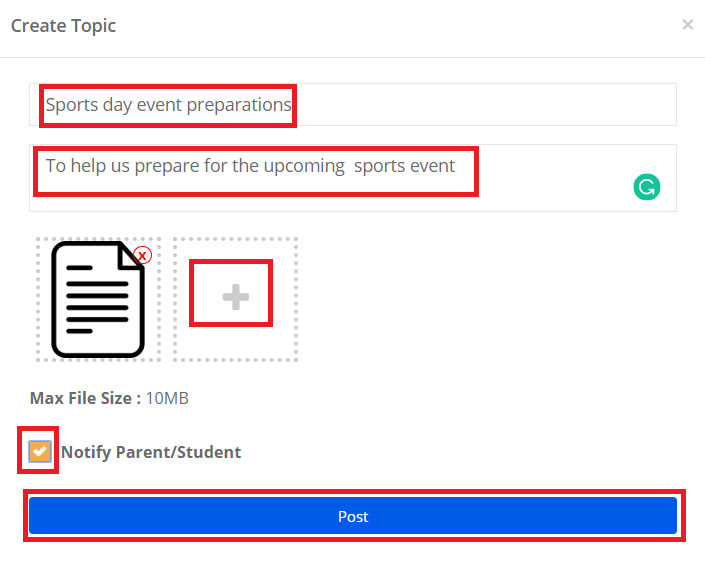
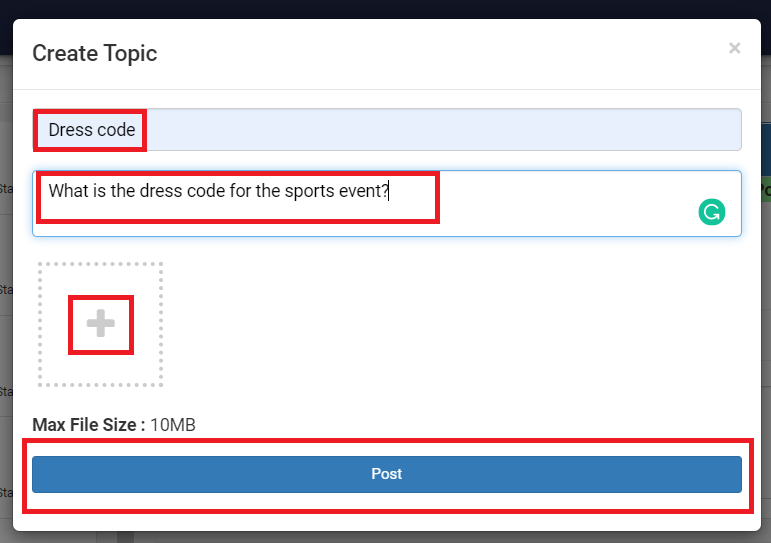
Step 5: Please do the following

Enter Topic Name, Description,

Click on + sign to add attachments,

Select the checkbox if you would like to notify the students on the mobile app about the topic

Click on the Post button to create the topic/post.

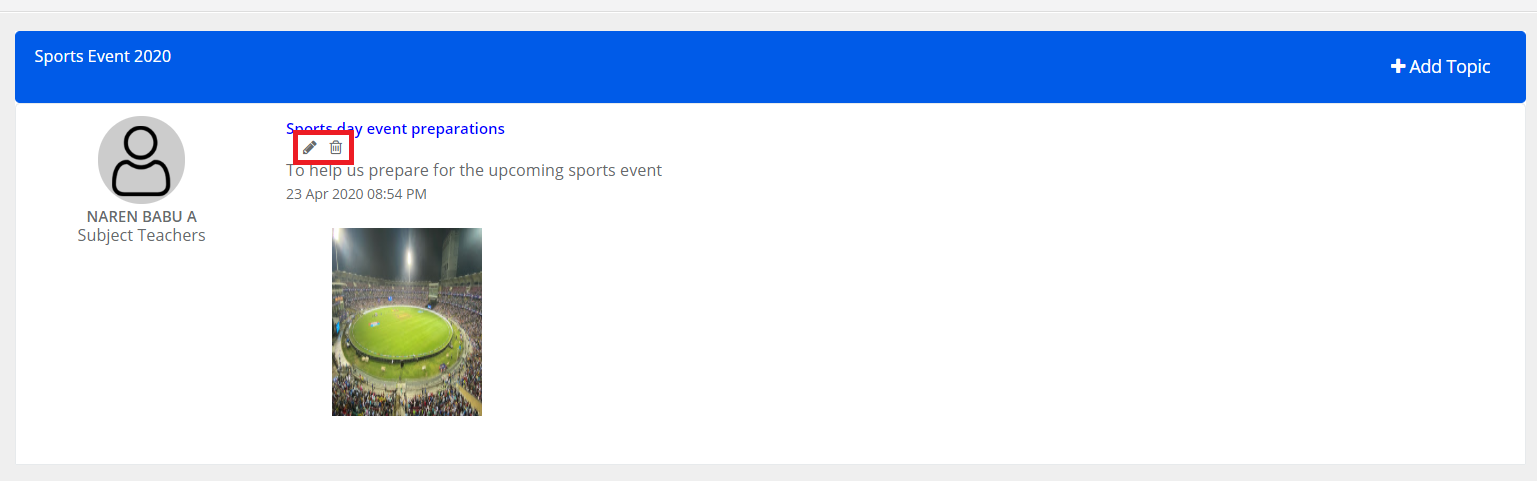
Step 6: To edit or delete the post, click on the respective icons available against the topic name. Please note that posts can be edited until there are no comments posted by students against it.

Accessing teacher post and commenting on a post by a student:

Step 7: Log in with student login and click on Learning league menu

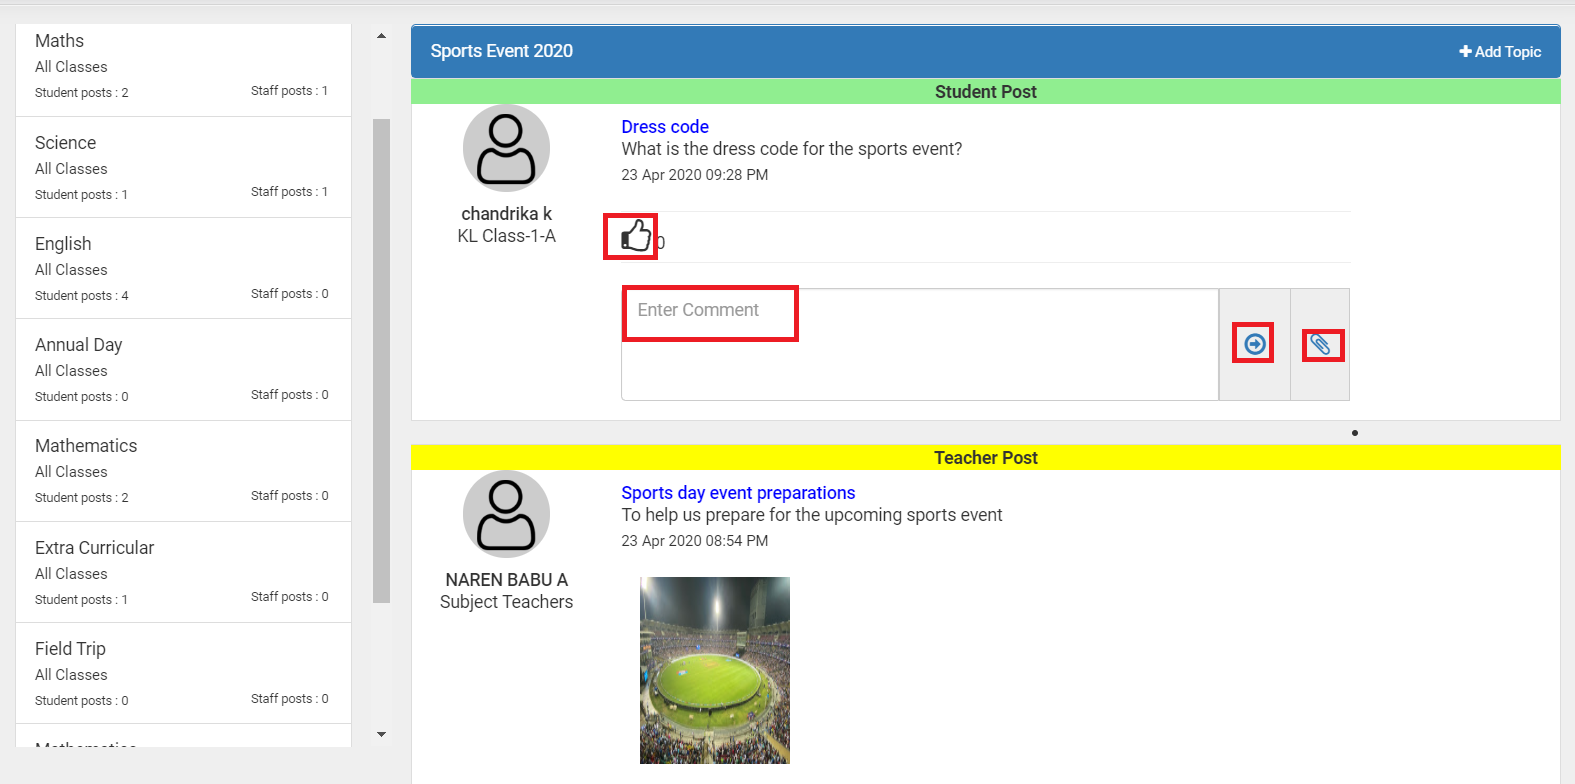
Step 8: It will list all the learning leagues created for his/her class. Click on the League’s names to view the posts created by the teachers. Please note that students can also create a post in the same league to discuss post among the peer group present in the league.

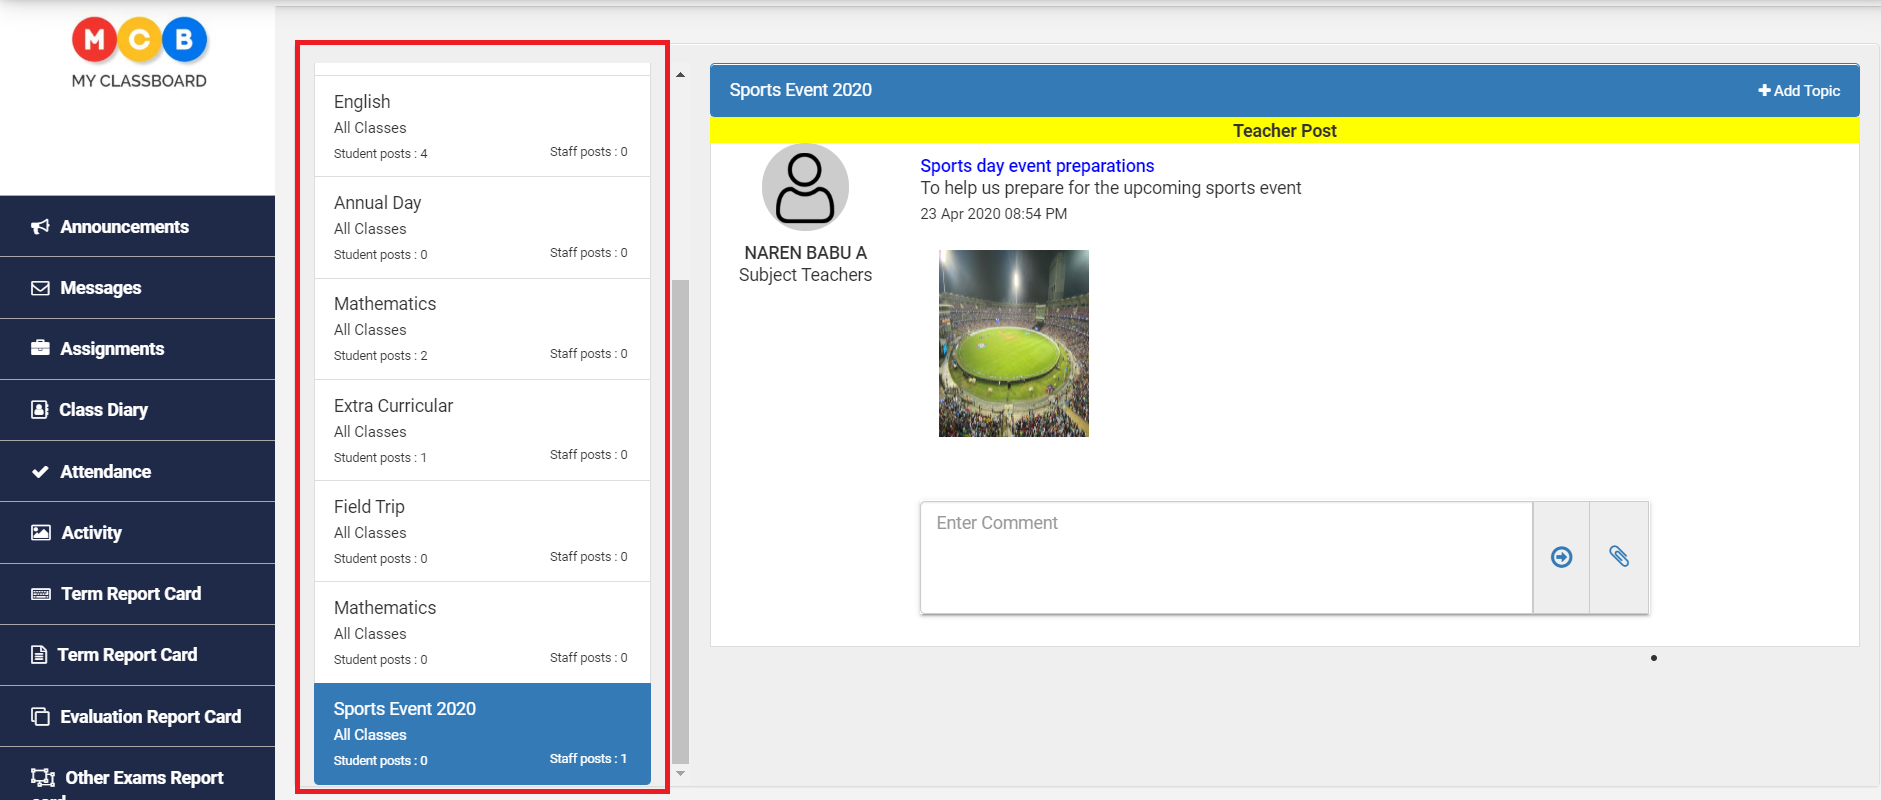
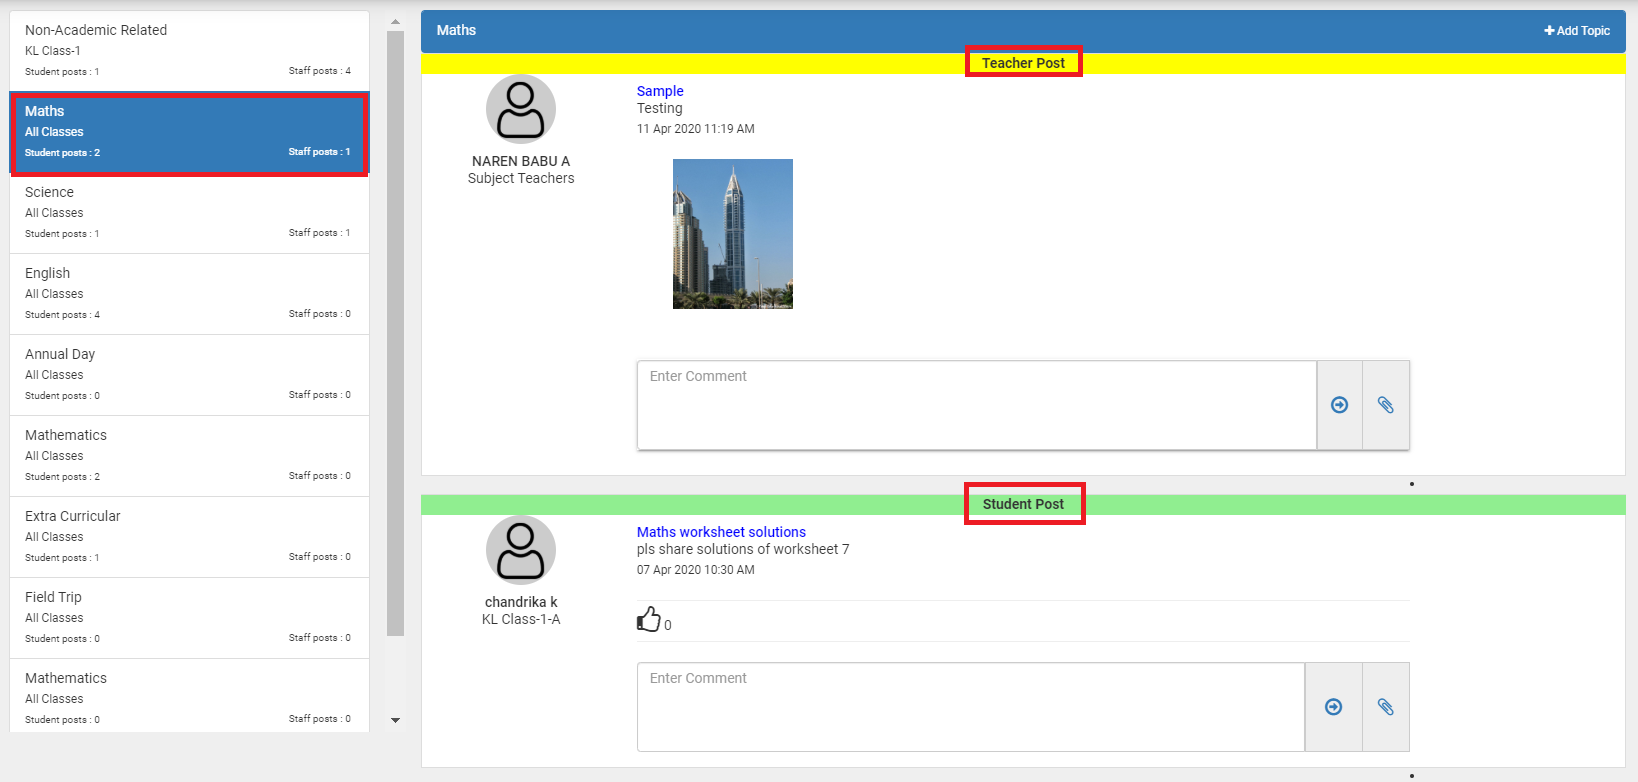
Step 9: You may observe that the selected league is highlighted with blue color. The posts in the leagues are differentiated between teacher and student as
Teacher post with yellow and student post with Green color.

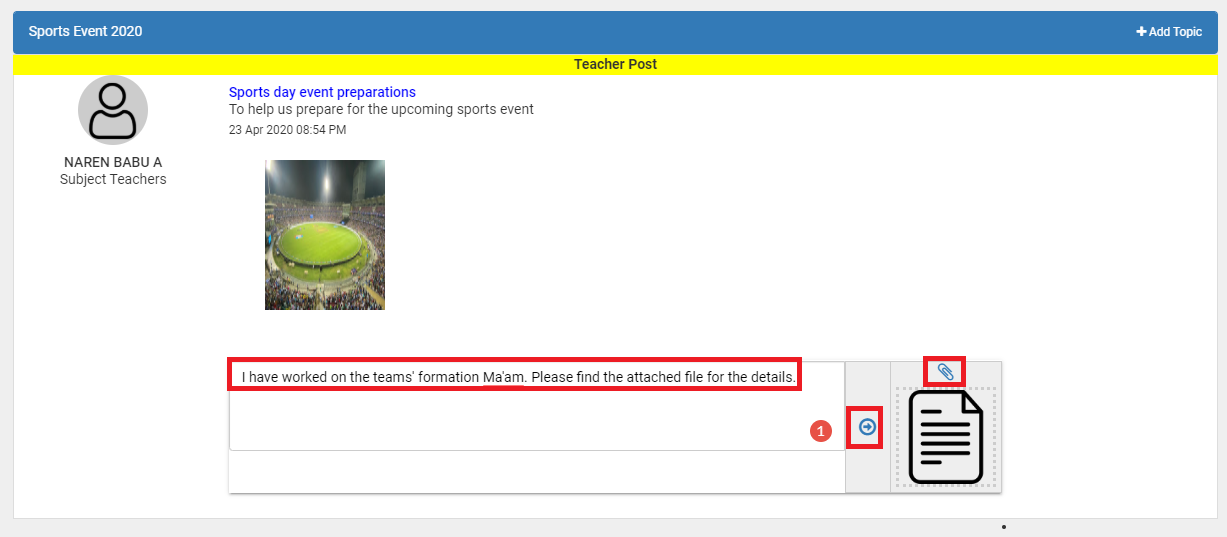
Step 10: To post the comment on teacher post or a student post, Type in the comment in the comment box and attach the files if required and click on -> button to post the comment. Please note that, once the comment is posted, the student cannot edit or delete it.

Teacher replying to the comment:

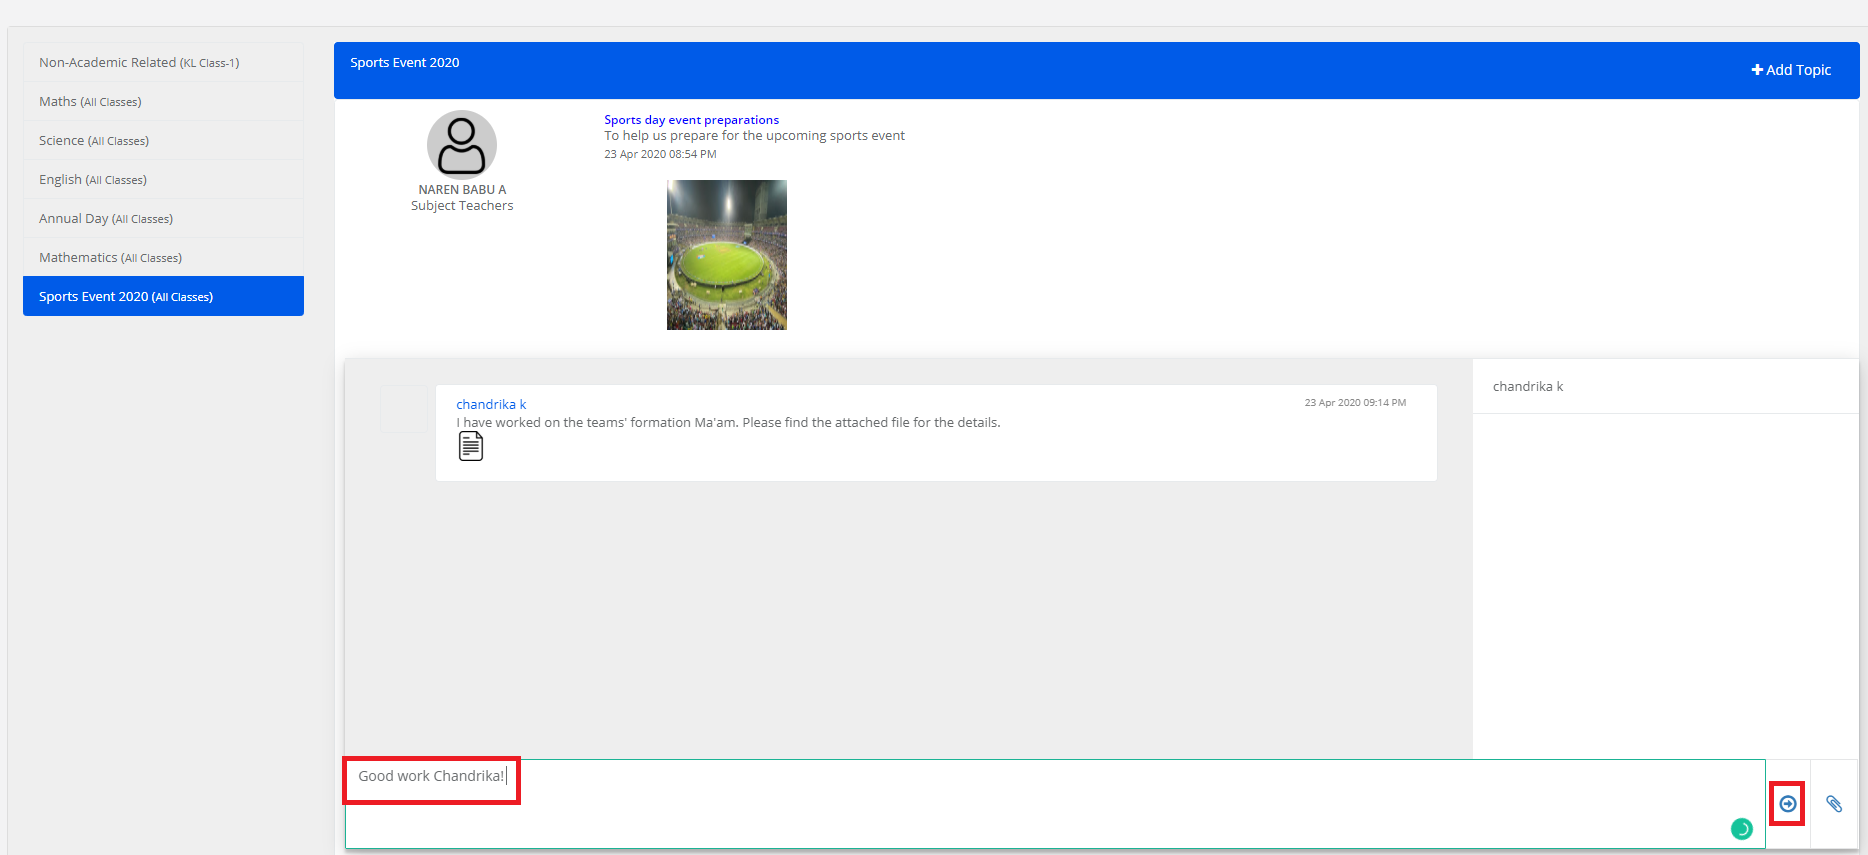
Step 11: Log in to the teacher access level, click on the Communication module, and then Learning league option.

Click on the league to view the posts and comments sent by the students.

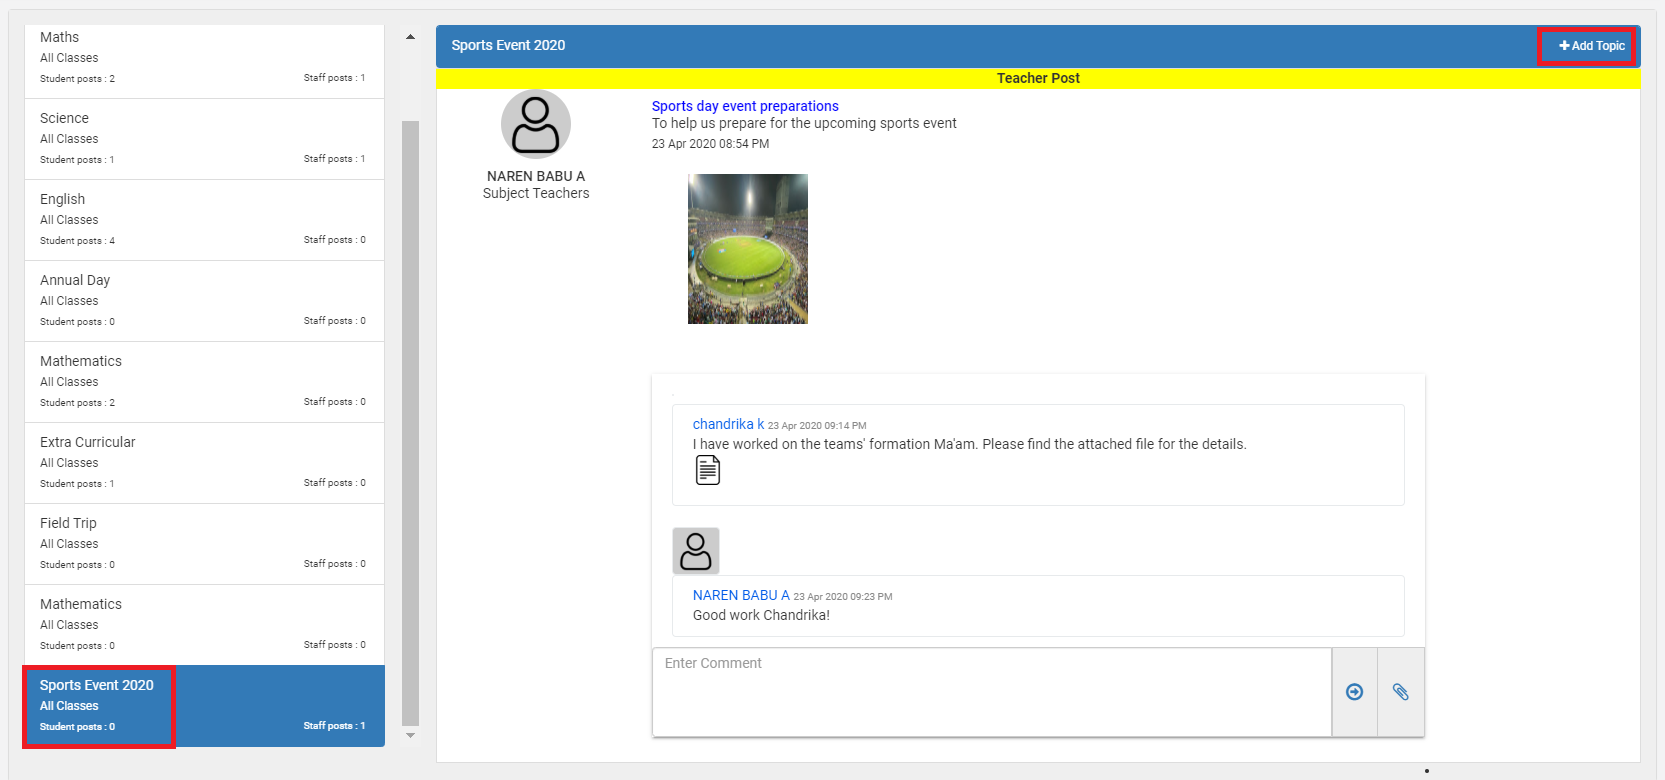
Write the comment in the comment box, attach files if any, and click on Post icon.

Step 12: To delete the comment, click on the delete icon against the comment.

Creating topics by students in a league:

Step 13: Login with student login and click on the Learning league menu. Click on the League’s name in which you would like to create a post. Click on Add topic option which is present at the top right corner.

Step 14: Enter the topic name, description, attach files if required, and click on Post.

Step 15: The other students present in the group can like the post and comment.

Note:

  1. Posts created by students are not visible in the teacher’s login.
  2. The posts and comments created by students & teachers can be moderated by the school admin. They can be deleted if necessary.

How to generate Learning League report and delete comments and likes of the posts?

How To Generate Learning League Reports from Raveendra Choudary

How to generate the Learning League report and delete comments and likes of the posts?

Learning league reports can be generated from System admin and branch principal login.

The comments and likes moderation can happen through the report.

An email alert can also be scheduled for principal and class teachers to understand the overview of the Learning leagues’ usage.

Step 1: Log in with system admin or principal login. Visit the Communication module and choose the Learning league from Discussions Menu.

Choose the academic year, league type, and click on Get to generate the report.

Step 2: This report helps you understand the available Learning leagues along with the branches and classes which are assigned to them.

You may export this report to excel by clicking on the excel icon on the top right corner of the report.

You can delete the branches only when there are no topics and comments available in the league.

You can delete the league, only when there are no branches and classes assigned to the league.

Step 3: To view the posts created in the specific league, click on the League’s name

Step 4: This report shows a number of topics created, who created, no of participants, comments and likes, comments posted by whom.

You can delete the topic, only when there are no comments against the topic.

You may export the report to excel by clicking on the excel export icon present on the top right corner.

Step 5: To view the comments against a topic, click on the number under the comments column.

Step 6: This report helps you understand who had given the comment, comment, and likes details.

To delete the comment, click on the delete icon against the comment.

You may export the report to excel by clicking on the excel export icon present on the top right corner.

To delete the entire learning league:

Please follow the sequence mentioned below

  1. Delete the likes and comments of the topics
  2. Delete the topics created by students and staff
  3. Delete the branches and Classes assigned to the league
  4. Delete the Learning League

How to create Online Classes?

How To Create Online Classes Report from Raveendra Choudary

Myclassboard started empowering students to attend live online classes(conducted by their school teachers) and learn from the convenience of their home.

To create the online class in MCB,

Step 1: Log in to MCB with Login Credentials.

Step 2: Click on the Communication module by clicking on the Home option next to the profile picture.

Step 3: Click on the “Online Classes” link under the communication menu.

Step 4: To create online class, click on create Online Classes option which on the top right corner of the screen.

Step 5: You will be redirected to create the online classes page.

Select the Class, Section, Choose the Subjects and enter the Topic.

Choose the Date, Time & duration of the Online class, enter the agenda & click on Submit to save the Online Class.

Step 6: You may check the online Class dashboard showing Upcoming Classes & Pervious/ Expired Classes

Under the Upcoming classes, against each session, you will have options to send the SMS, Email, Mobile App Notifications for the students to notify about the Online Classes.

If needed, you can also Cancel the Scheduled Meeting.

You can find the Status of the Online Classes (To Start / Class will start in time ) under the Action which is based on Time & Duration.

You can view the Previous or expired Online session details under Previous/expired Classes

Step 7: Click on the Start button to start the Online session

Step 8: Read the instructions given in the pop window. Click in cross mark to close it.

Step 9: Click on Allow to enable Camera & Join audio by computer for enabling audio.

Here’s a list of icons with a clear explanation

Mute: To allow / Block the Audio

Video: To allow/ Block the Video

Manage Participants: Here you can view the list of participants joined for online classes
You may chat with the participant, to start the video, You can Rename or Make host or you can remove the participant. Click on muteAll for not allowing the Audios of the participants

Share Screen: Share screen option allows you to share your computer screen with students. This will help you show resources like documents, Presentations, Videos, Images, etc while the online class is in progress.

Also, we are giving the option to set who can share (Only host / All Participants) & Who can start sharing when someone else is sharing (Only host / All Participants)

Chat: Chat option allows you to chat with all participants in a group and individually.

Step 9: Click on Leave meeting and End meeting option to close the online class session.

How can a student Join or attend an online class?

Step 1: Login to MCB with Login Credentials.

Step 2: Click Online Class Menu on the Left pane.

Please follow the below Instructions

1. Make sure your internet connection is of high speed and uninterrupted during the class.
2. Click on Join option against the online class’s session
3. Allow Camera option for switching on your video
4. Join Audio by computer for switching on your audio.
5. Message on chat if you would like your teacher to unmute the audio option if you would like to interact with your teachers and classmates during the online class.

Step 3: You will be redirected to the Online Classes page,where you can view the Subject & staff name,Topic / Agenda, Start Time & Duration (Minutes) created by the teacher. Click the Join icon to attend the session.

Step 4:
You will be redirected to a new window to start the session.

Click on to allow Camera & Audio option and Join audio by computer.
Click on video icon to switch on your Video.

Here list of icons with clear explanation

Manage Participants: Here you can view the list of participants joined for online classes

You can Rename the display name & Click on mute for not allowing the Audios of the participant.

Click on Raise Hand for any doubts or clarifications then the Teacher can respond by seeing the raised hand .

Share Screen: Share screen option allows you to share your computer screen with students. This will help you show resources like documents, Presentations, videos, Images, etc while the online class is in progress.

Chat: Chat option allows you to chat with all participants in a group and individually.

Leave Meeting: Click on Leave meeting and End meeting option to close the online class session.

How to generate the Online Classes Report?

To generate the report, please follow the steps mentioned below.
Step 1: Login to MCB and Choose communication module by clicking on the Home option.

Step 2: Choose “Online Classes report” option under the Reports menu.

Step 3: Choose required fields such as Classes & Report Type (Today, Last 7days,30 Days, Custom date & till date) to show report

Step 4: It will display a list of sessions conducted by whom, to which class, Subject & duration based on the selected period.
You can also view the Status of the Online classes, Start time of the session & Students count who are attended for the session

When you click on the number under the Students Count column it will display the list of students names attended for the session with Start time, Logged into via Web or Mobile app. Also We showing the IP Address details along with students details

How does Biometric Device ID mapping help?

The device ID will be provided by our vendor after installing Biometric machines/Patch files at the clients place. This will help in fetching the data from the client’s machine to MCB Server. Schools can use the biometric machine alone for students or staff or both. This needs to be set against the ‘Device for’ filed as Staff or Student or Staff and Student

You need to set the device for
Staff – When only the staff are going to punch in the biometric machine
Student – when only the students are going to punch in the machine
Staff & Student – when both Staff and Students are going to use the same for punching.

Note: ‘n’ number of machines can have the same Biometric Device ID.

Path: Settings / HR/ Biometric mapping