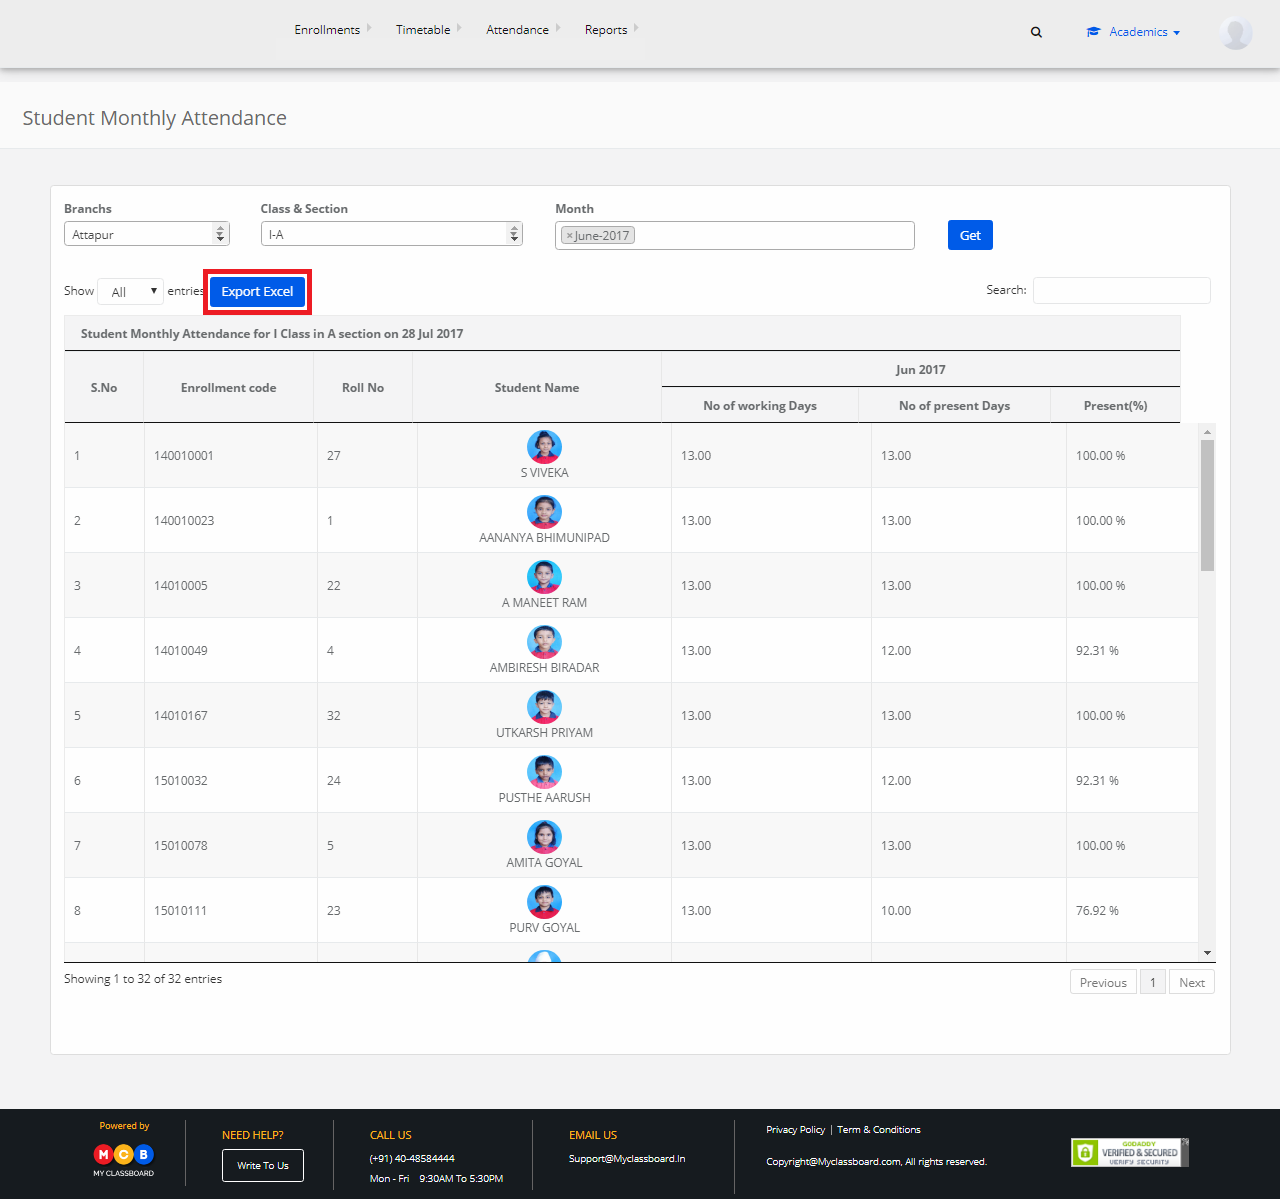
How to generate student strength report ?

Step 1: Login to MCB with Admin login Credentials and switch to the new version.

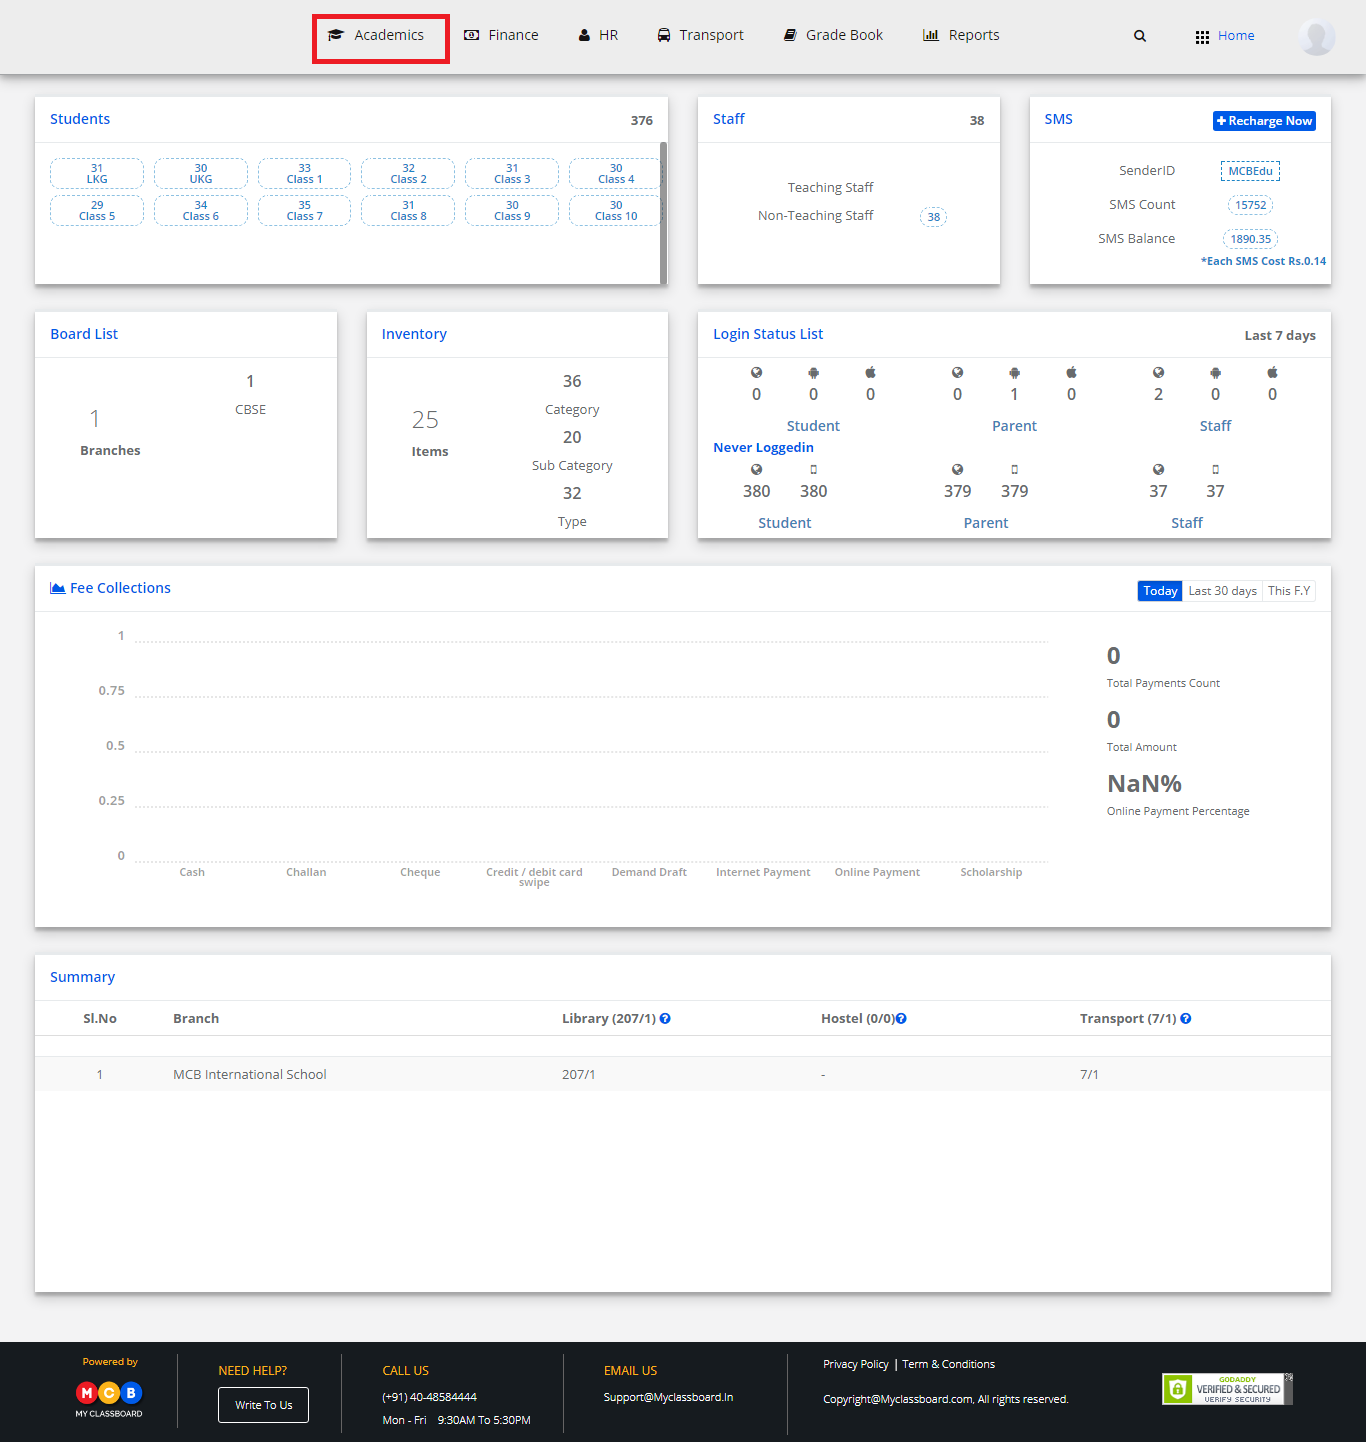
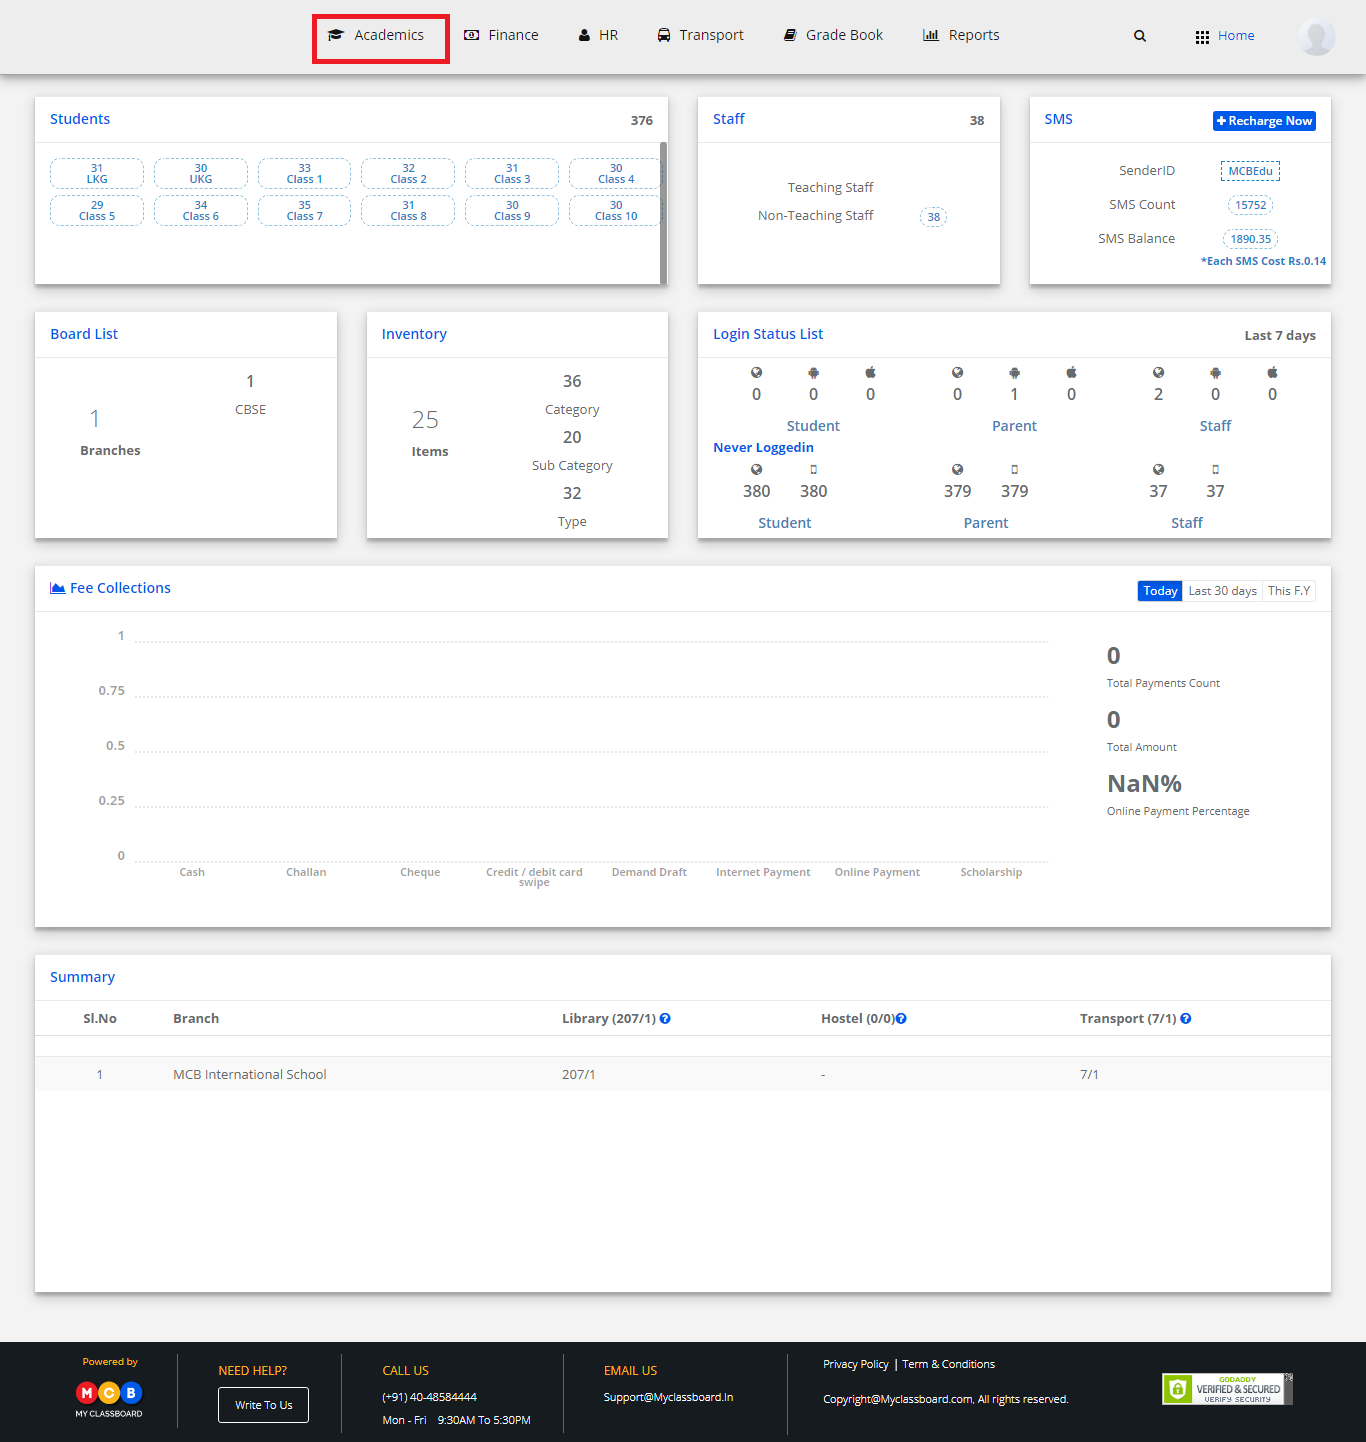
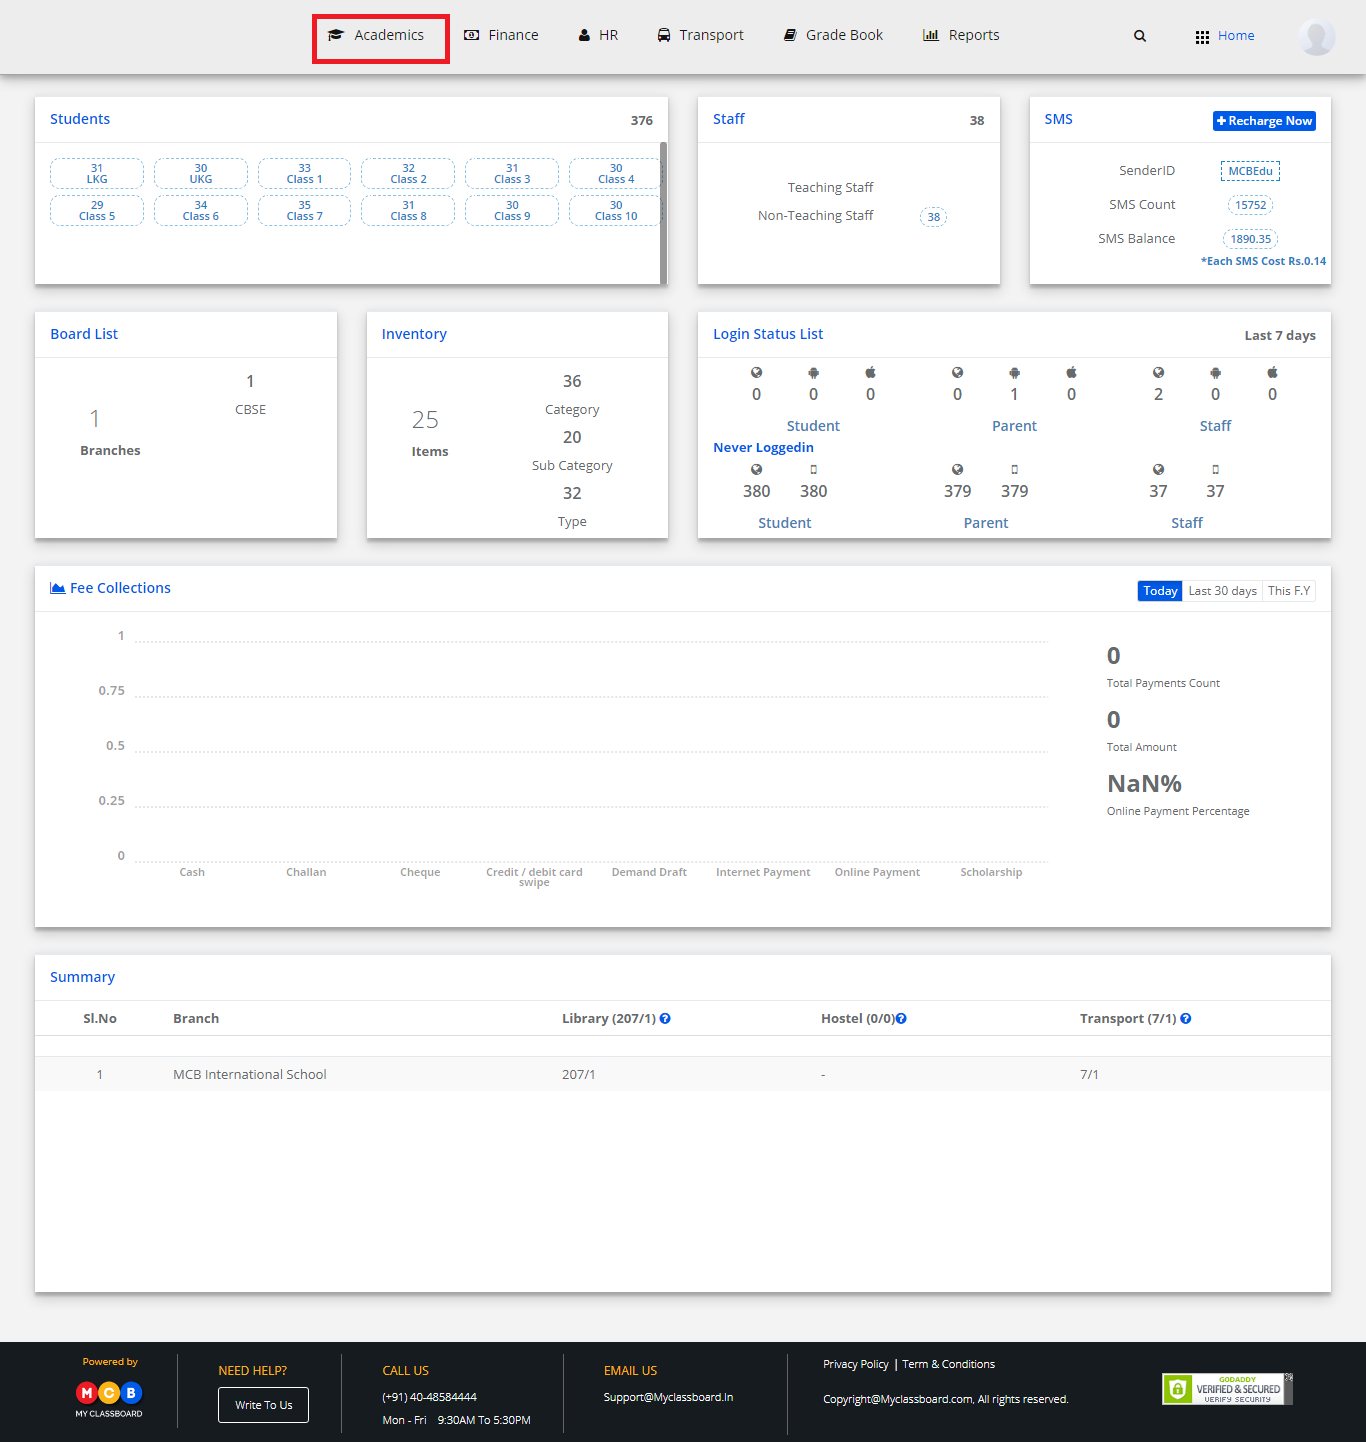
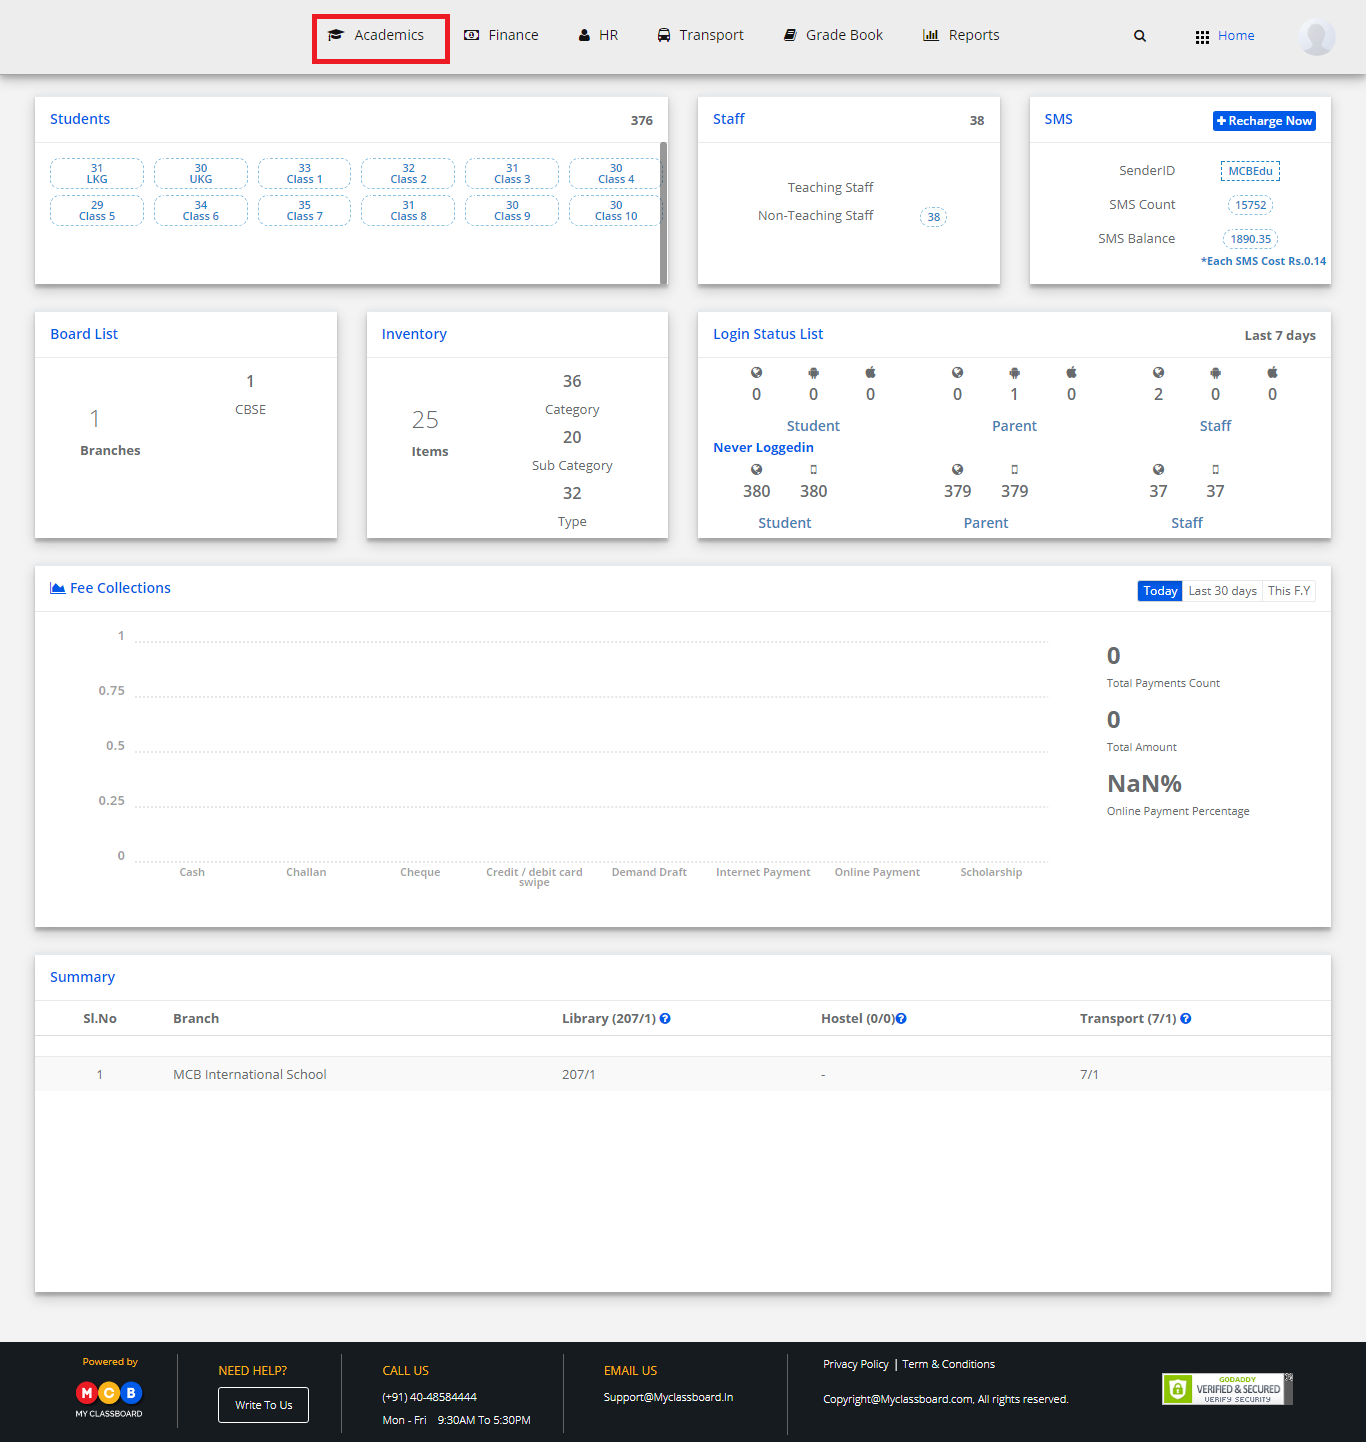
Step 2: Click on “Academics” on the top bar of the dashboard.

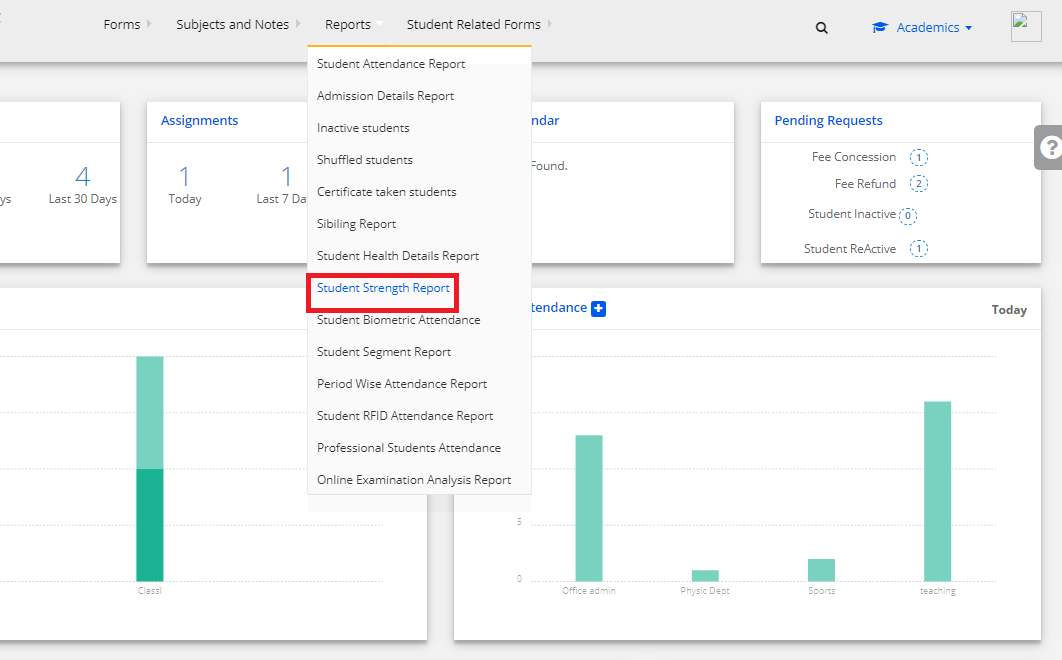
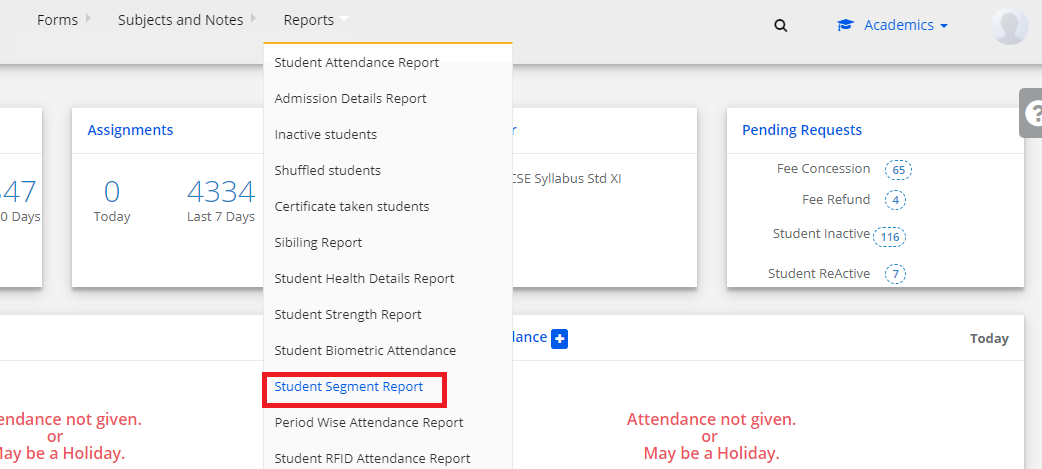
Step 3: Click on Reports and select Student Strength report

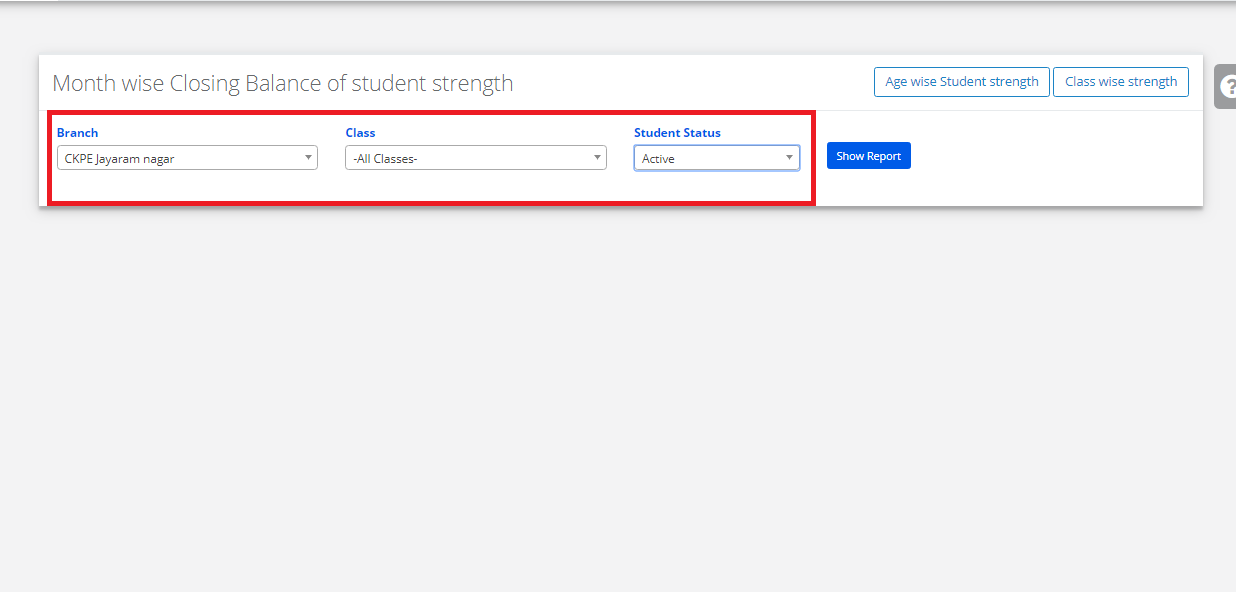
Step 4: Select Branch, Class, and Student Status Active.

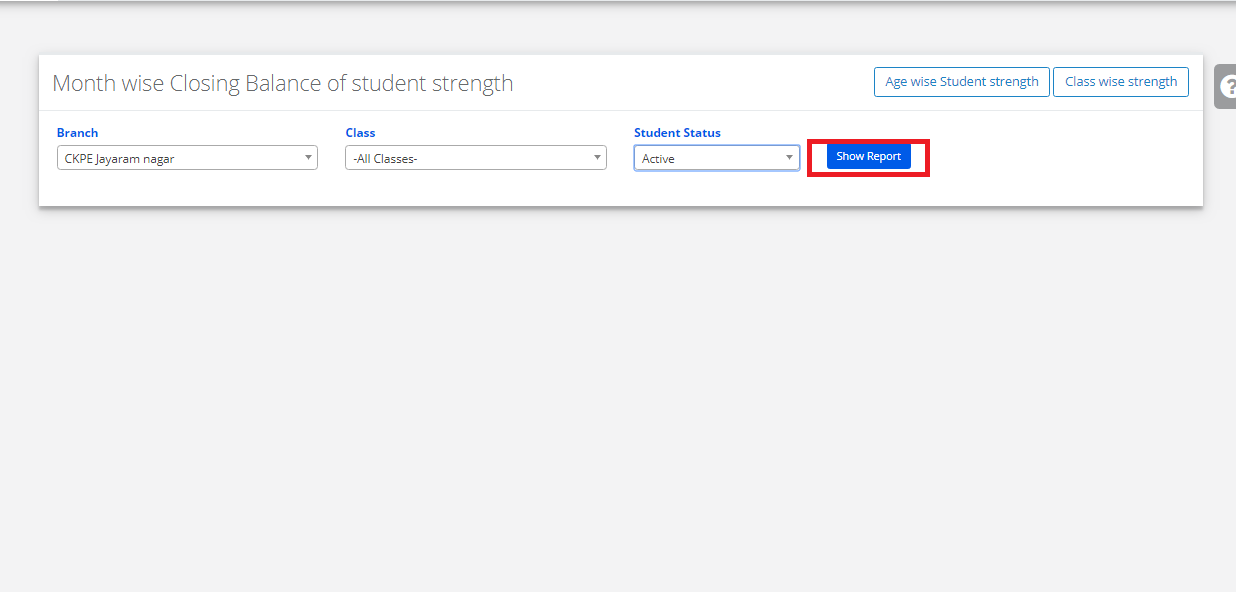
Step 5: After choosing the required option, click on “Show Report”

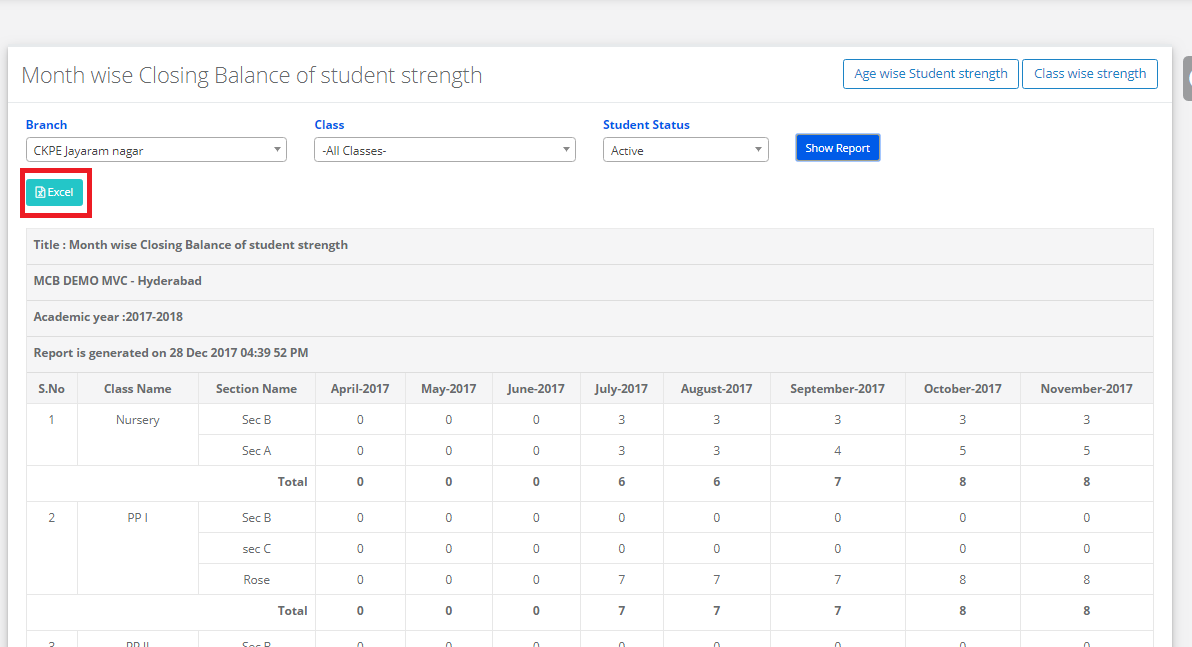
Step 6: The report is displayed. You may export the same to excel by clicking on the “Excel” option.

How to Generate Student Biometric Attendance Report ?

Step 1: Login to MCB with SysAdmin login credentials.

Step 2: Select “Academics” option on the top bar of the Dashboard. You’ll be directed to the “Academics” page

Step 3: Select “Reports” on the top bar and choose “Student Biometric Attendance”.

Step 4: Select Branch, Date, Attendance Timings.

Step 5: After choosing the required options, click on “Get Students”.

Step 6: The report is displayed. You may export, Print and Print the same by clicking on the “Print/ Excel”Pdf option.

How to Generate Student Segment Report ?

Step 1: Login to MCB with SysAdmin login credentials.

Step 2: Select “Academics” option on the top bar of the Dashboard. You’ll be directed to the “Academics” page.

Step 3: Select “Reports” on the top bar and choose “Student Segment Report”.

Step 4: Select Branch, Active Students.

Step 5: After choosing the required options, click on “Show Report”.

Step 6: The report is displayed. You may export and Print the same by clicking on the “Print/ Excel” option.

How to Generate Student RFID Attendance Report ?

Step 1: Login to MCB with SysAdmin login credentials.

Step 2: Select “Academics” option on the top bar of the Dashboard. You’ll be directed to the “Academics” page.

Step 3: Select “Reports” on the top bar and choose “Student RFID Attendance Report ”.

Step 4: Select Branch , Date, Class and Status Present.

Step 5: After choosing the required options, click on “Get”.

Step 6: The report is displayed. You may export the same by clicking on the Excel” option.

How to give attendance to students?

Step 1: Login to MCB with Principal login credentials.

Or if you’re already logged in with Admin login credentials you can change the access level to User Level.

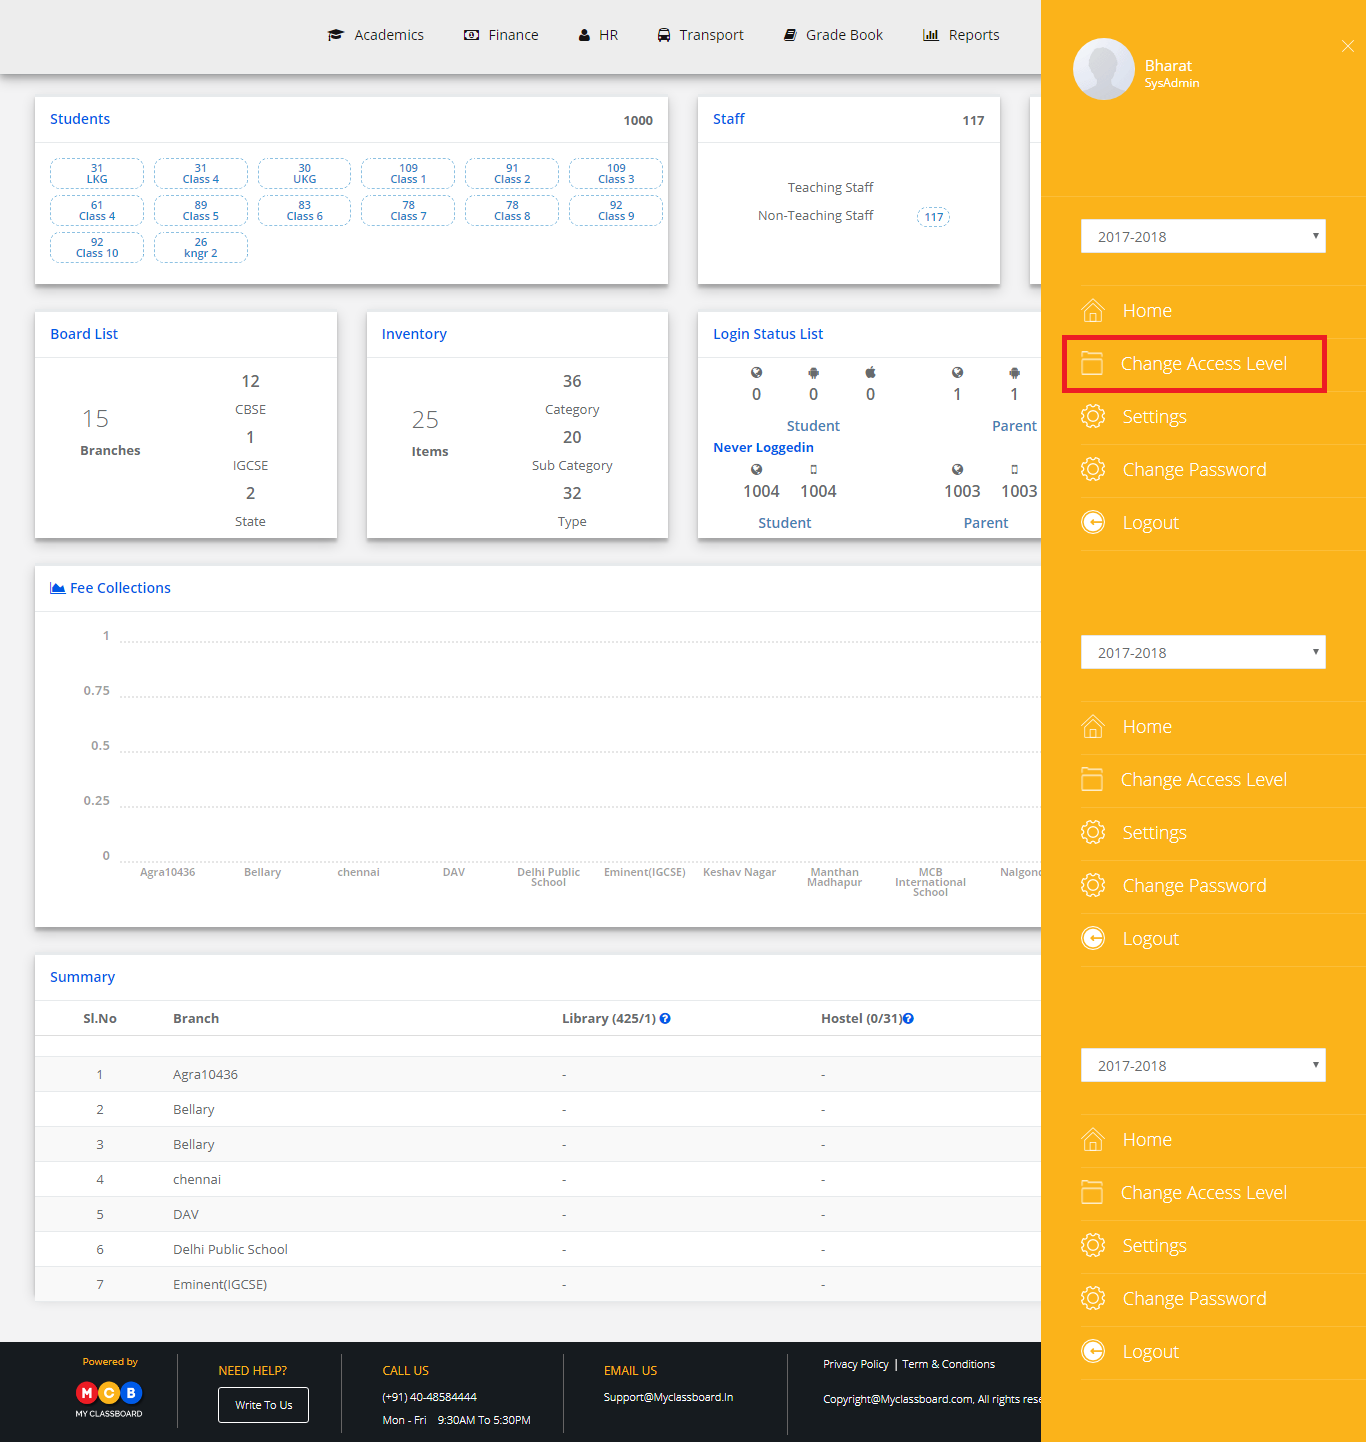
Change Access Level

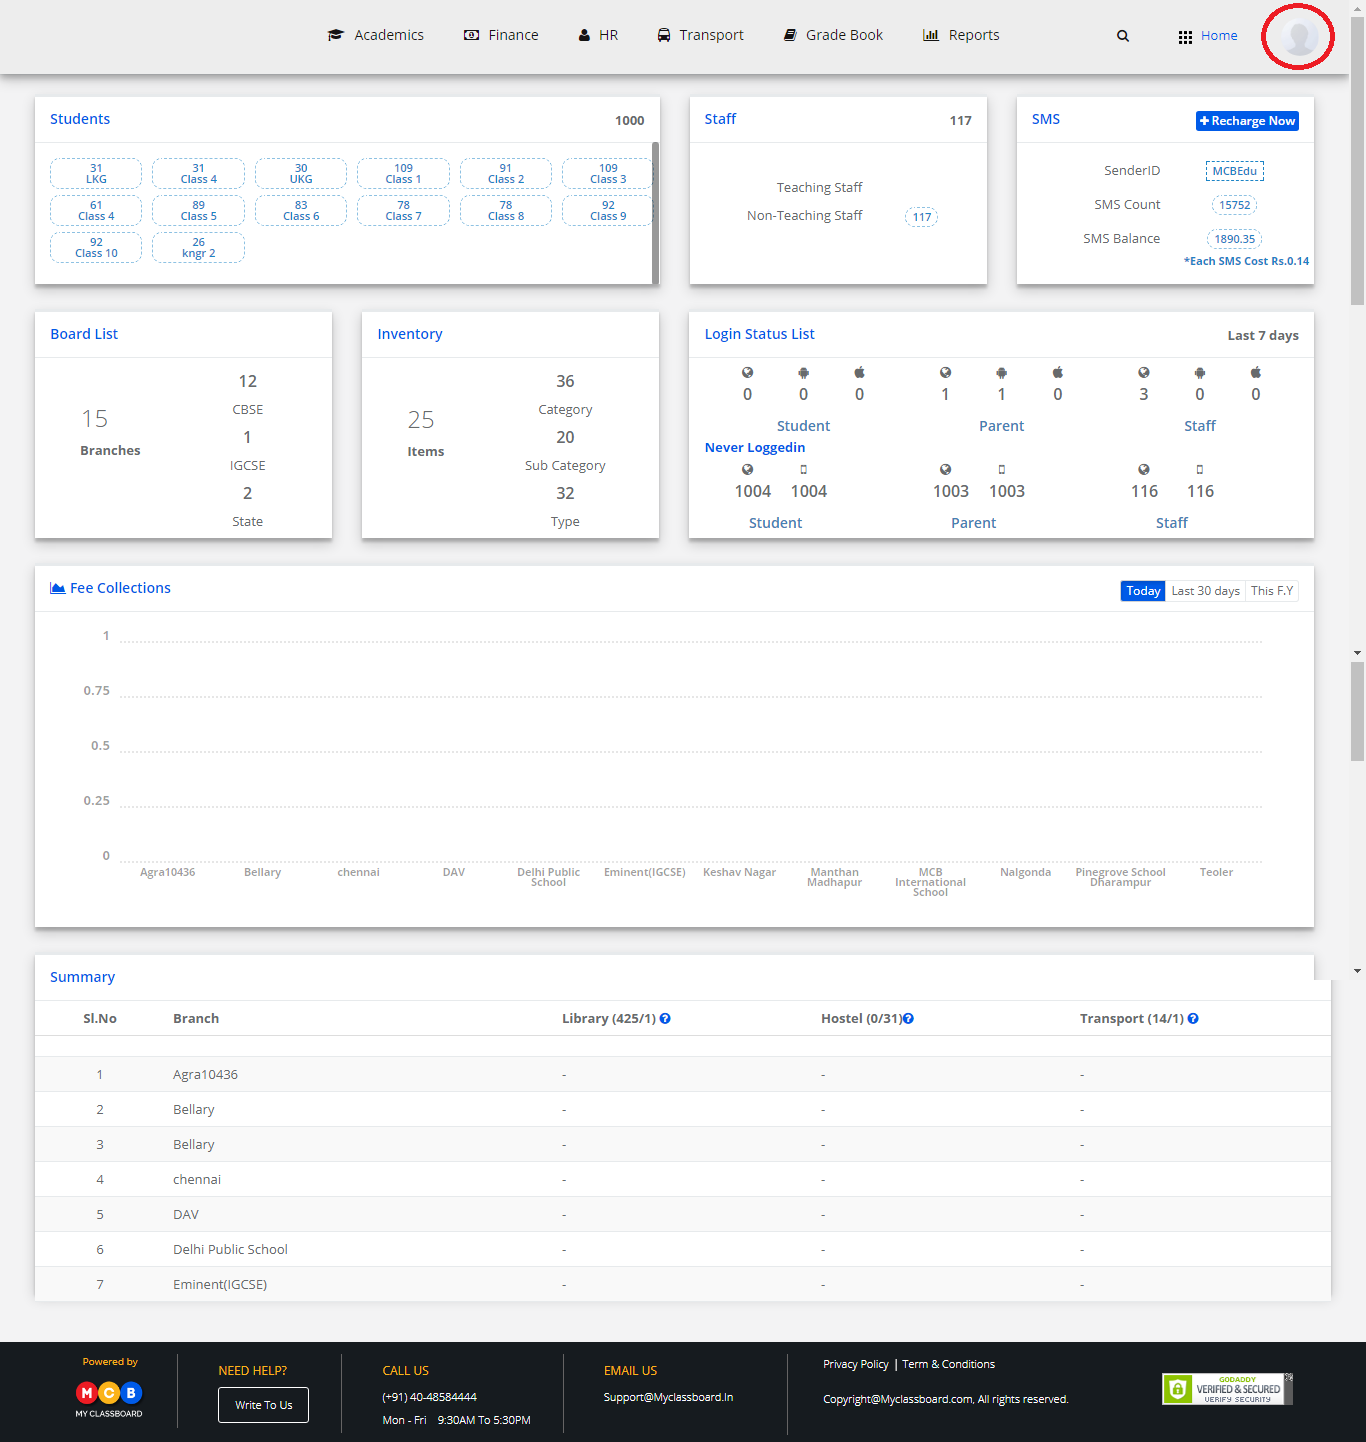
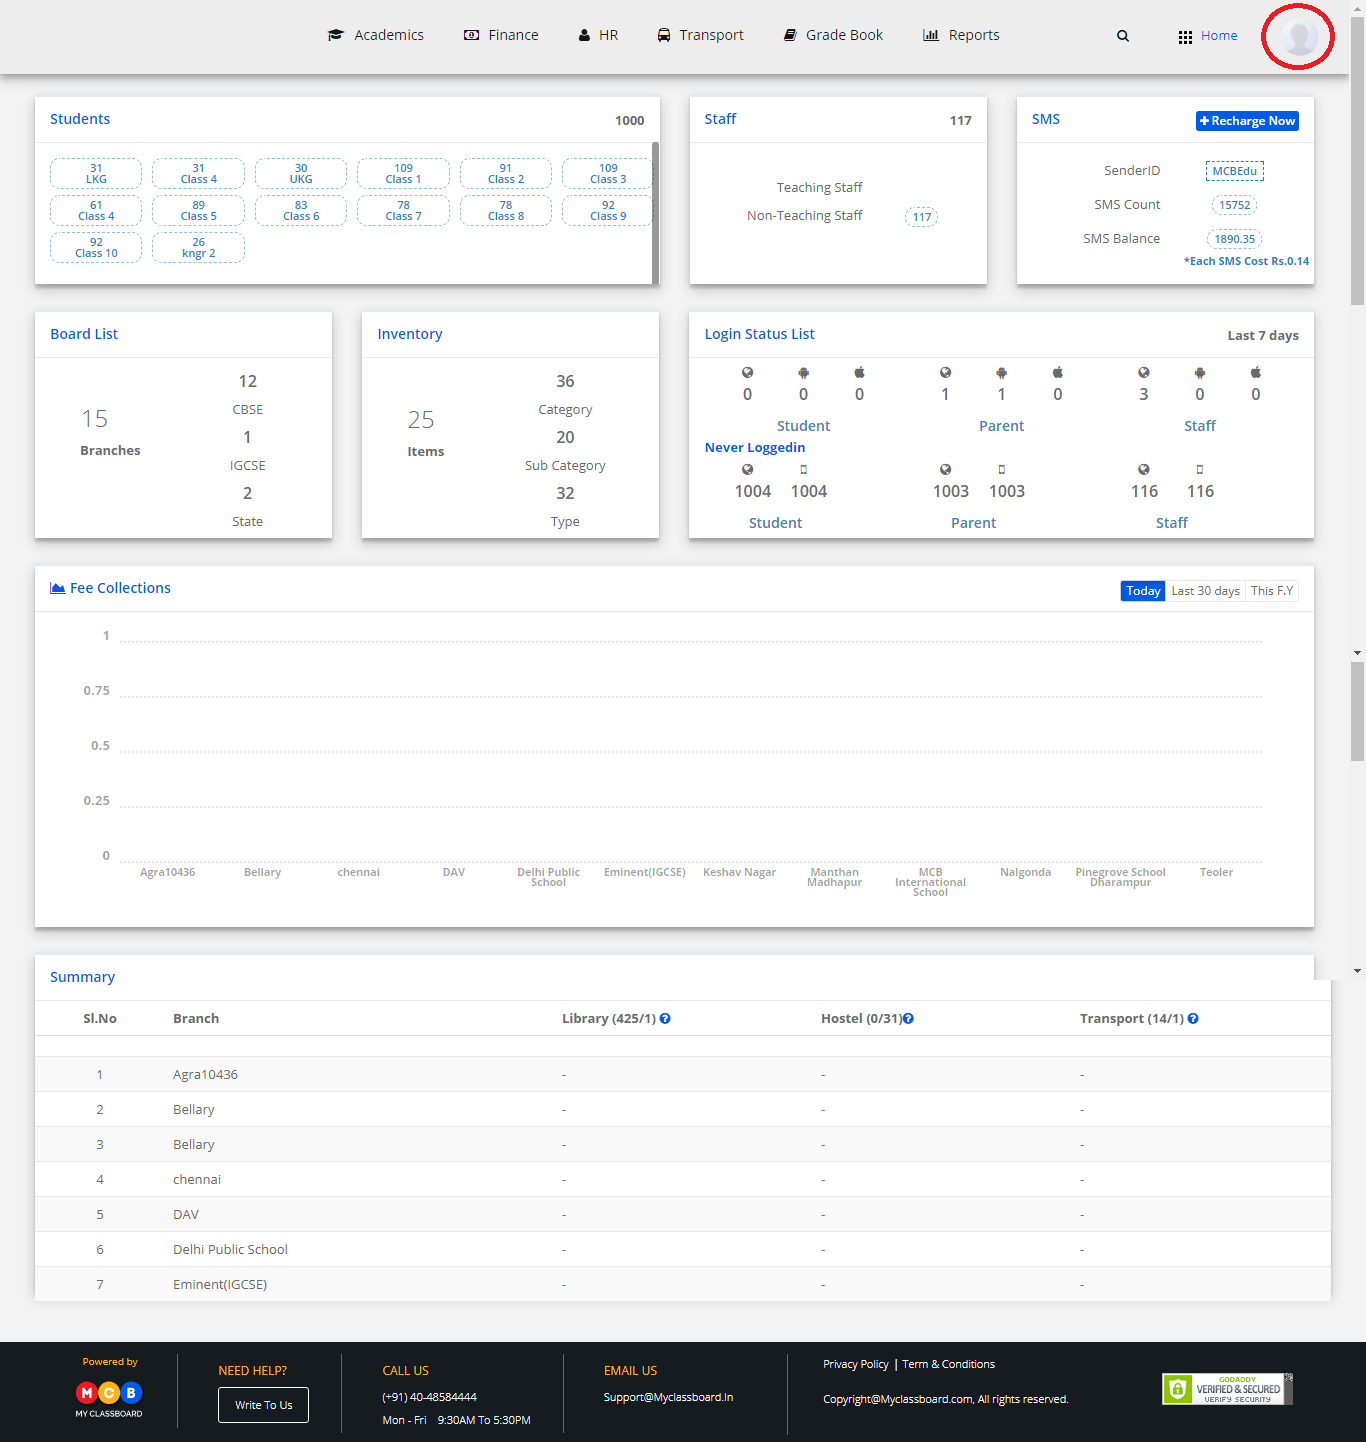
Step 2: Click on the “User Profile” icon on the right-hand top corner.
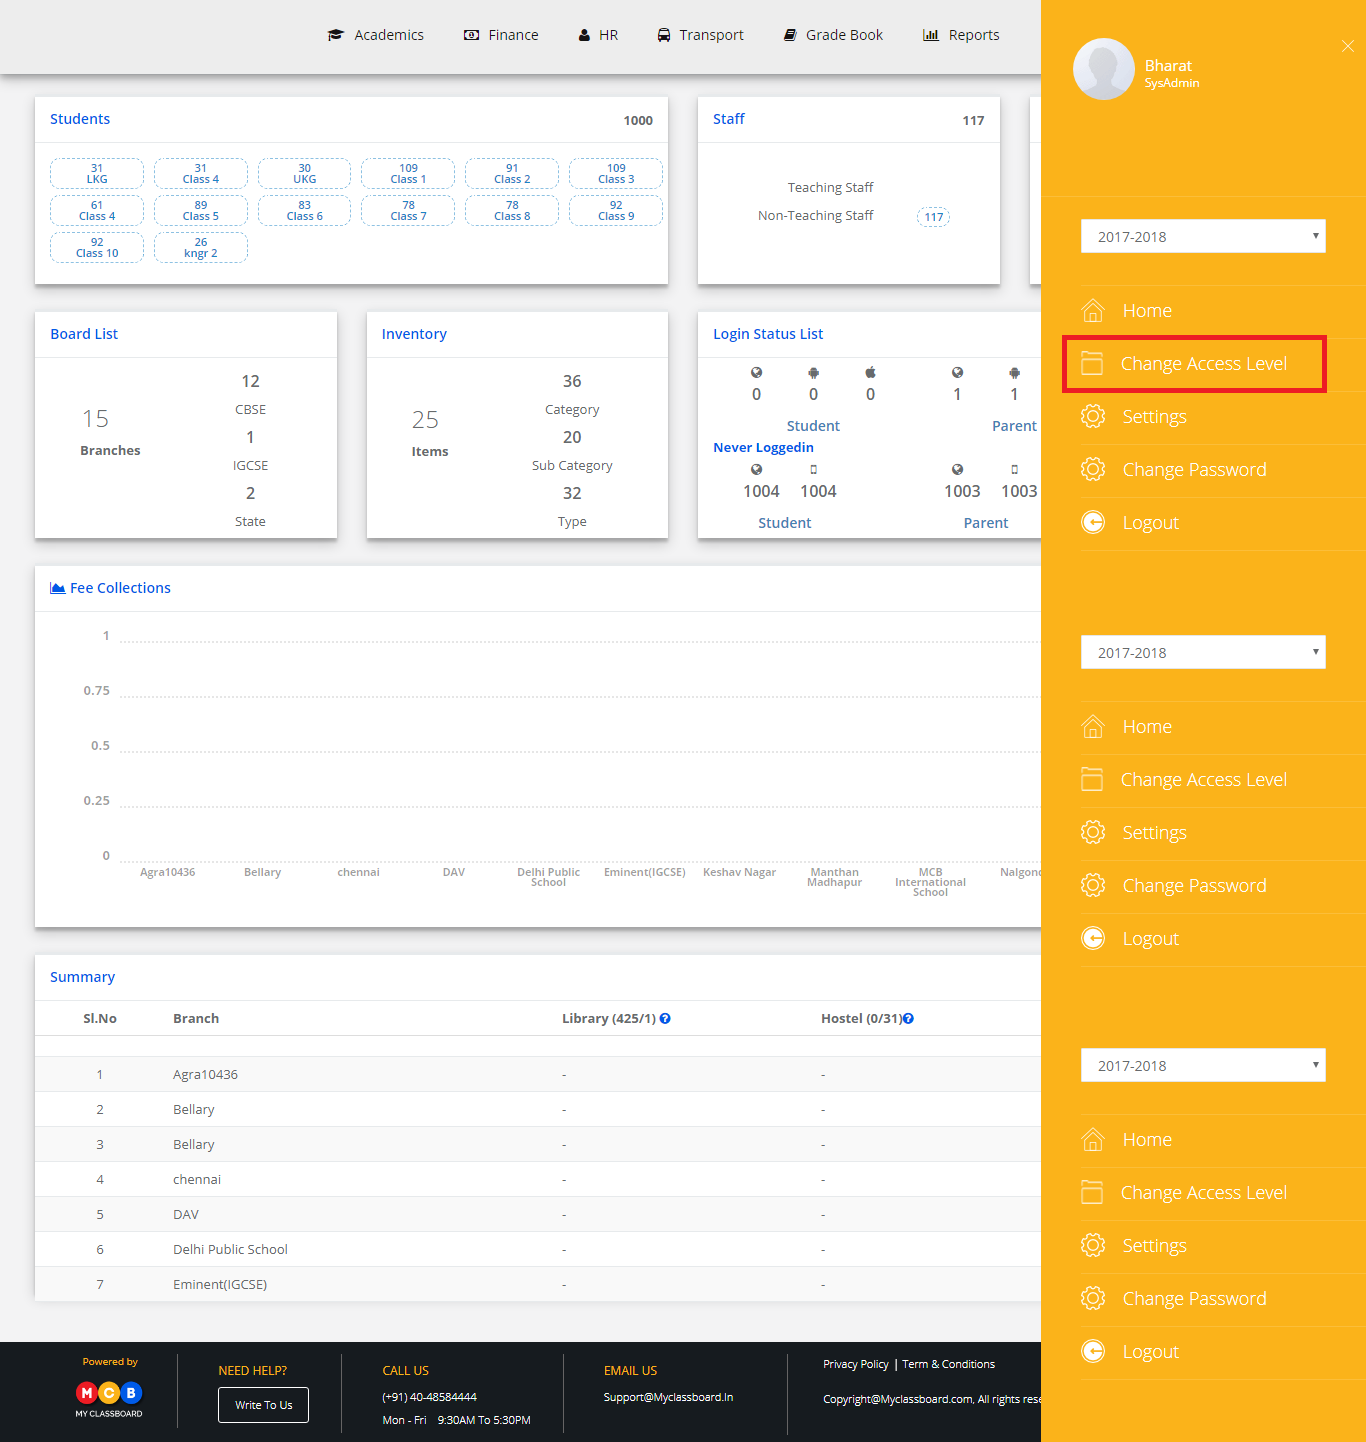
Step 3: Select “Change Access Level”.
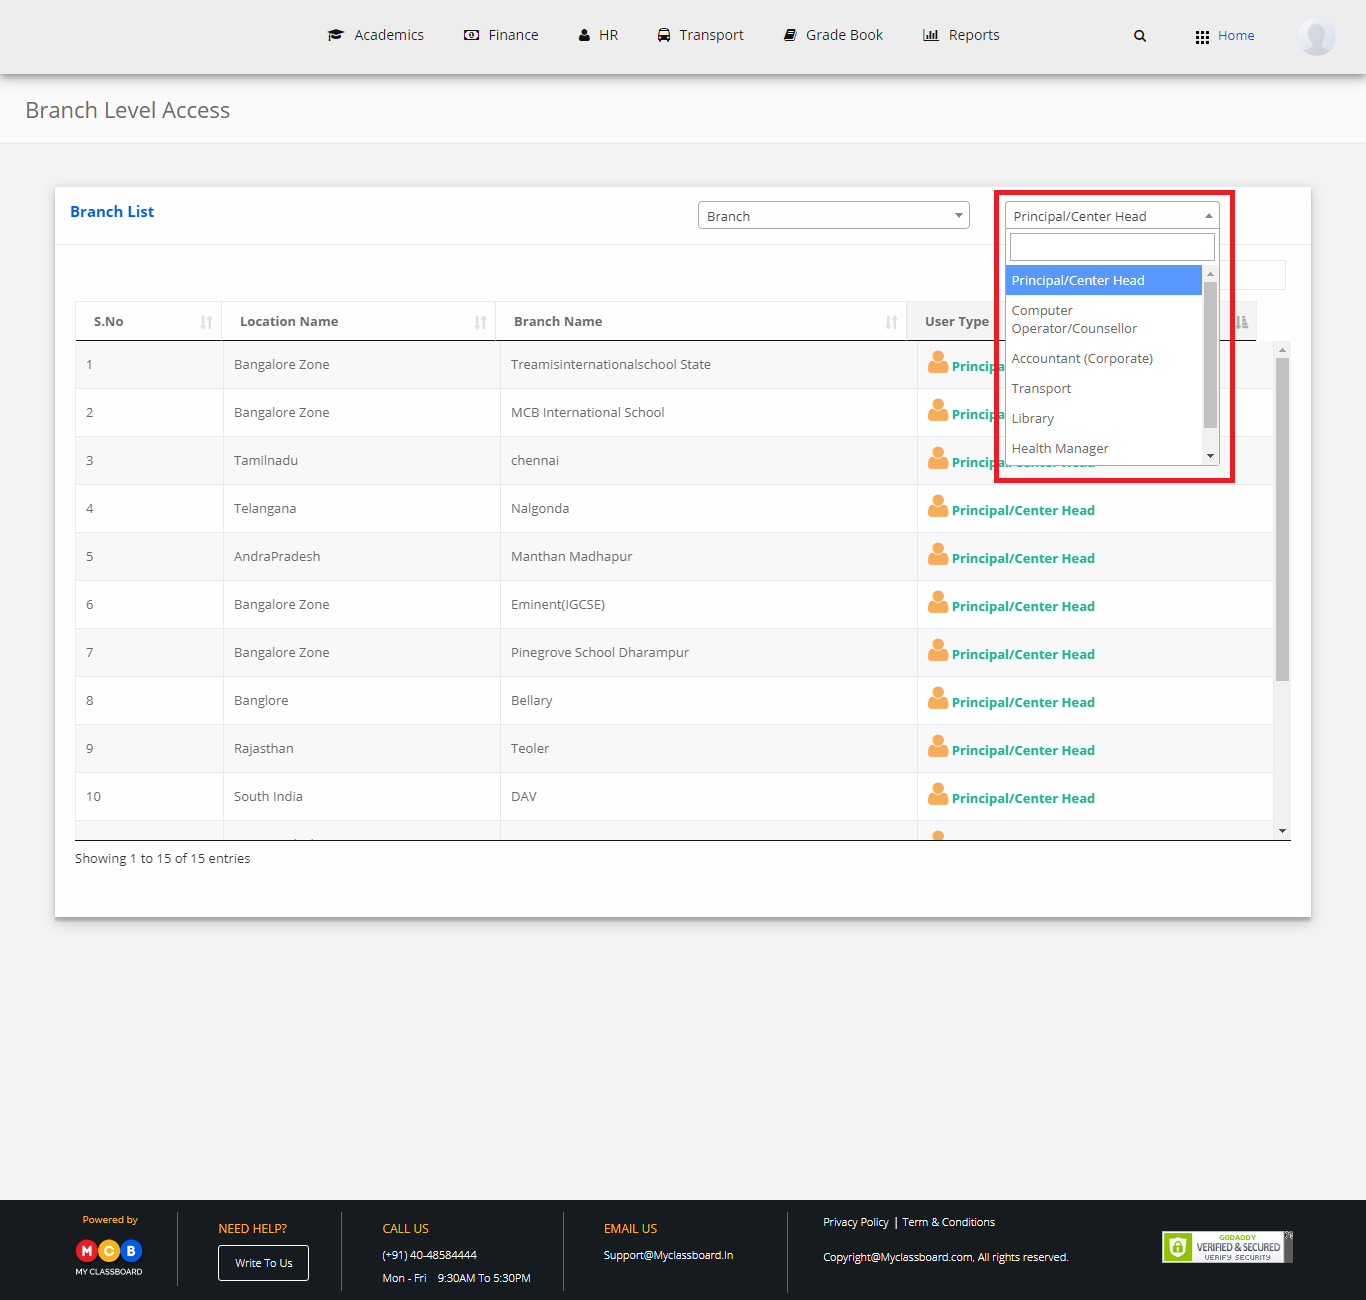
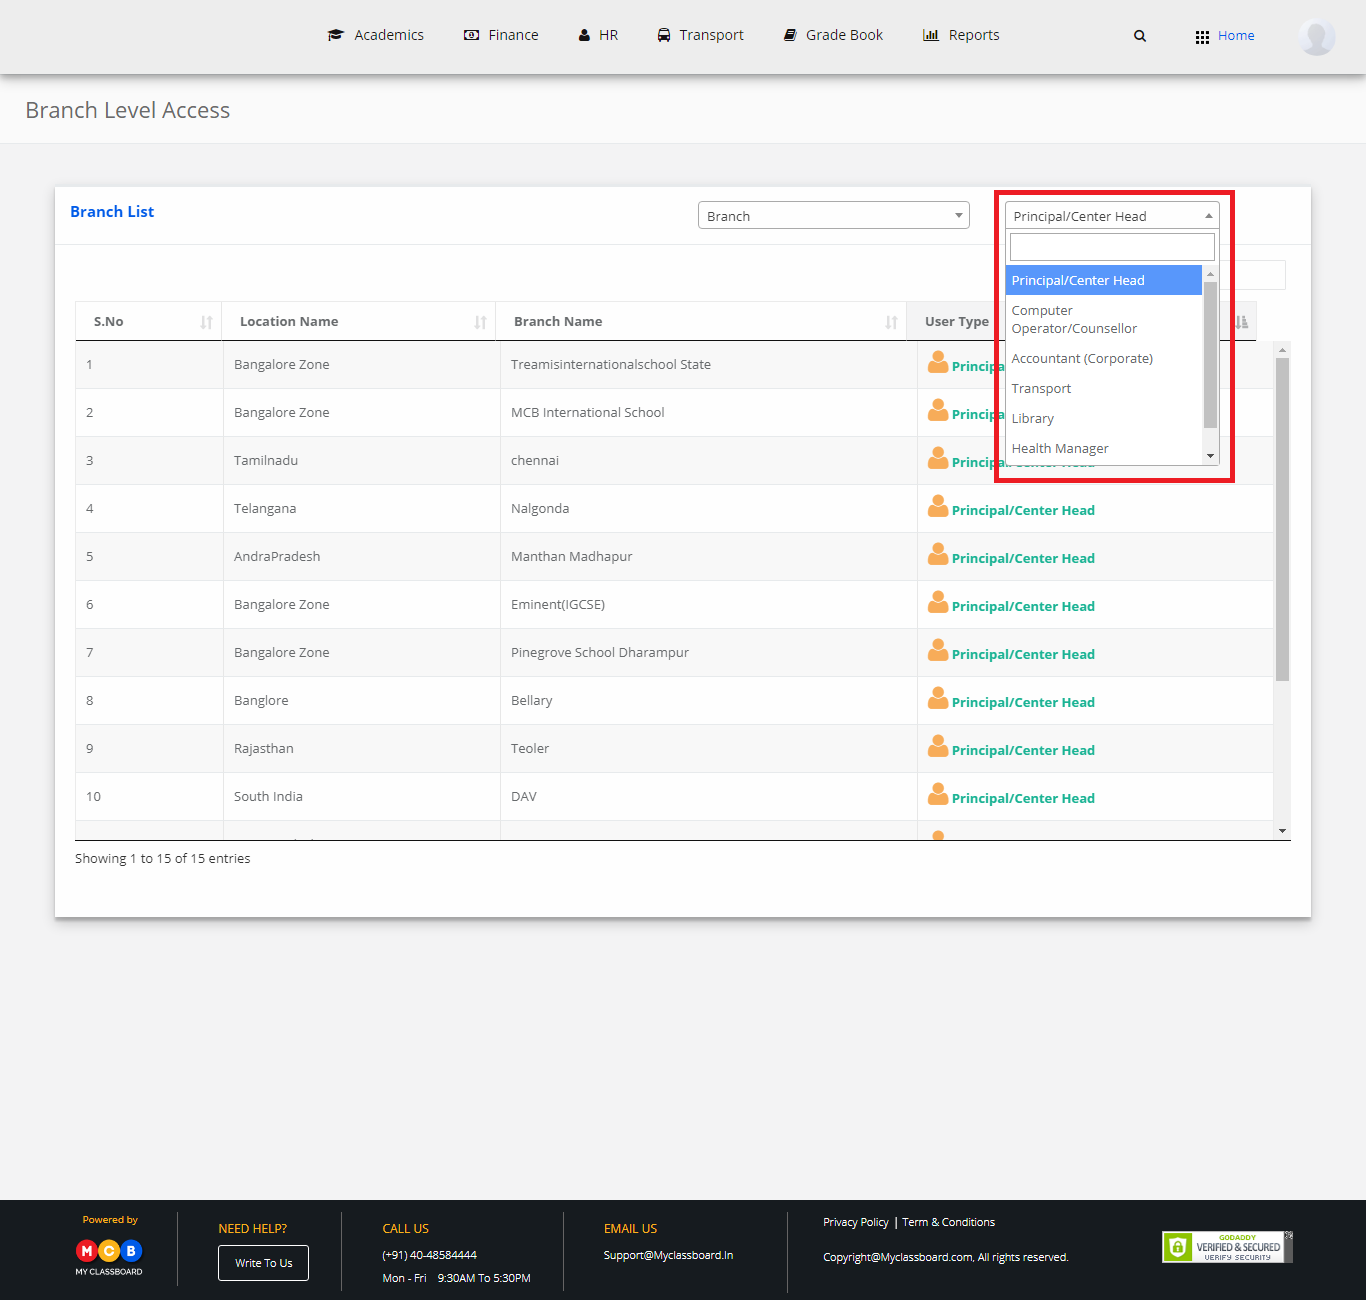
Step 4: Select the User Type as “Principal”.
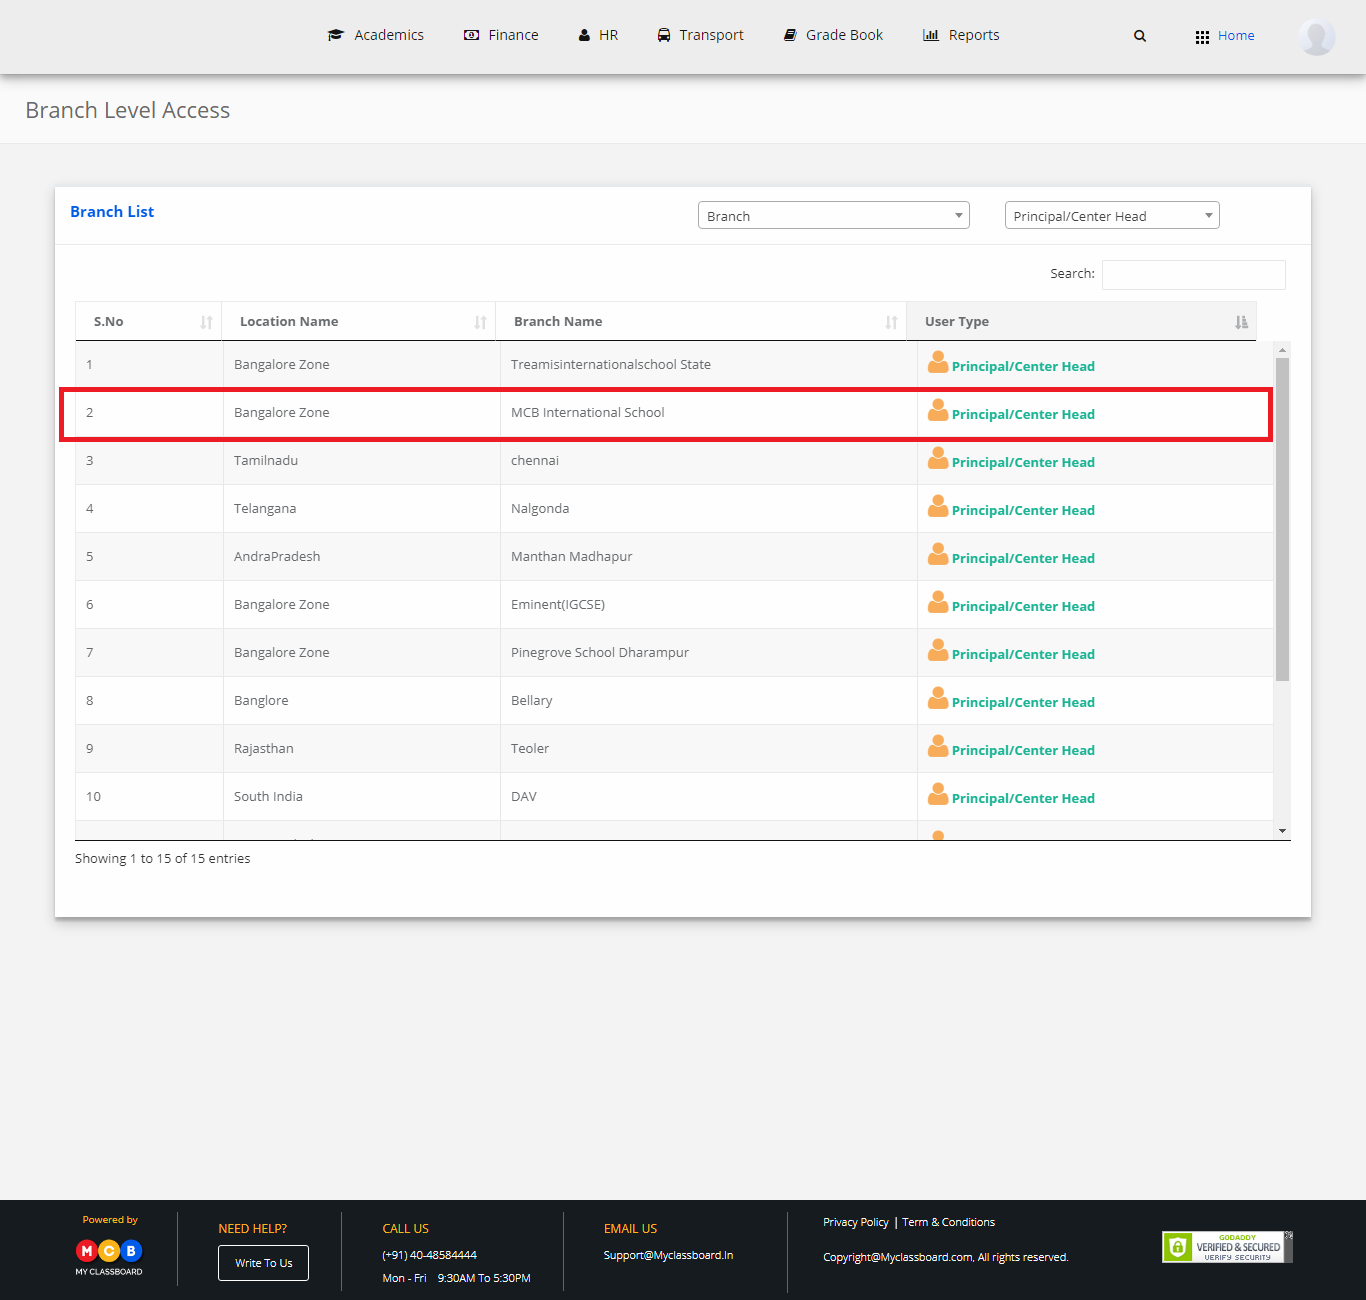
You’re now in the Principal Level Access. Now select any branch.

Step 7: Select “Academics” option on the top bar of the Principal Level Access Dashboard. You’ll be directed to the “Academics” page.
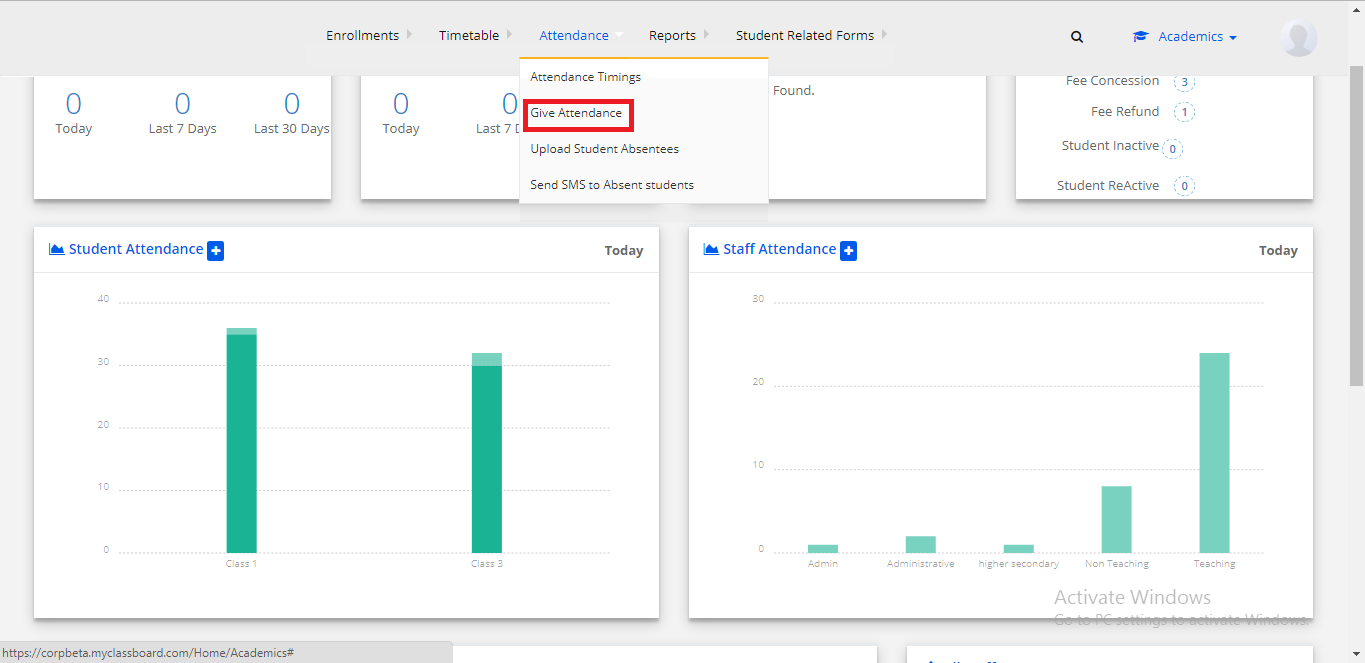
Step 8: Select “Attendance” on the top bar and choose “Give Attendance”.
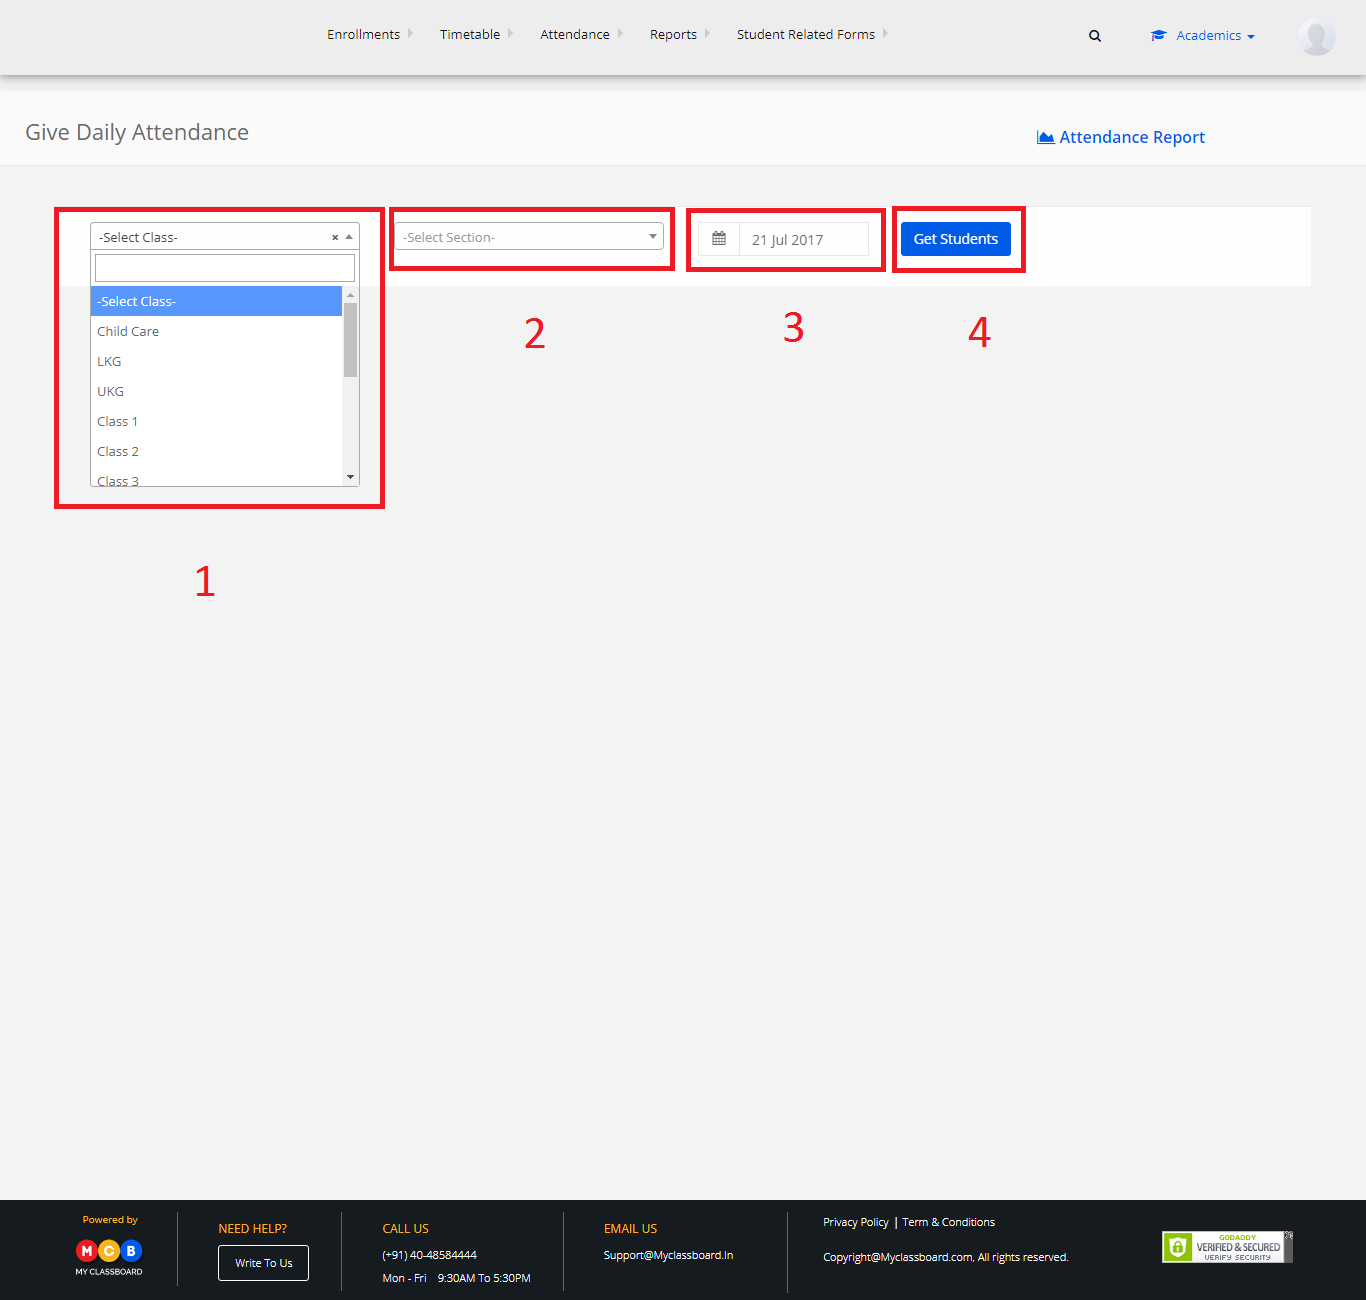
Step 9: Select Class, Section, Date and click on “Get Attendance”.
Step 10: List of the students for morning and afternoon sessions are displayed here.

Step 11: To give attendance, click on the check box for morning/afternoon sessions.
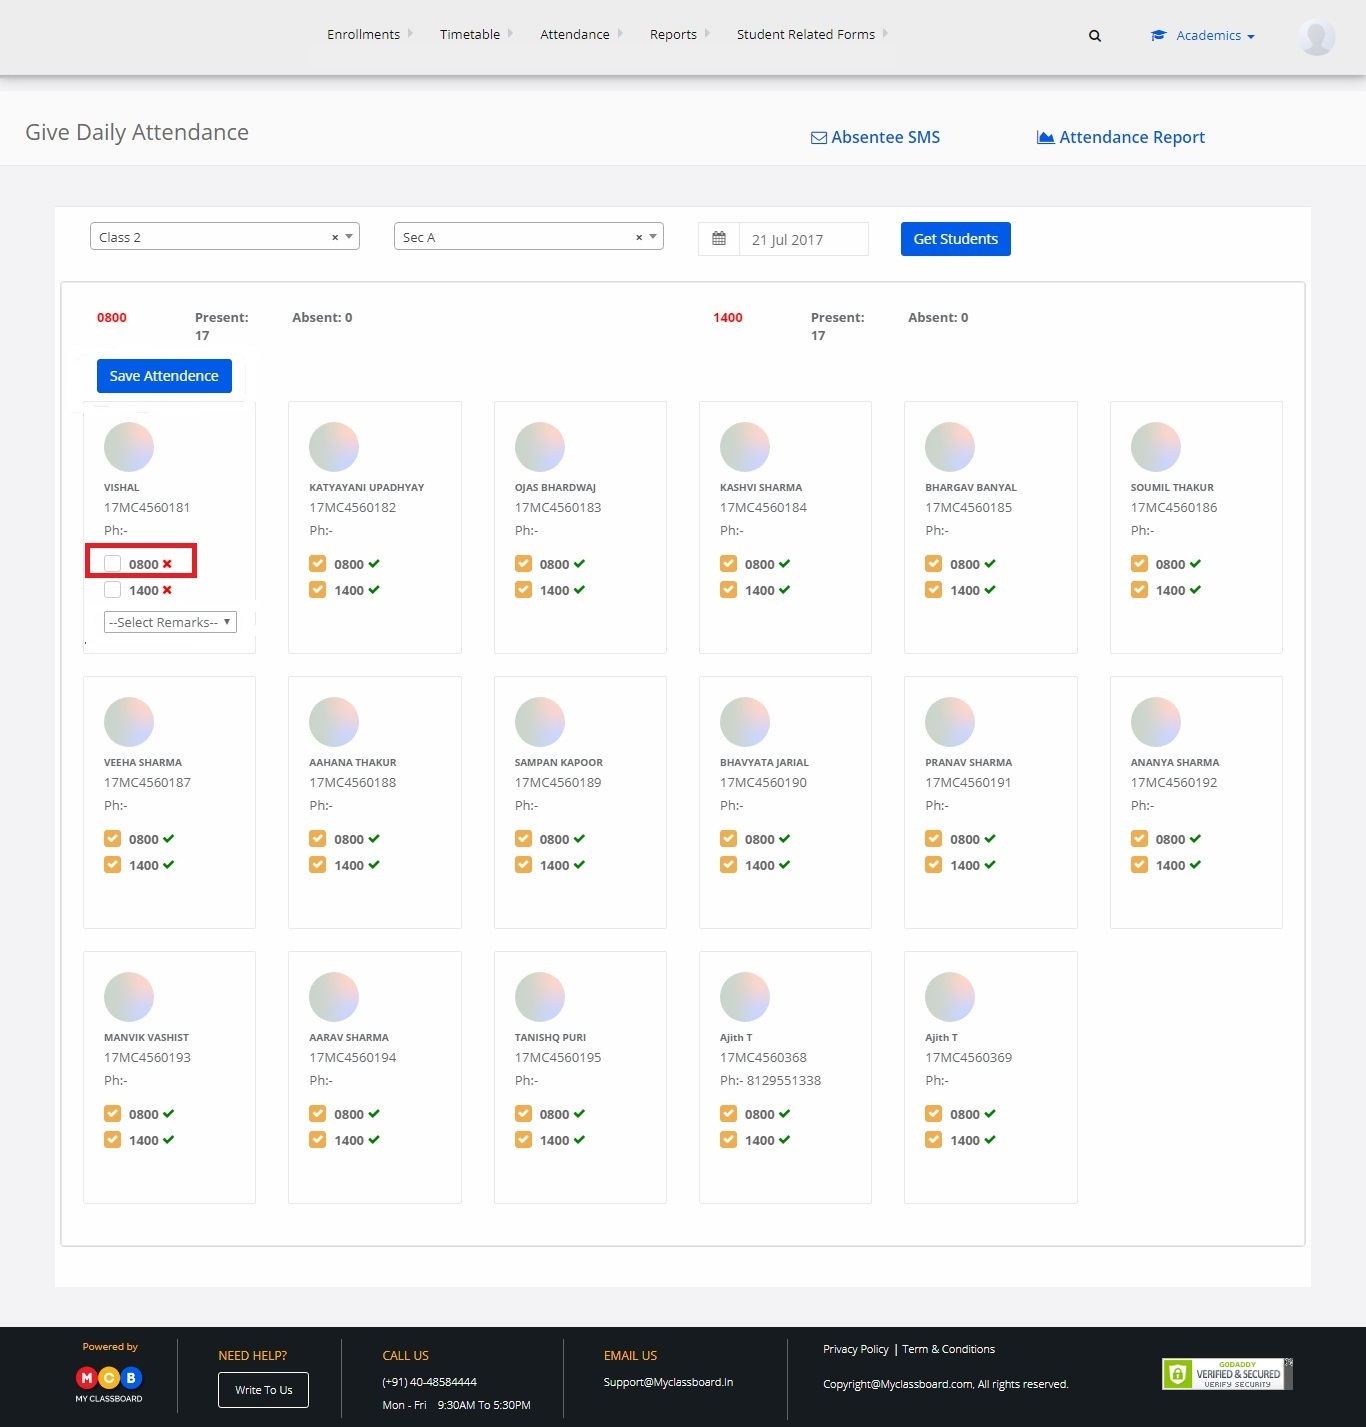
Step 12: For marking absent you give remarks under the checkbox.
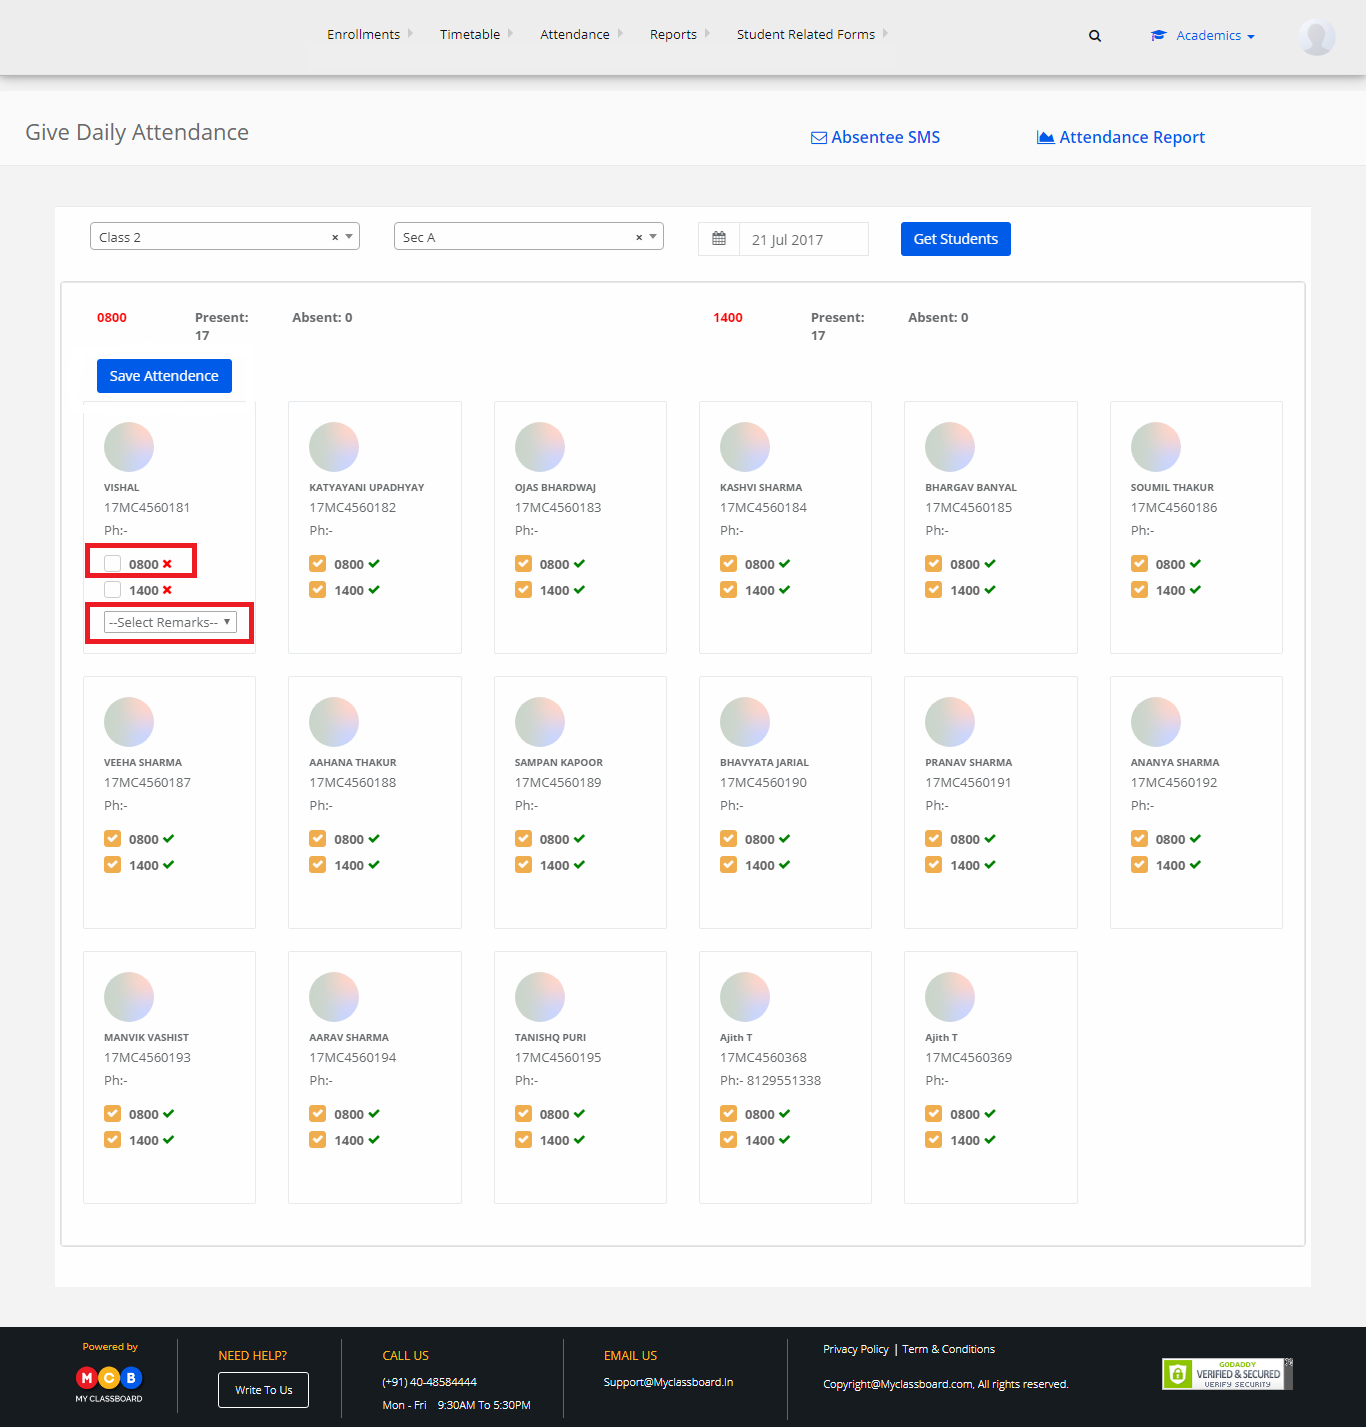
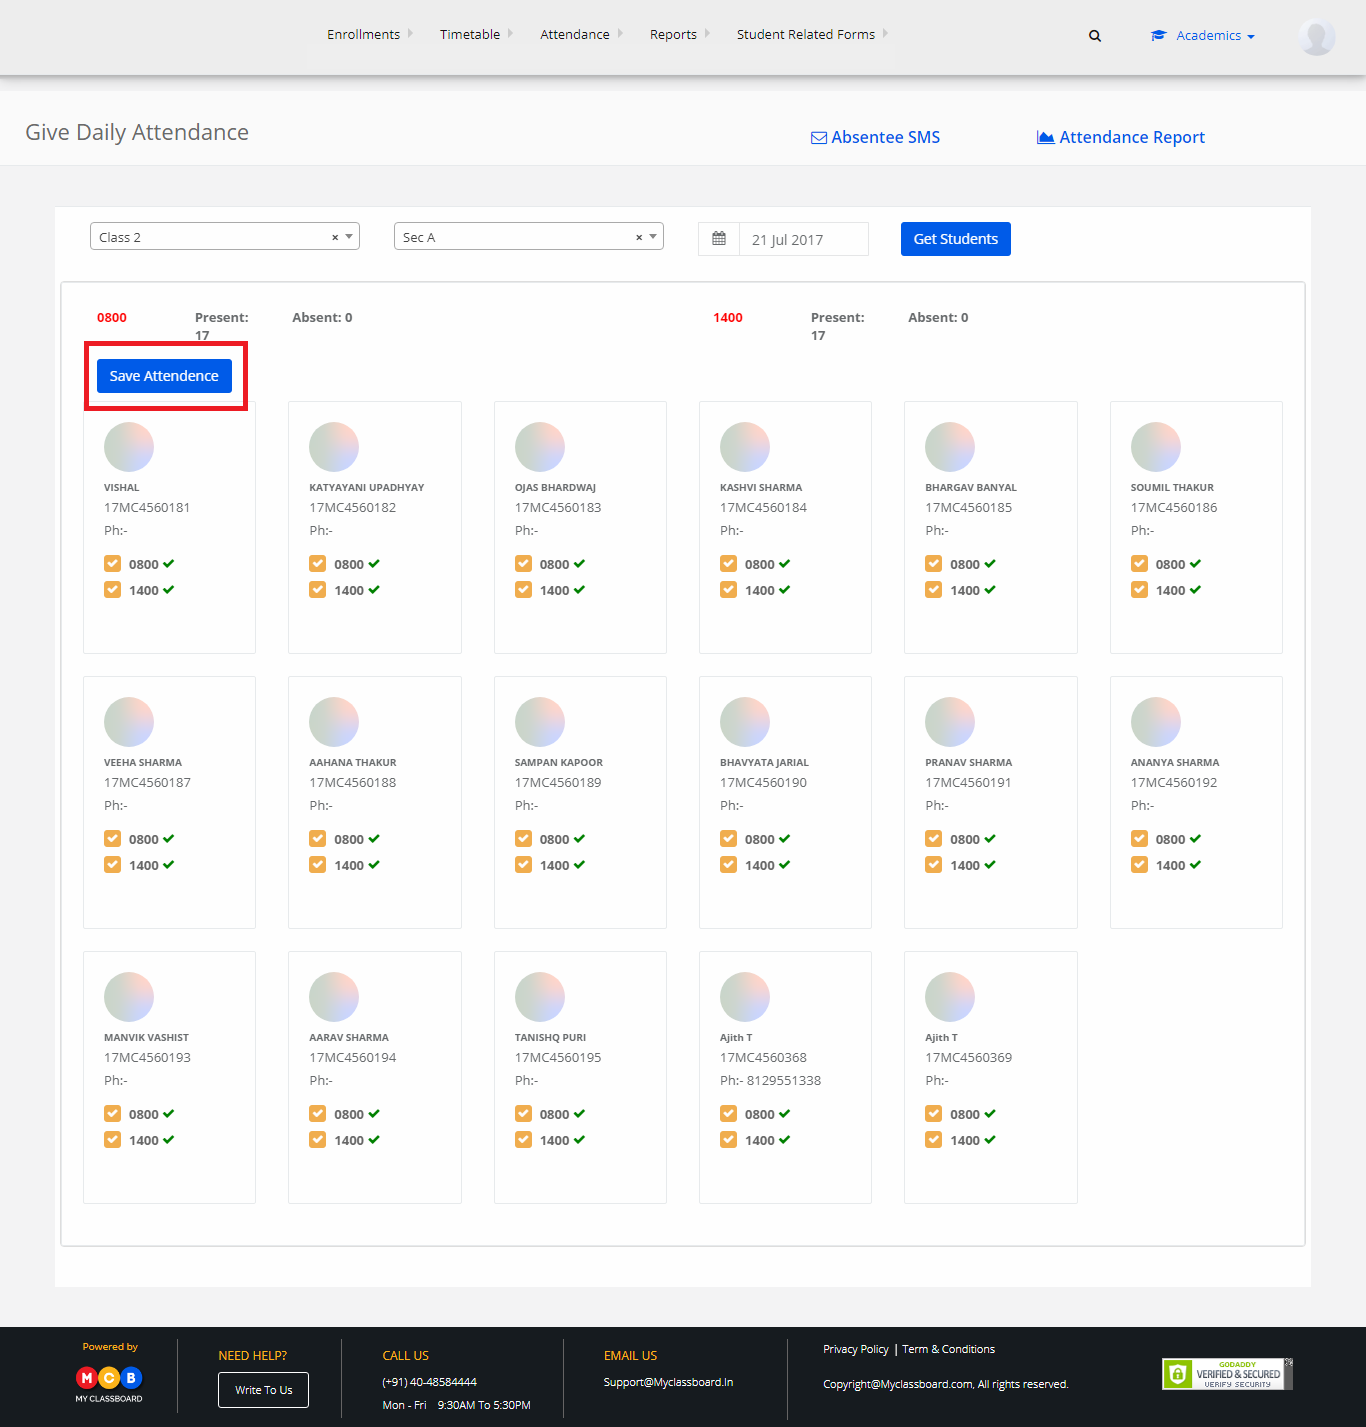
Step 13: After marking the attendance, click on “Save”.
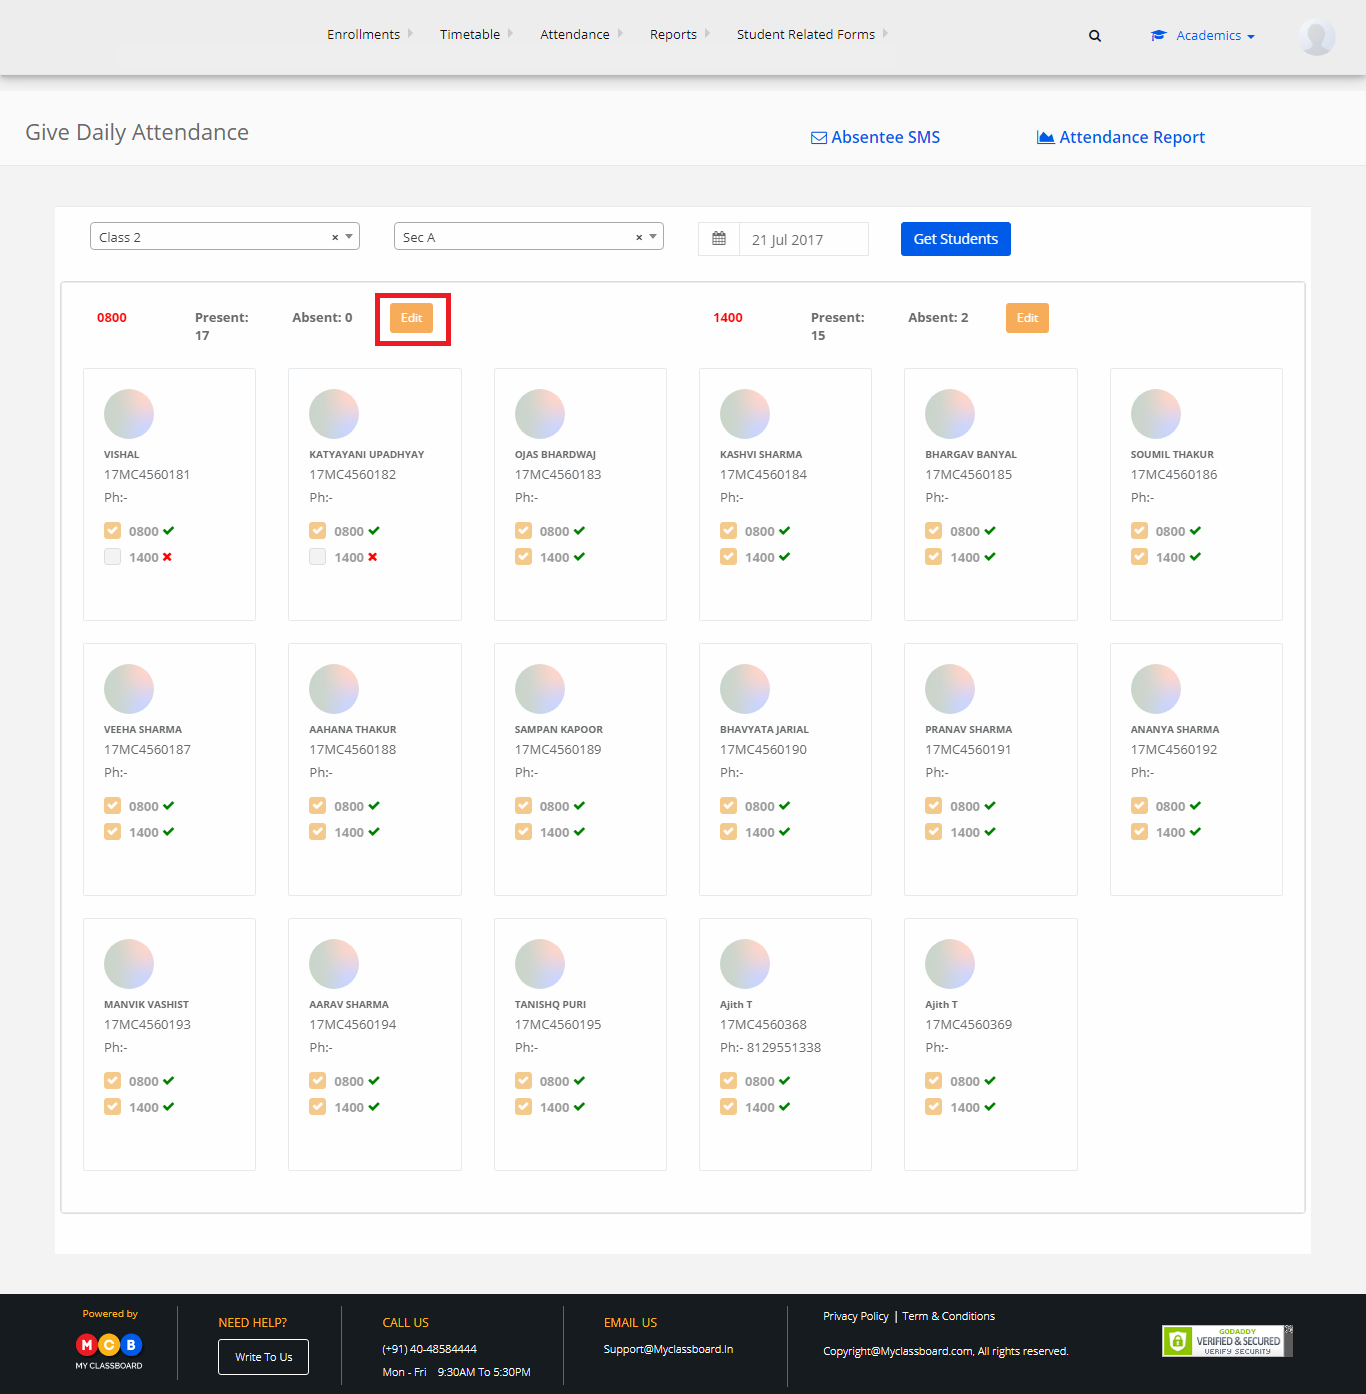
To Edit the attendance

To edit the attendance for morning/afternoon sessions, click on the “Edit” option beside.
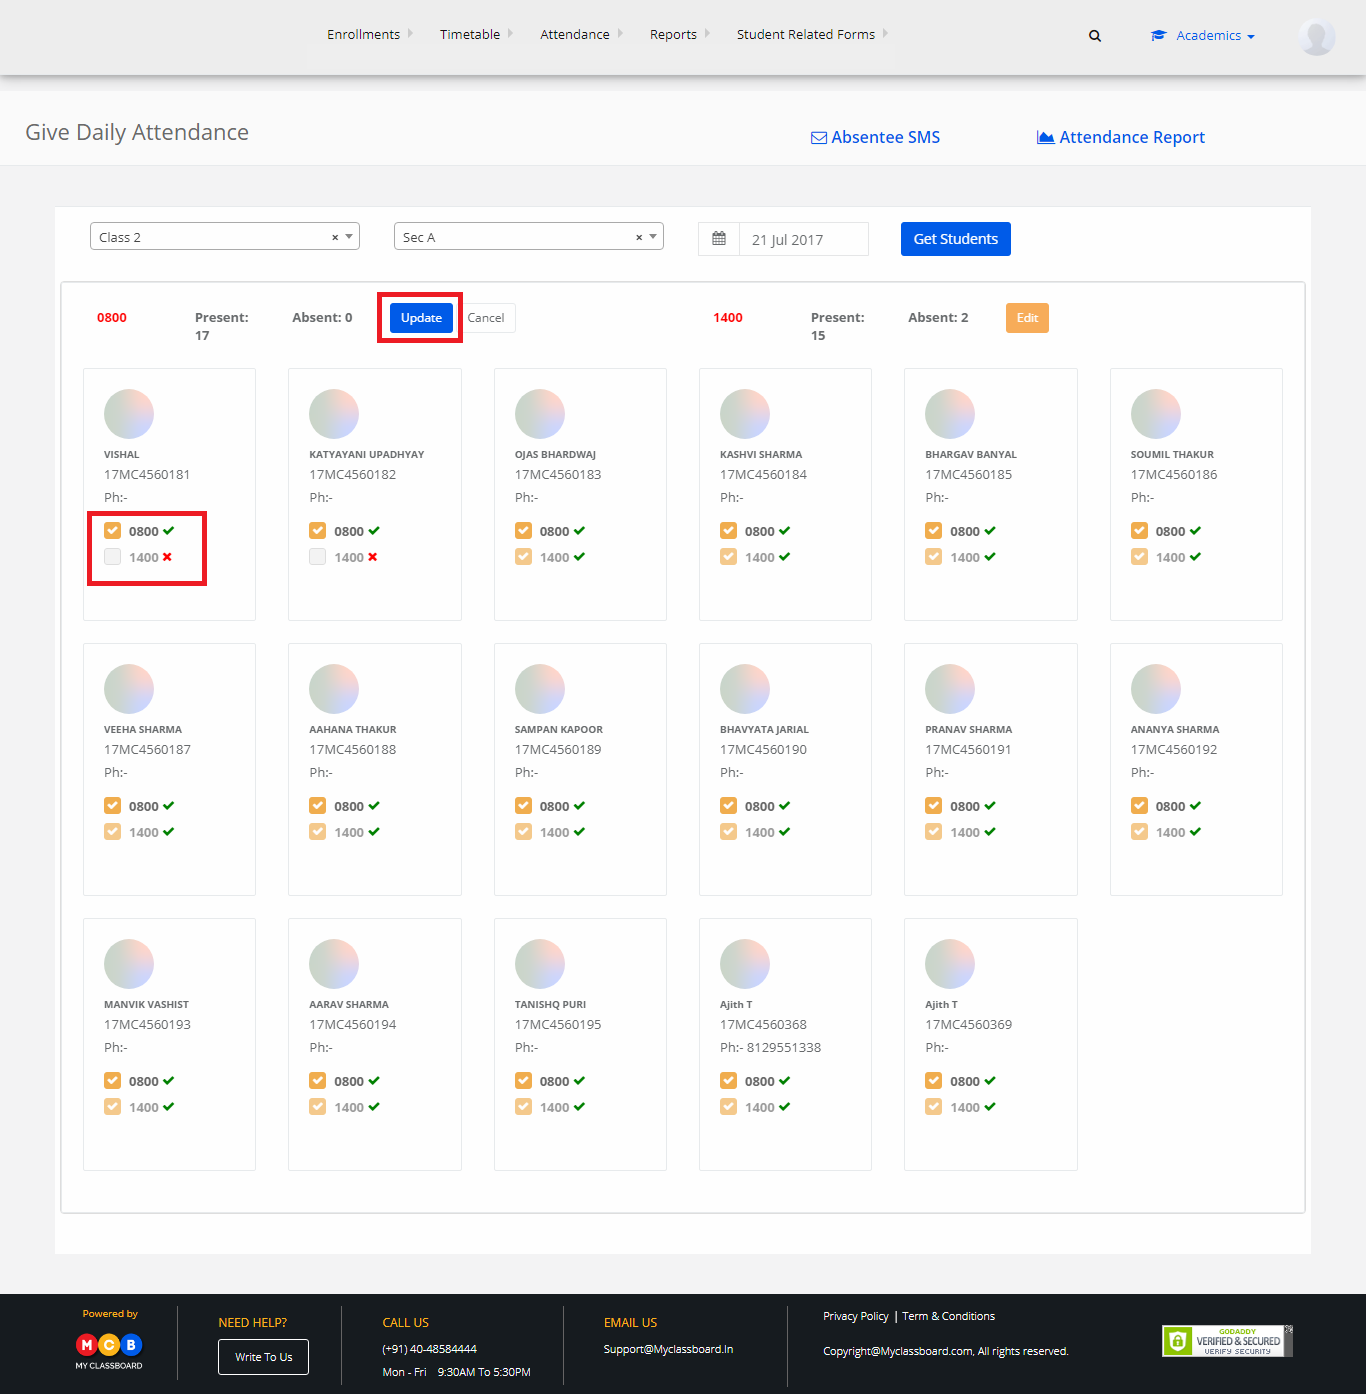
Step 14: Select the checkbox for students and click on update. The changes are updated successfully.
How to Update Monthly Attendance?

Step 1: Login to MCB with System Admin credentials and switch to the new version.
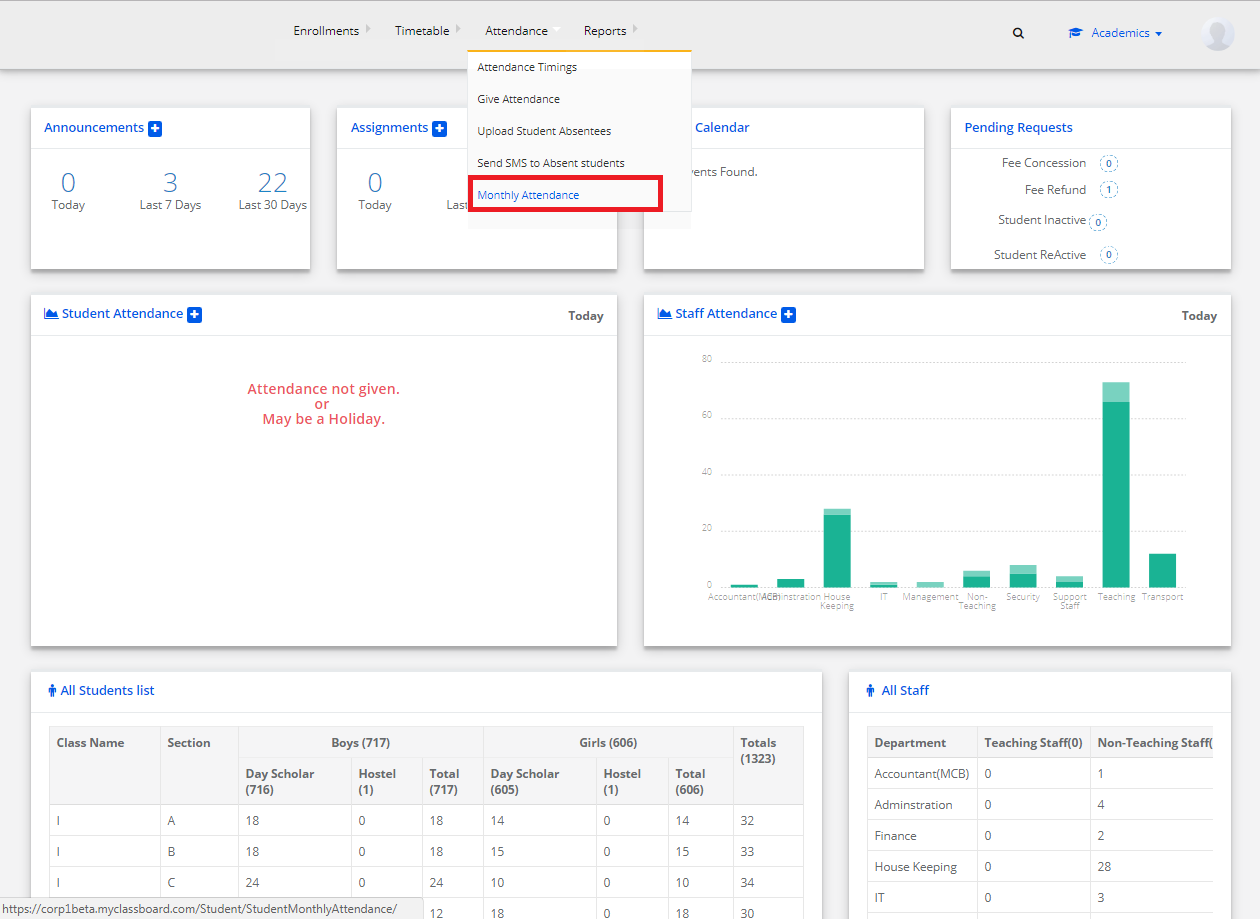
Step 2: Change Access Level – Click on the “User Profile” icon on the right-hand top corner.

Step 3: Select “Change Access Level”.

Step 4: Select the User Type as “Principal”.

Step 5: Select Principal against the respective branch.

Step 6: Click on “Academics” on the top bar of the dashboard.

Step 7: Select “Attendance” and choose “Monthly attendance” under it.

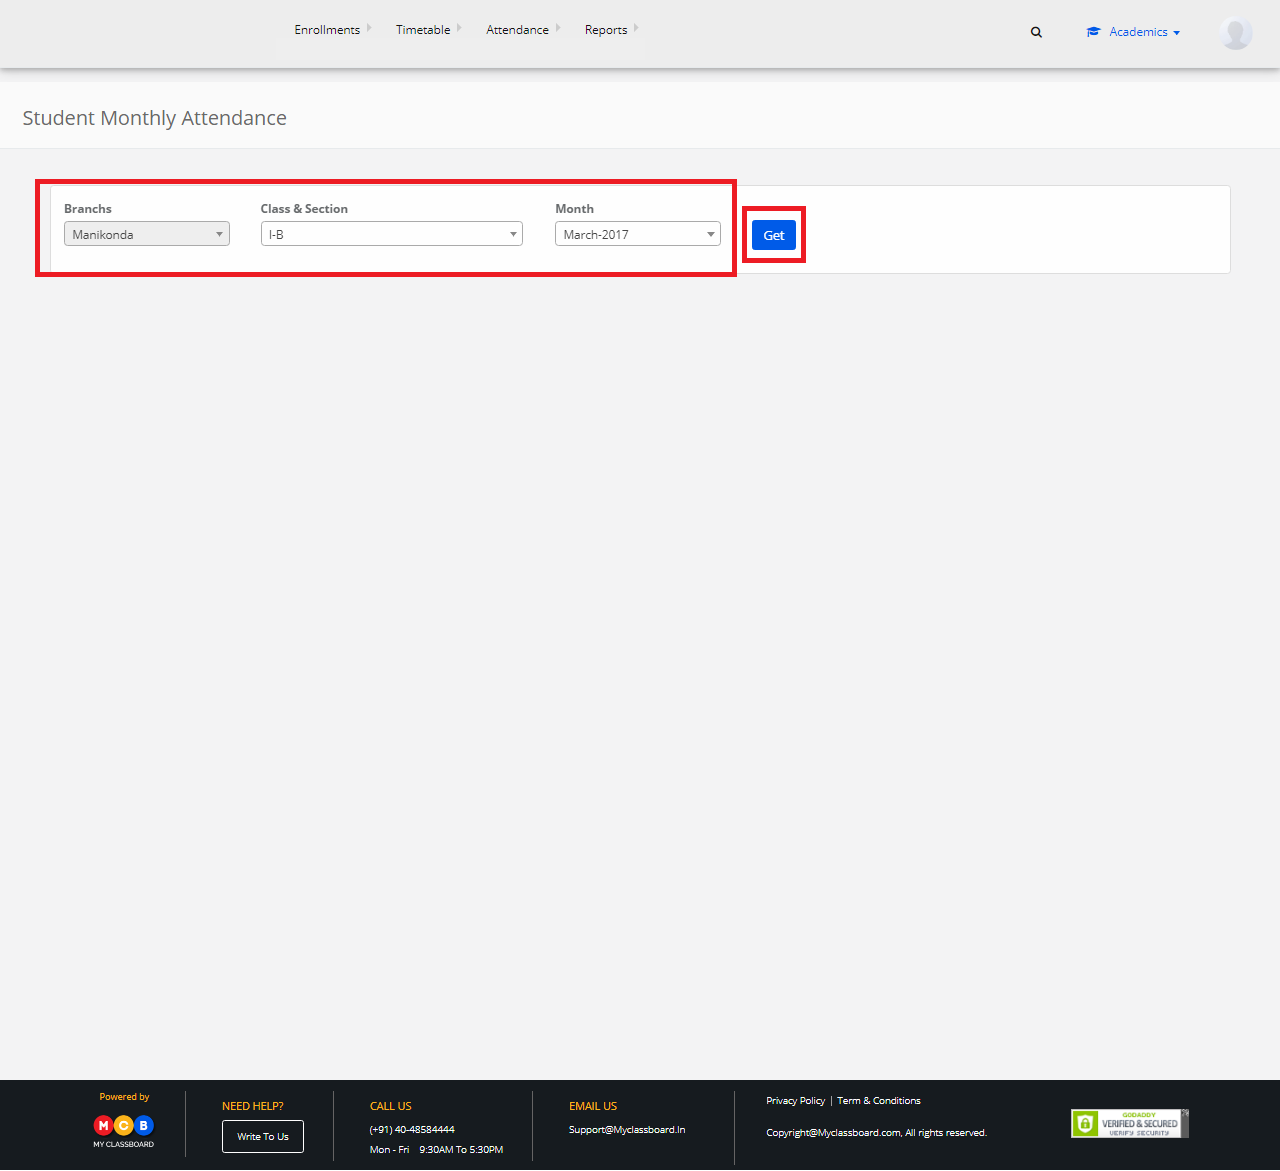
Step 8: Select Class/ section, Month and click on Get

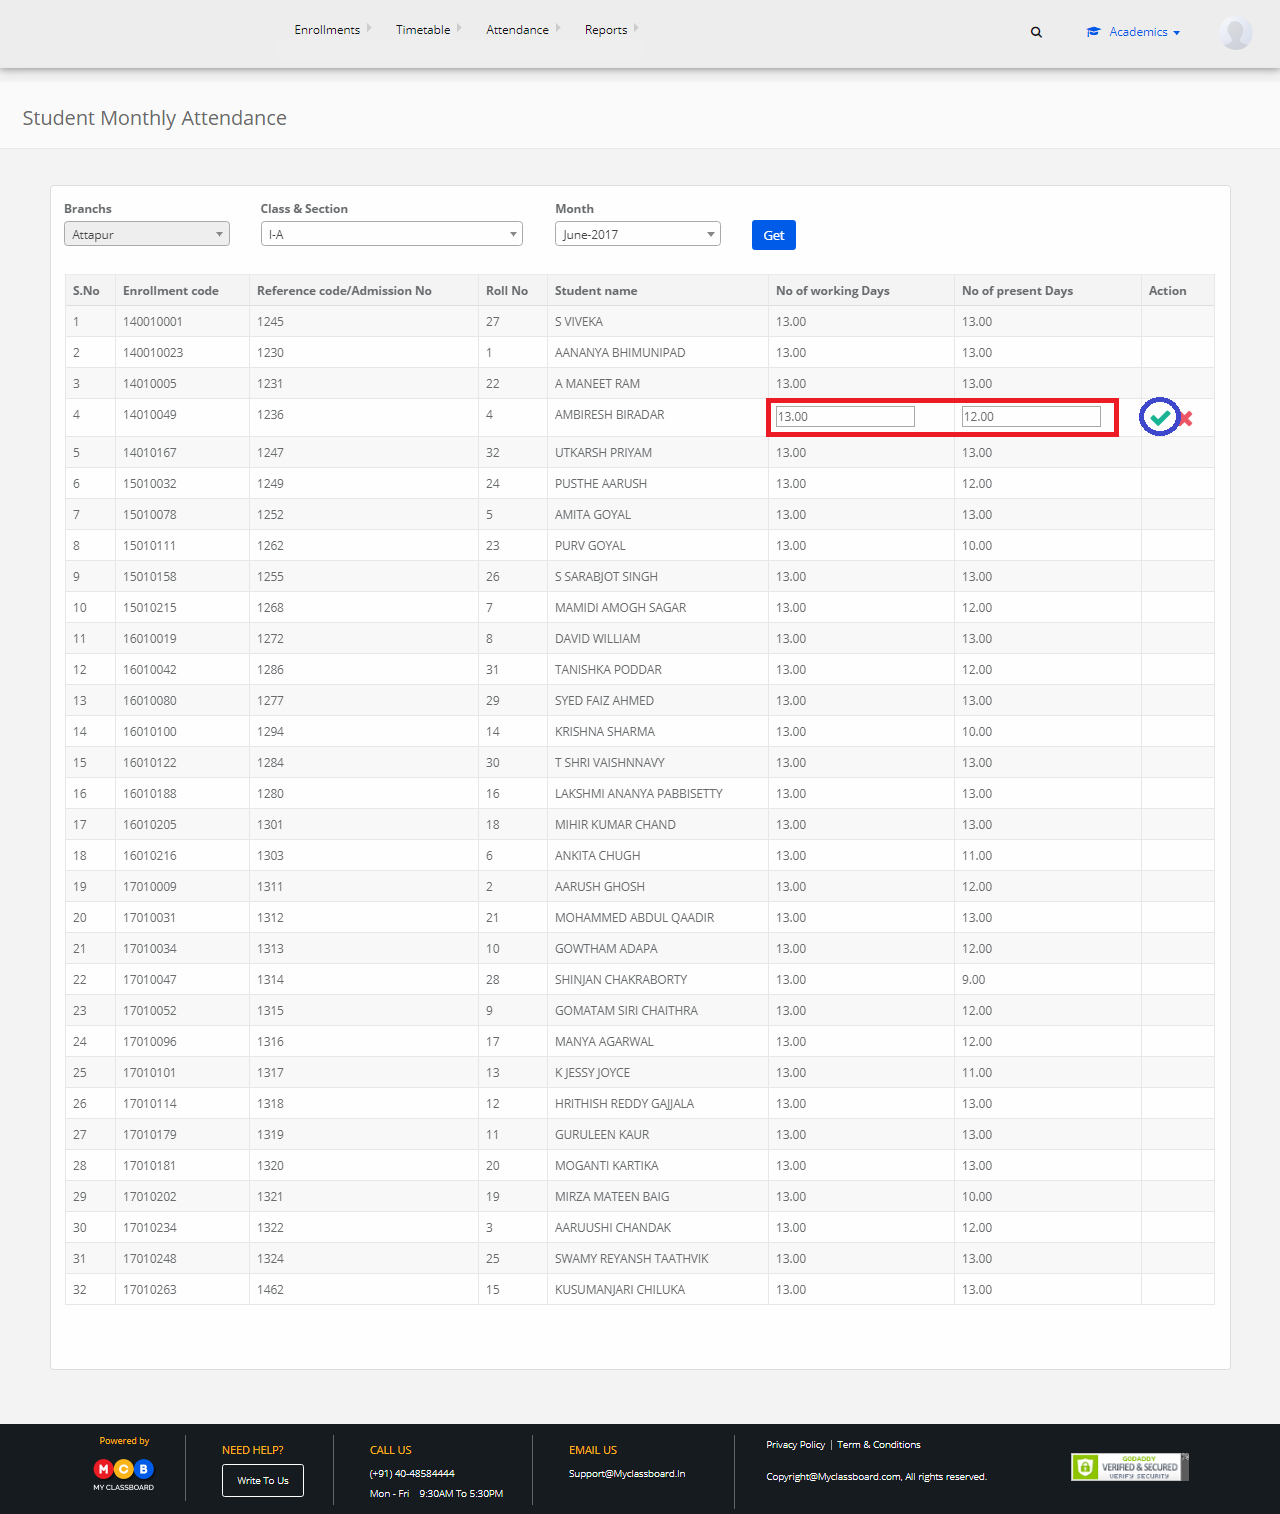
Step 9: Add no. of present days and click on Save.

To Generate Monthly Attendance report

Step 10: Go back to “Academic” dashboard page.

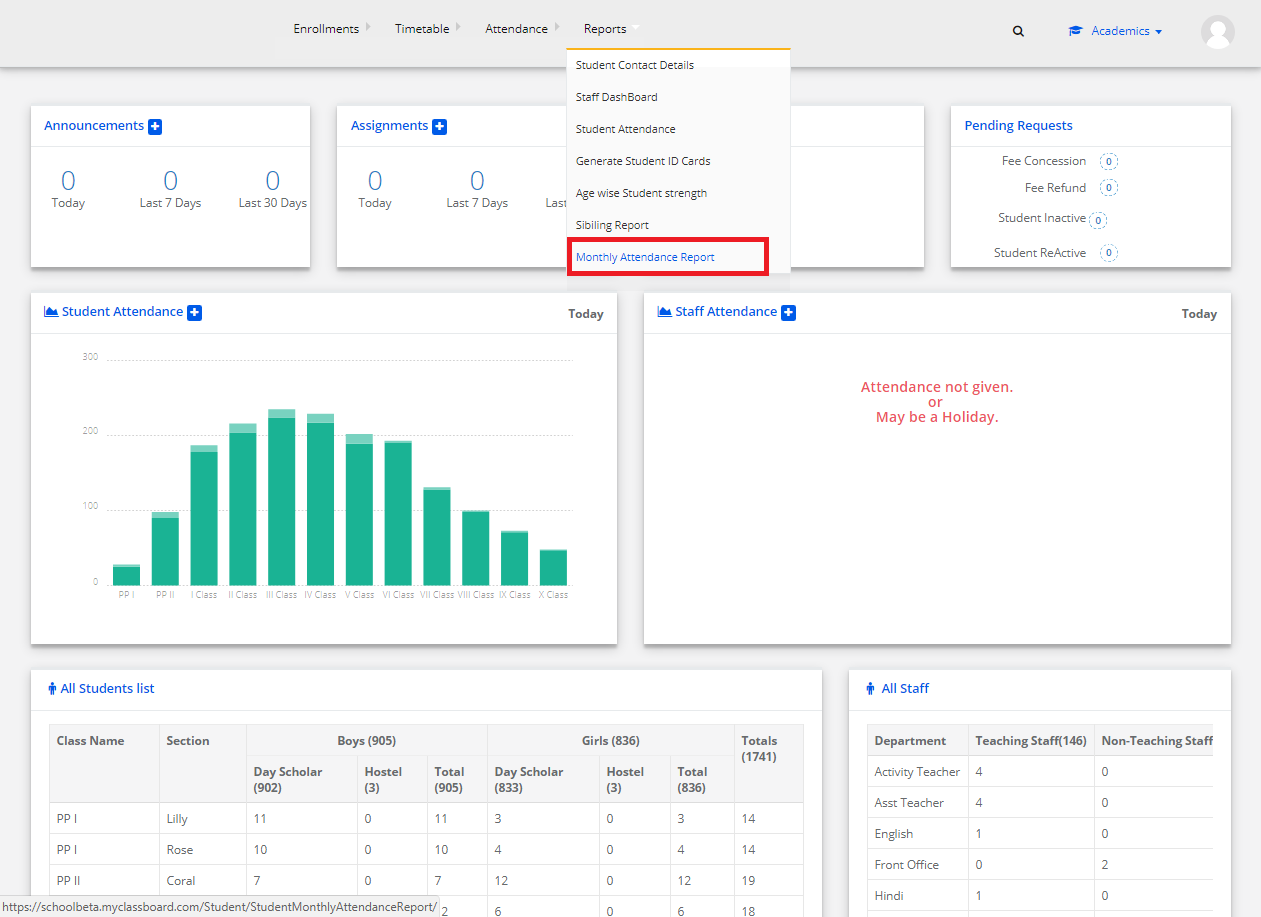
Step 11: Select “Reports” on the top bar and choose “Monthly Attendance Reports” under it.

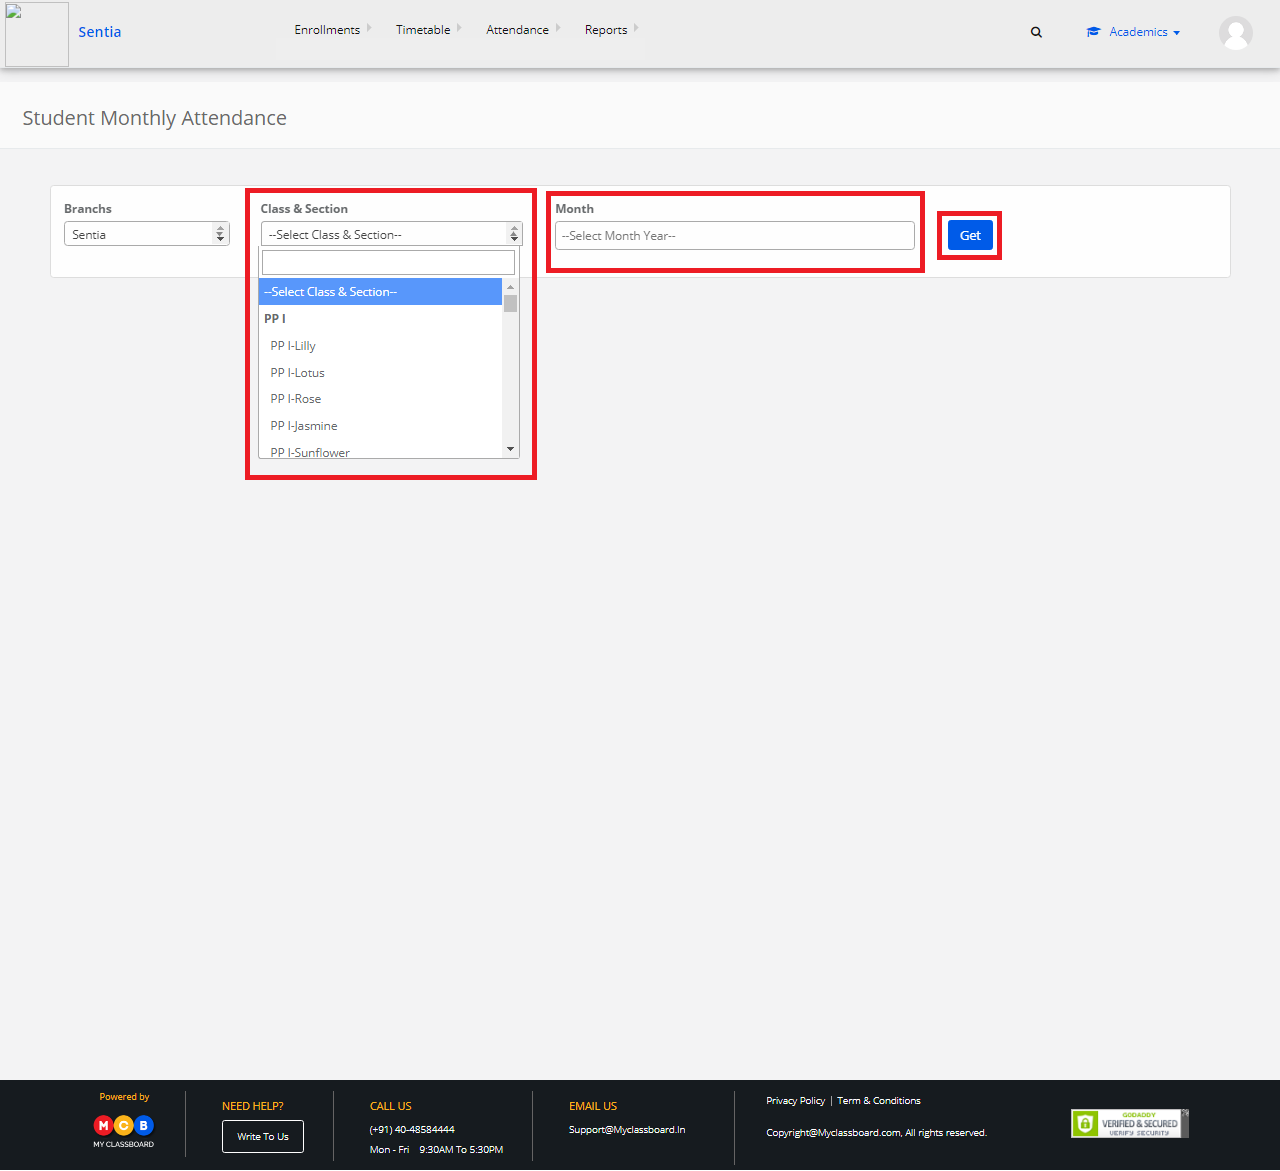
Step 12: Select Class&Section, Month and click on “Get”.

Step 13: The attendance report for that month is displayed. You can export the same to excel by choosing the “Excel” option.