How to Edit or Cancel an Enquiry form?

To Edit an Enquiry Form

Step 1: Sign in to the MyClassboard website with Admin login credentials.

Step 2: Select Admissions from Home

Step 3: Click on front office and select Enquiry Form.

Step 4: Enter the Enquiry Form created date and then click on Get.

Step 5: If more than one enquiry is displayed you can search through the enquiry code on the right corner. Then you can find your Enquiry Form.

Step 6: Then you can click on edit button from that enquiry.

Step 7: Enquiry Form will be opened you can edit that and then click on save.

To Cancel Enquiry form:

Step 8: Sign in to the MyClassboard website with Admin login credentials.

Step 9: Select Admissions from Home

Step 10: Click on front office and select follow up.

Step 11: Click on Date to get the enquiry details.

Step 12: Select the Enquiry form which you have created.

Step 13: Enter the remarks in Inactive Status Details like “Not Interested” or any and click save. Then click on Cancel Enquiry.

Step 14: Your enquiry is inactive now.

How to create an Enquiry form or How to enter details in Enquiry form?

Step 1: Sign in to the MyClassboard website with Admin login credentials.

Step 2: Select Admissions from Home.

Step 3: Click on front office and select Enquiry Form

Step 4: Click on Create new on the right corner.

Step 5: A Dialogue box will appear, Select the academic year and enter your phone number and then click on search.

Step 6: Click on Continue to create new.

Step 7: Fill the enquiry form and then click on save.

Step 8: Enquiry form will be saved successfully and Enquiry code will be displayed.

You can check whether your enquiry has been created or not. This is how you can do it.

Step 9: Go to search and click on Enquiry Search.

Step 10: Search by Enquiry code which is displayed while saving the form or By phone number which you have provided to create the form.

Step 11: If your Enquiry Form is saved successfully then it will be displayed here. Or you can create it again by following the above steps.

Payroll?

Step 1: Login to MCB with SysAdmin Login credentials.

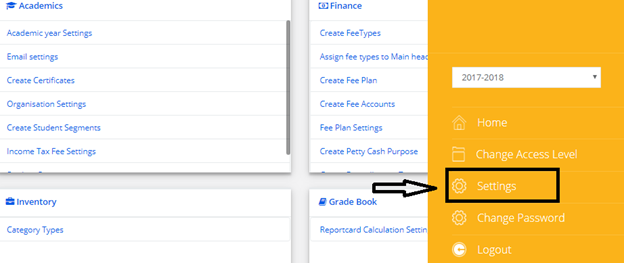
Step 2: Click on Settings.

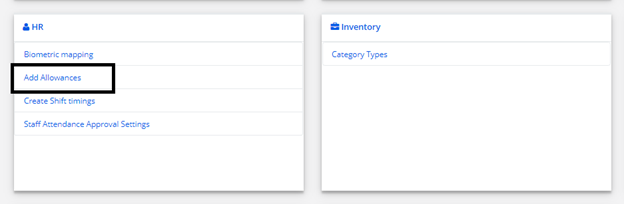
Step 3: Click on Add Allowances in HR Menu

Step 4: Select Branch Name and Click on Get.

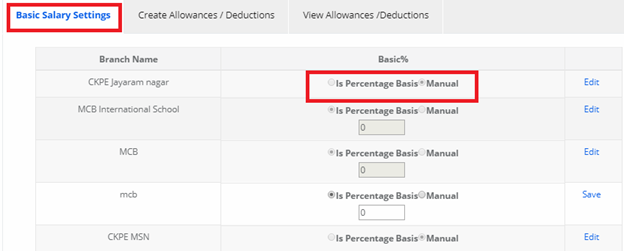
Step 5: Click on Basic Salary settings and provide Basic Type depends on Organisation( Manual or Percentage )

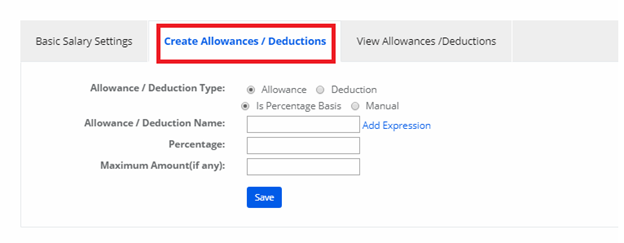
Step 6: Click on “Create Allowances / Deductions “ and provide the details(like HRA, DA, PF, ESI,etc..) based on criteria.

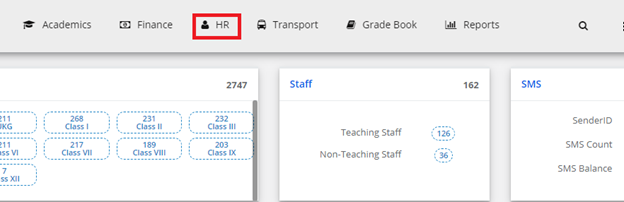
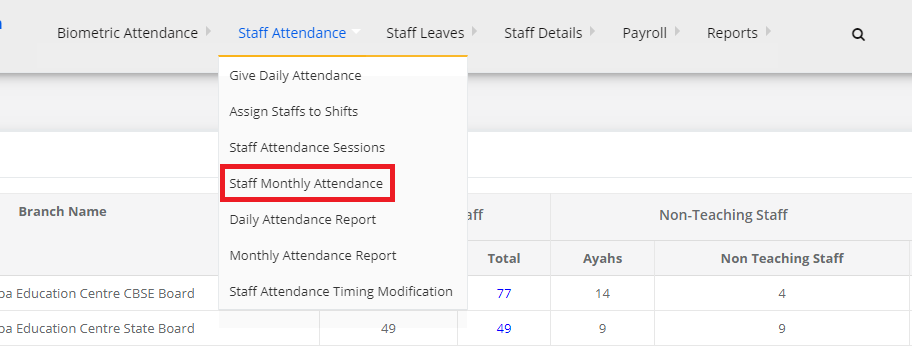
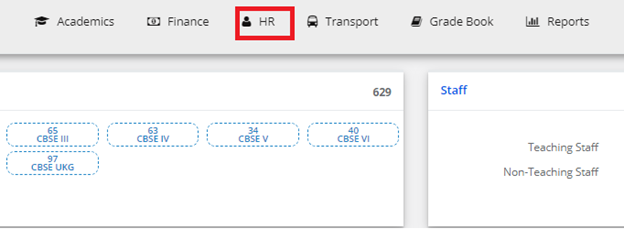
Step 7: Now go to “HR” on the top bar of the dashboard. You will be directed to the HR page.

Step 8: In “Payroll” click on “ Staff salary details”

Step 9: Select Branch Name and click on Submit.

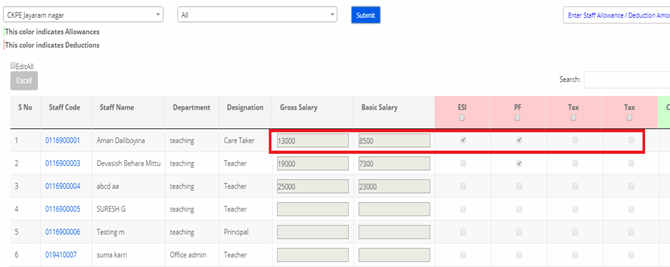
Step 10: After getting Staff details, provide Gross salary, Basic salary, Allowances/Deductions ((like HRA, DA, PF, ESI, etc.)

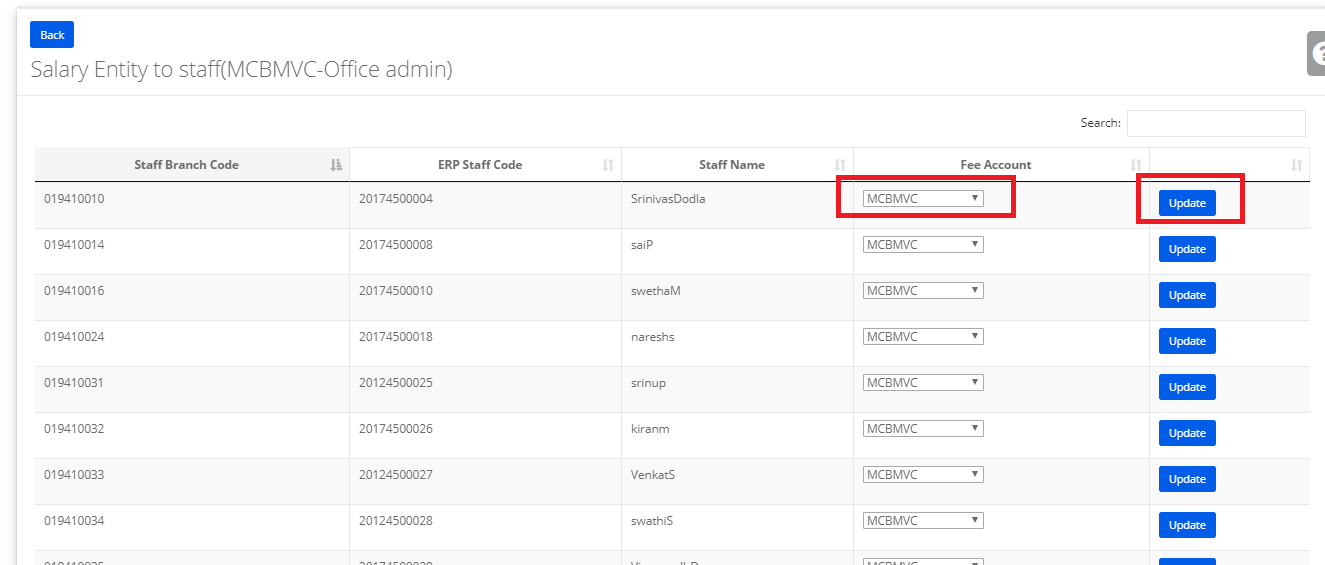
Step 11: Select Branch click get and click on the count.

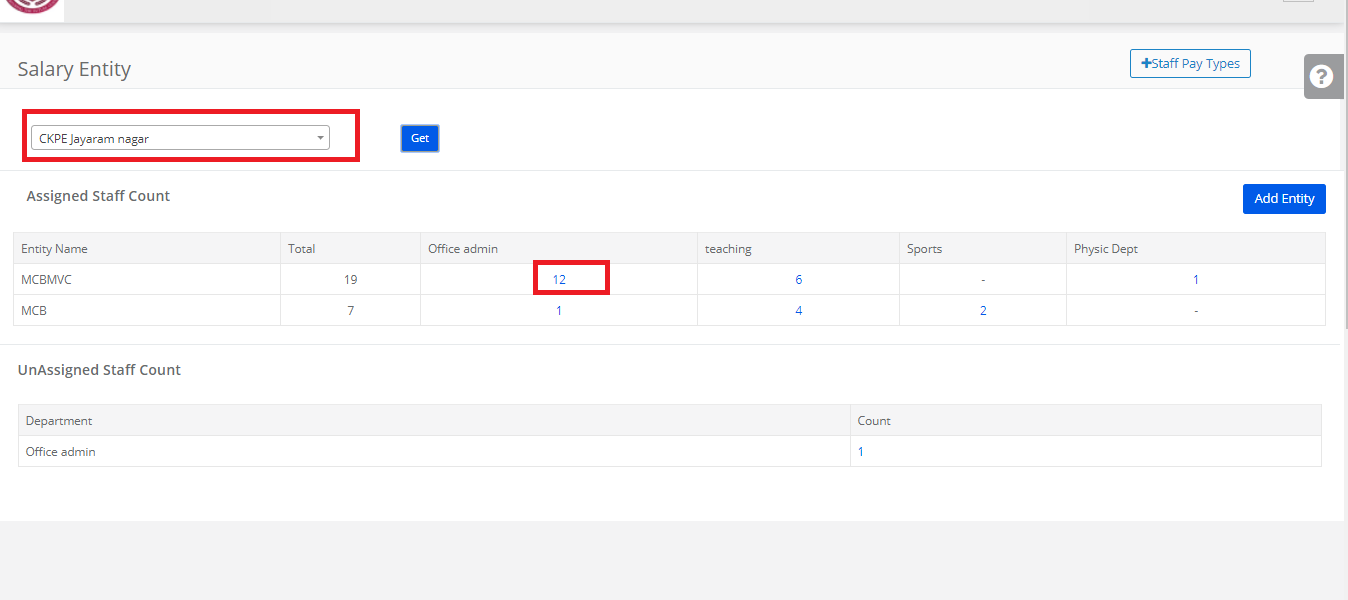
Step 12: Update the ENTITY/ACCOUNTs.

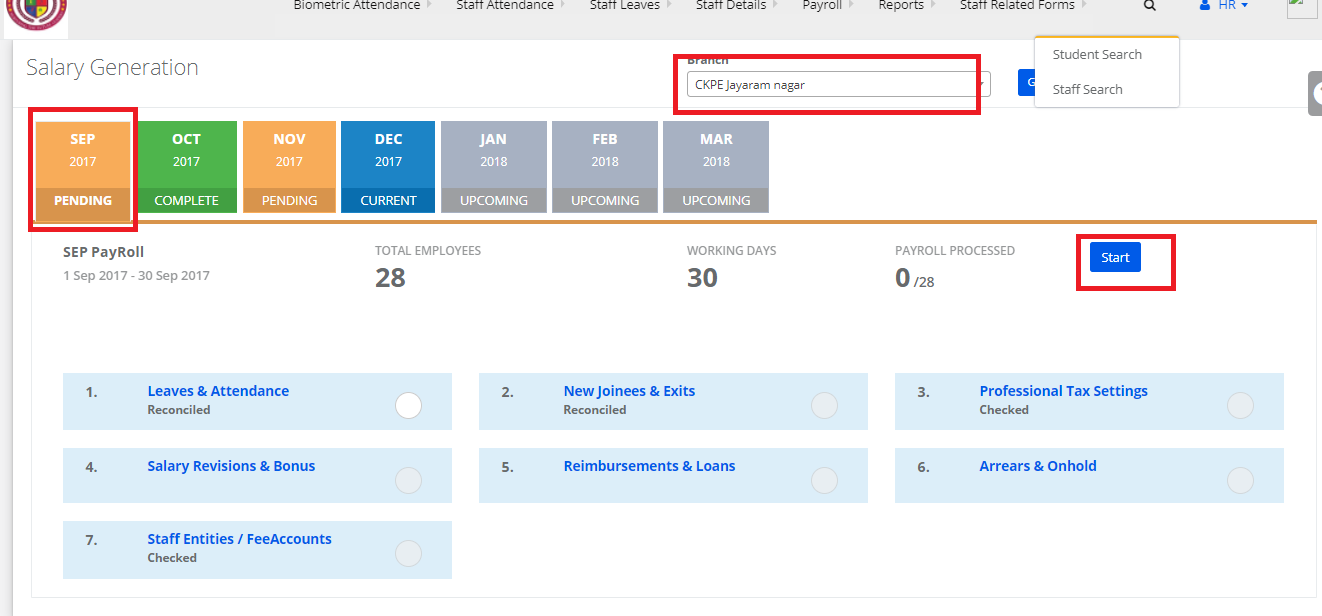
Step 13: Select branch, click get, click the month and click start

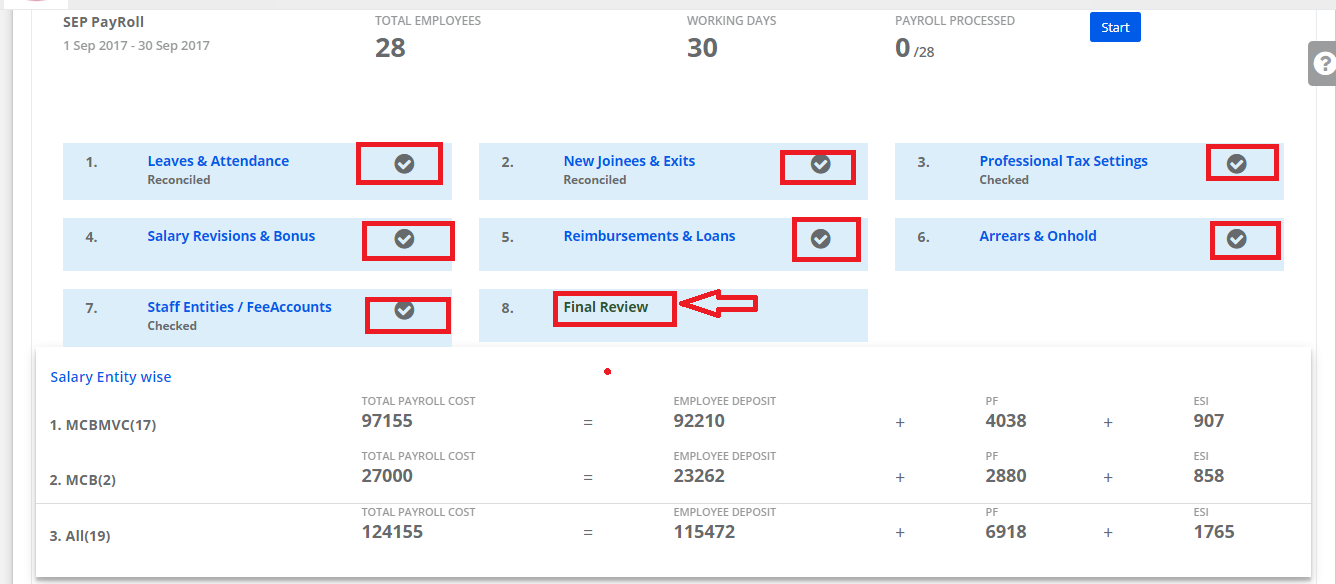
Step 14: Select all the check boxes and click final review.

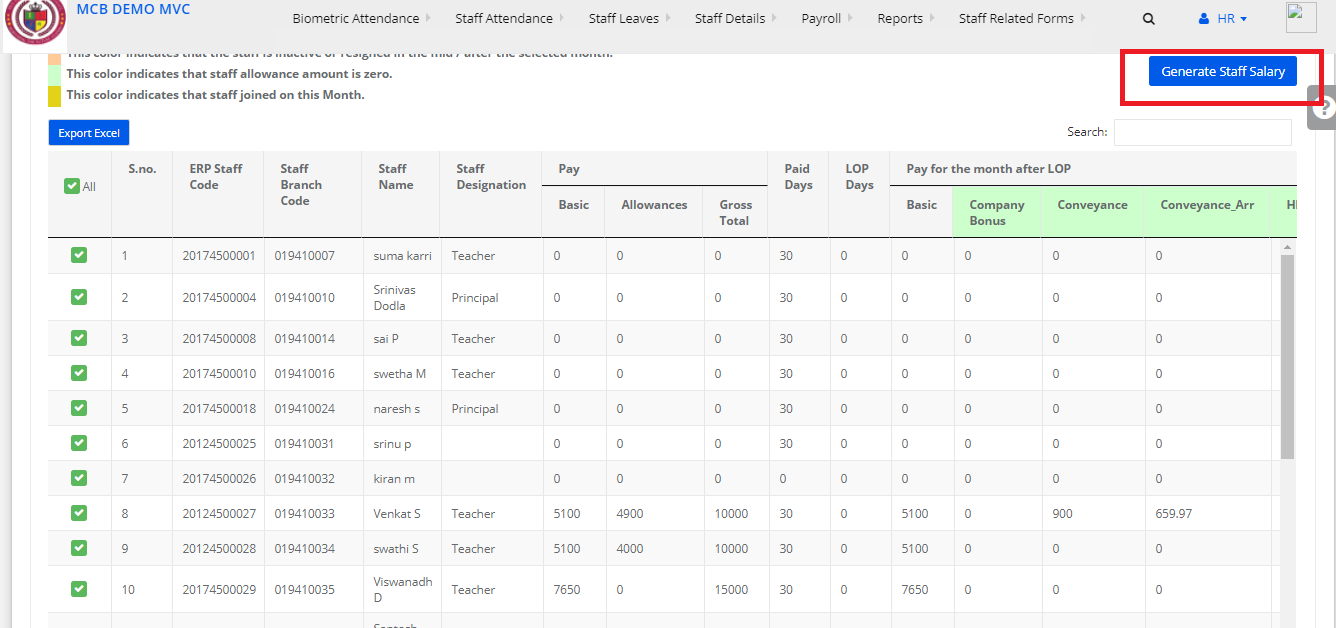
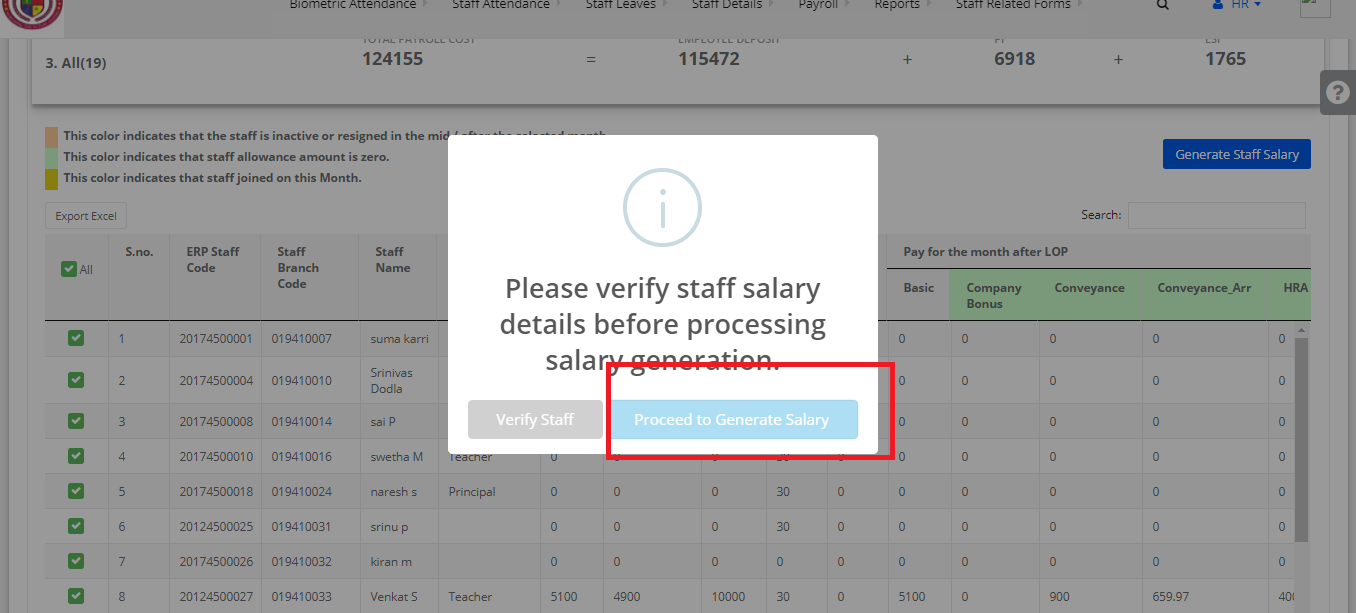
Step 15: Check the Salaries and click Generate staff salary.

Step 16: Click Proceed to generate salary

Step 17: Click Conform

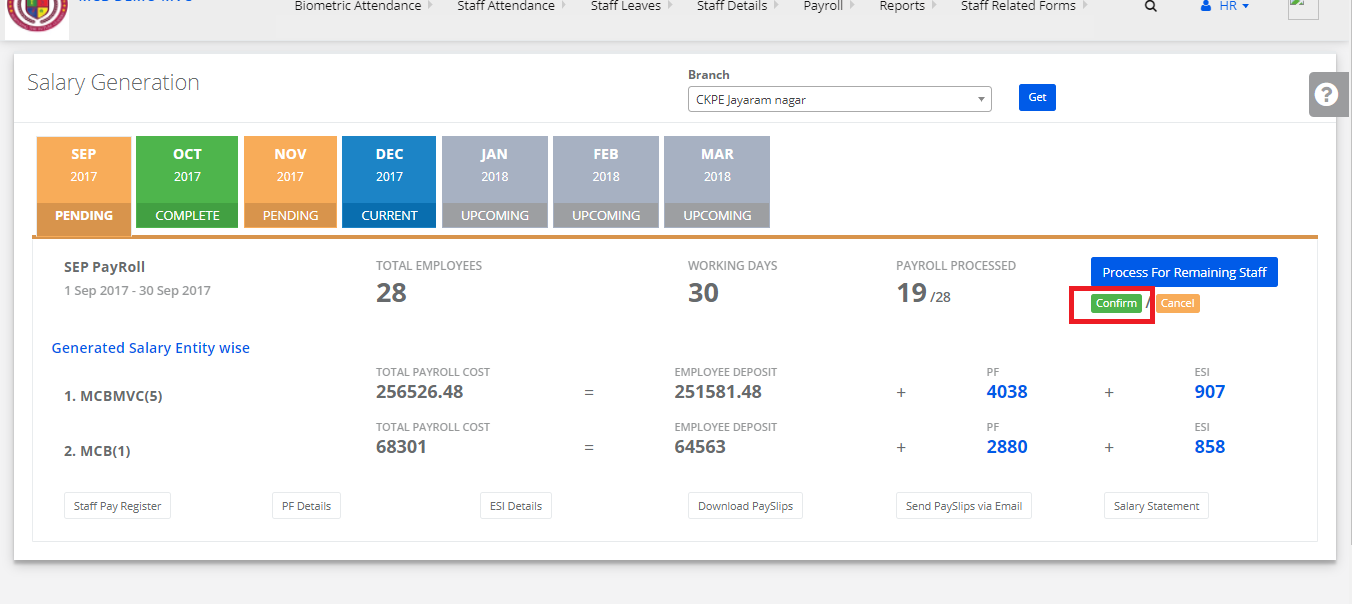
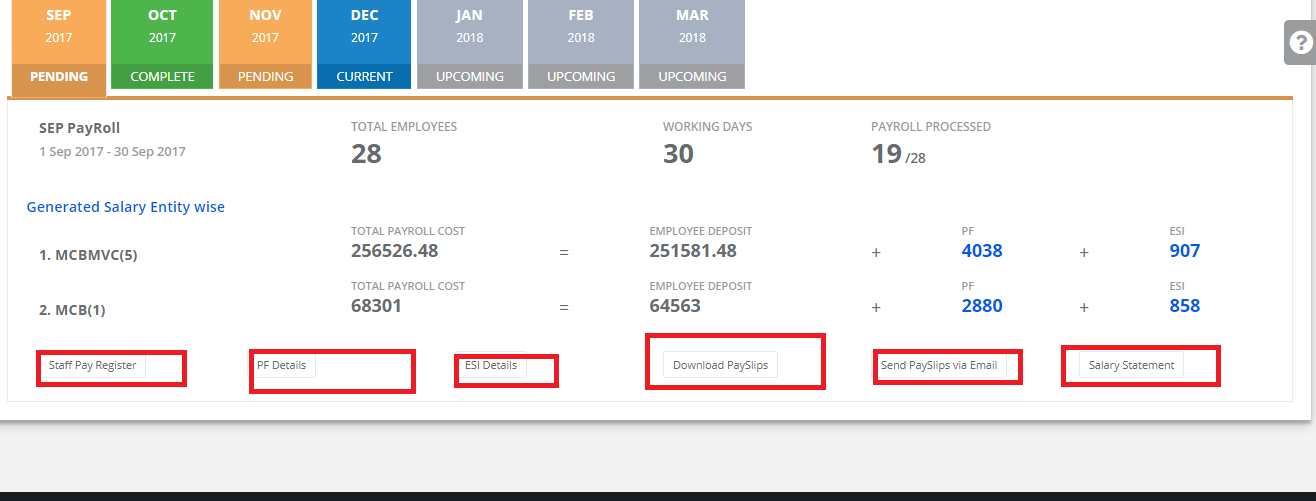
Step 18: Click Staff pay register/PF details/ESI/ Download Pay slips/Send Payslips via Email / Salary Statement

How to update biometric codes?

Step 1: Login to MCB with Principal level login

Step 2: Select “HR” in the top bar of the dashboard. You will be directed to the HR page.

Step 3: Click on Biometric Attendance.

Step 4: Select the “Staff Biometric codes” option.

Step 5: Select Branch, department and click on “ Get” to get Staff details.

Step 6: Click on the Edit button and give staff biometric code and update.