Amount got deducted from the account but receipt was not generated

Thank you for your recent inquiry about Receipt not being generated despite amount getting deducted from the parent’s account.

We would like to mention that the above-mentioned scenario is a rare case and there are 3 possibilities wherein you encounter this issue.

1. Internet Speed Fluctuations
2. Server Down
3. Page Refresh

The aforementioned reasons are what make you confront the situation.

However, if the parent has made a payment through Atom Payment Gateway and the amount has been credited to the school’s account, we assure you that the receipt can be generated from our end. In Atom, the job is run in every 2 hours and the receipts can be generated.

In any case, the payment has been made through a payment gateway other than Atom, and the payment has been credited to the school’s account, We request you to submit an authorization from the bank that the amount has been debited. Upon submission, we can generate the receipt for you.

Note: We strongly recommend using Atom over any other gateways to avoid any such discrepancies. Atom has an inbuilt feature that automatically generates receipts in every 2 hours.

Hope this helps. Please feel free to reply back to this email or call us at 040-48584444, should you need any further assistance.

How to Assign Service based fee types?

Step 1: Login to MCB with Login Credentials.

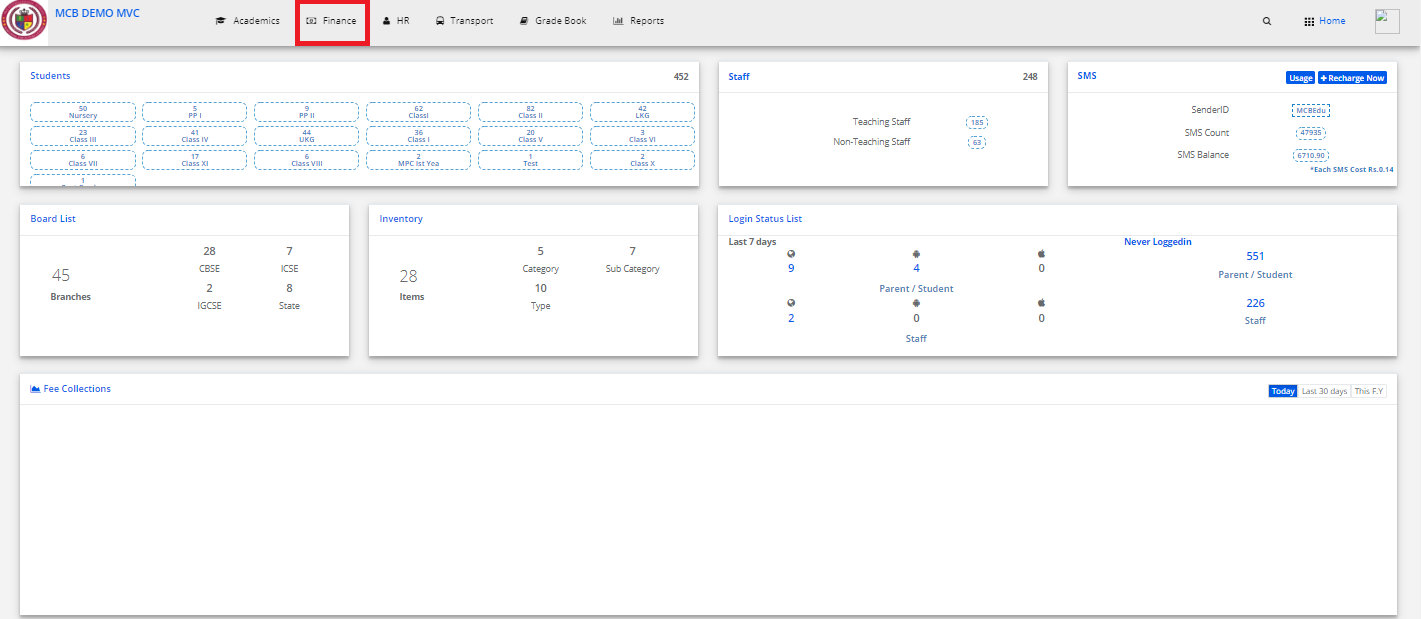
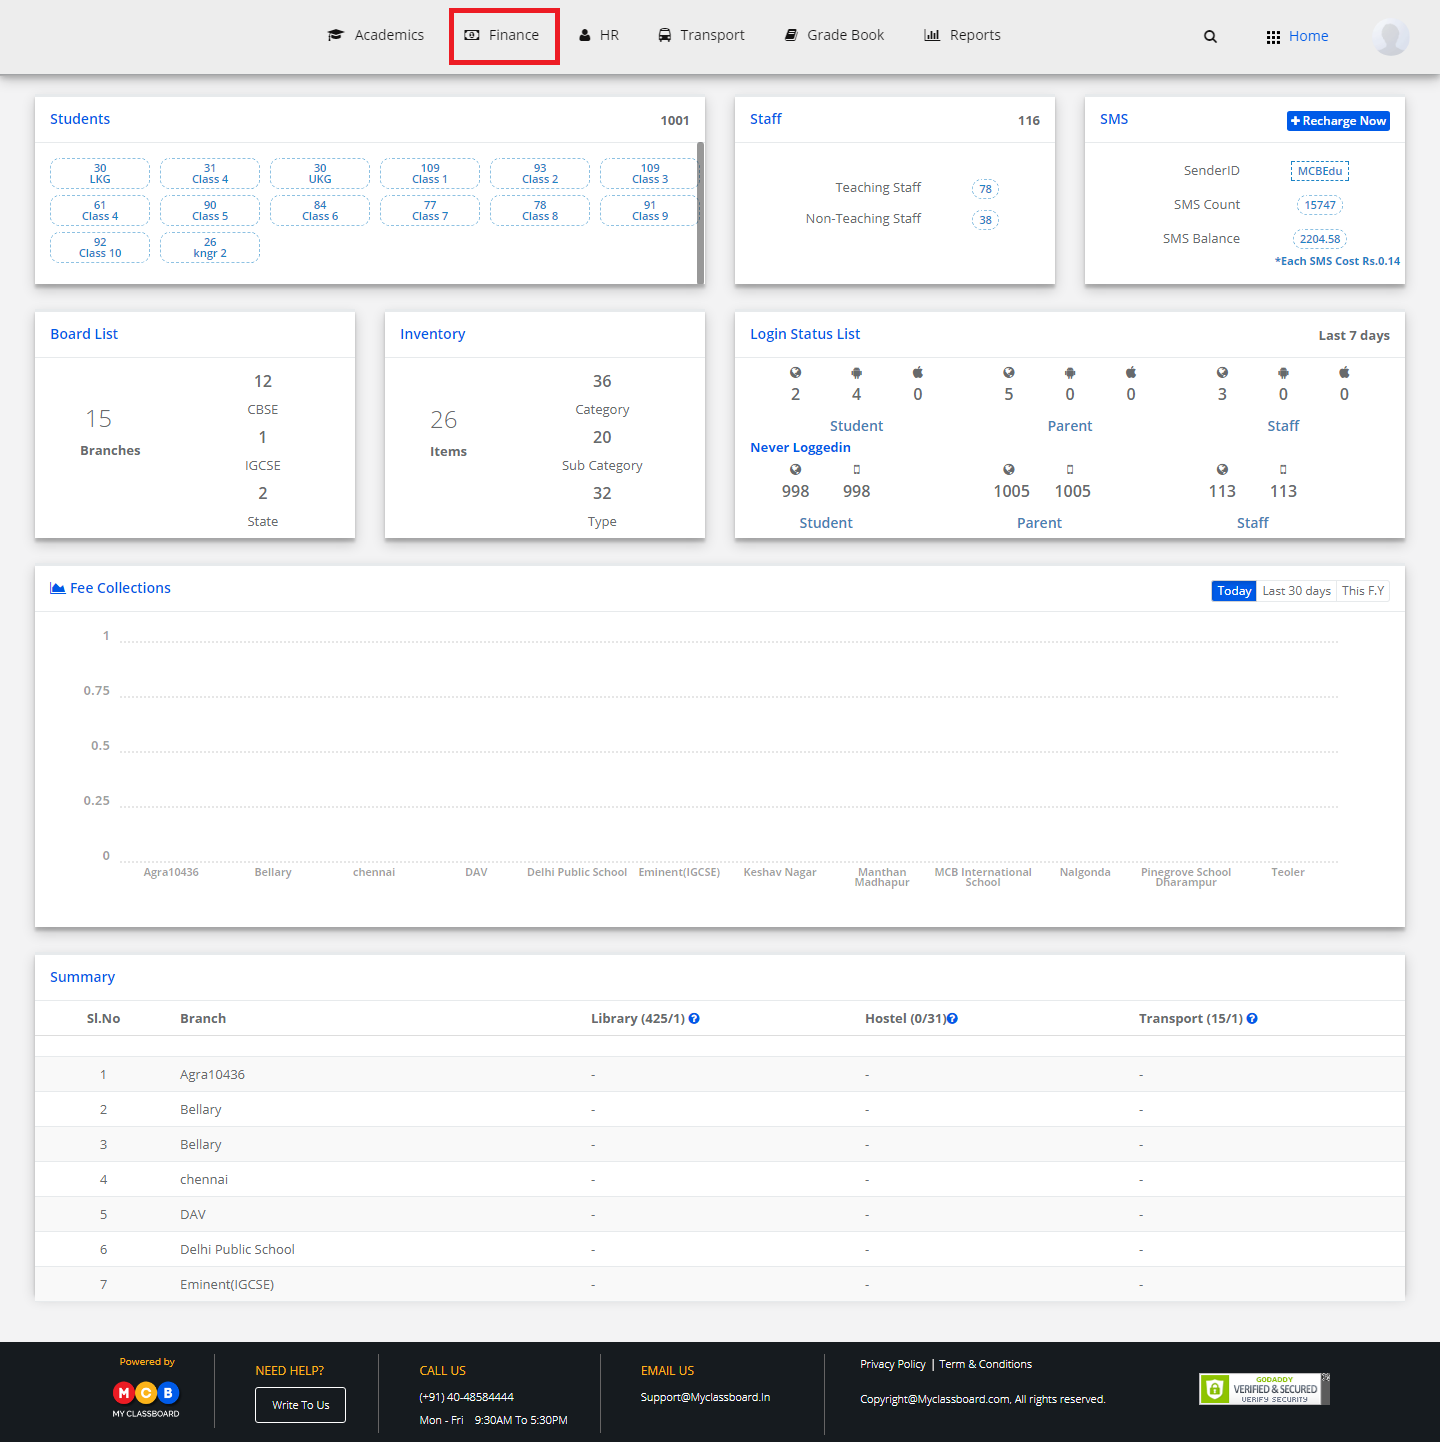
Step 2: Select Finance on the dashboard and you will be directed to the Finance page.

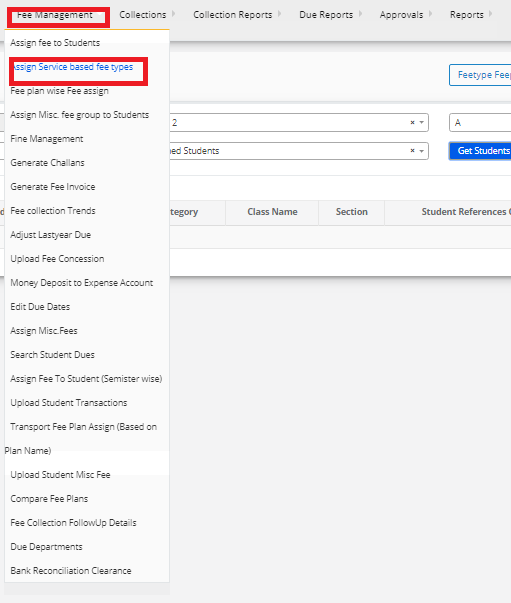
Step 3: In finance module click on fee management and go to assign service-based fee.

Step 4: Select the class, section, fee plan and fee type and click on Get and

Step 5: Select the students to assign the service based fee.

How to assign/unassign concession?

Step 1: Login to MCB with Accountant login credentials.

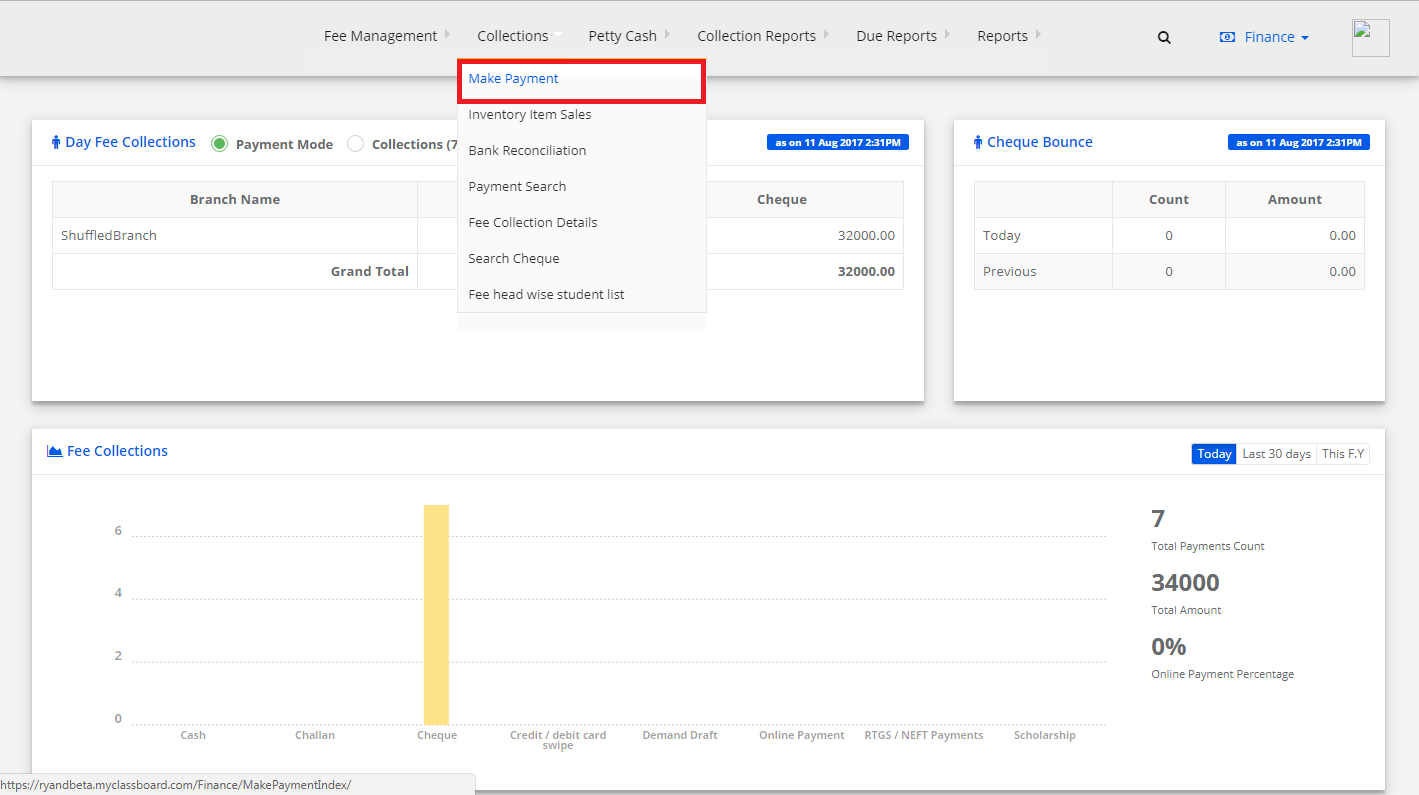
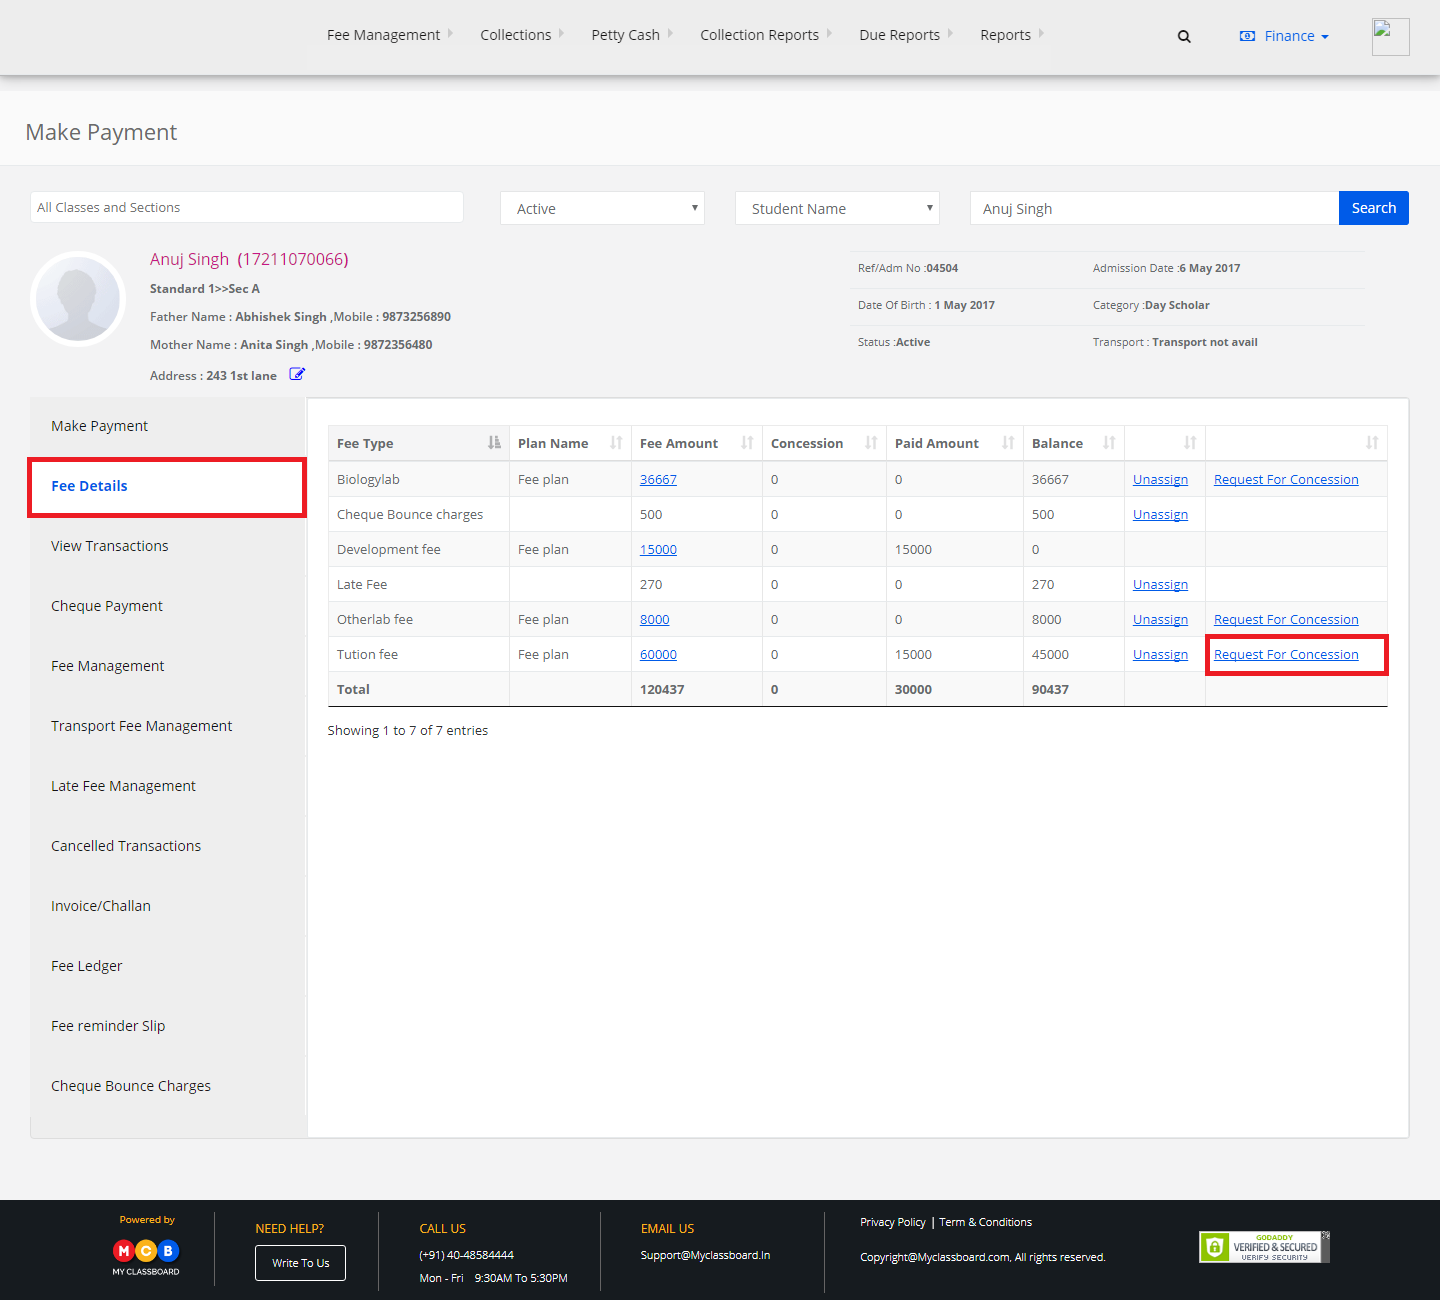
Step 2: Select “Collections” on the top bar and choose “Make Payment”.

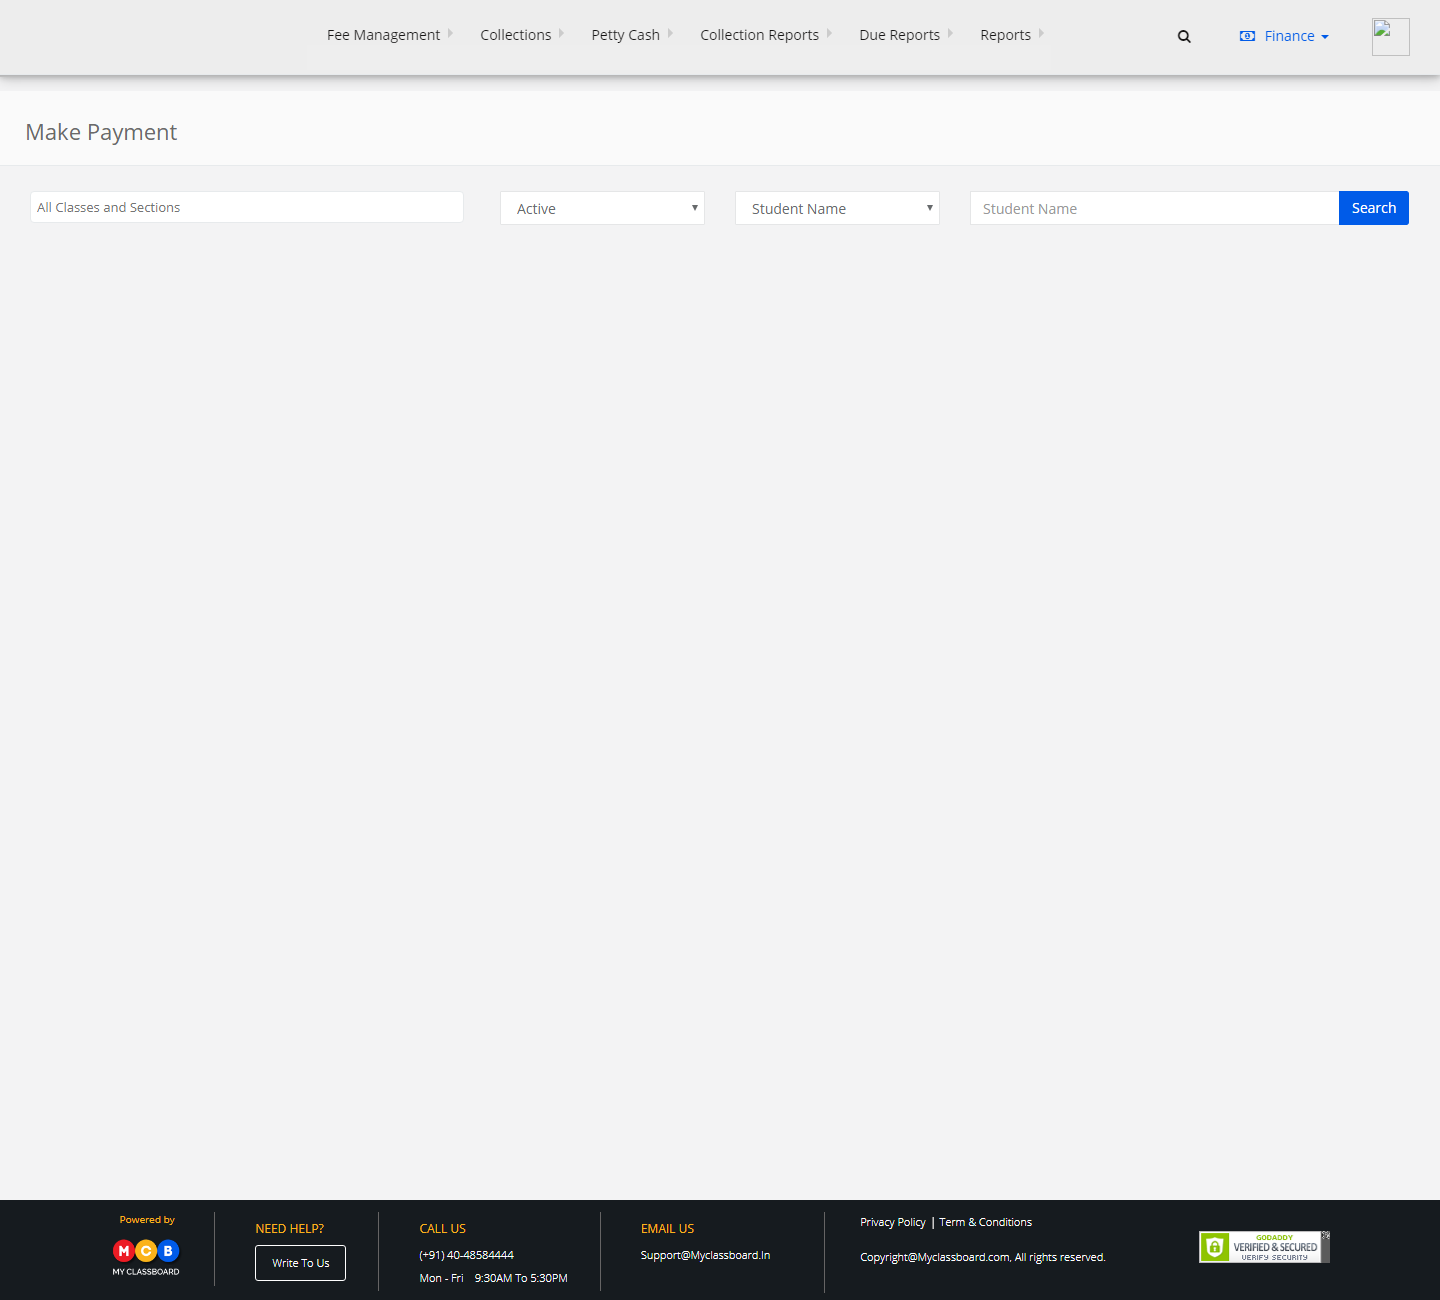
Step 3: Search for the student by entering the required search criteria.

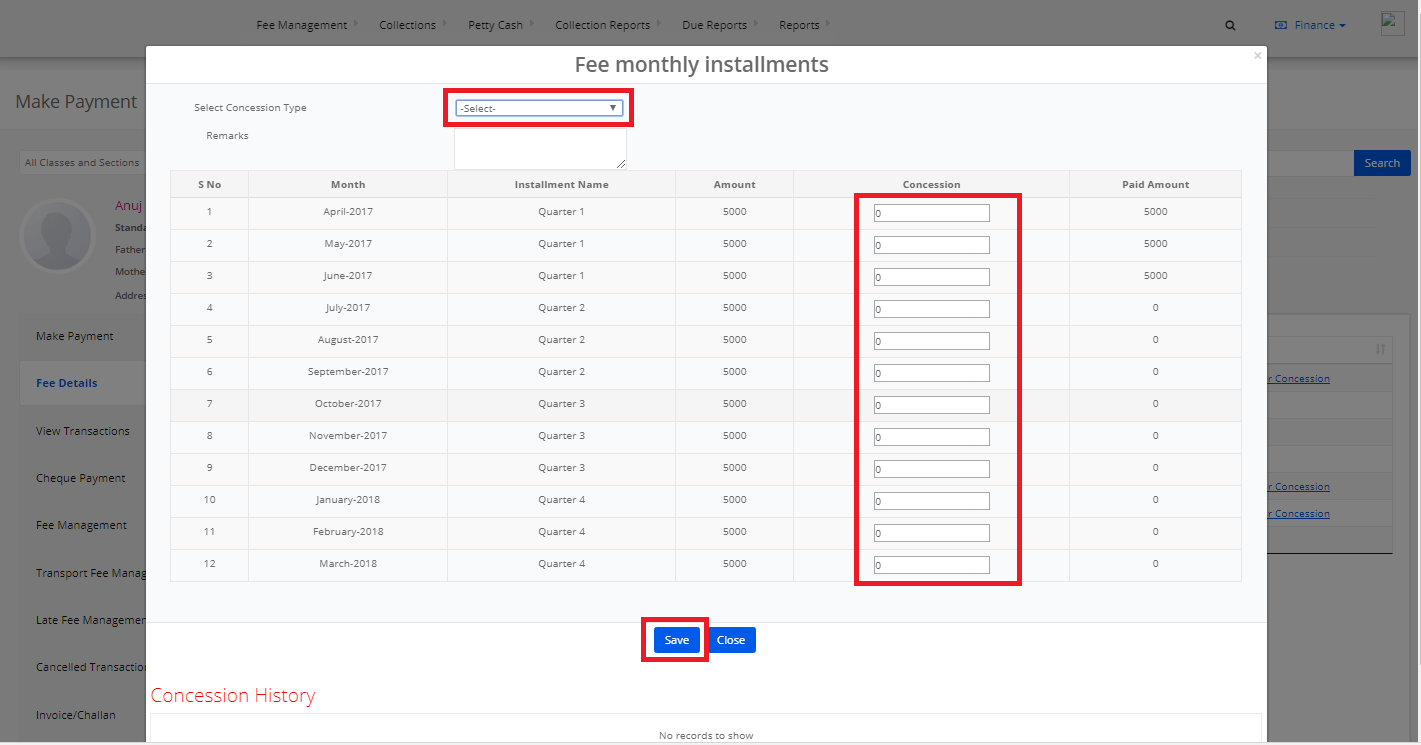
Step 4: Select “Fee Details” on the left pane. Select any fee type and click on “Request For Concession”.

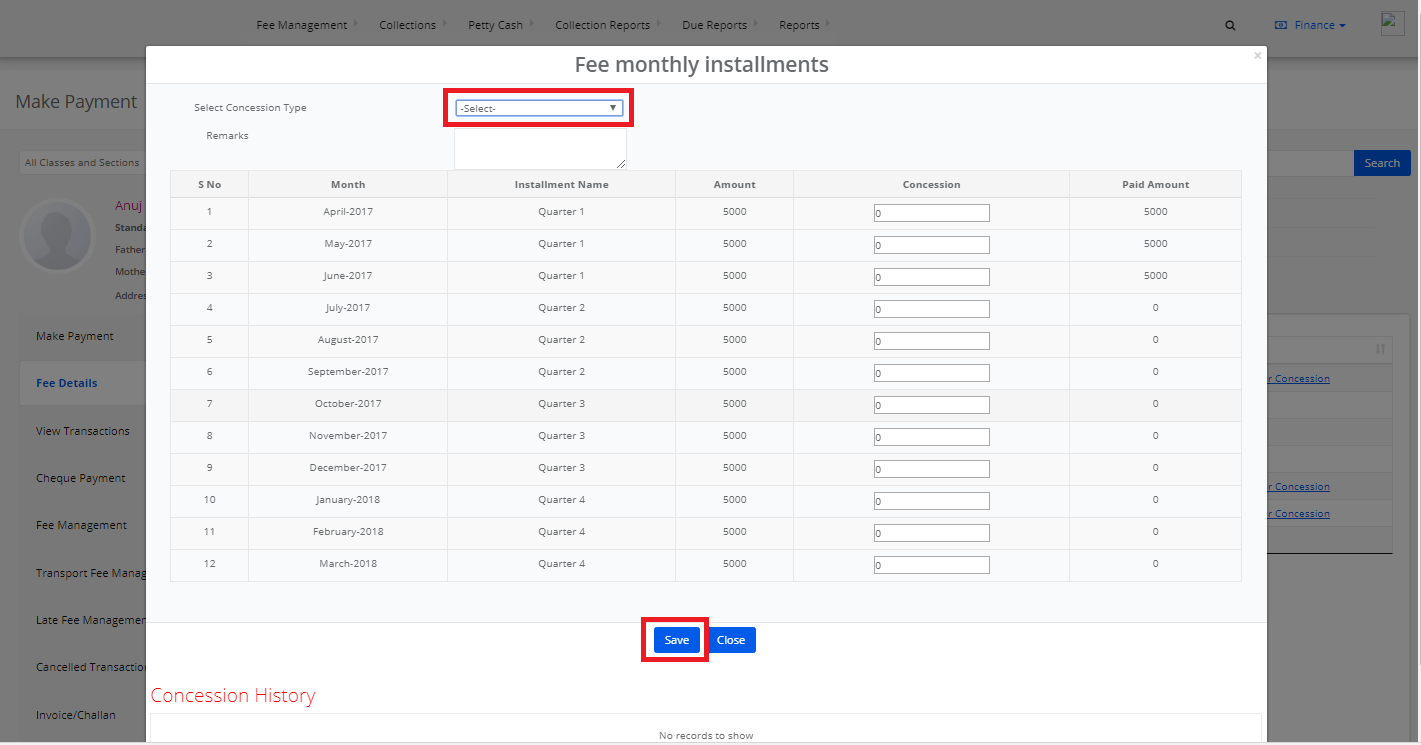
Step 5: Select “Concession Type”, enter “Remarks” and click on “Save”.

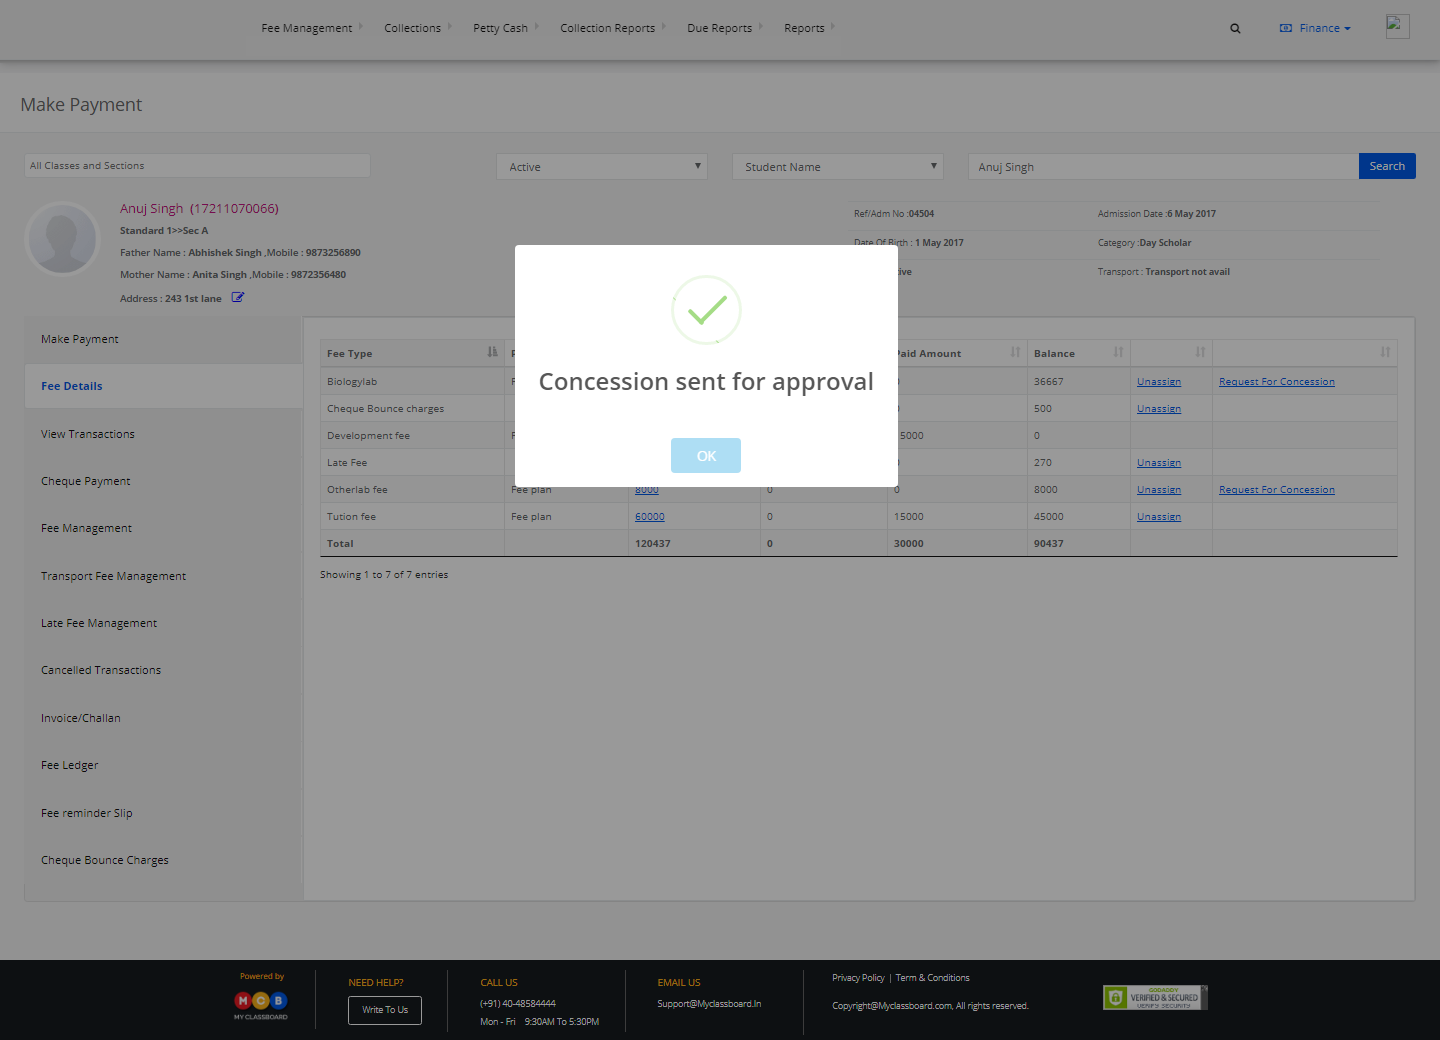
Step 6: The concession is sent for approval.

The concession is approved at the MD level.

Step 7: Change the user access to System Admin and click on Finance on the top bar.

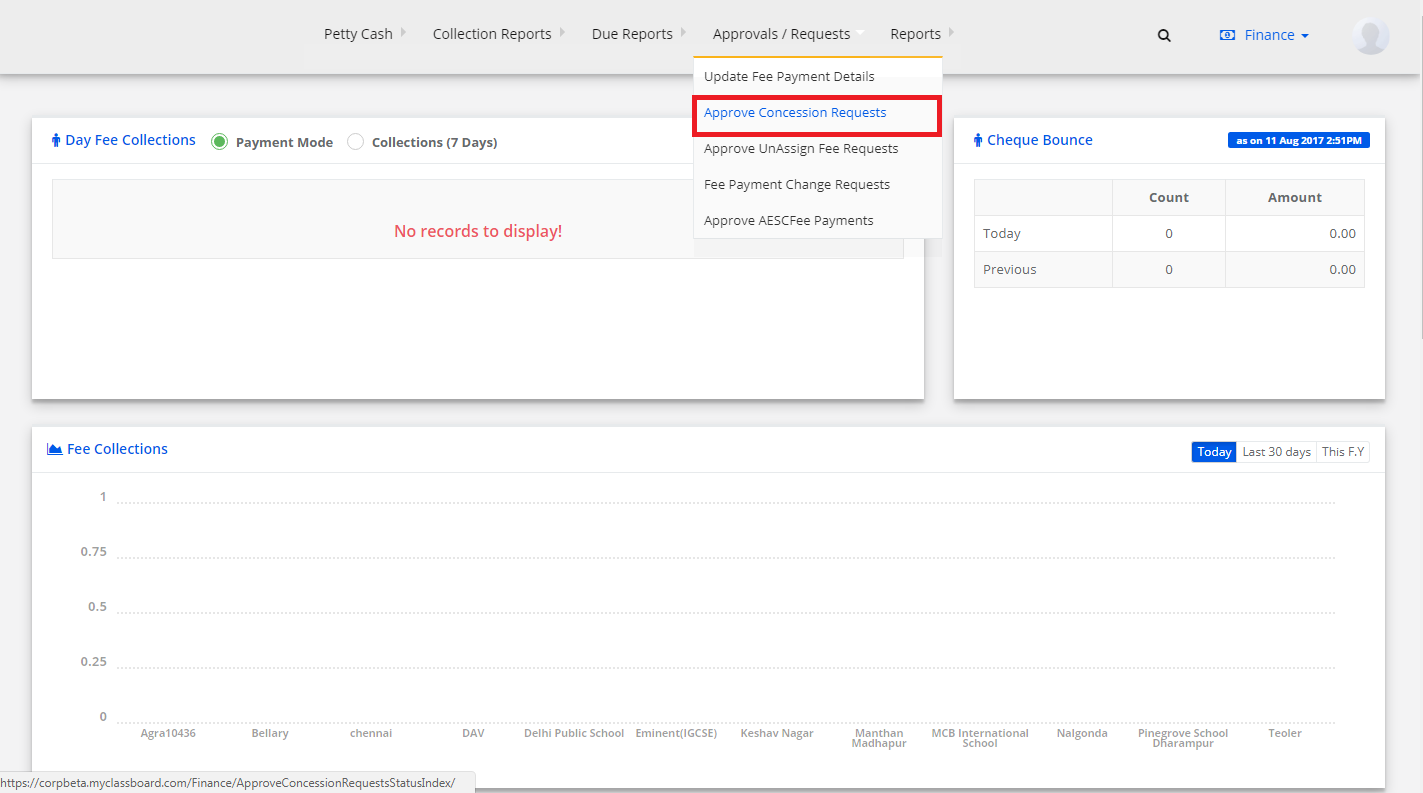
Step 8: Select “Approvals/Requests” and choose “Approve Concession requests”.

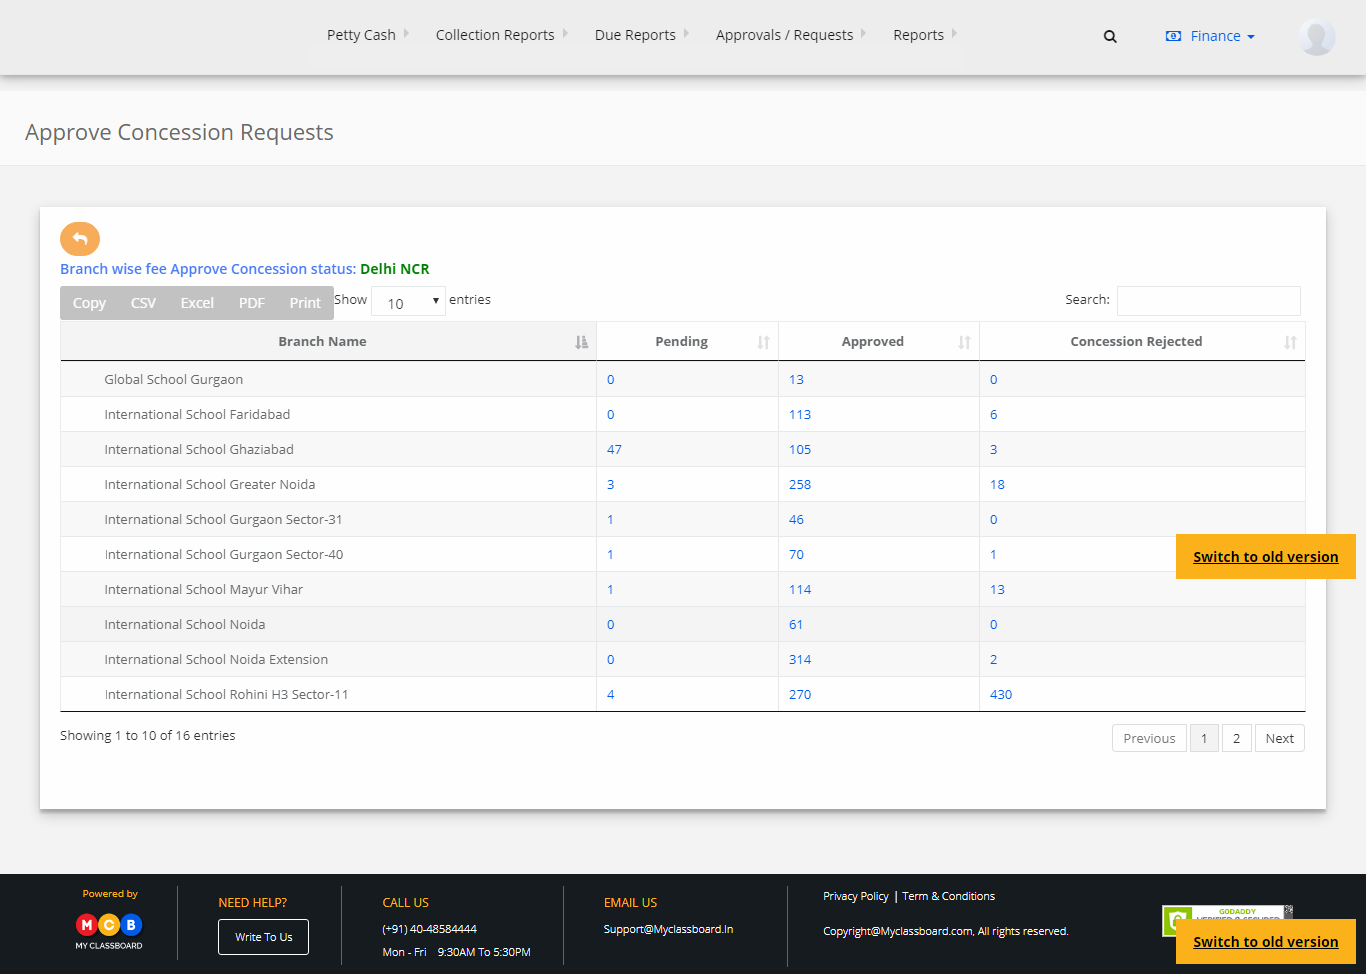
Step 9: Select location and then branch.

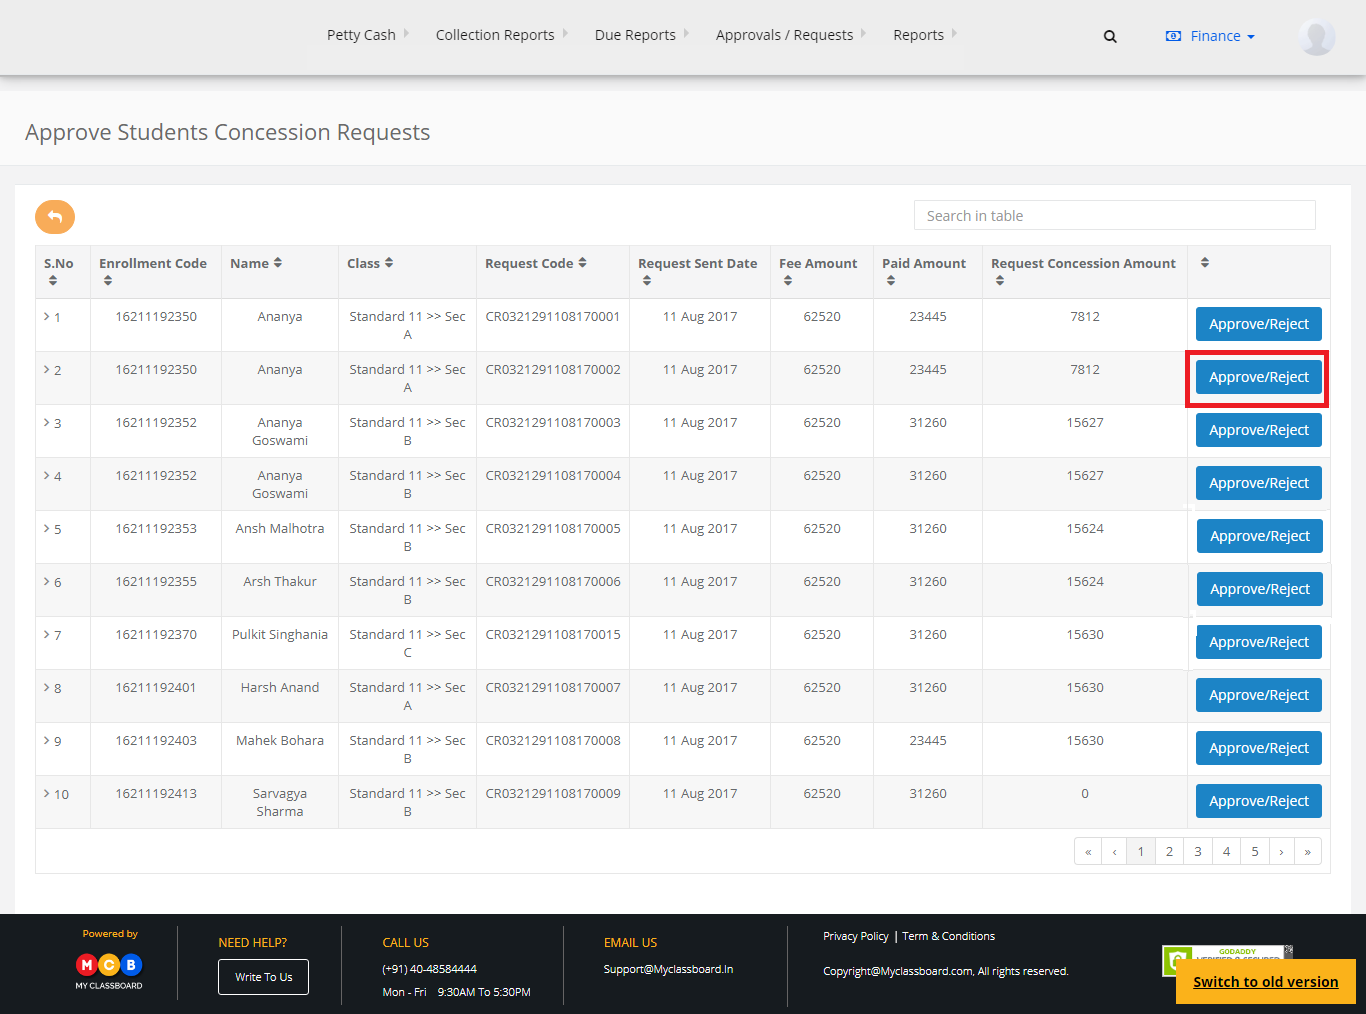
Step 10: Select the student and click on “Approve/Reject”.

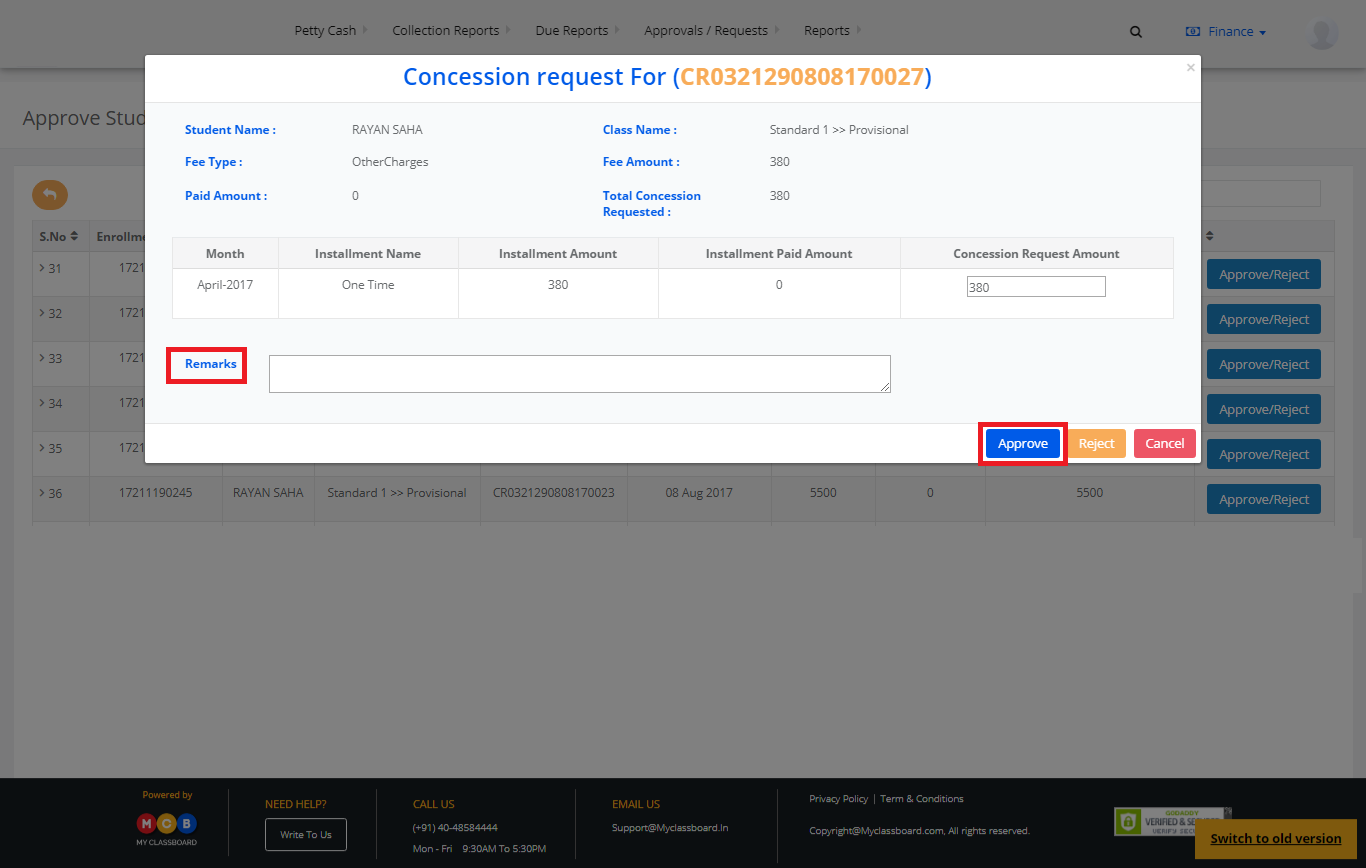
Step 11: Enter the remarks and click on “Approve”.

Step 12: The concession request is successfully approved.

To un-assign Concession

Step 13: Change the user access to “Accountant”. Repeat steps 2,3,4 and 5.

Step 14: In step 5, make the concession amount as “Zero”, enter remarks and click on “Save”.

The concession is unassigned successfully.