How to choose teaching plan fields as per the school’s preference?

When a certain field is chosen by the school in teaching plan, the selected fields will appear in topic plan creation and updation for all users in the school. Otherwise, the default fields available in the lesson plan would appear in topic plan creation and updation for all users.

School can choose the specific fields and give a customized title for the fields of the lesson plan as per the terminology used by the school in the lesson plan.

To choose specific fields and give customized names to the fields, please follow the steps below.

Step 1: Login to MCB with system admin login credentials.

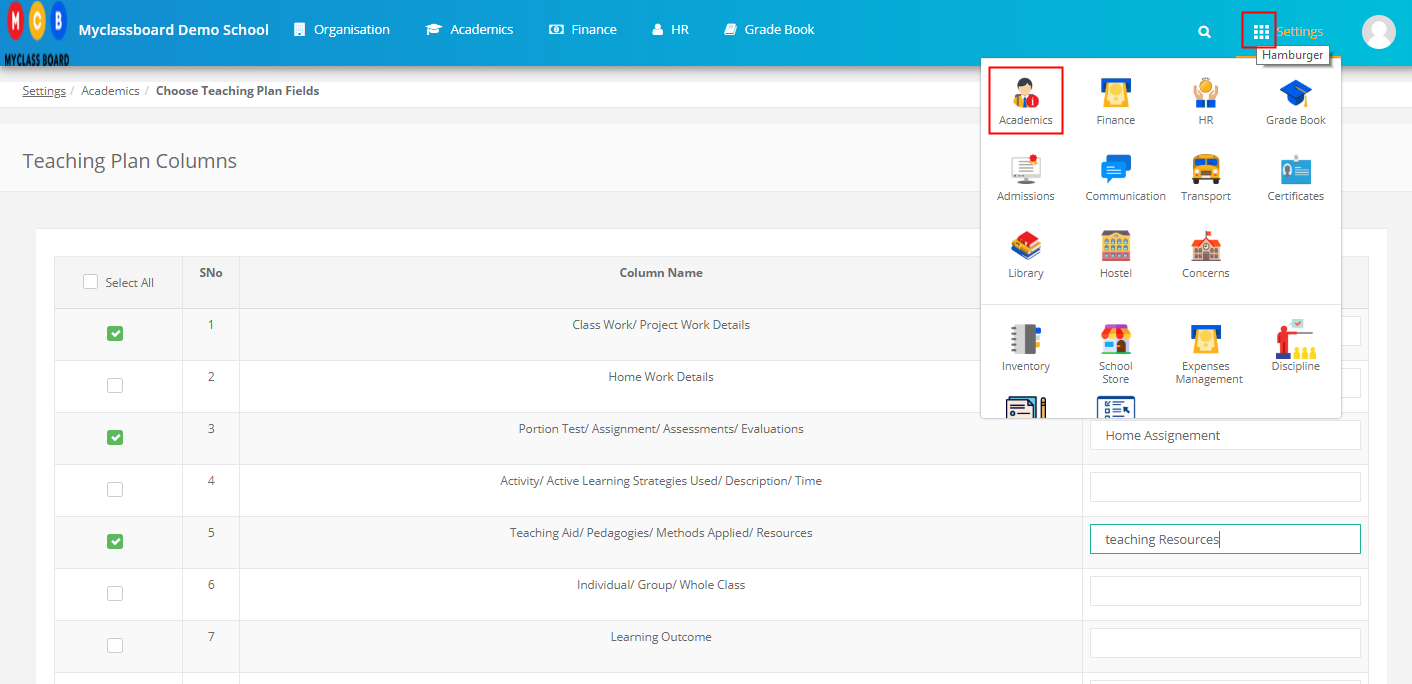
Step 2: Click on settings on the right panel as you click on the user’s profile picture.

Step 3: Click on Choose Teaching Plan Fields option under Academics

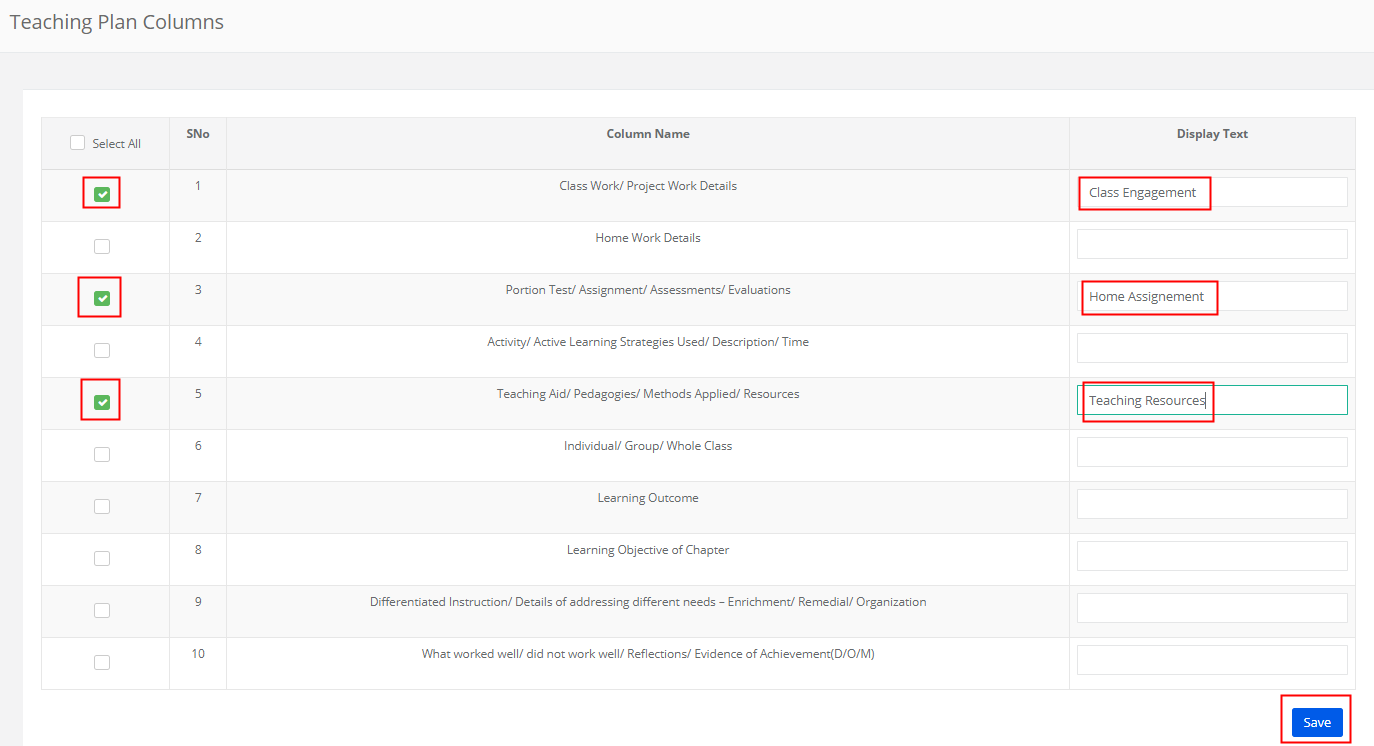
Step 4: Select the fields which you would like to use in the teaching plan and enter the display text as per your school’s terminology to show in the lesson plan while creation and updation. Click on Save button to save the settings.

To check,
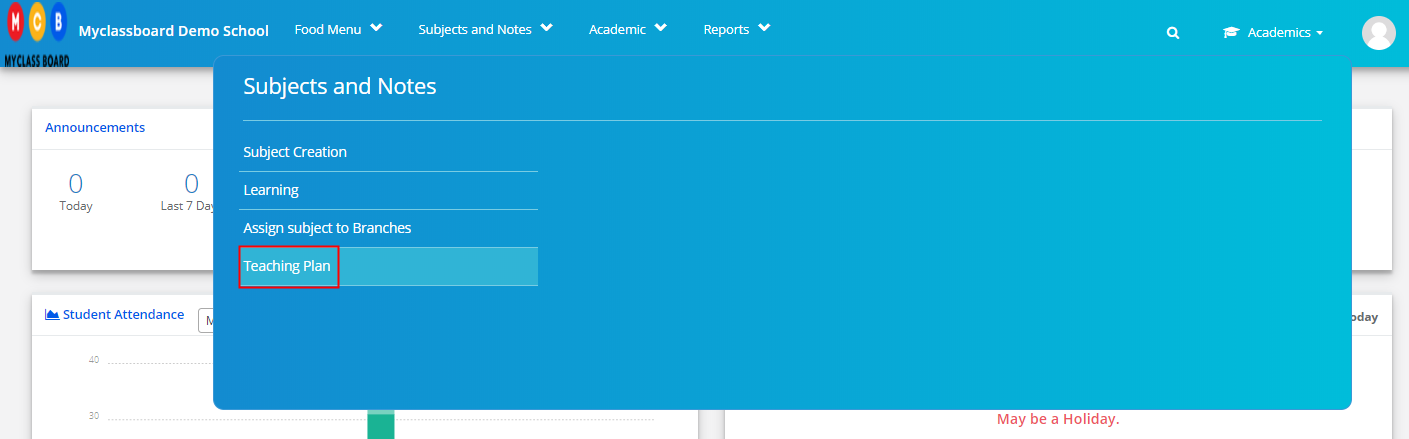
Step 5: Click on Modules Hamburger and Choose Academics Module from the modules pallet.

Step 6: Choose Teaching Plan option under Subjects and Notes Menu.

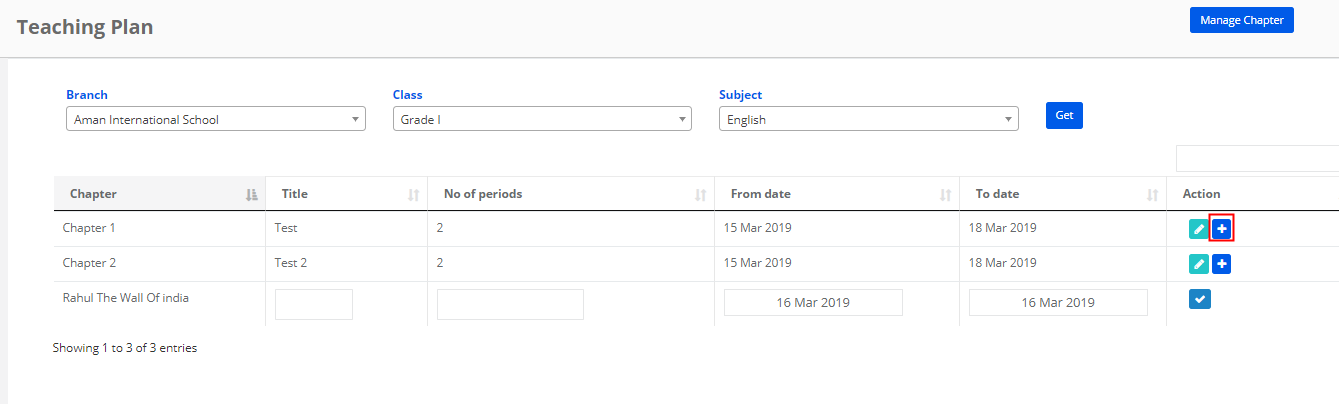
Step 7: Choose Branch, Class, Subject and click on Get to view lesson plan available or create lesson plan.

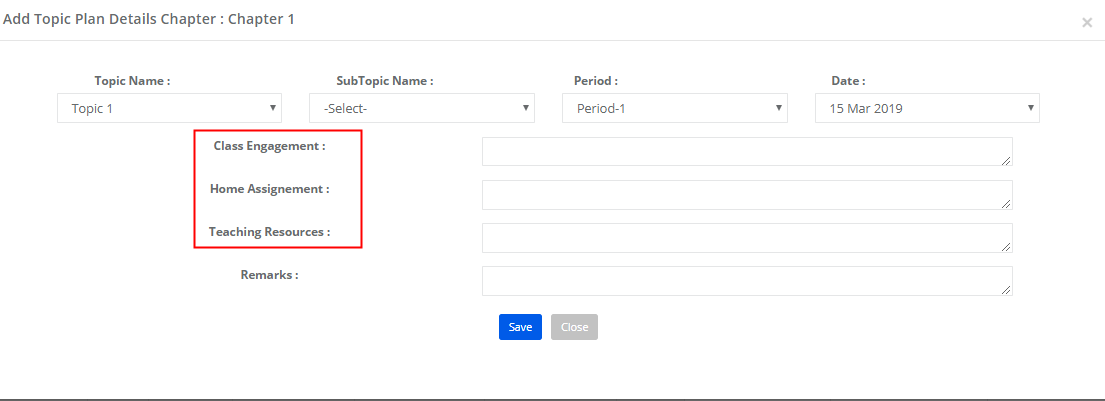
Step 8: Click on + icon against the chapter to view the topic plan available and create the topic plan.

Step 9: Locate the fields chosen by you in teaching plan settings. While adding or uploading or updating the teaching plan, the fields chosen are only available with the Display text given.

How to send Transport Notifications to mobile app?

Step 1: Login to MCB with System admin login credentials.

Step 2: Select “Home” on the right-hand top corner.

Step 3: Select Communication. You’ll be directed to the “Communication” page

Step 4: Choose “Send Transport Notifications” option under Communication Menu

Step 5: Choose Branch, Routes as single or Multiple, Bus Routes, Stop as per the requirement, Route type as PickUp, Drop or Both, user type as Parent, Student or Staff, and Classes and click on Get count button to get the list of students.

Step 6: If you would like to send notifications for selected students, select the checkbox at “For Selected Students only” and choose the students, enter a message. Click on Preview and Send notification.

Step 7: If you would like to send notifications for all students, unselect the checkbox at “For Selected Students only” and enter the message. Click on Preview and Send notification.

How to send push notifications on mobile app?

Step 1: Login to MCB with System admin login credentials.

Step 2: Select “Home” on the right-hand top corner.

Step 3: Select Communication. You’ll be directed to the “Communication” page

Step 4: Choose to Send Push Notifications option under the Communication menu.

Step 5: Choose branch, user type as Student/Parents or staff, Gender, Transport type, Student Category and click on continue.

Step 6: If you would like to send notifications only for selected students, select the checkbox “For selected students only” to get the list of students based on your selection in the previous screen.

Step 7: Select the students for whom you would like to send a message, enter the message and attach the file if required and click on Send Notifications button.

Step 8: If you would like to send a message for all students based on your selection in the previous screen, uncheck the box “For selected students only” and type the message, attach the file, enter the message and click on “Send Notifications” button.

Note: Please follow the procedure described above for sending push notifications to staff.

How to create announcements for School Admins?

Step 1: Login to MCB with System admin login credentials.

Step 2: Select “Home” on the right-hand top corner.

Step 3: Select Communication. You’ll be directed to the “Communication” page

Step 4: Choose “Create Announcements for Admins” option under the Communication menu.

Step 5: Click on the + sign on the top right corner to create a new announcement.

Step 6:

  • Find the following three option in the branch selection.
    • All Locations and Branches : Announcement for all locations and branches
    • Selected Locations of All branches: Announcement all branches of a specific location
    • Selected Branches: Specific branches of all locations
  • To create announcement type, click on + sign next to type and create a new type as per your requirement.
  • Under To, find the following
    • All Admins – Announcement for all users created in organization
    • Organisation – Announcement for selected user types created at Organisation Level.
    • Zonal – Announcement for selected user types created at Zonal Level.
    • Branch – Announcement for selected user types created at Branch Level.
  • Add description of Announcement
  • Add Attachments if required
  • Click on Save button to create the announcement.

Step 7 : Created Announcements can be viewed monthly, weekly or between selected dates by choosing the respective filter.

An announcement can be edited or deleted by clicking on the edit and delete icons respectively

How to Subscribe or Recharge the Voice SMS?

Step 1: Login to MCB with Login Credentials.

Step 2: Select Communication on the dashboard and you will be directed to the Communication page.

Step 3: Click on “Voice SMS” on the top bar and select “Subscribe/Recharge Voice SMS”.

Step 4: Choose the Recharge Plan & click on Pay online.

Step 5: you will be redirected to Online payment gateway page for the payment, Choose the payment mode, enter the required details and proceed to complete the payment by clicking on Paynow

How to send wishes to Students on their Birthday?

Step 1: Login to MCB with Principal login credentials.

Step 2: Select “Home” on the right-hand top corner.

Step 3: Select Communication. You’ll be directed to the “Communication” page

Step 4: Click on “Others” on the menu bar and select “ Student Birthday Calendar”

Step 5: Click on Month name to get the list of students who are celebrating the birthday in the month selected.

Step 6: Click on SMS against the student to send birthday wishes through SMS.

Step 7: Choose the template from the dropdown and click on send SMS.

Step 8: Click on Email against the student to send birthday wishes through Email.

Step 9: Choose from address, Enter the subject and content in email body, attach the file if required and click on Send Email button.

Step 10: If you wish to use templates, click on Select template, choose the template from gallery, attach a file if required and click on Send Email button.