Step 1: Login to MCB with Principal login credentials.
Step 2: If you’re already logged in with System Admin credentials, change access to “Principal” level. (Click on user profile picture in the right corner – change access level – click on principal against the respective branch).
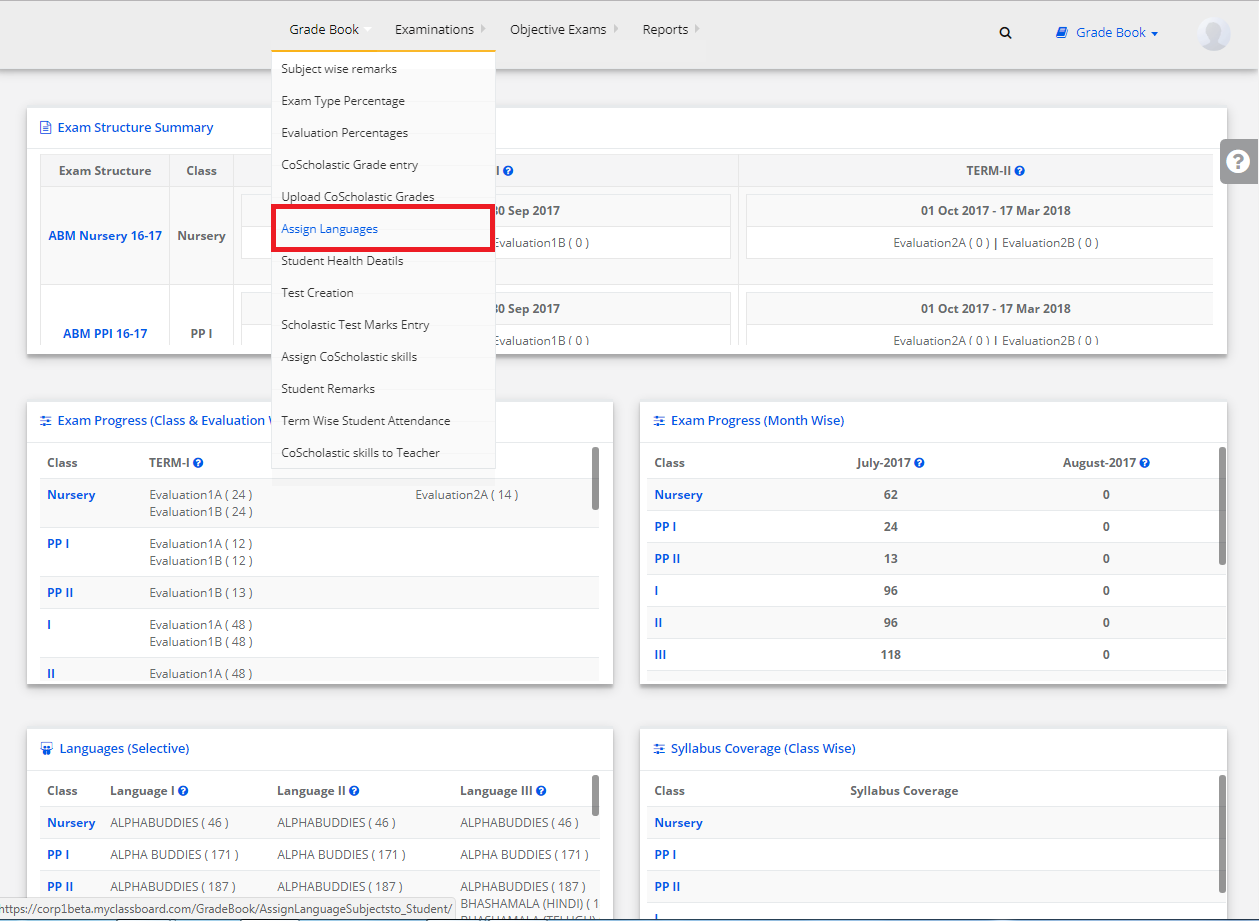
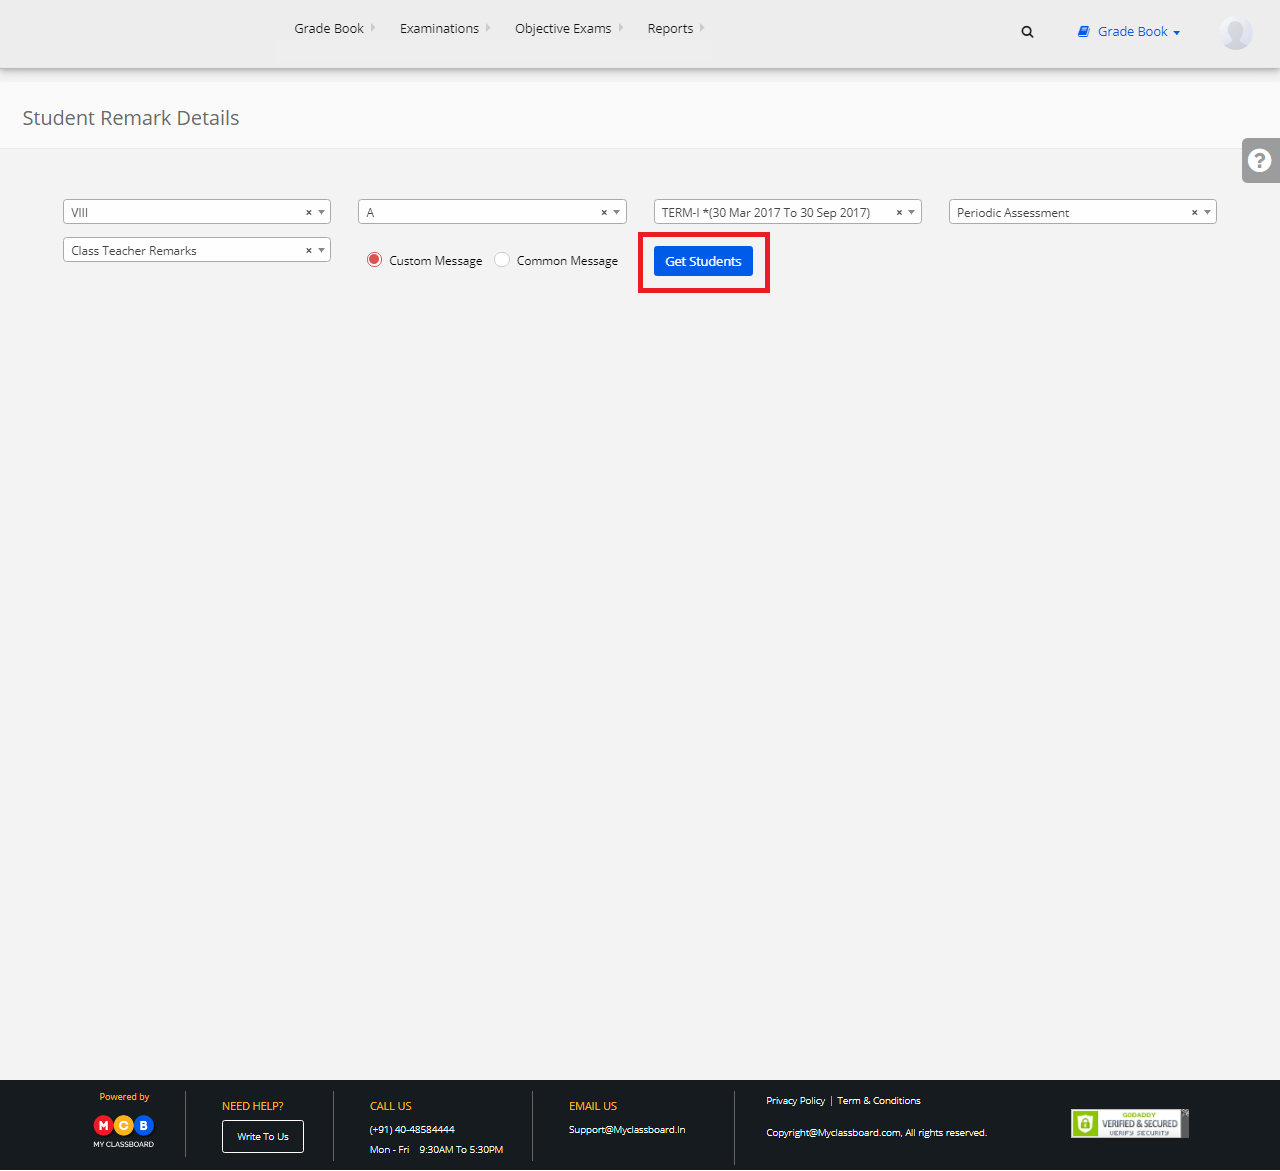
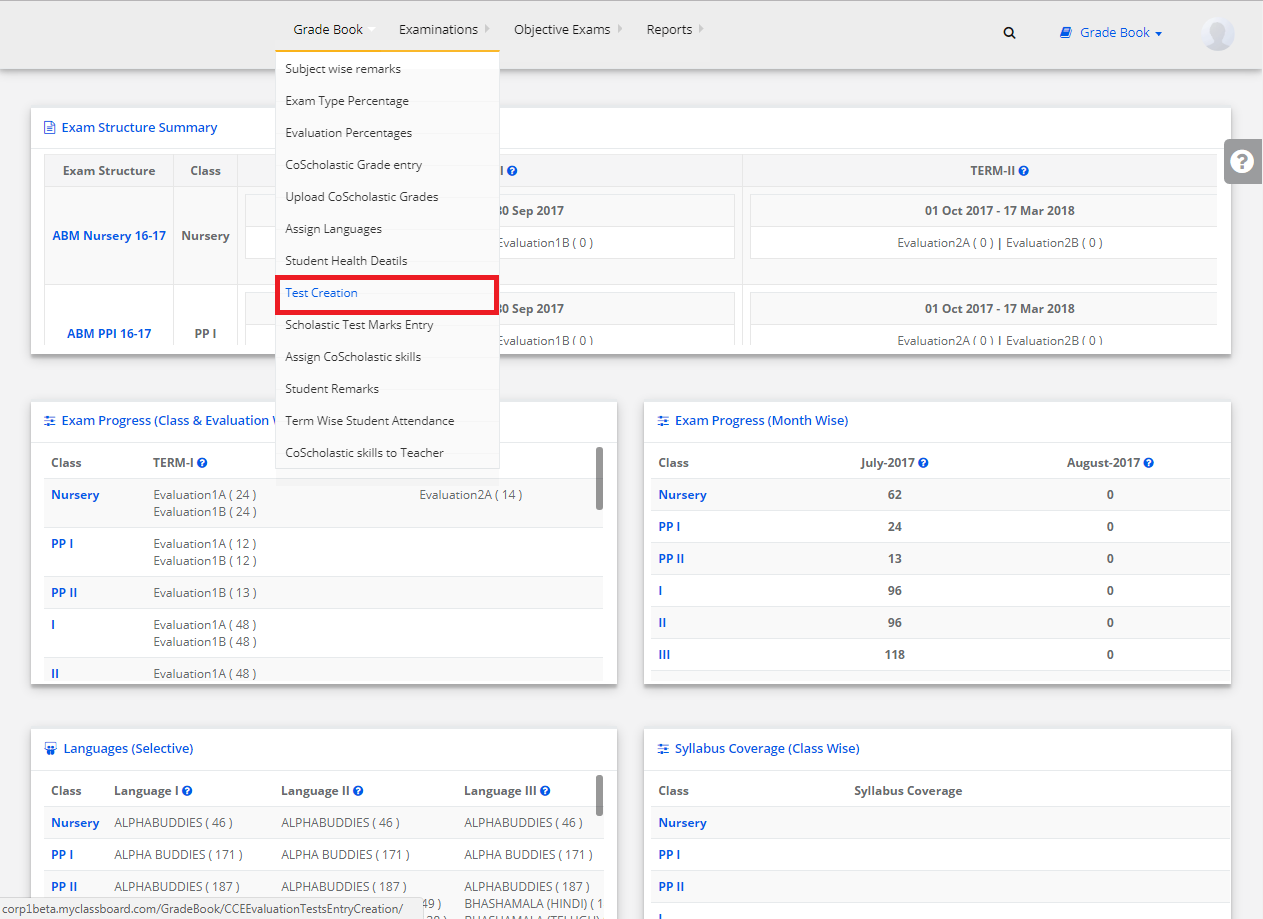
Step 3: Select Gradebook. You’ll be directed to the “Gradebook” page.

Step 4: Click on “Gradebook” on the top bar and select “Test Creation”.
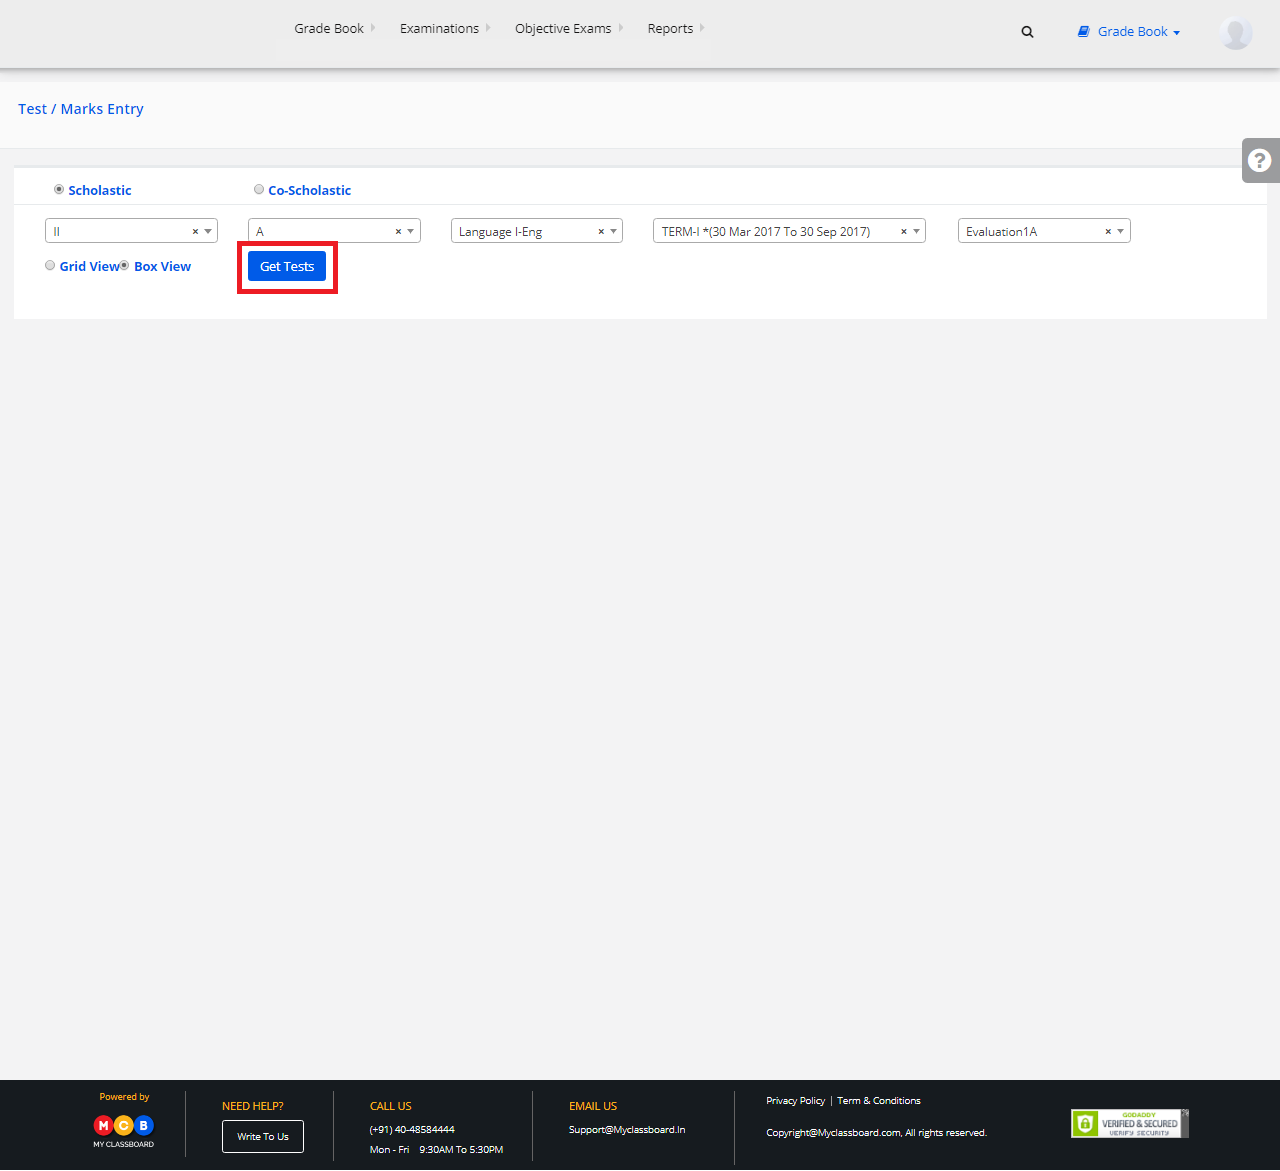
Step 5: Select Scholastic/Co-Scholastic ——> Select Class, Section, Subject, Term, Evaluations and click on “Get Tests”.
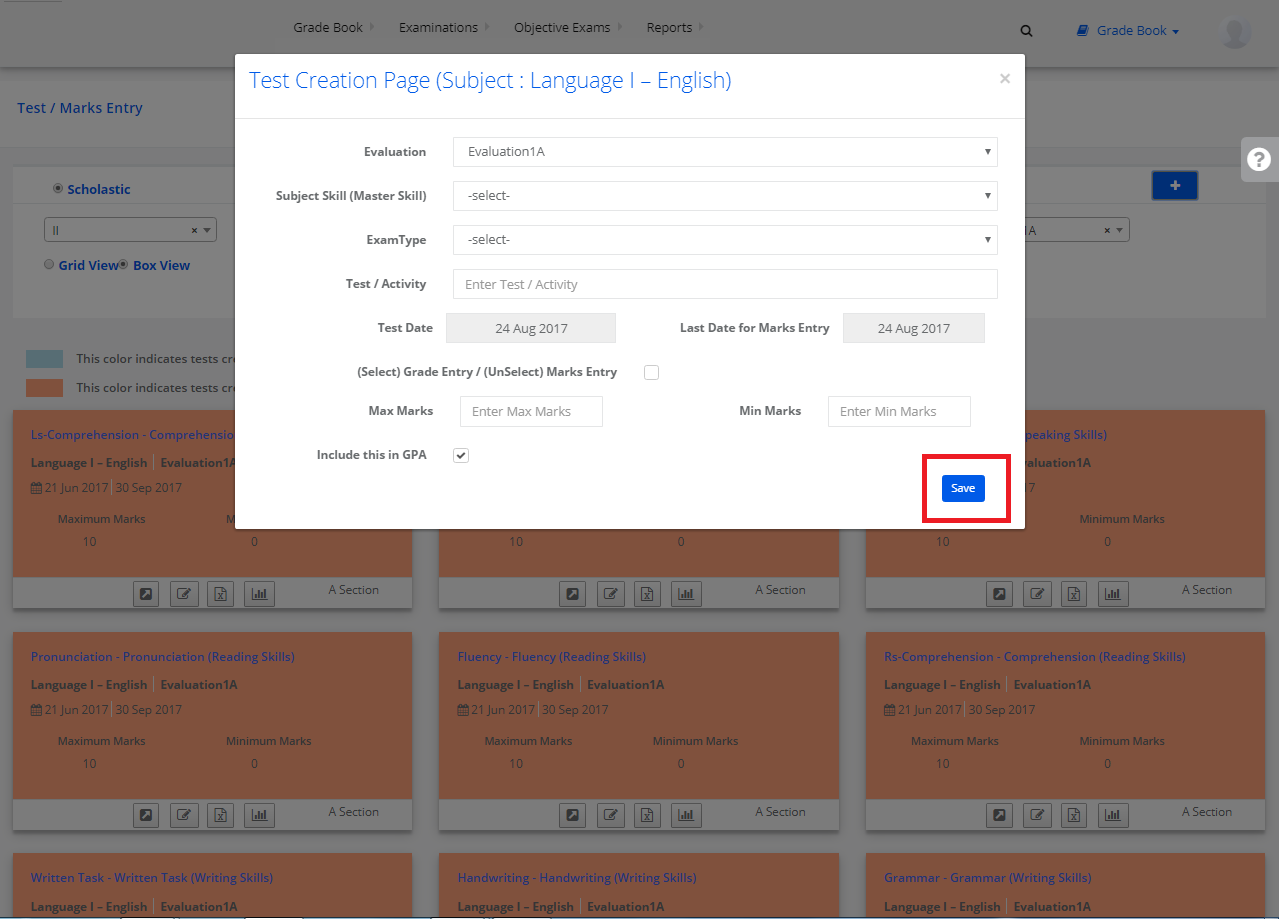
Step 6: Click on “Add” symbol and you’ll be directed to a “Test Creation Page”.

Step 7: Entering the required details here and click on “Save”. The Test is created successfully.
Marks Entry
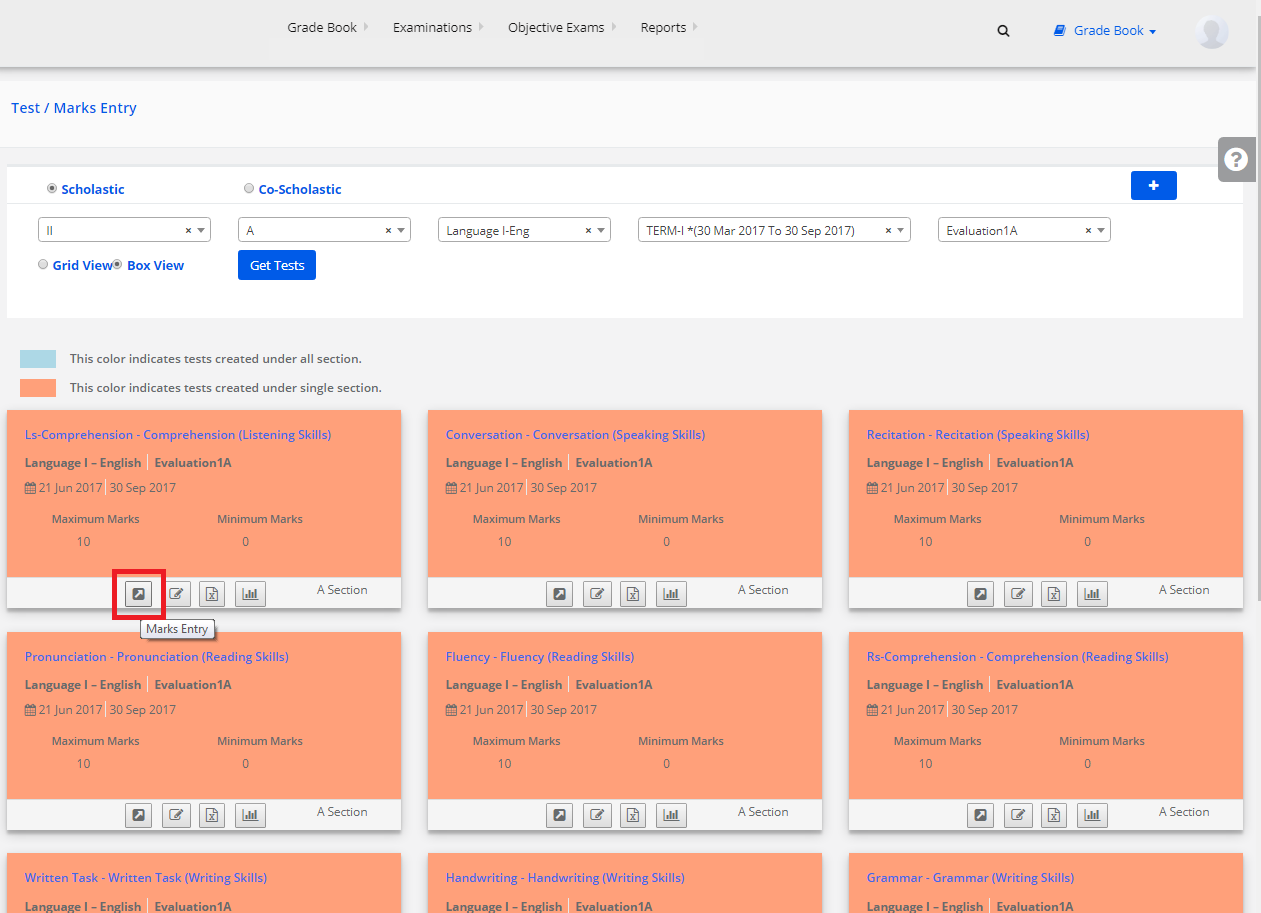
After the test creation, click on any of the tests created to upload the marks.
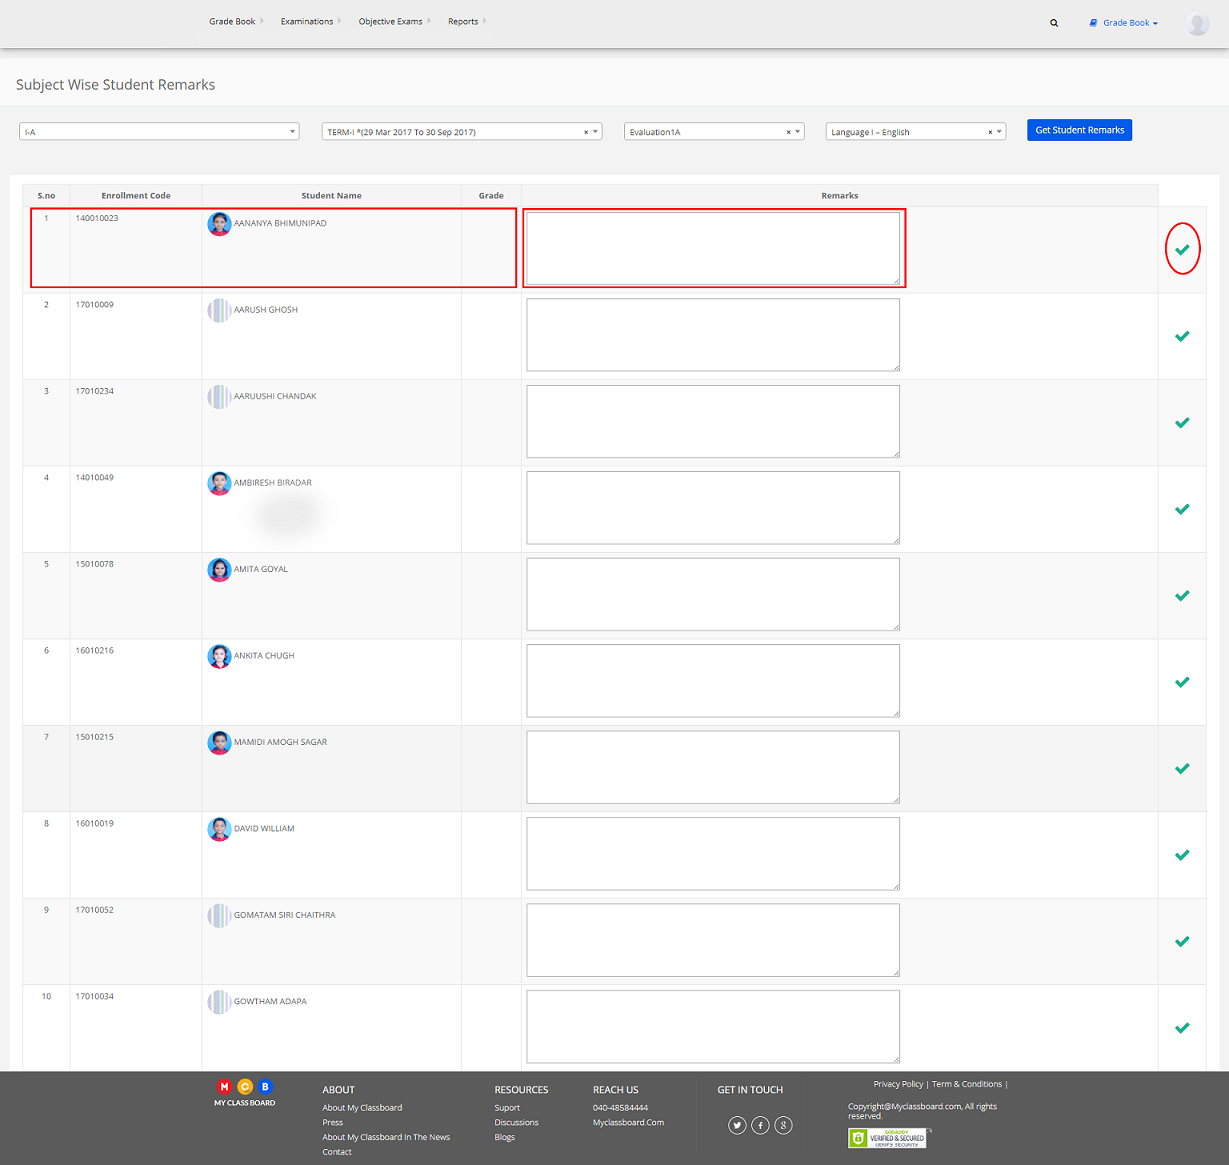
Step 8: Select any Test and click on “Marks Entry”.
Step 9: Enter the marks of students individually here and click on “Update Marks”. The marks are updated.

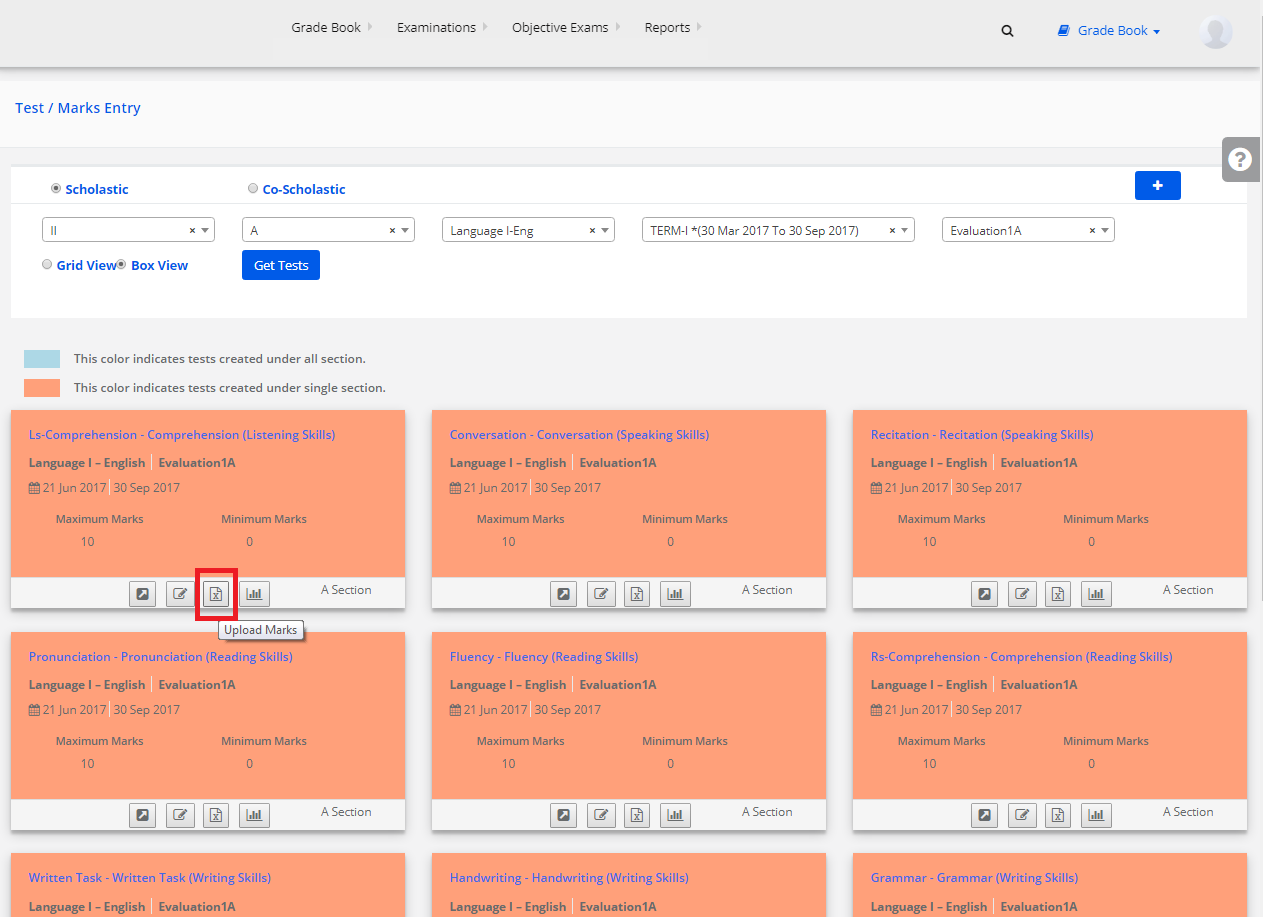
Bulk Entry of Marks
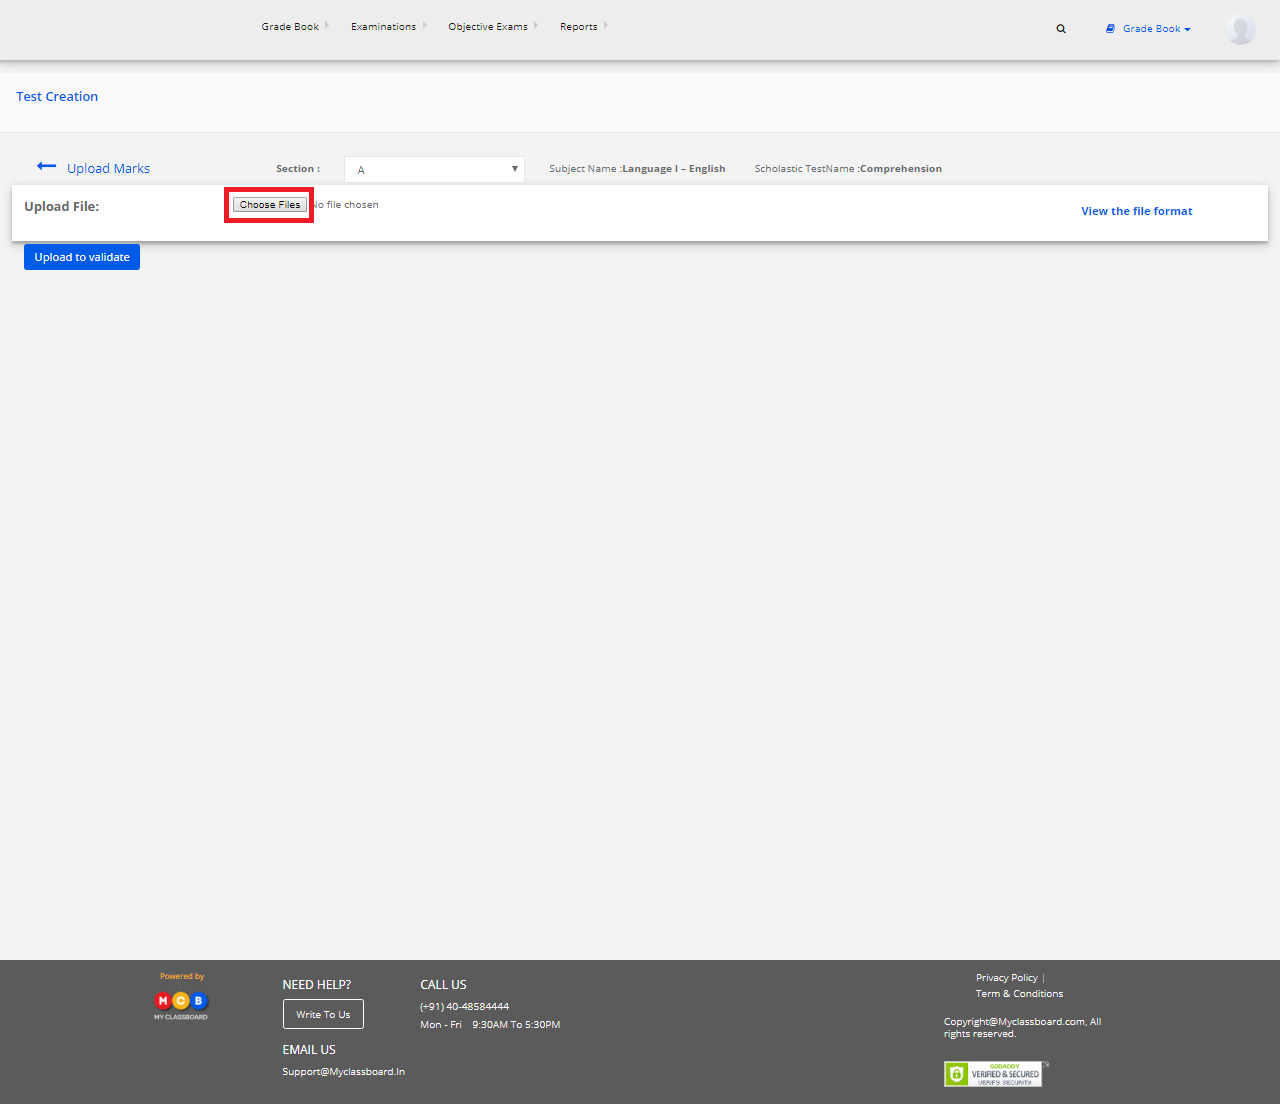
Step 10: Click on “Upload Marks”.
Step 11: Choose File ——> Upload to Validate.