How to View Staff Details Report?

Step 1: Login to MCB with Principal or SysAdmin Login credentials.

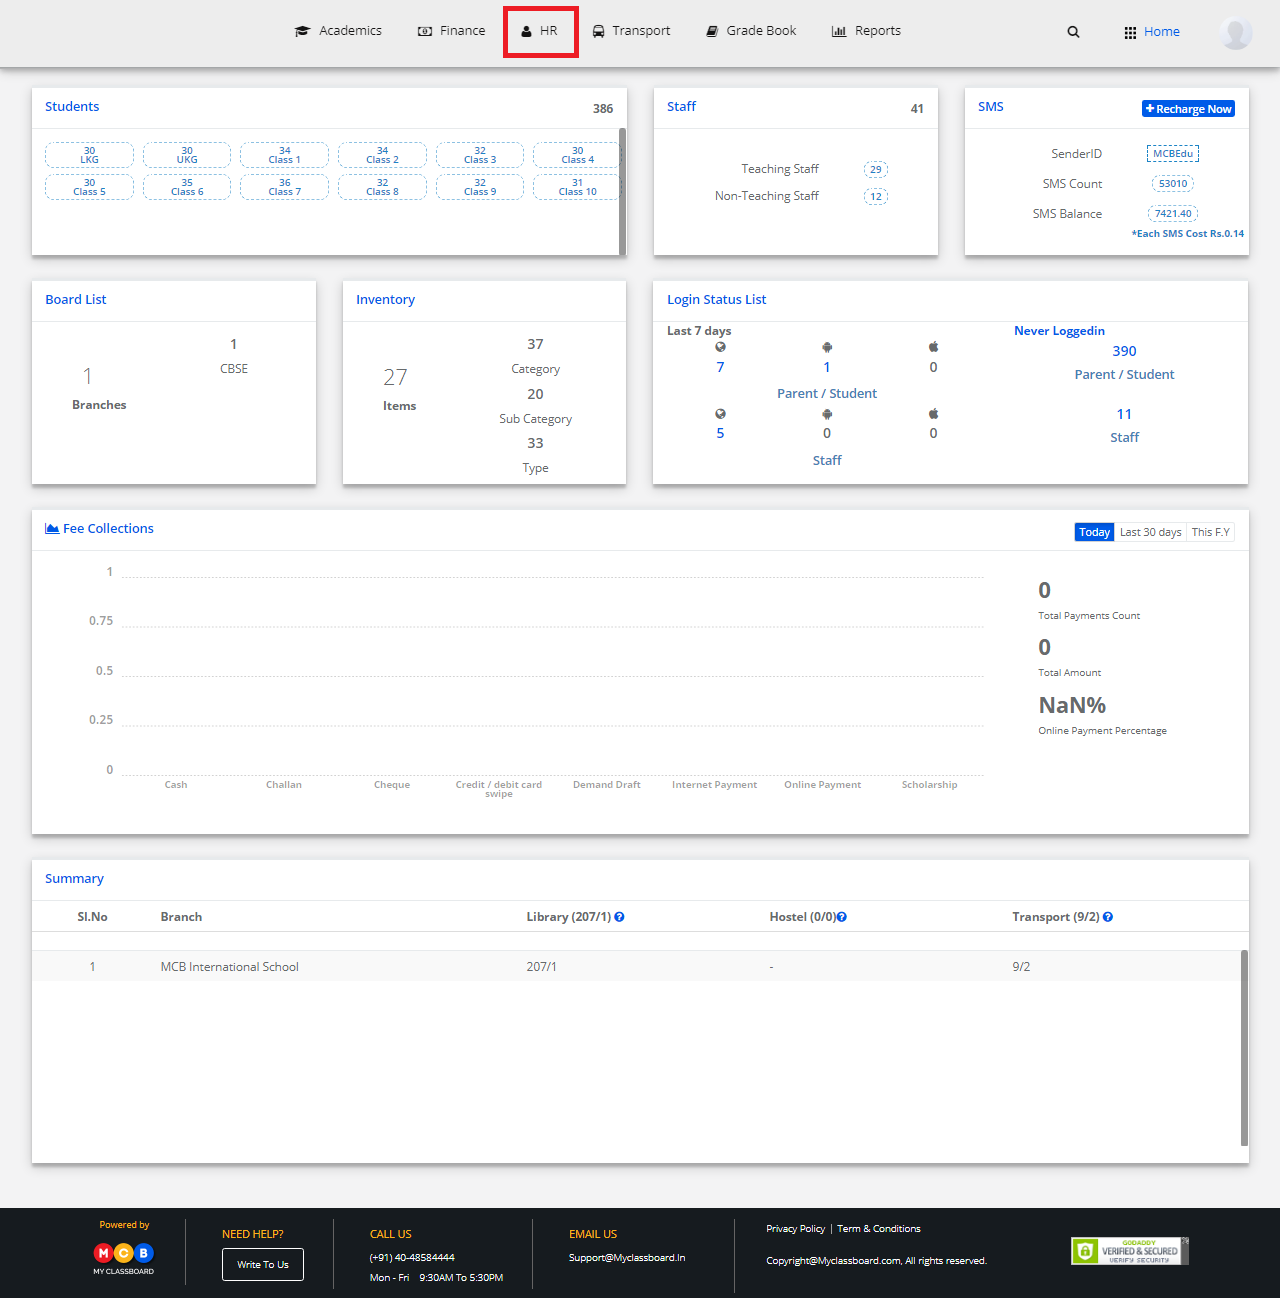
Step 2: Select “HR” on the top bar of the dashboard. You will be directed to the HR page.

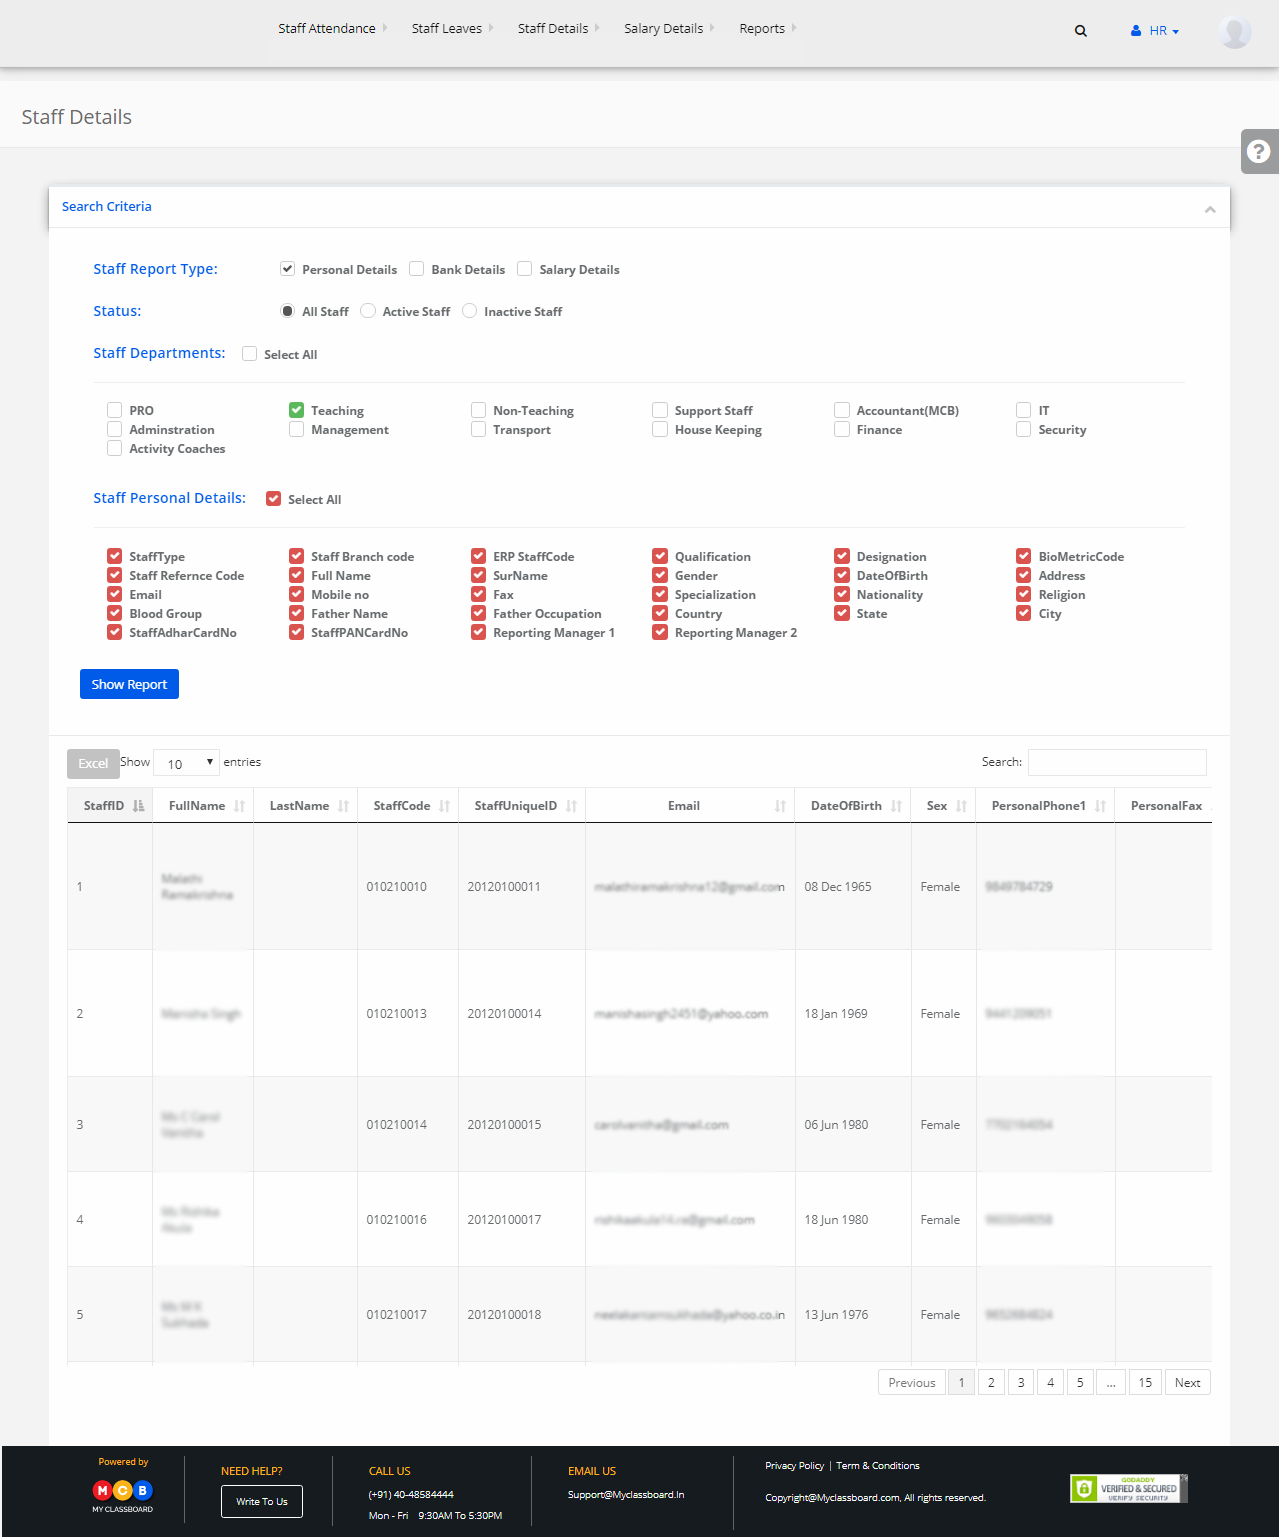
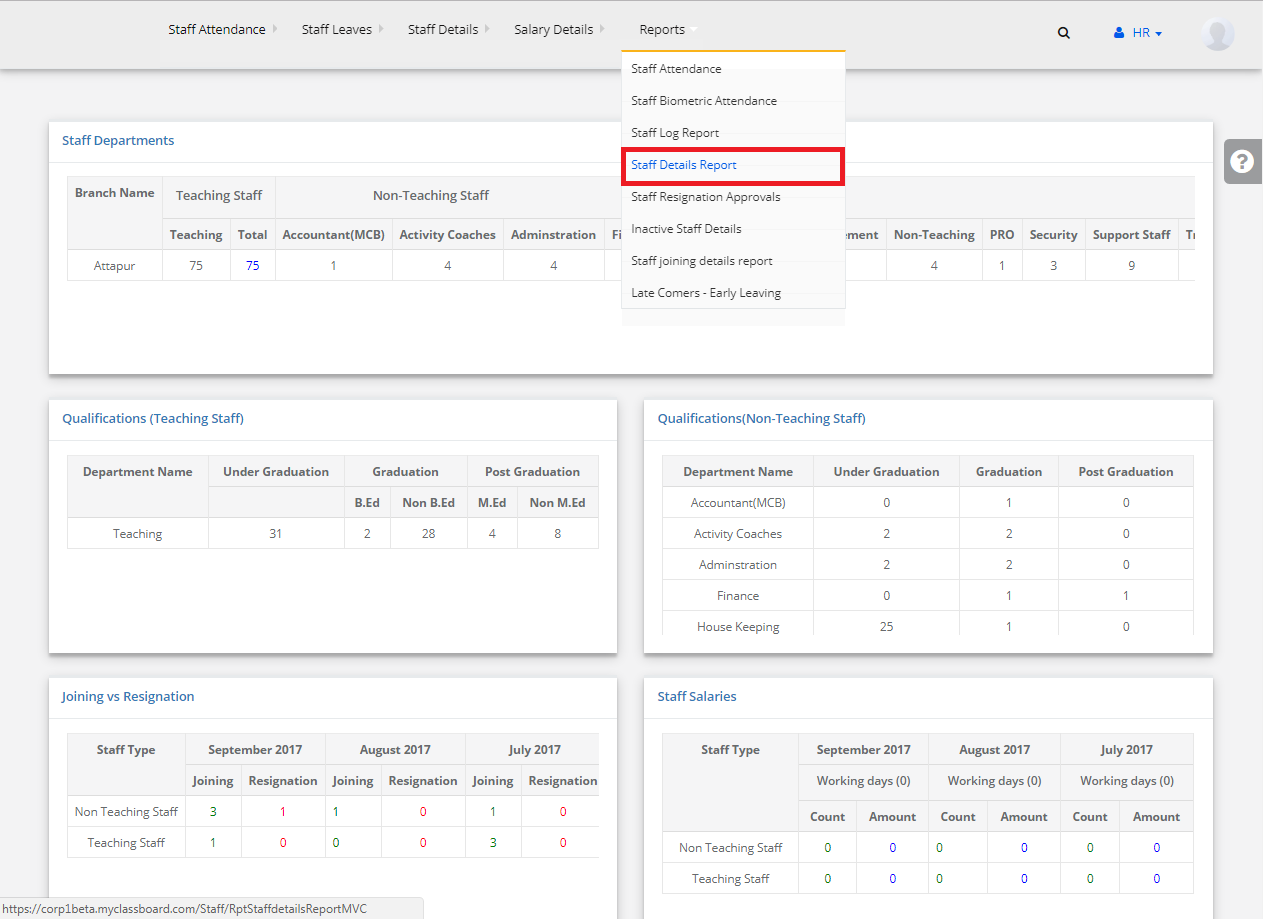
Step 3: Select “Reports” on the top bar and choose “Staff Details Report”.

Step 4: Select the type of Staff Report by choosing any of the options like Personal Details or Bank Details or Salary Details.

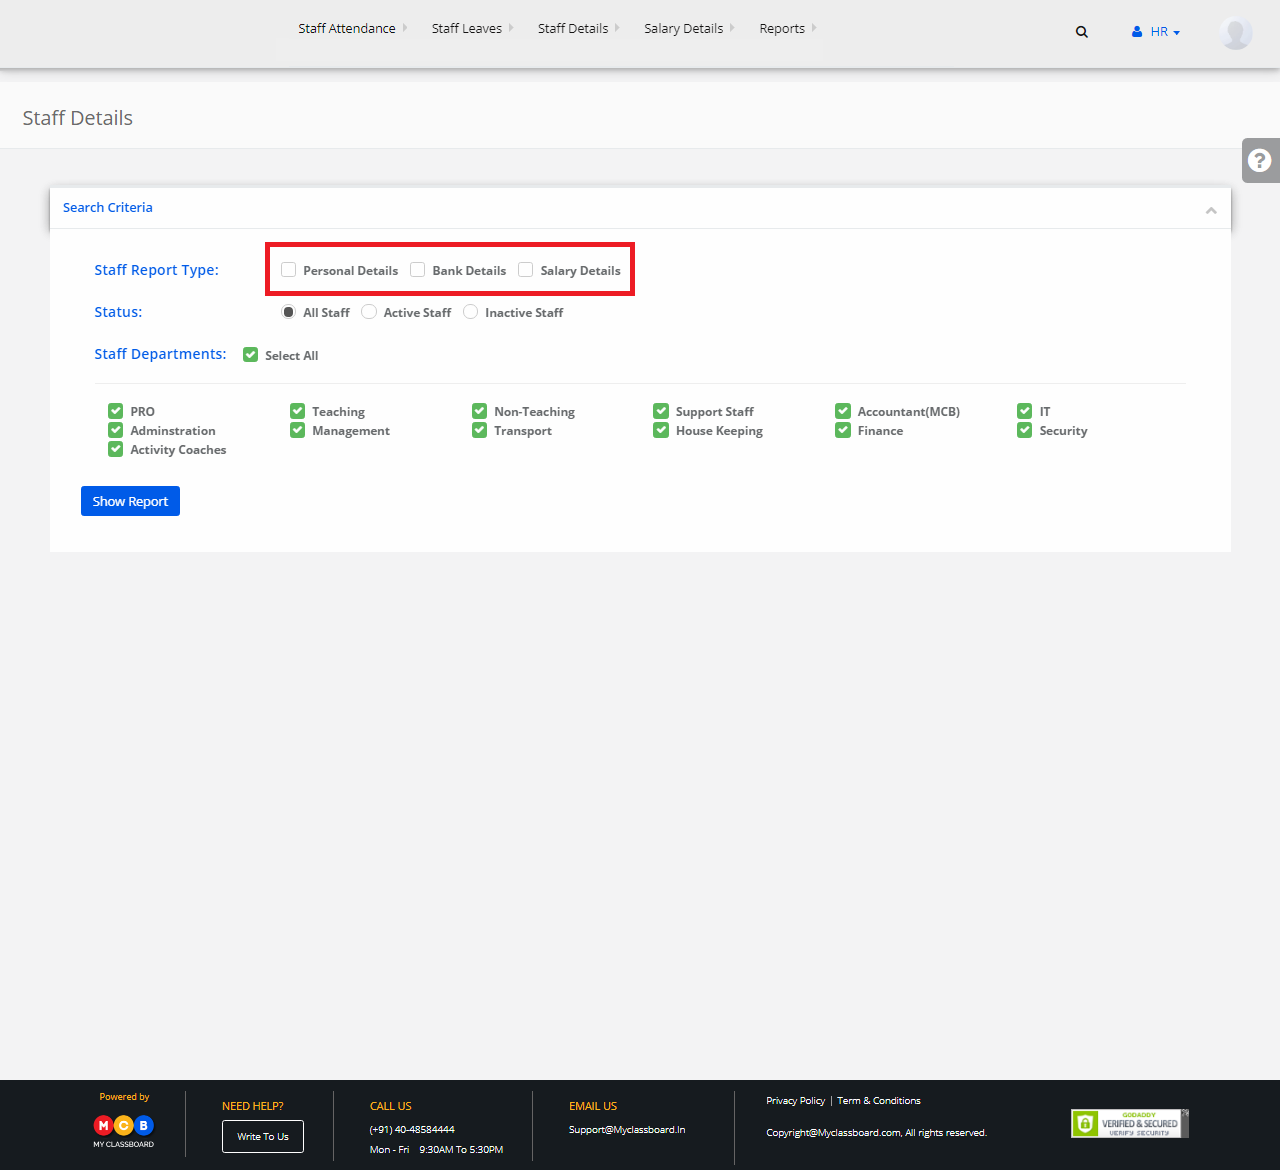
Step 5: Select other the required options, click on “Show Report”.

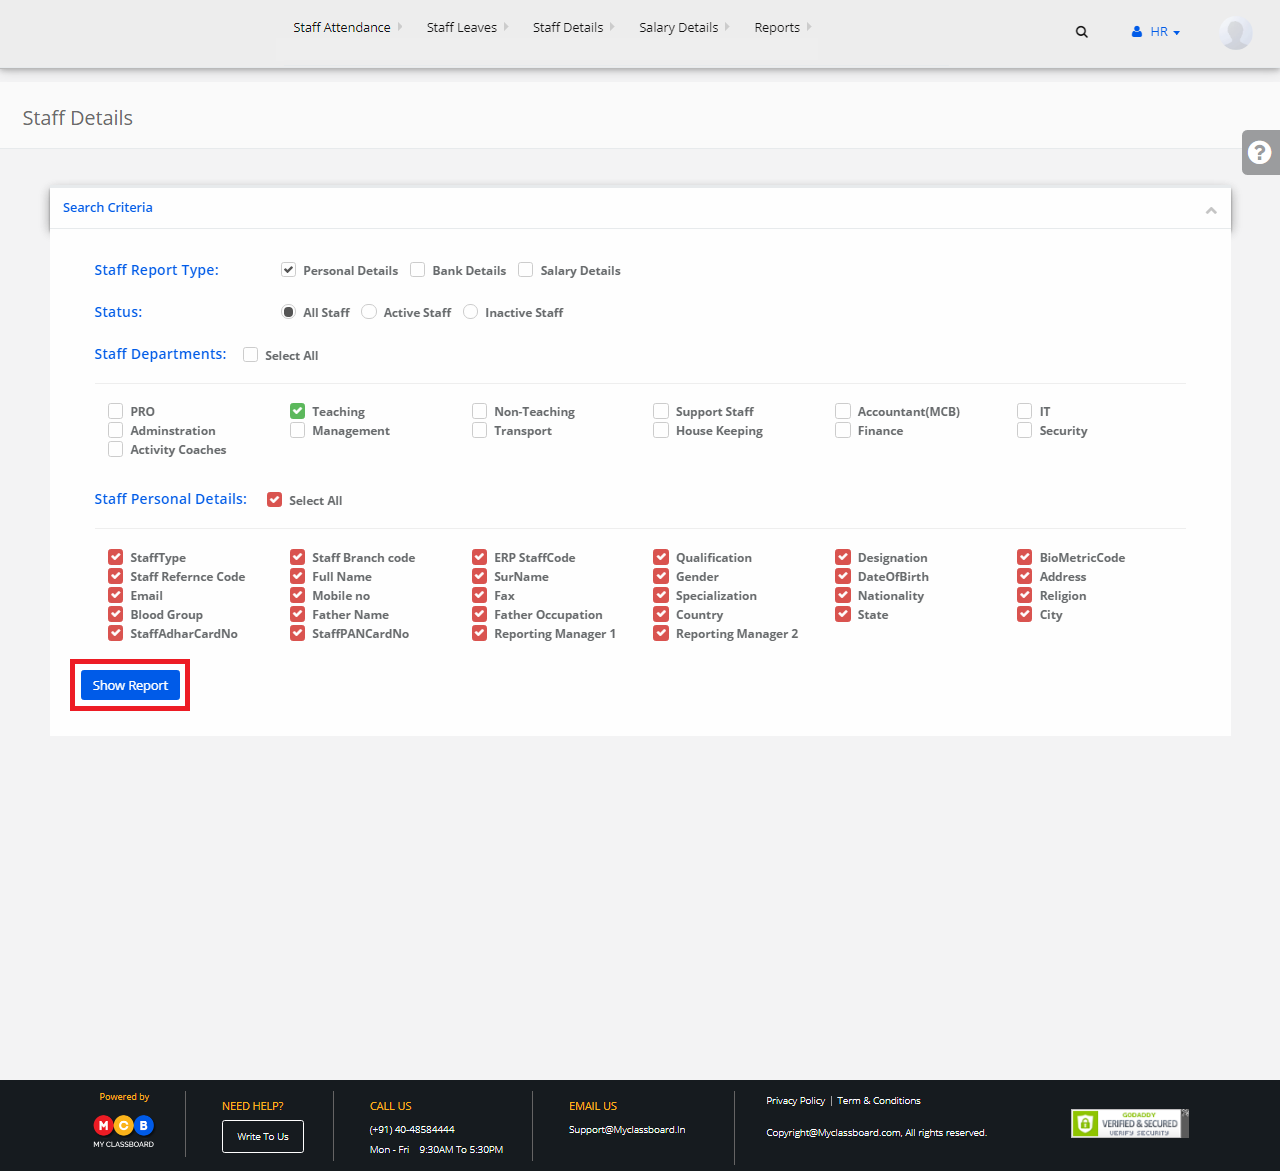
Step 6: The entire details of the staff are displayed here. You can export the same to excel.

How to copy languages from previous academic years?

Step 1: Switch to the academic year from which you wish to copy the languages from the current academic year.
Go to Grade Book menu at branch level and choose to assign languages option from GradeBook Menu.
Select Grade and Section and click on “Get Language Subjects”.

Step 2: To copy the languages from the previous academic year, click on the copy button.

Step 3: Choose the year to which you wish to copy, select grade and section and Click on Get. It will list you the students based on the selected year, grade and section with the languages assigned in the previous year.

Step 4: if required, change the language for all students or particular students. To continue with the same languages, click on save.

How to Enter Scholastic Marks?

Step 1: Login to MCB with Principal login credentials.

Step 2: If you’re already logged in with System Admin credentials, change access to “Principal” level. (Click on user profile picture in the right corner – change access level – click on Principal against the respective branch).

Step 3: Select Gradebook on the top bar of the dashboard. You’ll be directed to the “Gradebook” page.

Step 4: Click on “Gradebook” on the top bar and select “Scholastic Test Marks Entry”.

Step 5: Select Class, Section, Term, Evaluation and Subject. Upon selection, click on “Search”.

Step 6: Select any Test and click on “Enter Marks”.

Step 7: To enter the marks manually, select “Click Here To Get Student List To Enter Marks Manually”.

Step 8: Enter the marks of students individually here and click on “Save” button.

How to update Exam Type Percentage?

Step 1: Login to MCB with Principal login credentials.

Step 2: If you’re already logged in with System Admin credentials, change access to “Principal” level. (Click on user profile picture in the right corner – change access level – click on Principal against the respective branch).

Step 3: Select Gradebook on the top bar of the dashboard. You’ll be directed to the “Gradebook” page.

Step 4: Click on “Gradebook” on the top bar and select “Evaluation Percentages”.

Step 5: Select Structure and Class. Enter the Percentages against each Assessment and click on “Save”.

How to Upload Co Scholastic Grades?

Step 1: Login to MCB with Principal login credentials.

Step 2: If you’re already logged in with System Admin credentials, change access to “Principal” level. (Click on user profile picture in the right corner – change access level – click on Principal against the respective branch).

Step 3: Select Gradebook. You’ll be directed to the “Gradebook” page.

Step 4: Click on “Reports” on the top bar and select “Upload Co Scholastic Grades”.

Step 5: Select the required options like Class, Term, Co Scholastic Part, Assessment, Co Scholastic Master Skill and click on “Get”.

Step 6: Select at least one Co-Scholastic SubSkill under the Co-Scholastics Skill and click on “Proceed to get file format”.

Step 7: Click on “Download File Format” to download the sample file, enter the details to upload and finally select “Choose Files” to upload CCE Co Scholastic SubSkill Grades.

How to Create Exam Types?

Step 1: Login to MCB with System Admin credentials.

Step 2: Select Gradebook on the top bar of the dashboard. You’ll be directed to the “Gradebook” page.


Step 3: Click on “Gradebook” on the top bar and select “Create Exam Types” under it.


Step 4: Click on “Add Exam Type” to add a new exam type.


Step 5: Add a new exam type here and click on “Save”.


The new exam type is created.


Step 6: To Edit the created Exam type, click on the “Edit” option.


Step 7: Make the necessary changes and click on “Update” button. The changes are saved successfully.


Step 8: To Delete the Exam Type, simply click on the “Delete” button.