Payroll?

Step 1: Login to MCB with SysAdmin Login credentials.

Step 2: Click on Settings.
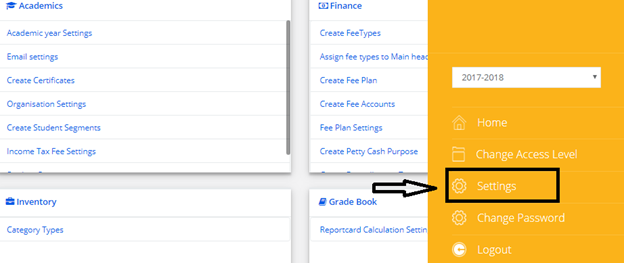
Step 3: Click on Add Allowances in HR Menu

Step 4: Select Branch Name and Click on Get.

Step 5: Click on Basic Salary settings and provide Basic Type depends on Organisation( Manual or Percentage )
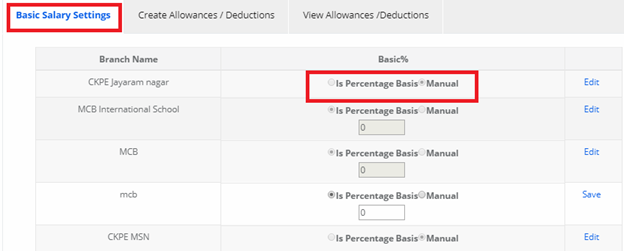
Step 6: Click on “Create Allowances / Deductions “ and provide the details(like HRA, DA, PF, ESI,etc..) based on criteria.
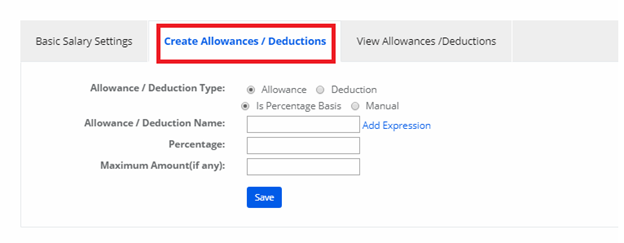
Step 7: Now go to “HR” on the top bar of the dashboard. You will be directed to the HR page.
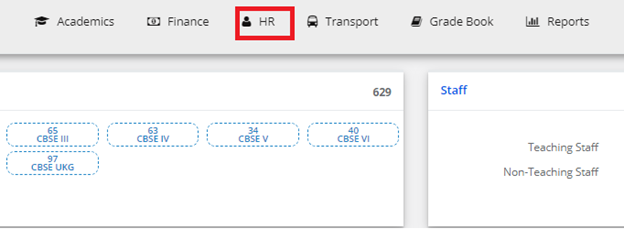
Step 8: In “Payroll” click on “ Staff salary details”
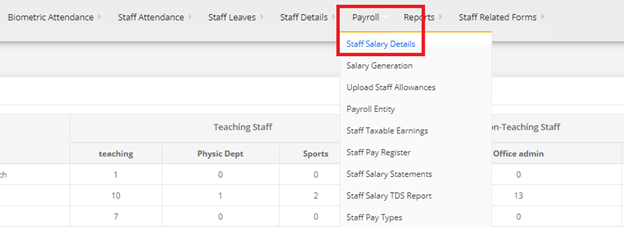
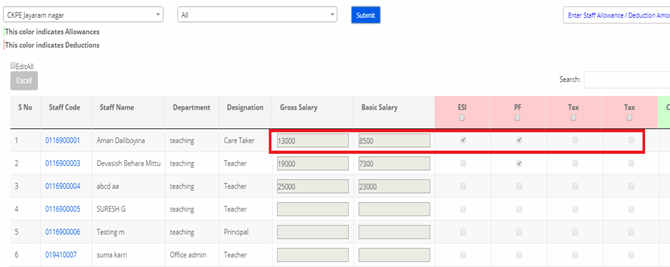
Step 9: Select Branch Name and click on Submit.

Step 10: After getting Staff details, provide Gross salary, Basic salary, Allowances/Deductions ((like HRA, DA, PF, ESI, etc.)
Step 11: Select Branch click get and click on the count.
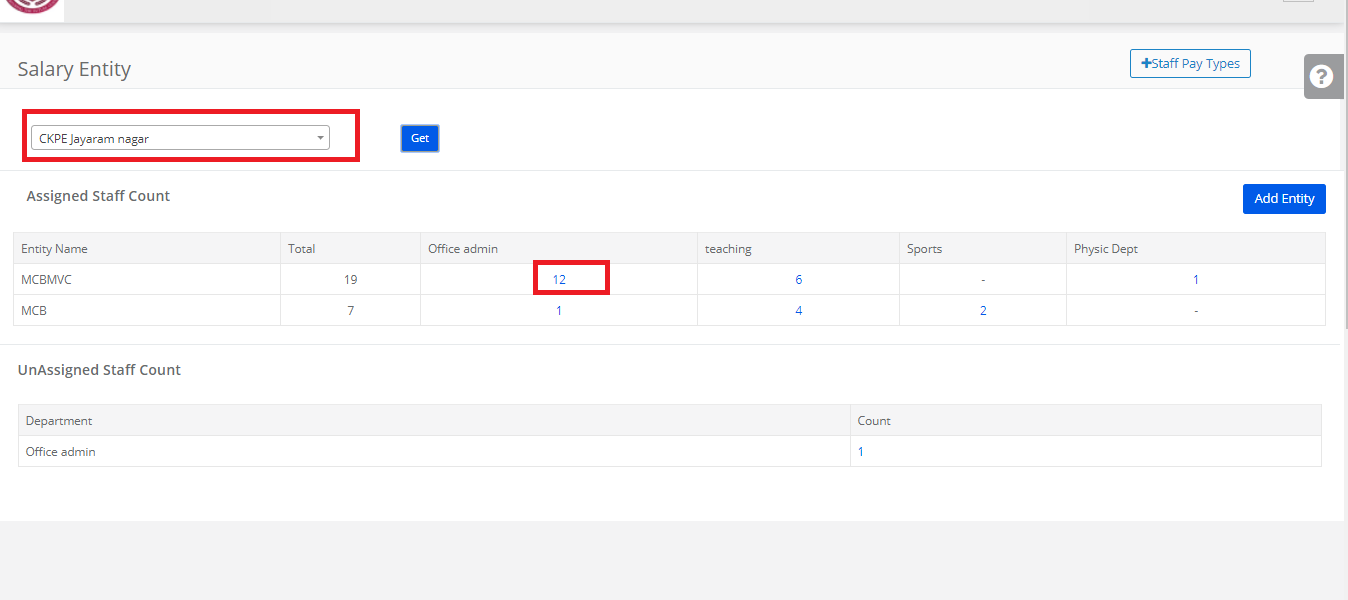
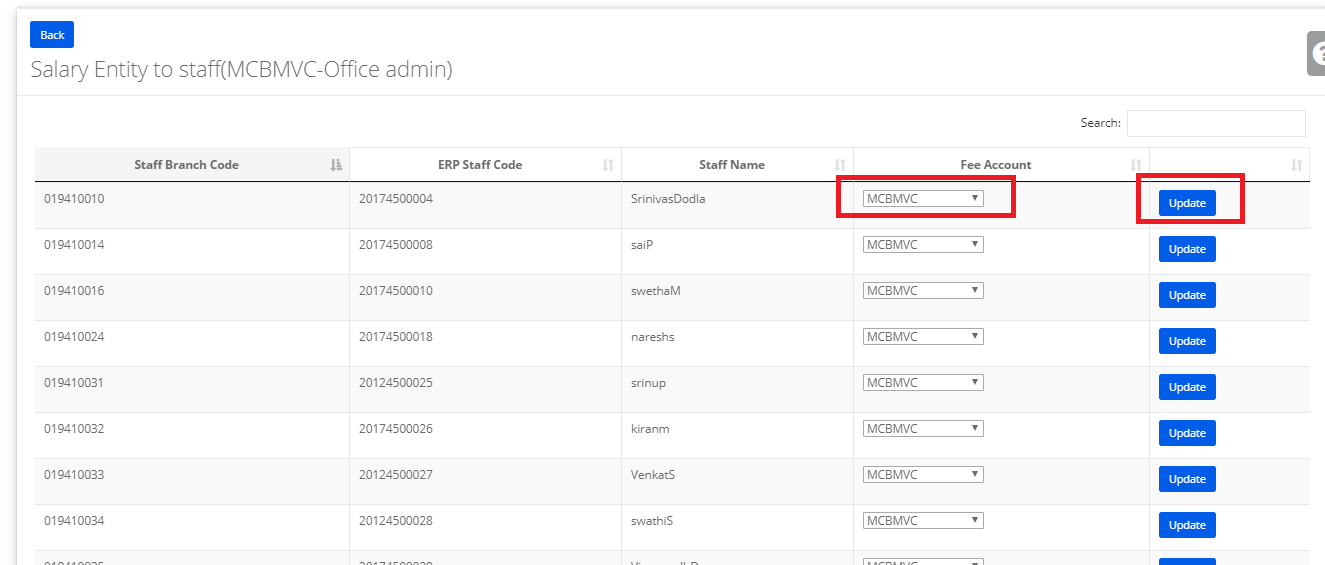
Step 12: Update the ENTITY/ACCOUNTs.
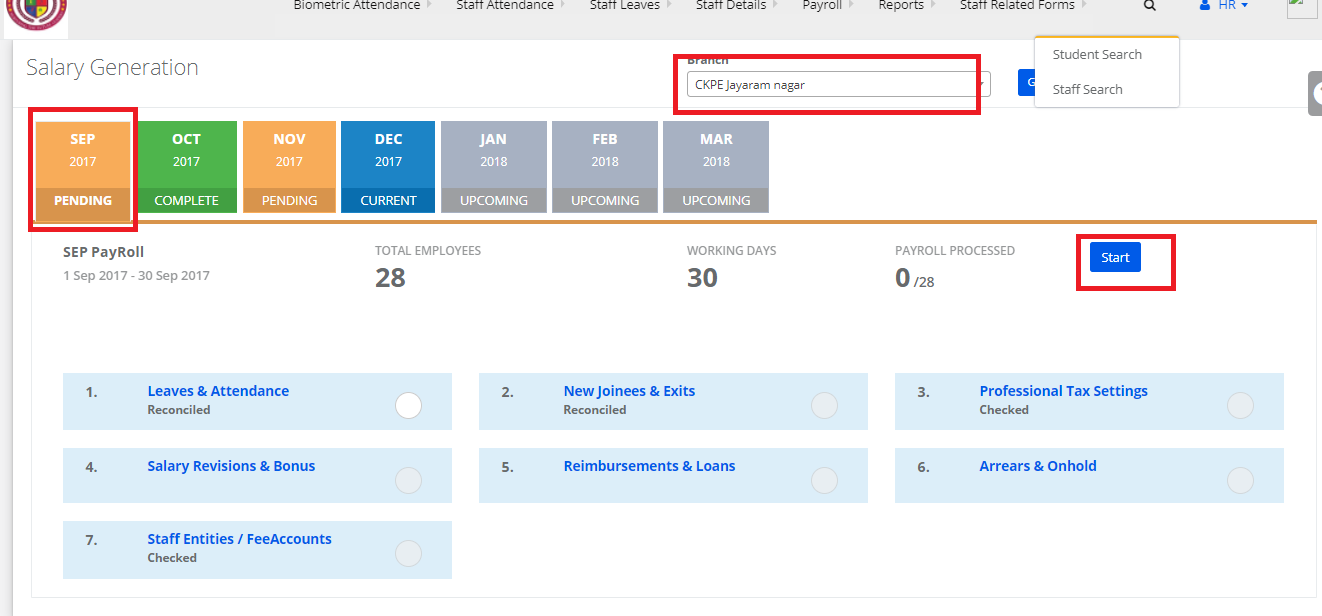
Step 13: Select branch, click get, click the month and click start
Step 14: Select all the check boxes and click final review.
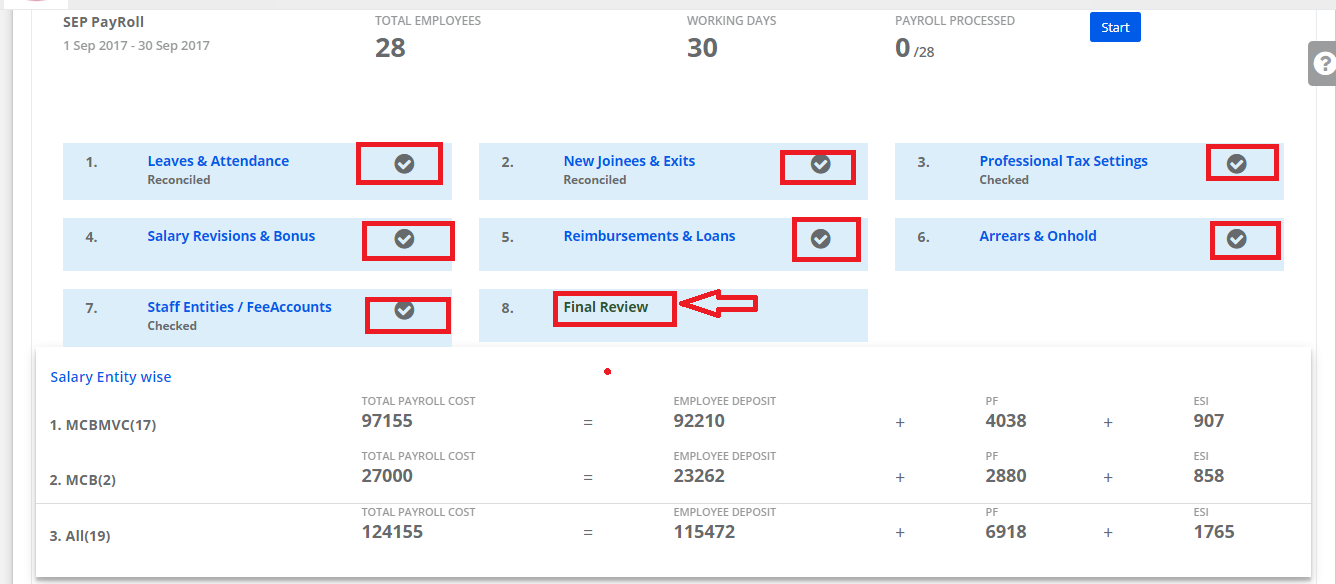
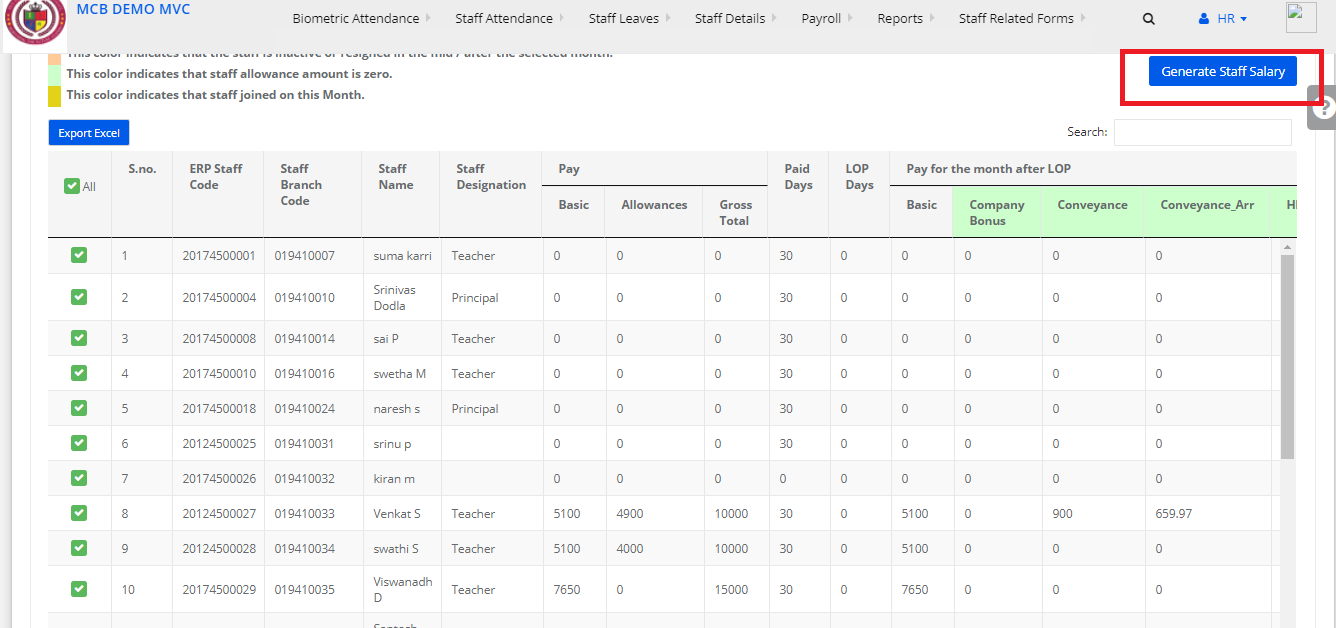
Step 15: Check the Salaries and click Generate staff salary.
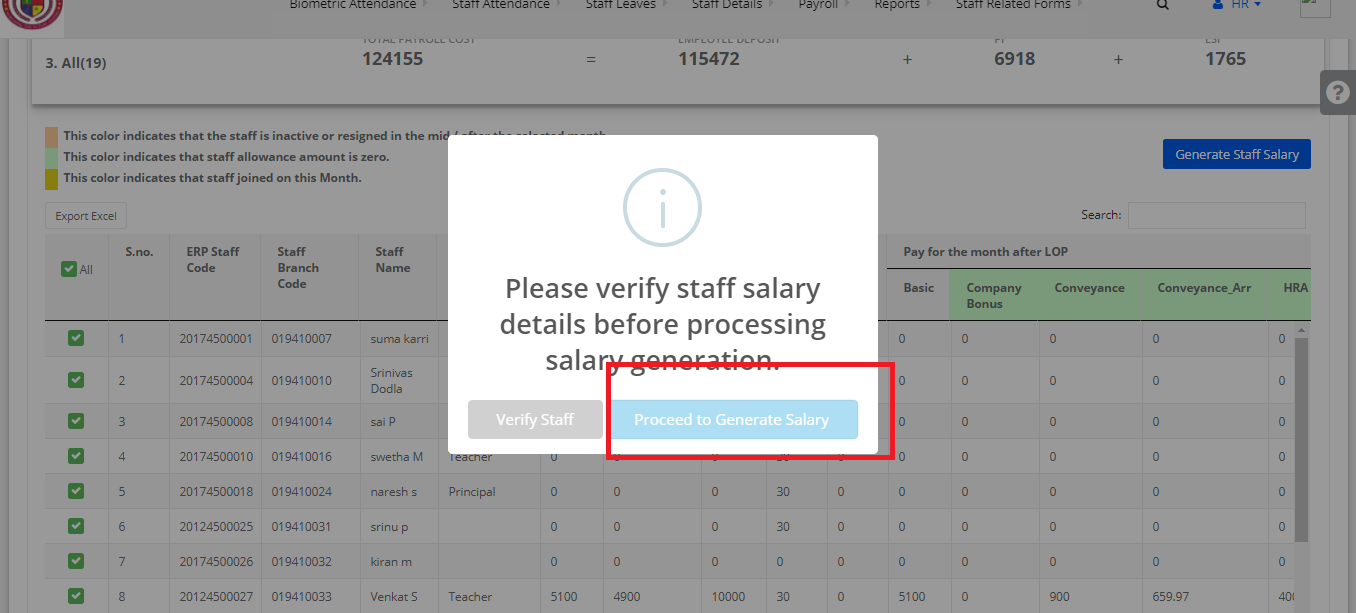
Step 16: Click Proceed to generate salary
Step 17: Click Conform
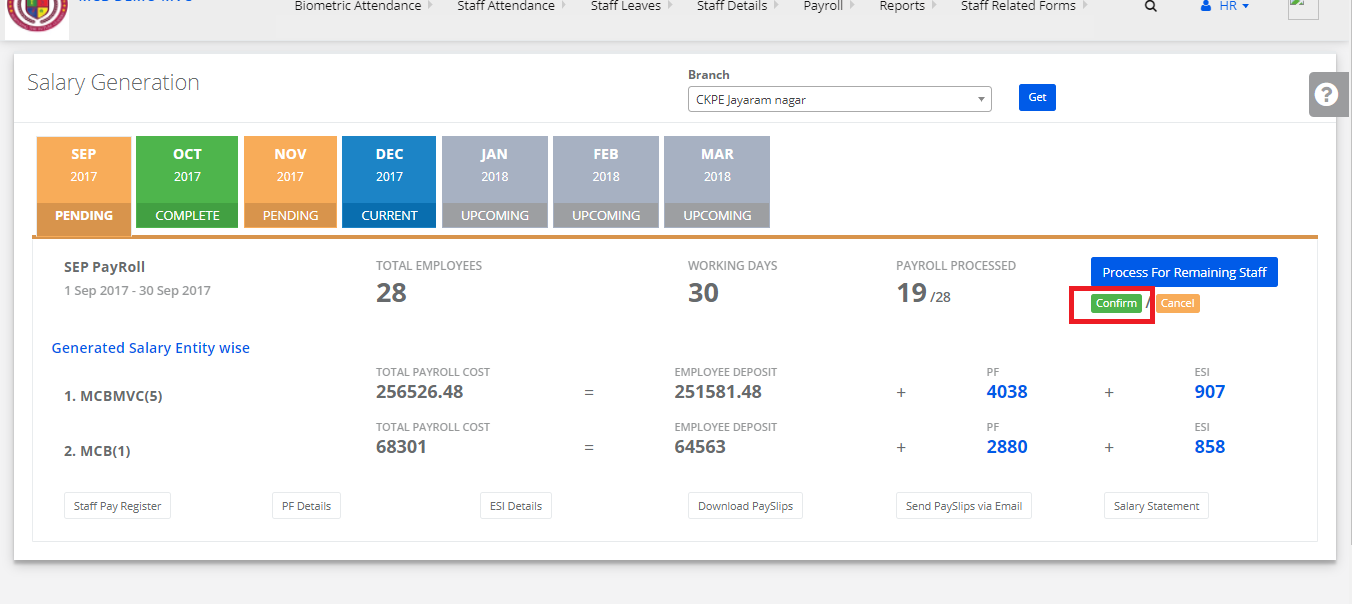
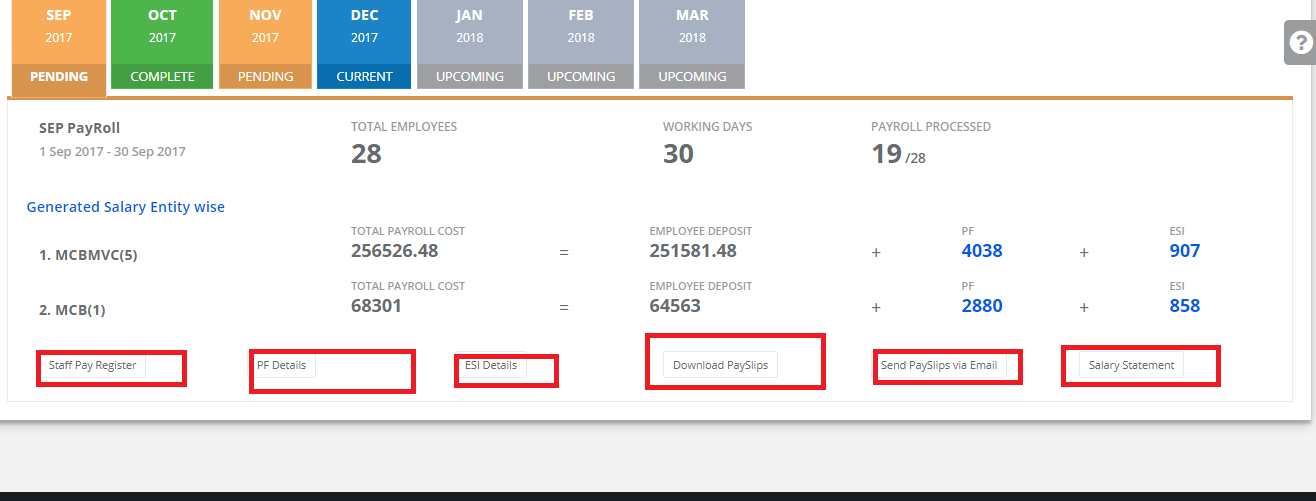
Step 18: Click Staff pay register/PF details/ESI/ Download Pay slips/Send Payslips via Email / Salary Statement
How to update biometric codes?

Step 1: Login to MCB with Principal level login

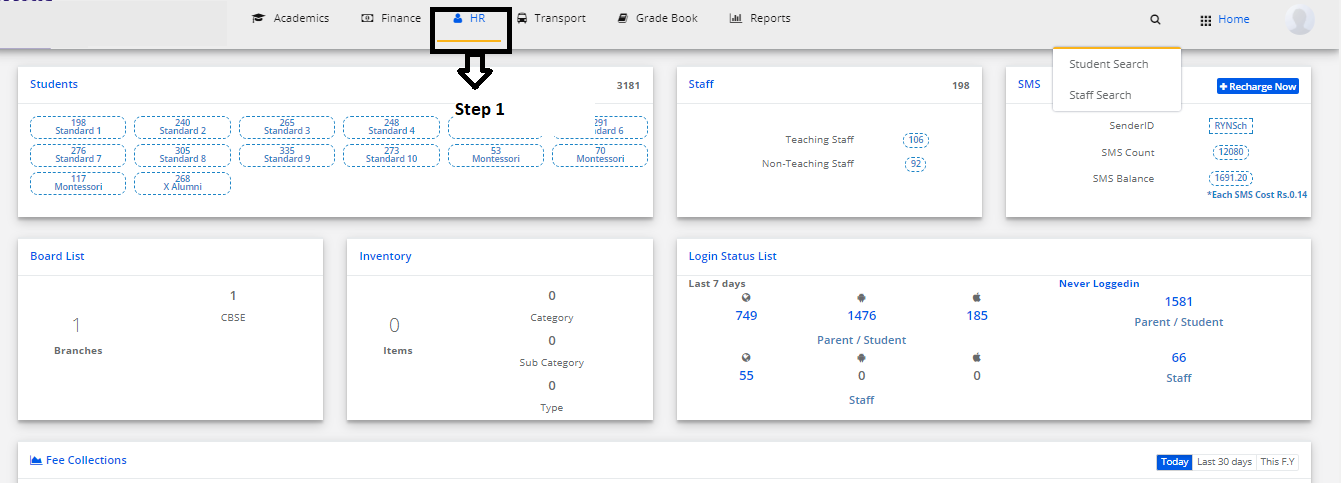
Step 2: Select “HR” in the top bar of the dashboard. You will be directed to the HR page.

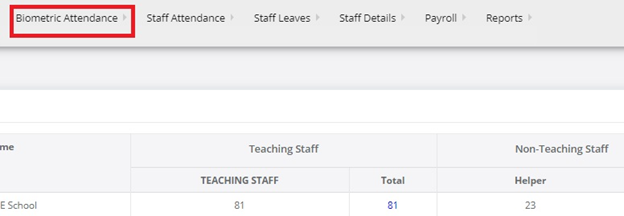
Step 3: Click on Biometric Attendance.

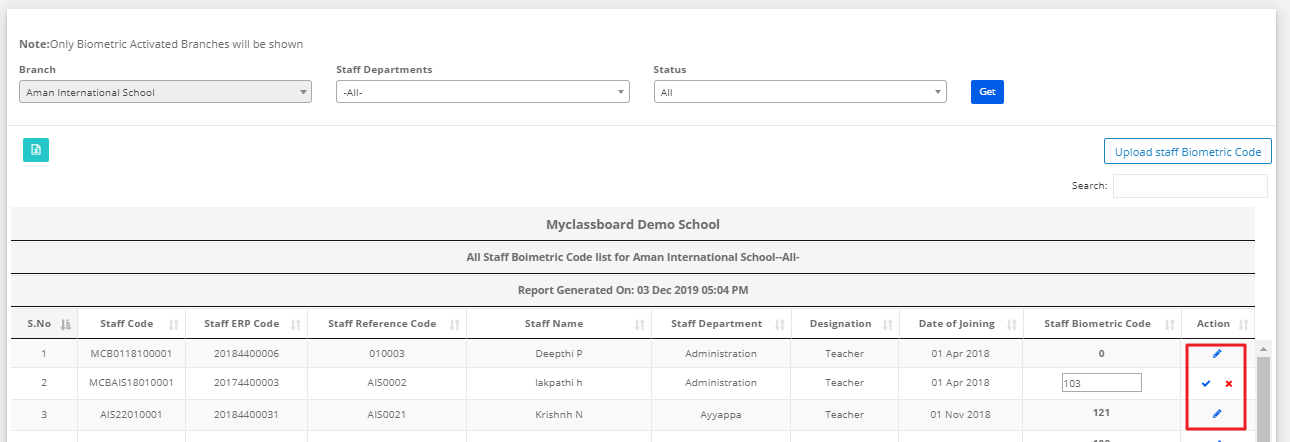
Step 4: Select the “Staff Biometric codes” option.

Step 5: Select Branch, department and click on “ Get” to get Staff details.

Step 6: Click on the Edit button and give staff biometric code and update.

How to modify Staff Biometric Attendance?

Step 1: Login and switch to branch level and go to HR module

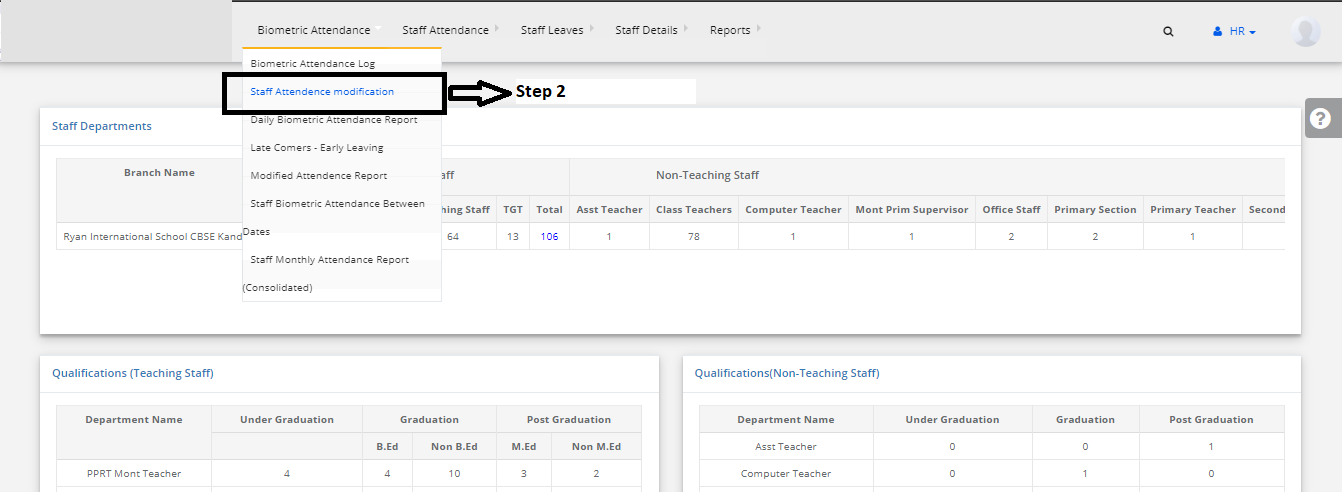
Step 2: In Biometric attendance menu, select Biometric Attendance Modification

Step 3: Select the criteria punching criteria to get the list of staff. Please note the 4 criteria available and approve the attendance.

Step 4: Choose the reason for approval and save. Check the attendance report for the updated attendance.

How to update biometric attendance log?

Step 1: Login to MCB with Principal of SysAdmin Login credentials.

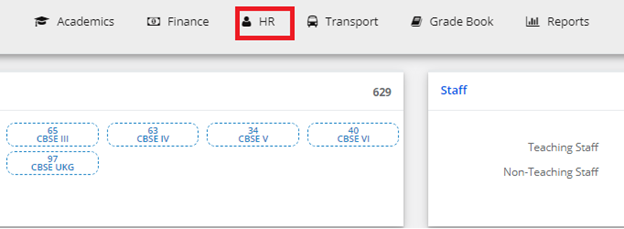
Step 2: Select “HR” on the top bar of the dashboard. You will be directed to the HR page.

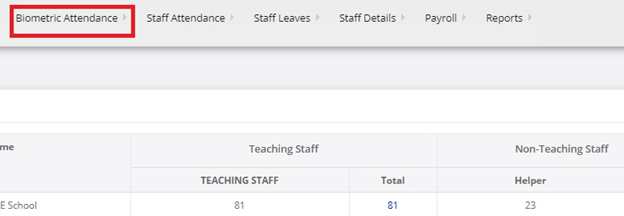
Step 3: Click on Biometric Attendance.

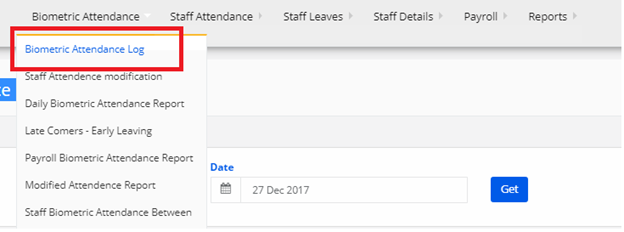
Step 4: Select “Biometric Attendance Log” option

Step 5: Select Location, Branch and Date and click on “Get “to get the updated data.

Step 6: Click on “ Run” to update attendance from bio-metric.

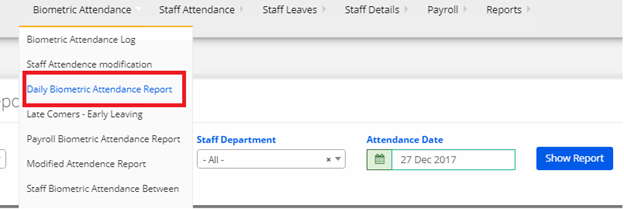
Step 7: Now select “Daily Biometric Attendance Report” to verify staff timings.

Step 8: Select Branch, shift, department, date and click show report.

Step 9: Click on Shift Name to get Attendance Report.

Step 10: Timings will be shown in below given format.

How can I integrate my existing biometrice device with MCB HR and Payroll Software?

We don’t sell or integrate with existing biometric devices. We propose you to have word with our
There is a sequence of steps involved for us to make the integration successful.

1) As a first step, we will need to get in touch with your existing solution provider. We request you to provide the details of your existing vendor. Name – company name – mobile – email

2) Discuss about the compatibility product + mcb software compatibility issues.
3) Then come up with a plan whether it is possible to integrate both solutions or not.

However
You can contact us
As mcb, we have already integrated our product with very proven and committed solution partners who have worked along with us in resolving this problem across 100 of MCB clients

MCB Solution Partner – Access IT Information Systems
Chandra – 9885678123

client logs + product image

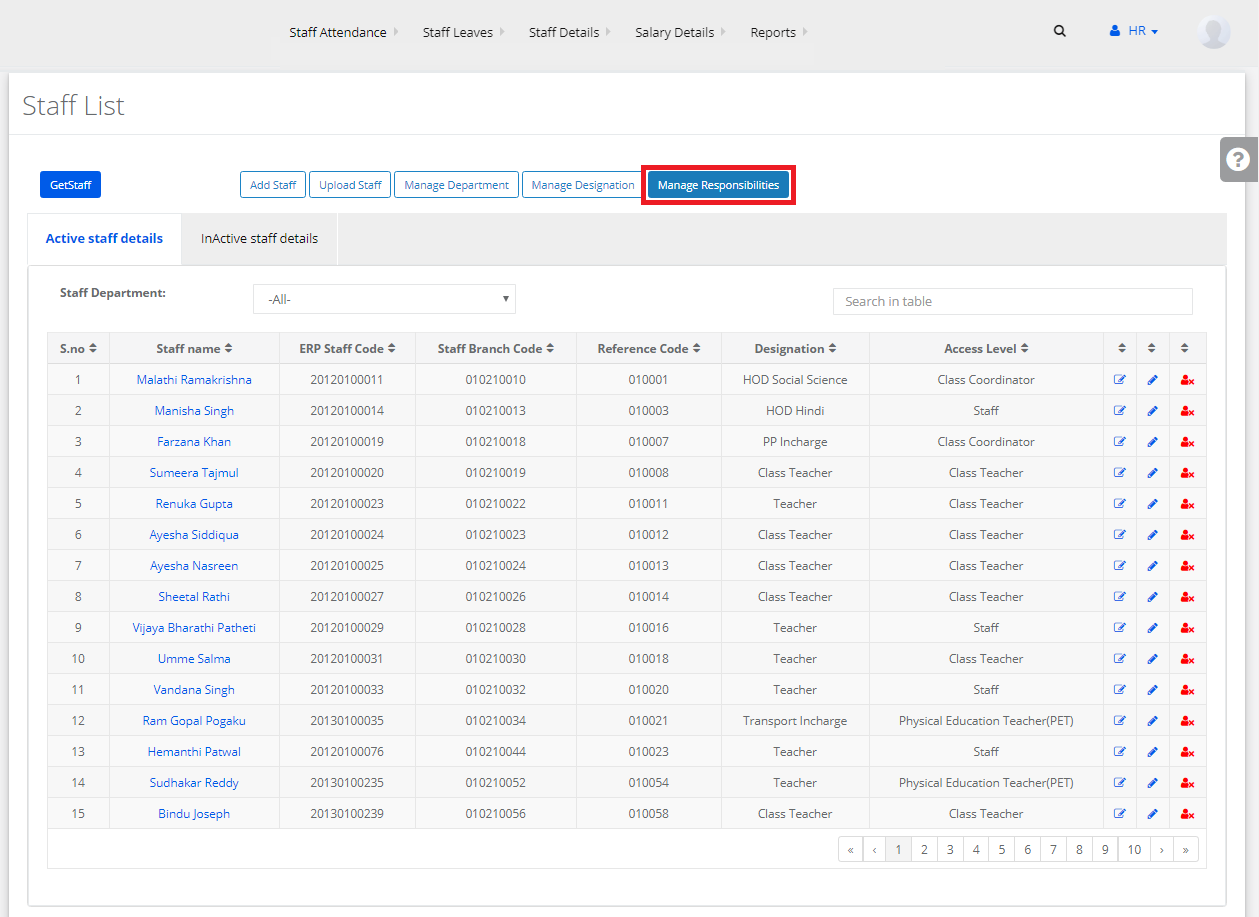
How to Create Staff Details?

Step 1: Login to MCB with Principal or SysAdmin Login credentials.

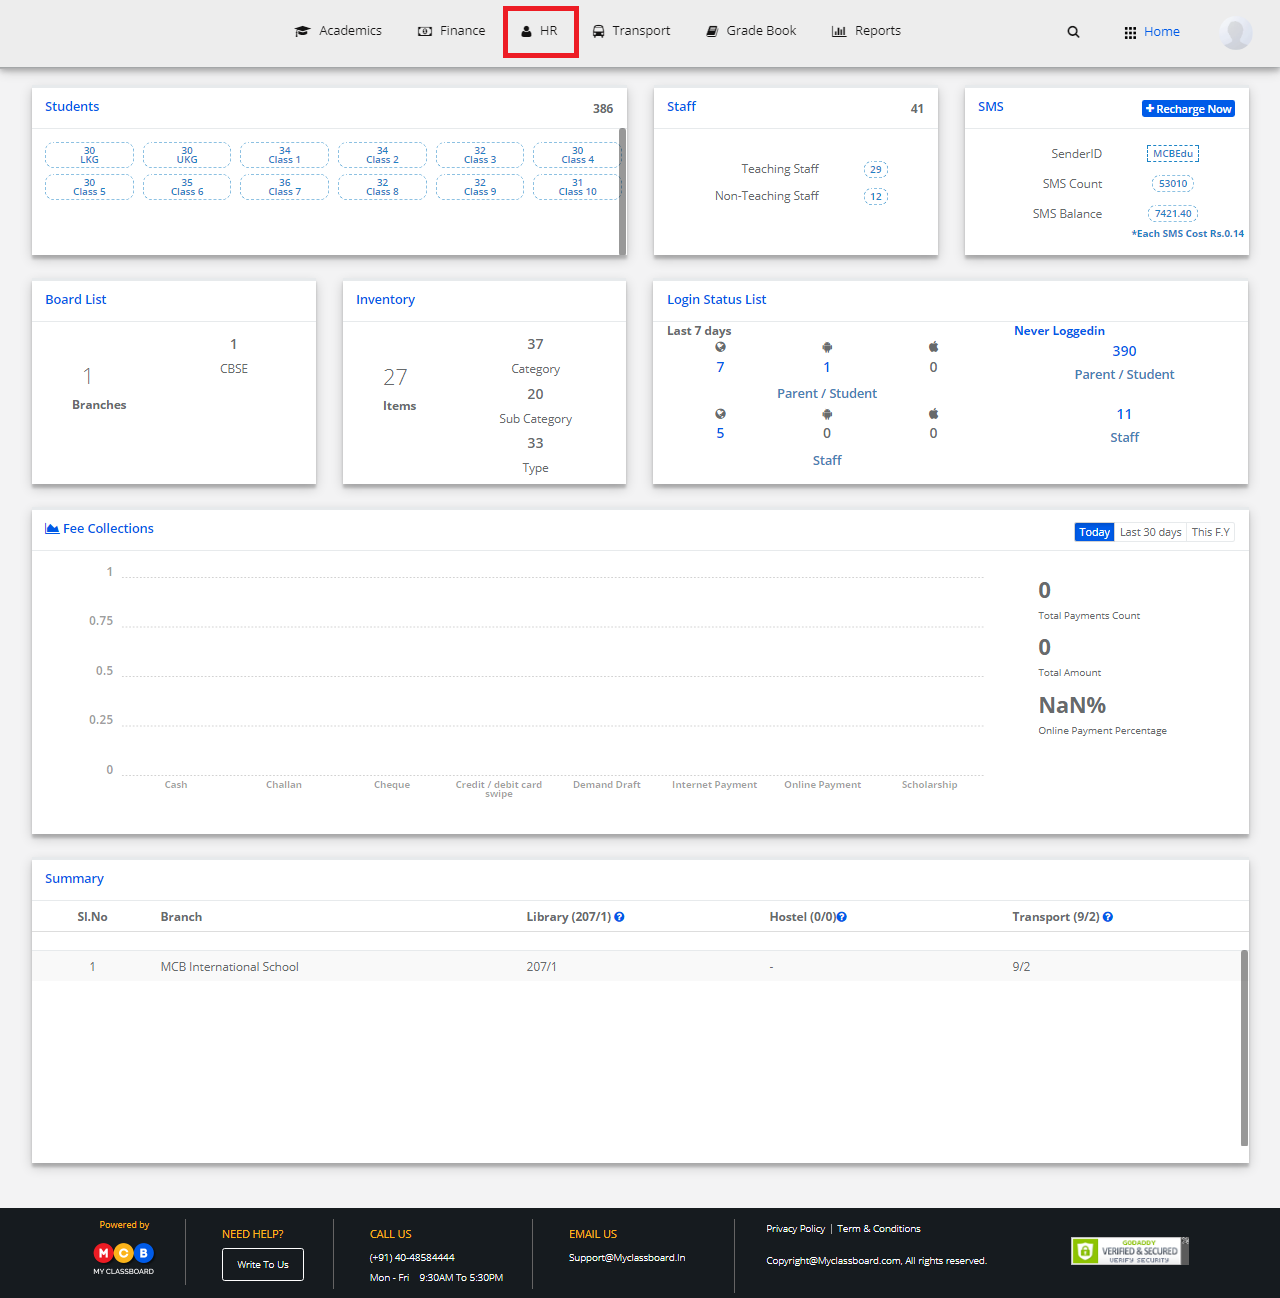
Step 2: Select “HR” on the top bar of the dashboard. You will be directed to the HR page.

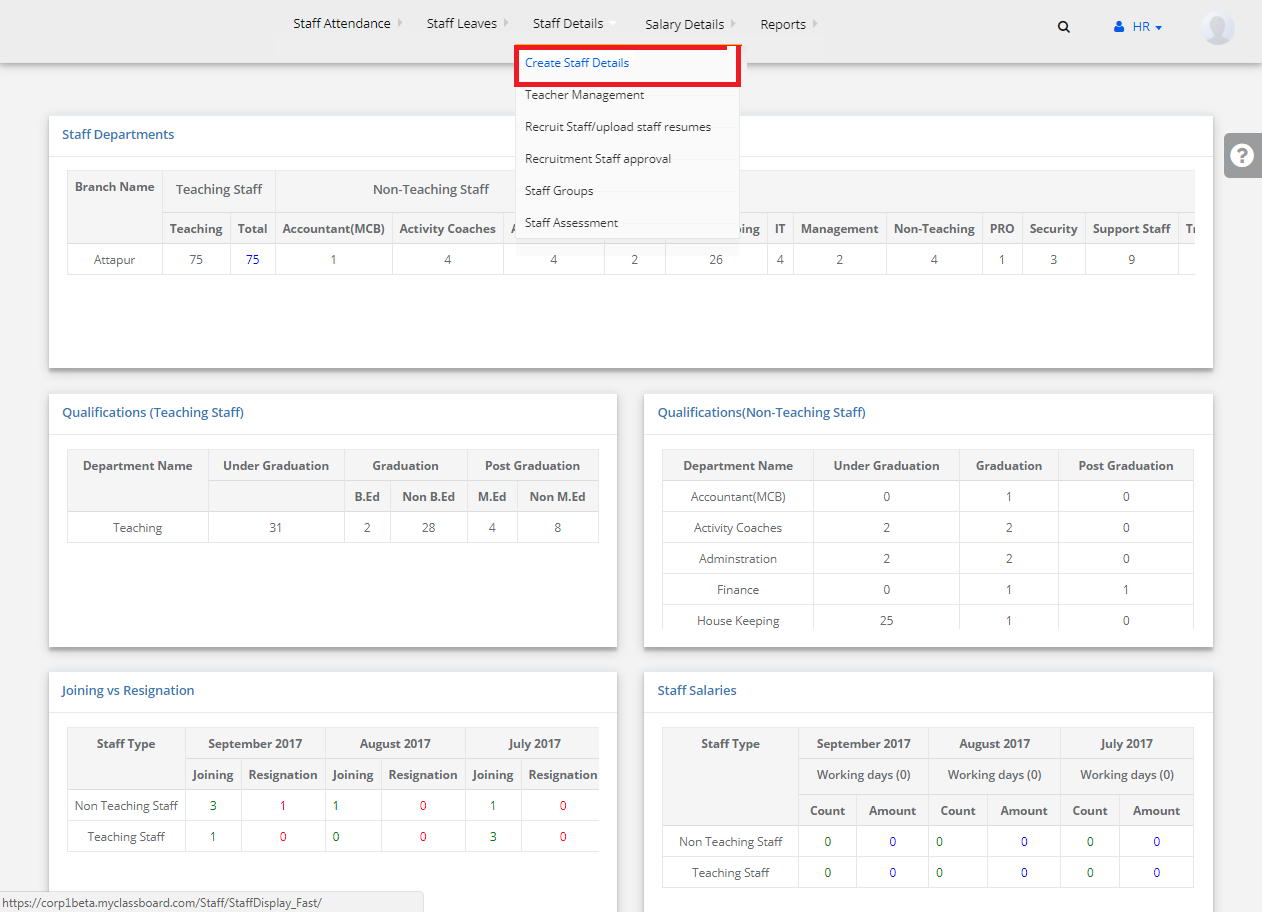
Step 3: Select “Staff Details” on the top bar and choose “Create Staff Details”.

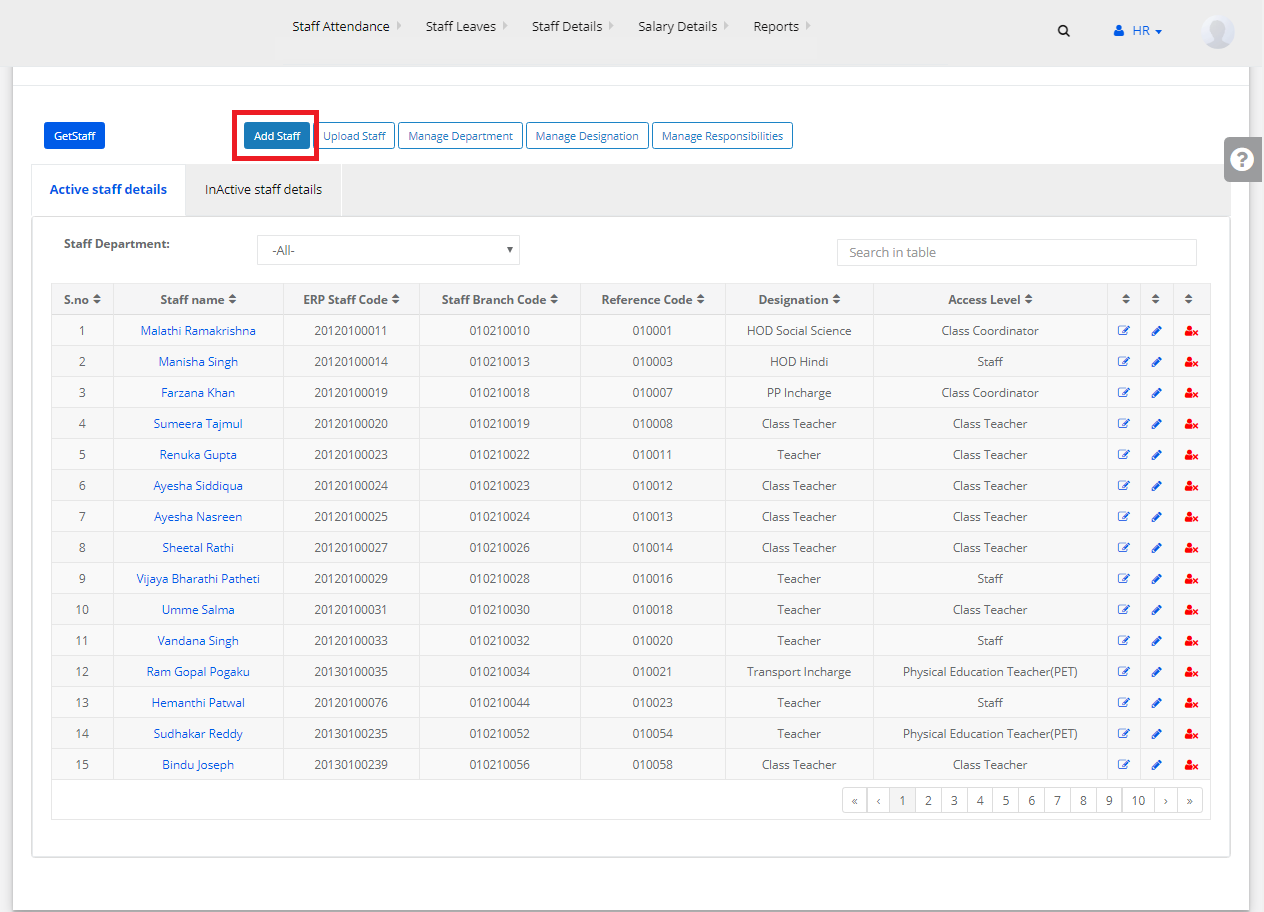
Step 4: Select “Add Staff”.

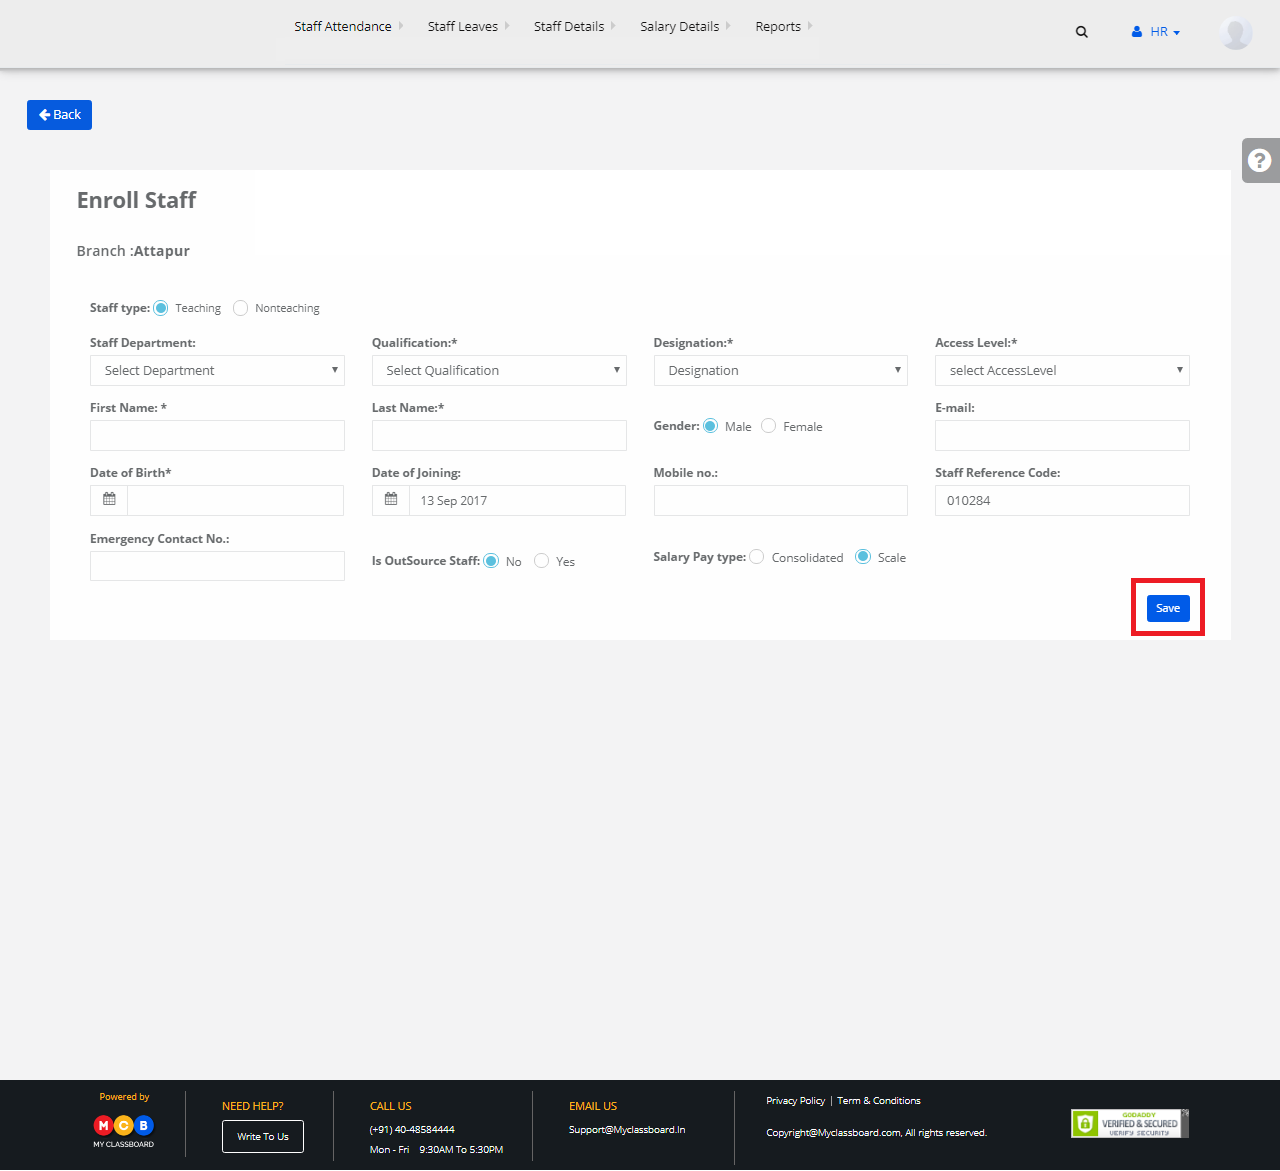
Step 5: Enter all the adequate details of the staff here and click on “Save” button.

The Staff information is successfully added.

Upload Staff Details

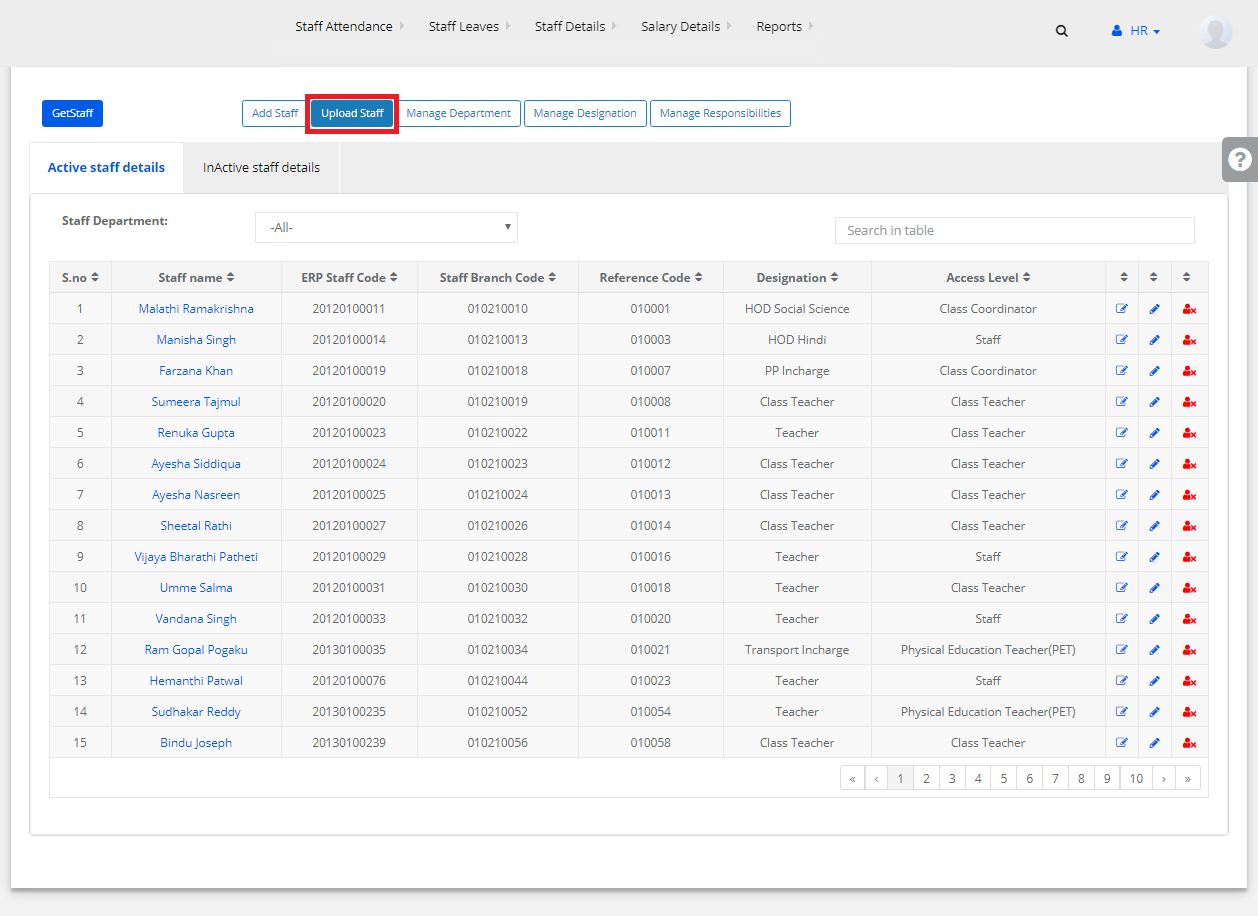
Step 1: Go back to the “Create Staff Details” page. Select “Upload Staff”.

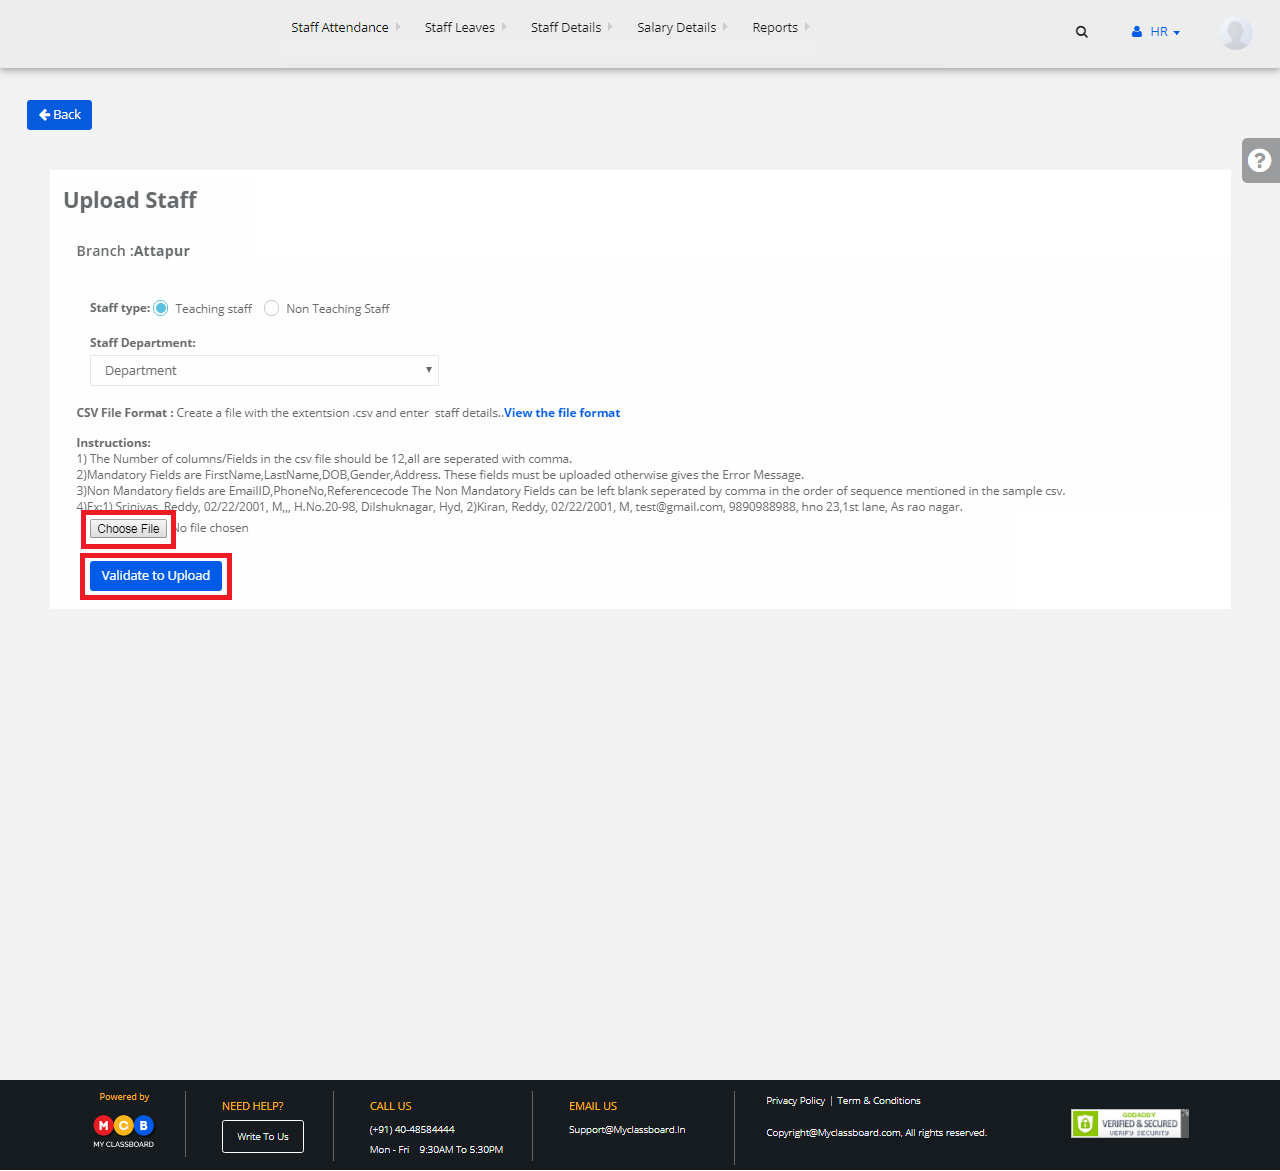
Step 2: Select Staff Type, Department and click on “Choose File” to upload a CSV File Format. Upon choosing, click on Validate to Upload.

The staff details are uploaded.

To Add/Create a New Staff Department

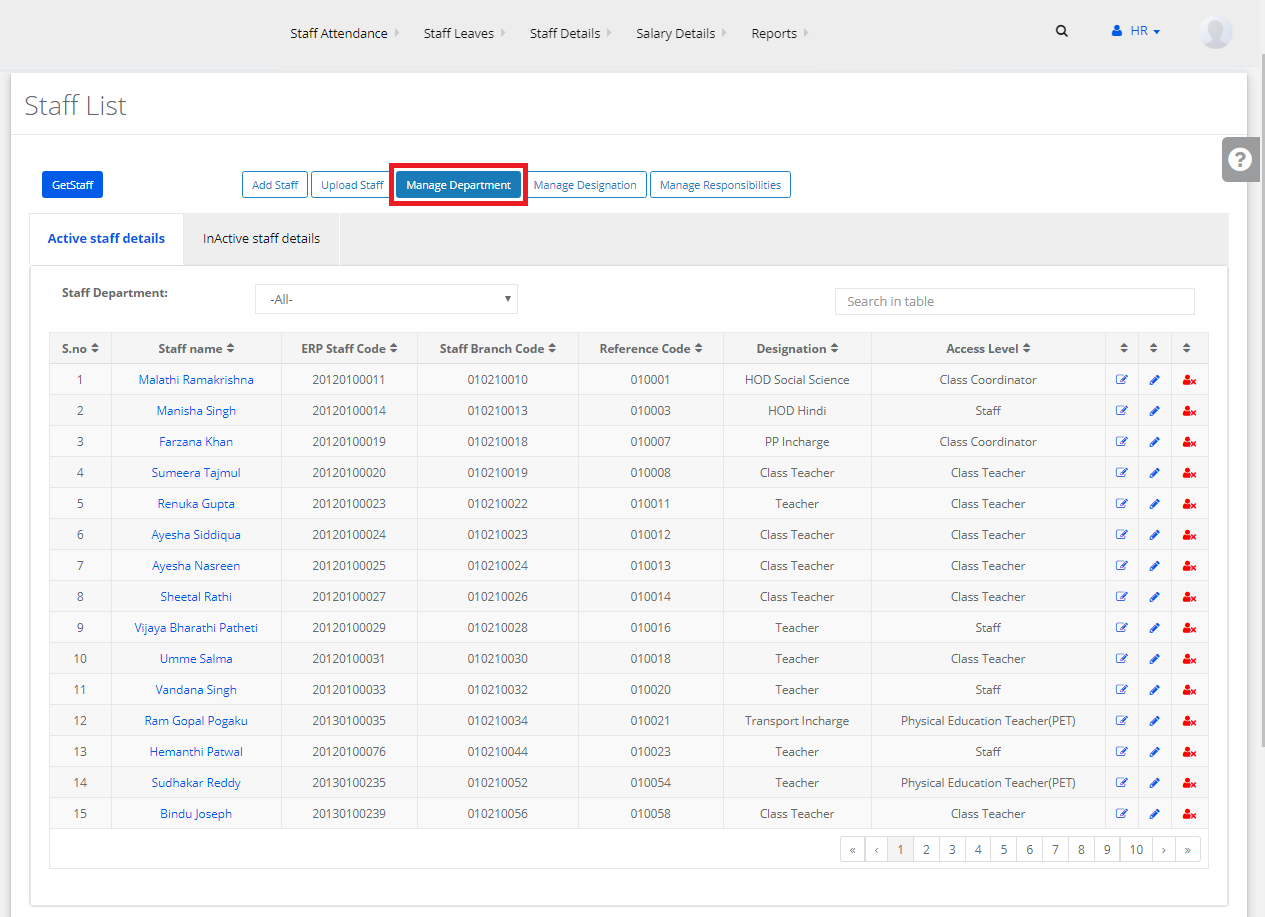
Step 1: Go back to the “Create Staff Details” page. Select “Manage Department”.

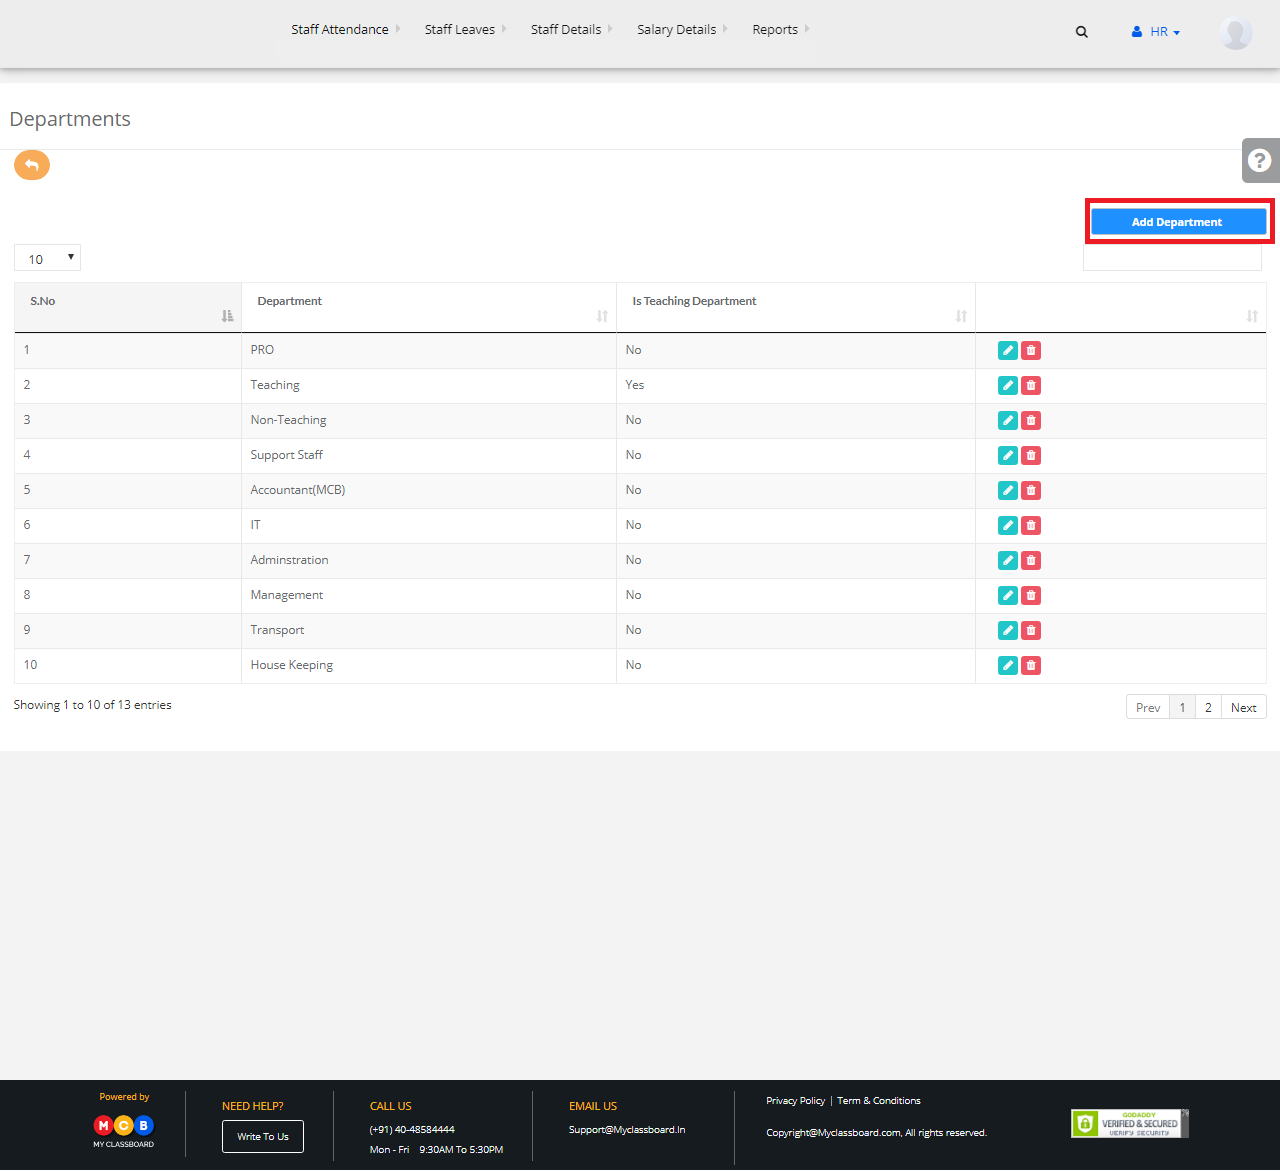
Step 2: Click on “Add Department” to create a new staff department.

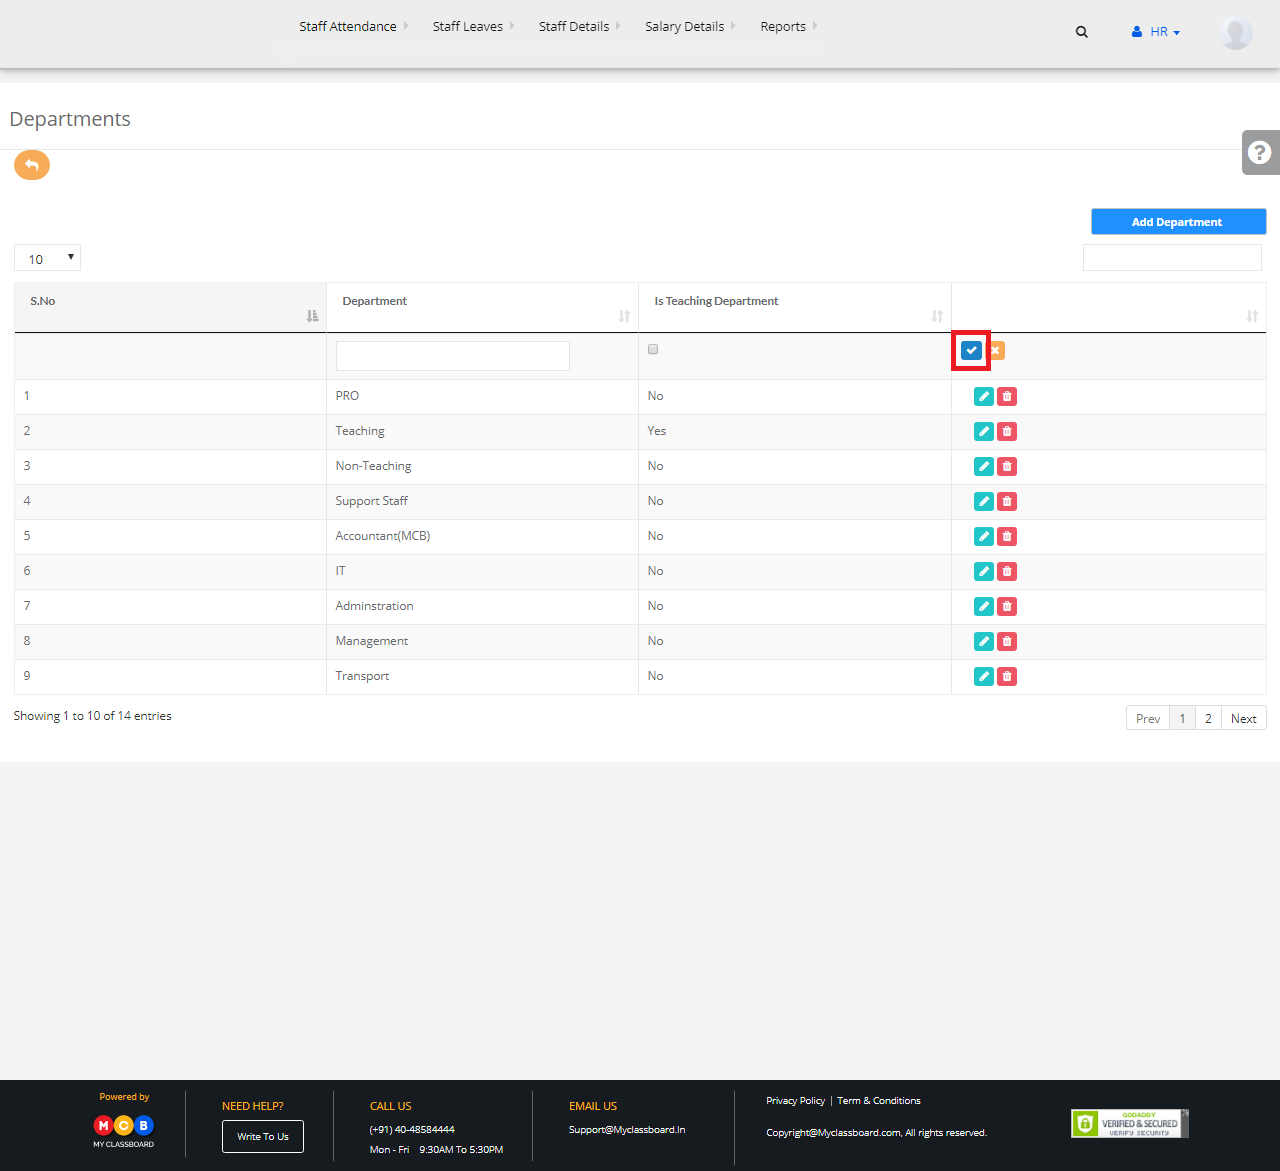
Step 3: Enter the required details here and click on “Save” button.

Step 4: The new staff department is added successfully.

To Add/Create a New Designation

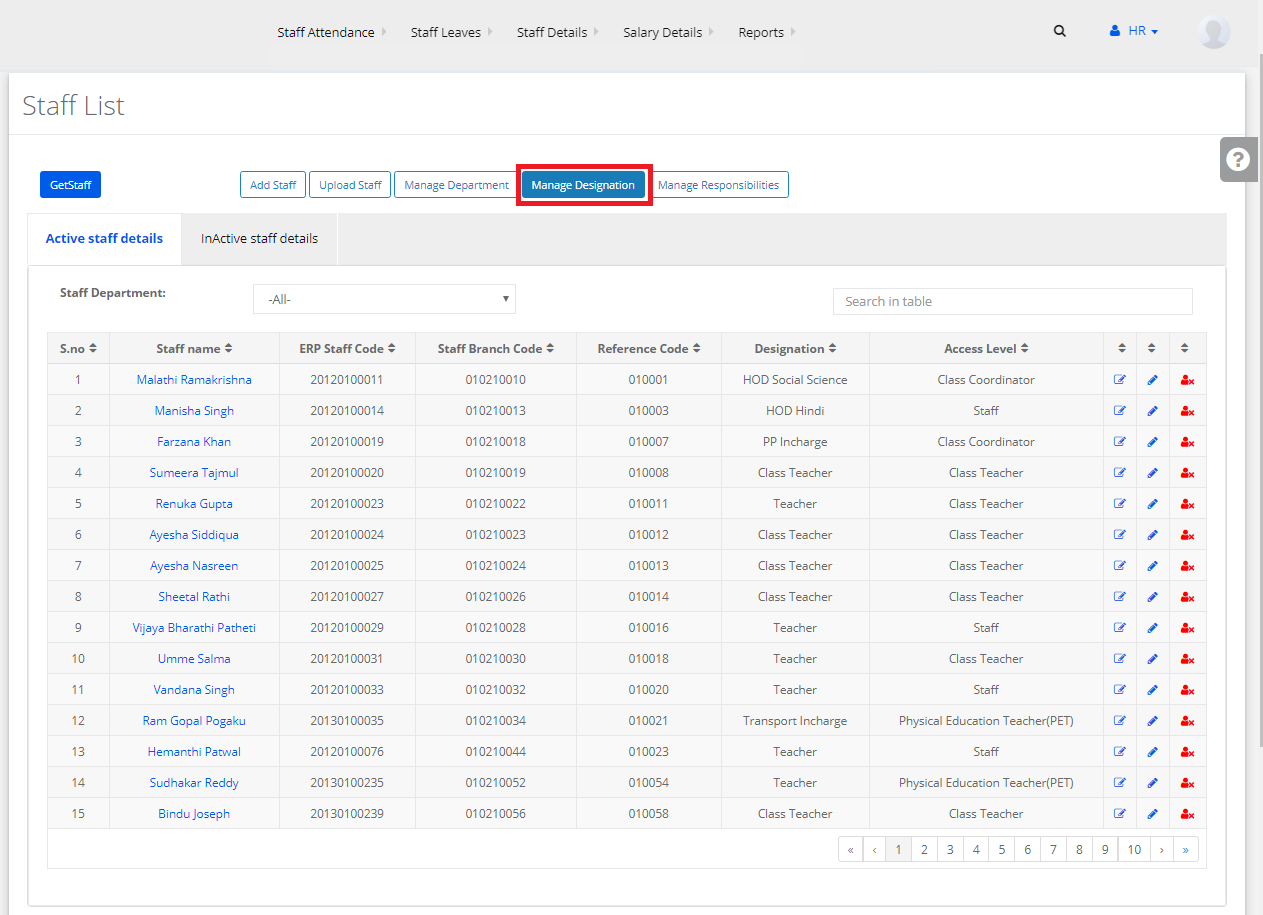
Step 1: Go back to the “Create Staff Details” page. Select “Manage Designation”.

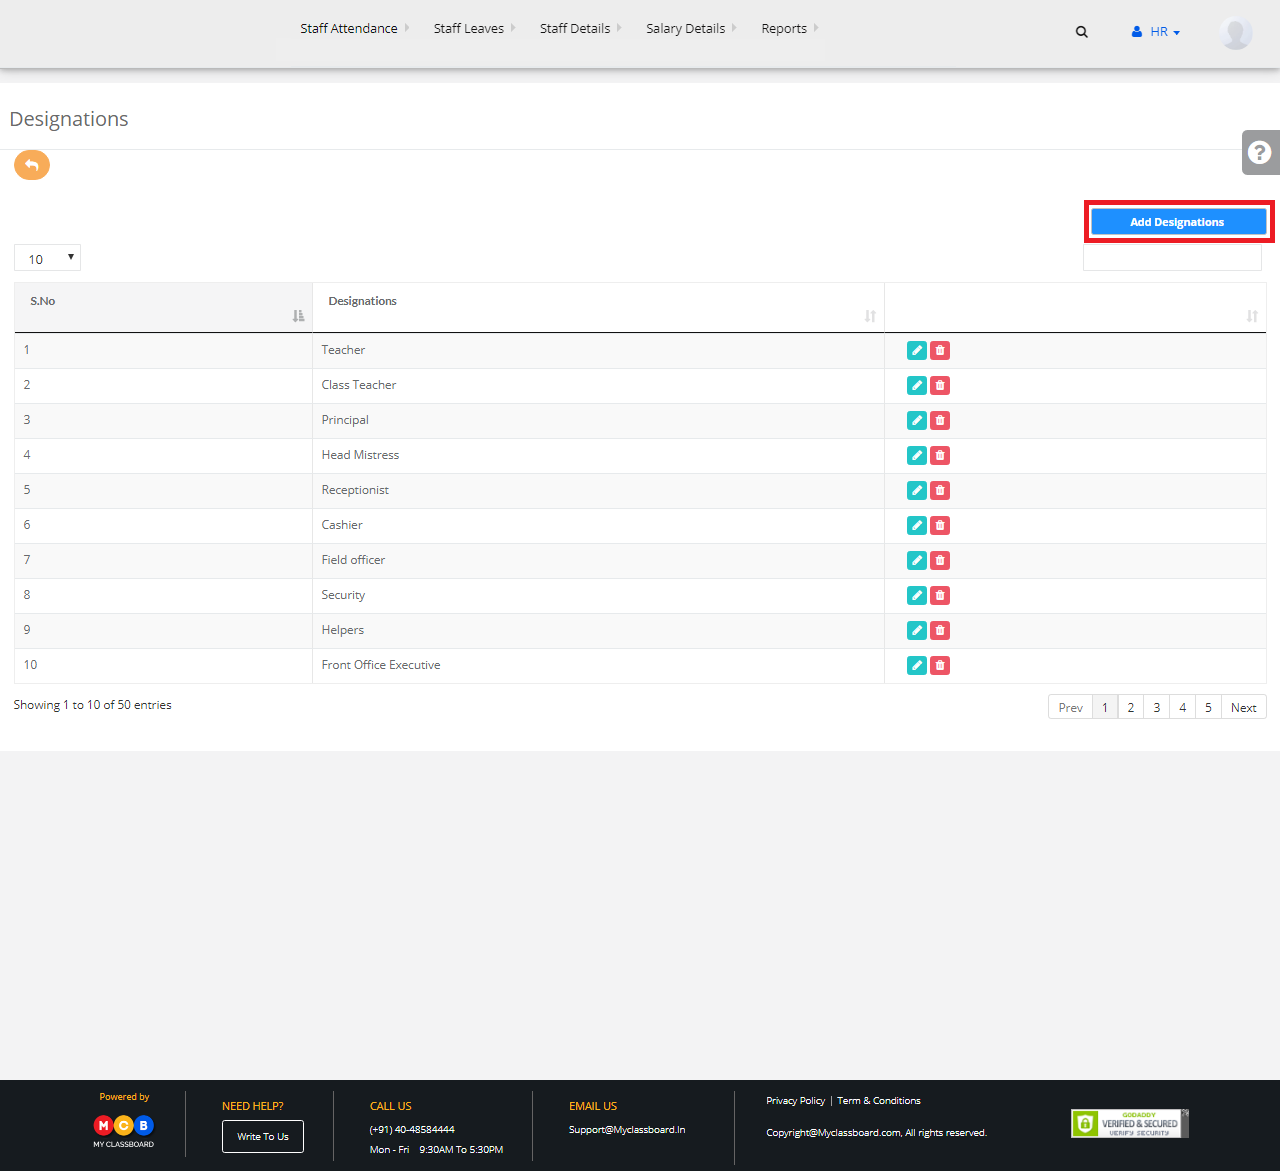
Step 2: Click on “Add Designation” to create a new designation to the staff.

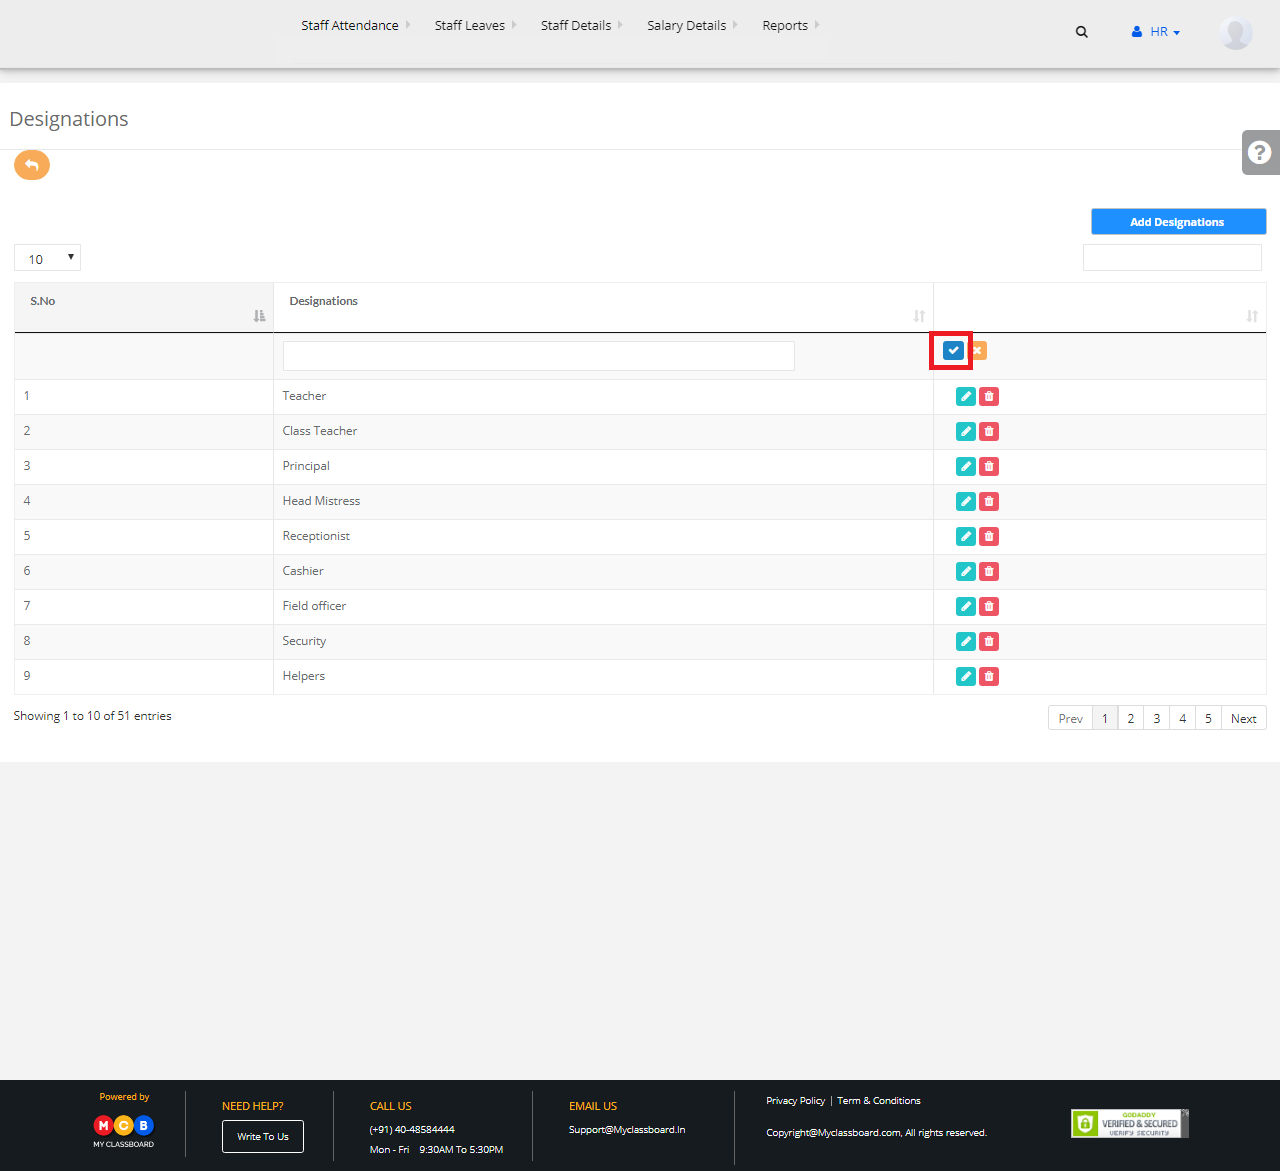
Step 3: Enter the required details here and click on “Save” button.

Step 4: The new designation is added successfully.

To Add/Create New Responsibilities

Step 1: Go back to the “Create Staff Details” page. Select Branch and click on “Manage Responsibilities”.

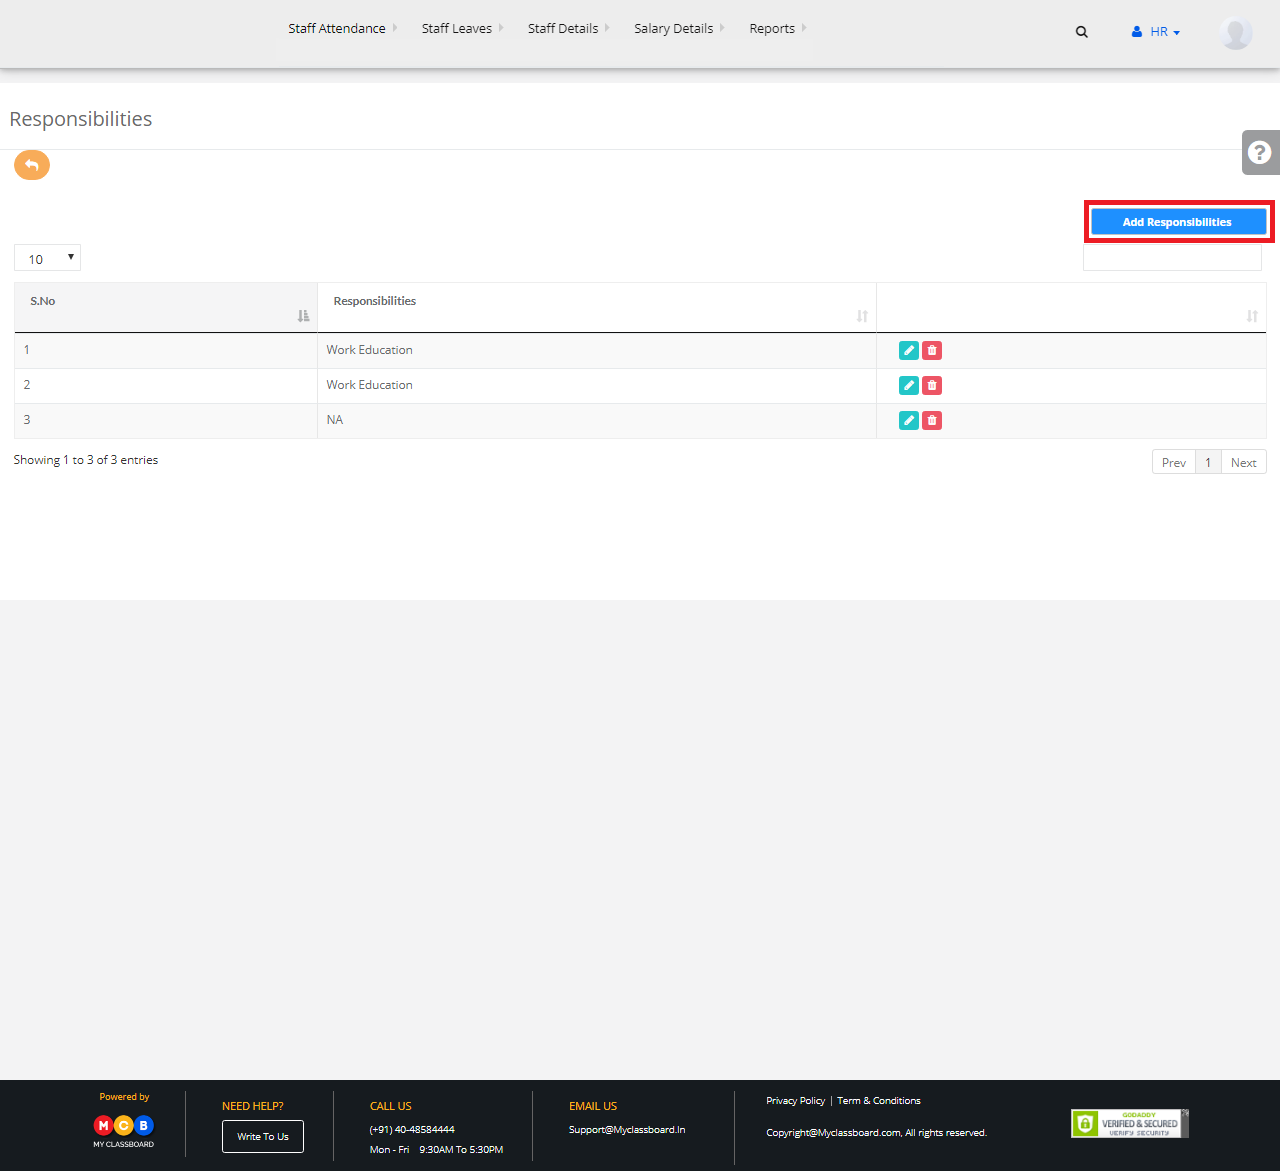
Step 2: Click on “Add Responsibilities” to create new responsibilities.

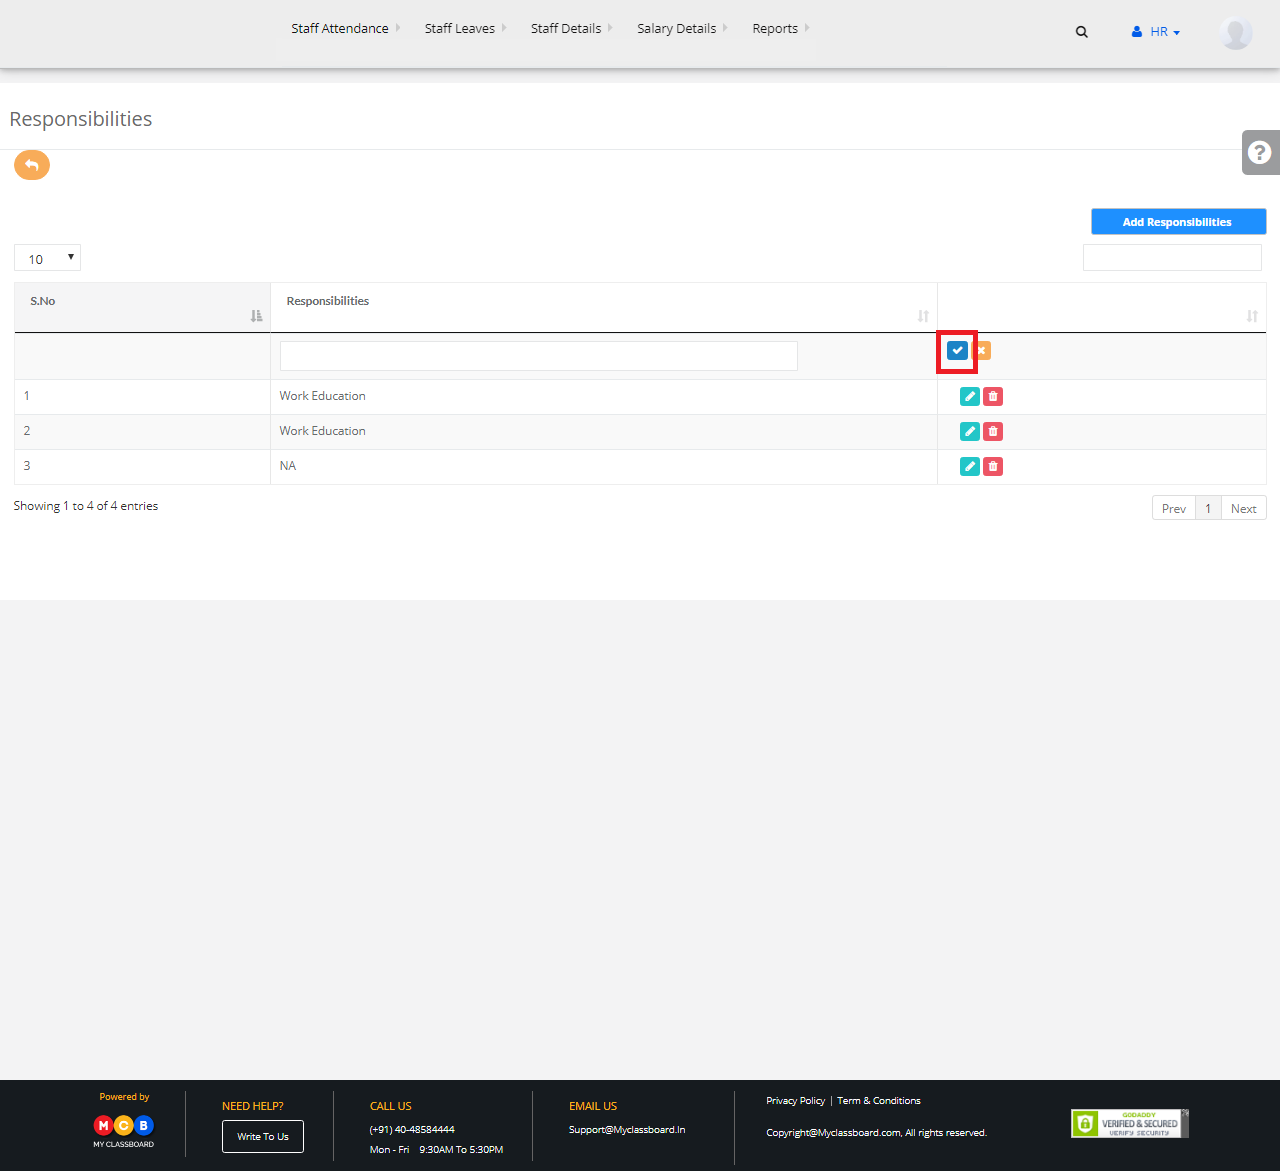
Step 3: Enter the required details here and click on “Save” button.

Step 4: The new responsibilities are added successfully.