How to Create and Edit Receipt Ranges?

Thank you for your recent inquiry about creating receipt ranges. Please follow the steps below:

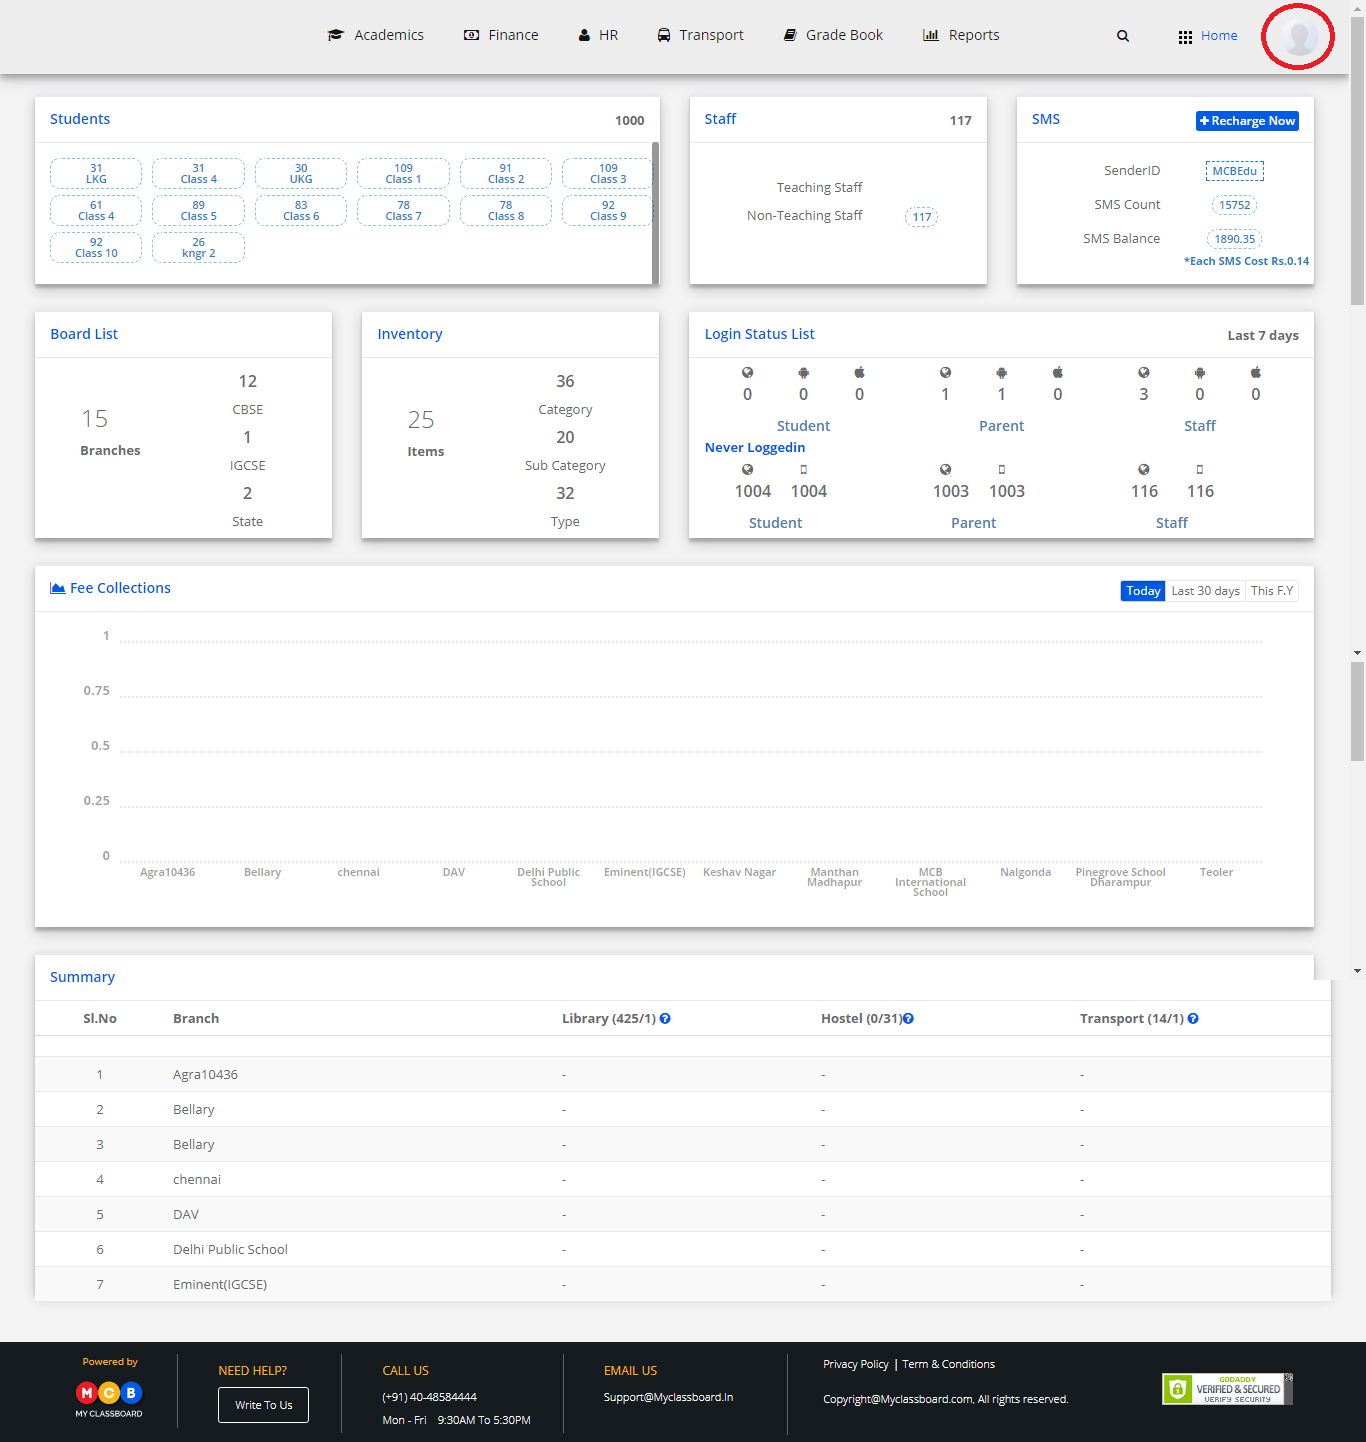
Create Receipt Range:

Step 1: Login to MCB with SysAdmin login credentials.

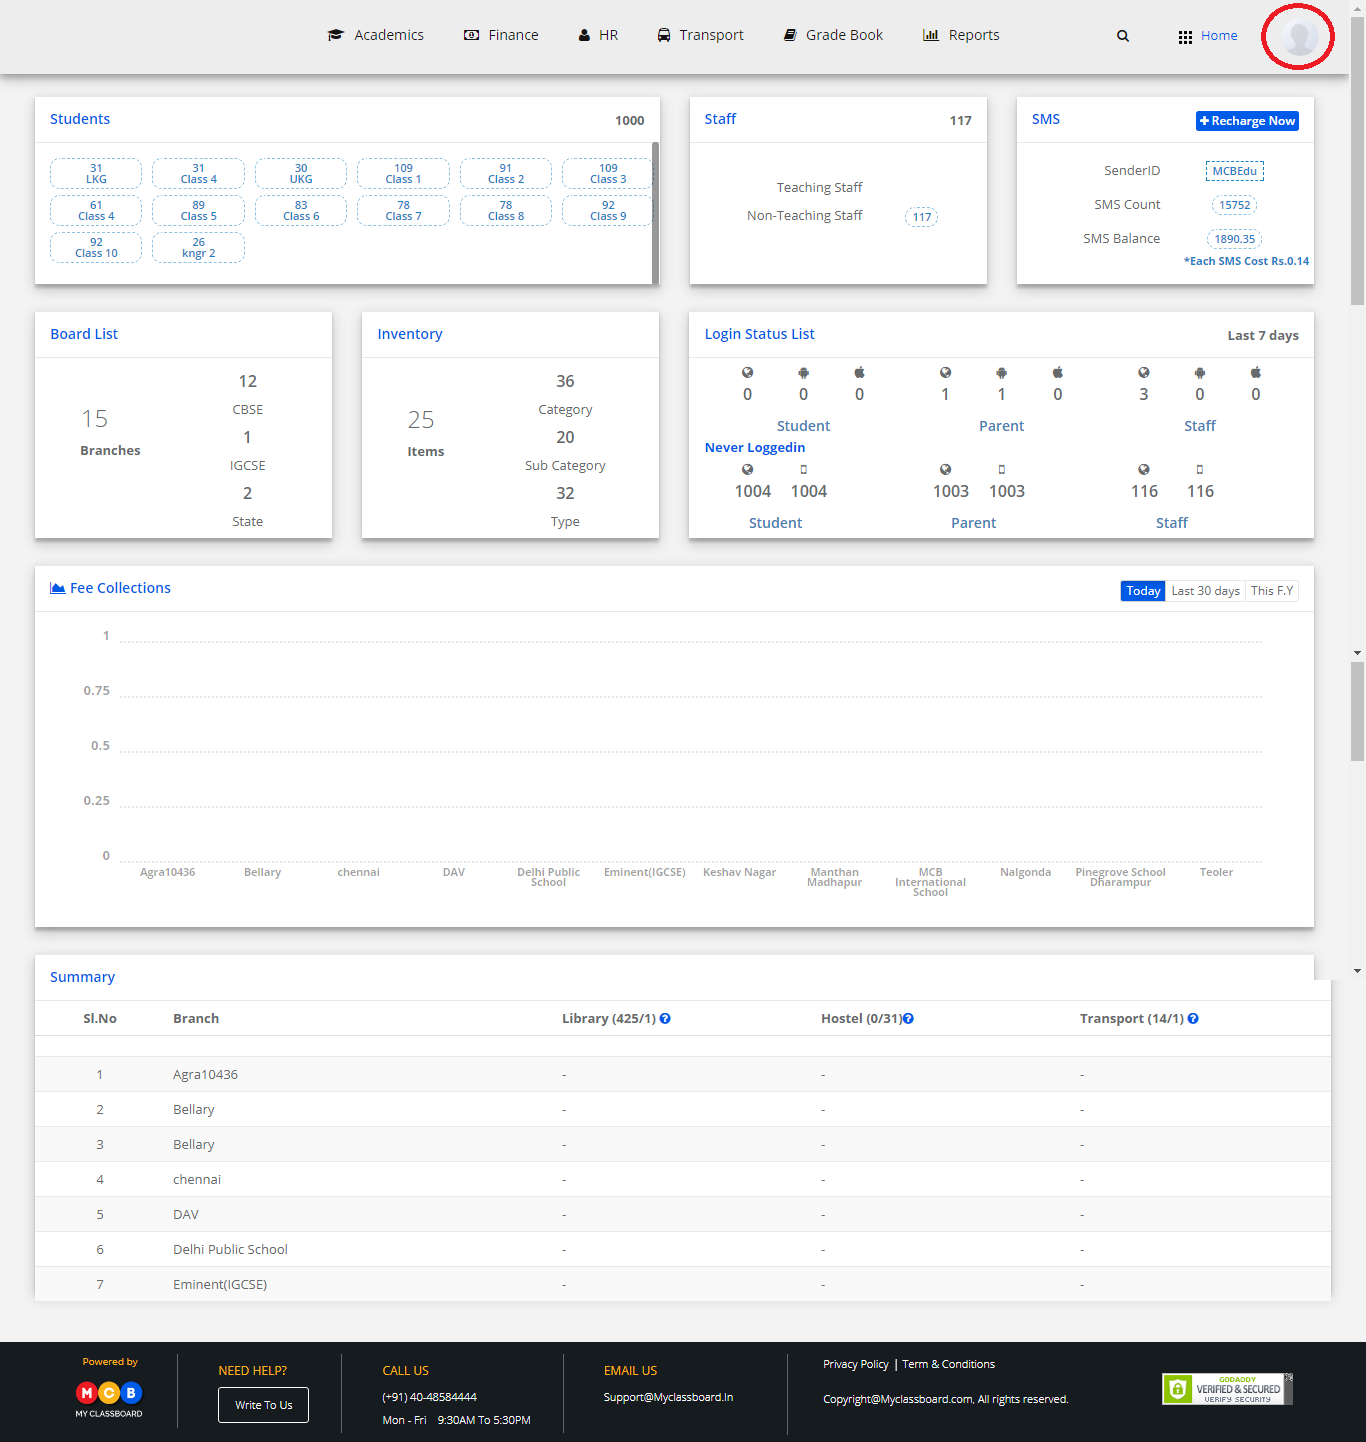
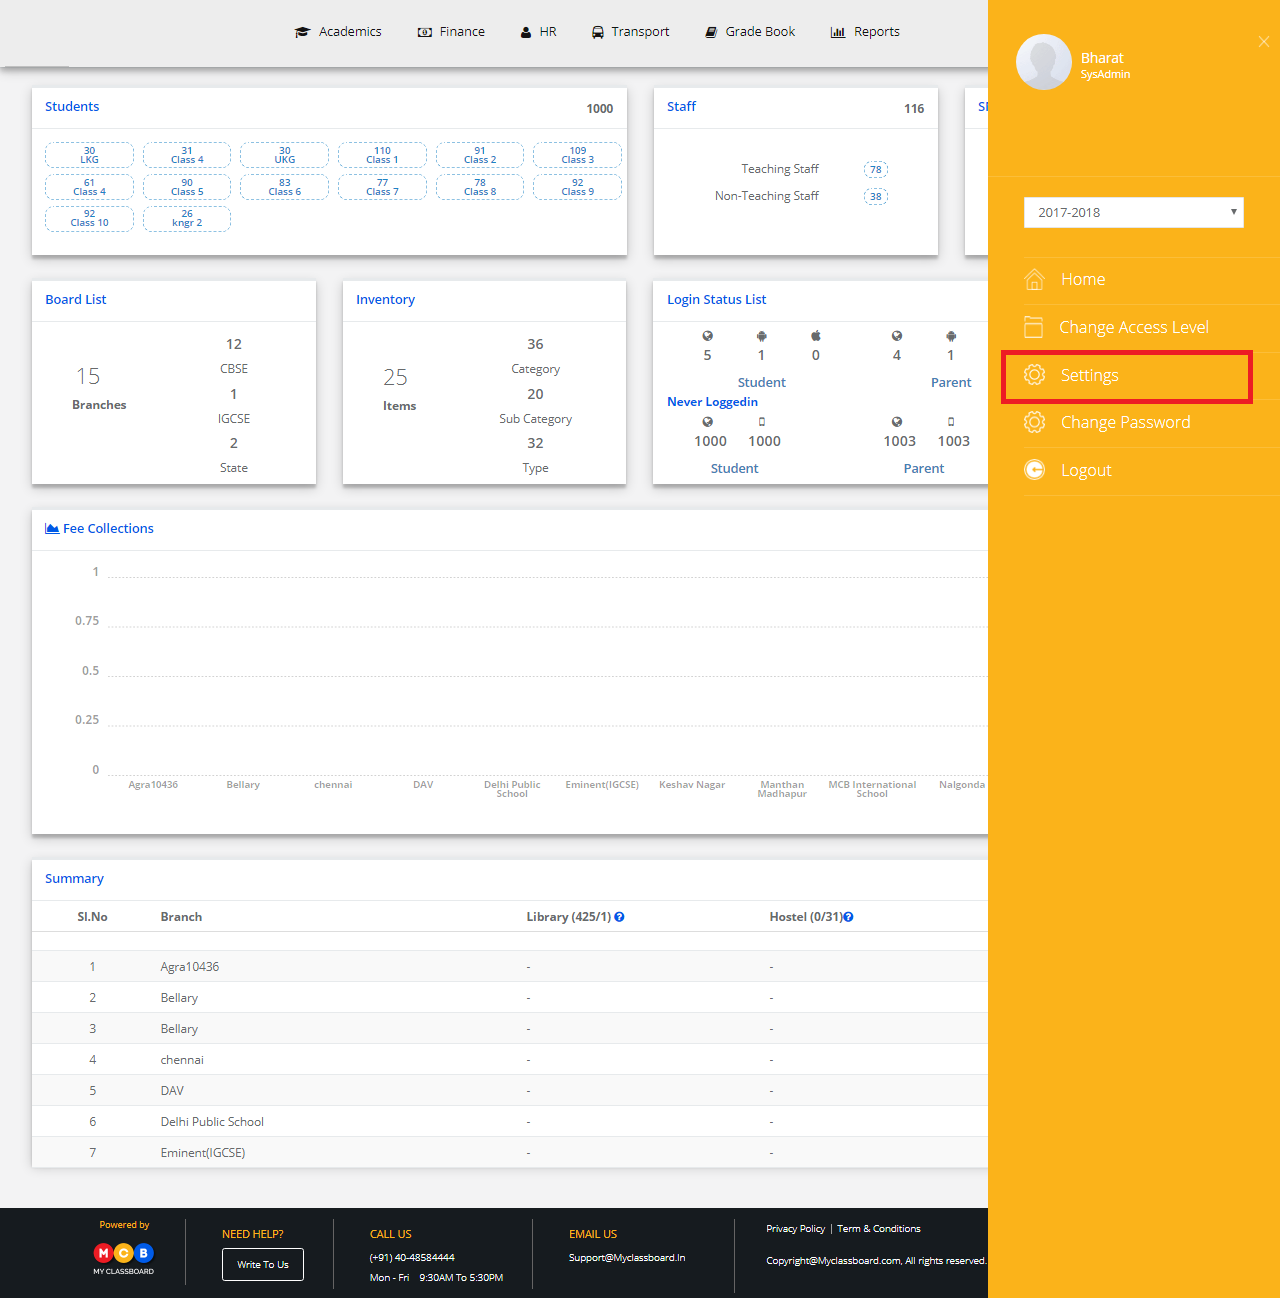
Step 2: Click on the “User Profile” icon on the right-hand top corner.
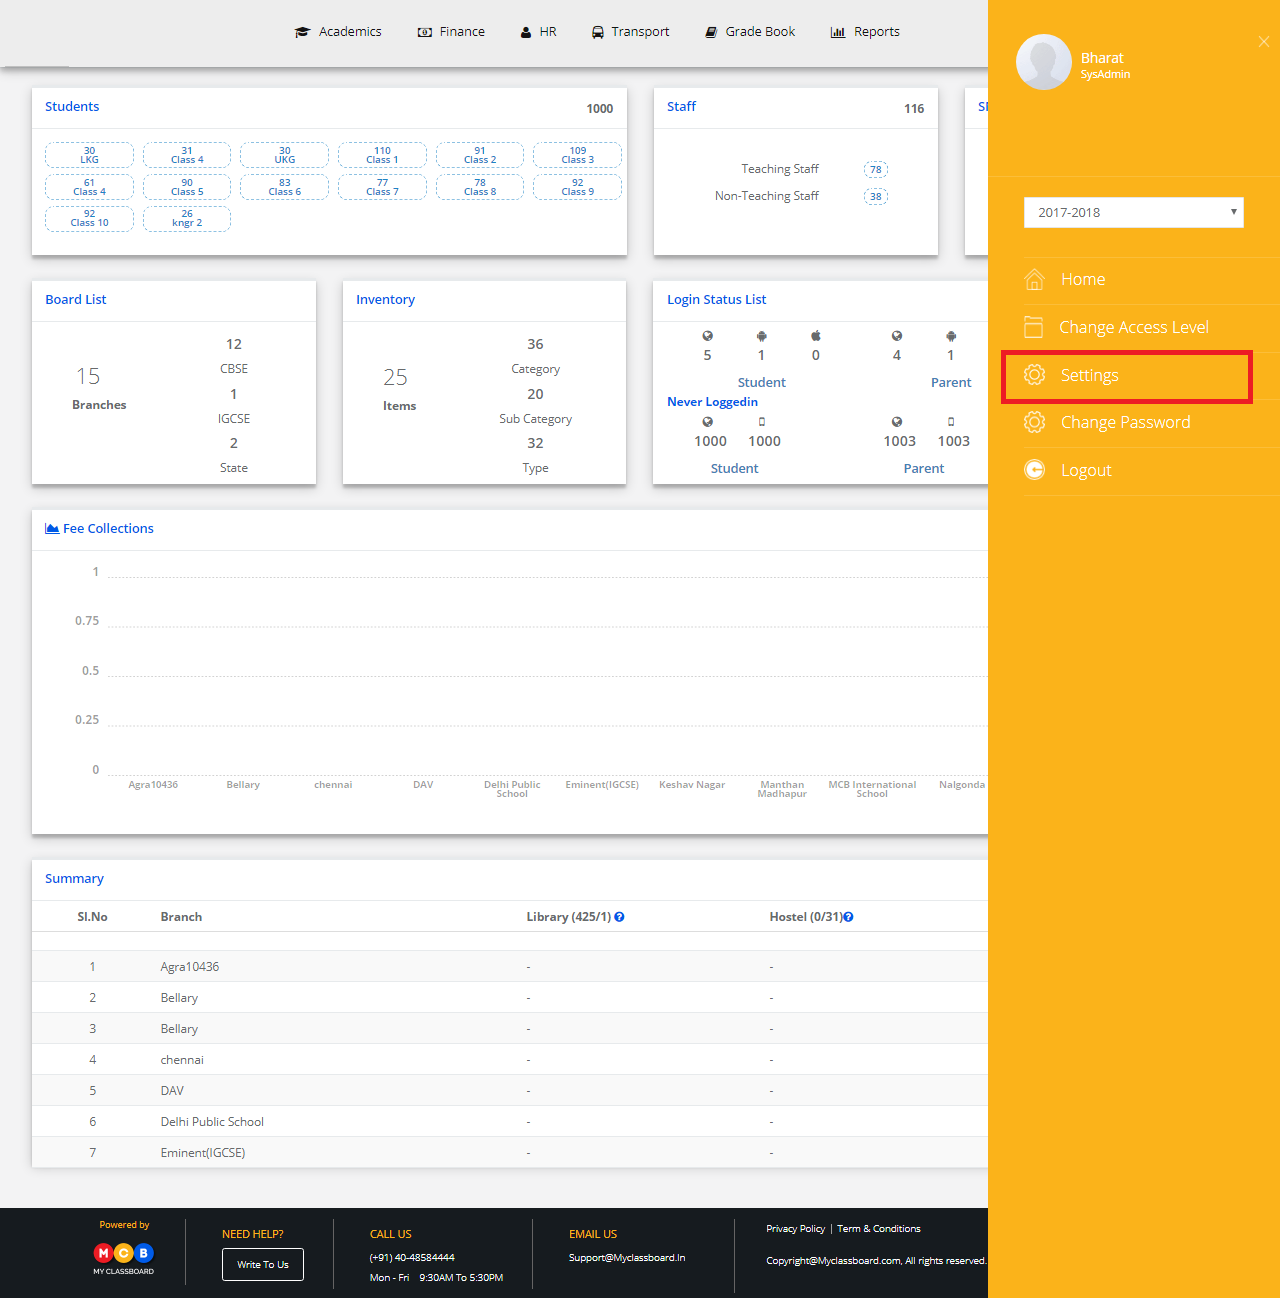
Step 3: Select “Settings”.
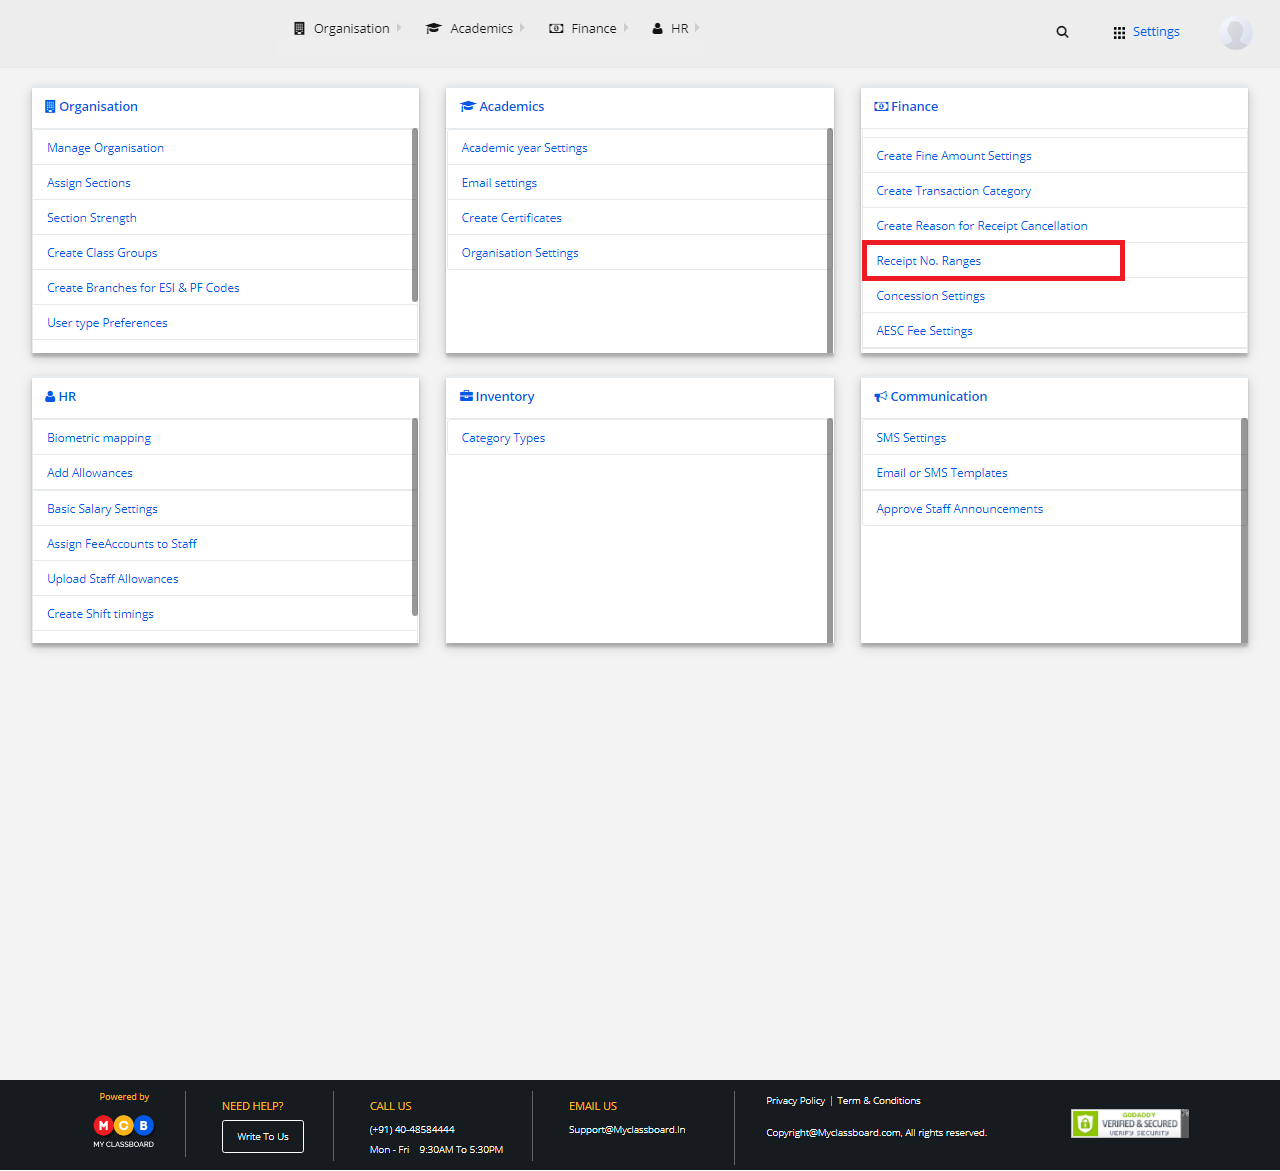
Step 4: Select Finance and click on “Receipt No. Ranges”.
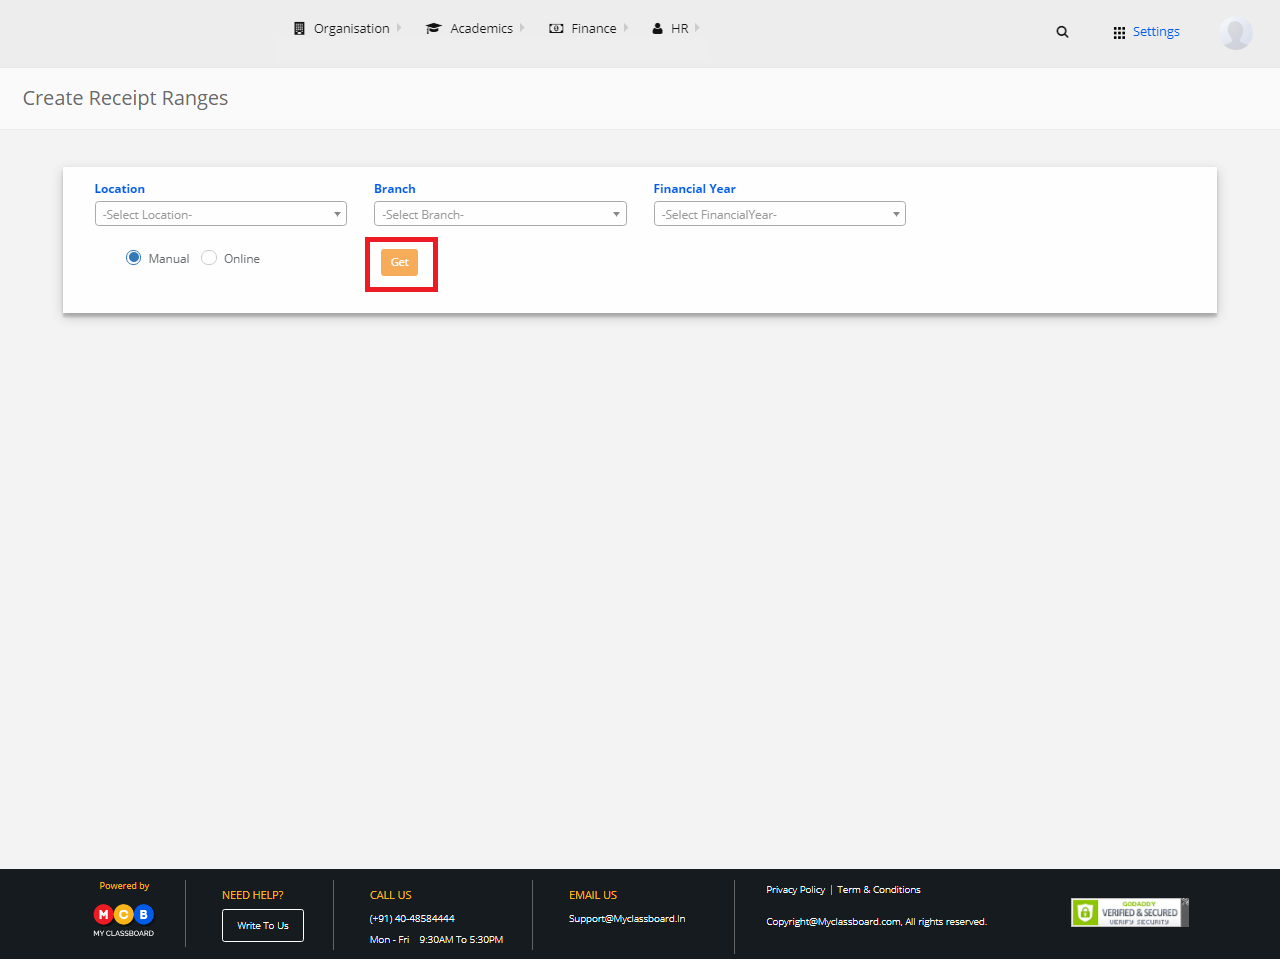
Step 5: Select Location, Branch, Financial Year, choose “Manual/Online” option and click on “Get”.
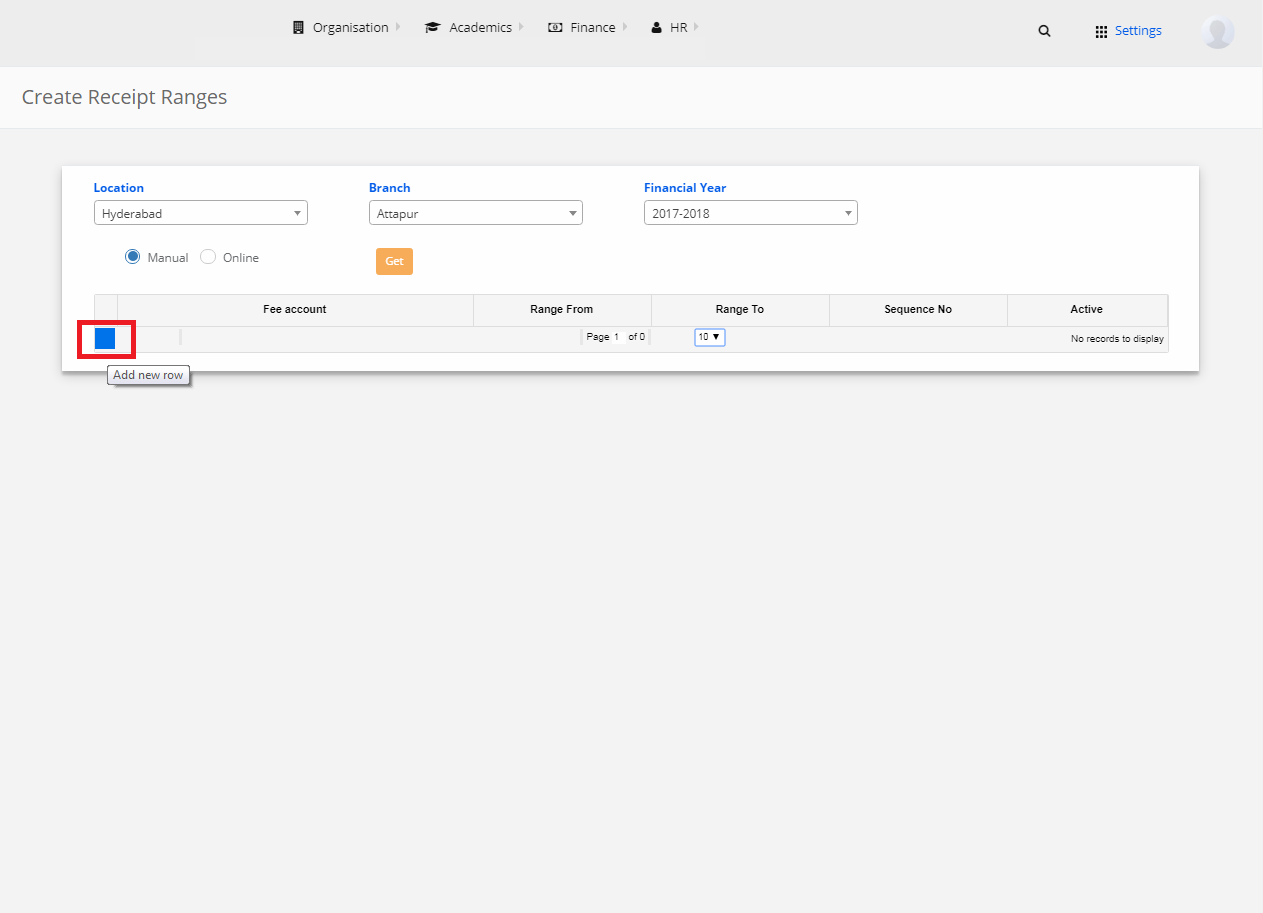
Step 6: Click on “Add New Row”.
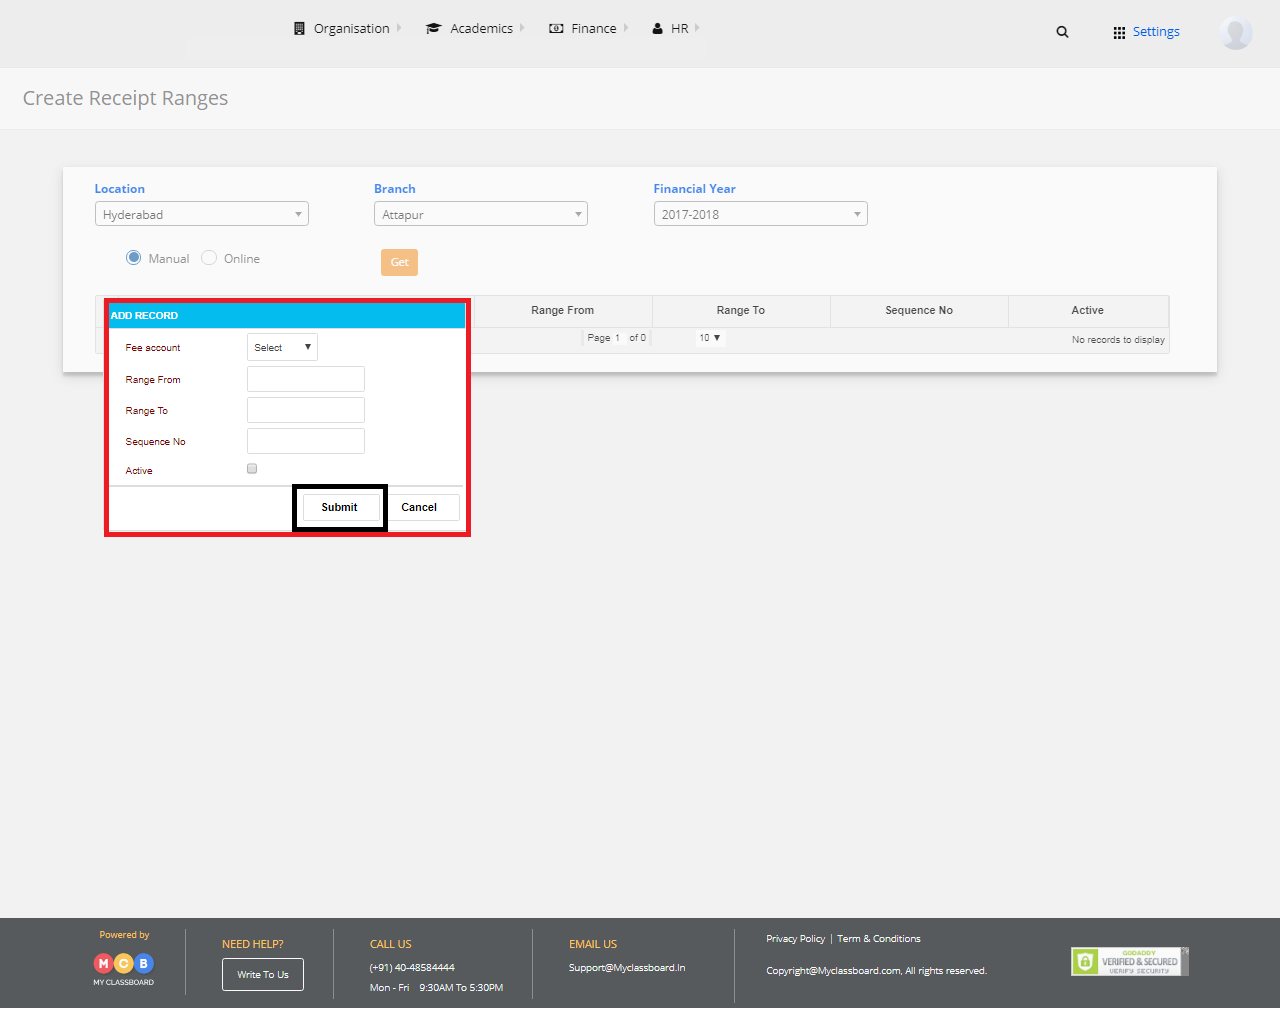
Step 7: Add a new record by giving Fee Account, Range From and To details and other information as required. After entering the required details, click on “Submit” to create the “Receipt Range”.
Edit Receipt Range:

Step 7: Select any row and click on “Edit Selected Row” to edit.

Step 8: Make the necessary changes and click on “Submit”.

Step 9: The changes are updated successfully.

Hope this helps. Please feel free to reply back to this email or call us at 040-48584444, should you need any further assistance.

How to Create Concession Settings?

Thank you for your recent inquiry on Creating Concession Settings. Please follow the steps below:

Step 1: Login to MCB with System Admin login credentials.

Step 2: Click on the “User Profile” icon on the right-hand top corner.

Step 3: Select “Settings”.

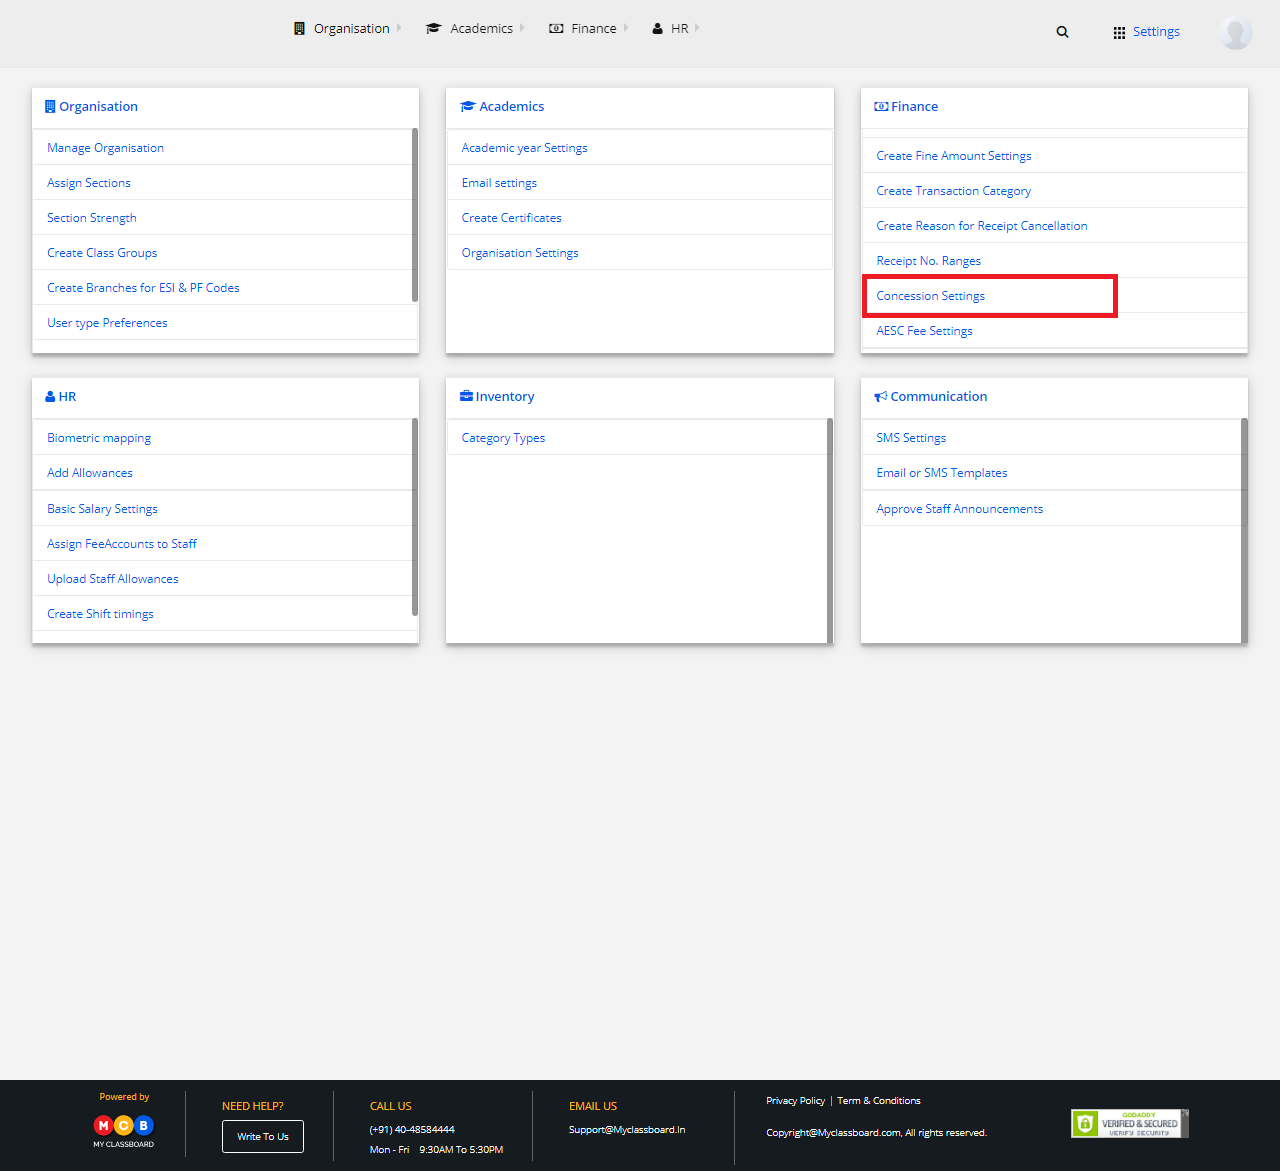
Step 4: Select “Finance” and click on “Concession Settings”.

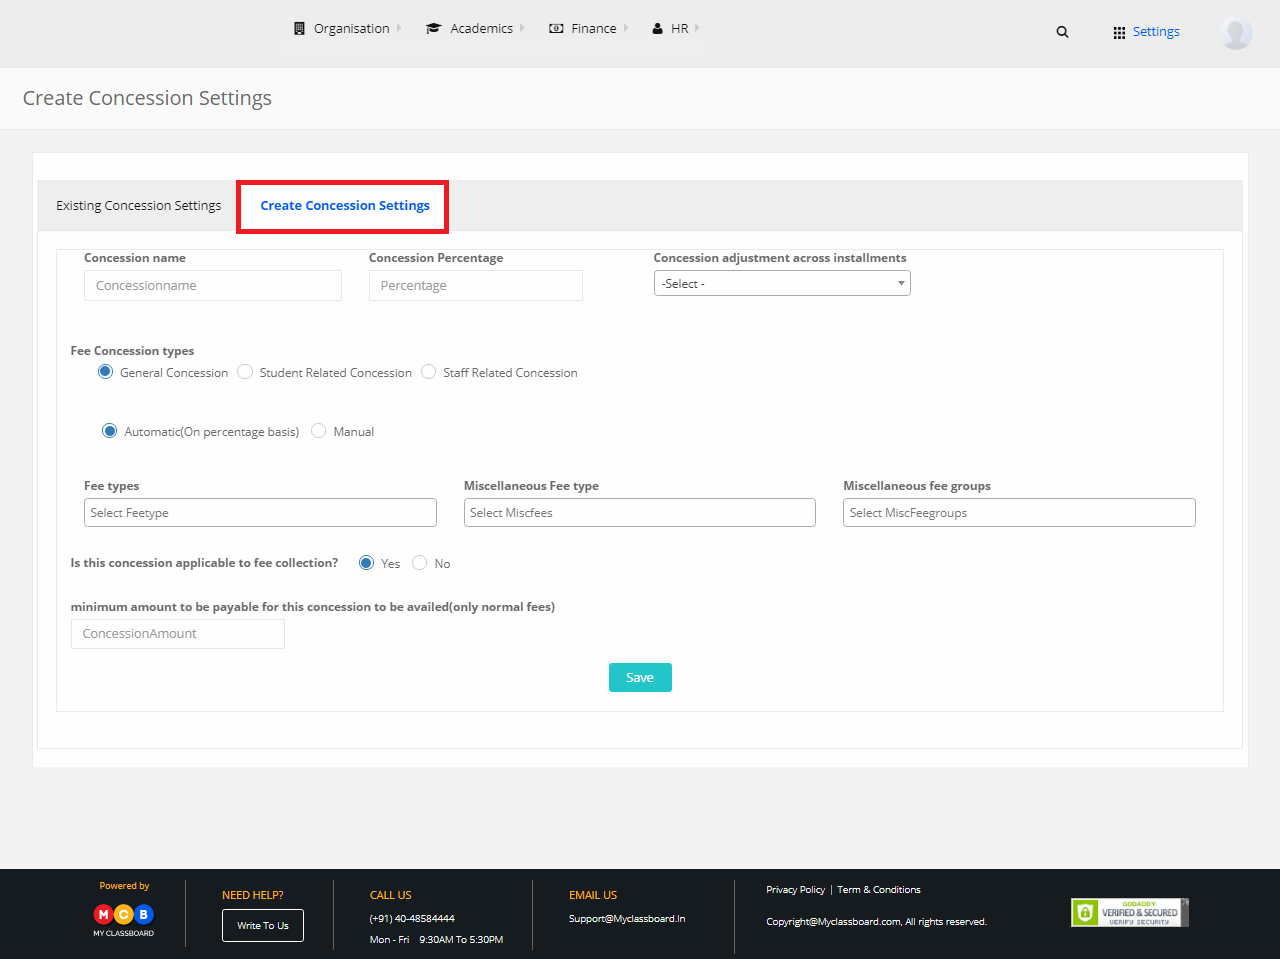
Step 5: Click on “Create Concession Settings” to add required fields like Concession name, Percentage and other necessary details.

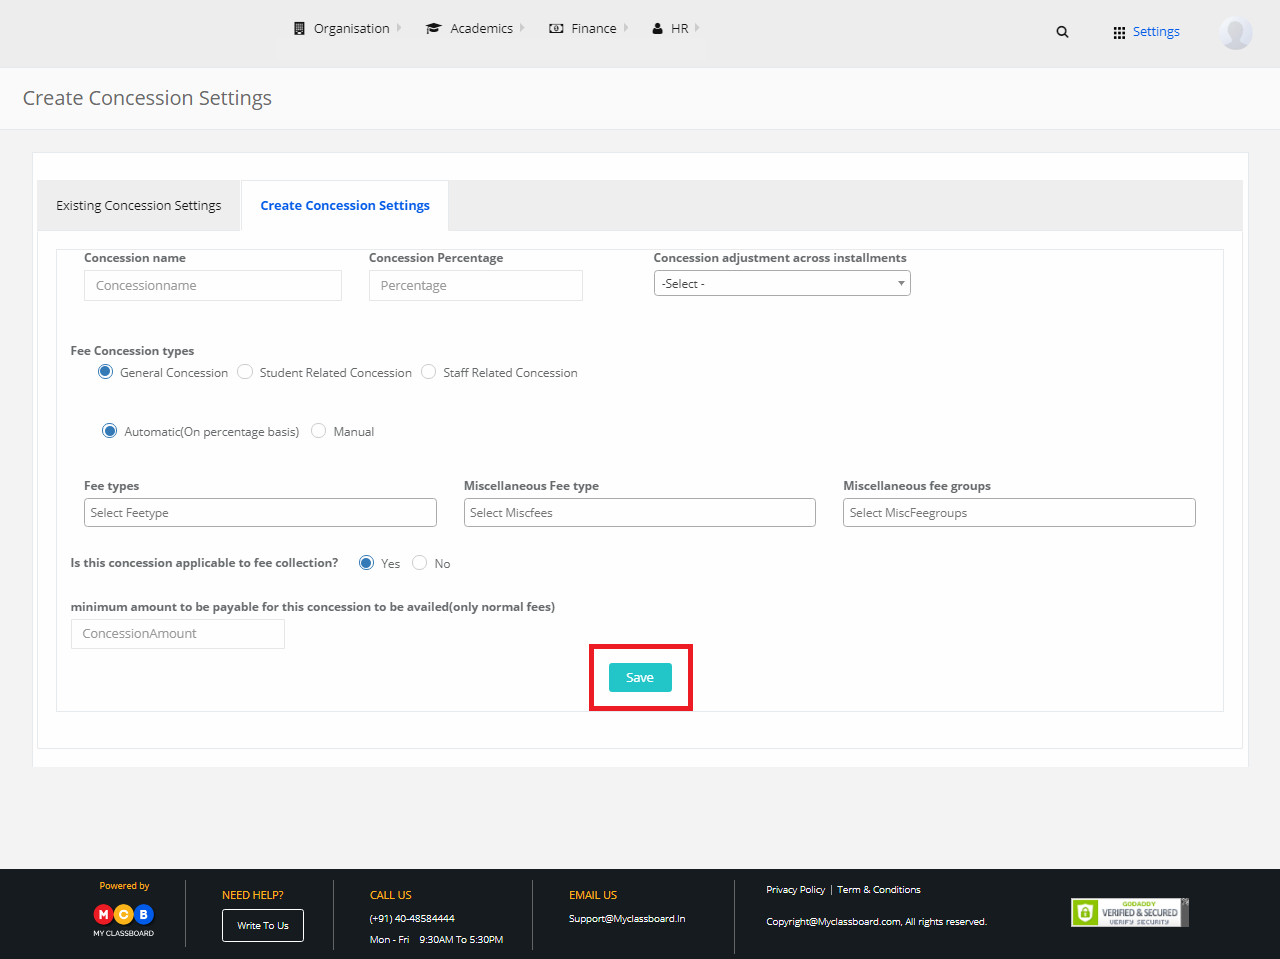
Step 6: After adding the required information, click on “Save”.

Step 7: The Concession Settings are created successfully.

Hope this helps. Please feel free to reply back to this email or call us at 040-48584444, should you need any further assistance.
How to create & edit Fee Plans?

Create Fee Plan:

Step 1: Login to MCB with System Admin login credentials.

Step 2: Click on the “User Profile” icon on the right-hand top corner.

Step 3: Select “Settings”.

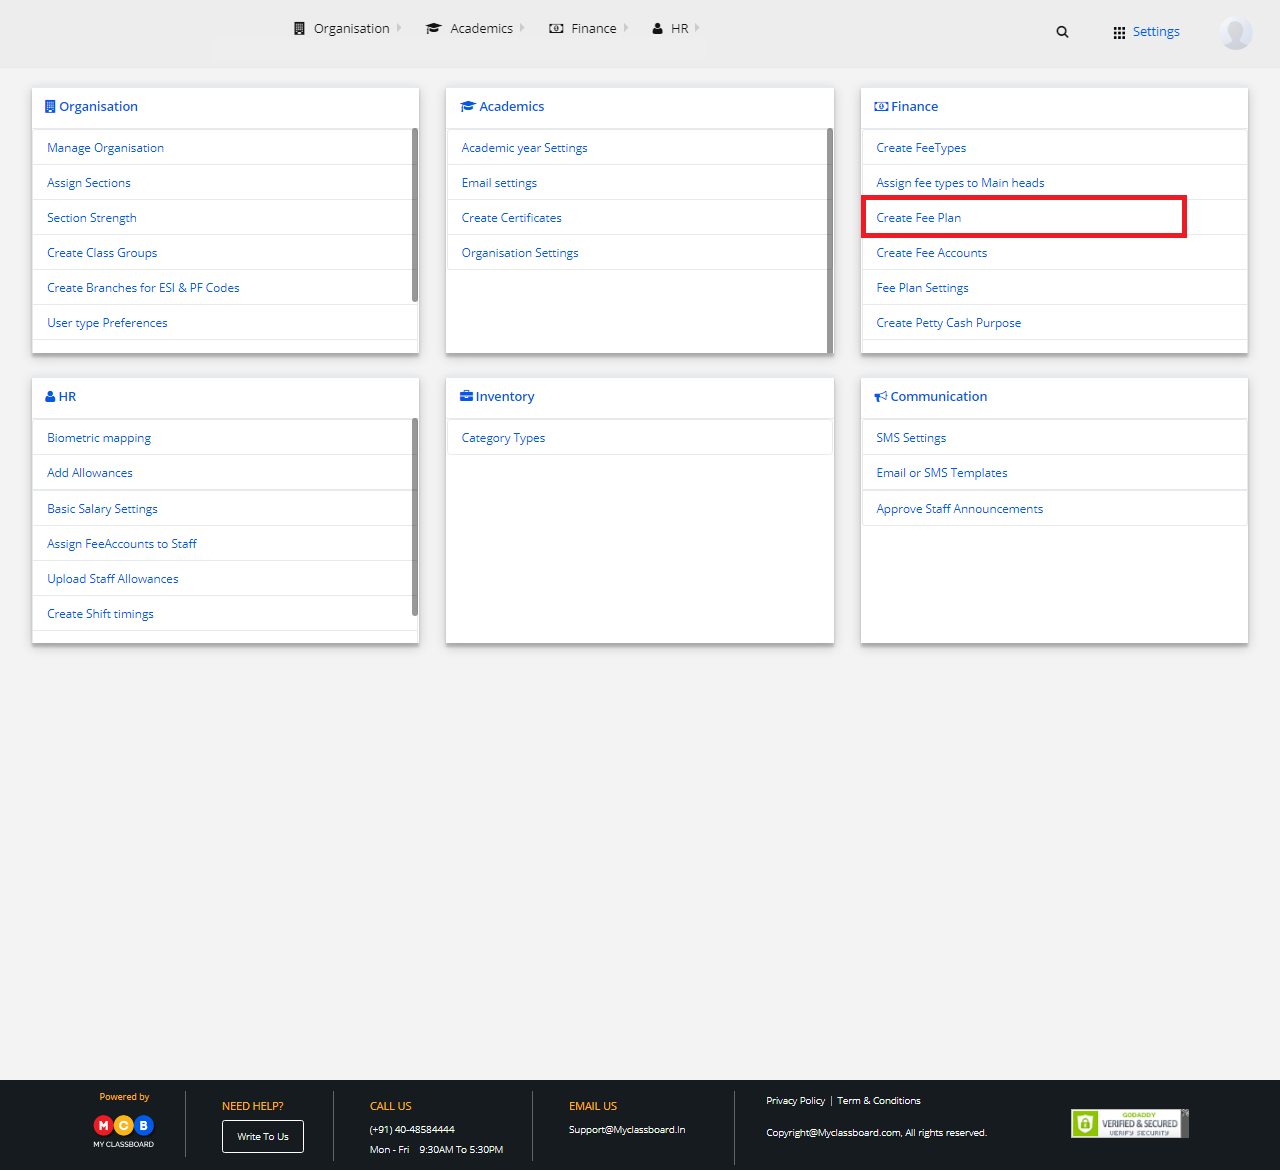
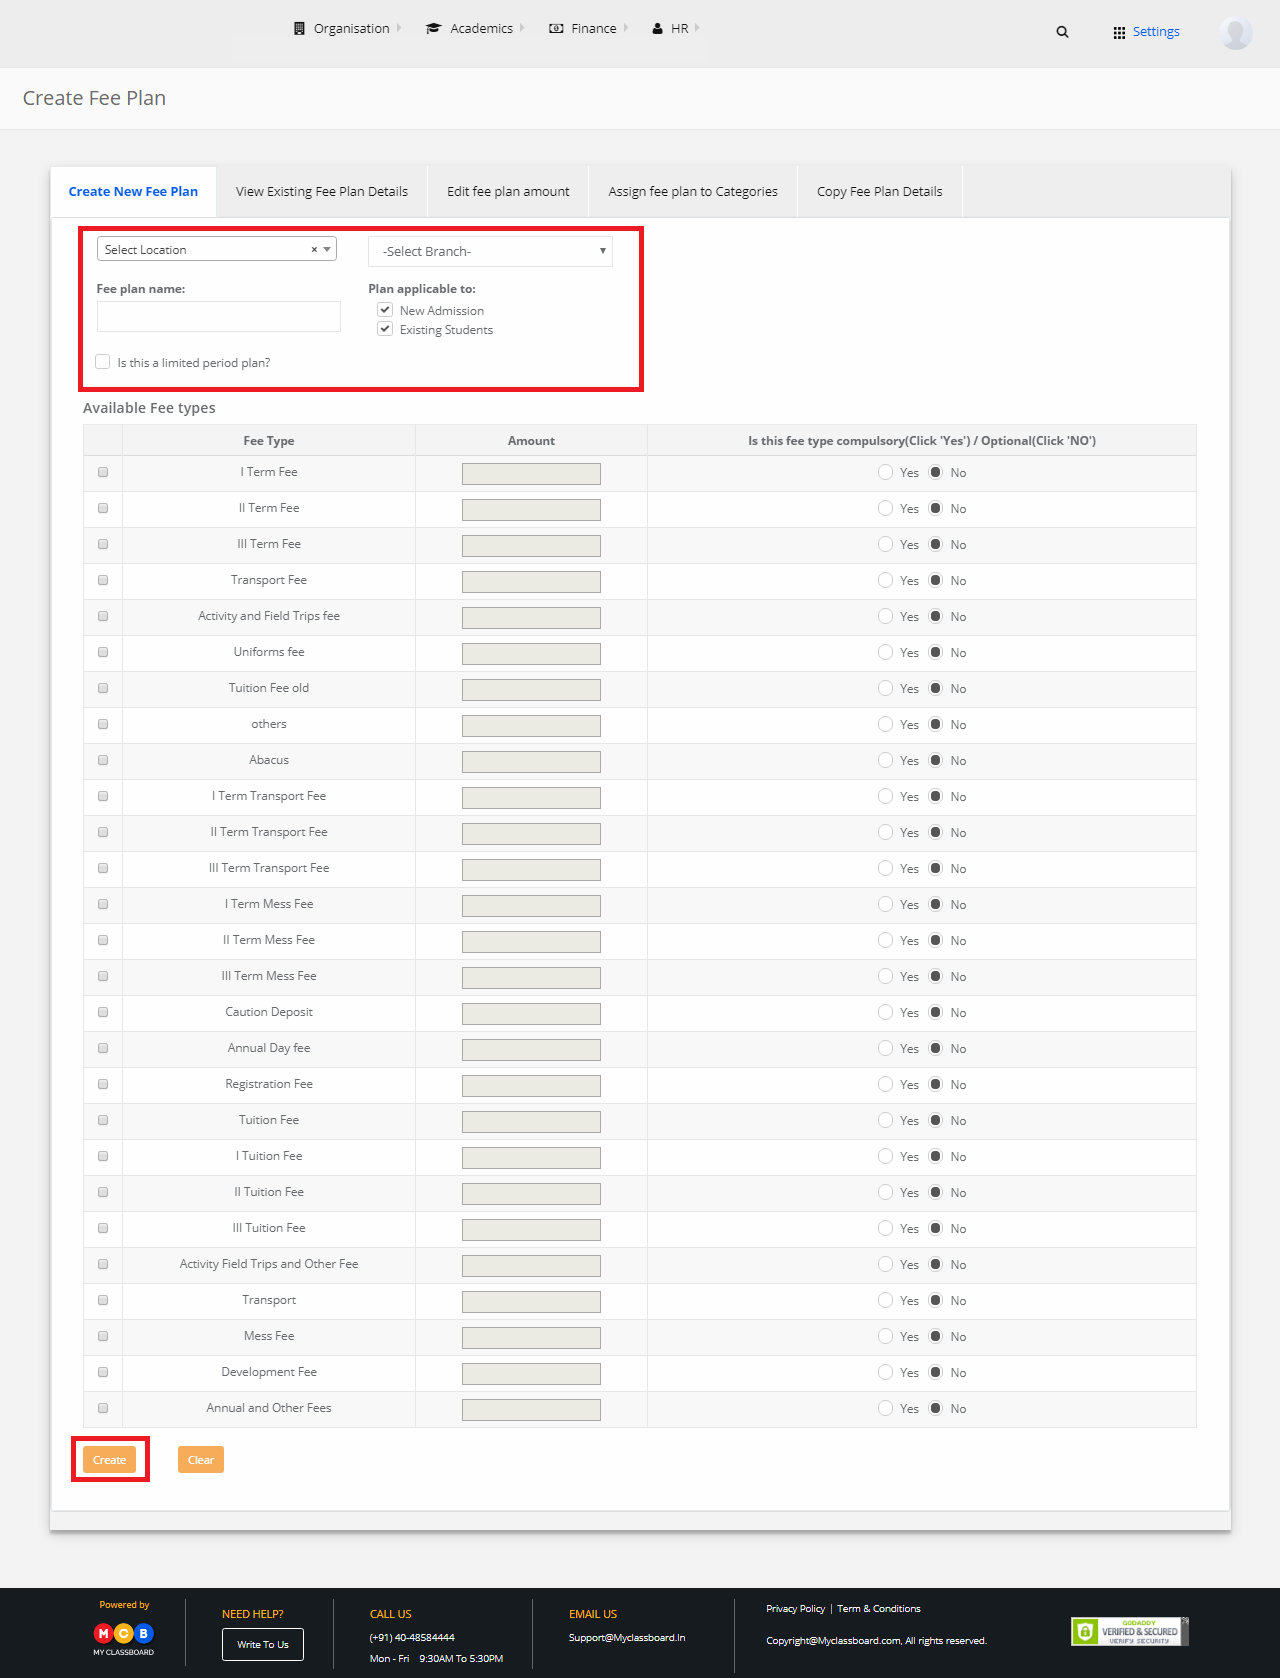
Step 4: Select Finance and click on “Create Fee Plan”.

Step 5: Select location, Branch, and name a Fee Plan. Choose the required options here and click on “Create”.

The New Fee Plan is created.

How to accept fee payments?

Step 1: Login to MCB with Accountant login credentials.

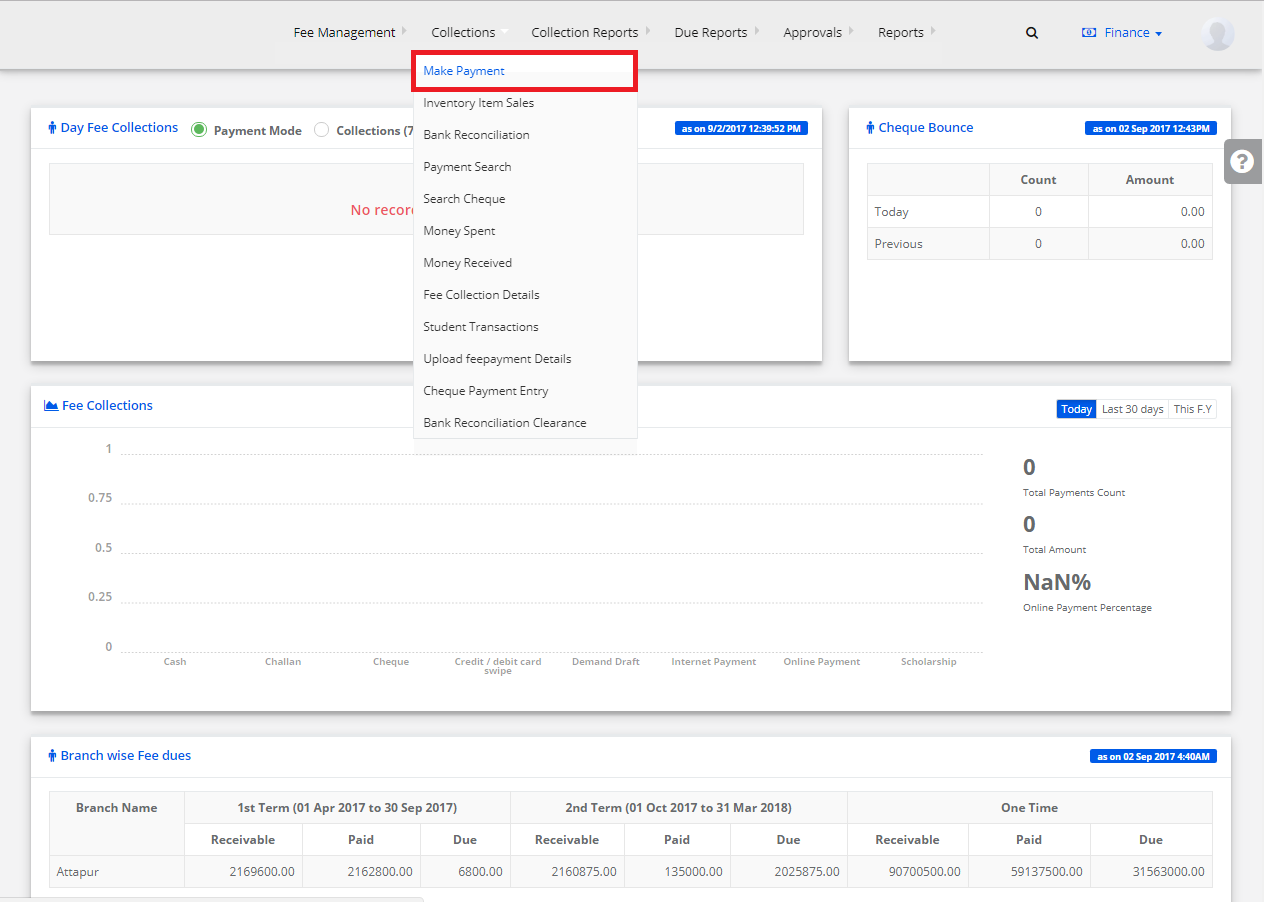
Step 2: Select “Collections” on the top bar and choose “Make Payment”.

Step 3: Search for the student here by entering the required criteria.

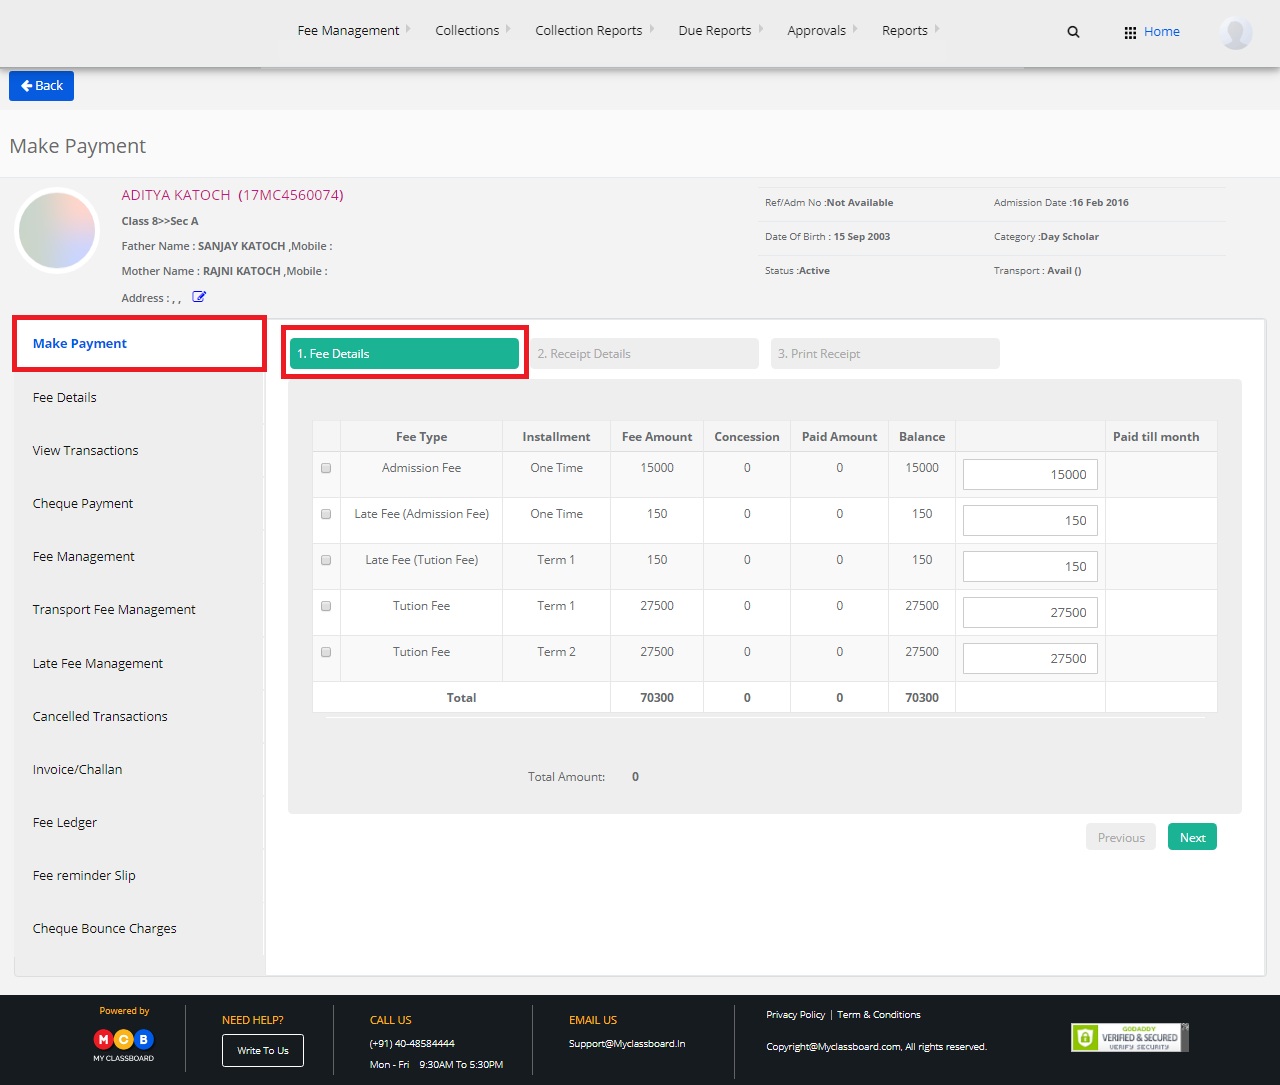
Step 4: Select “Make Payment” in the left pane of the page and click on “Fee Details”. Mark the checkbox against the fee details and click on next.

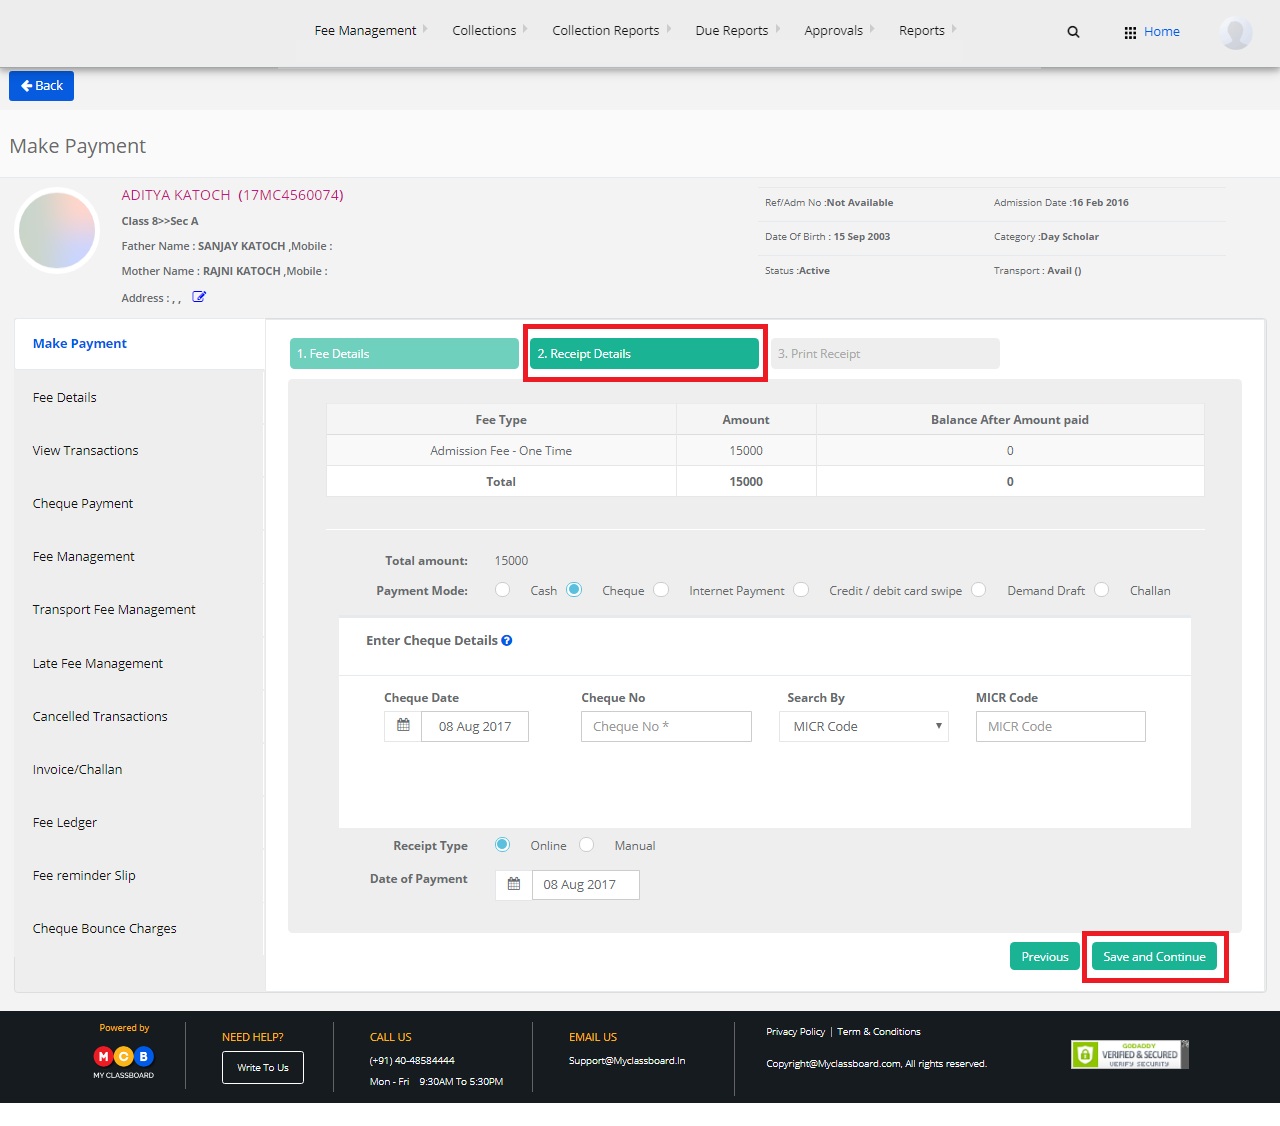
Step 5: Select the mode of payment, enter the details and click on “Save and Continue” to generate the receipt details.

Step 6: Click on “Print Receipt” option to take a printout of the generated fee receipt.

How to find Bank Submission Form?

Thank you for your recent inquiry.

Please follow the steps below to find the bank submission form.

Step 1: Login to MCB with Admin login credentials.

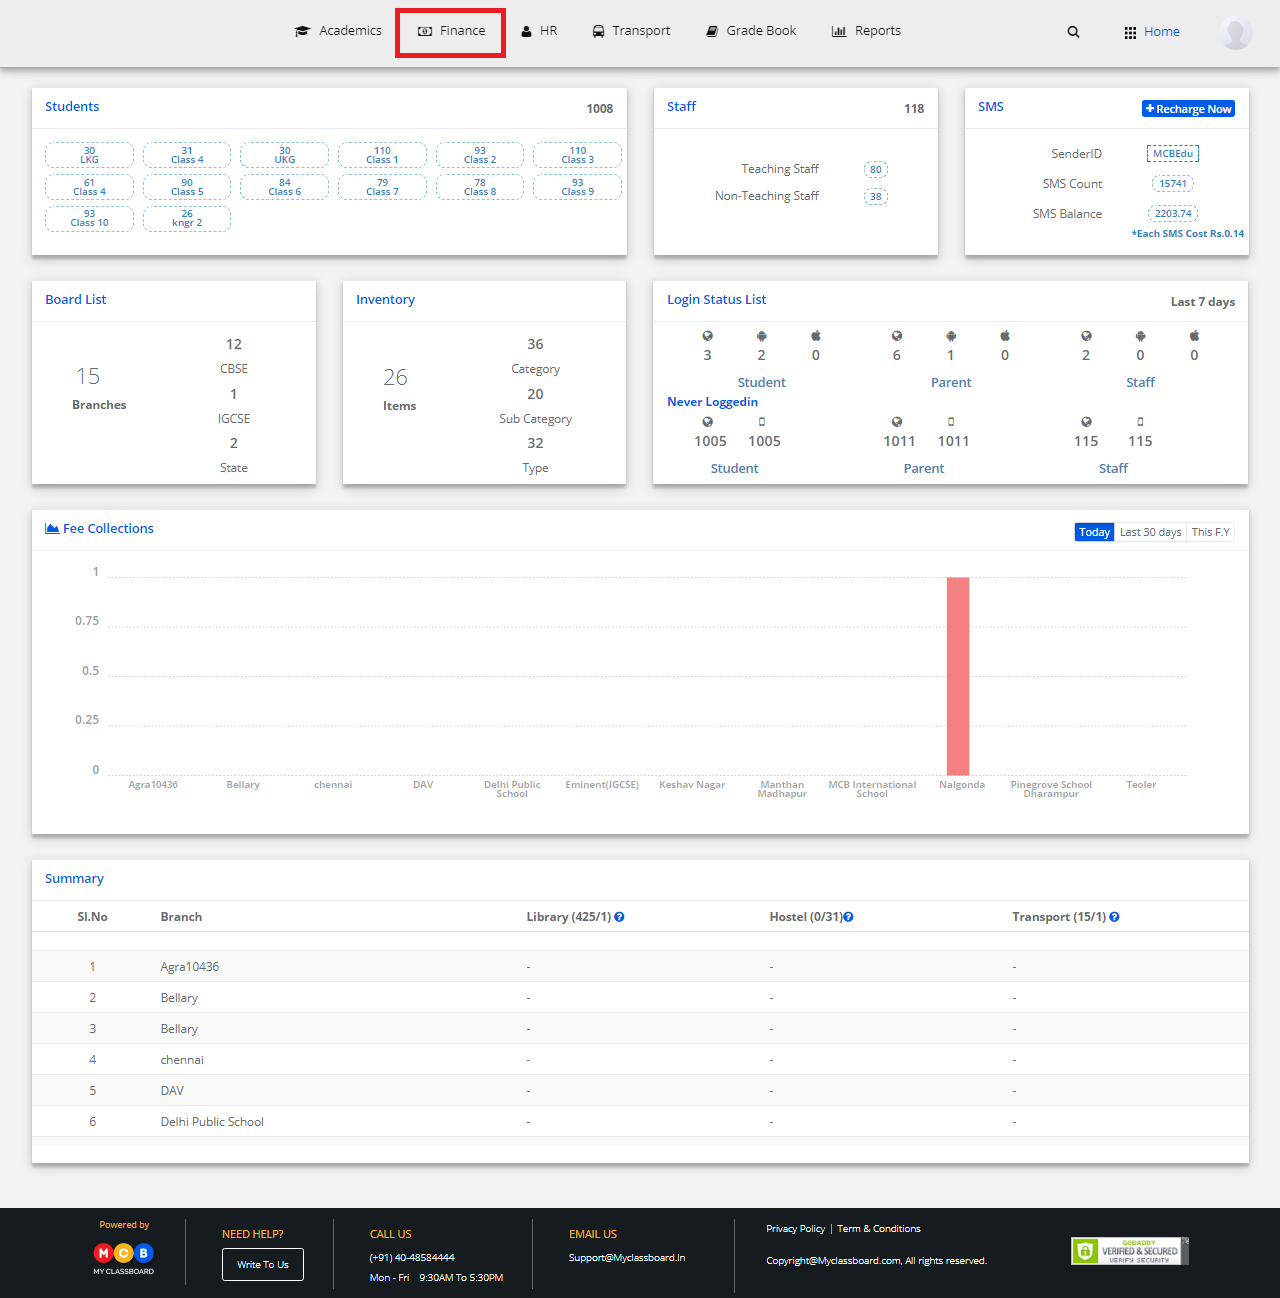
Step 2: Select “Finance” on the top bar of the dashboard.

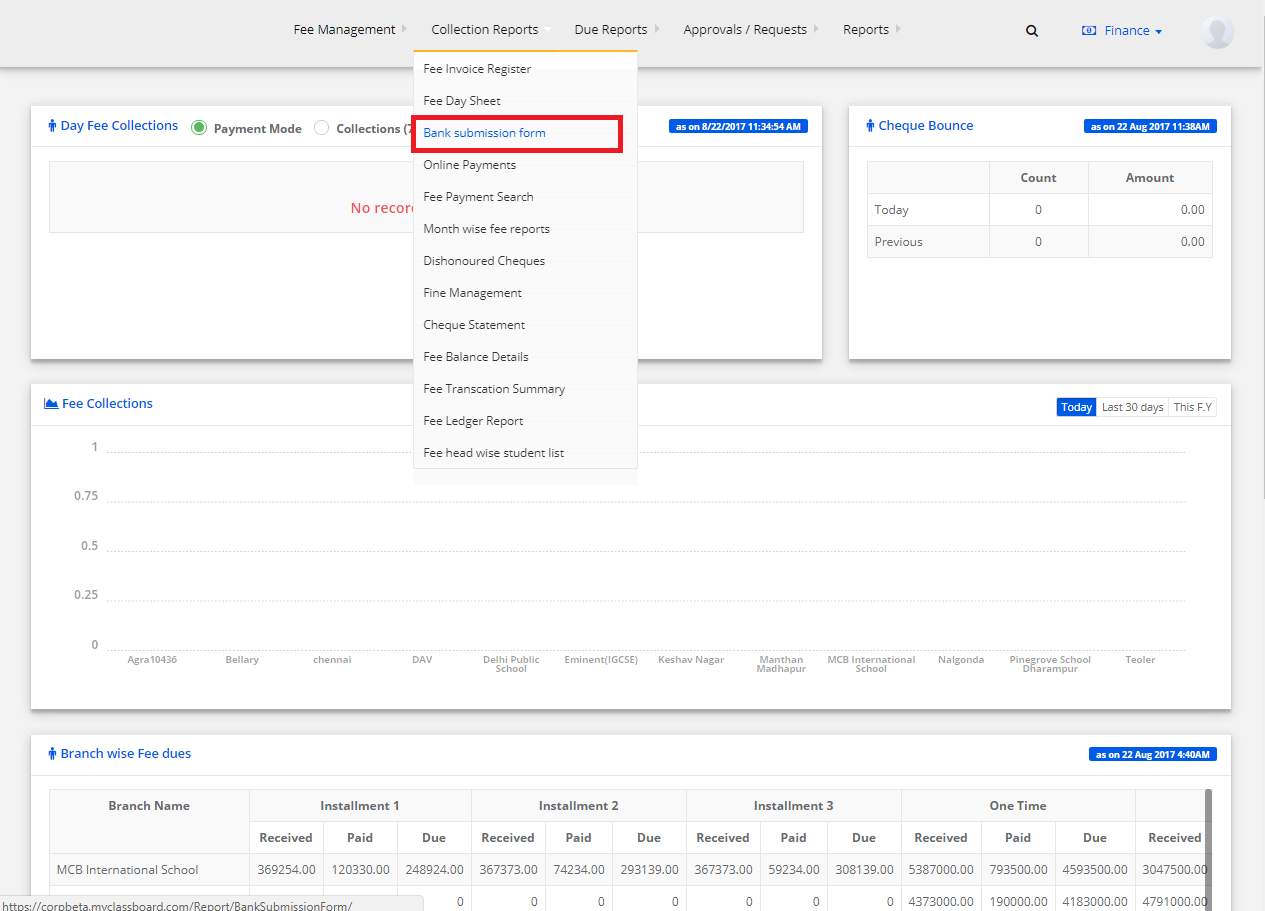
Step 3: Select “Collection Reports” and click on “Bank Submission Form”.

Step 4: Choose the options here like Branch, Bank, Date, Class and Payment Mode. After choosing the required options, click on Show Report.

Step 5: You’ll get the list of Bank Deposit Slips.

Hope this helps. Please feel free to reply back to this email or call us at 040-48584444, for further assistance.
How to generate Daily Fee Collections Report?

Step 1: Login to MCB with Accountant login credentials.

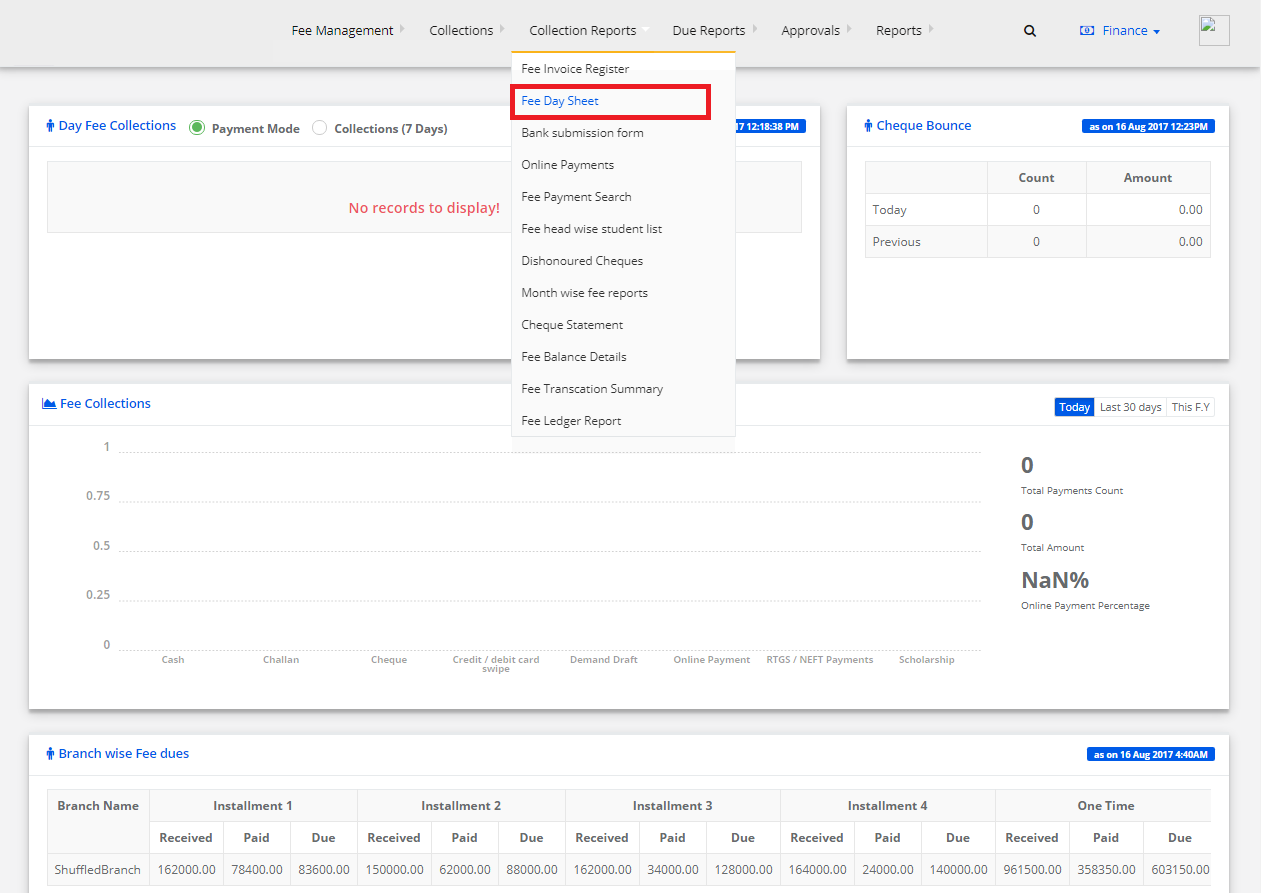
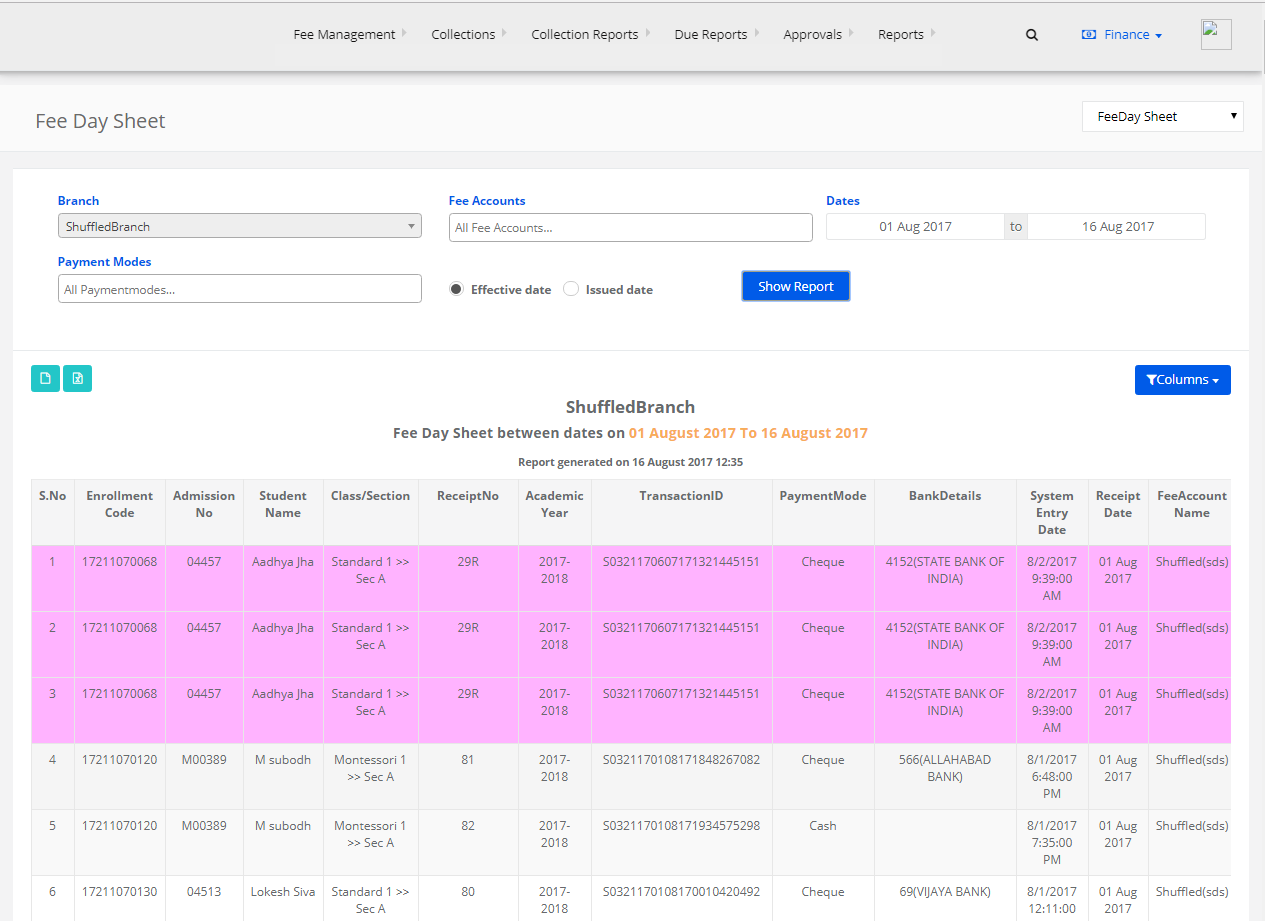
Step 2: Select “Collection Reports” on the top bar and choose “Fee Day Sheet”.

Step 3: Enter the required details like Branch, Fee Accounts, Date, Payment Modes and click on “Show Report”.

Step 4: The Fee Day Sheet Report is generated. You can export them to excel or print the report directly.

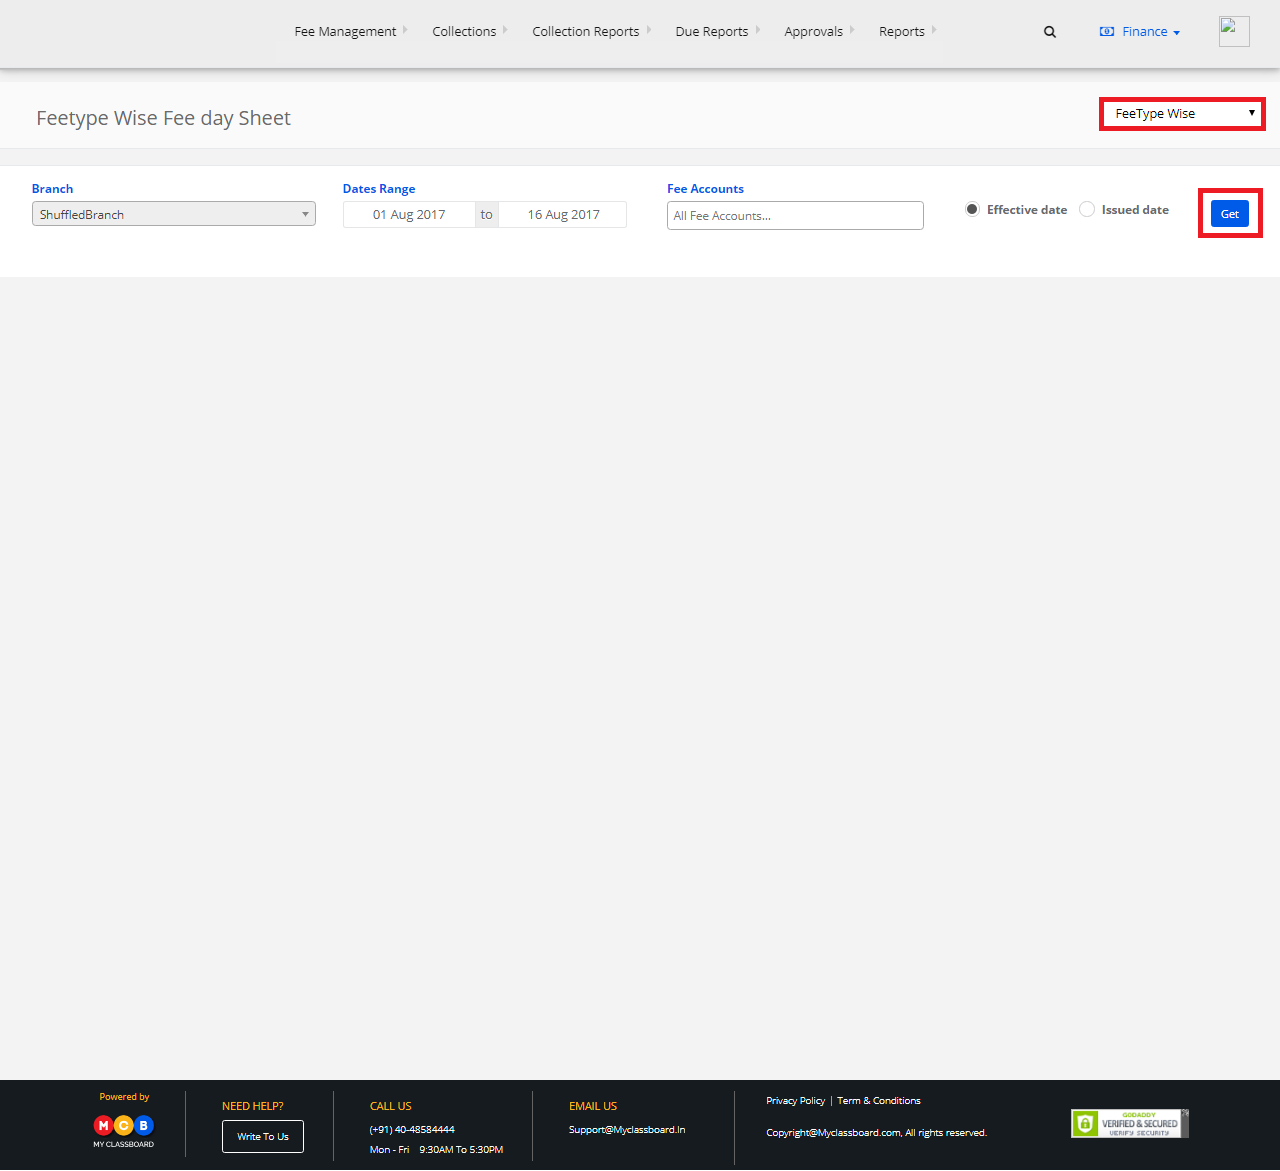
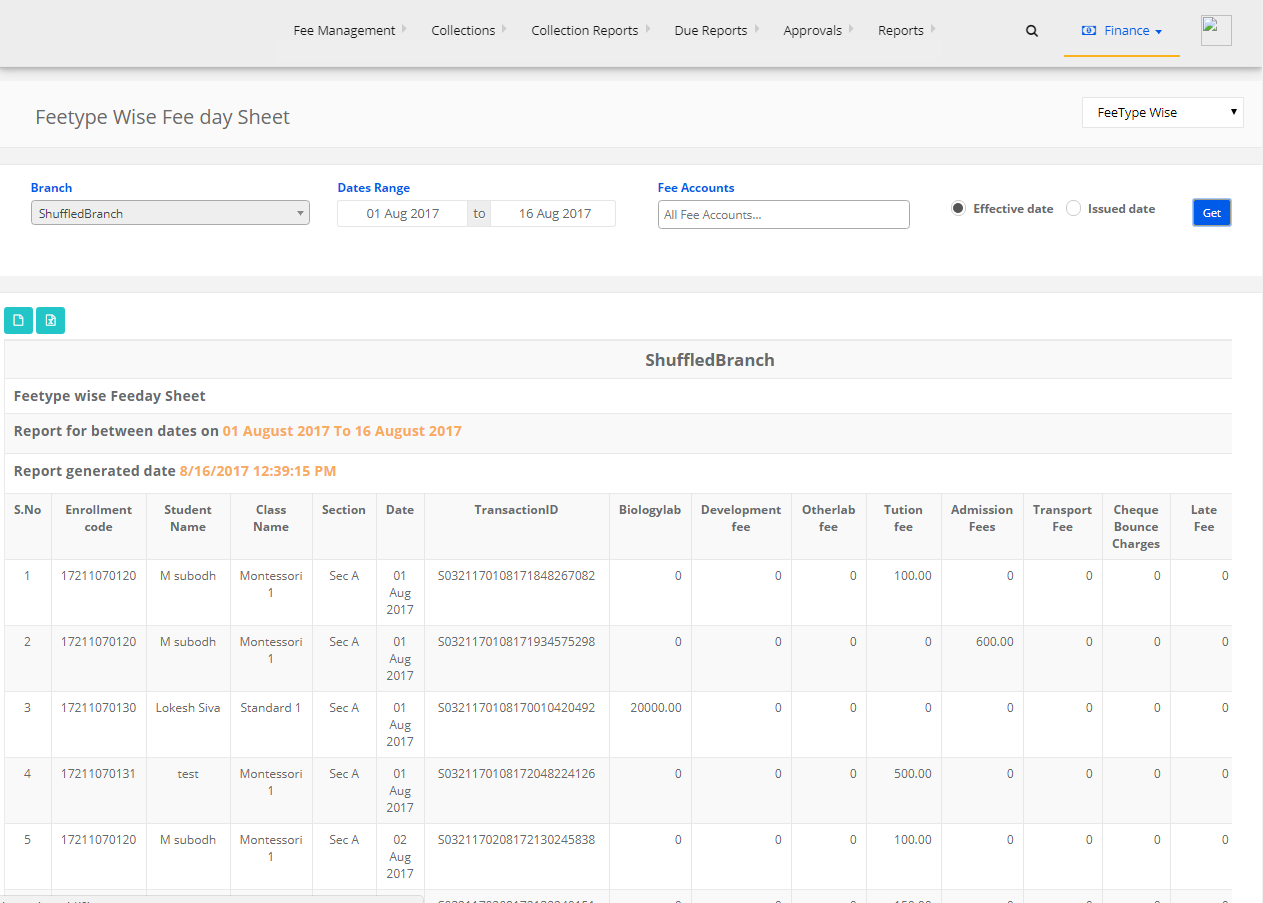
Step 5: Select “Fee Typewise” from the top right corner drop-down and select the Branch, Dates and other details and click on “Get”.

Step 6: The Fee Typewise Report is generated. You can export them to excel or print the report directly.

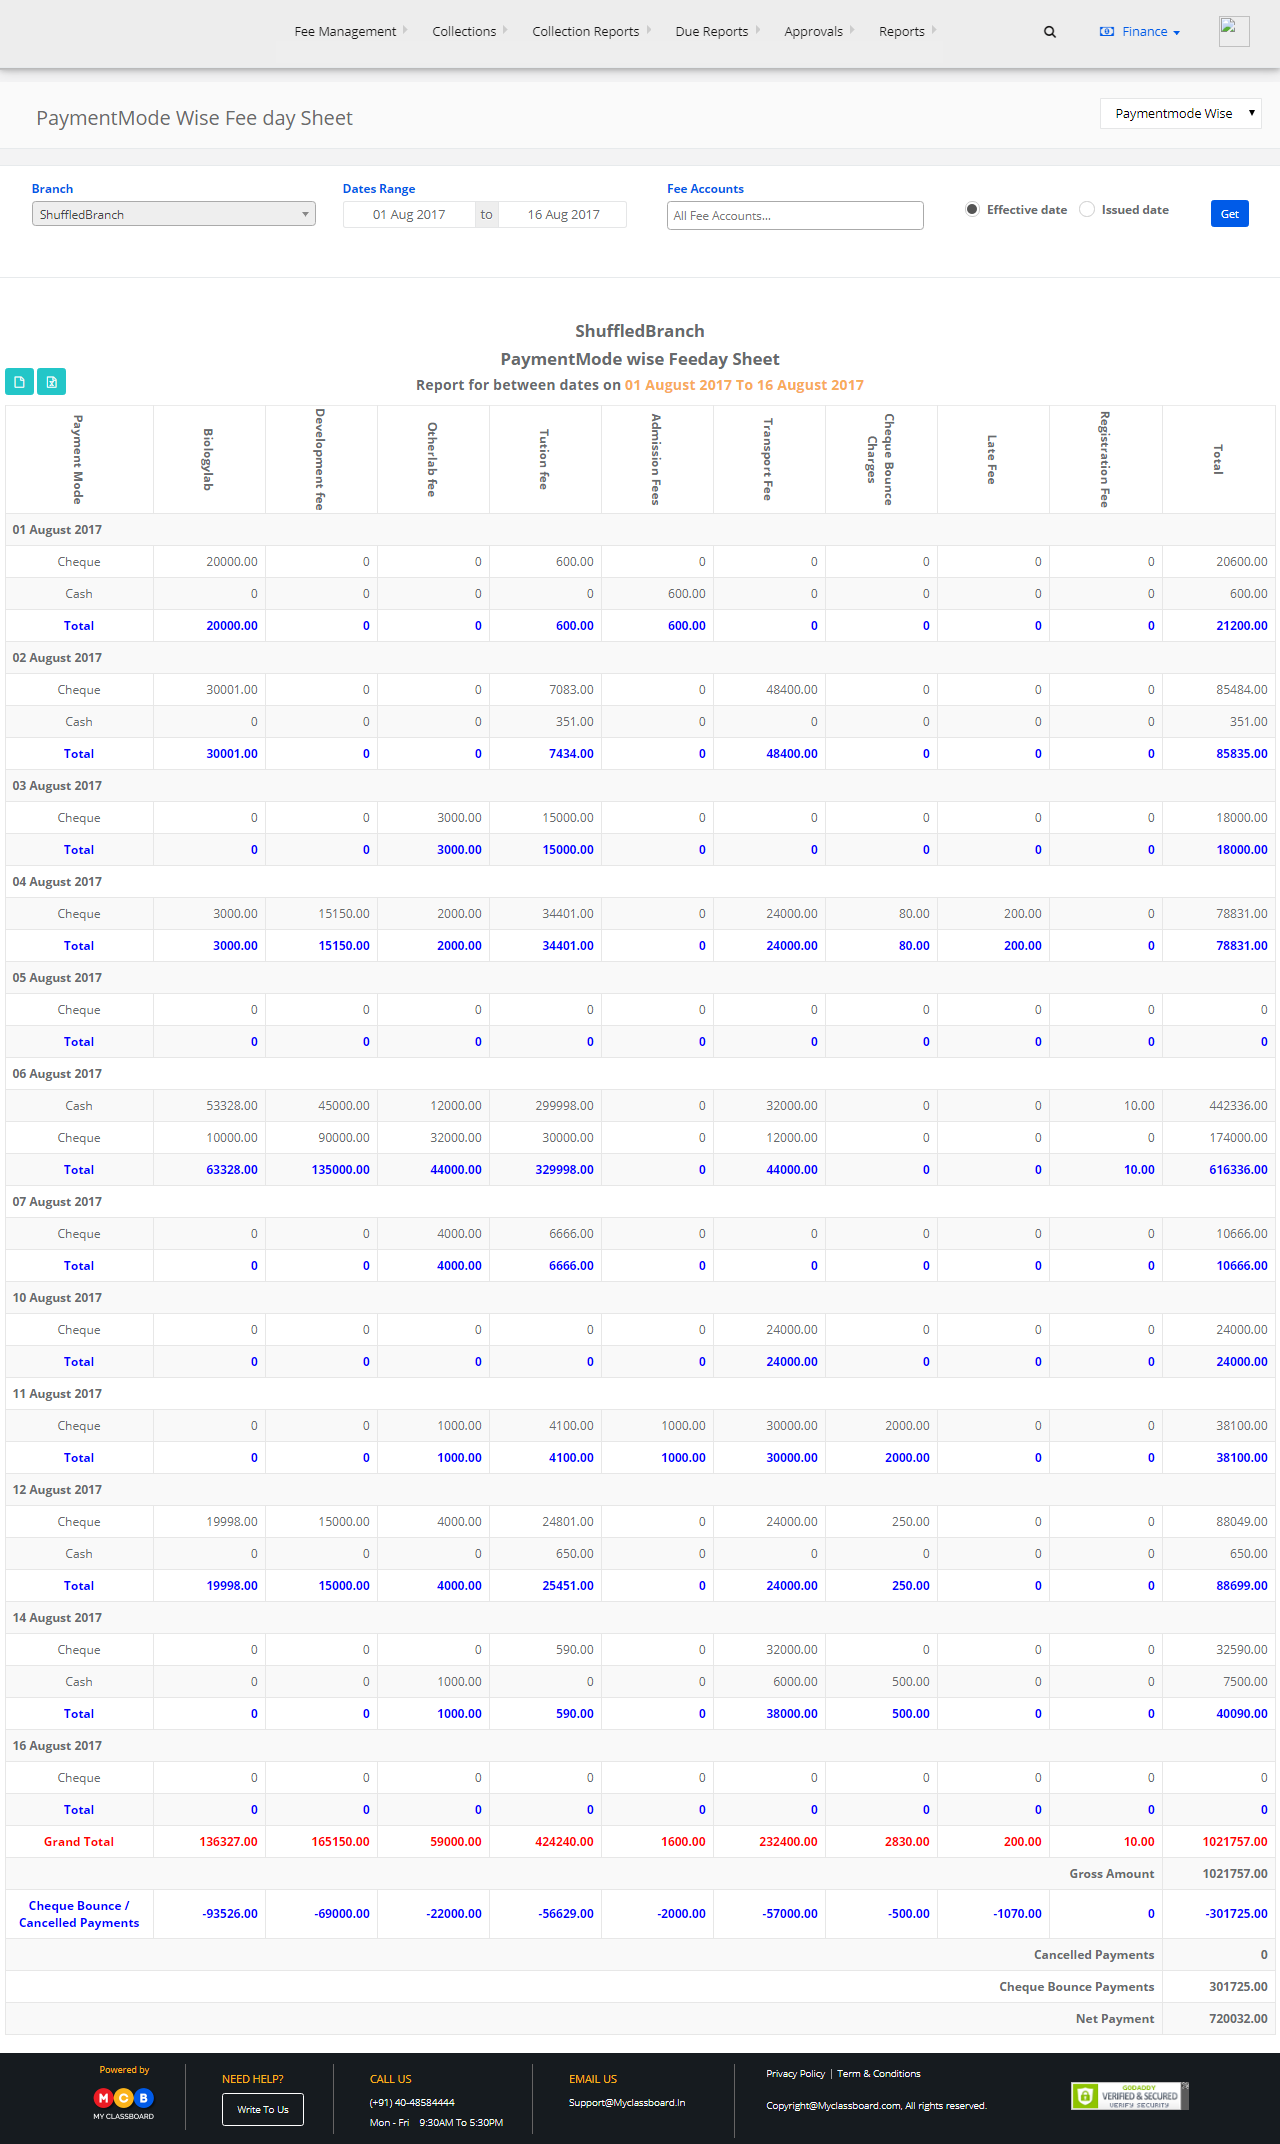
Step 7: Select “Payment mode Wise” from the top right corner drop-down and select the Branch, Dates and other details and click on “Get”.

Step 8: The Payment mode Wise report is generated. You can export them to excel or print the report directly.