How to generate Daily Fee Collections Report?

Step 1: Login to MCB with Accountant login credentials.

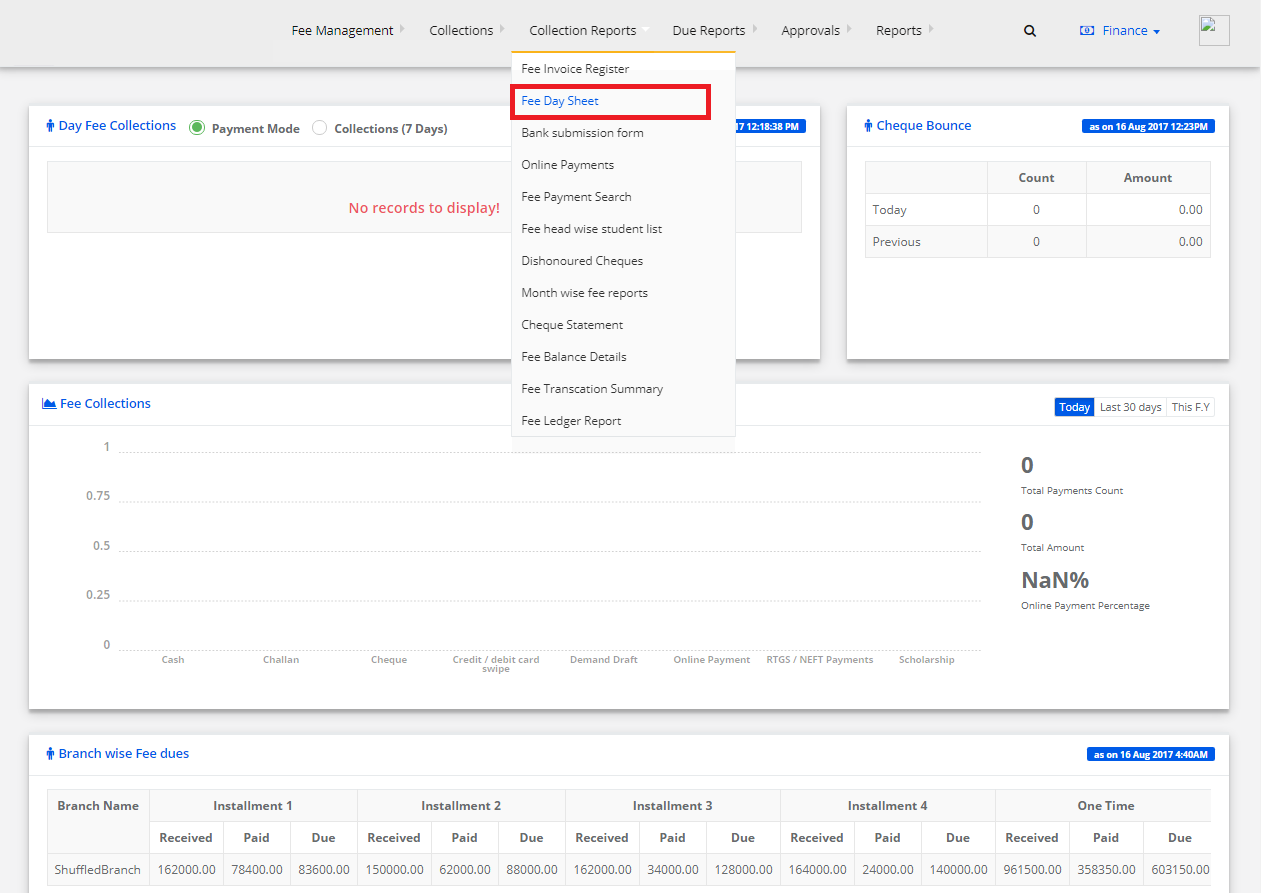
Step 2: Select “Collection Reports” on the top bar and choose “Fee Day Sheet”.

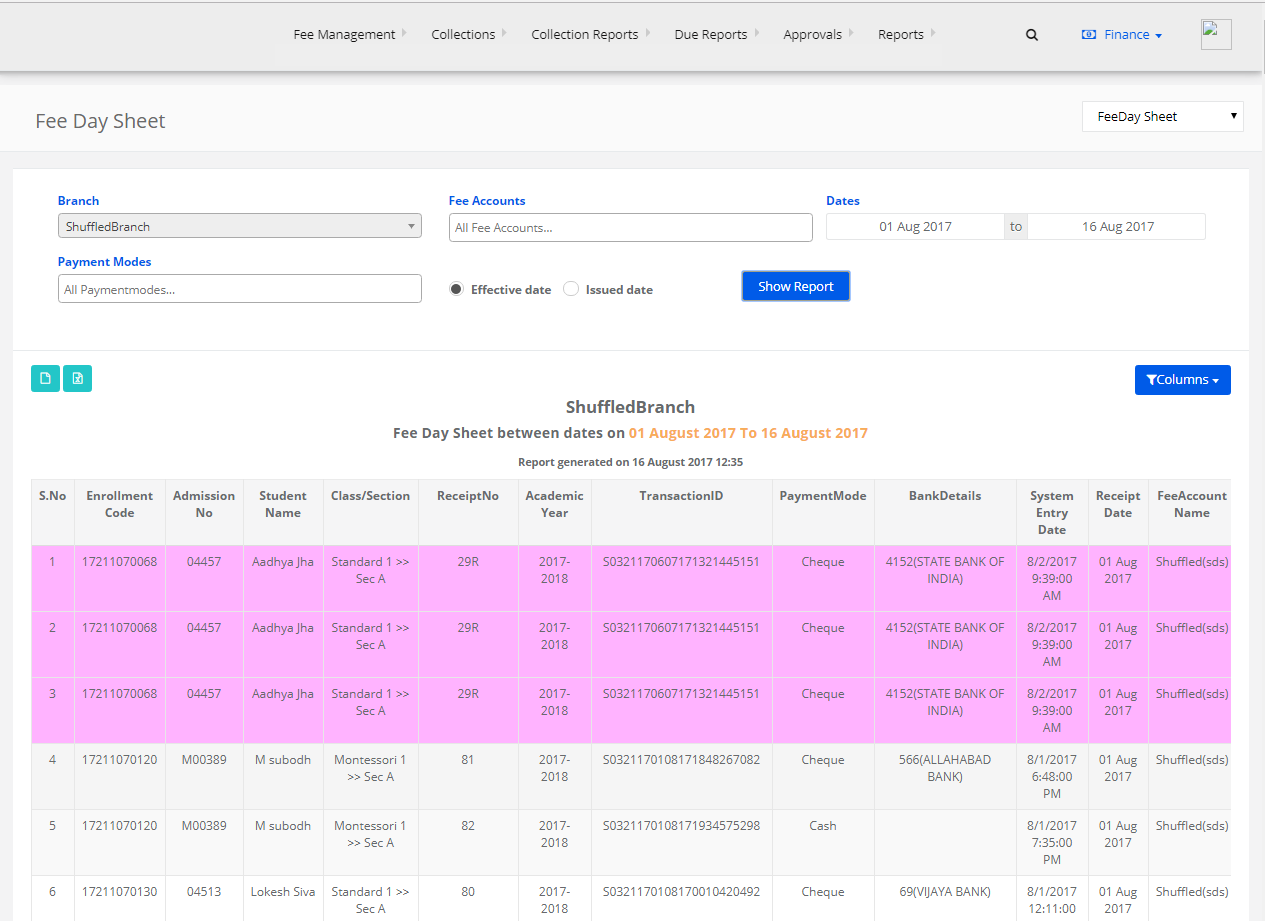
Step 3: Enter the required details like Branch, Fee Accounts, Date, Payment Modes and click on “Show Report”.

Step 4: The Fee Day Sheet Report is generated. You can export them to excel or print the report directly.

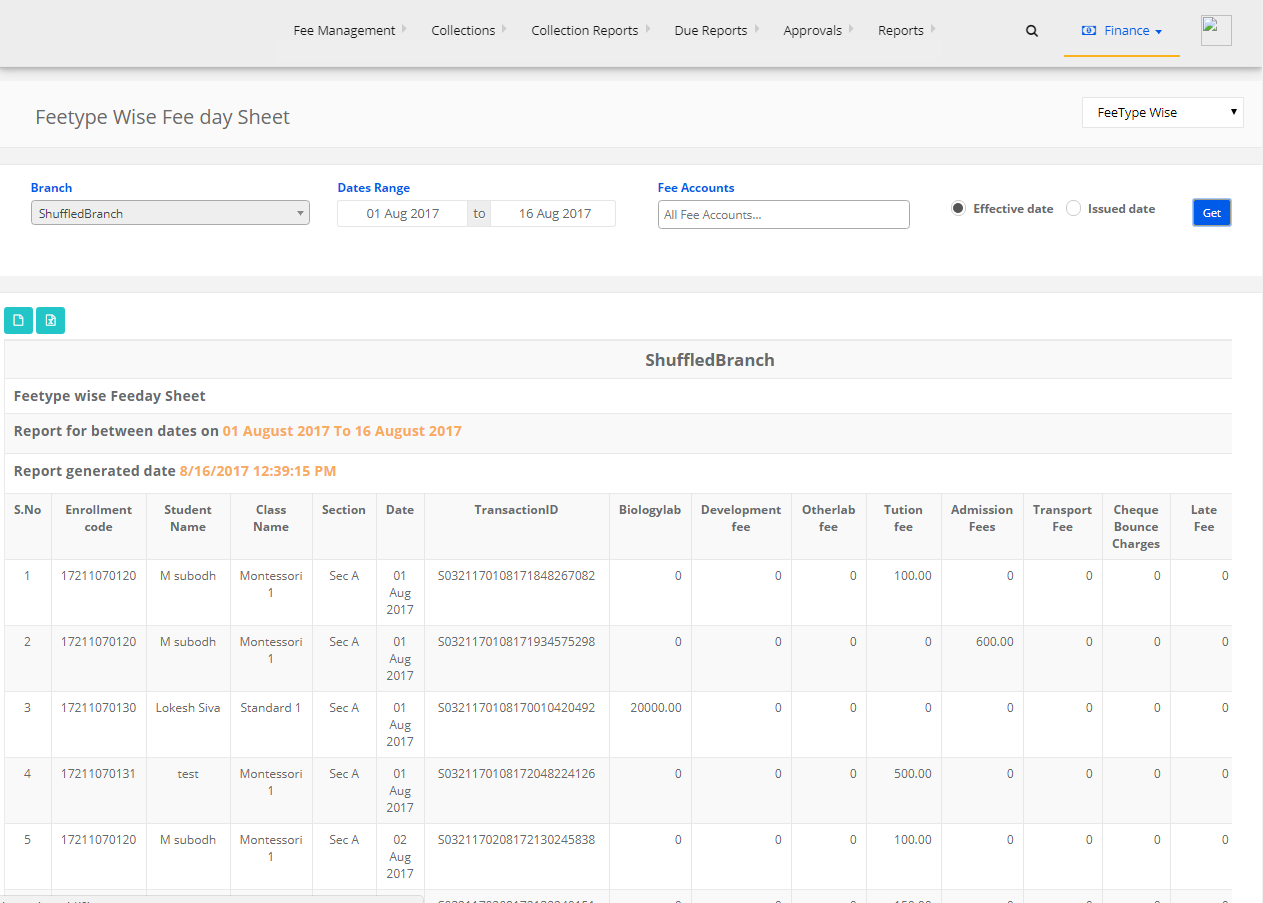
Step 5: Select “Fee Typewise” from the top right corner drop-down and select the Branch, Dates and other details and click on “Get”.

Step 6: The Fee Typewise Report is generated. You can export them to excel or print the report directly.

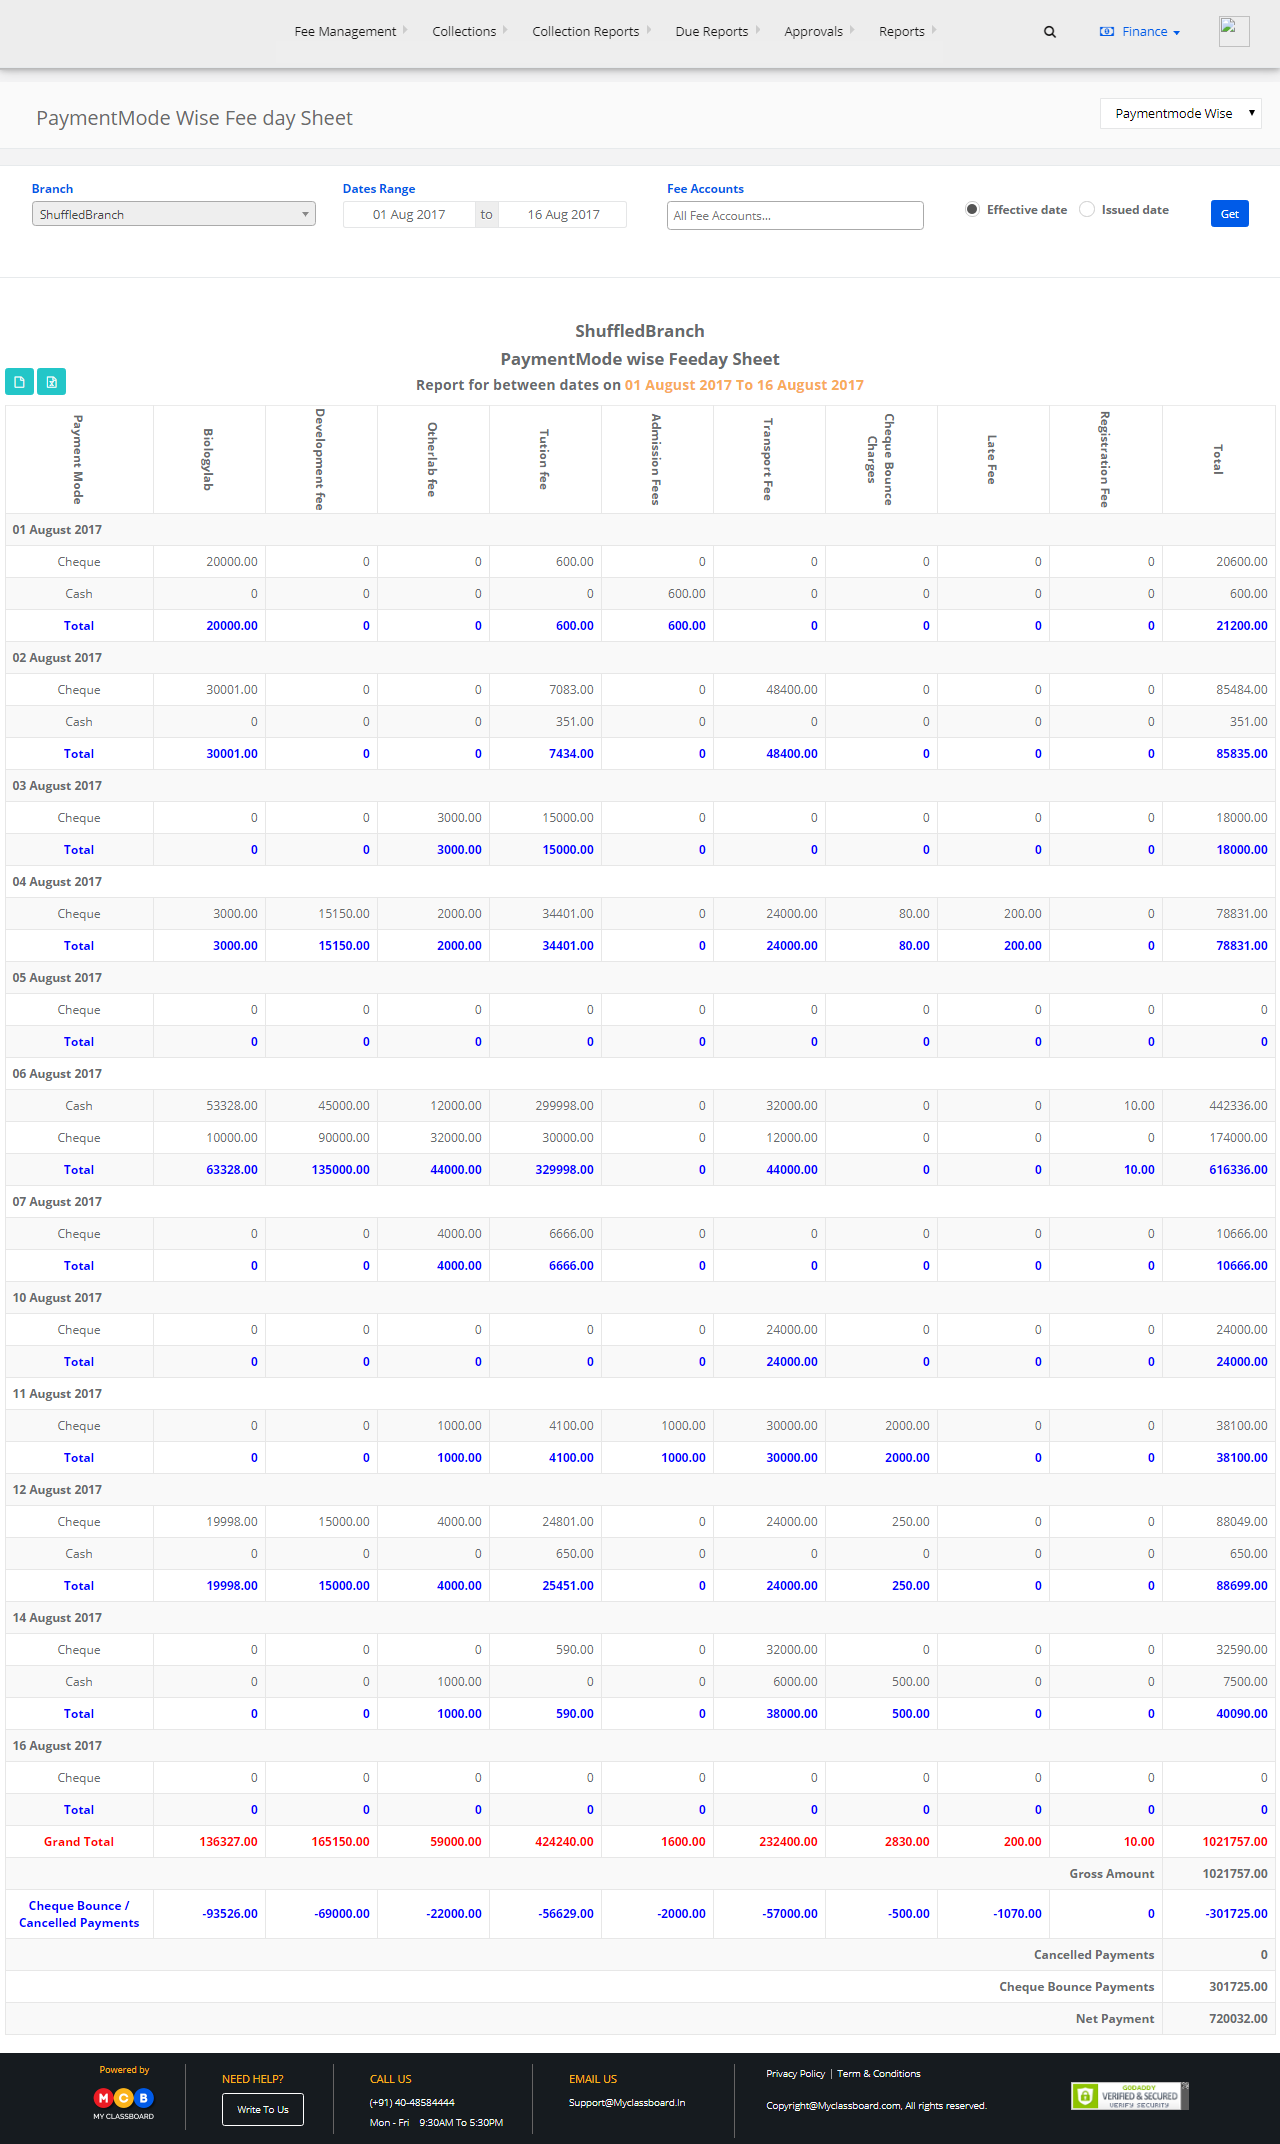
Step 7: Select “Payment mode Wise” from the top right corner drop-down and select the Branch, Dates and other details and click on “Get”.

Step 8: The Payment mode Wise report is generated. You can export them to excel or print the report directly.

How to generate Fee Transaction summary Report?

Step 1: Login to MCB with Accountant login credentials.

Step 2: Select “Collection Reports” on the top bar and choose “Fee Transaction Summary”.

Step 3: Enter the required details like Branch, Fee Accounts, Date, etc. Select the cheque status as “Deposited Cheques” and click on “Show Report”.

Step 4: The report is generated. You can export the same into excel or print the report directly.

Step 5: Select the cheque status as “All Cheques” and click on “Show Report”.

Step 6: The report is generated. You can export the same into excel or print the report directly.

How to generate Dishonored Cheque Report?

Step 1: Login to MCB with Accountant login credentials.

Step 2: Select “Collection Reports” on the top bar and choose “Dishonoured Cheques”.

Step 3: Choose the required options here like Branch, Date, Fee Accounts, Cheque Status (All, Repaid, Unpaid) and click on “Get”.

Step 4: If you want to generate a Dishonored Cheque Report as per the transaction date, select the option as “As per Transaction Date”.

Step 5: You may print the report directly or export into Excel, by clicking on the options.

Step 6: If you want to generate a Dishonored Cheque Report as per the Cheque bounce date, select the option as “As per Cheque Bounce Date”.

Step 7: You may print the report directly or export into Excel, by clicking on the options

How to generate a report on Cheque Statement?

Step 1: Login to MCB with Accountant login credentials.

Step 2: Select “Collection Reports” on the top bar and choose “Cheque Statement”.

Step 3: Choose the required options here like Branch, Fee Accounts, Date, Bank and other options and click on “Show Report”.

Step 4: If you want to generate a Cheque statement report of deposited cheques, select the option as “Deposited cheques”.

Step 5: There is a drop-down using which you can include the required fields in the report. You may export the same to Excel, by clicking on the “Excel” option.

Step 6: If you want to generate a Cheque statement report of bounced cheques, select the option as “Bounced cheques”.

Step 7: There is a drop-down using which you can include the required fields in the report. You may export the same to Excel, by clicking on the “Excel” option.

Step 8: If you want to generate a Cheque statement report of both deposited & bounced cheques, select the option as “All cheques(including bounced cheques)”.

Step 9: There is a drop-down using which you can include the required fields in the report. You may export the same to Excel, by clicking on the “Excel” option.

How To Assign Fee Plan to Students?

Thank you for your recent inquiry about assigning Fee Plan to students. Please follow the steps below:

Step 1: Login to MCB with Accountant login credentials. If you’re already logged in with Sys Admin, you can change the access to “Accountant”.

Step 2: Click on the “User Profile” icon on the right-hand top corner.

Step 3: Select “Change Access Level”.

Step 4: Change the User Type here by selecting “Accountant”.

Step 5: After changing, select “Accountant” against any branch.

Step 6: In the dashboard, select “Fee Management” on the top bar and choose “Assign Fee to Students”.

Step 7: Select Class, Section, Plan, Fee Type and click on “Get Students”.

Step 8: In the below-displayed list, select the master check box and click on “Assign Fee To Selected Students.”

The fee plan is assigned successfully.

Hope this helps. Please feel free to reply back to this email or call us at 040-48584444, should you need any further assistance.