The CBSE Progress Report is set up in following stages through MD Level and Principal Level Logins.
Syst Admin Level Login:
In this level, the system administrator has the access to set up the CBSE structure.
User Level Login:
This user level login can be accessed by Principal, Computer Operator and Teachers. Here the users can create tests, assign subjects, enter marks in Scholastic and assign skills and upload grades in Co-scholastic. The school results are also updated at this level.
Stages involved in Report Card Setup:
Stage 1: Create CBSE CCE Structure
Stage 2: Create CCE Terms
Stage 3: Create CCE Evaluations
Stage 4: Create CBSE Parts
Stage 5: Create Subjects
Stage 6: Subjects Mapping
Stage 7: Create Scholastic Subject Skills
Stage 8: Create Co Scholastic Skills and Subskills
Stage 9: Create CCE Grades
Stage 10: Assign Languages
Stage 11: Assign Co-Scholastic Skills
Stage 12: Test Creation & Marks Entry
Stage 13: Co-scholastic Grade Entry
Stage 14: Subject wise Remarks
Stage 15: Student Health Details
Stage 16: Get Report Cards
Stage 1: Creating CBSE CCE Structure
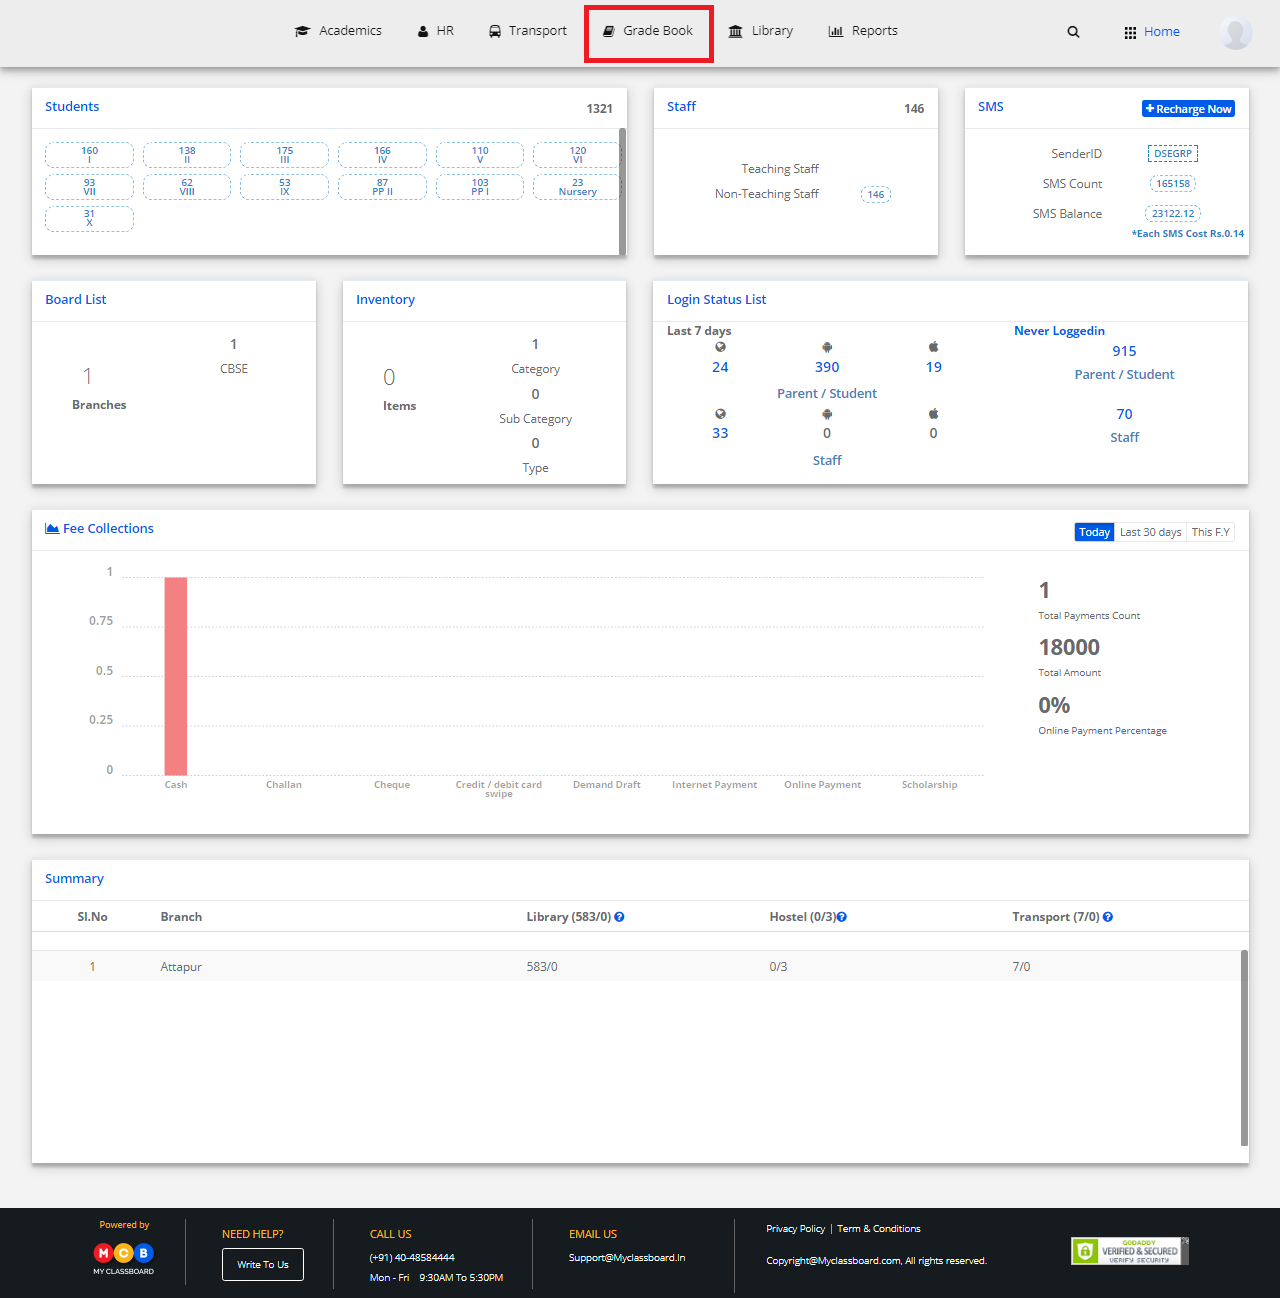
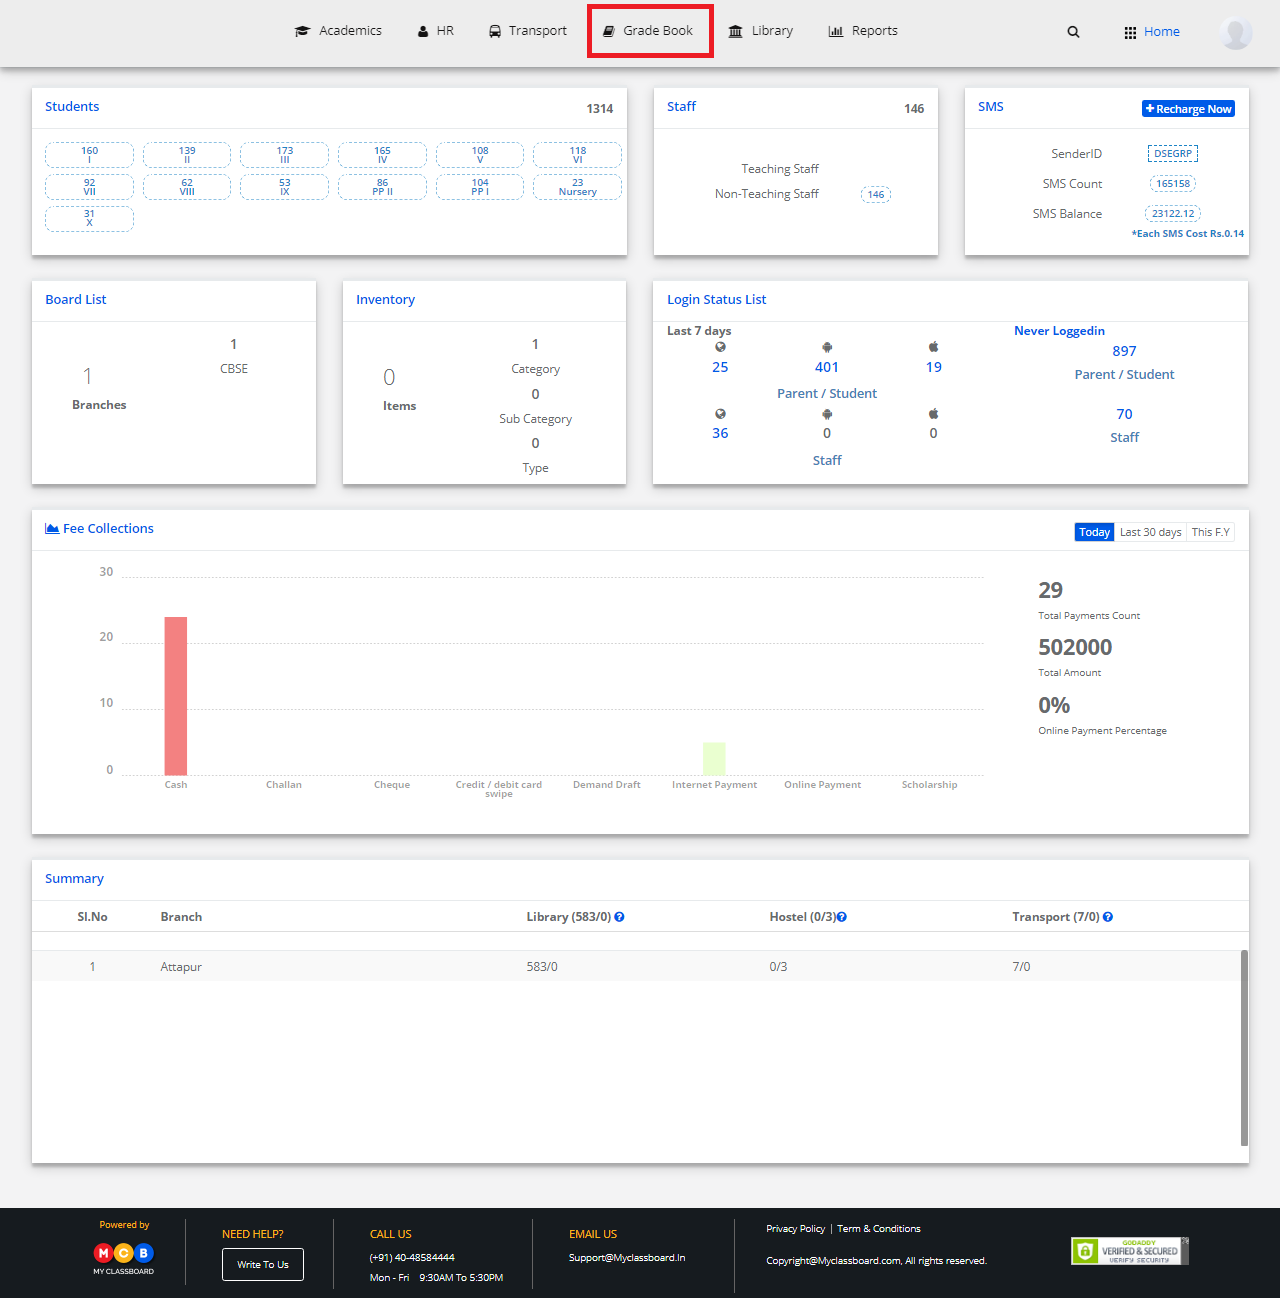
Step 1: Login to MCB with SysAdmin login credentials.
Step 2: Select “Gradebook” on the top bar on the dashboard page. You’ll be directed to the “Gradebook” page.
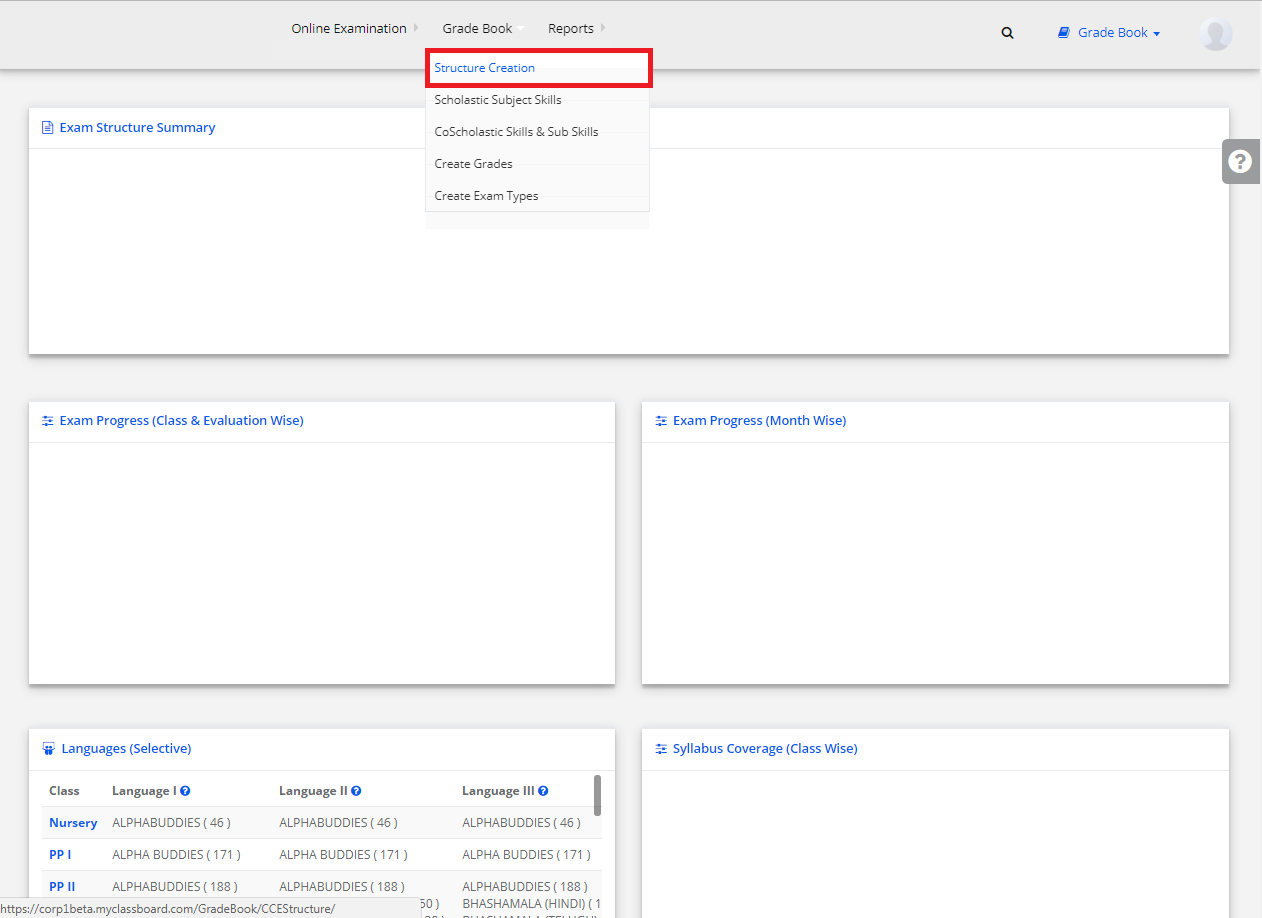
Step 3: Click on “Gradebook” on the top bar and select “Structure Creation”.
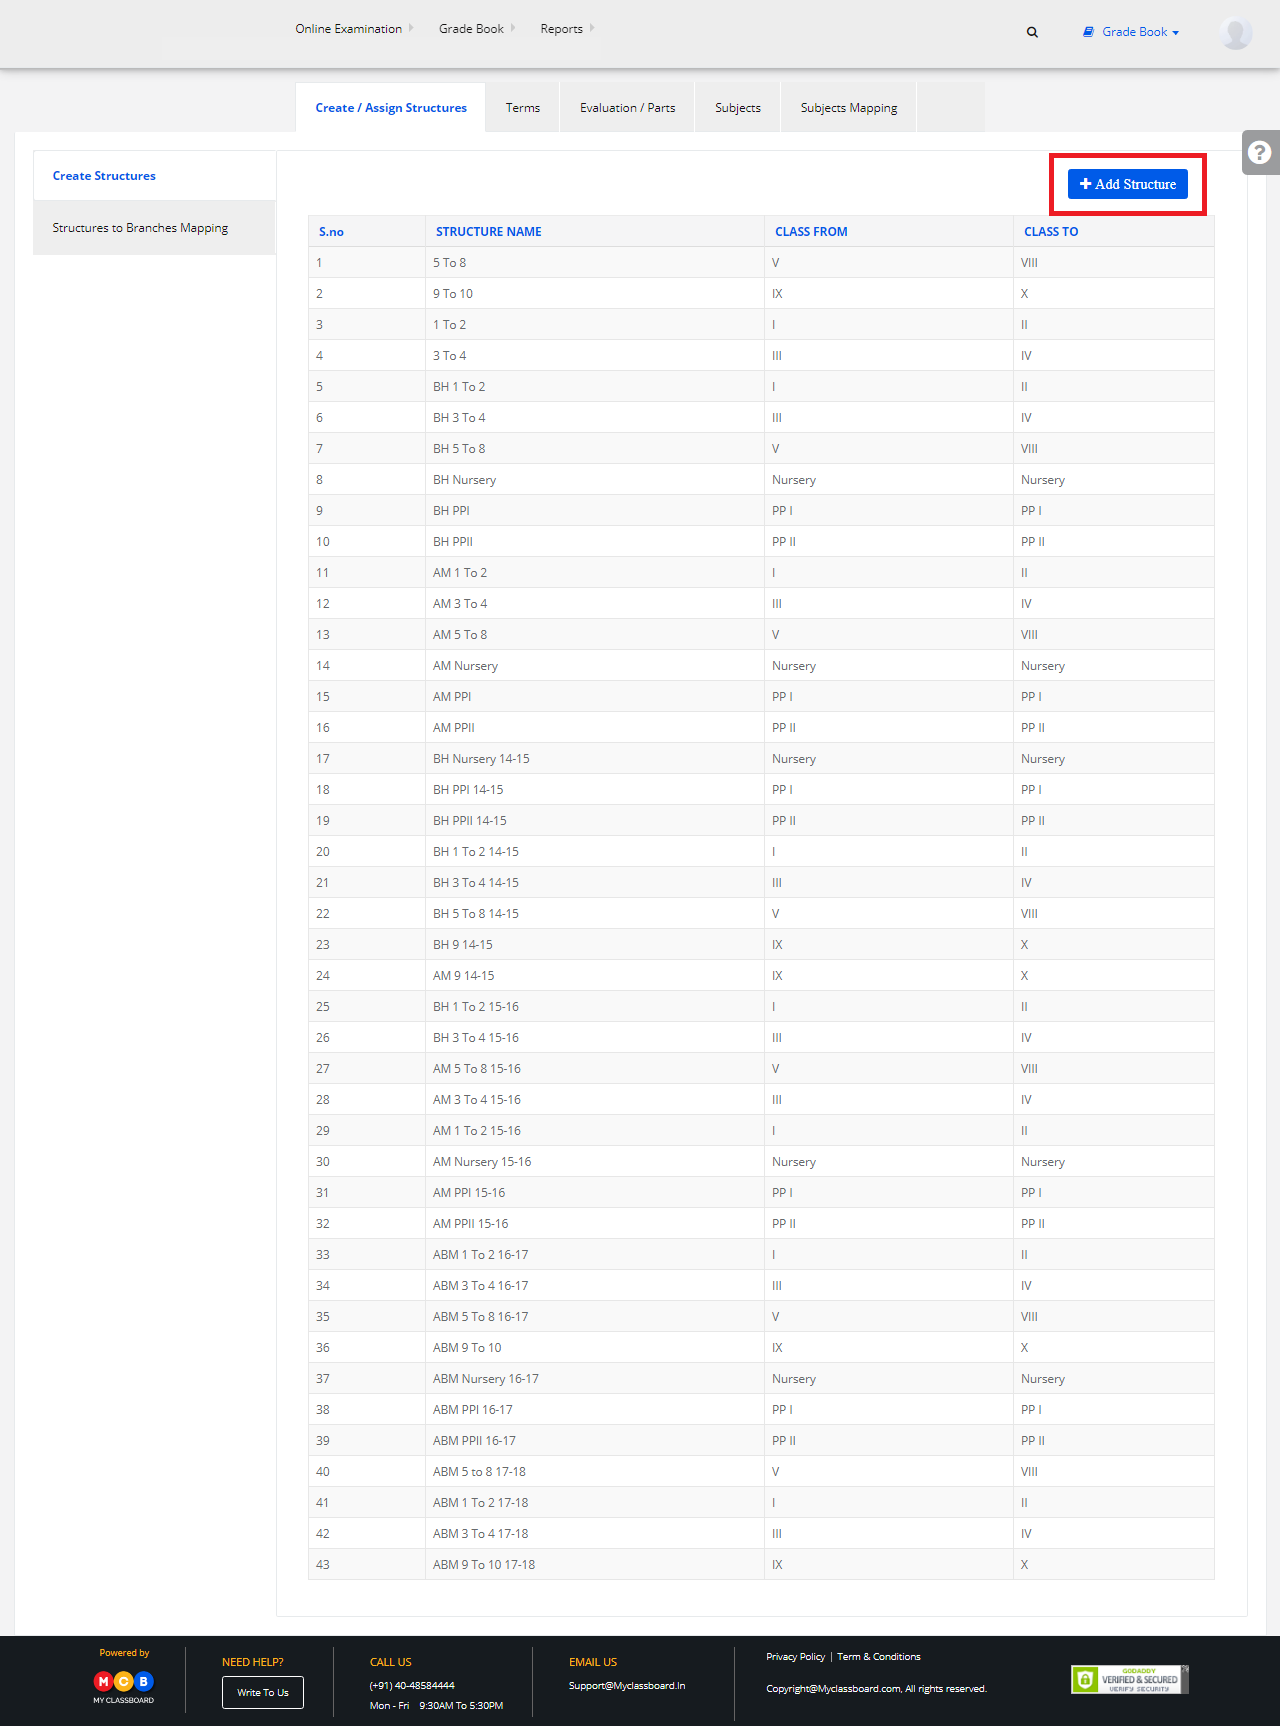
Step 4: Select Structure and Click on “Add Structure” to create a new structure.
Step 5: Enter the Classes and name the structure. After entering the required details click on “Save”.
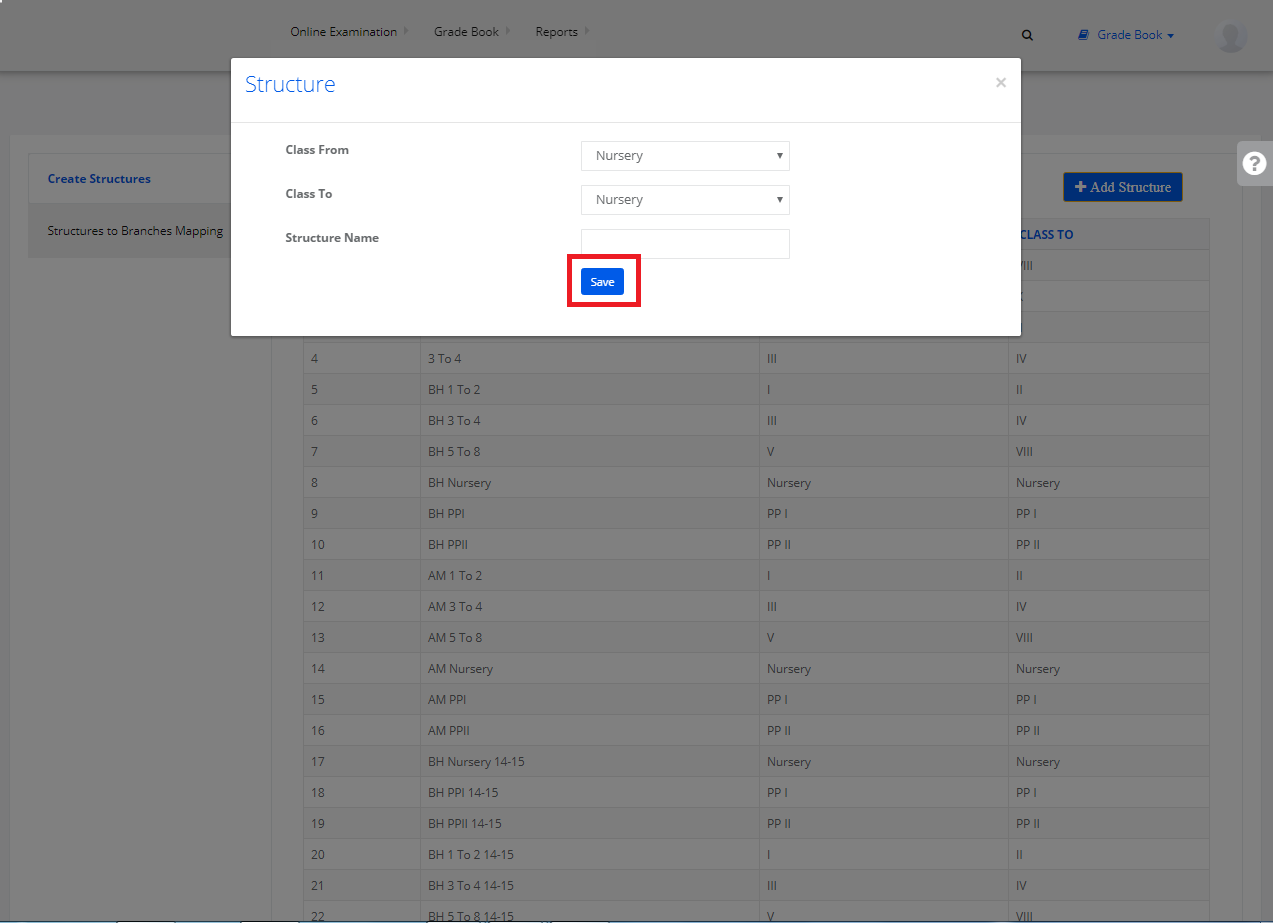
The structure is created successfully.
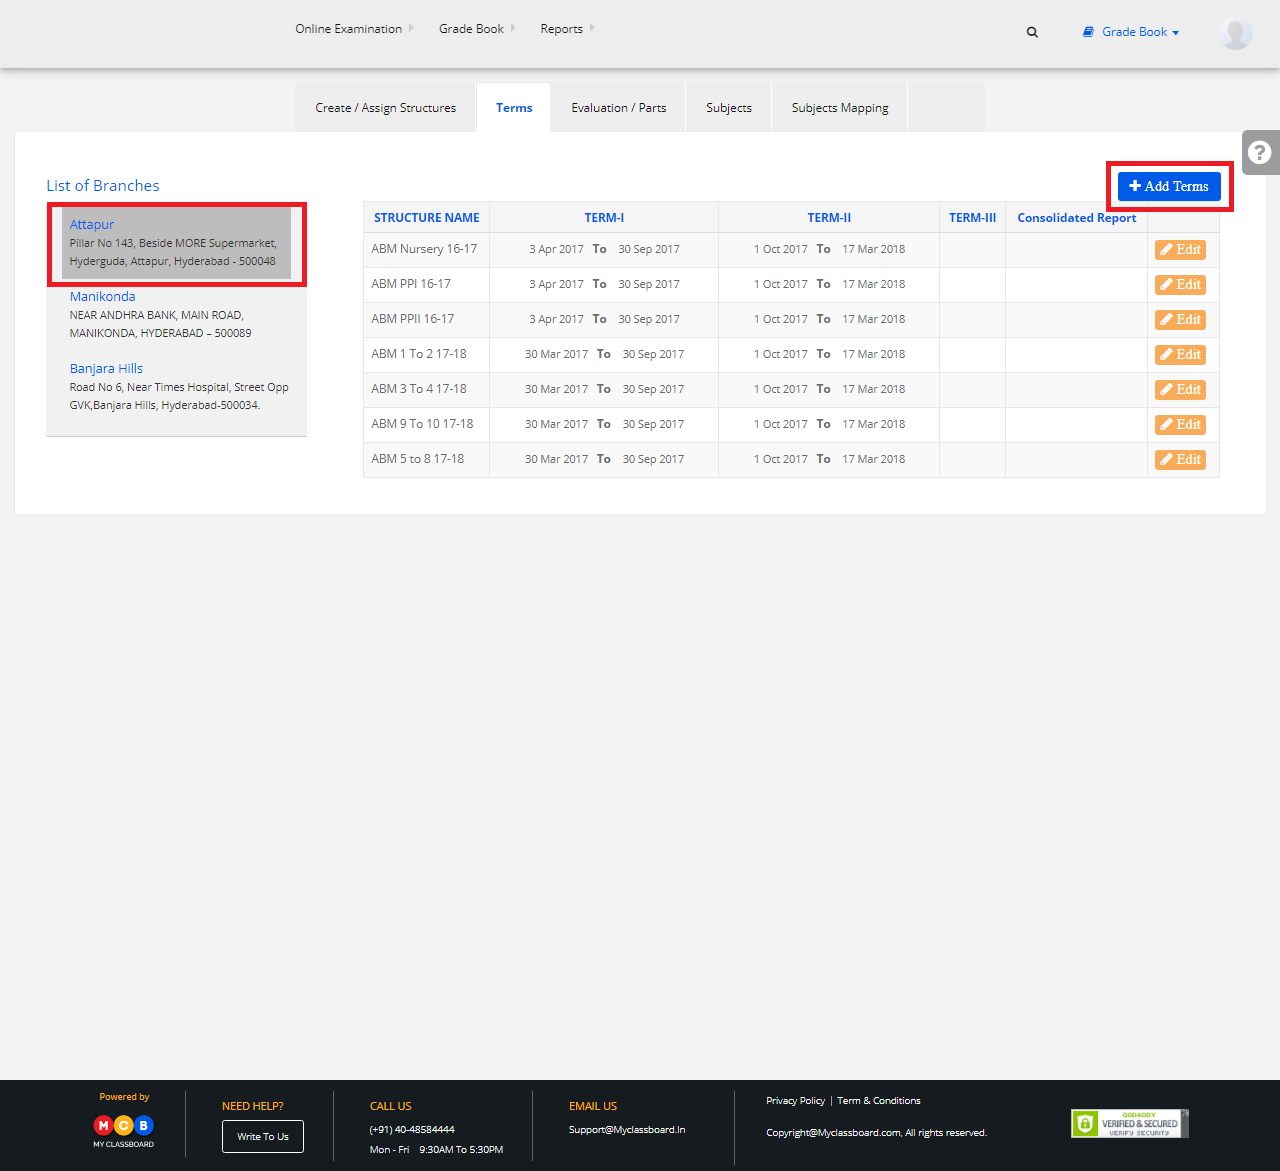
Stage 2: Creating CCE Terms
Step 1: Select “Terms” ——> Select the Branch for which you want to create Terms.

Step 2: Click on “Add Terms” to create a new term.
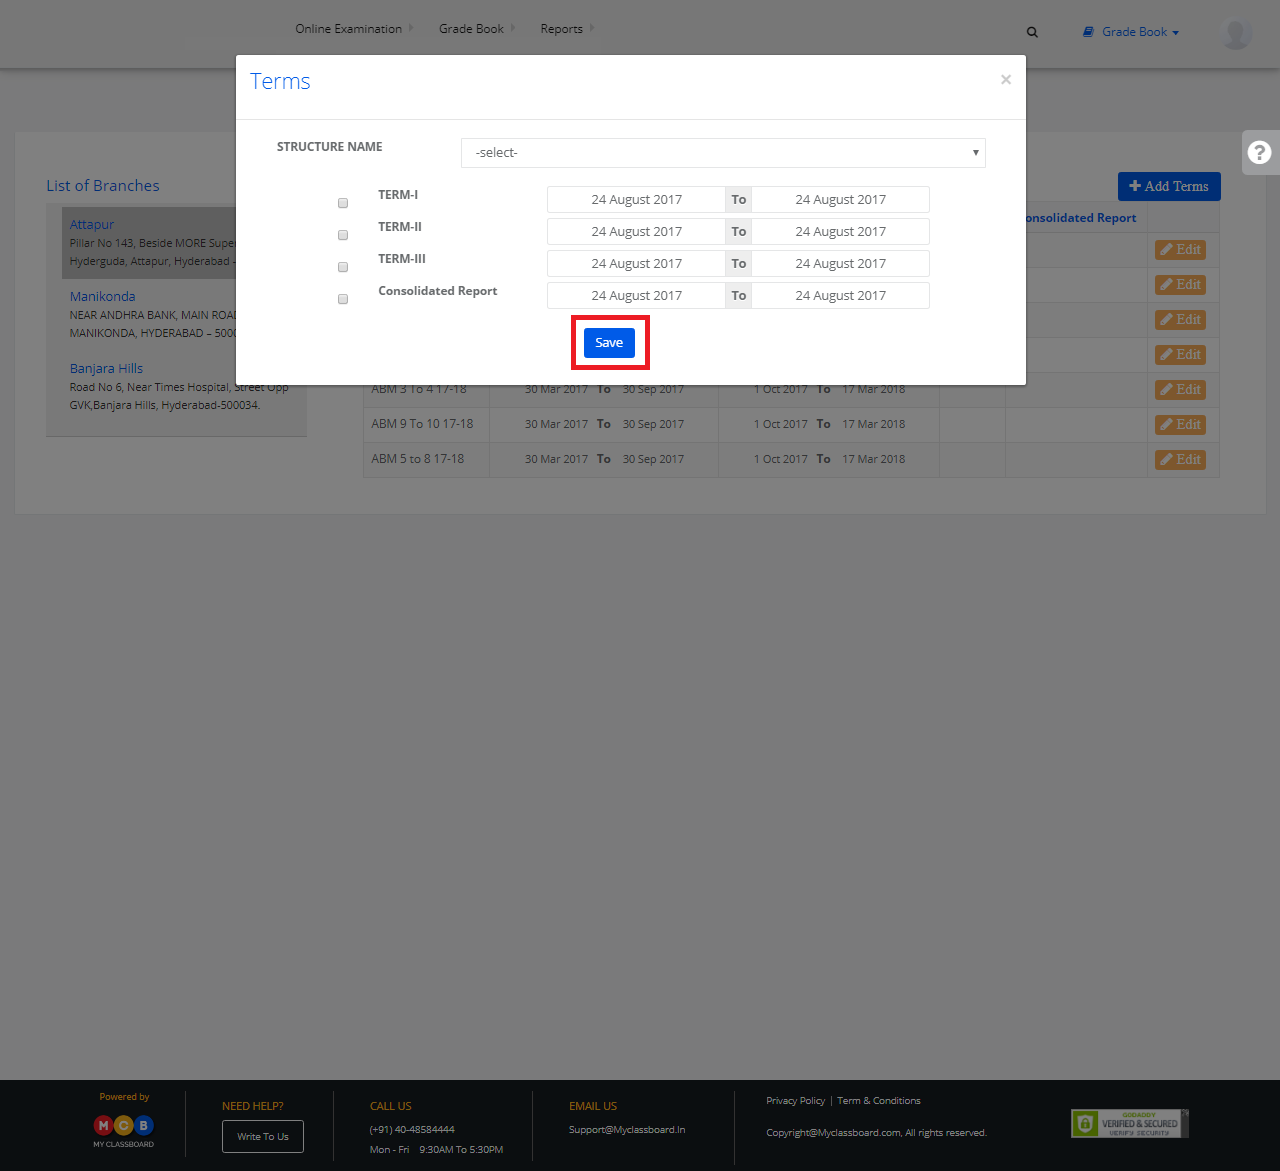
Step 3: Select the Structure, Term. Choose the dates for the terms and then click on “Save”. The Term for that respective structure is successfully created.
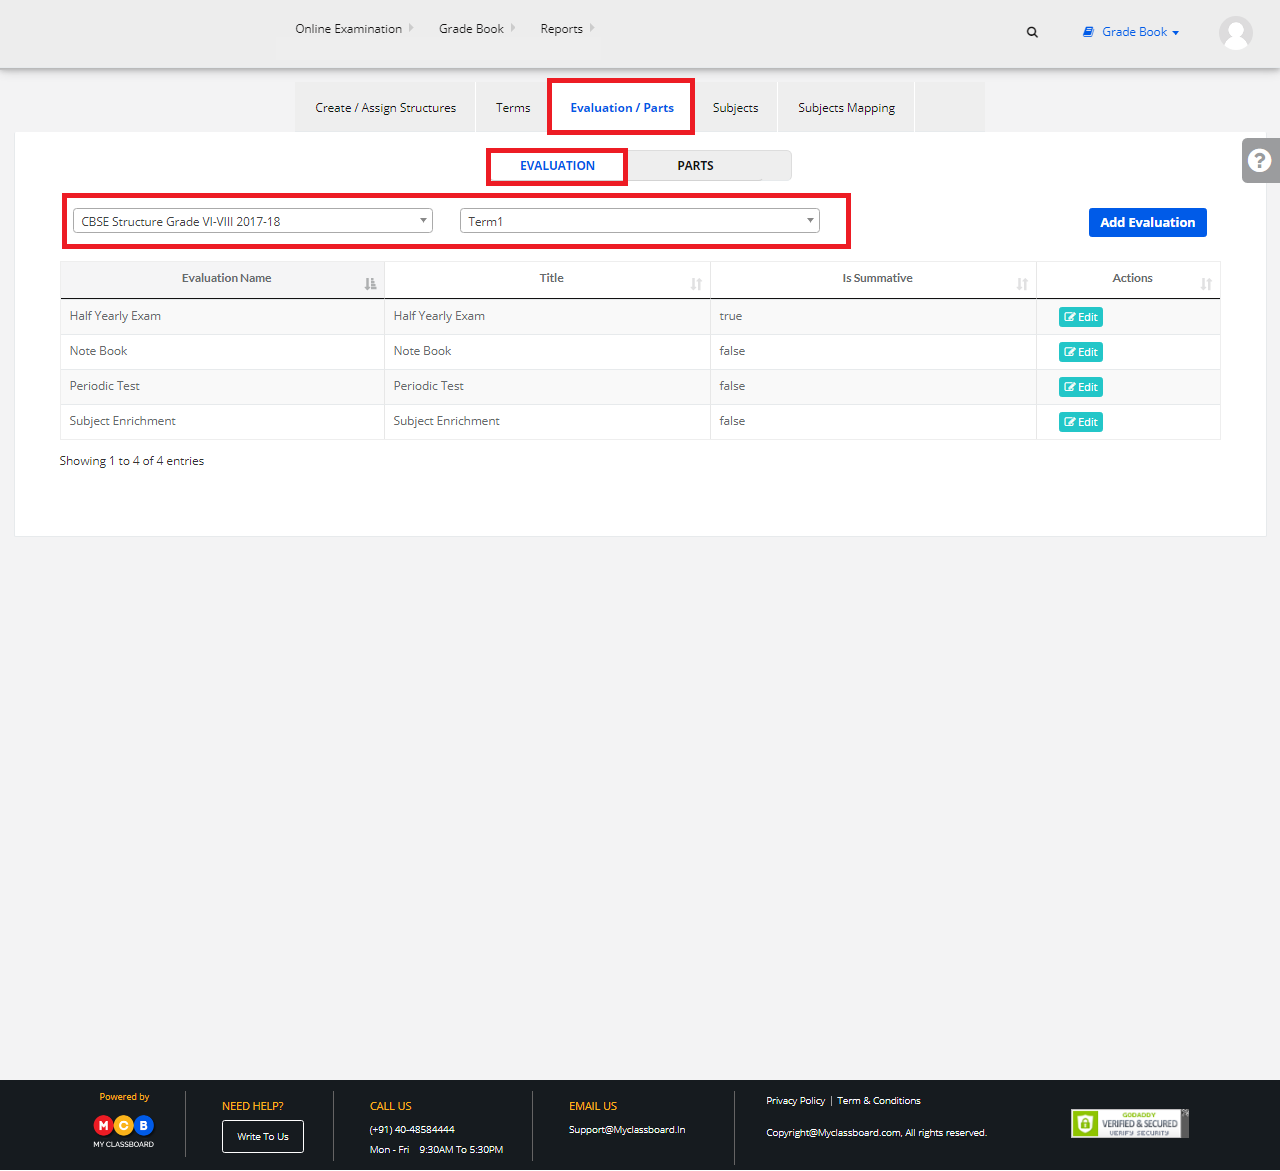
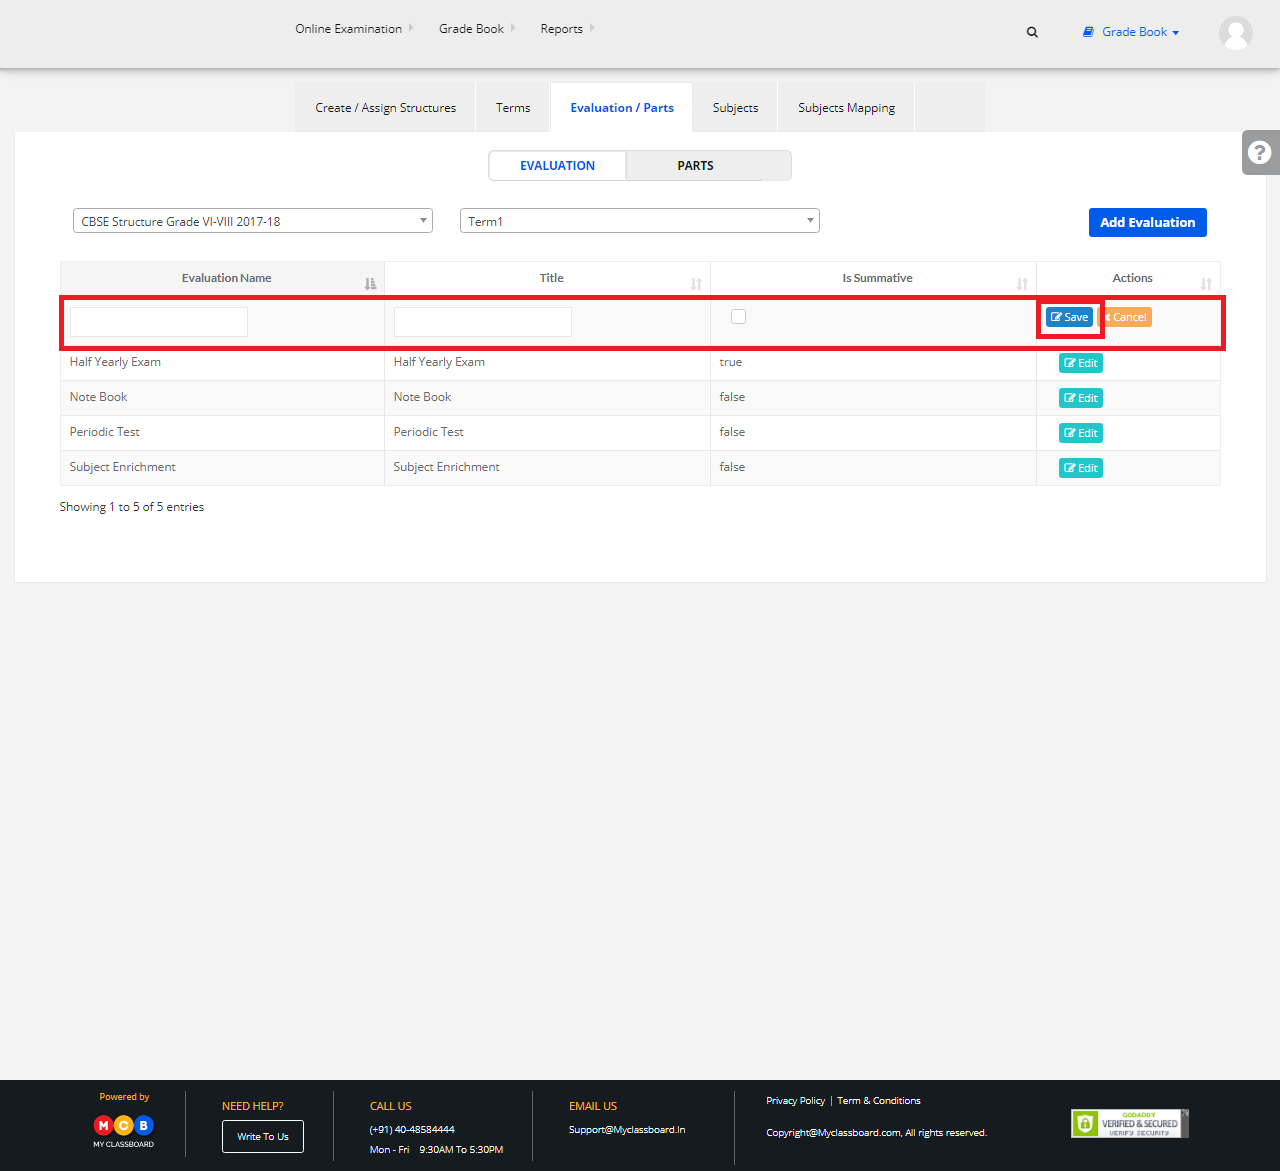
Stage 3: Create CCE Evaluations
Step 1: Select “Evaluation/Parts” ——> “Evaluation” ——> Select “Structure” and “Term”.
Step 2: Click on “Add Evaluation” to create a new Evaluation.
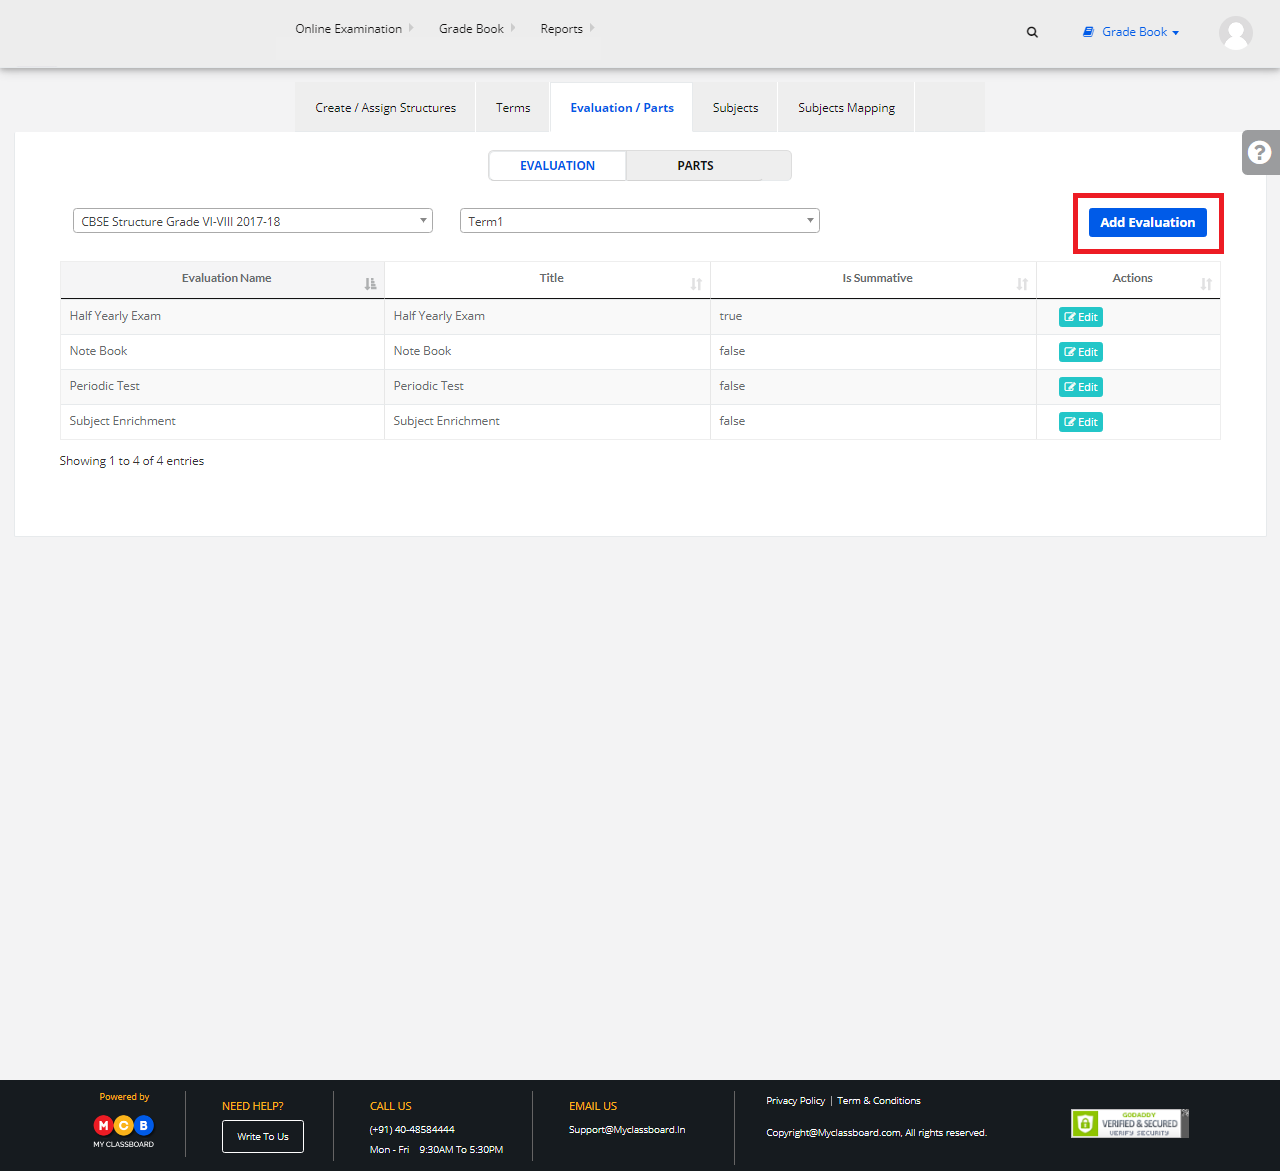
Step 3: Enter the necessary details here and then click on “Save”. The Evaluation for that respective Structure and Term is created successfully.
Step 4: You can also edit the existing evaluation by clicking on the edit option shown beside.
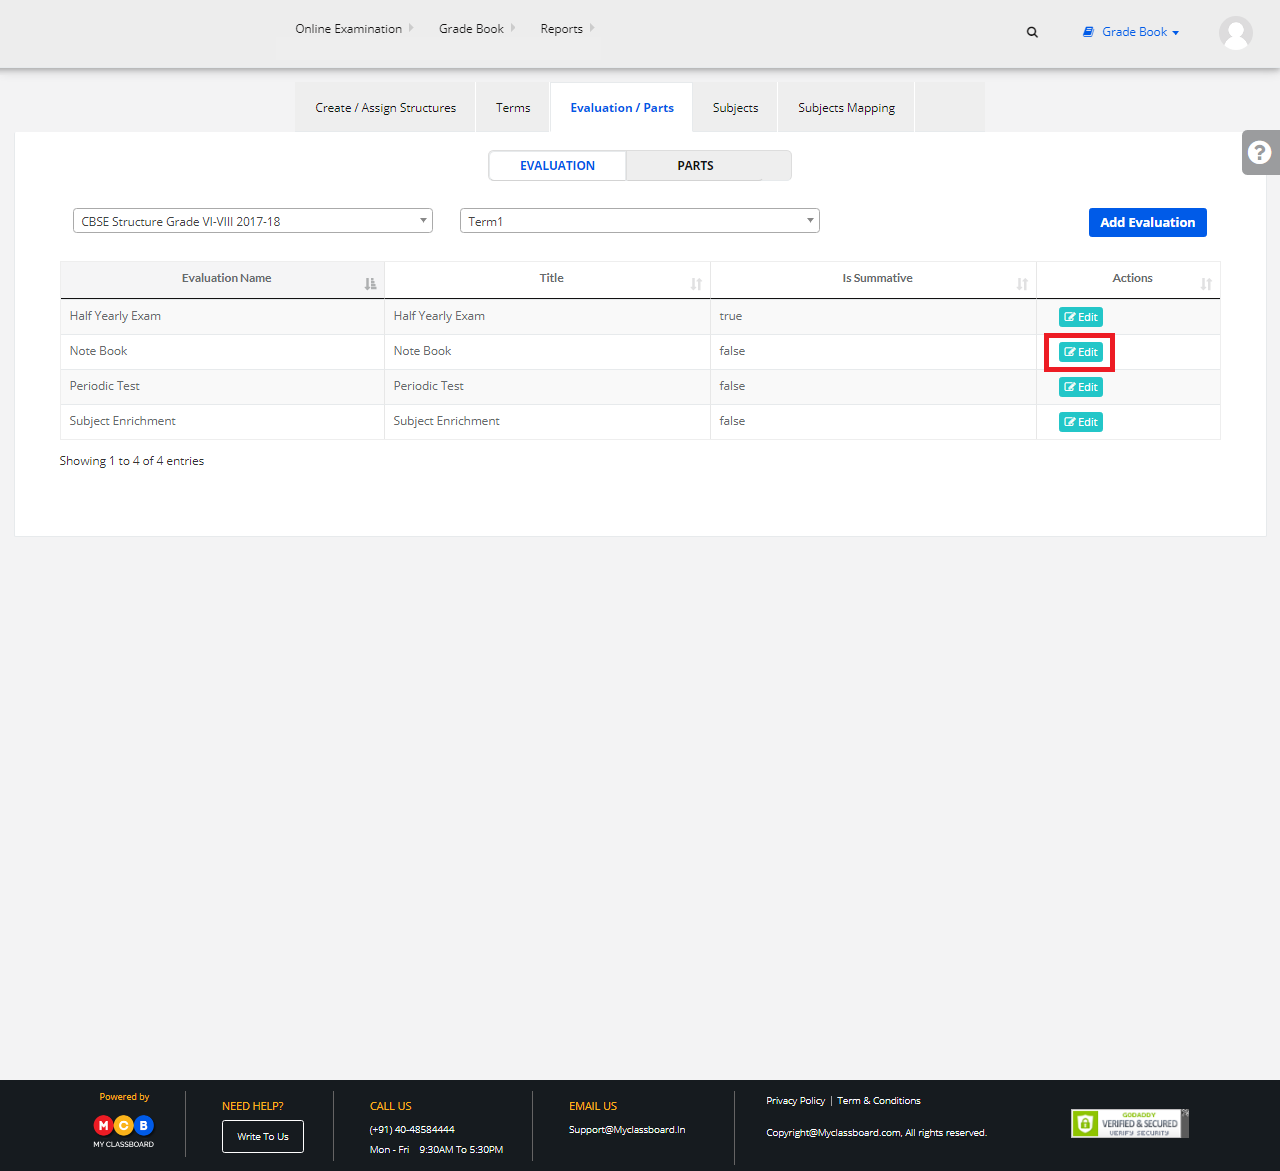
Step 5: Make the necessary changes and click on the “Update” button.

Stage 4: Create Parts
Step 1: Select “Evaluation/Parts” ——> “Parts”
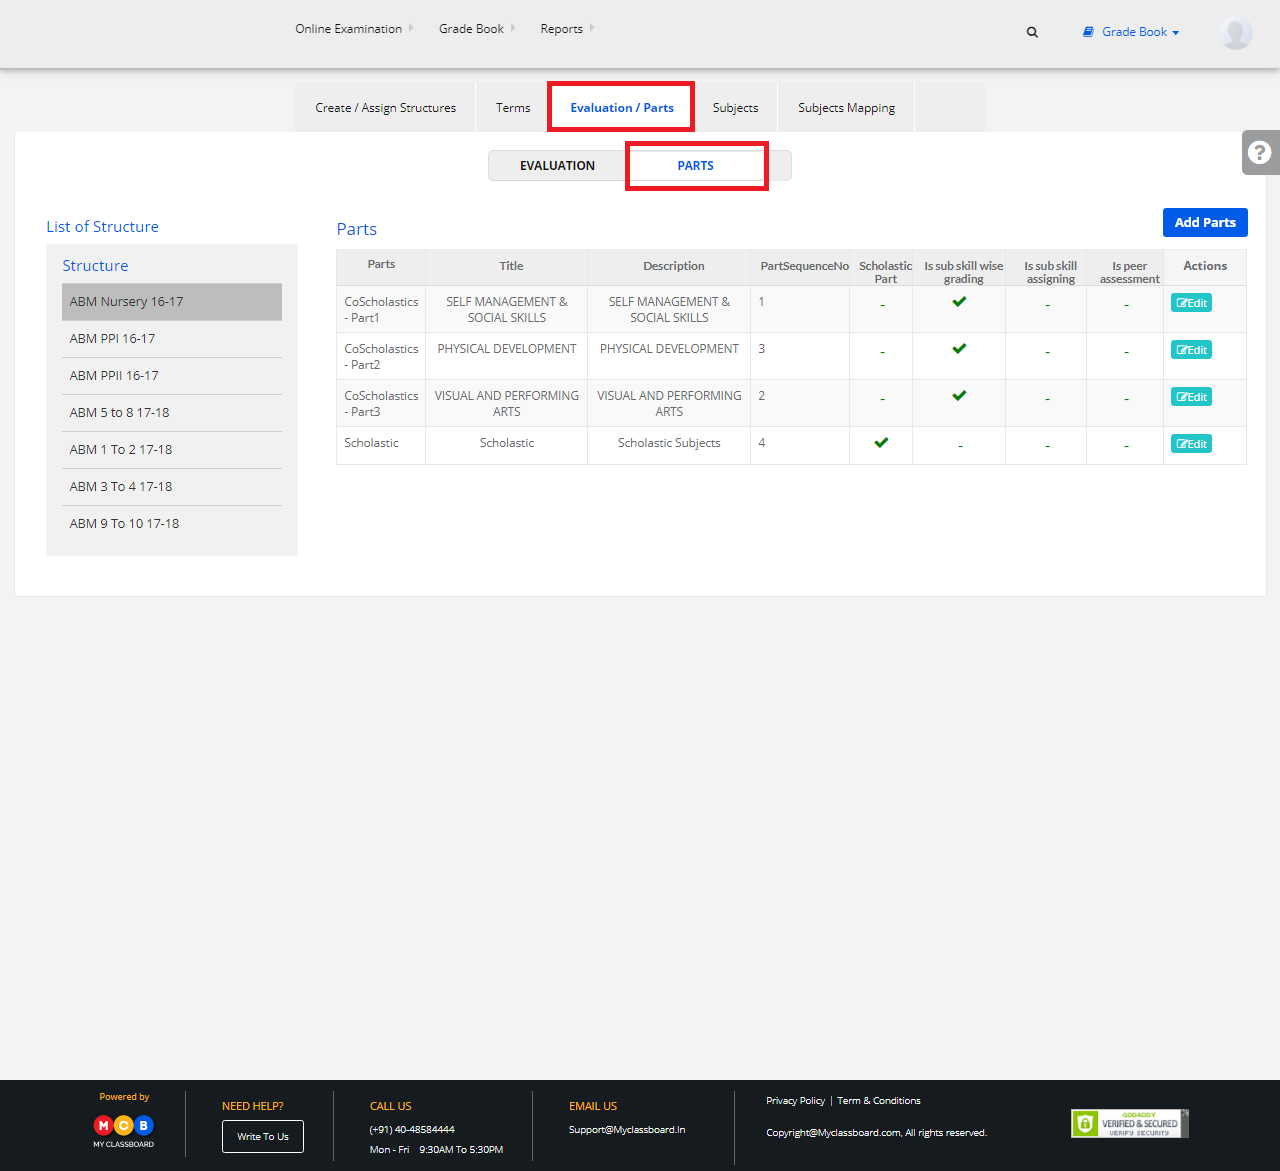
Step 2: Select any structure on the left pane and click on “Add Parts” to create a new Part.
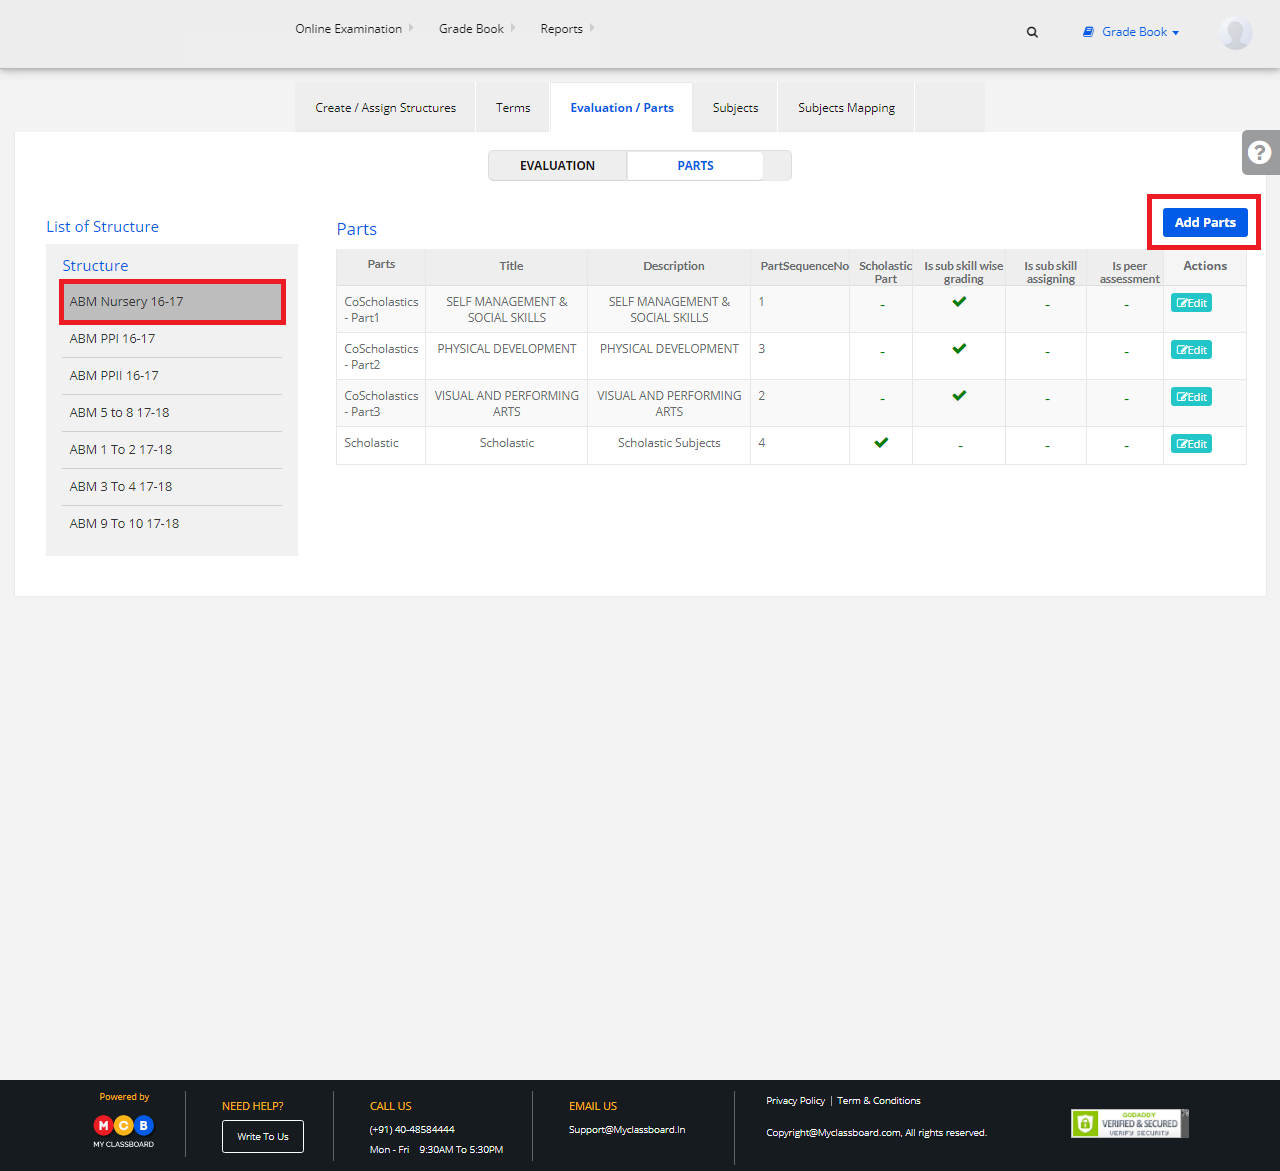
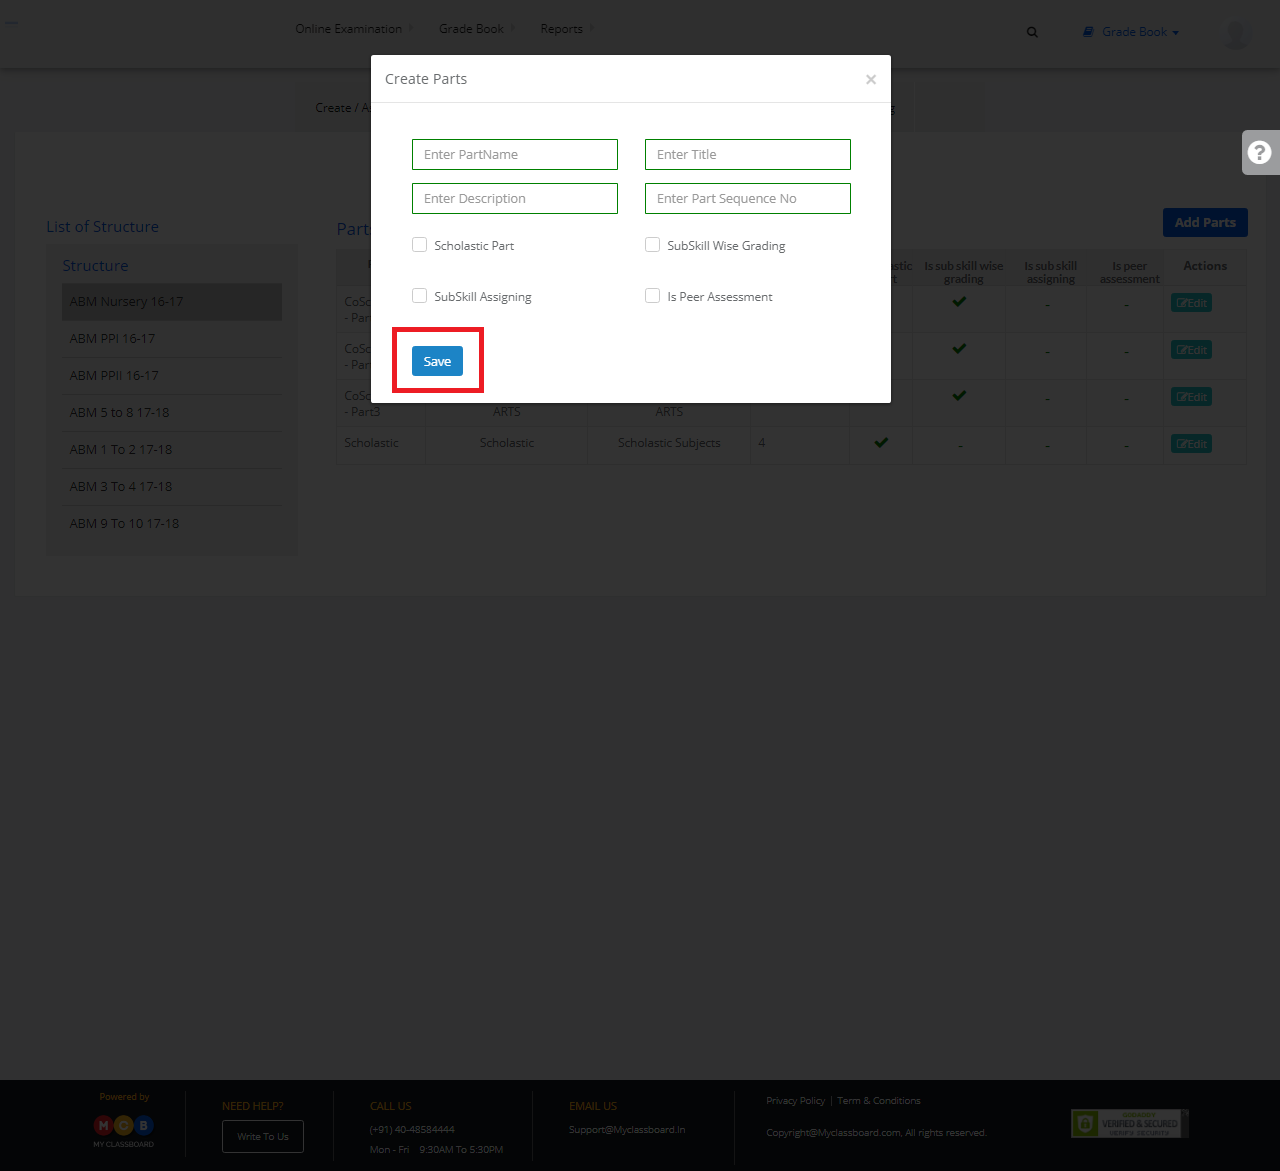
Step 3: Enter Part Name, Title, Description, Part Sequence No and other required details and click on “Save”. The Part for that respective structure is created.
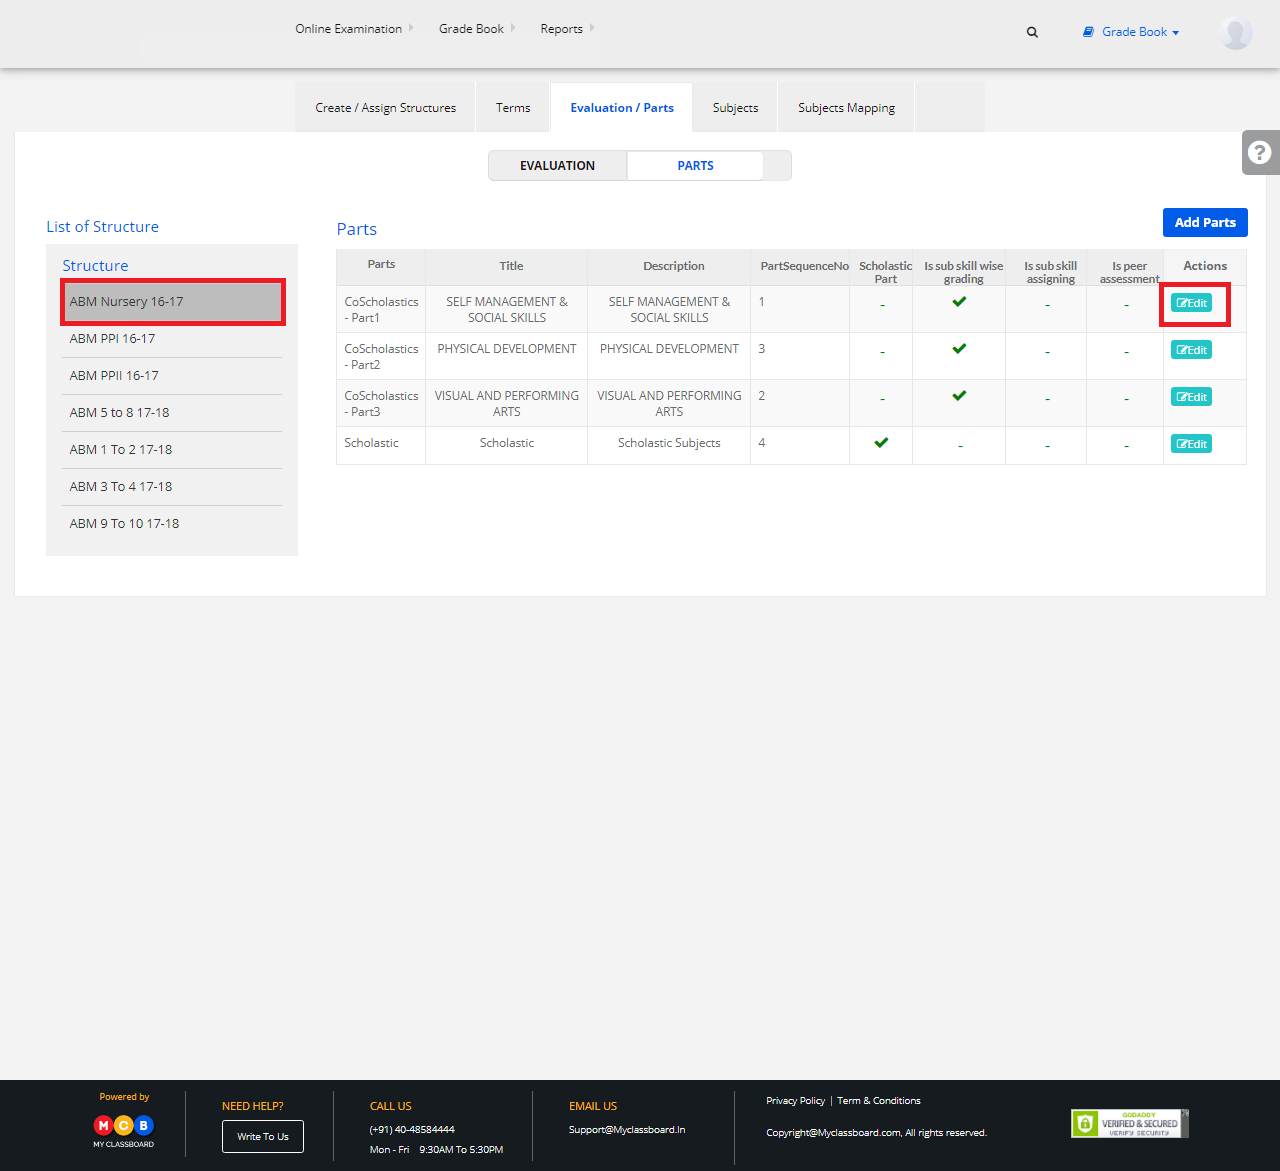
To Edit:
Step 4: You can also edit the existing part by clicking on the edit option shown beside.
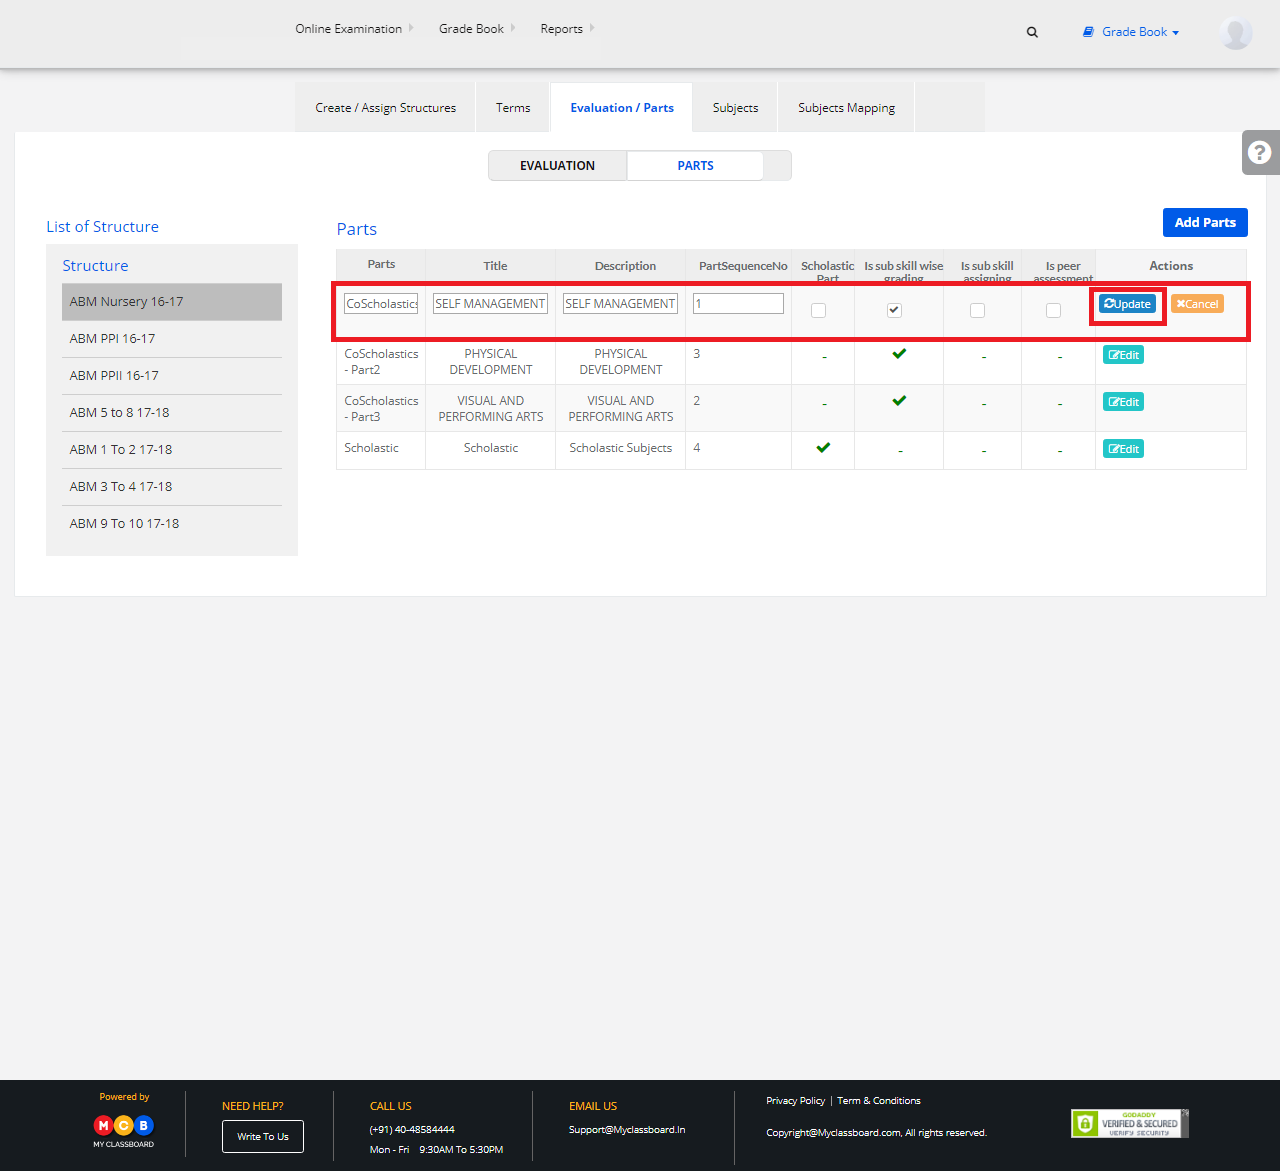
Step 5: Make the necessary changes and click on the “Update” button.
Stage 5: Create subjects
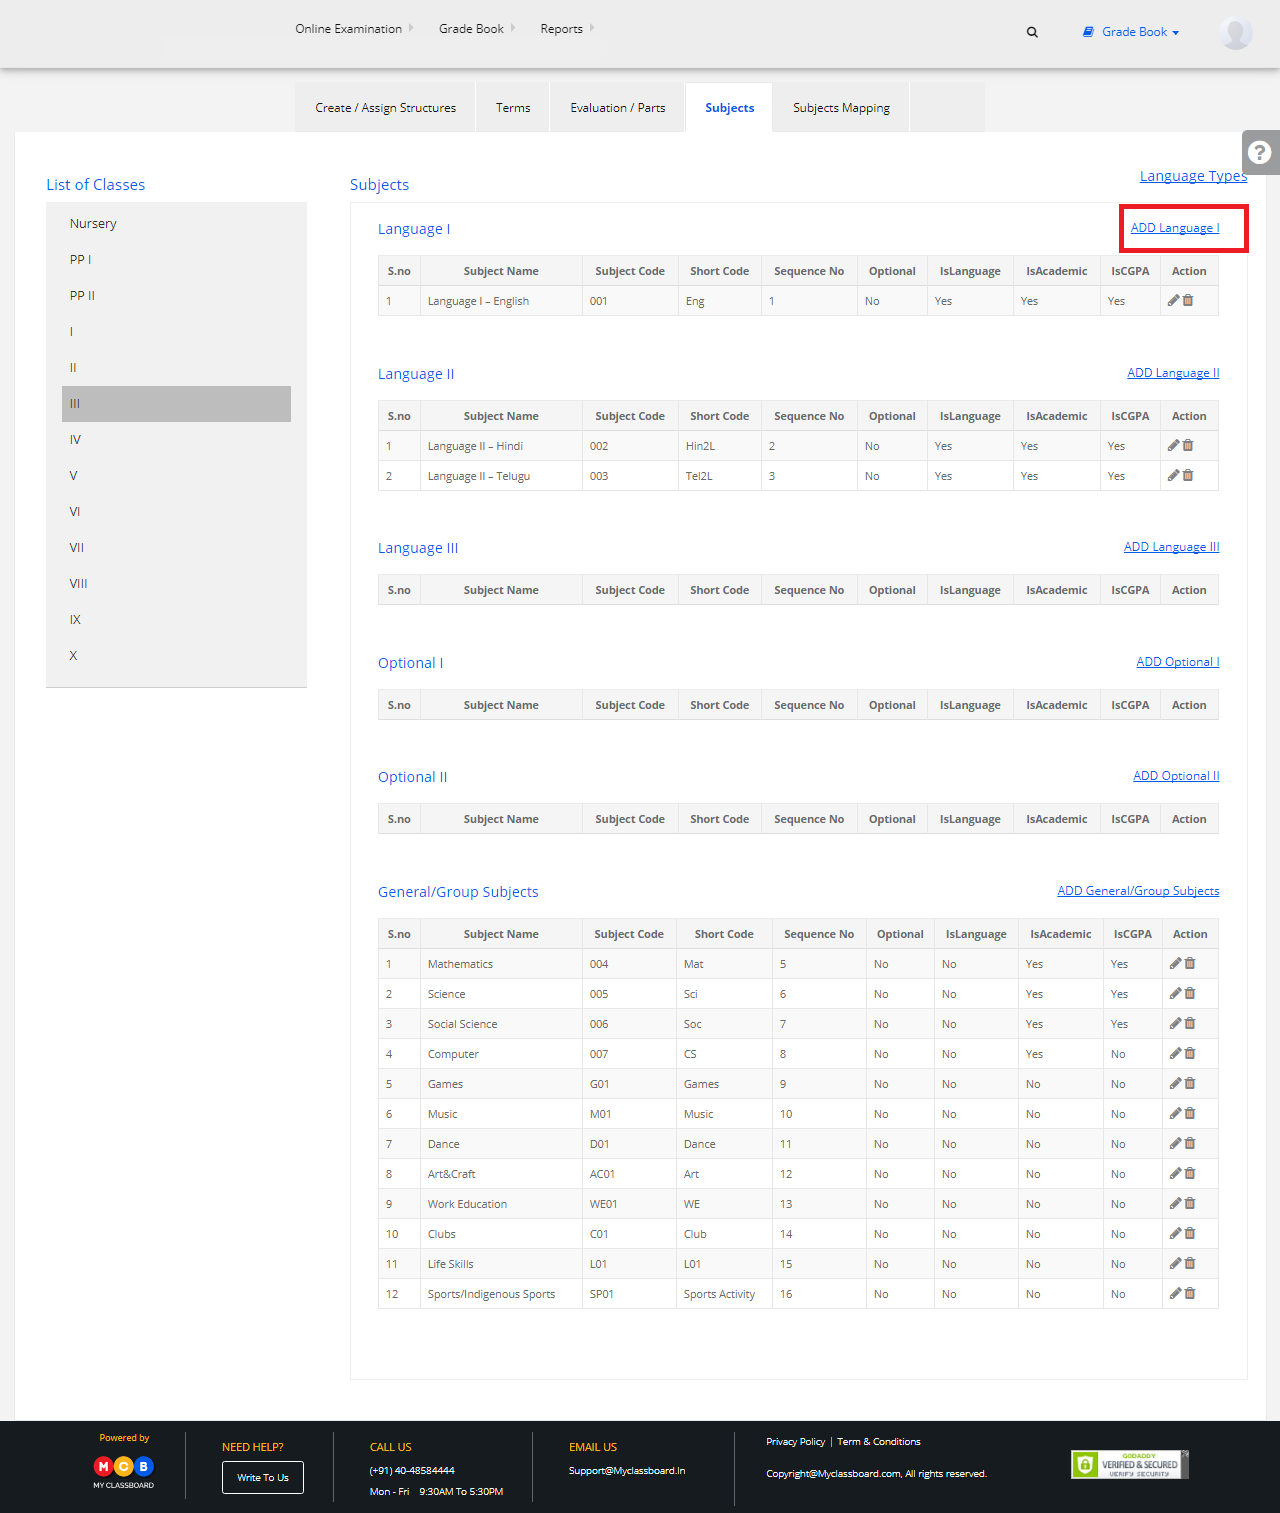
Step 1: Select “Subjects” and now select any Class for which you want to create Subjects.
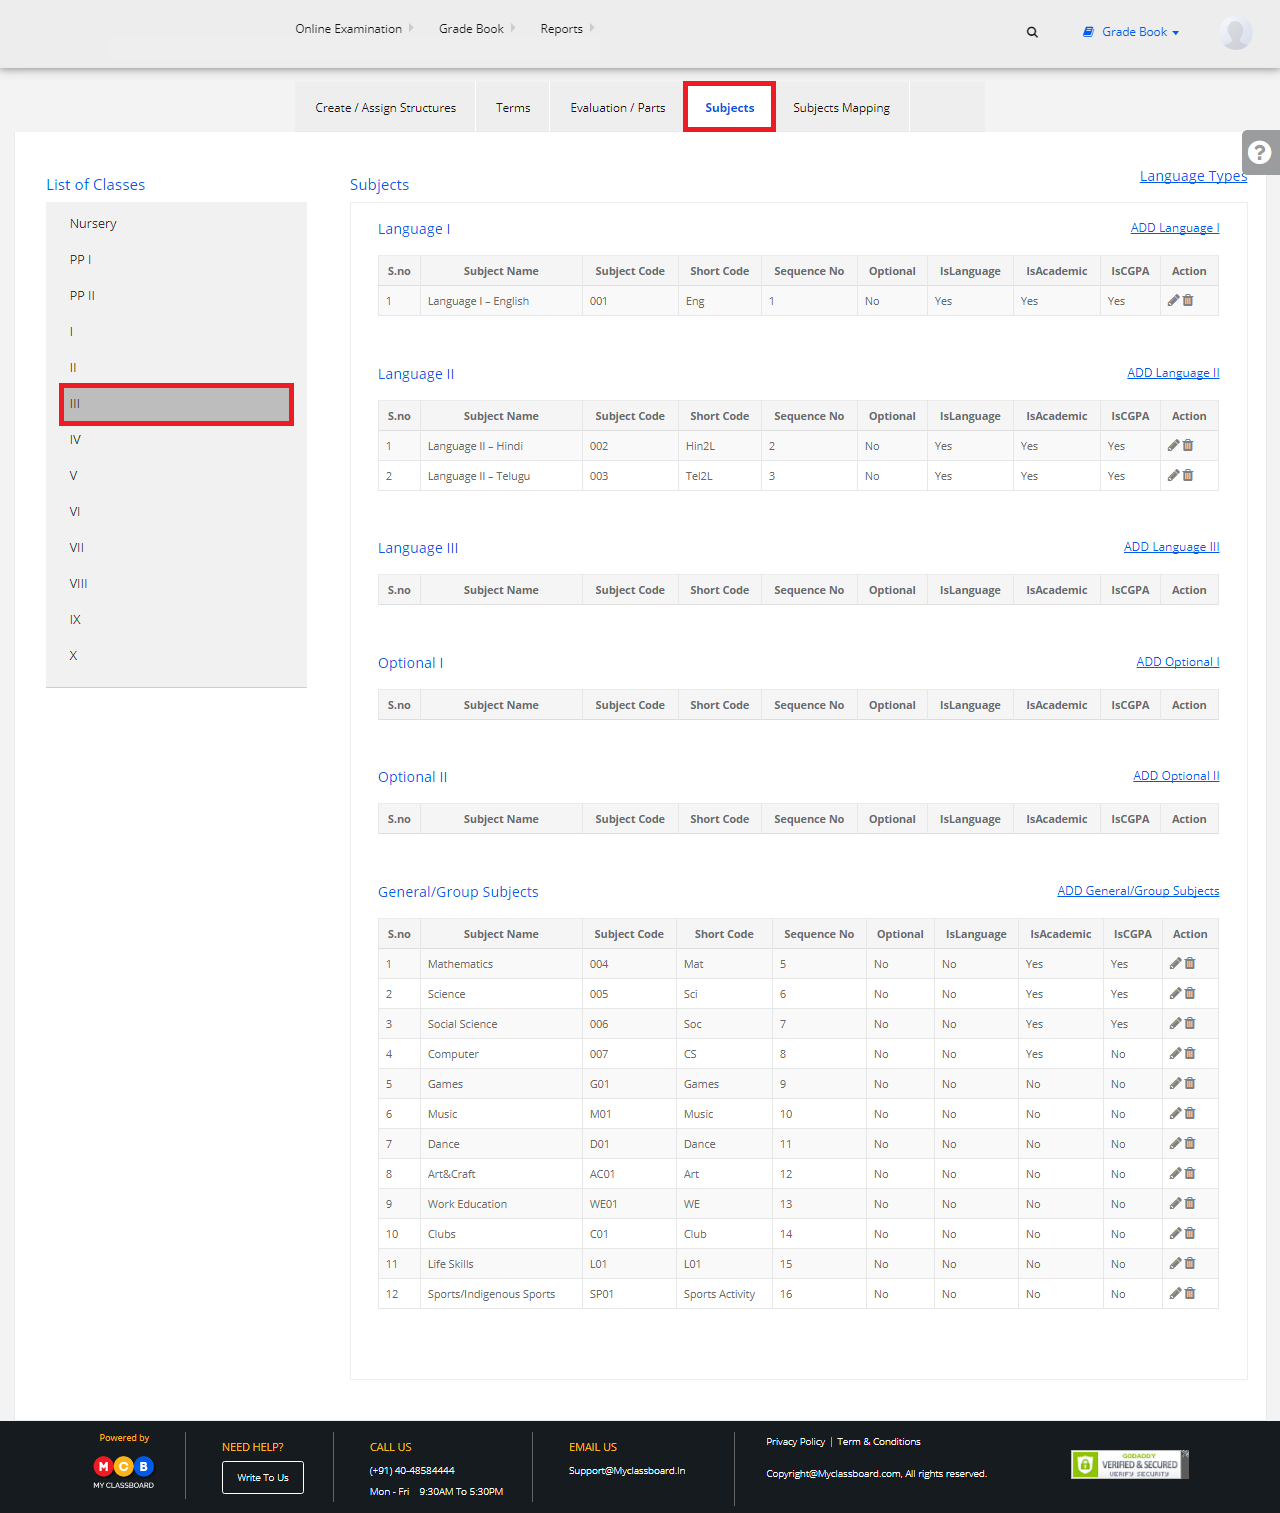
Step 2: Select any language and click on “Add Language” to add/create a new language.
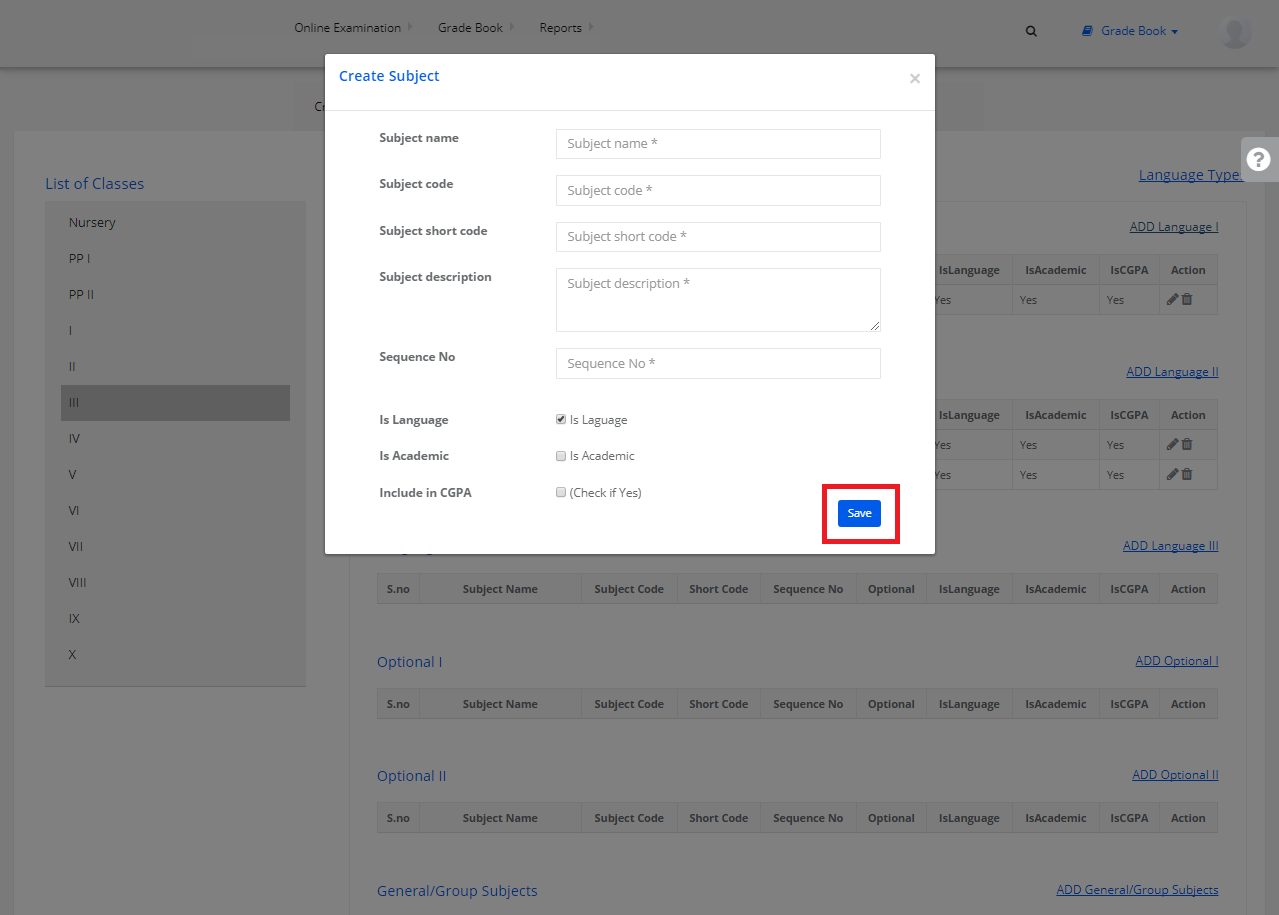
Step 3: Create the subject by giving the subject name, code and other necessary details. Click on “Save”. The language is created.
General Subjects
Step 4: Select General/Group Subjects and click on “Add General/Group subjects”.
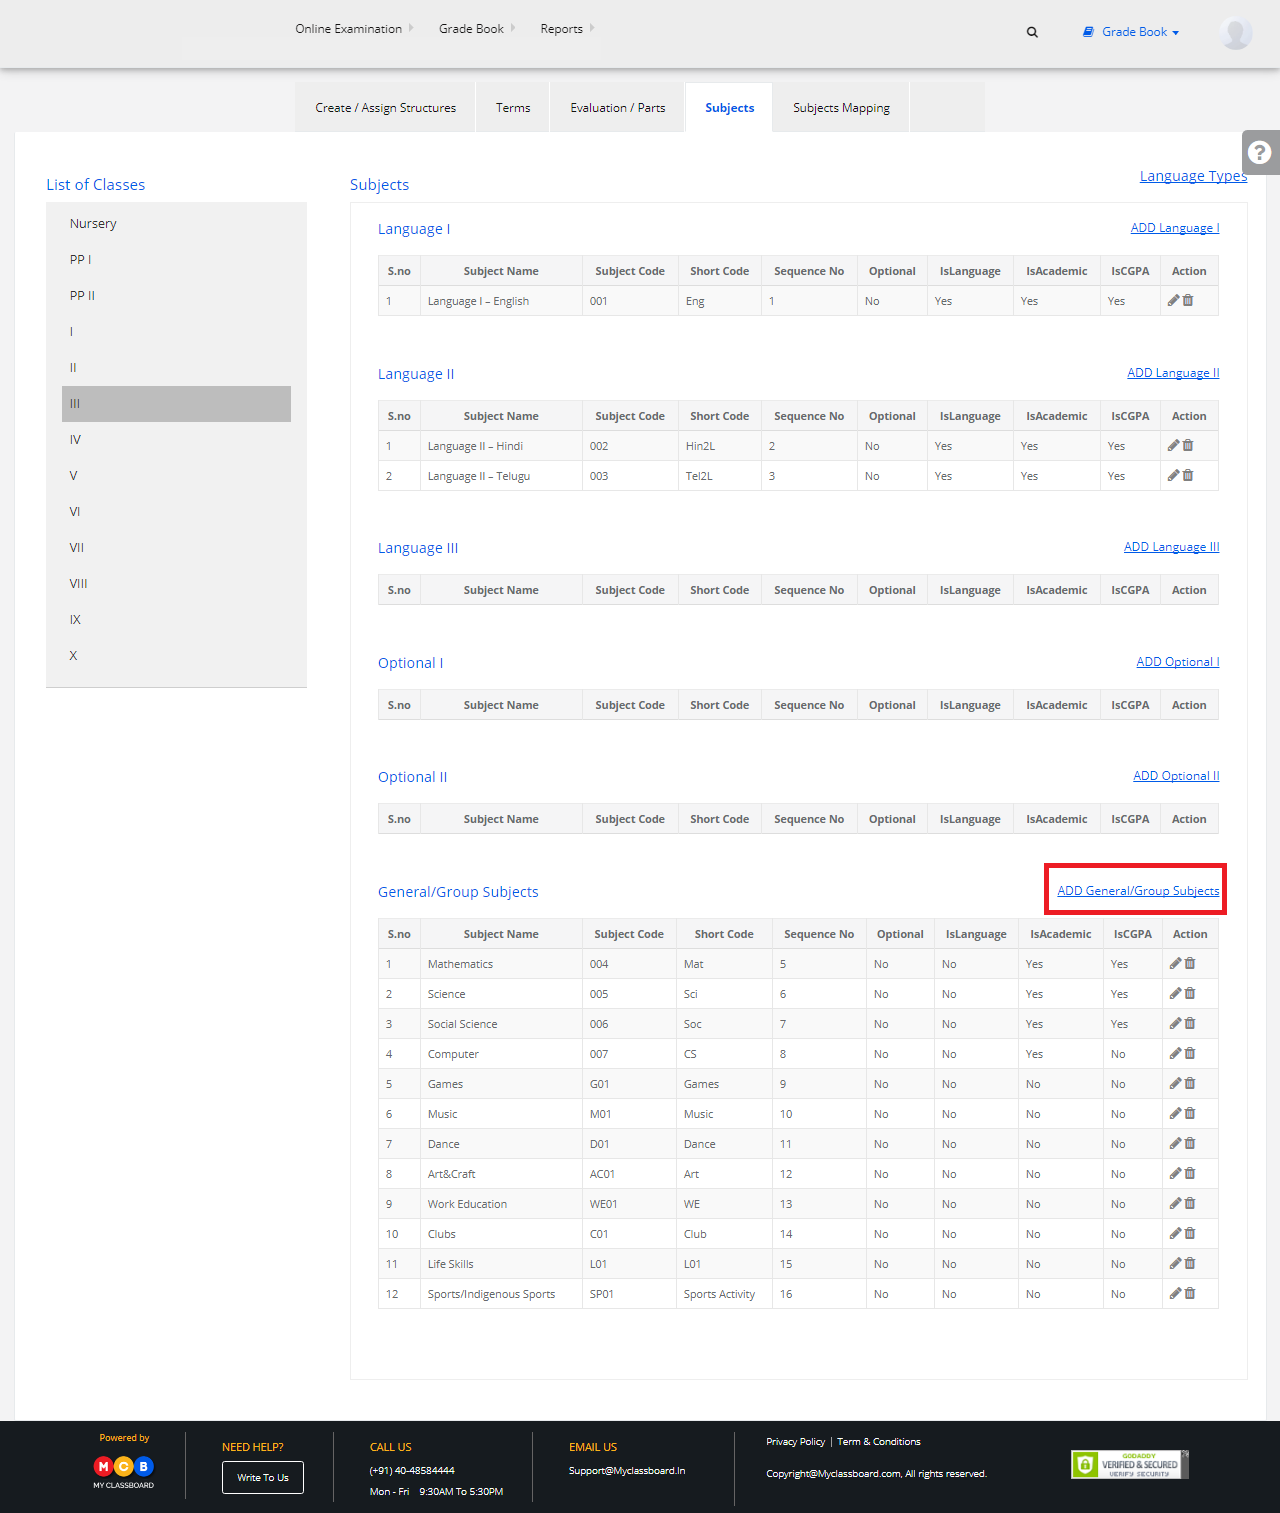
Step 5: Create the subject by giving the subject name, code and other necessary details. Click on “Save”. The general/group subject is created.

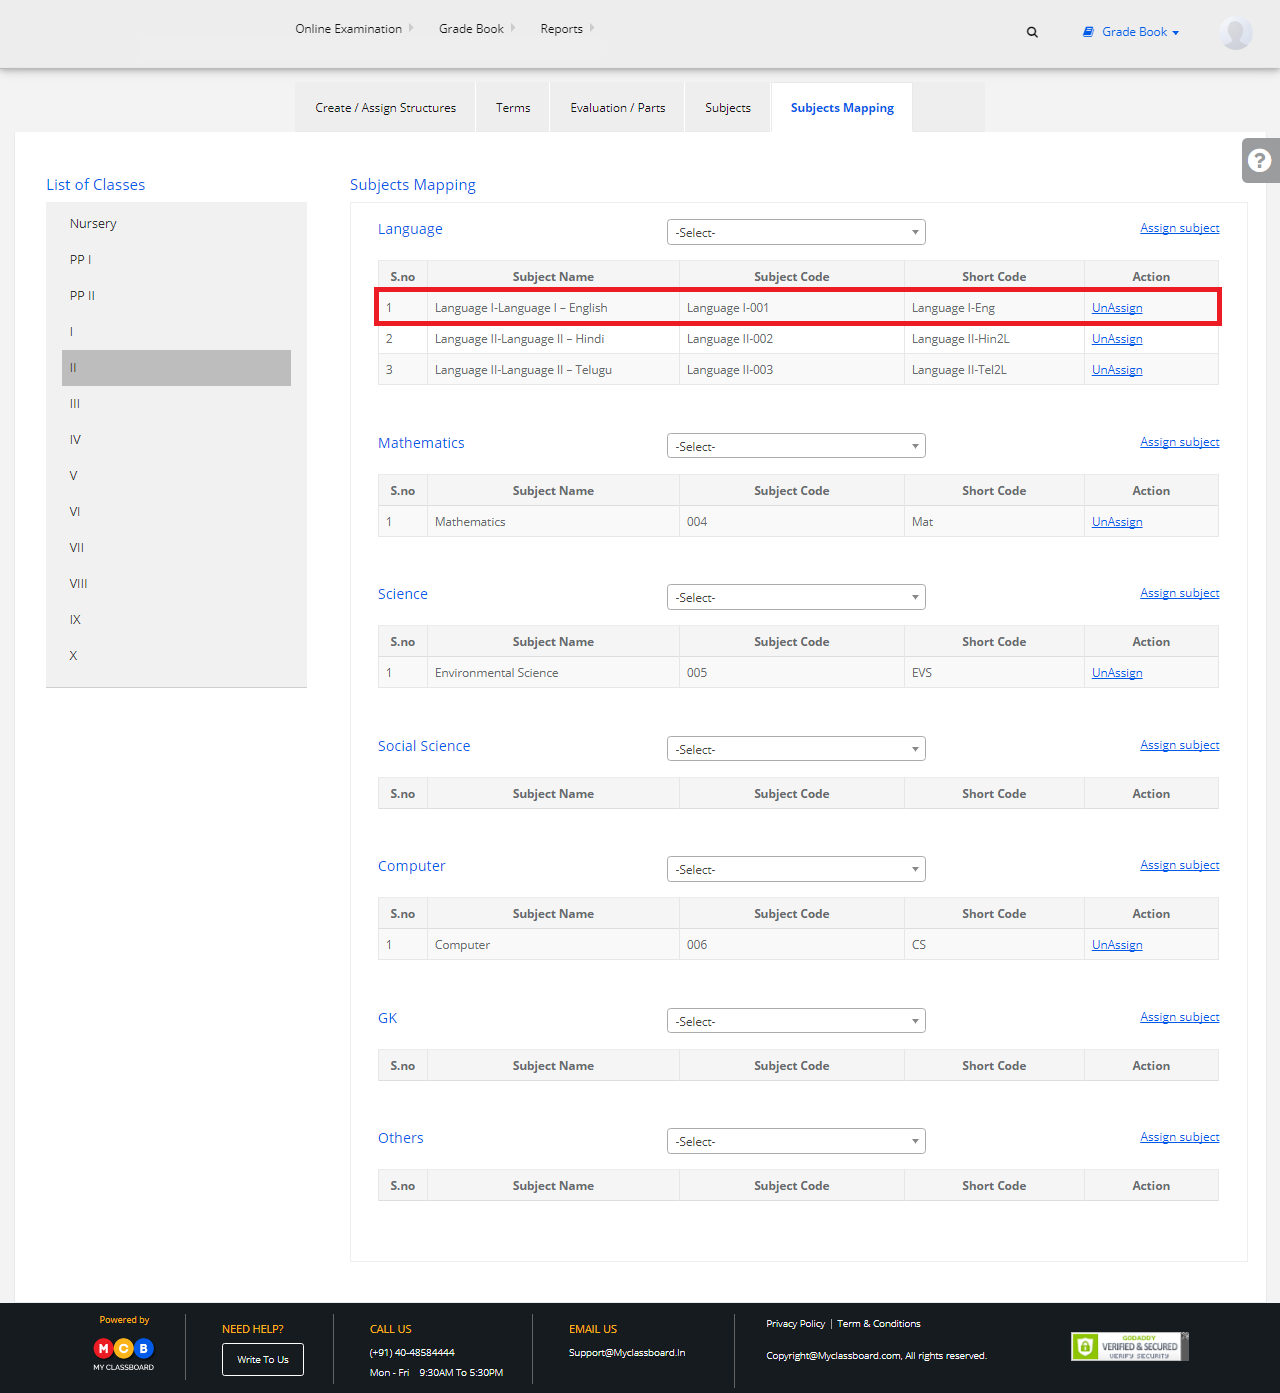
Stage 6: Mapping subjects
Step 1: Select Subjects Mapping —–> Select Class.
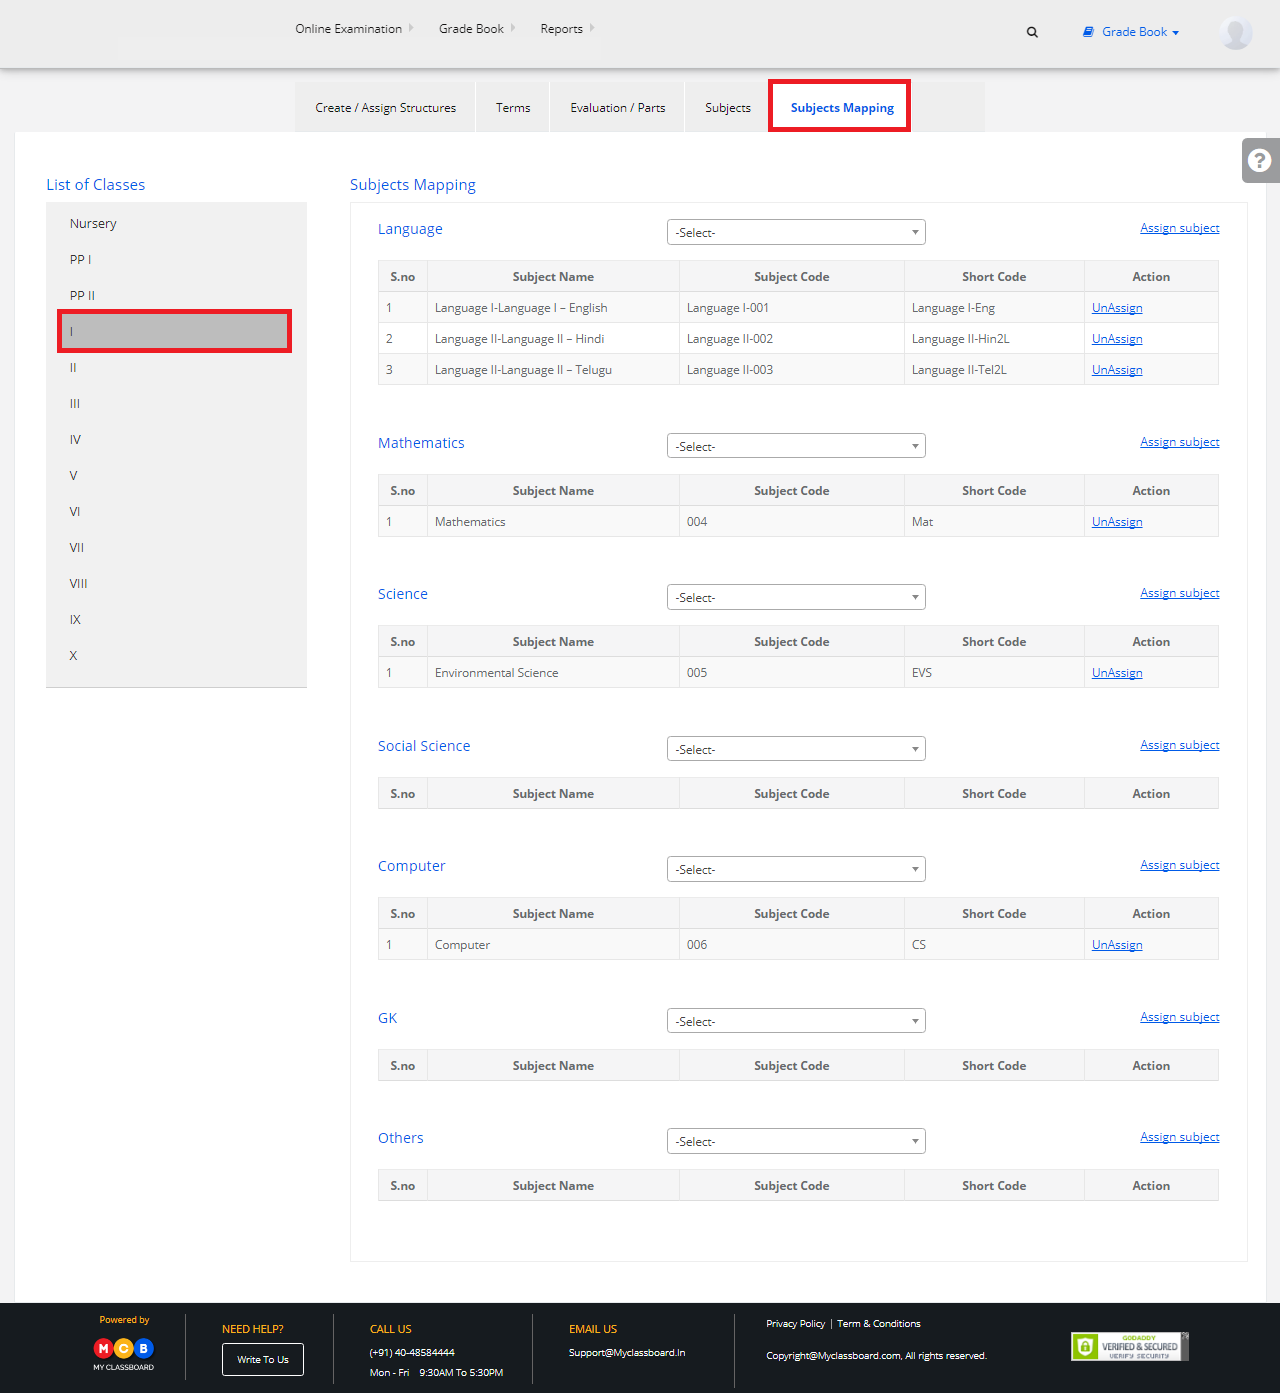
Step 2: Select any subject in the mentioned list and click on “Assign Subject” to assign the same.
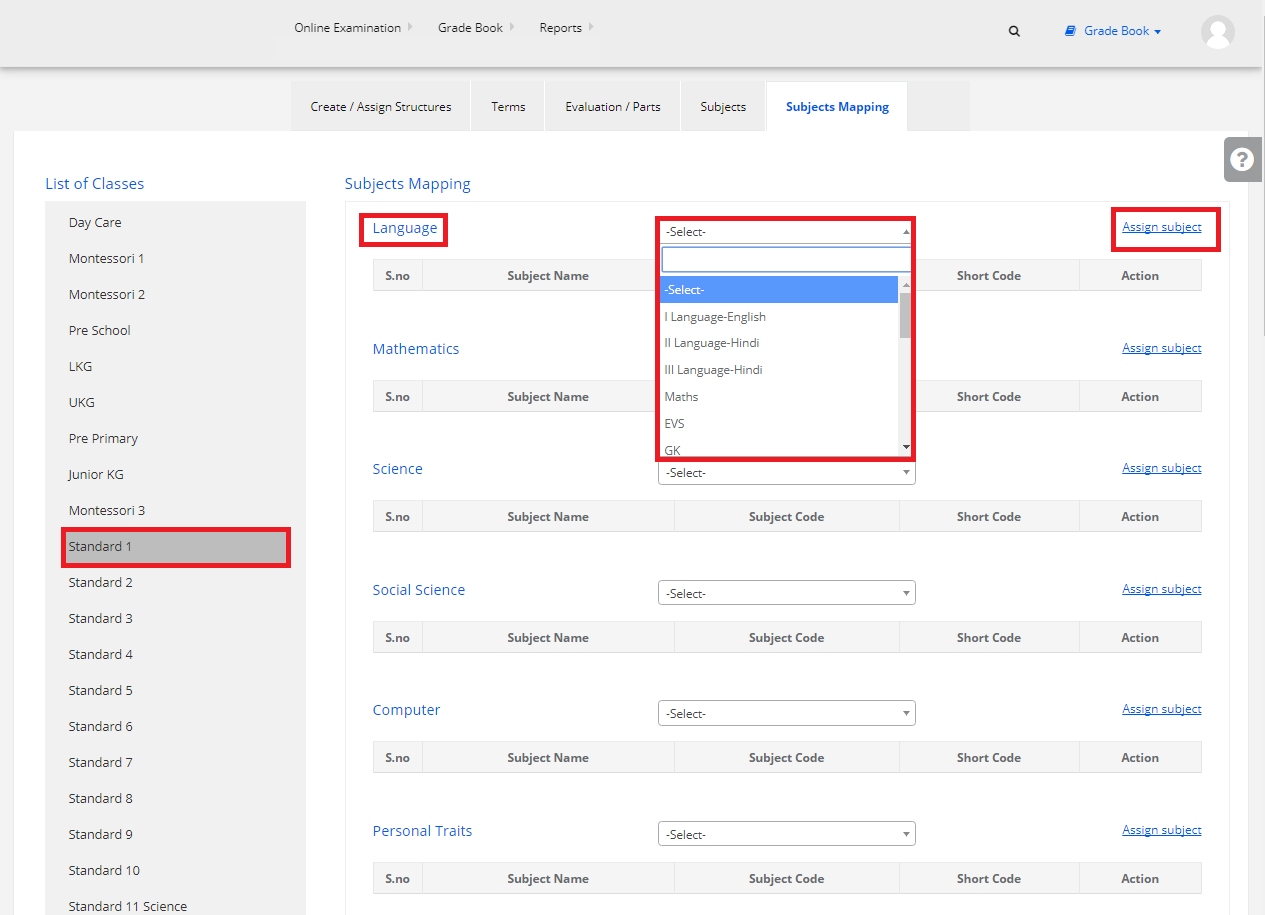
Step 3: To un-assign, the subjects, click on the un-assign option shown beside.
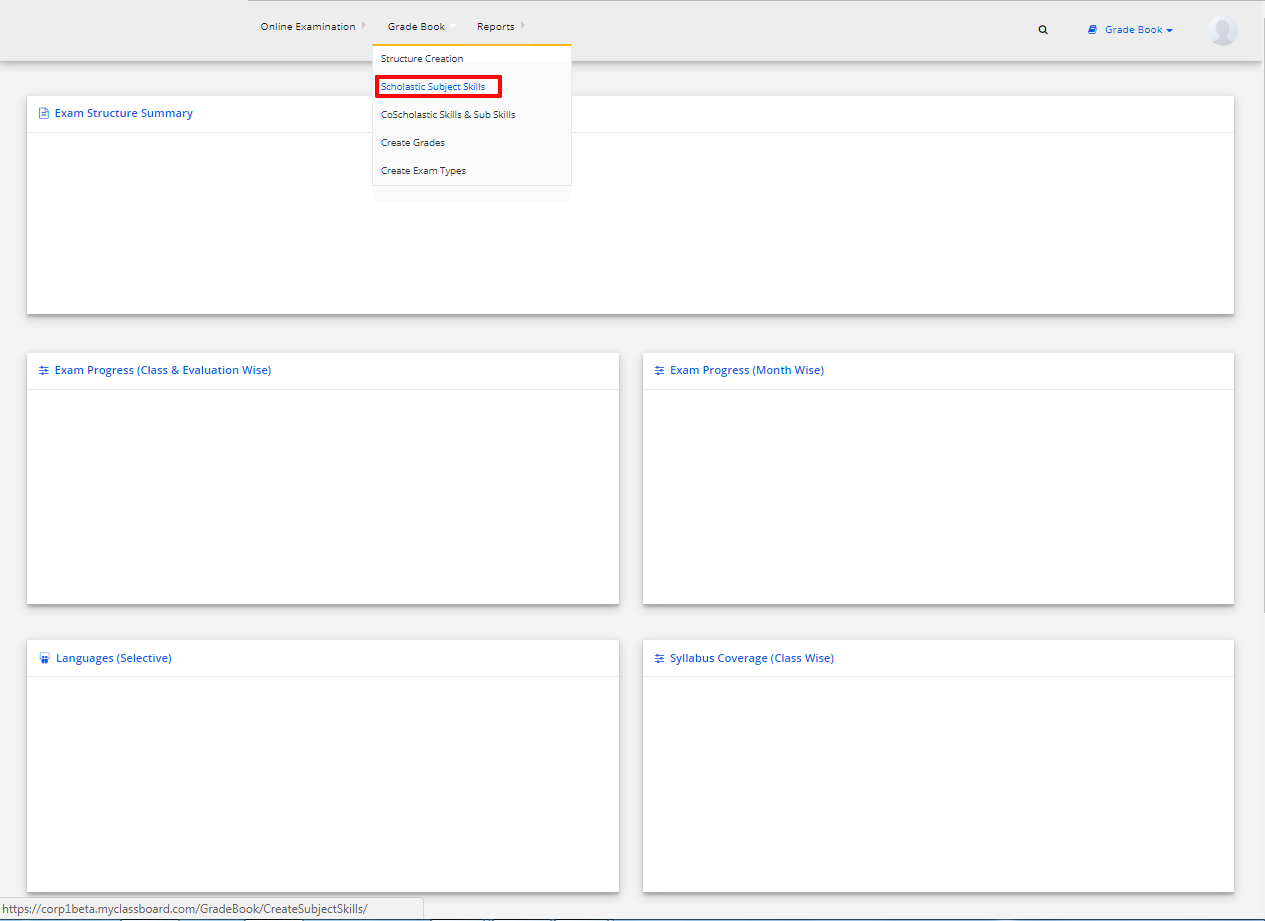
Stage 7: Create Scholastic Subject Skills
Step 1: Click on “Gradebook” on the top bar and select “Scholastic Subject Skills”.
Step 2: Select “Structure Name” and Click on “Get”.
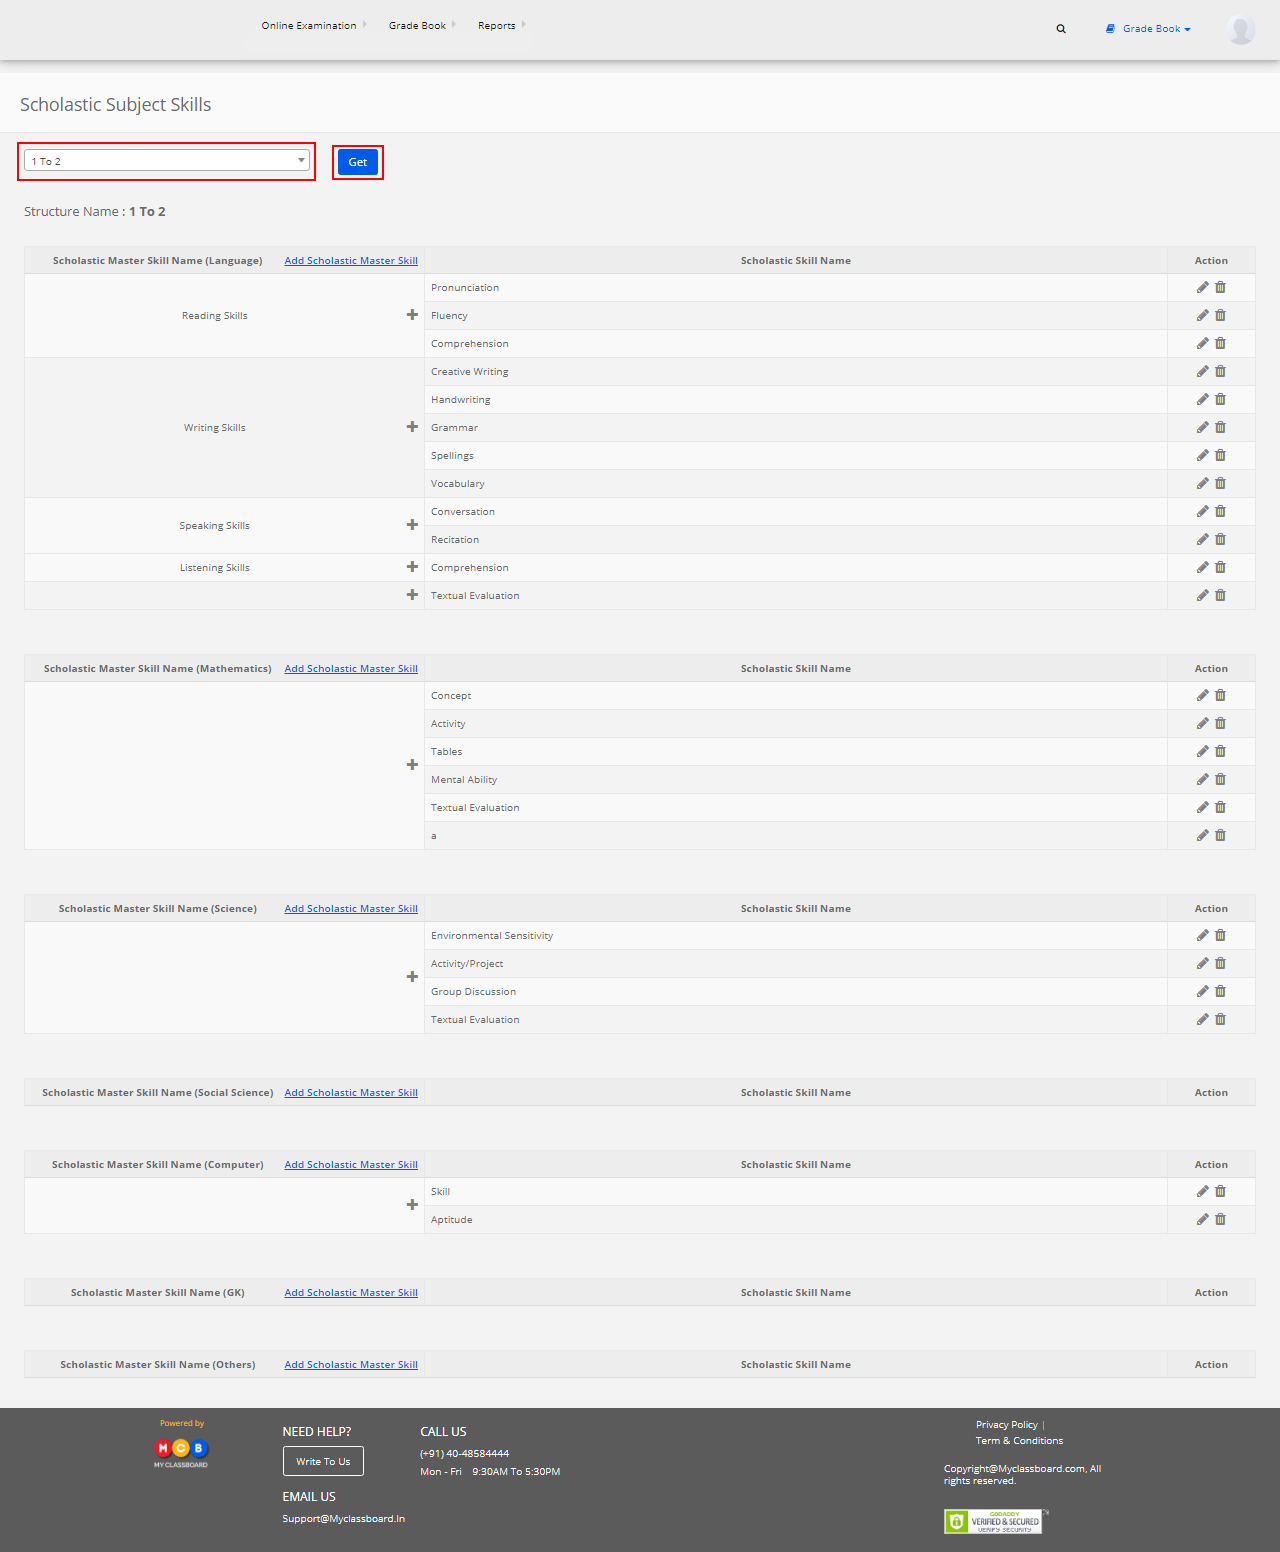
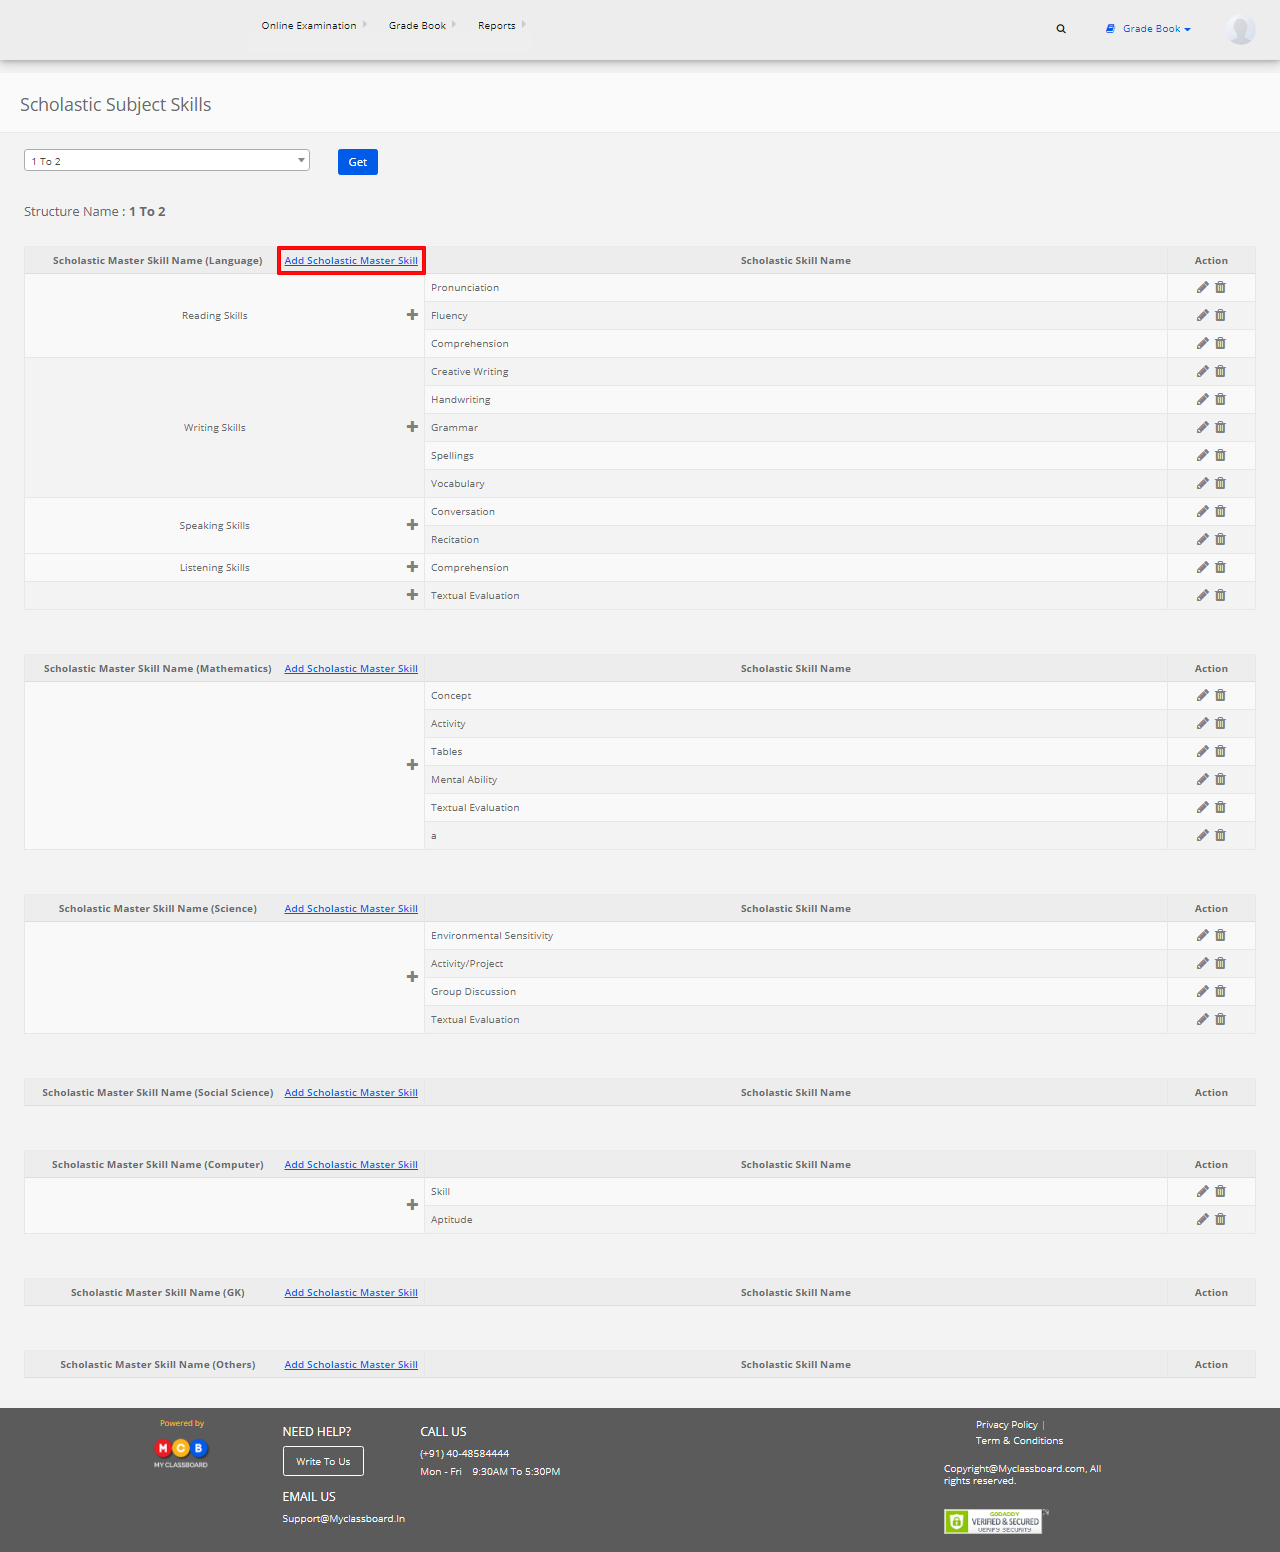
Step 3: Click on “Add Scholastic Master Skill” to create new Scholastic Master Skills.
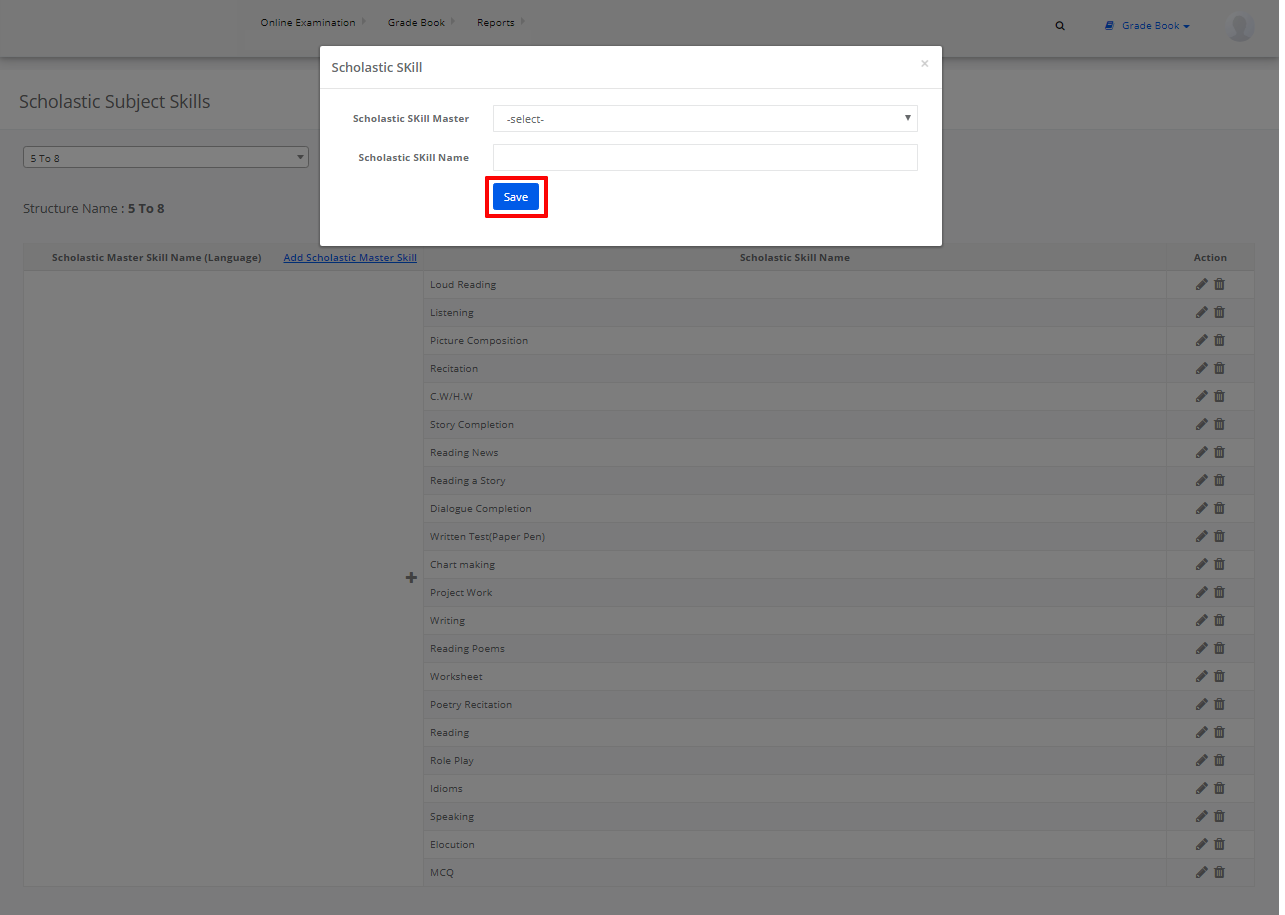
Step 4: Select the Skill Master and name a skill under it and click on save. The new Scholastic Master Skill is created.
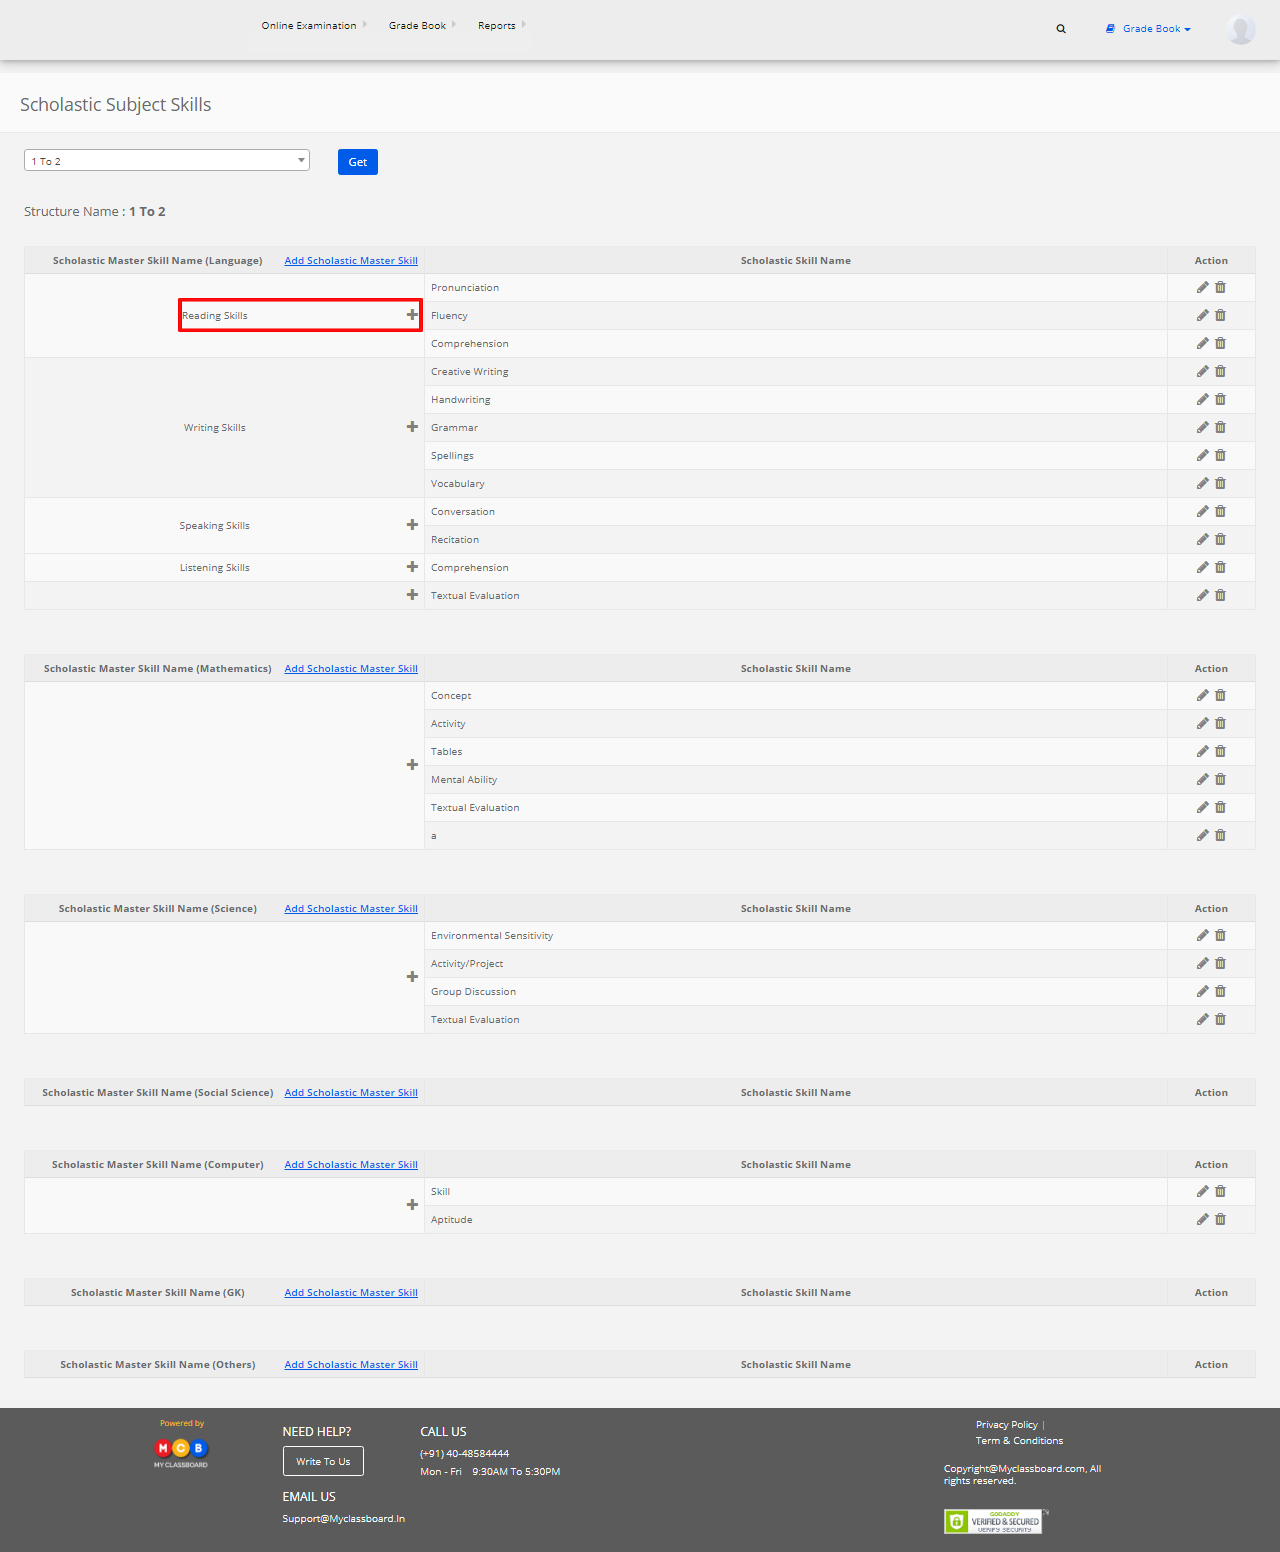
Step 5: To add more skills to the skill master, select any scholastic skill master. Click on “Add Scholastic Skill” to add new skills under it.
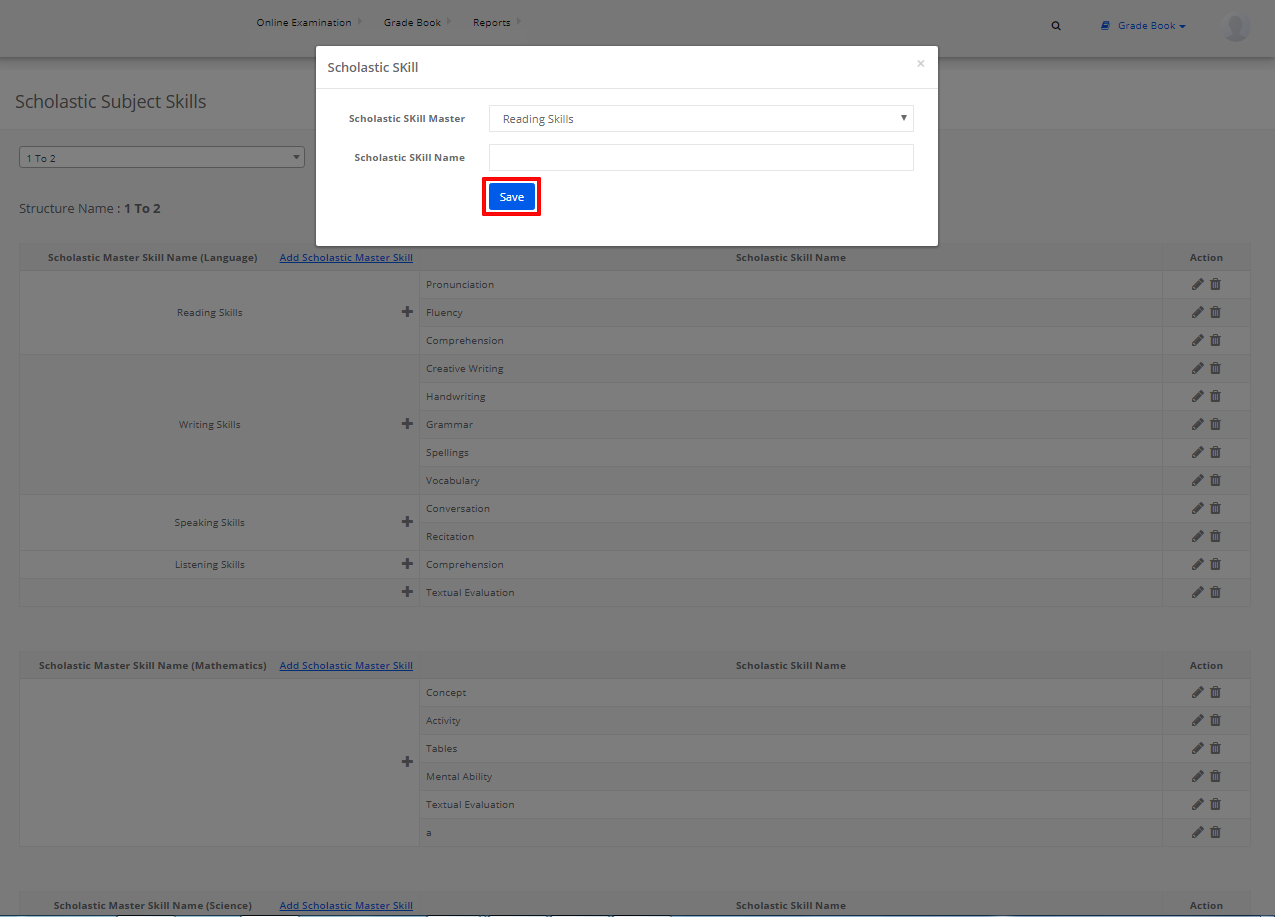
Step 6: Name the Skill and click on Save. The new Scholastic Skill is added under the Scholastic Master Skill.
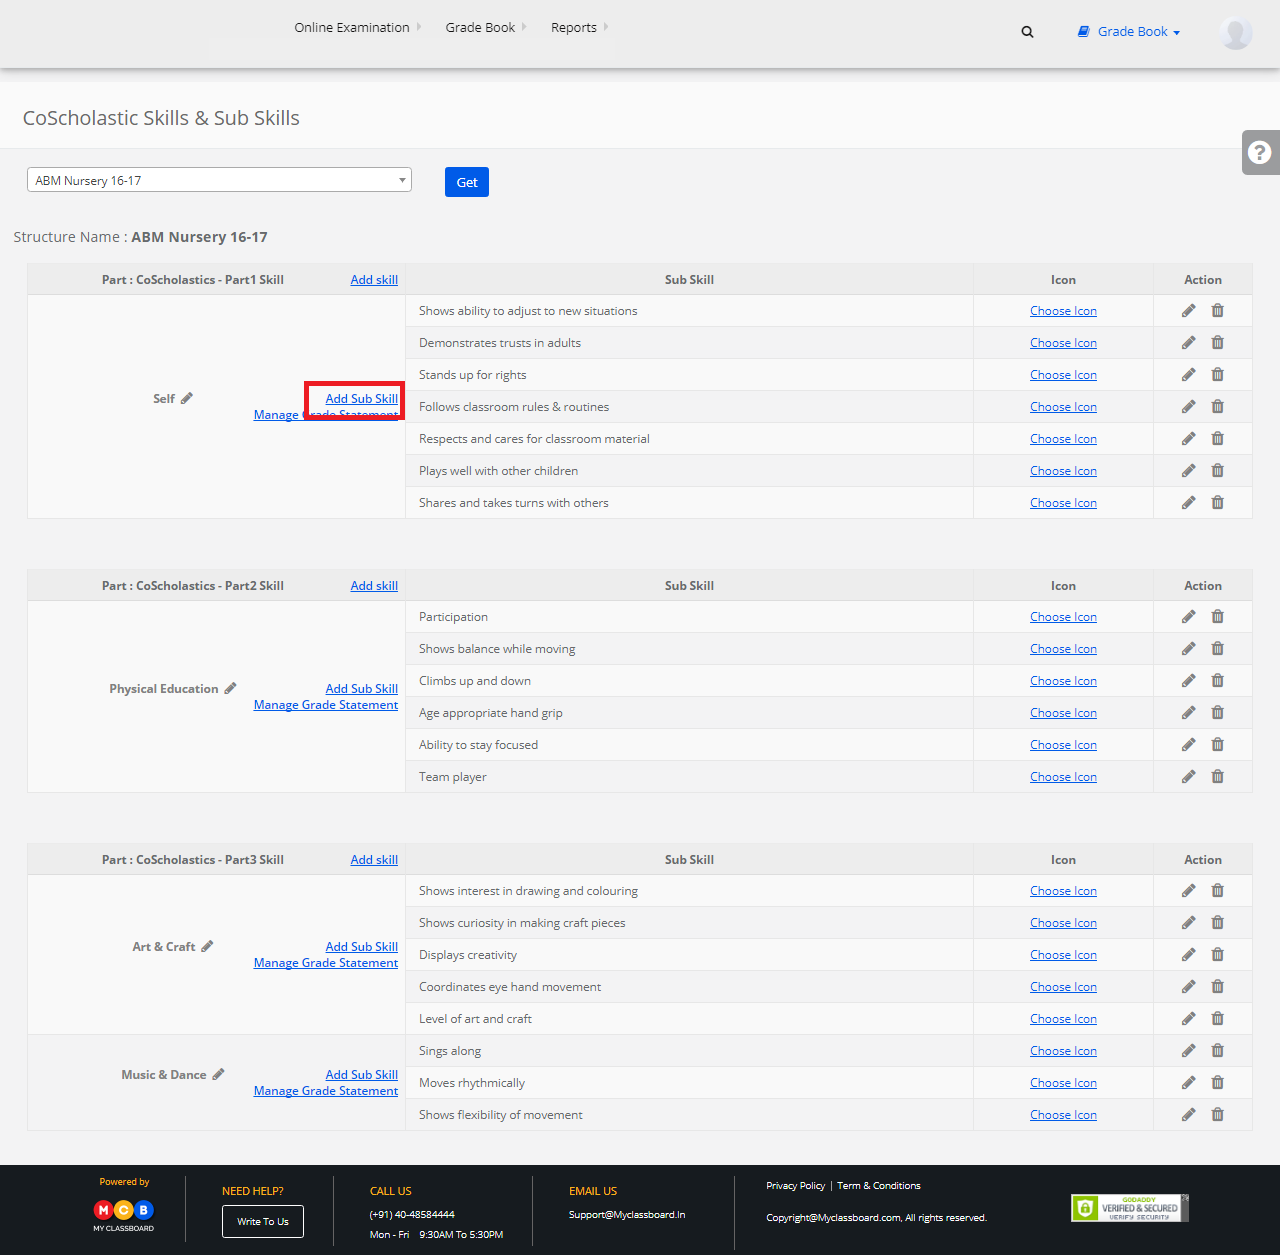
Stage 8: Create Co Scholastic Skills and SubSkills
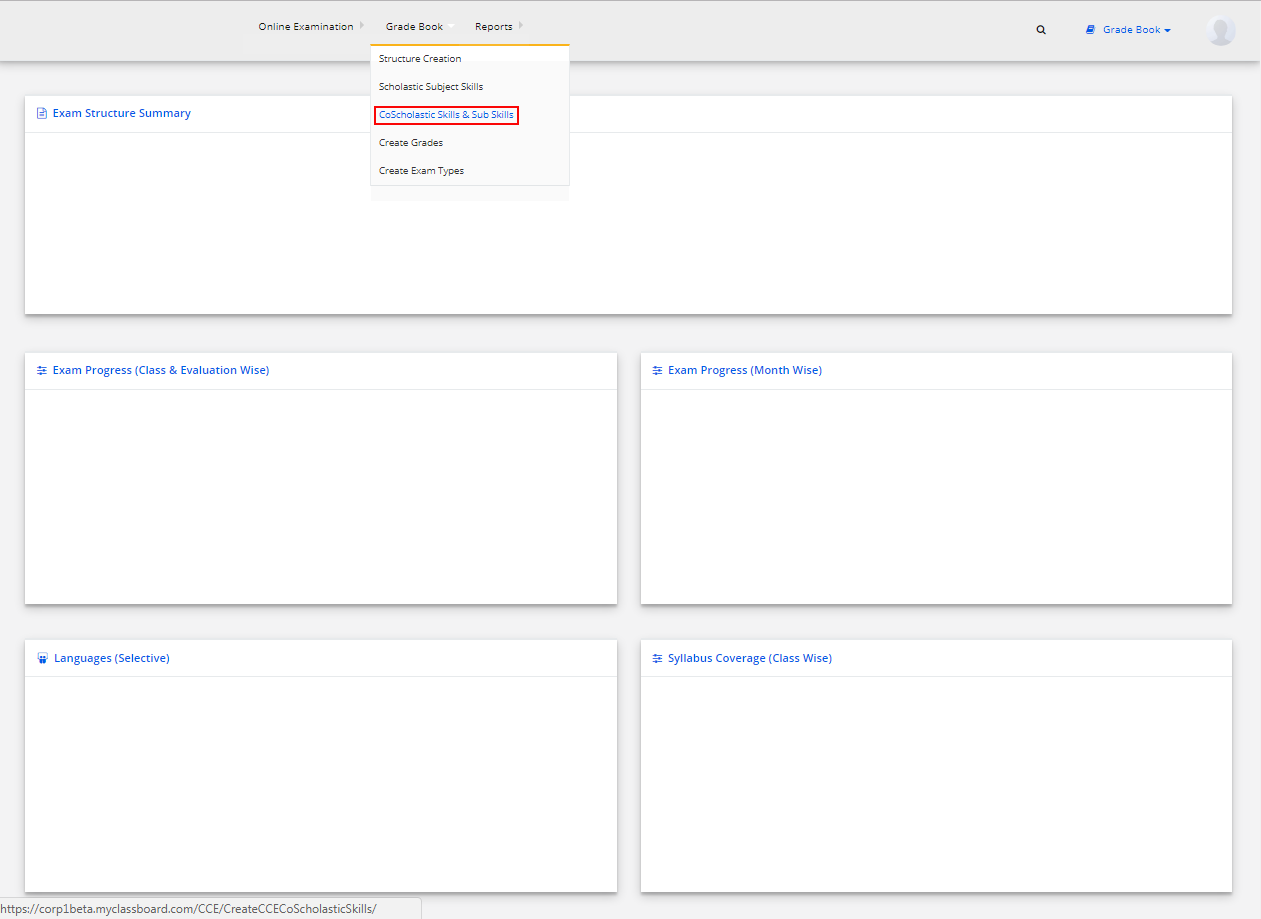
Step 1: Click on “Gradebook” on the top bar and select “Co-scholastic Skills and SubSkills”.
Step 2: Select “Structure Name” and Click on “Get”.
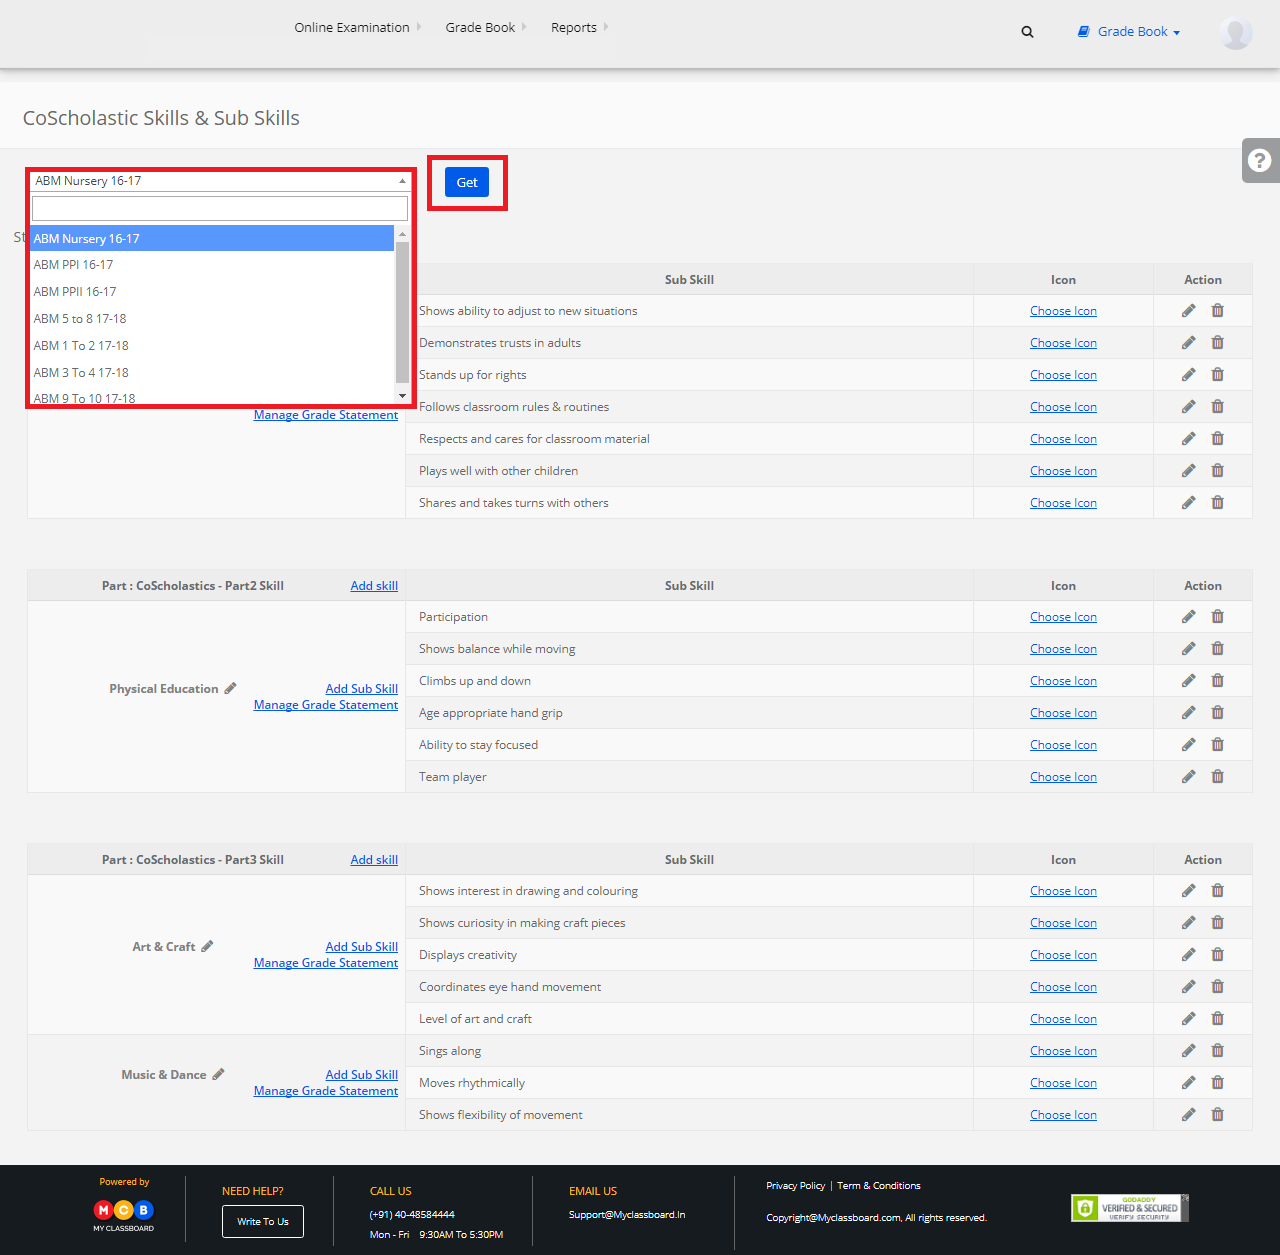
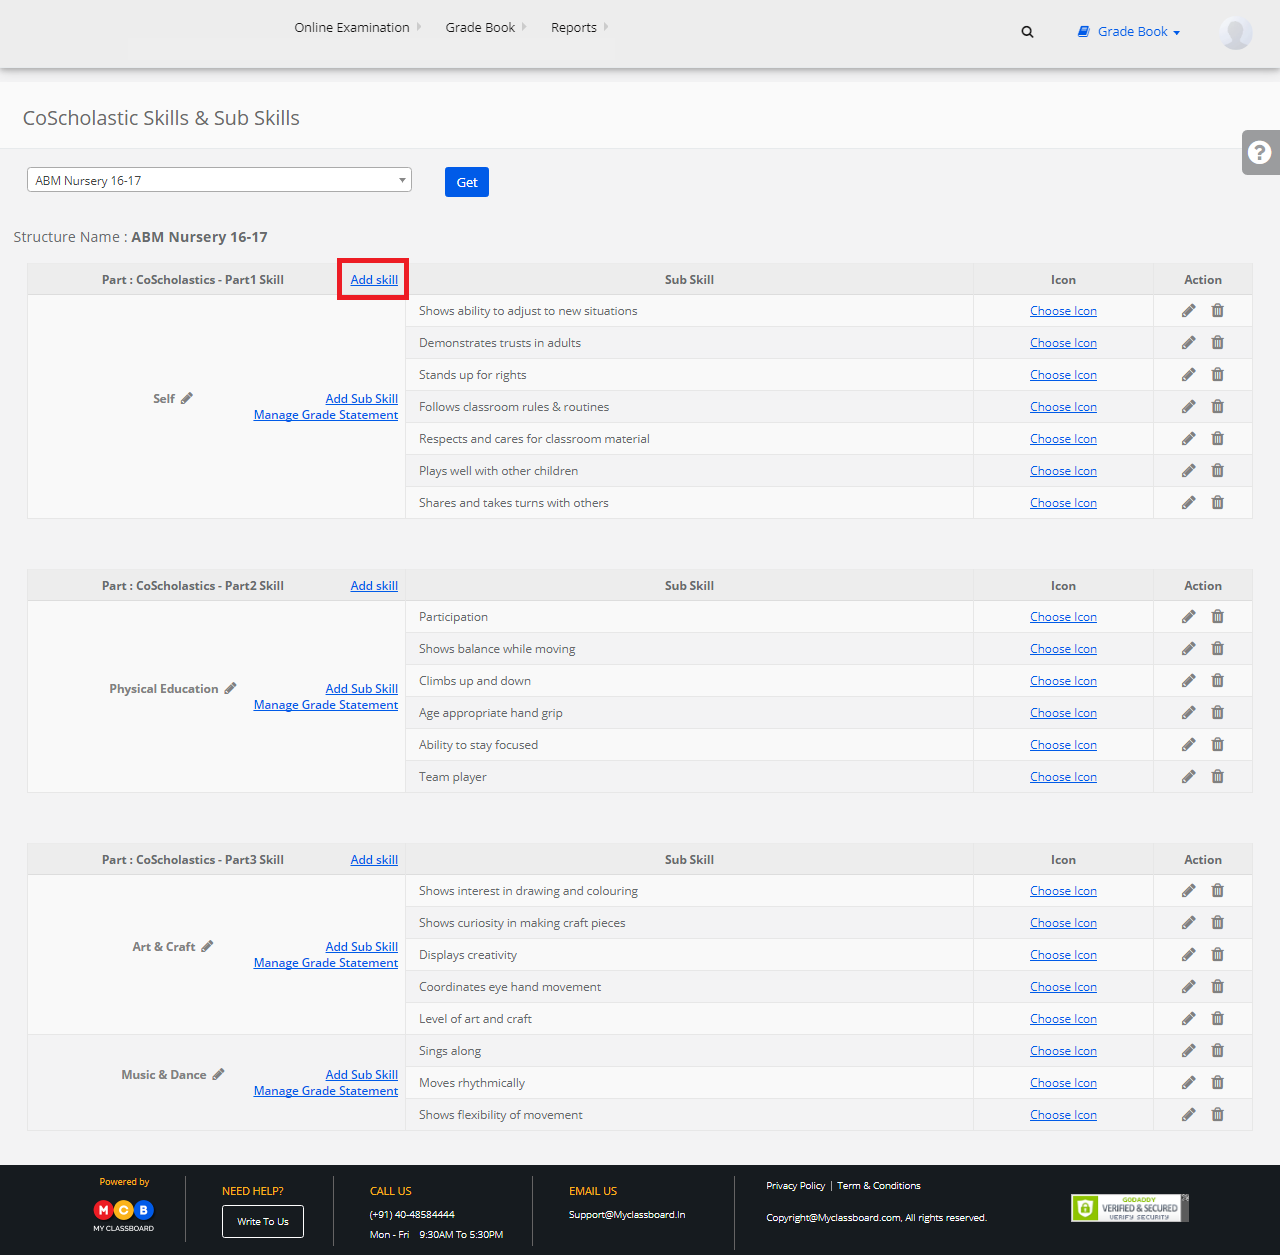
Step 3: Click on “Add Skill” to create new skills.
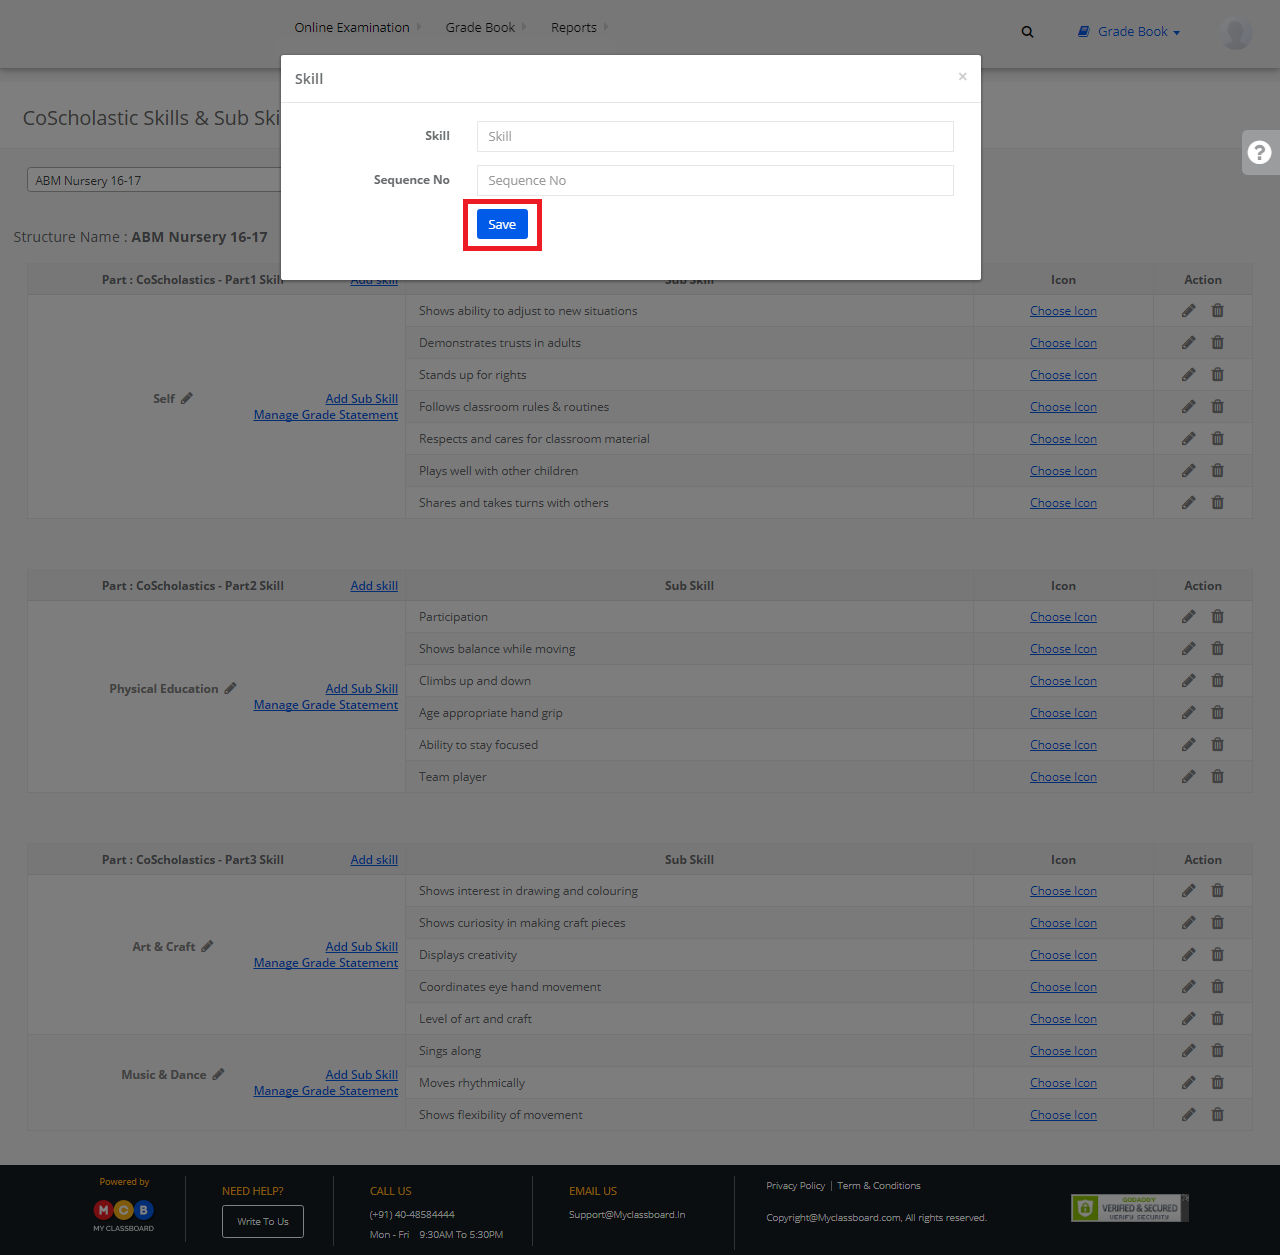
Step 4: Enter the Skill Name, Sequence No. and click on Save. The new Skill is created.
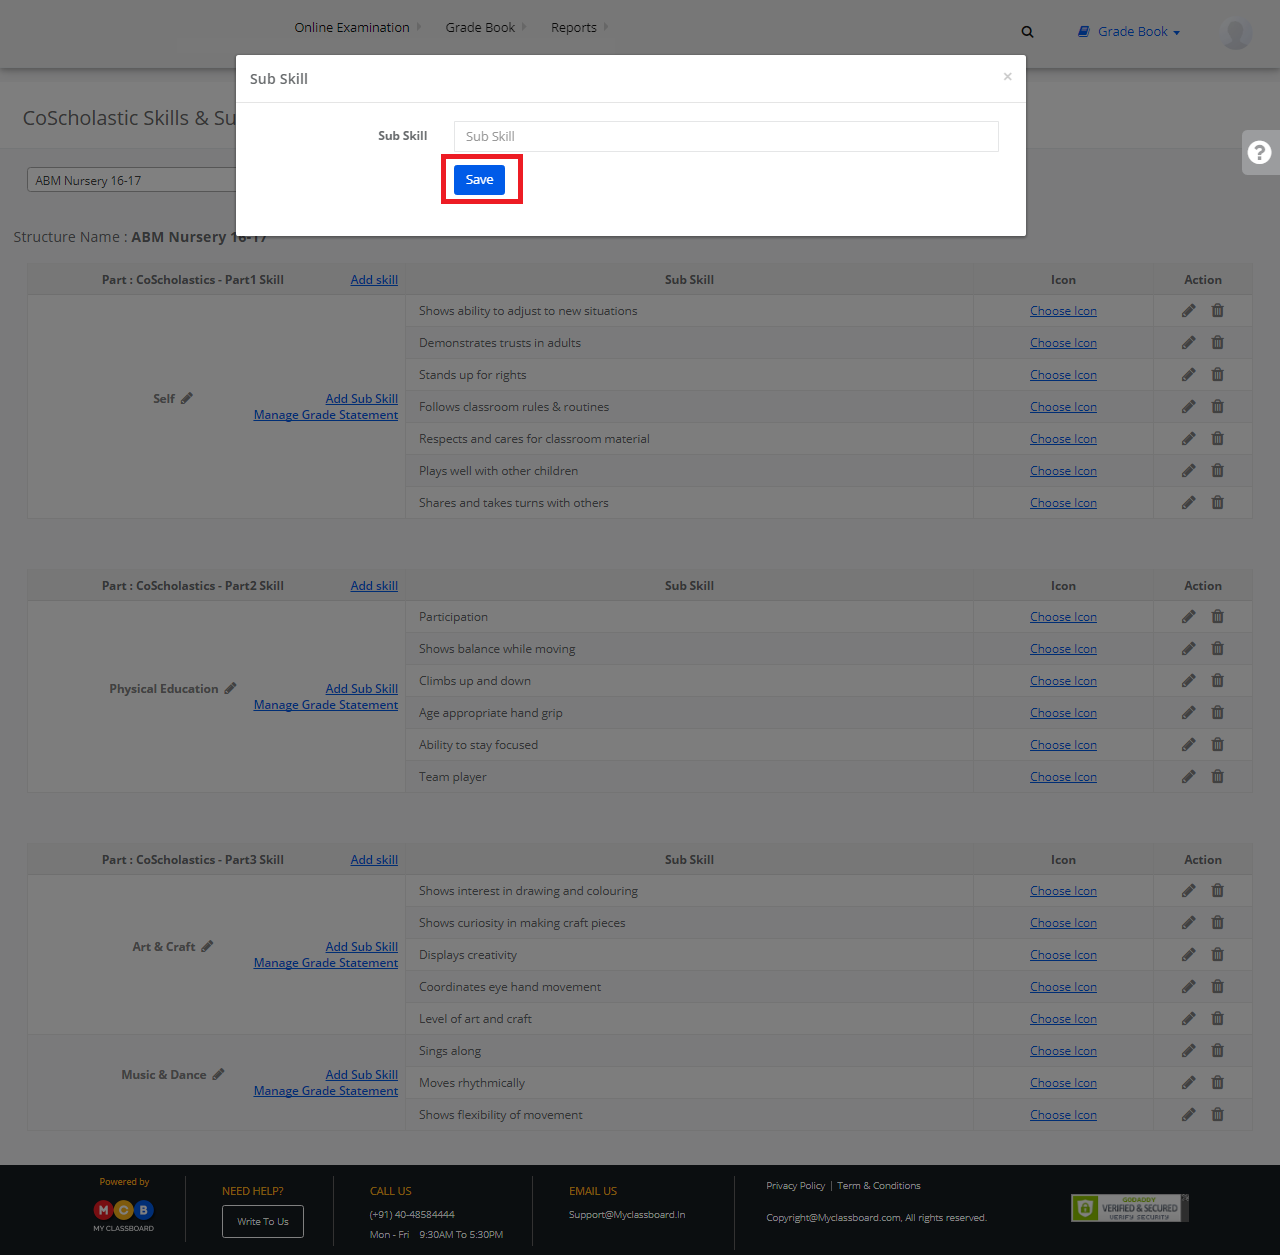
Step 5: Click on “Add Sub Skill” to create new sub-skills.
Step 6: Name the Sub Skill and click on Save. The new Sub Skill is created.
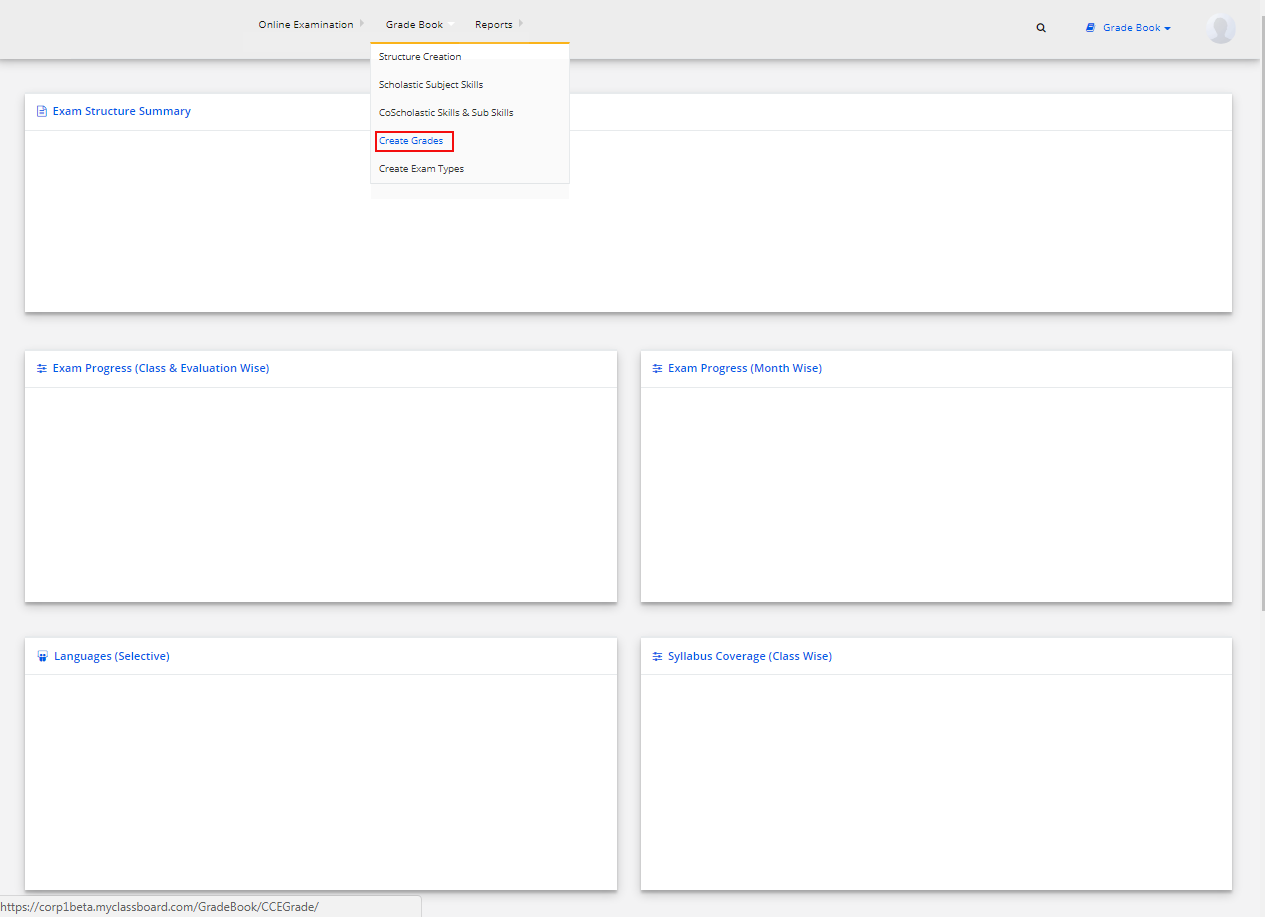
Stage 9: Create CCE Grades
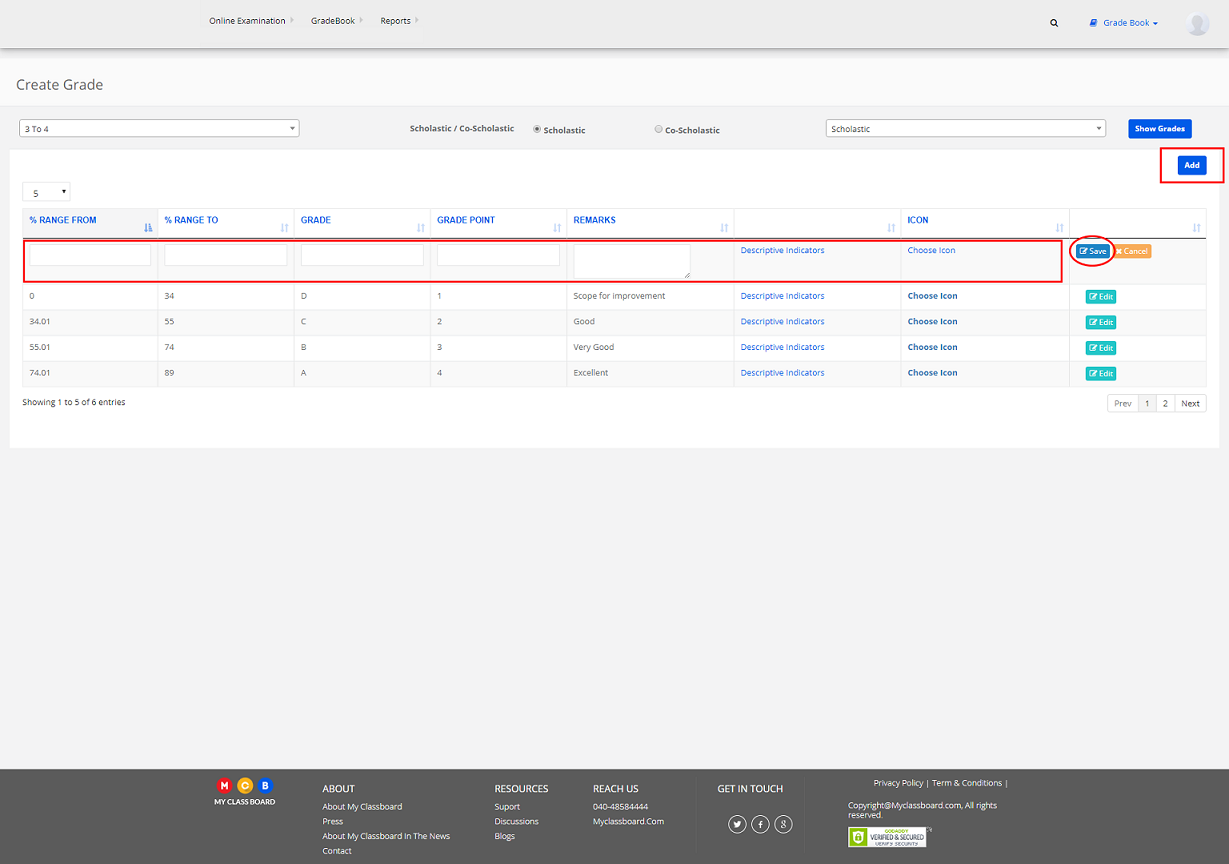
Step 1: Click on “Gradebook” on the top bar and select “Create Grades”.
Step 2: Select “Structure Name” ——> Scholastic/Co-Scholastic ——> Parts and click on “Show Grades”.
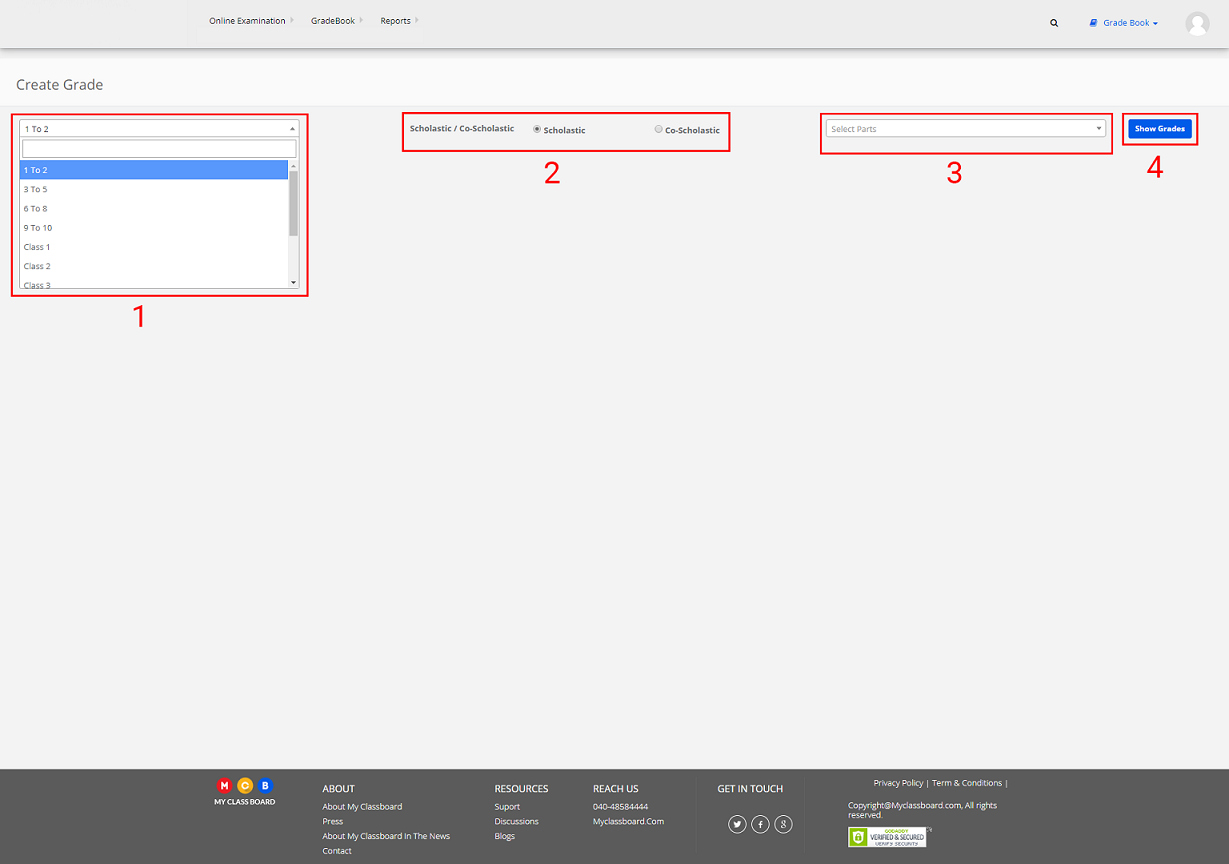
Step 3: Click on “Add” to create or add grades to it.

Step 4: Enter the necessary details here and click on “Save”. The grades are added successfully.
Assigning languages, Co-scholastic skills, Test creation followed by Co-scholastic Grade Entry is done
at the principal level.
Step 1: Login to the MyClassboard website with Principal login credentials.
Or if you’re already logged in with Admin login credentials you can change the access level to User Level.
Change Access Level
Step 2: Click on the “User Profile” icon on the right-hand top corner.
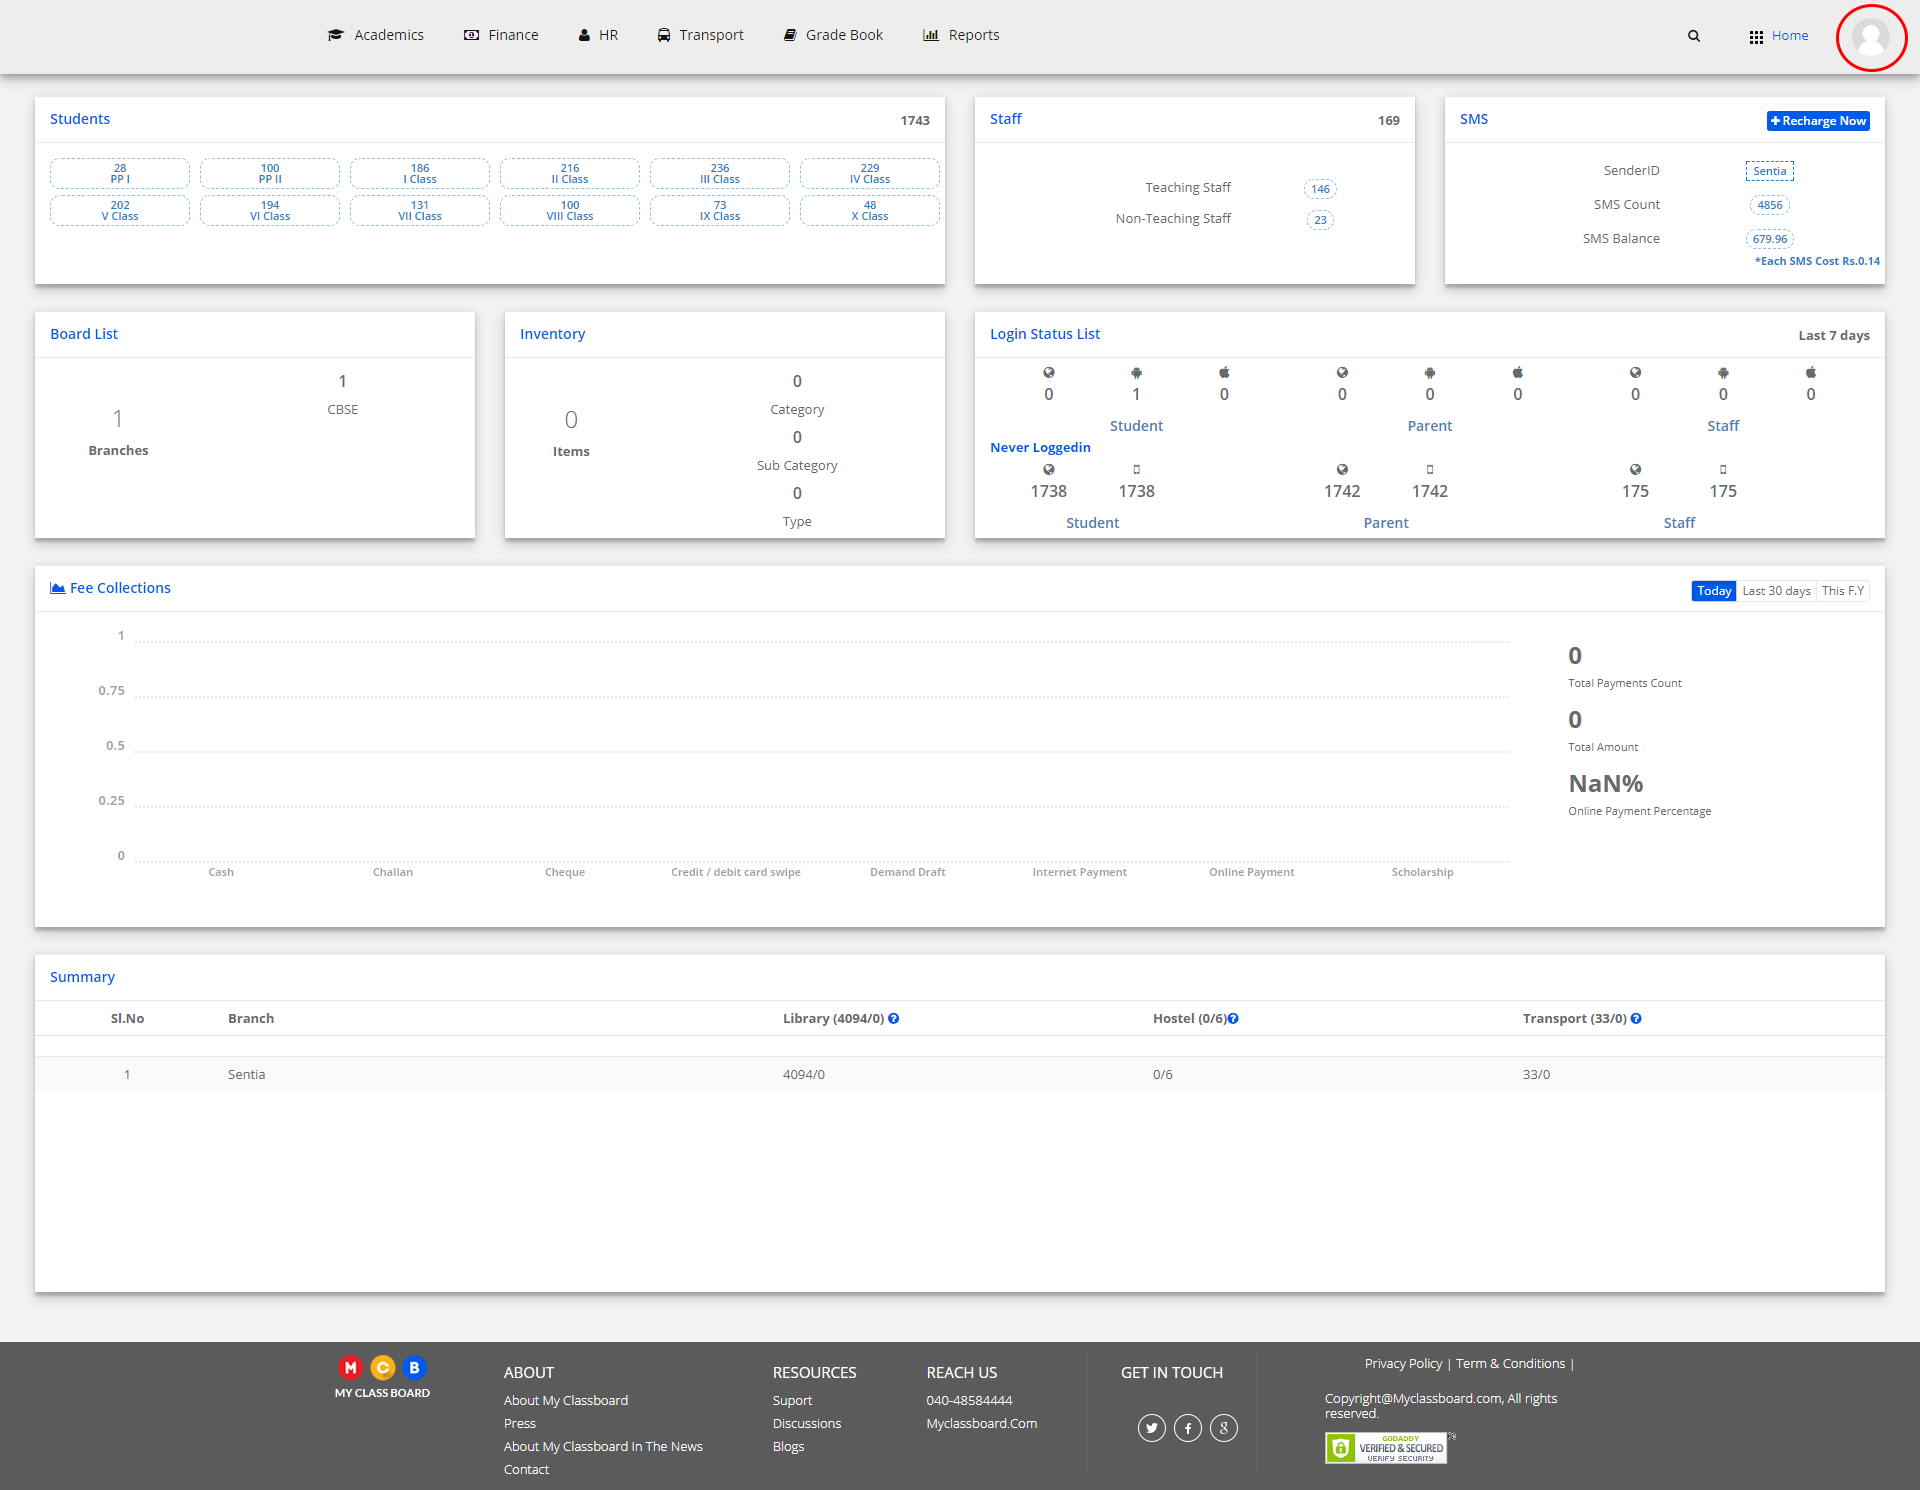
Step 3: Select “Change Access Level”.
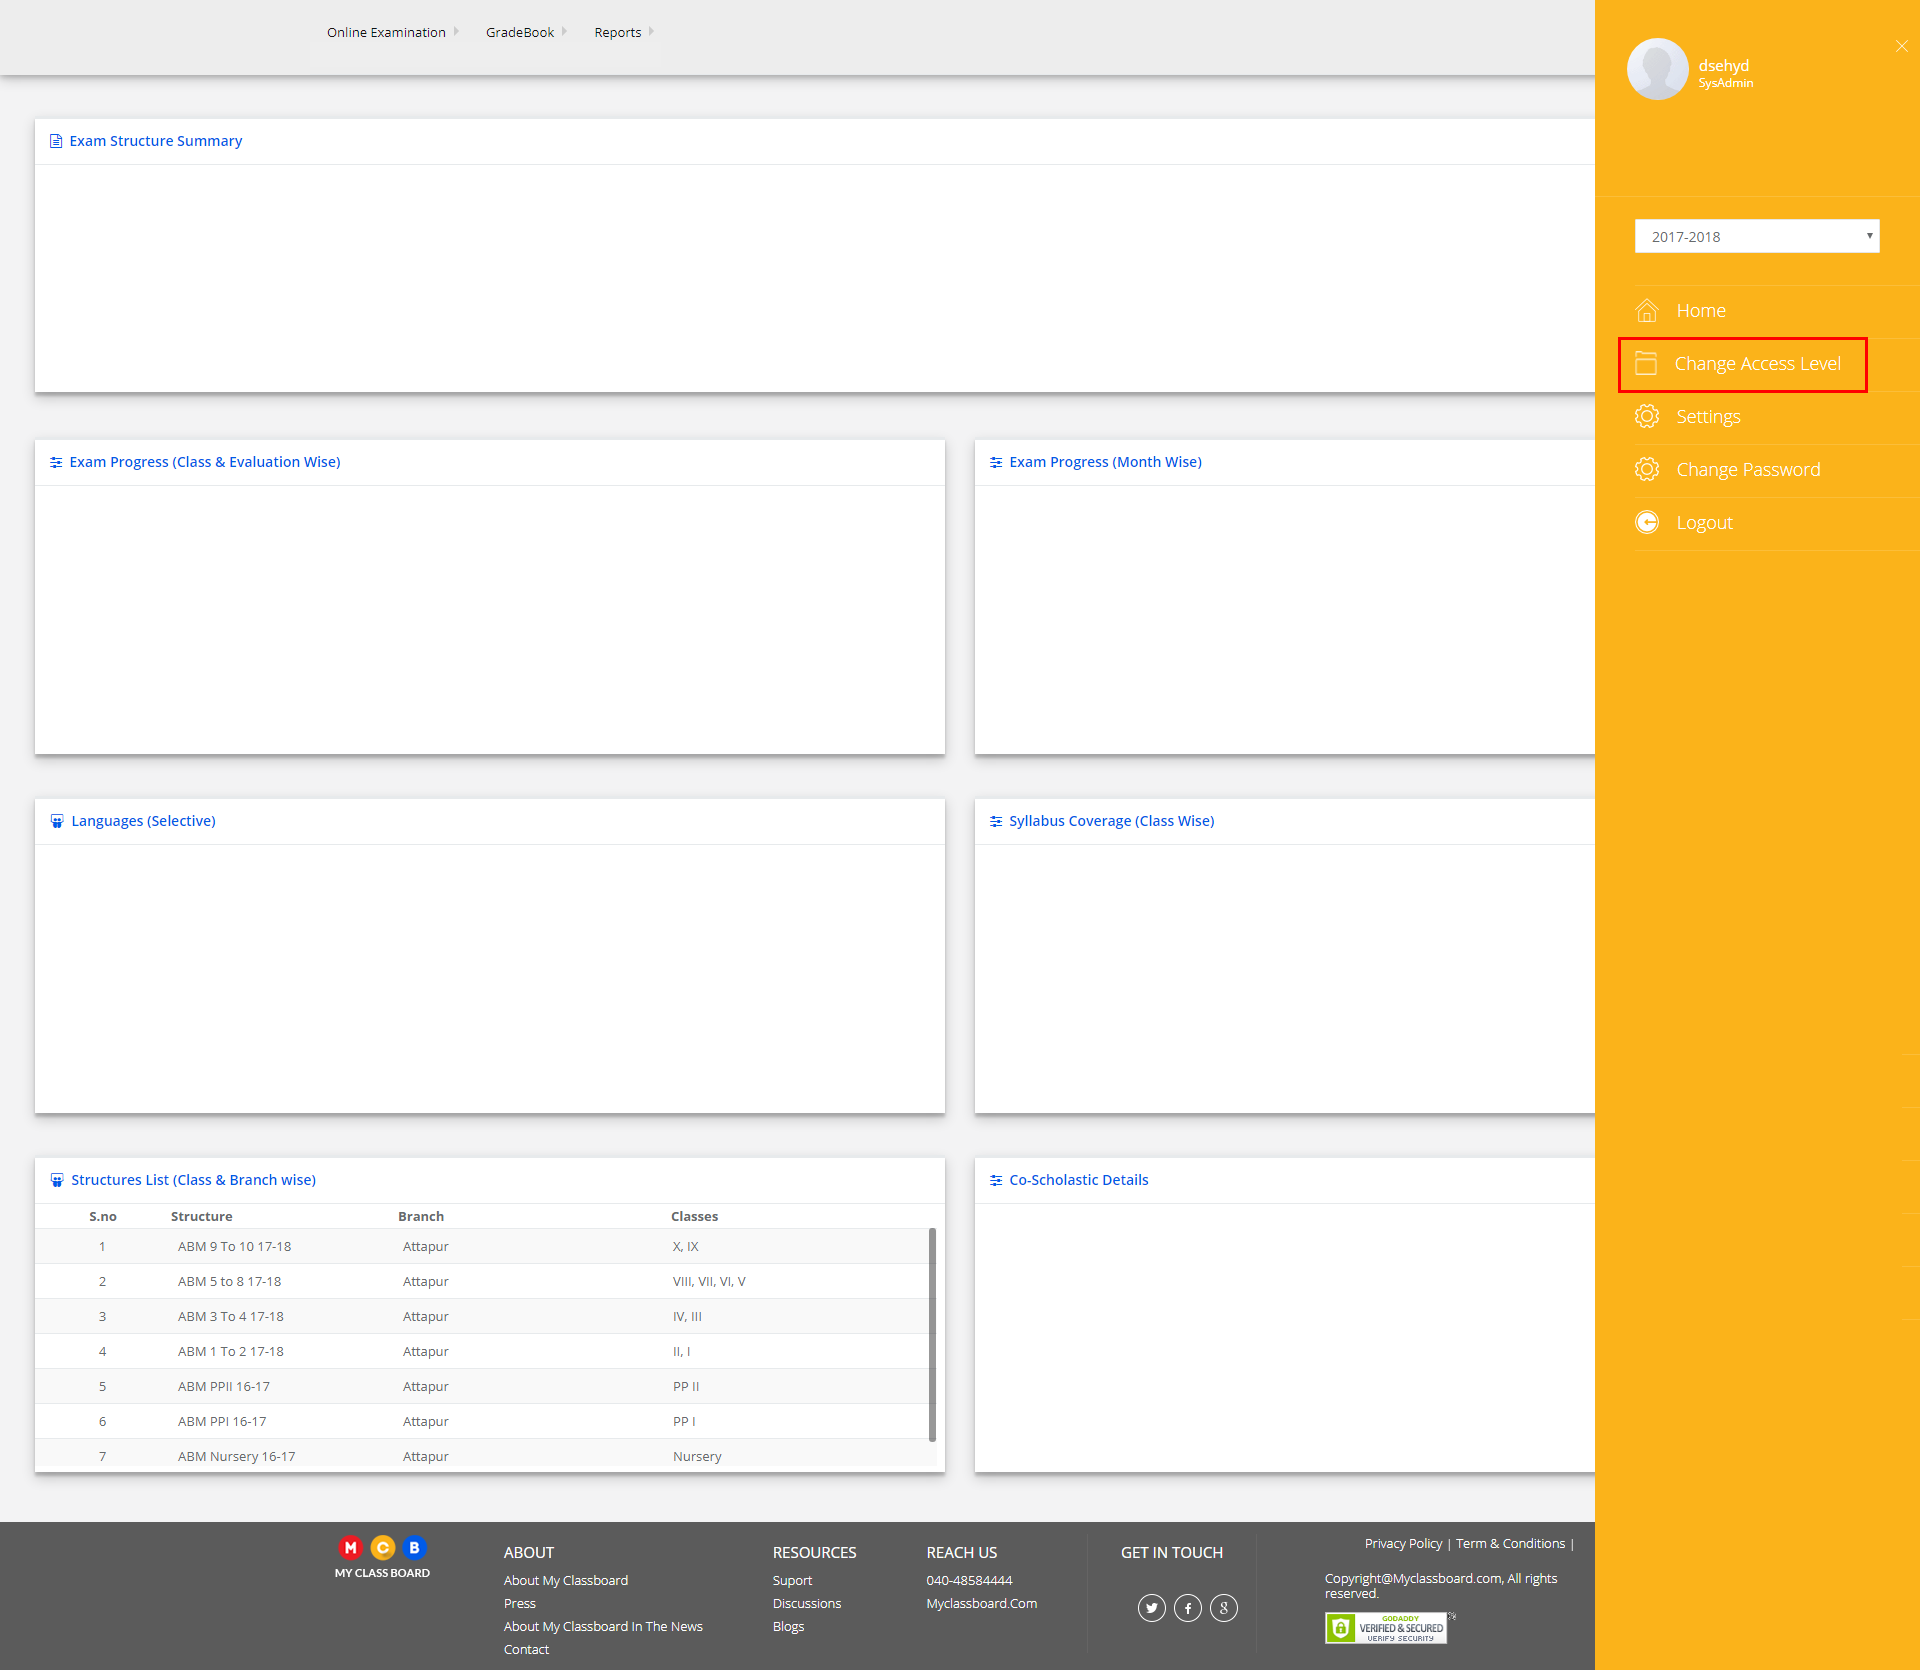
Step 4: Select the “Branch” and choose the User Type as “Principal” or “Computer Operator”.
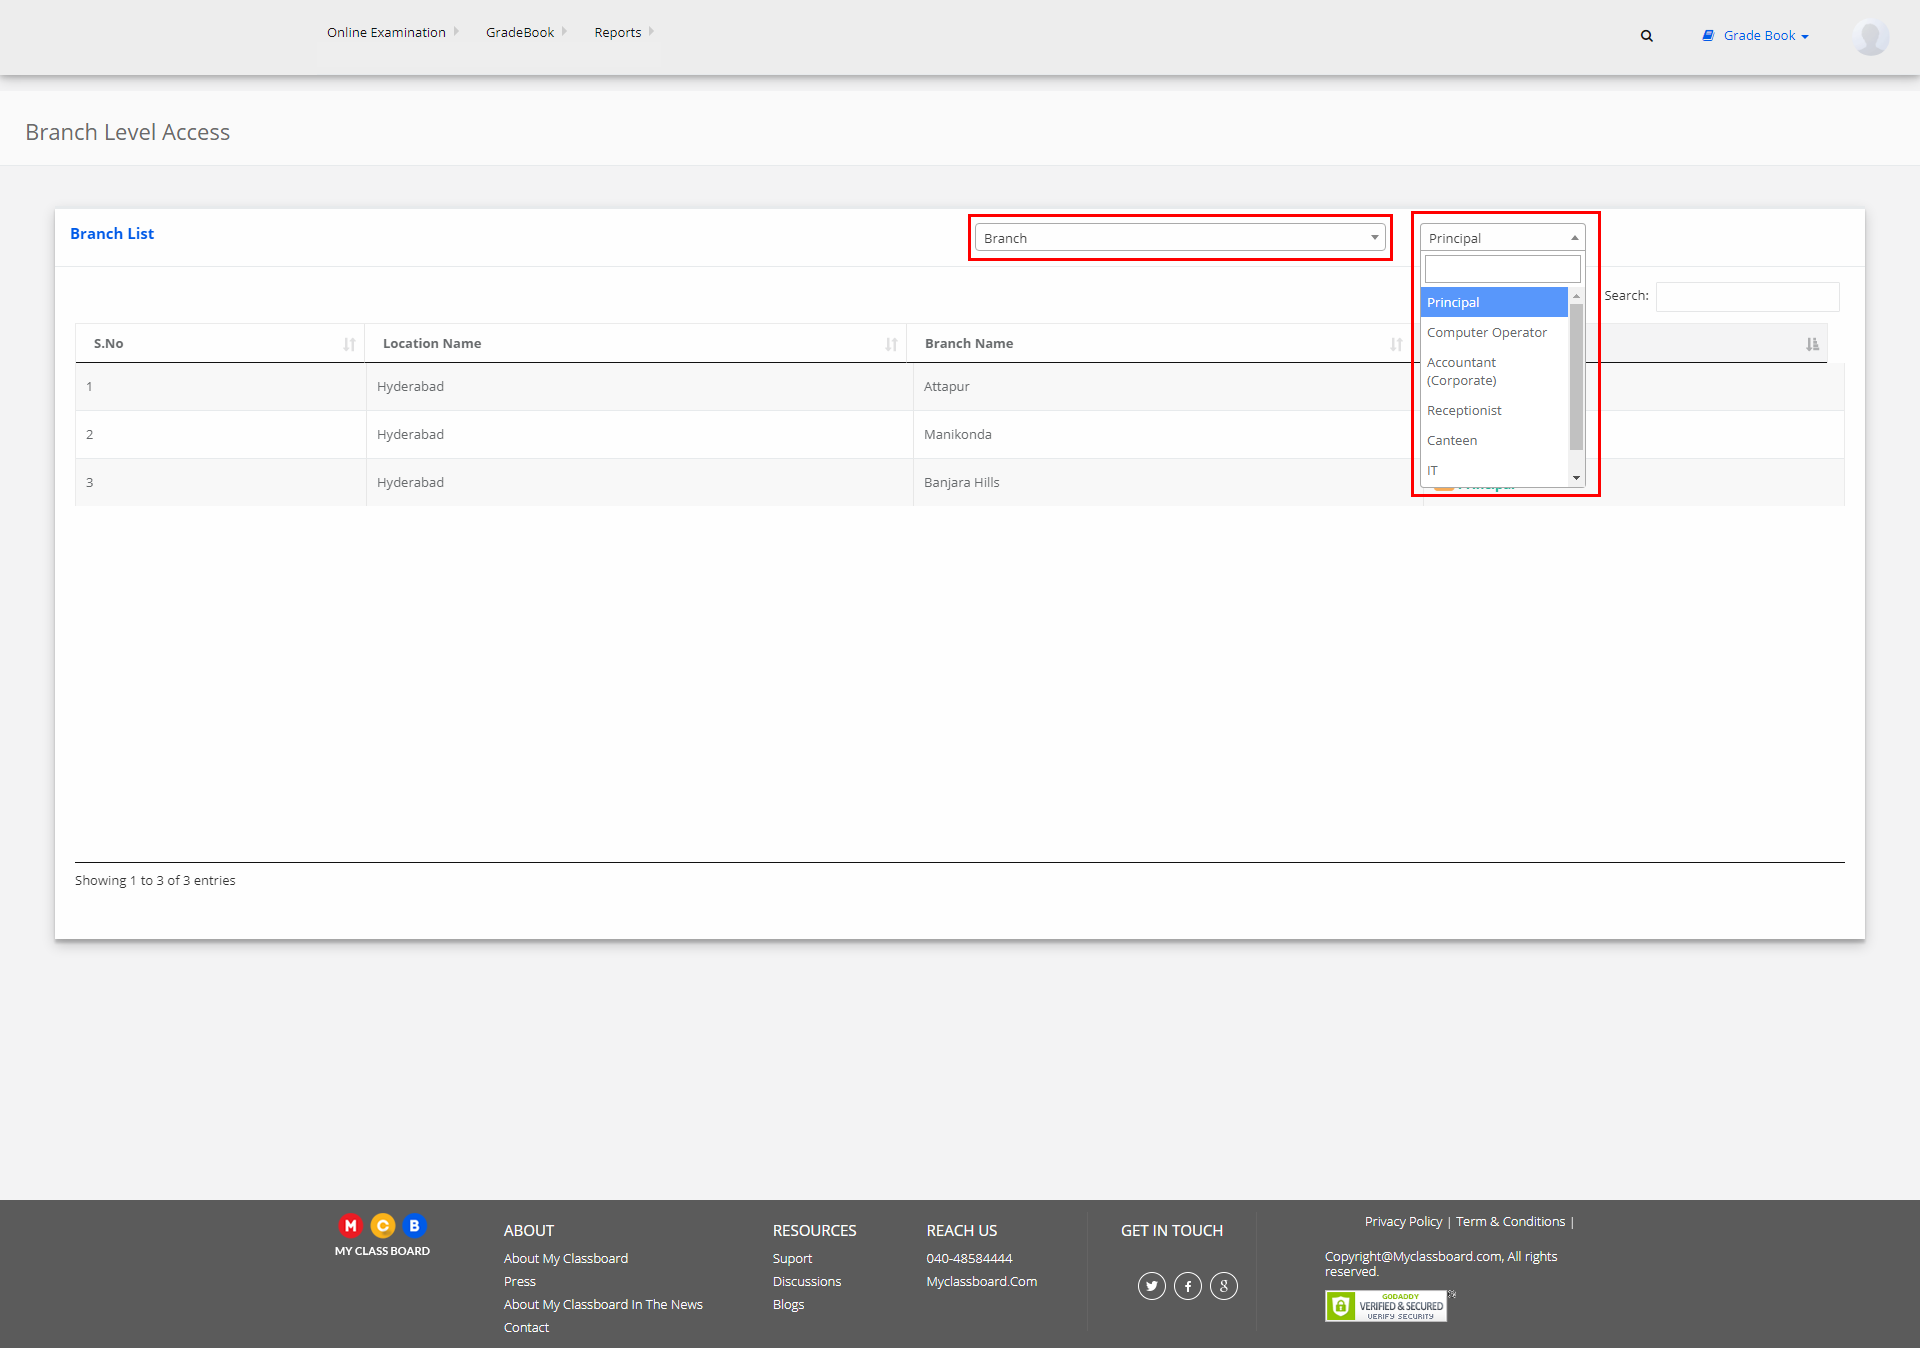
You’re now in the Principal Access Level.
Step 5: Select Gradebook. You’ll be directed to the “Gradebook” page.

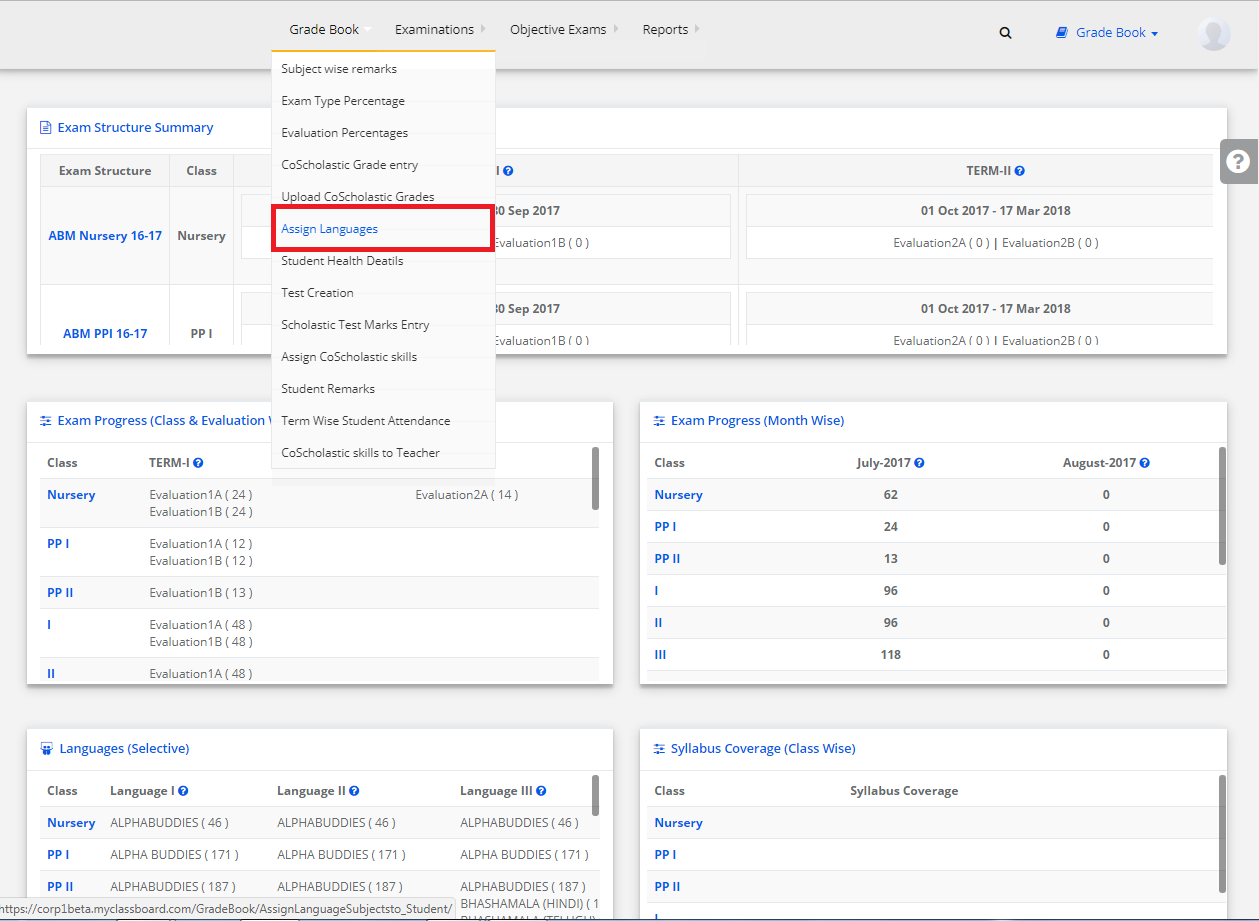
Stage 10: Assign Languages
Step 1: Click on “Gradebook” on the top bar and select “Assign Languages”.
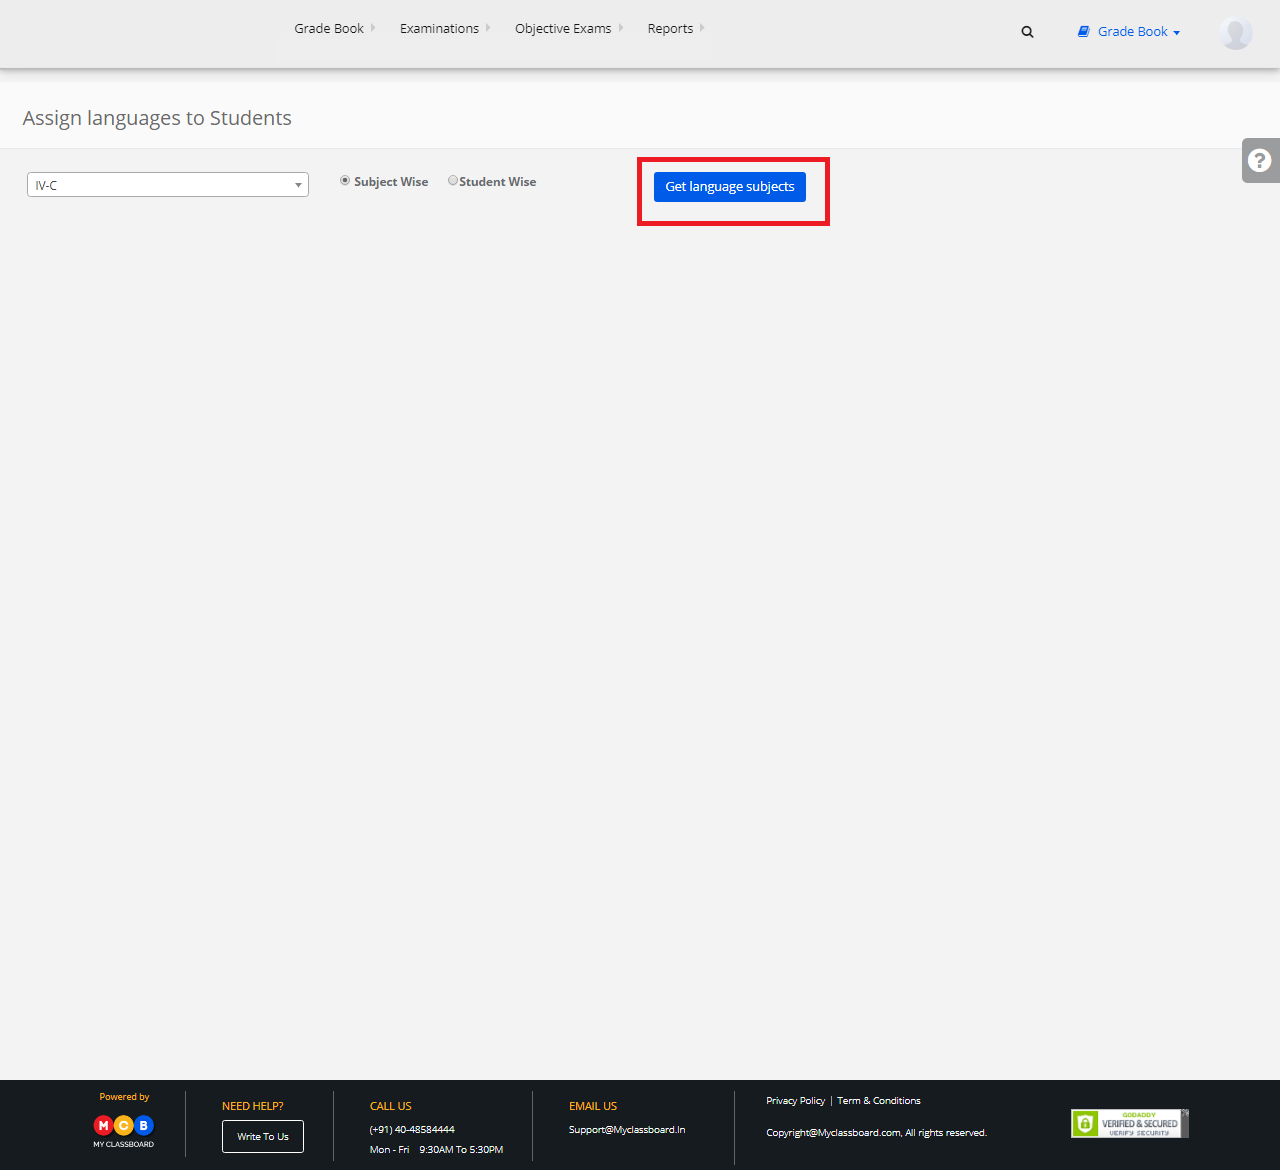
Step 2: Select Class and click on “Get Language Subjects”.
Step 3: Choose any Language and click on “Assign/Unassign Subjects(Manually)”.
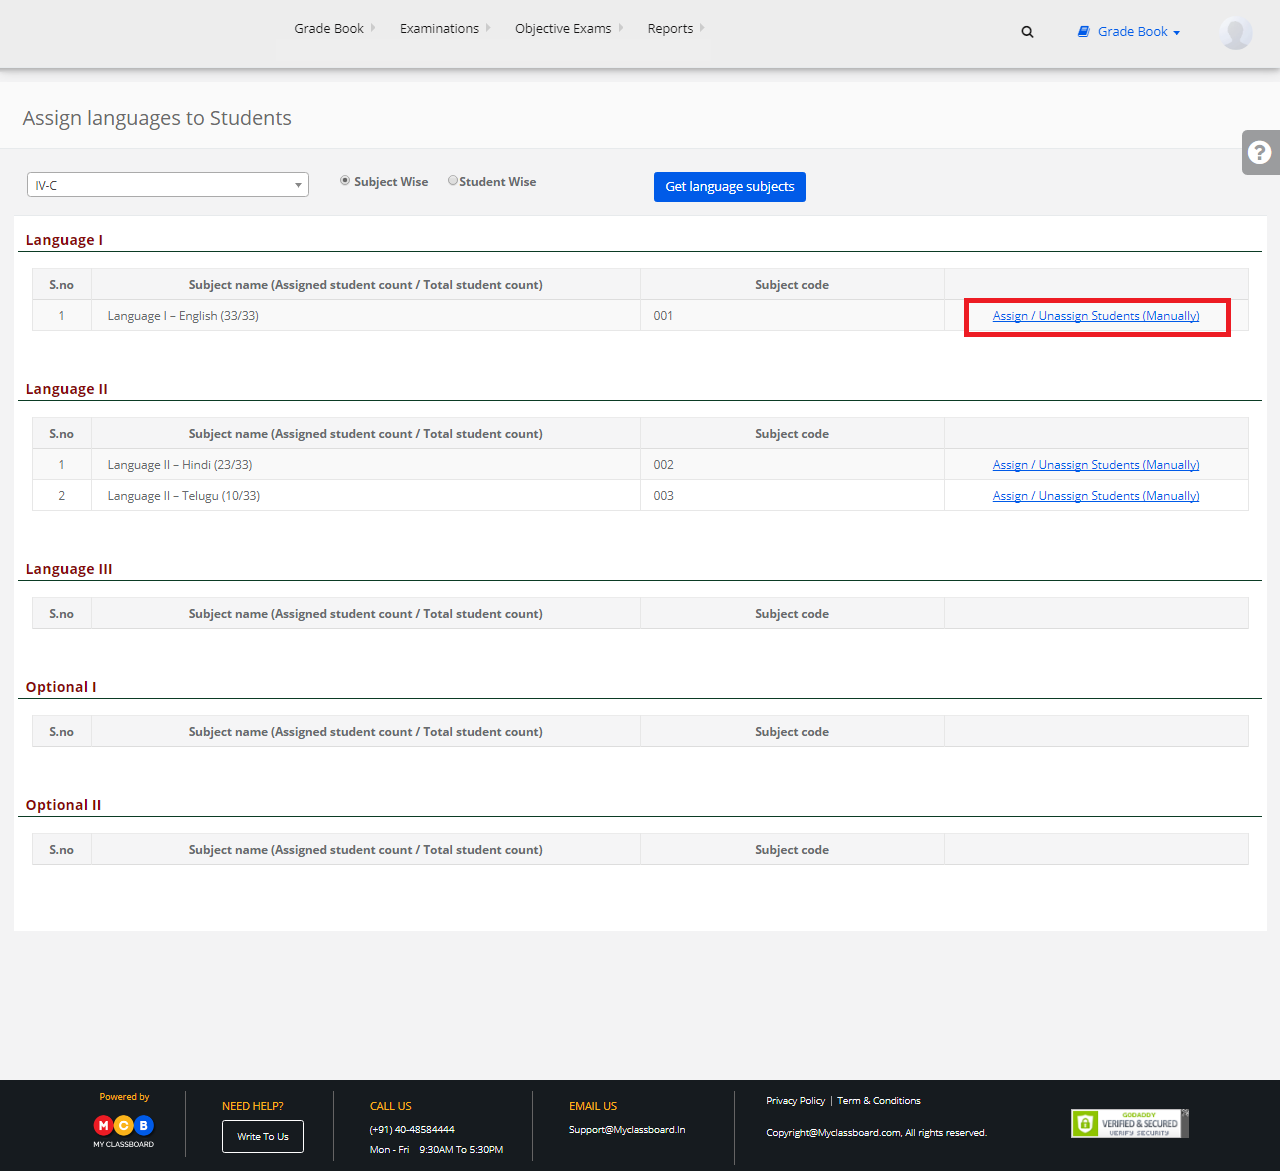
Step 4: Select the students by marking the checkbox and click on “Assign/Unassign Subjects to Students”.

Step 5: The respective Language is assigned to the students.
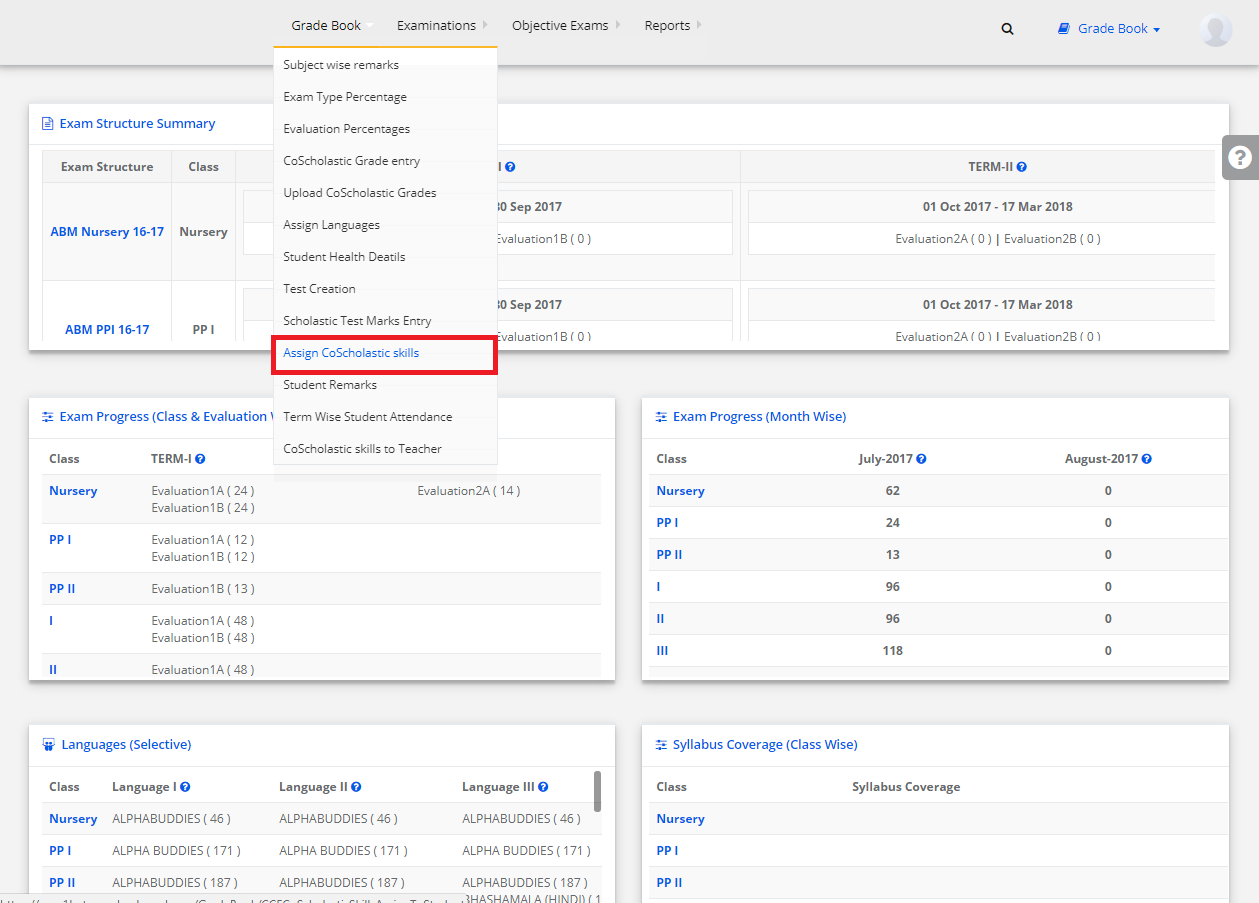
Stage 11: Assign Co-scholastic Skills
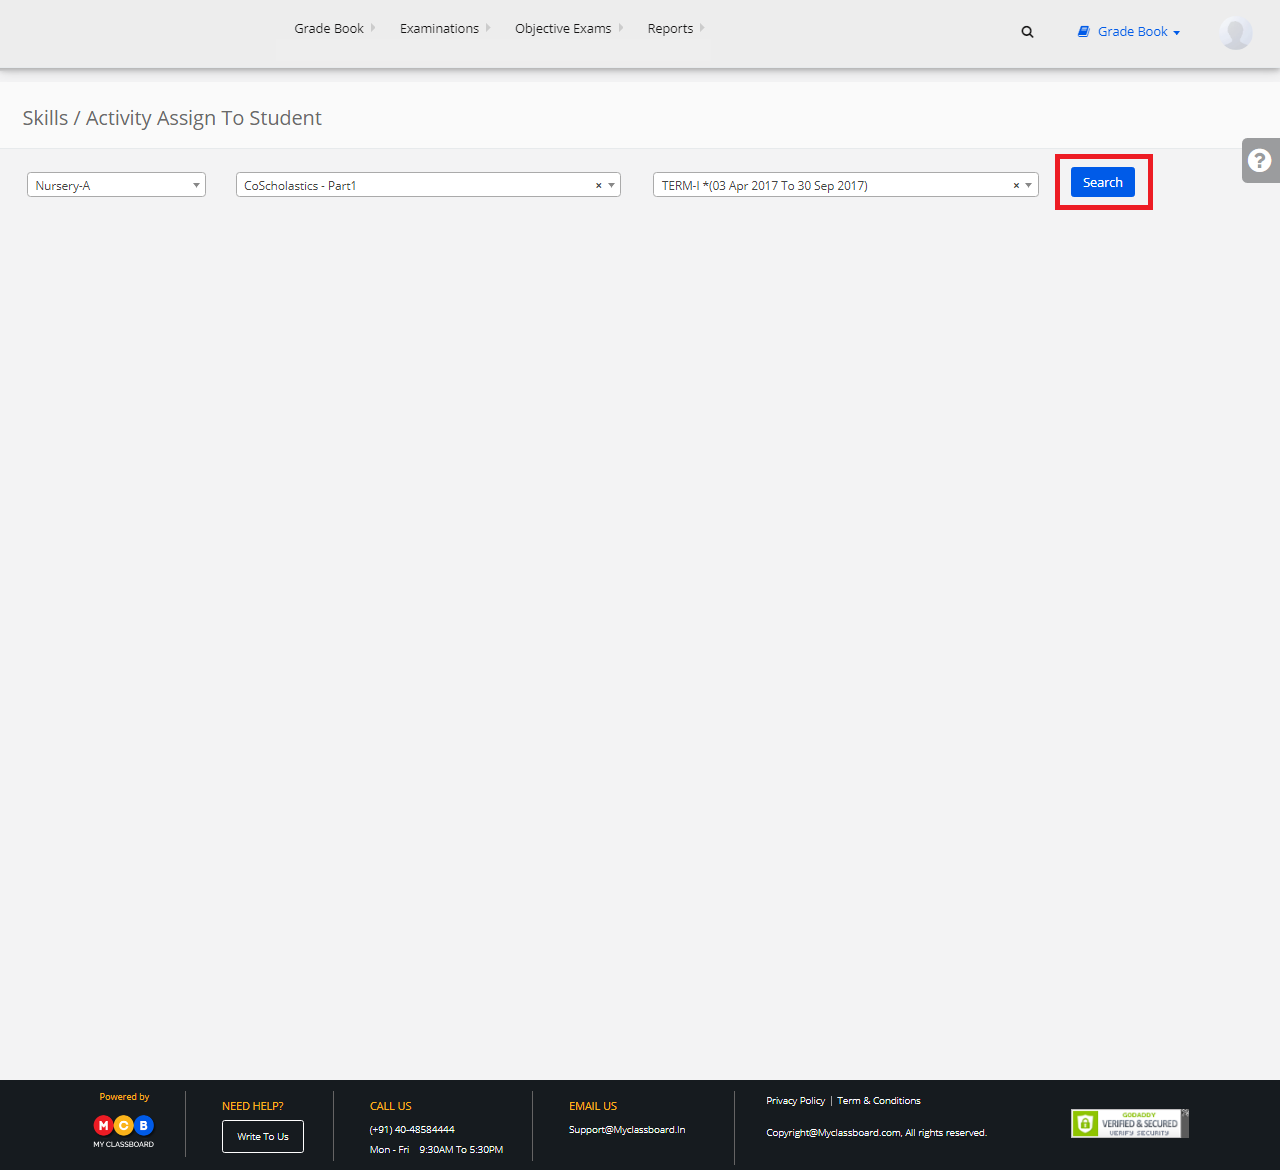
Step 1: Click on “Gradebook” on the top bar and select “Assign Co-Scholastic Skills”.
Step 2: Select Class, Co-Scholastic Part, Term and click on “Search”.
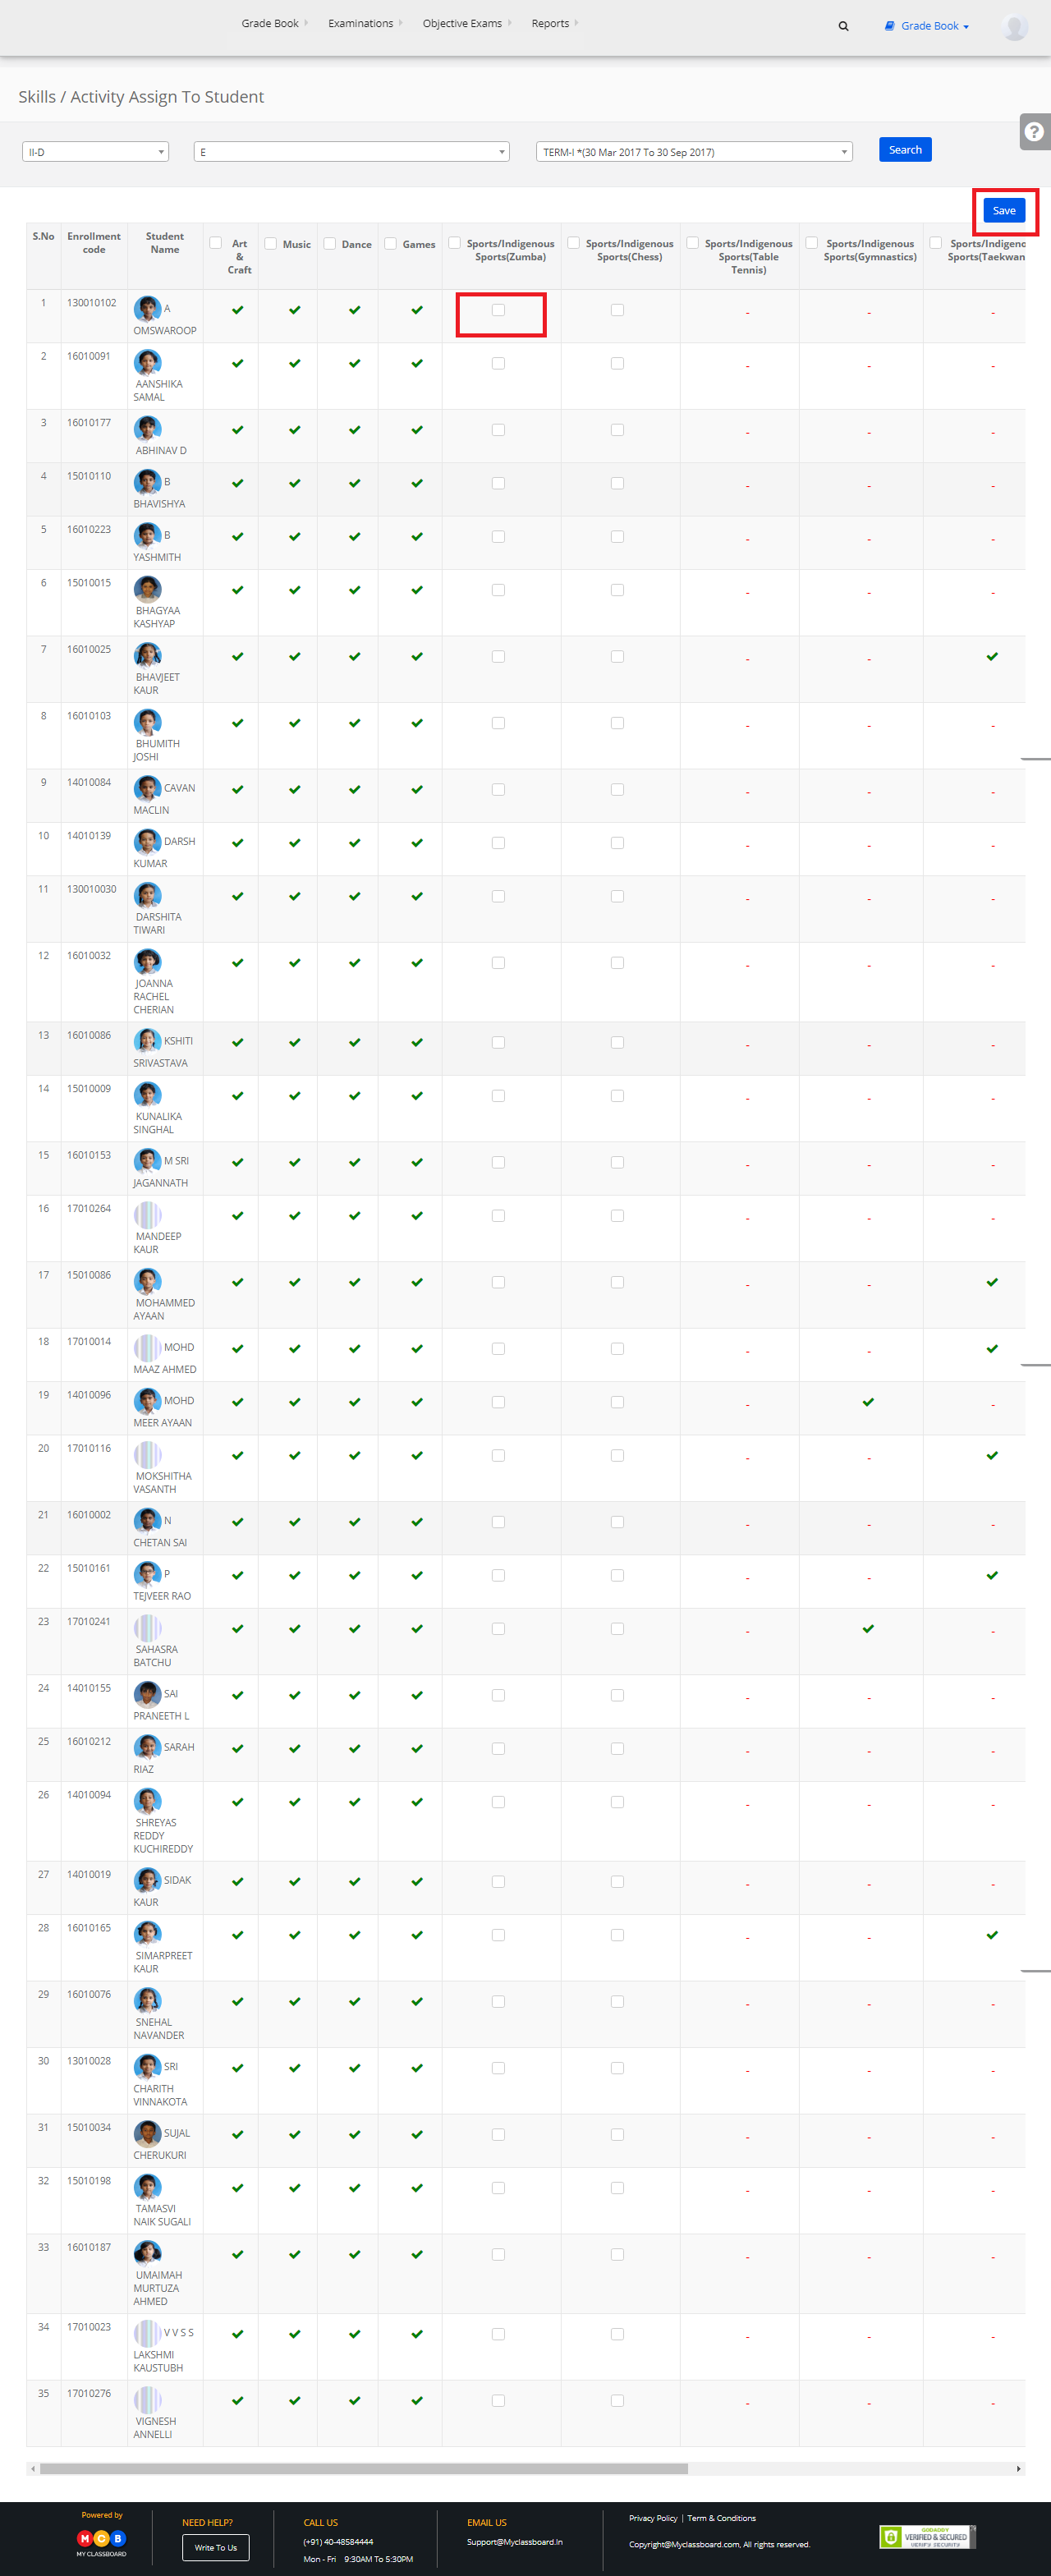
Step 3: To Assign, Select student —-> Select Skills(Mark the checkbox) and click on Save.
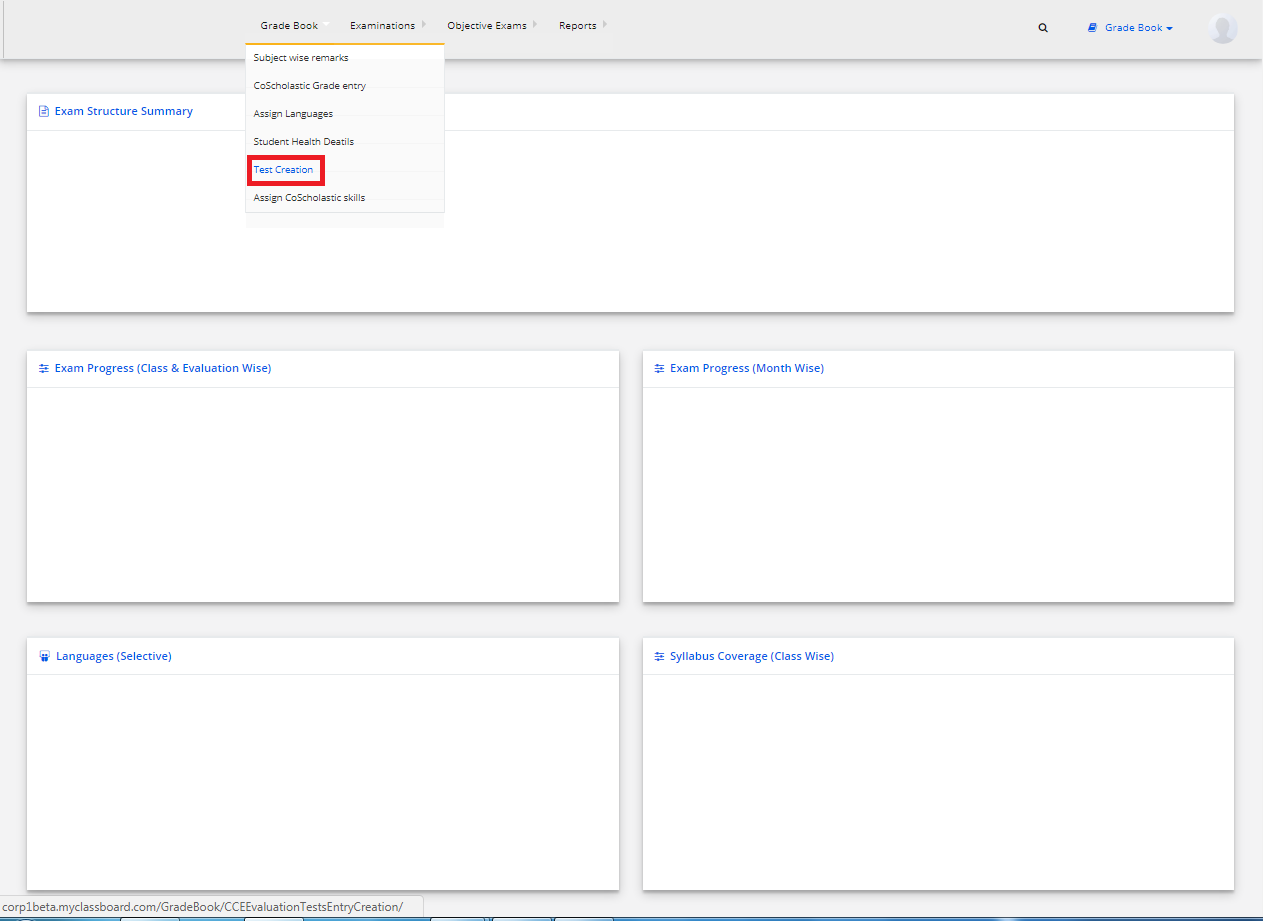
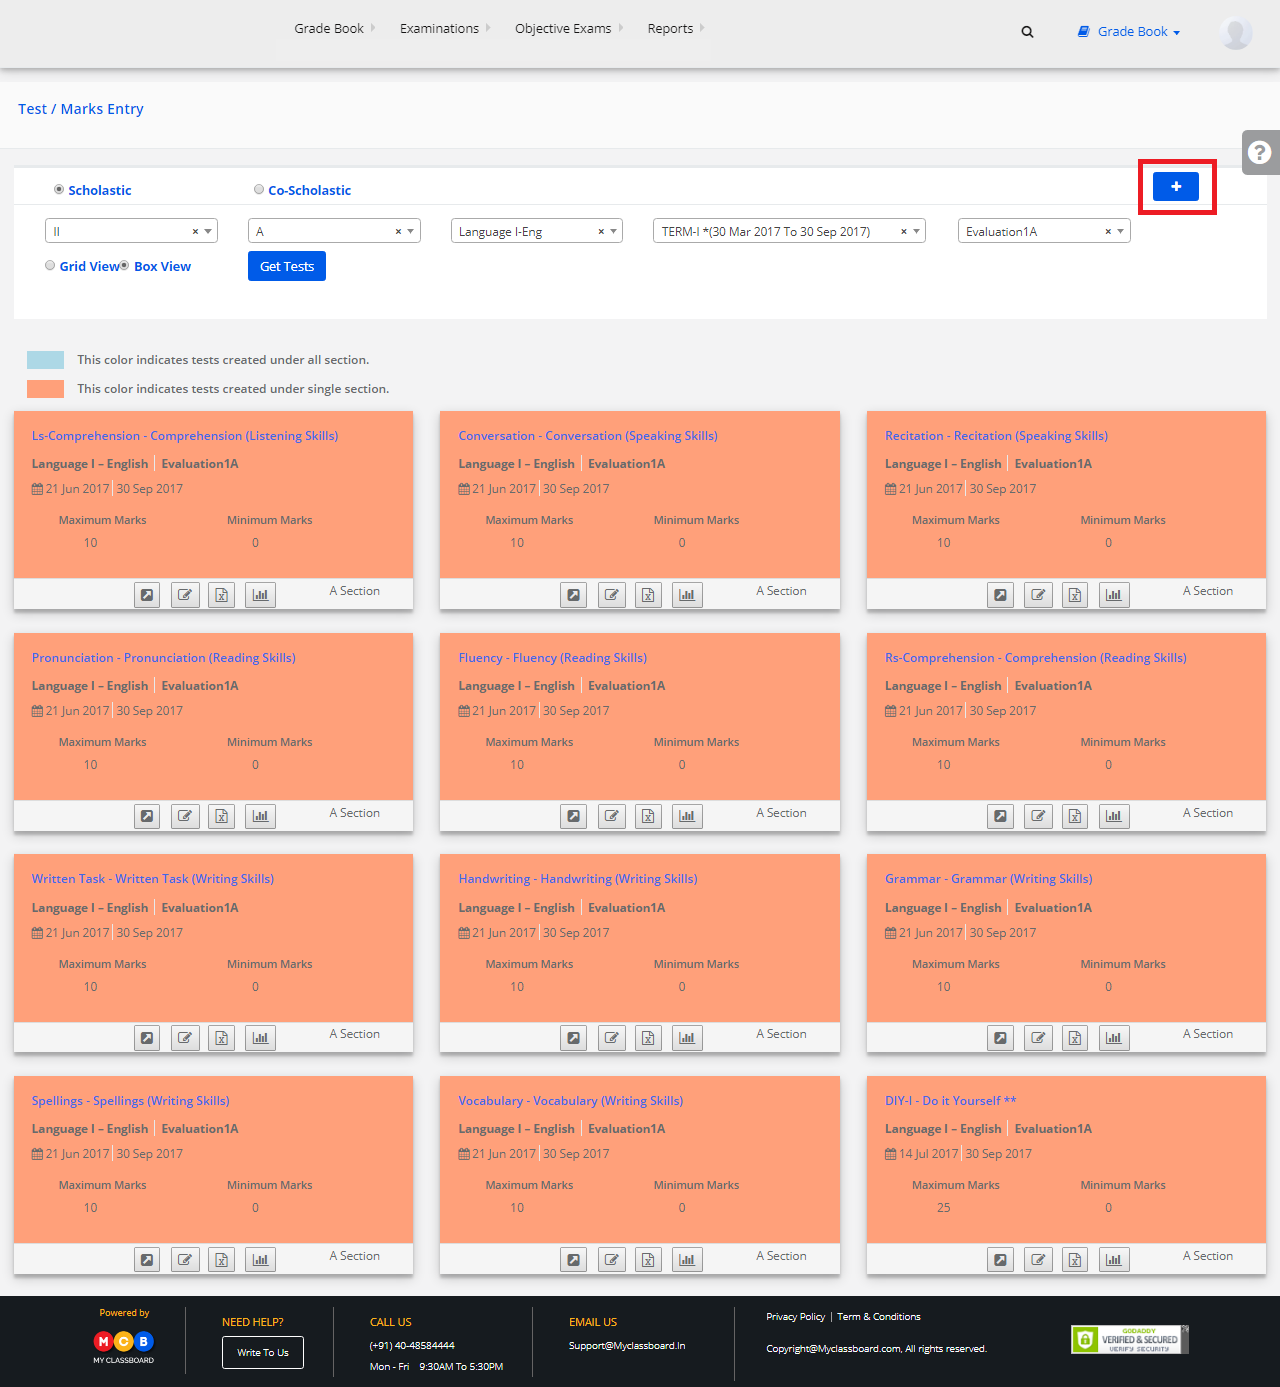
Stage 12: Create Tests and Enter Marks
Step 1: Click on “Gradebook” on the top bar and select “Test Creation”.
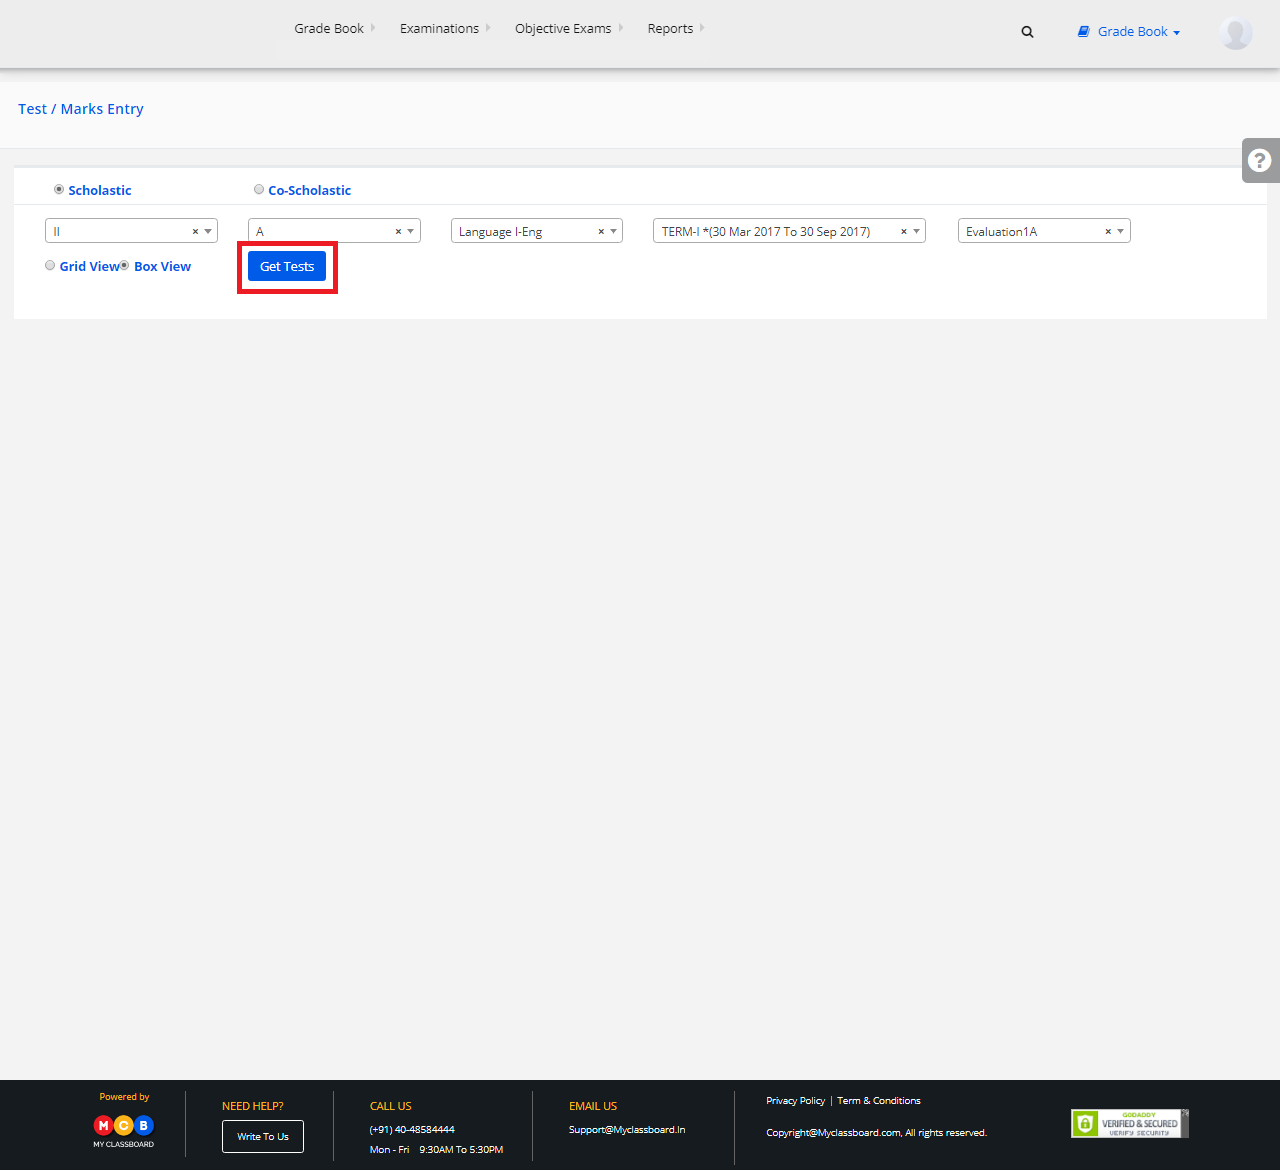
Step 2: Select Scholastic/Co-Scholastic ——> Select Class, Subject, Term, Evaluations and click on “Get Tests”.
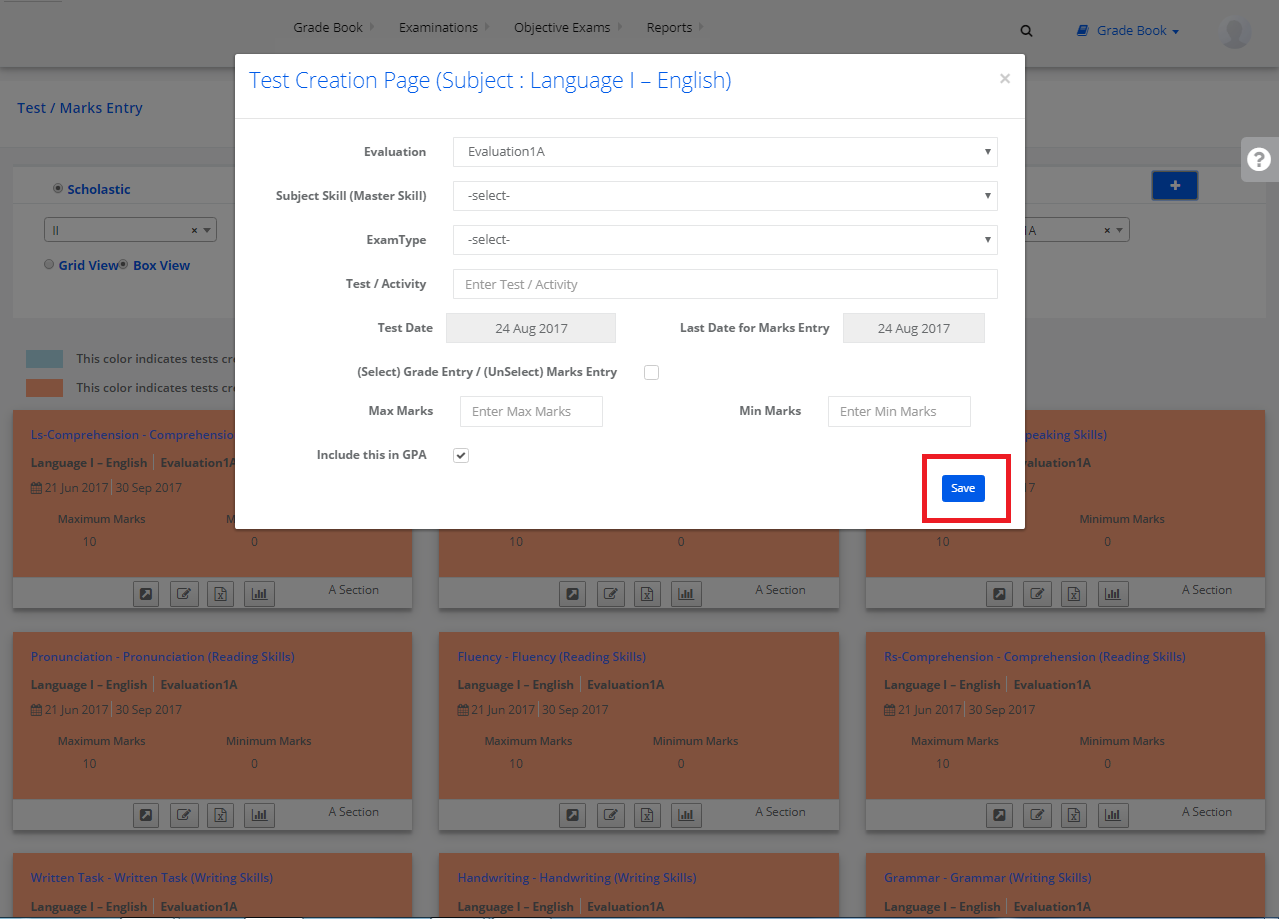
Step 3: Click on “Add” symbol and you’ll be directed to a “Test Creation Page”.
Step 4: Entering the required details here and click on “Save”. The Test is created successfully.
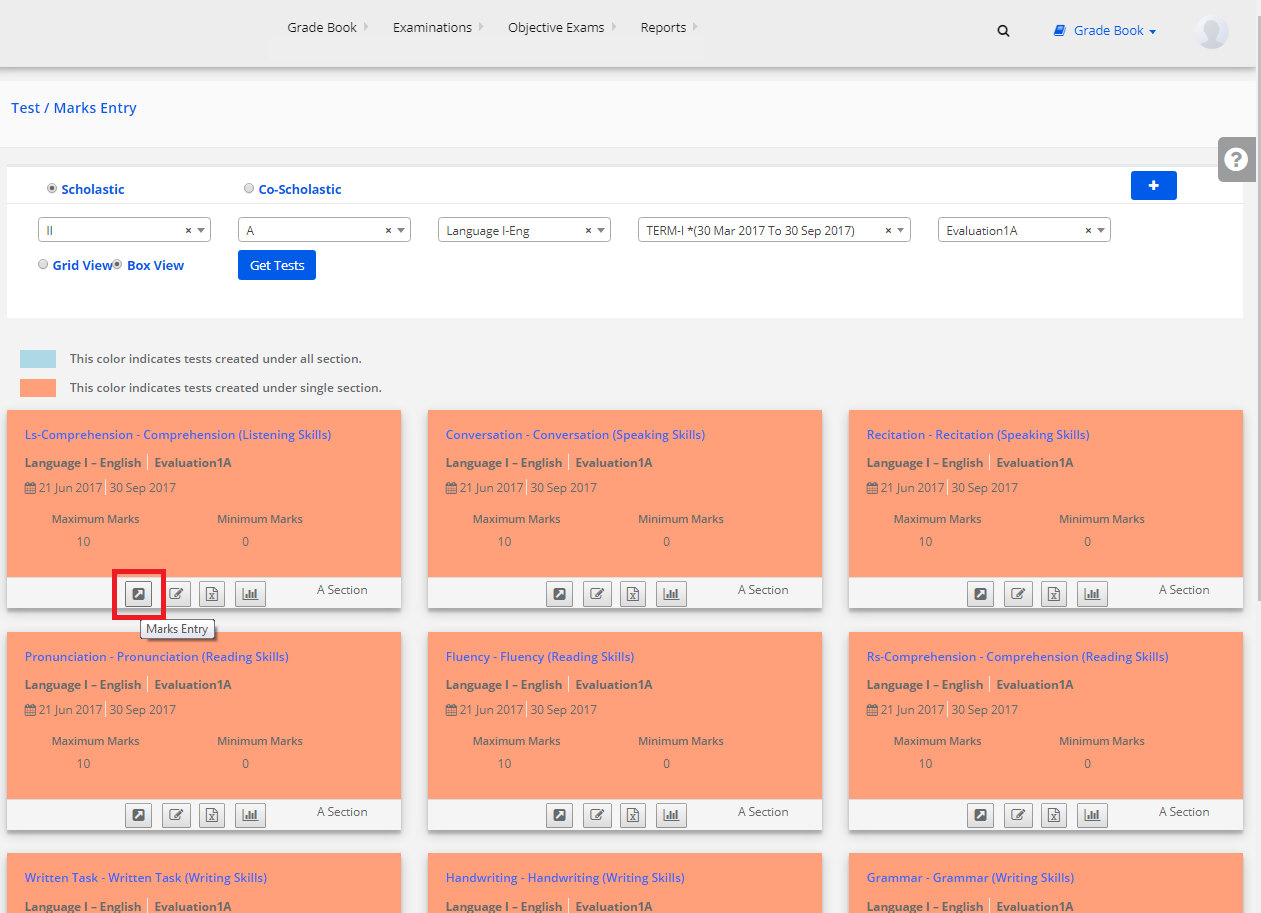
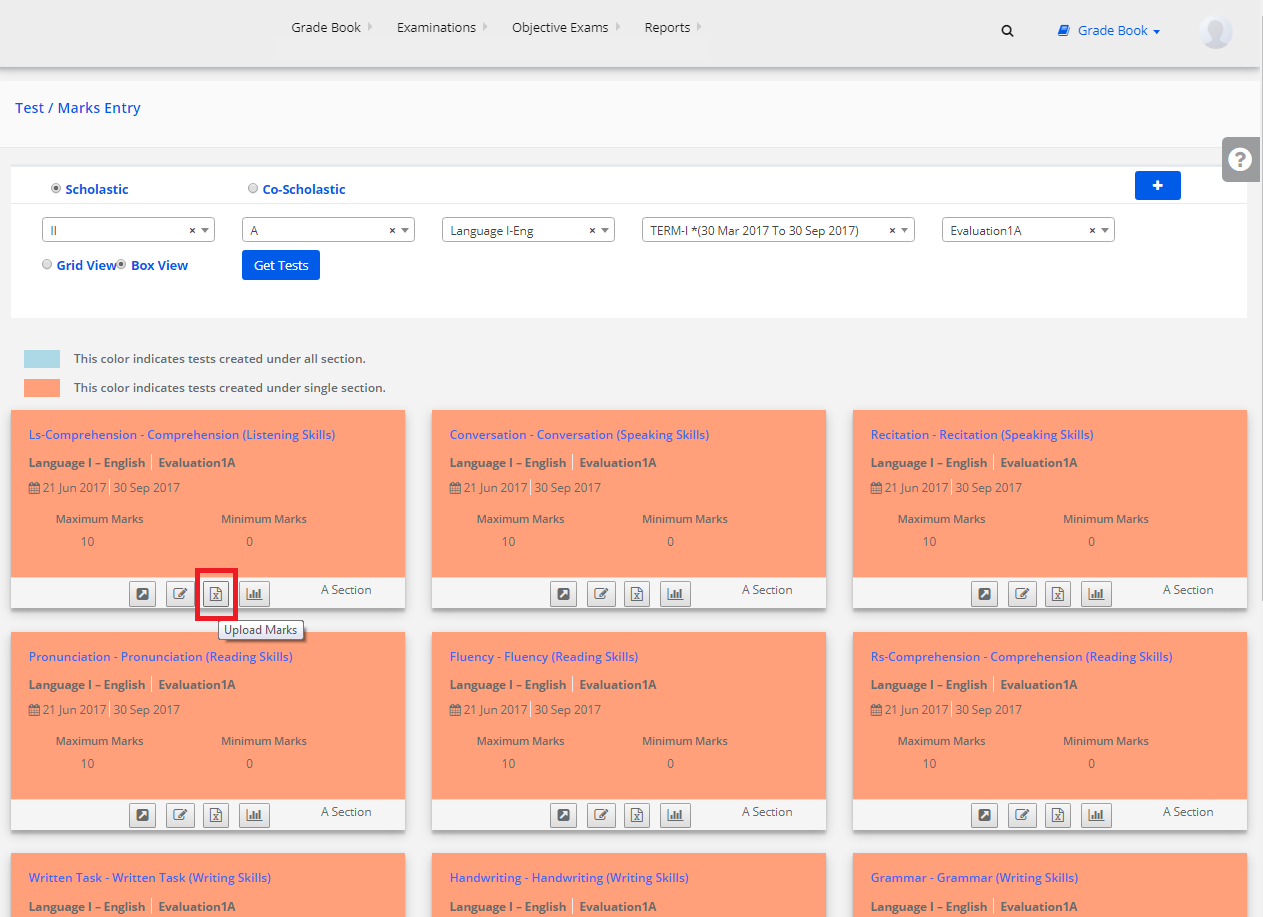
Marks Entry
After the test creation, click on any of the tests created to upload the marks.
Step 5: Select any
test
and click on “Marks Entry”.
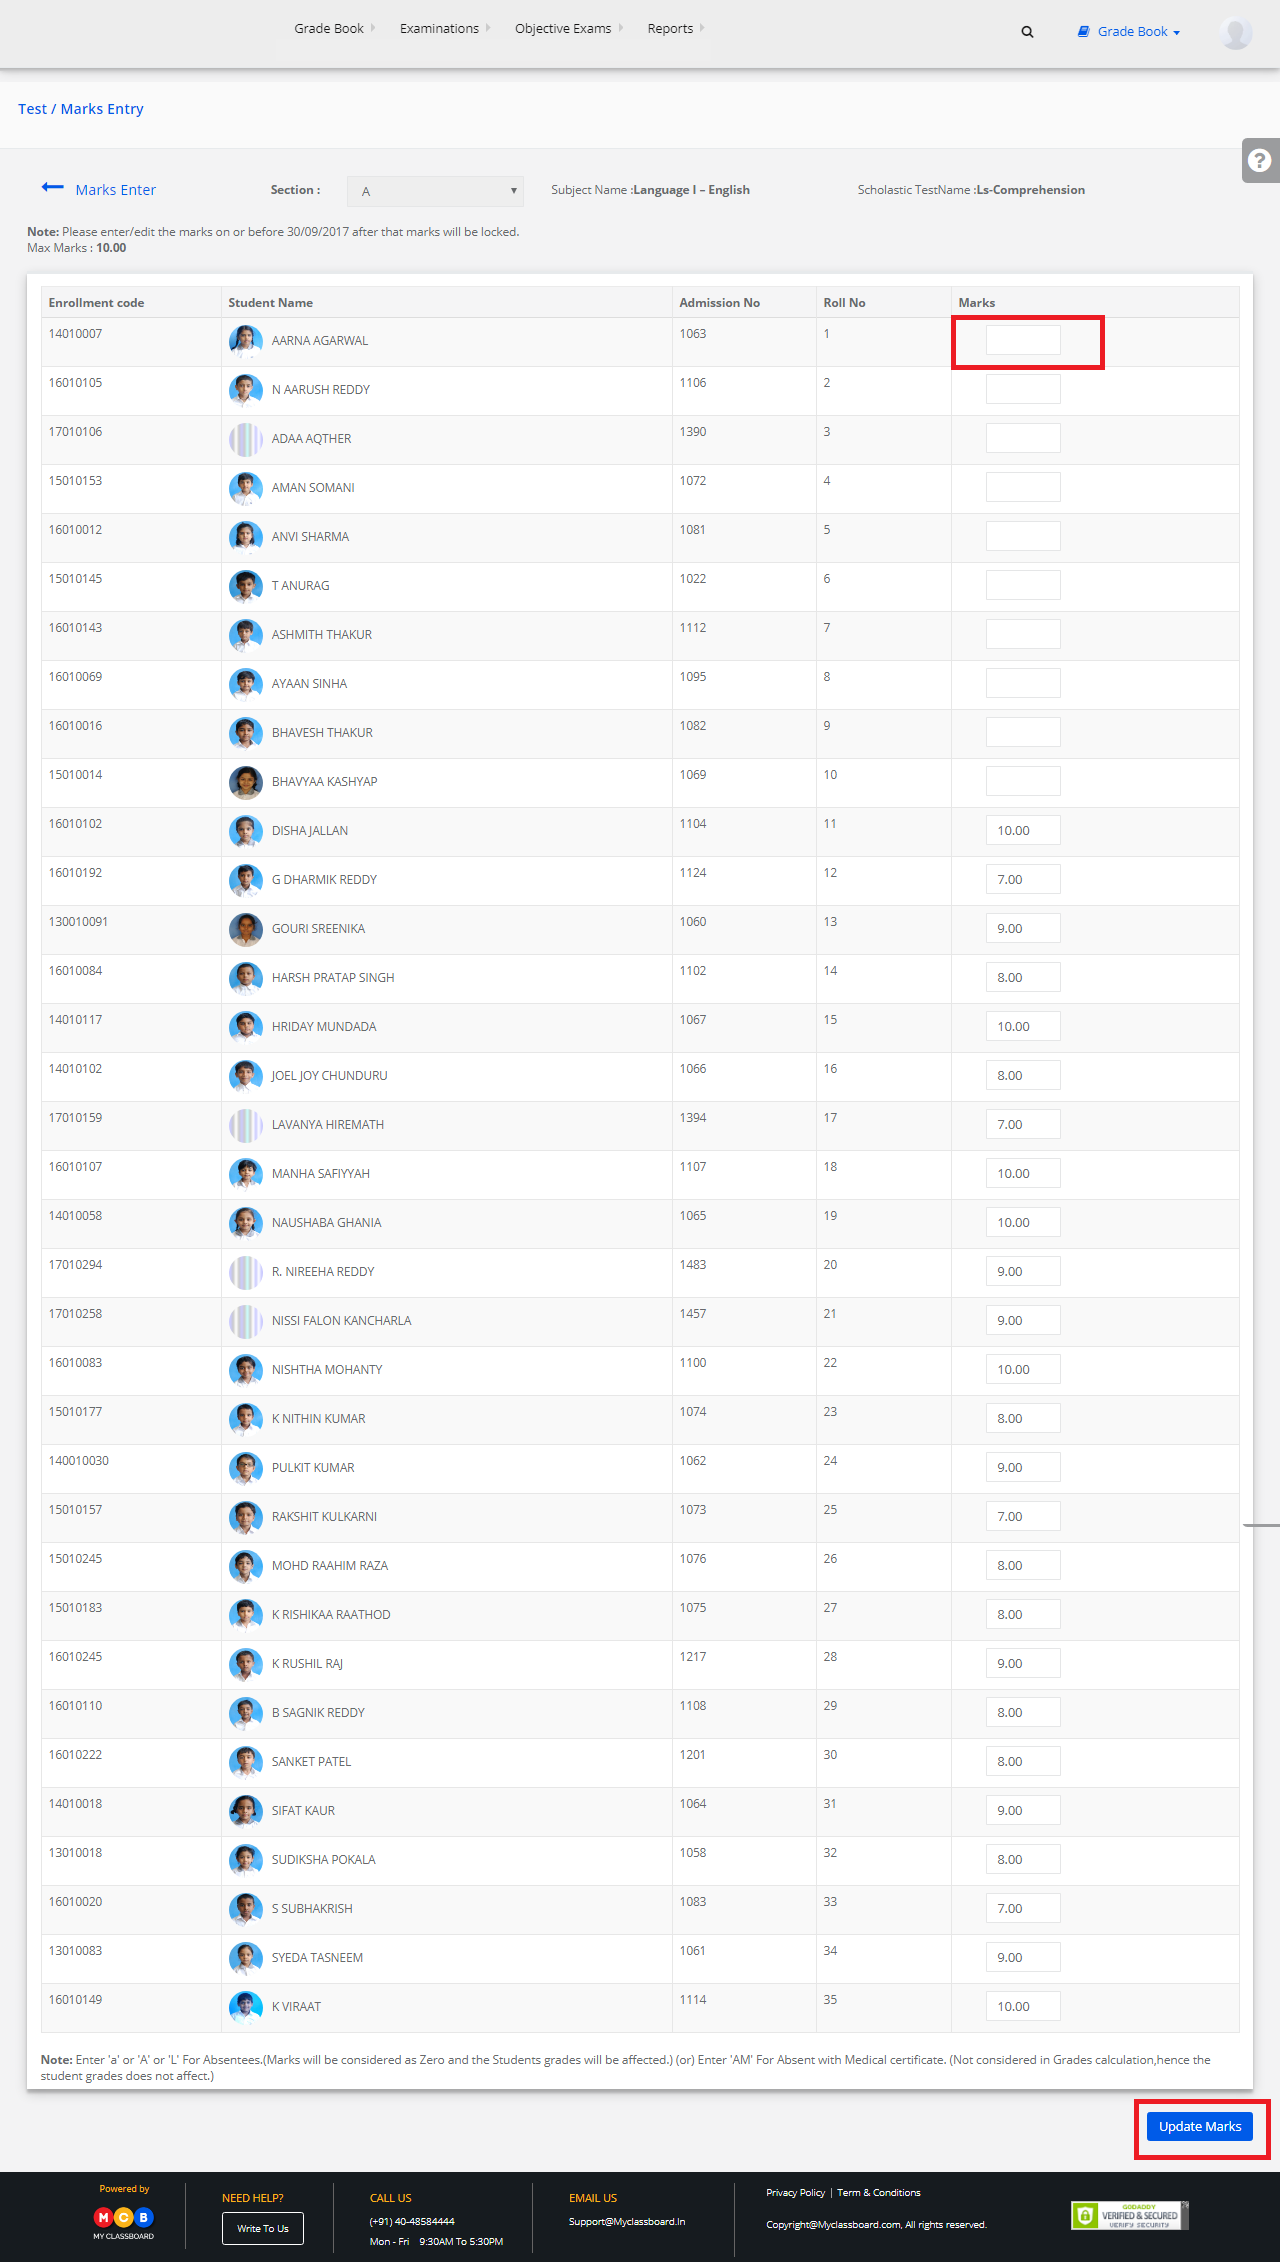
Step 6: Enter the marks of students individually here and click on “Update Marks”. The marks are updated.
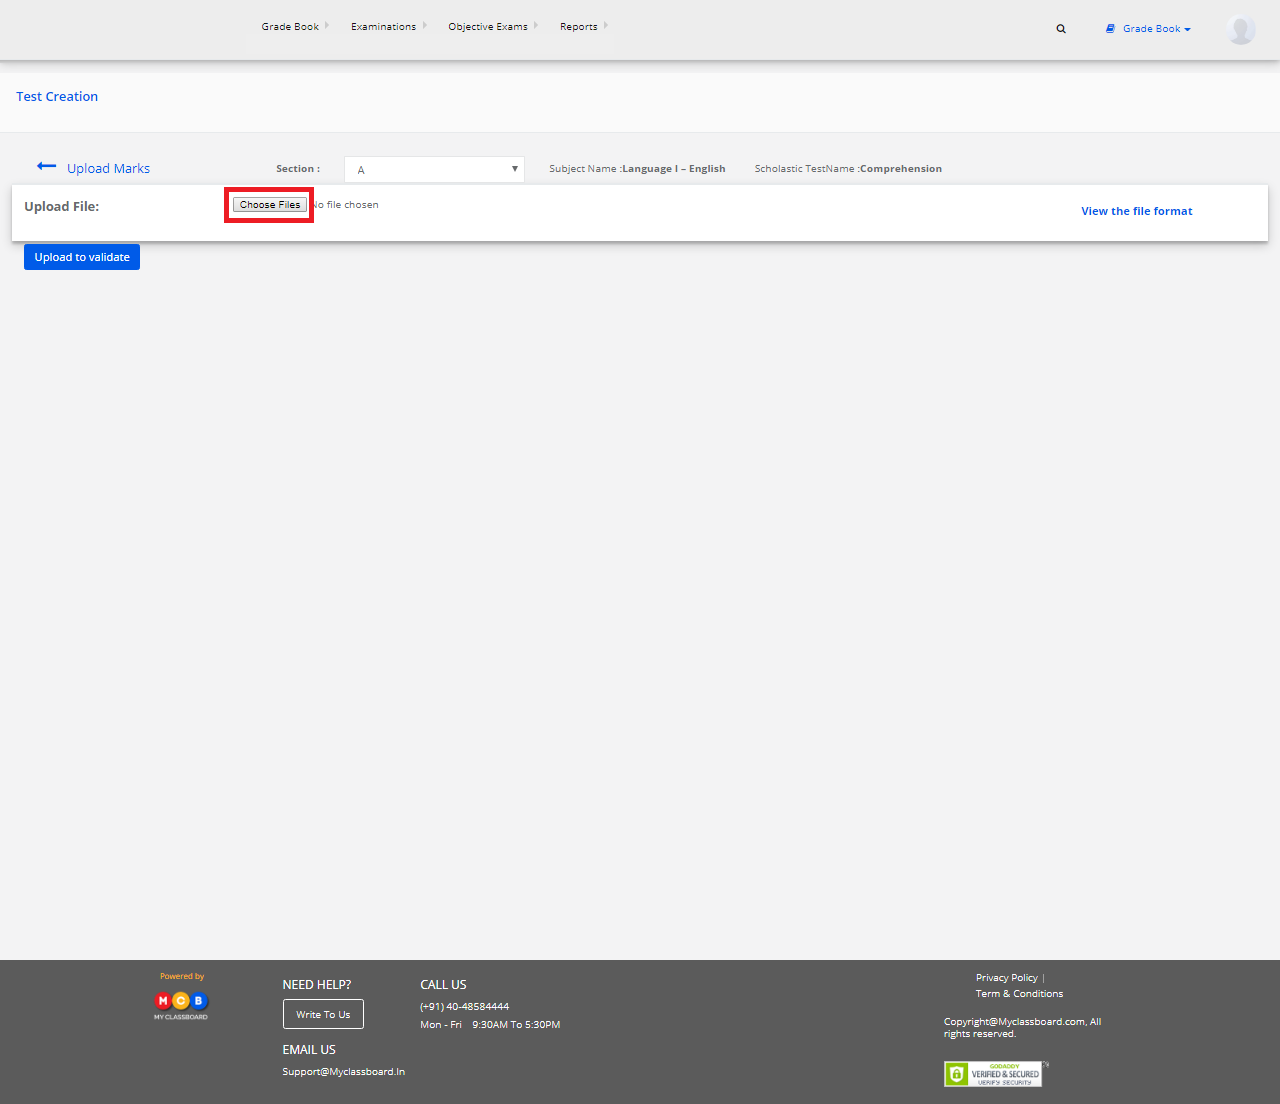
Bulk Entry
Step 7: Click on “Upload Marks”.
Step 8: Choose File ——> Upload to Validate.
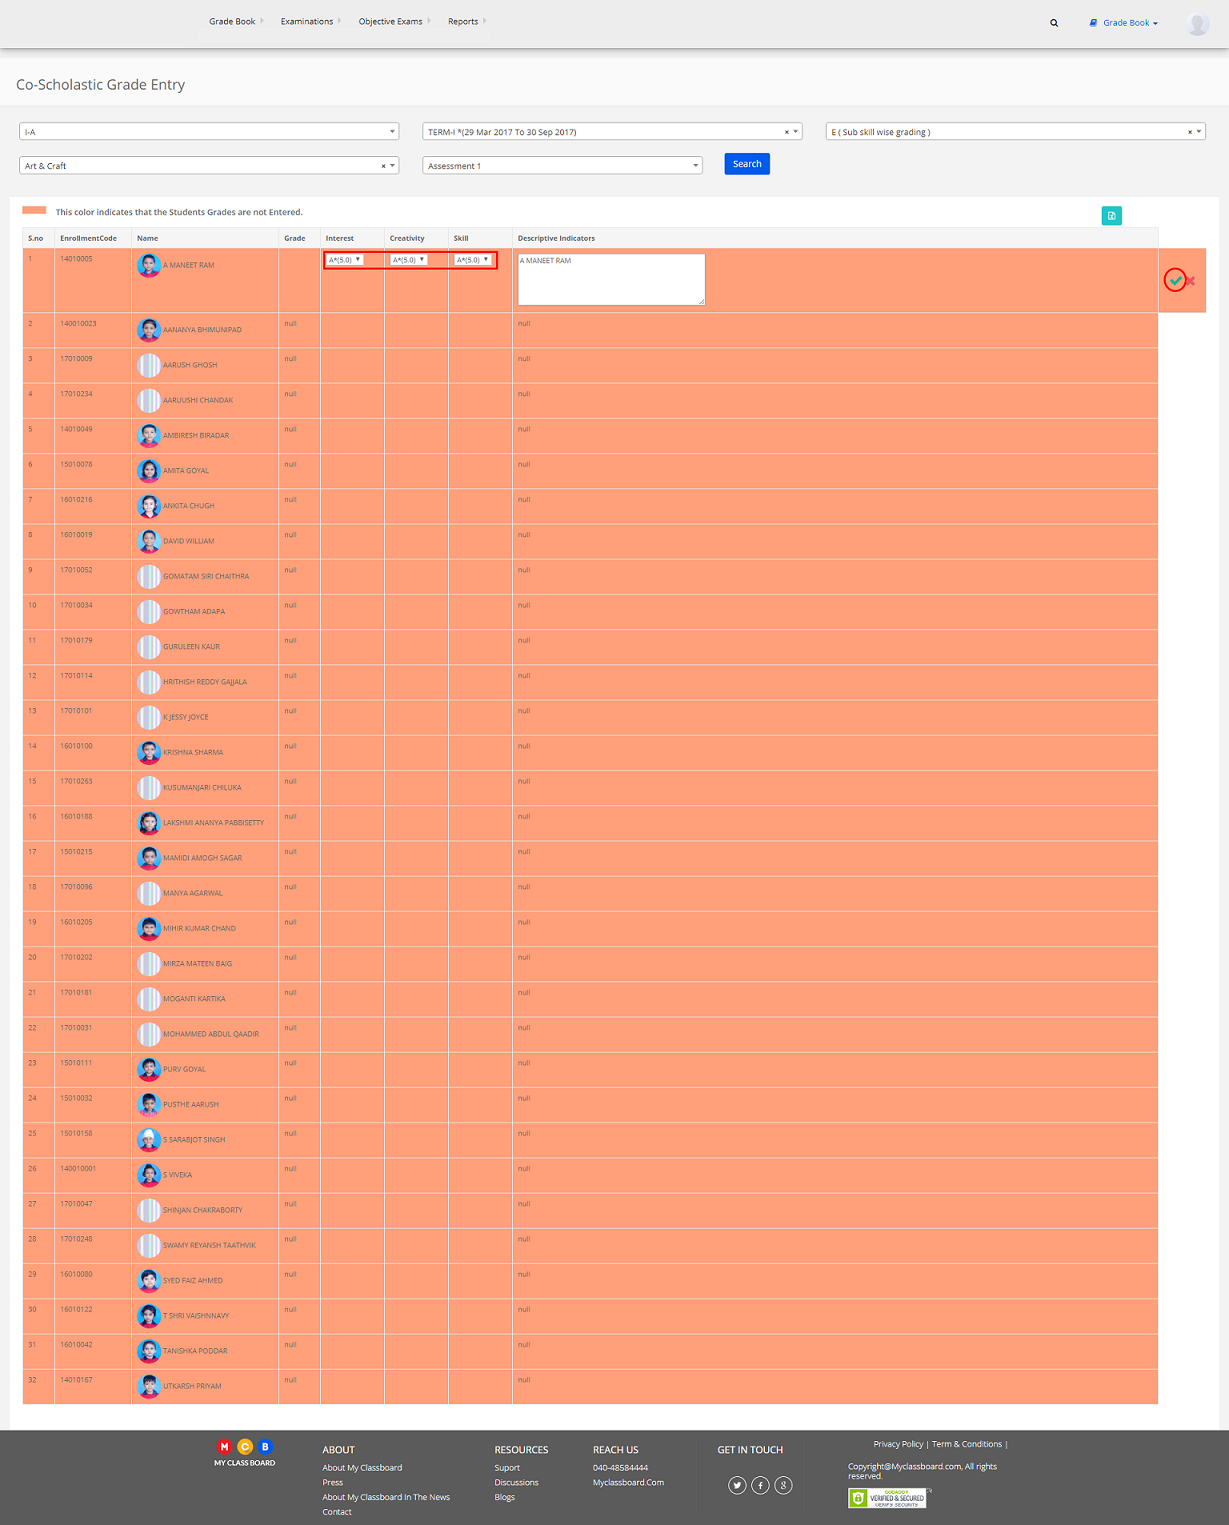
Stage 13: Co-scholastic Grade Entry
Step 1: Click on “Gradebook” on the top bar and select “Co-Scholastic Grade Entry”.
Step 2: Select Class, Term, Co-Scholastic Part, Co-Scholastic Skill-wise, Test and click on “Search”.
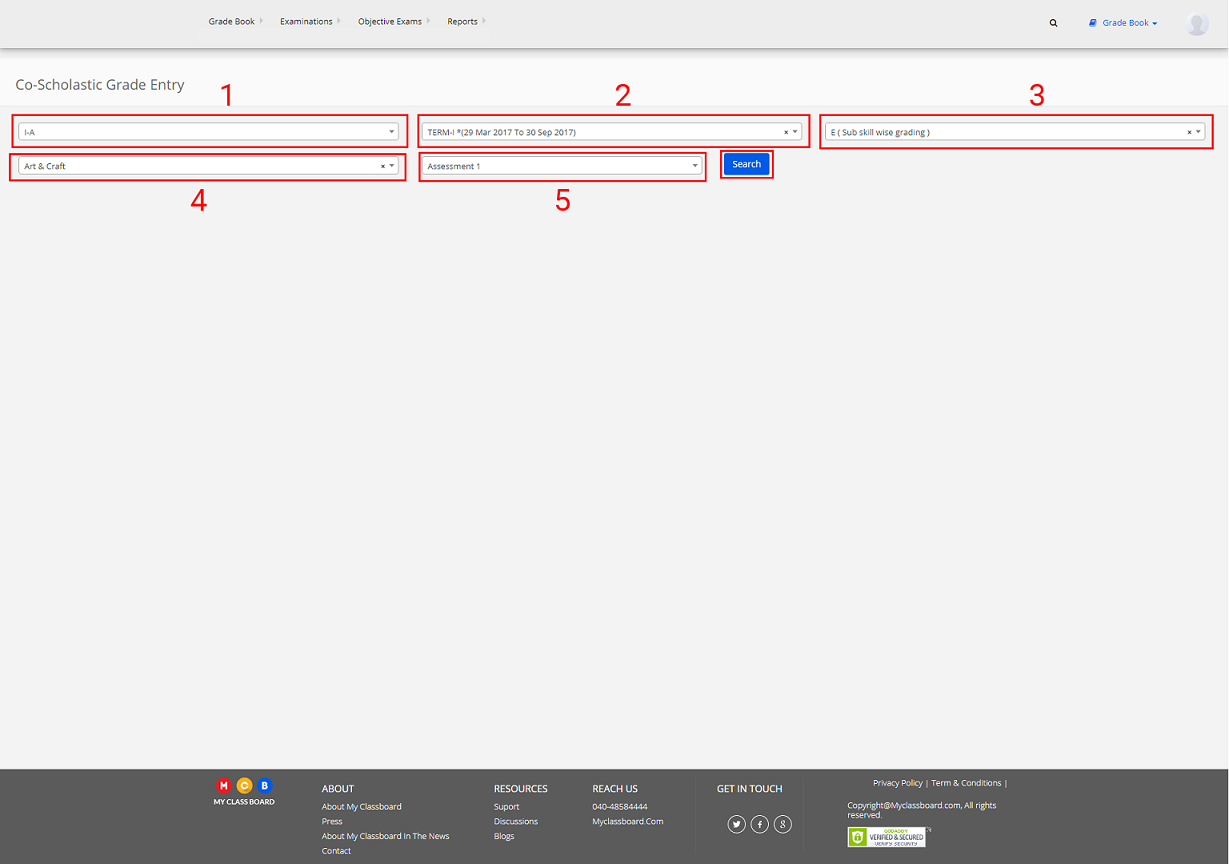
Step 3: Select Student, enter the grade individually and click on Save.
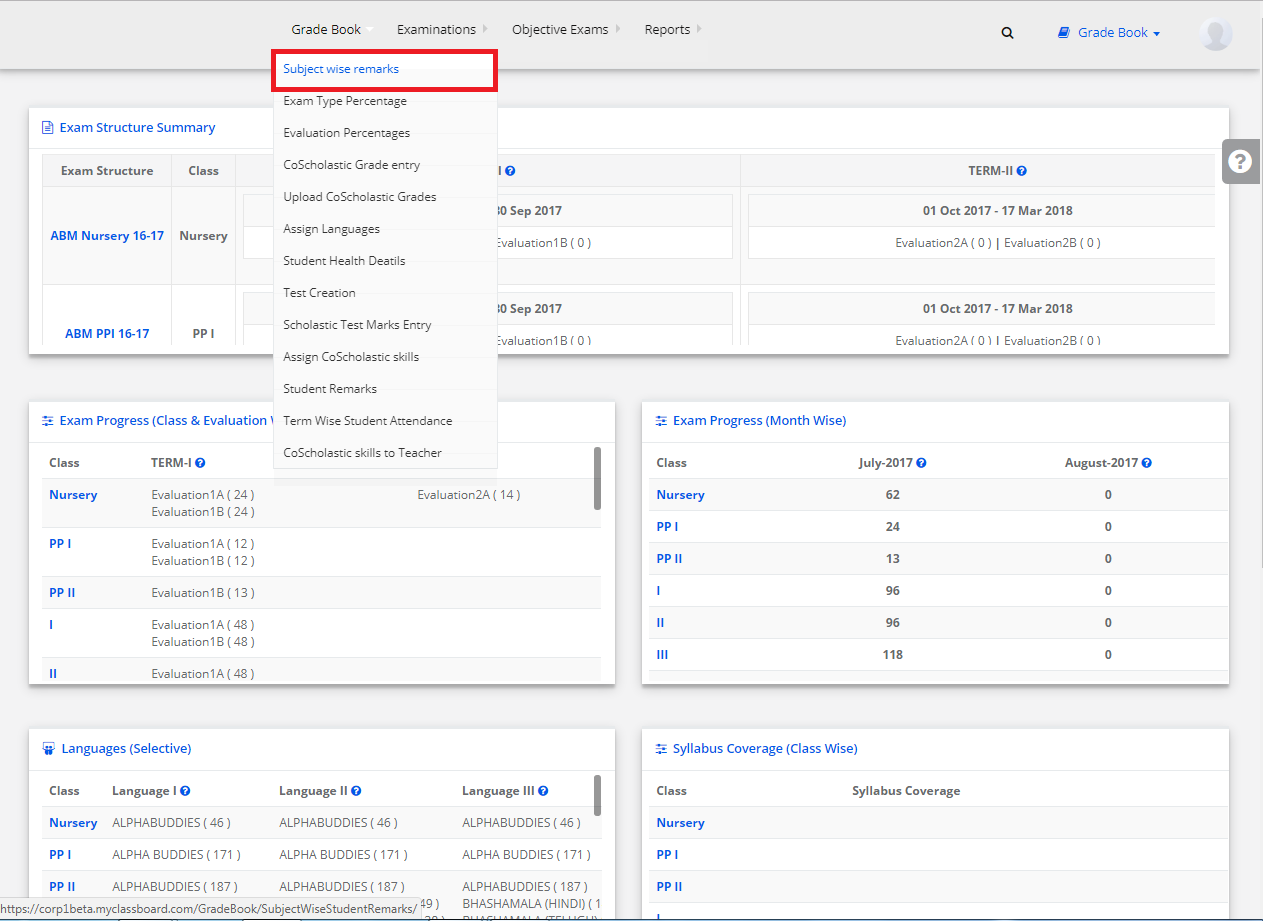
Stage 14: Subject Wise Remarks
Step 1: Click on “Gradebook” on the top bar and select “Subject-wise remarks”.
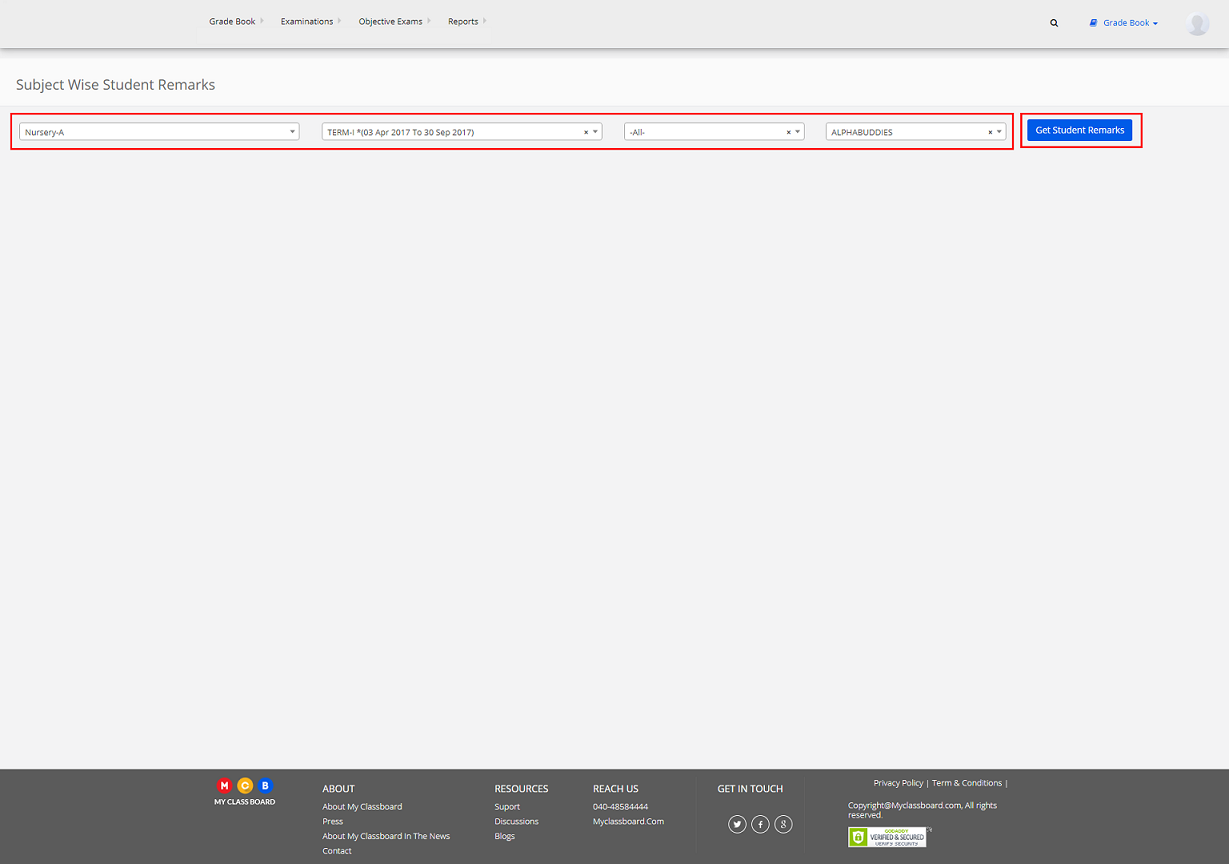
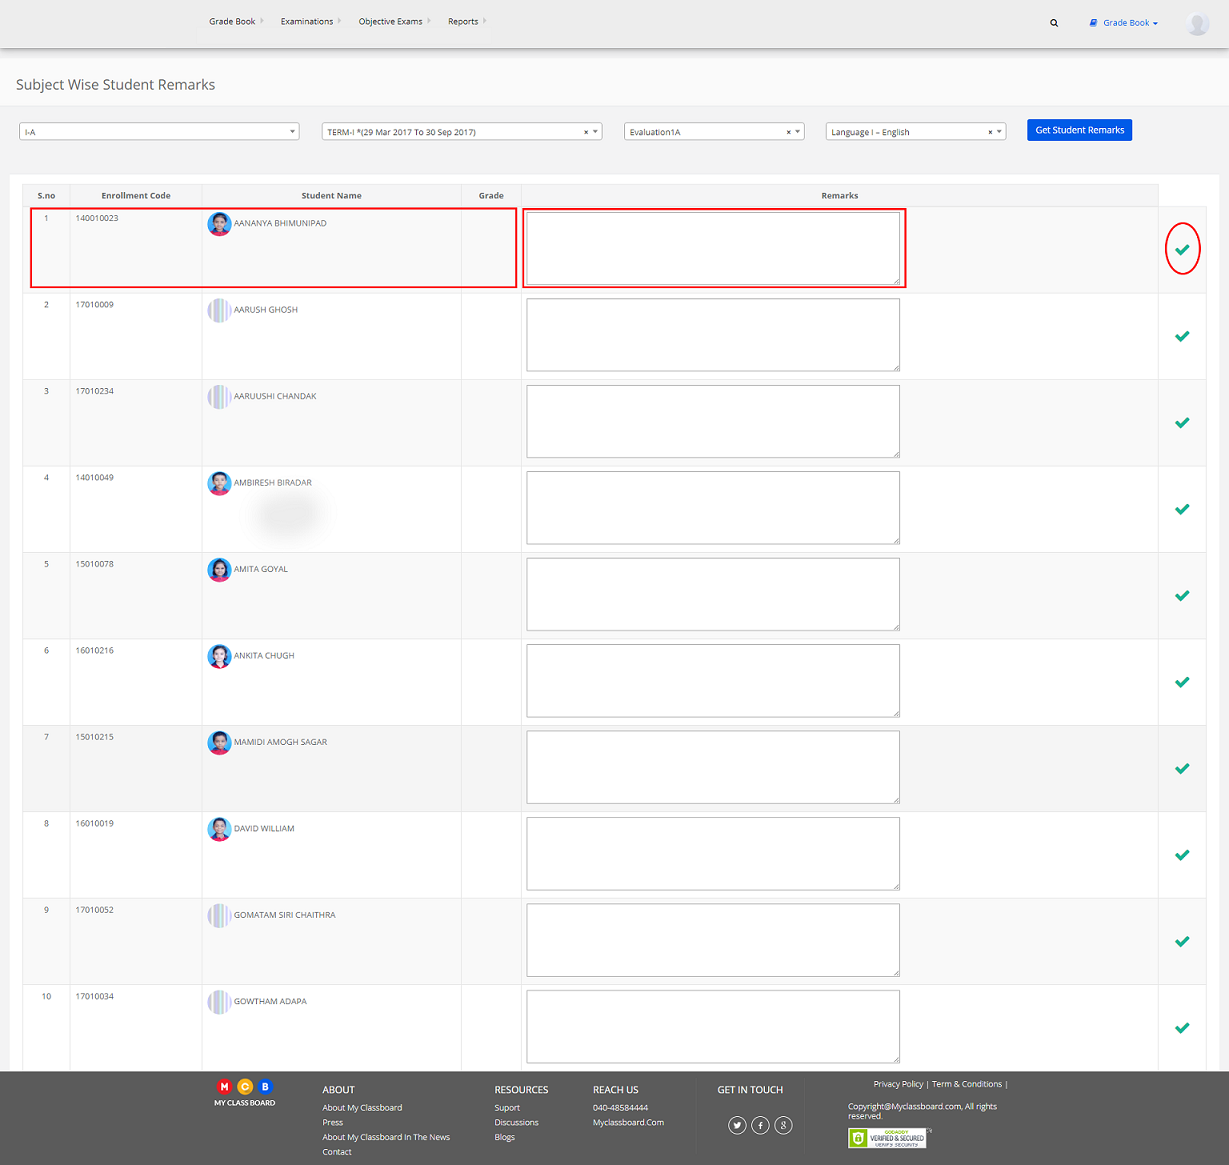
Step 2: Select Class, Term, Evaluation, Subject and click on “Get Student Remarks”.
Step 3: Select Student, enter the remarks individually and click on Save.
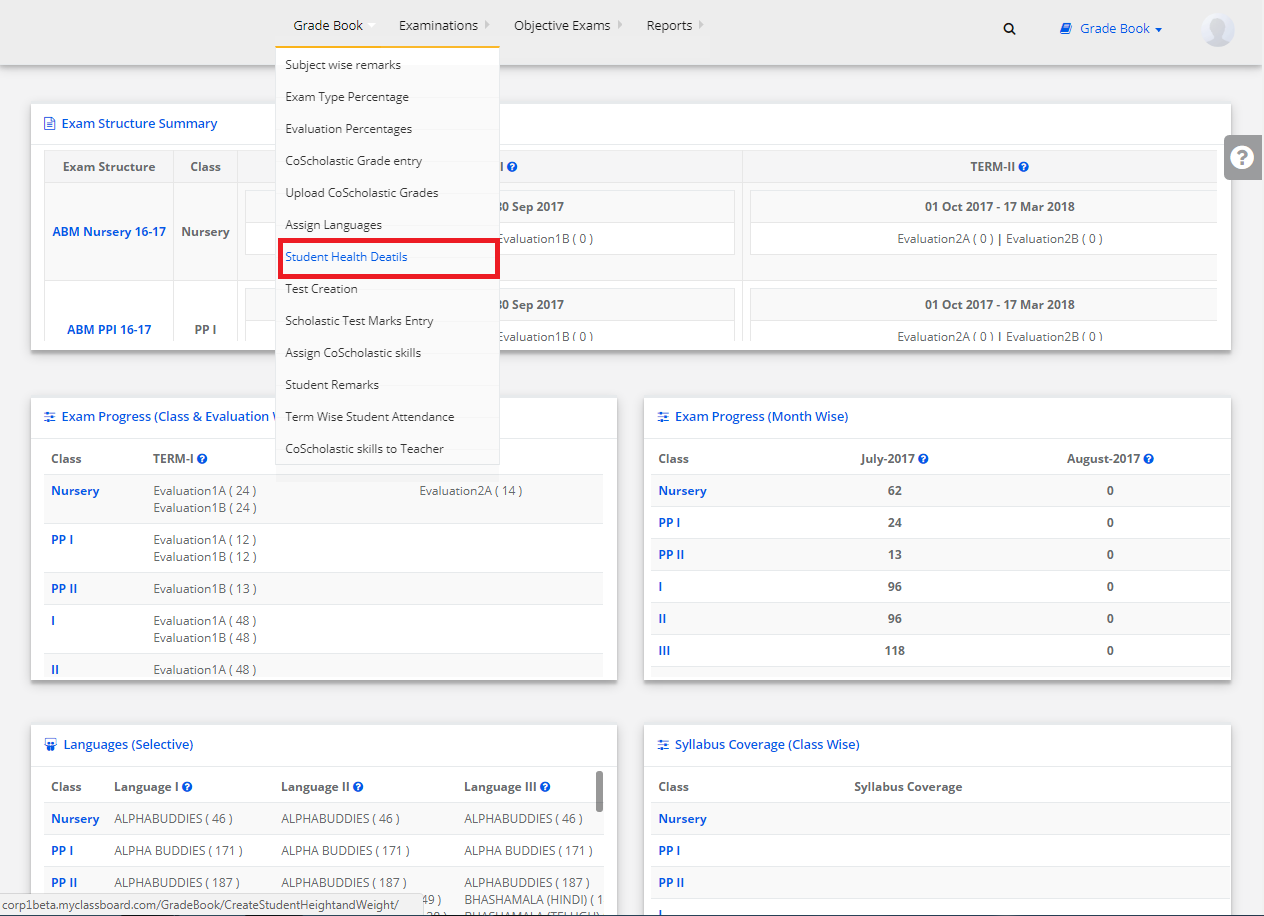
Stage 15: Student Health Details
Step 1: Click on “Gradebook” on the top bar and select “Student Health Details”.
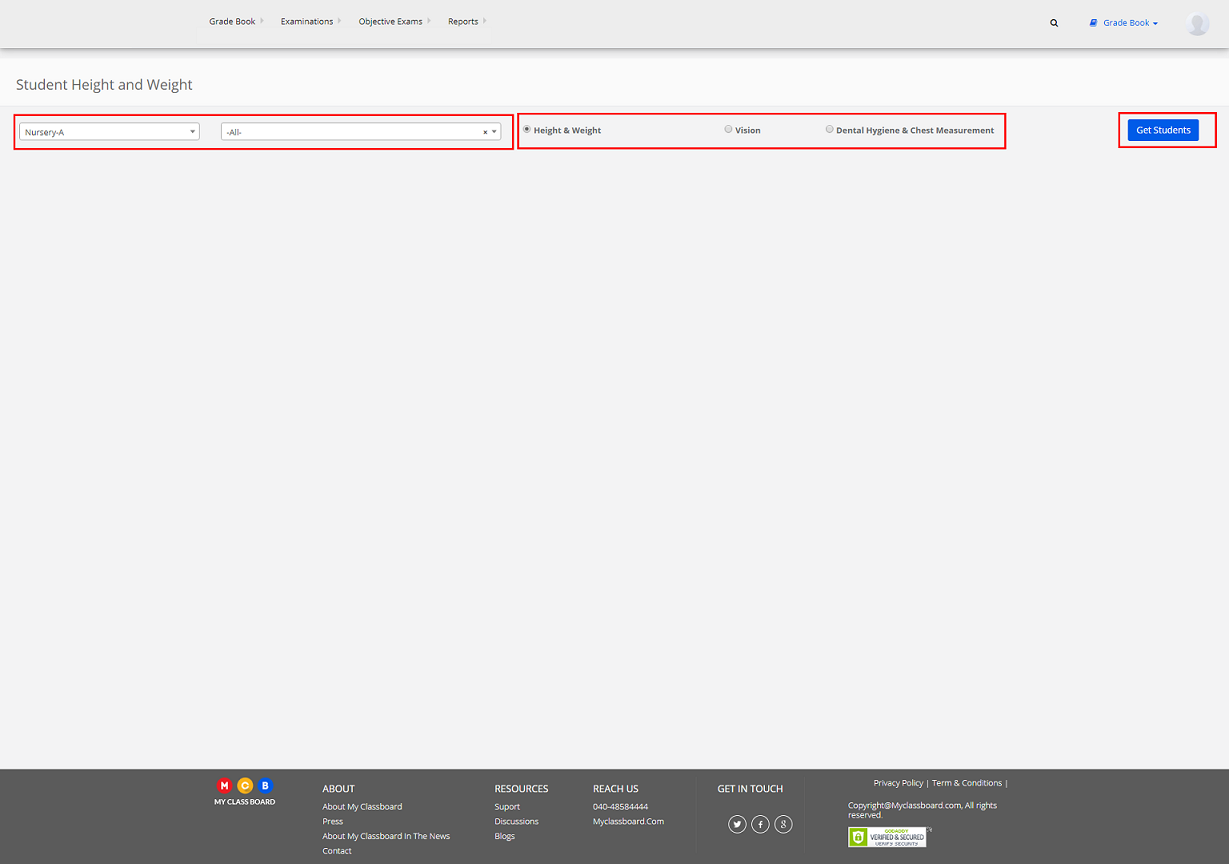
Step 2: Select Class,
Term
and other required options and click on “Get Students”.
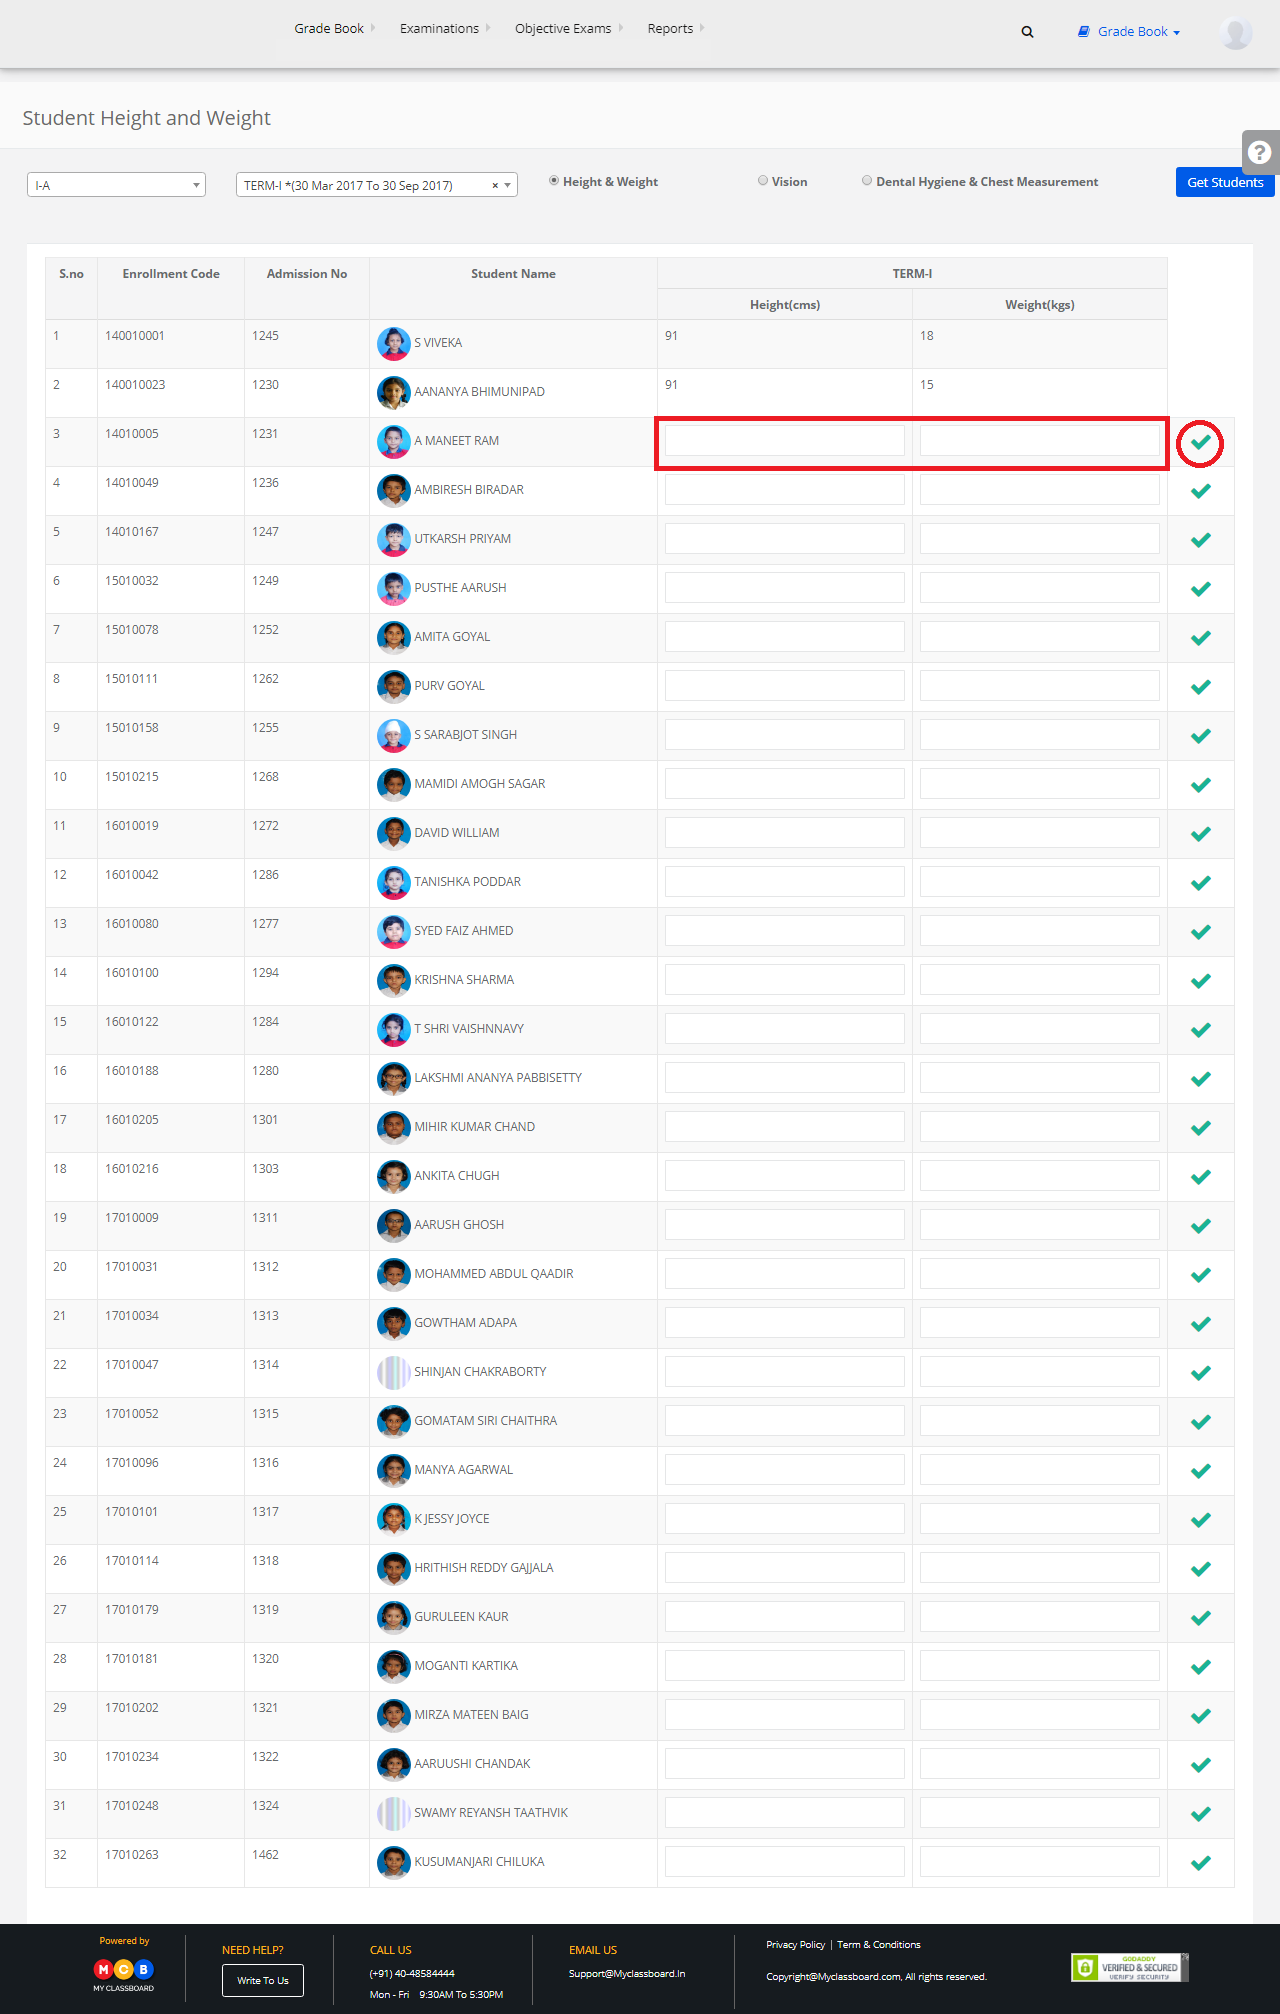
Step 3: Select Student, enter the health details individually and click on Save.
Stage 16: Report Generation
CCE Report
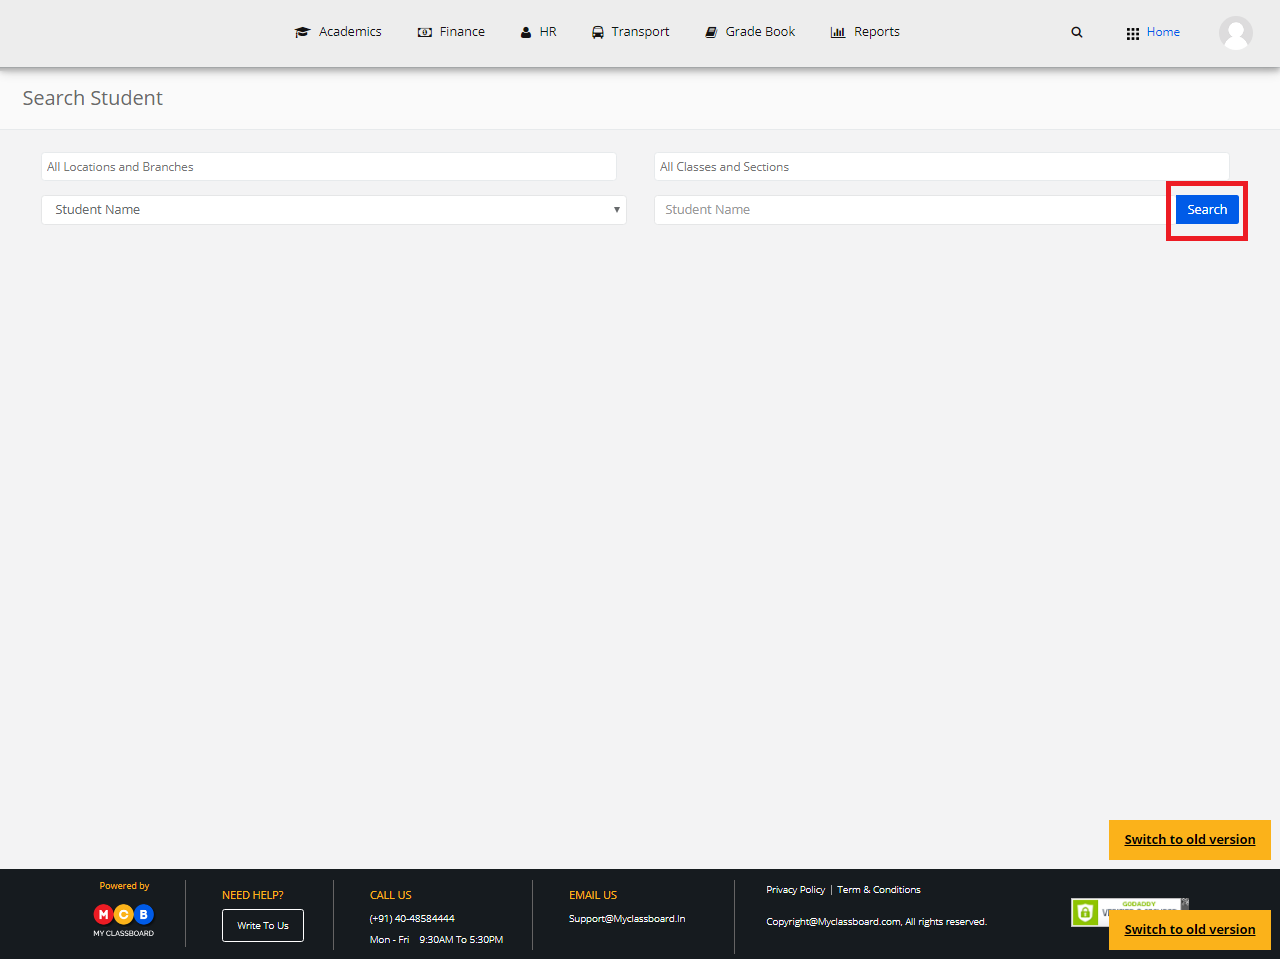
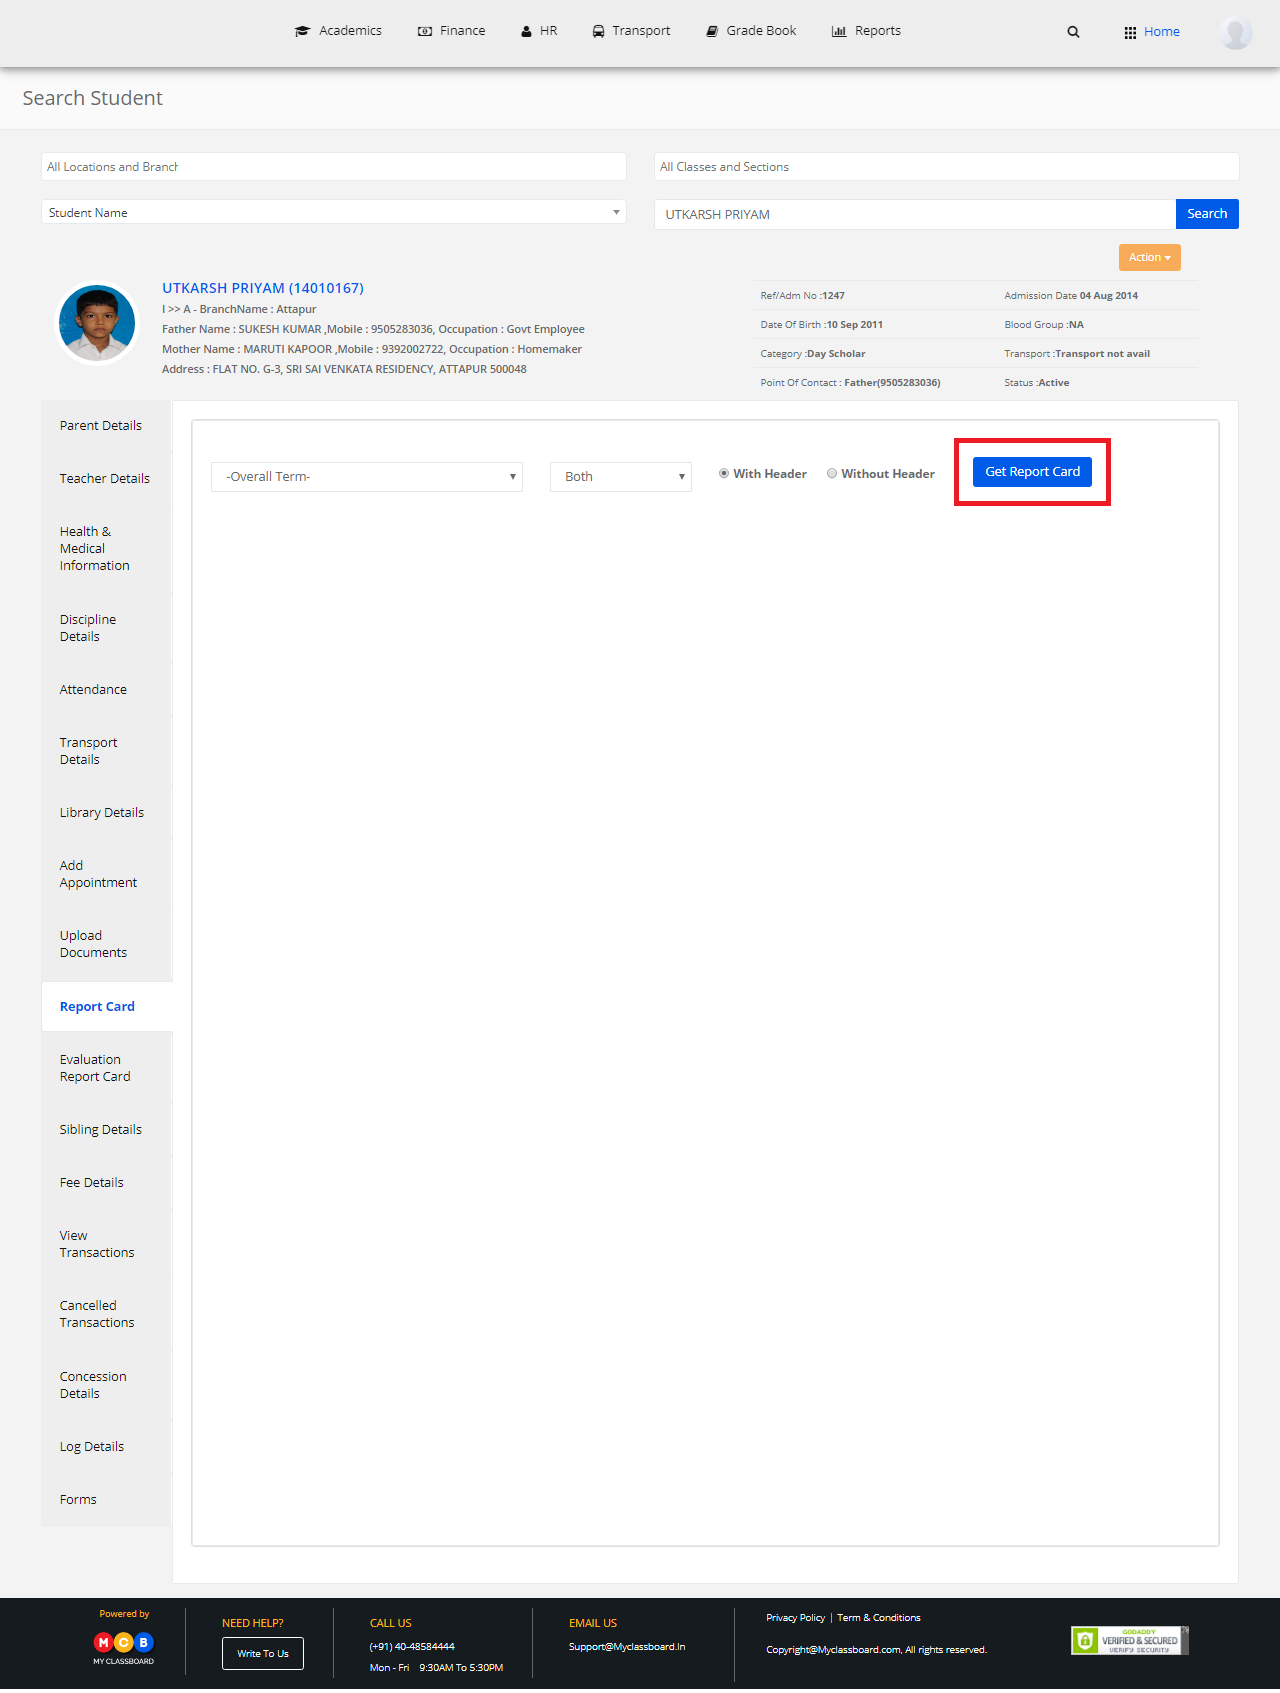
Step 1: Click on the “Search” tab on the top bar to search for the student.

Step 2: Search for a student using the search criteria. Choose the required options and click on “Search”.
Step 3: Select “Report Card” on the left pane.

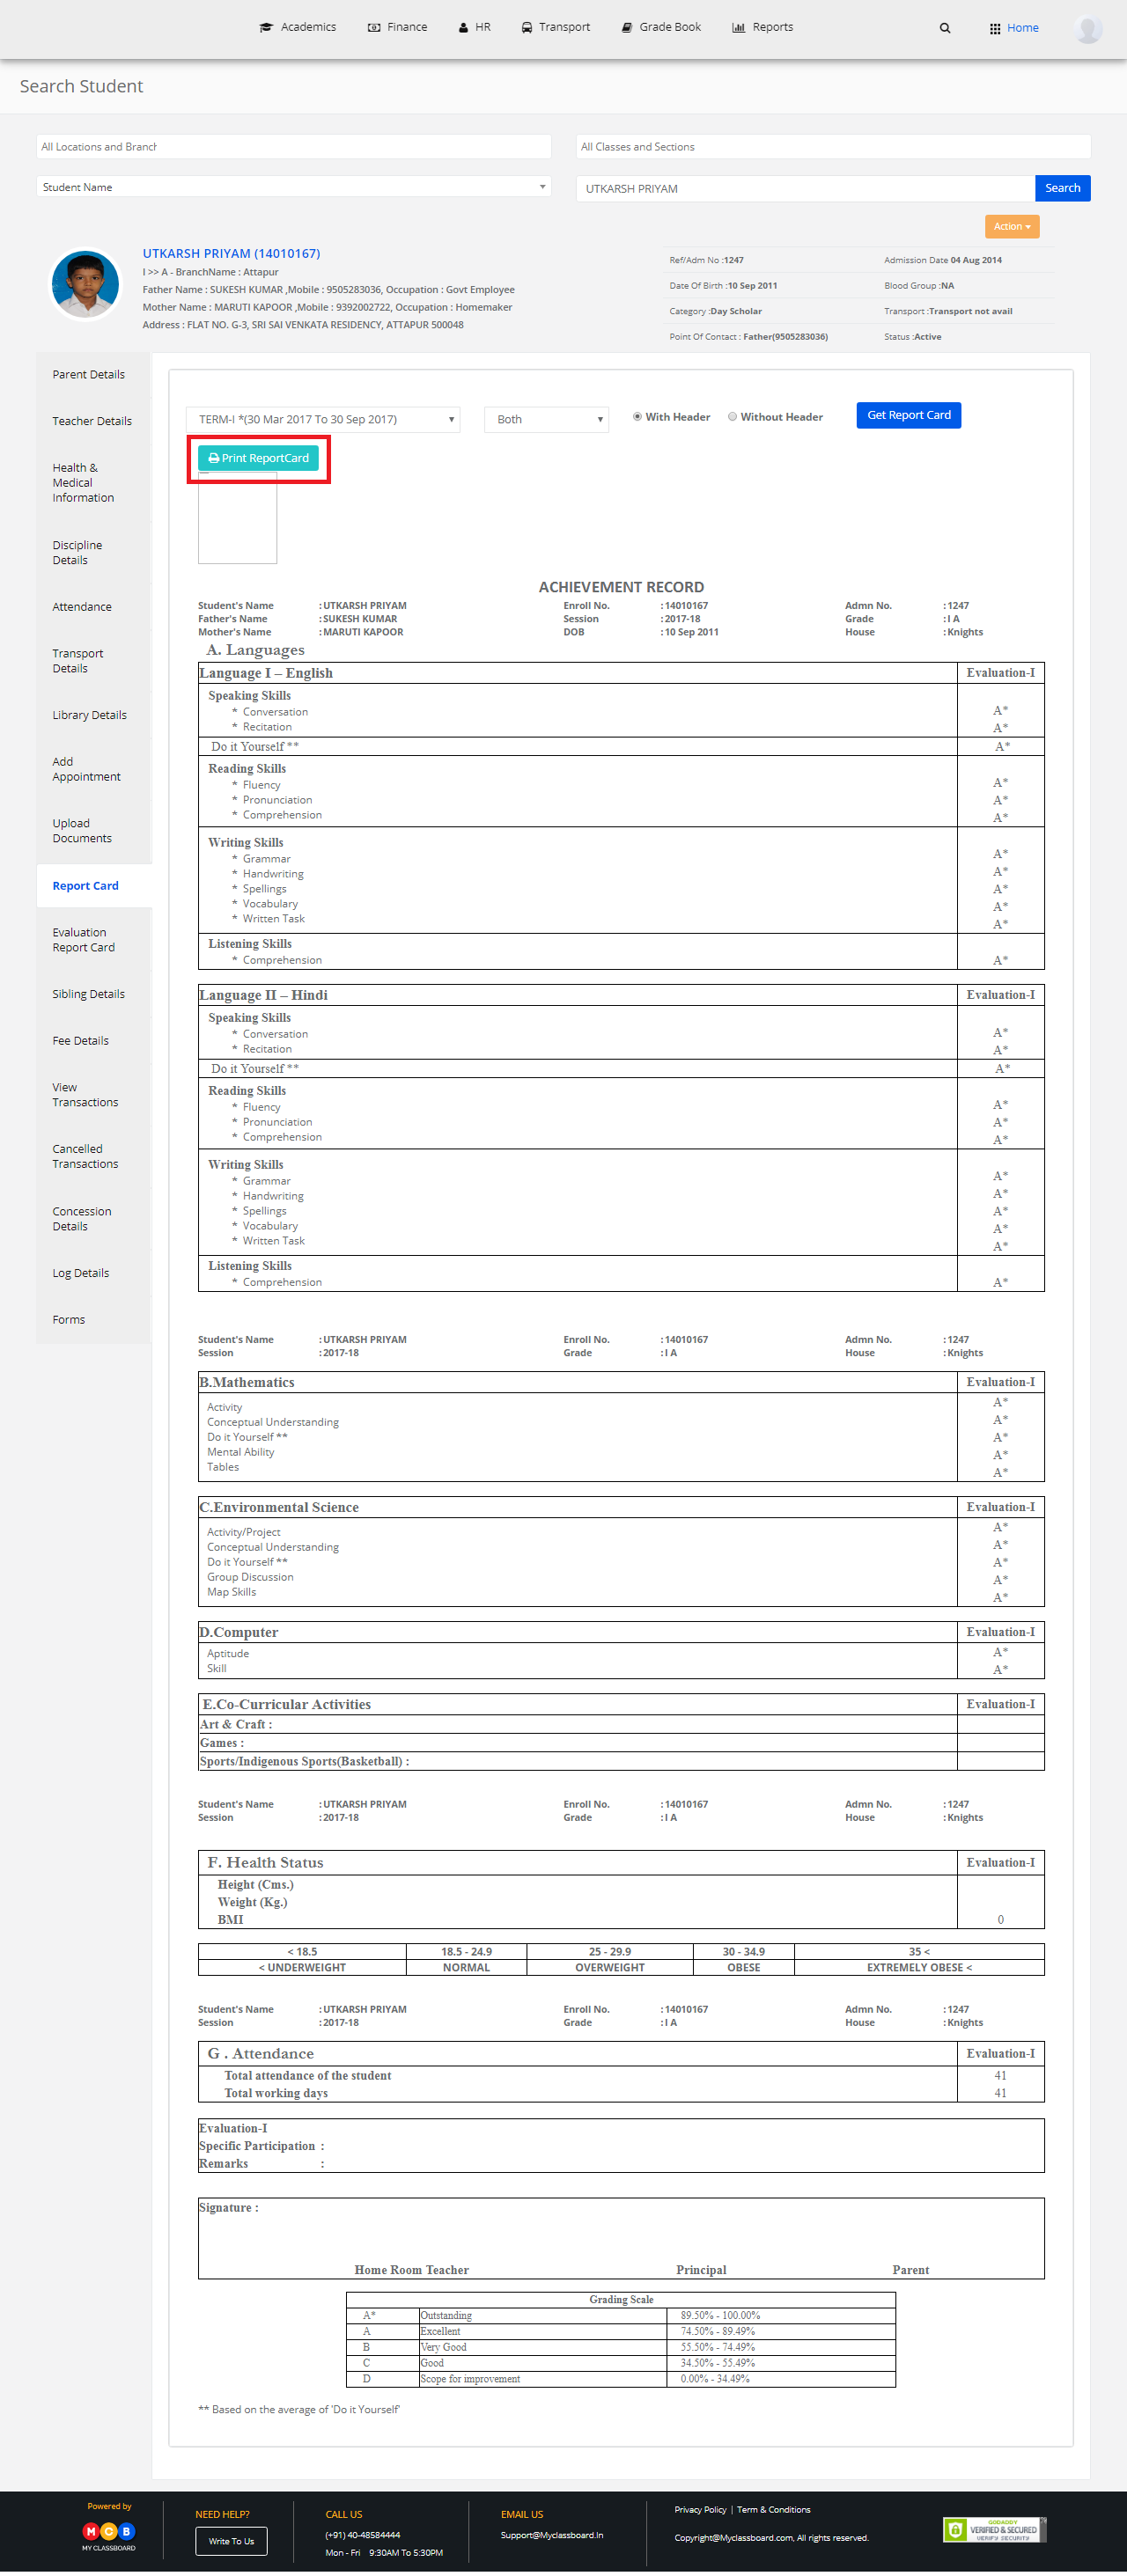
Step 4: Select required options and click on “Get Report”.
Step 5: To take a print of the report, click on “Print ReportCard” option.
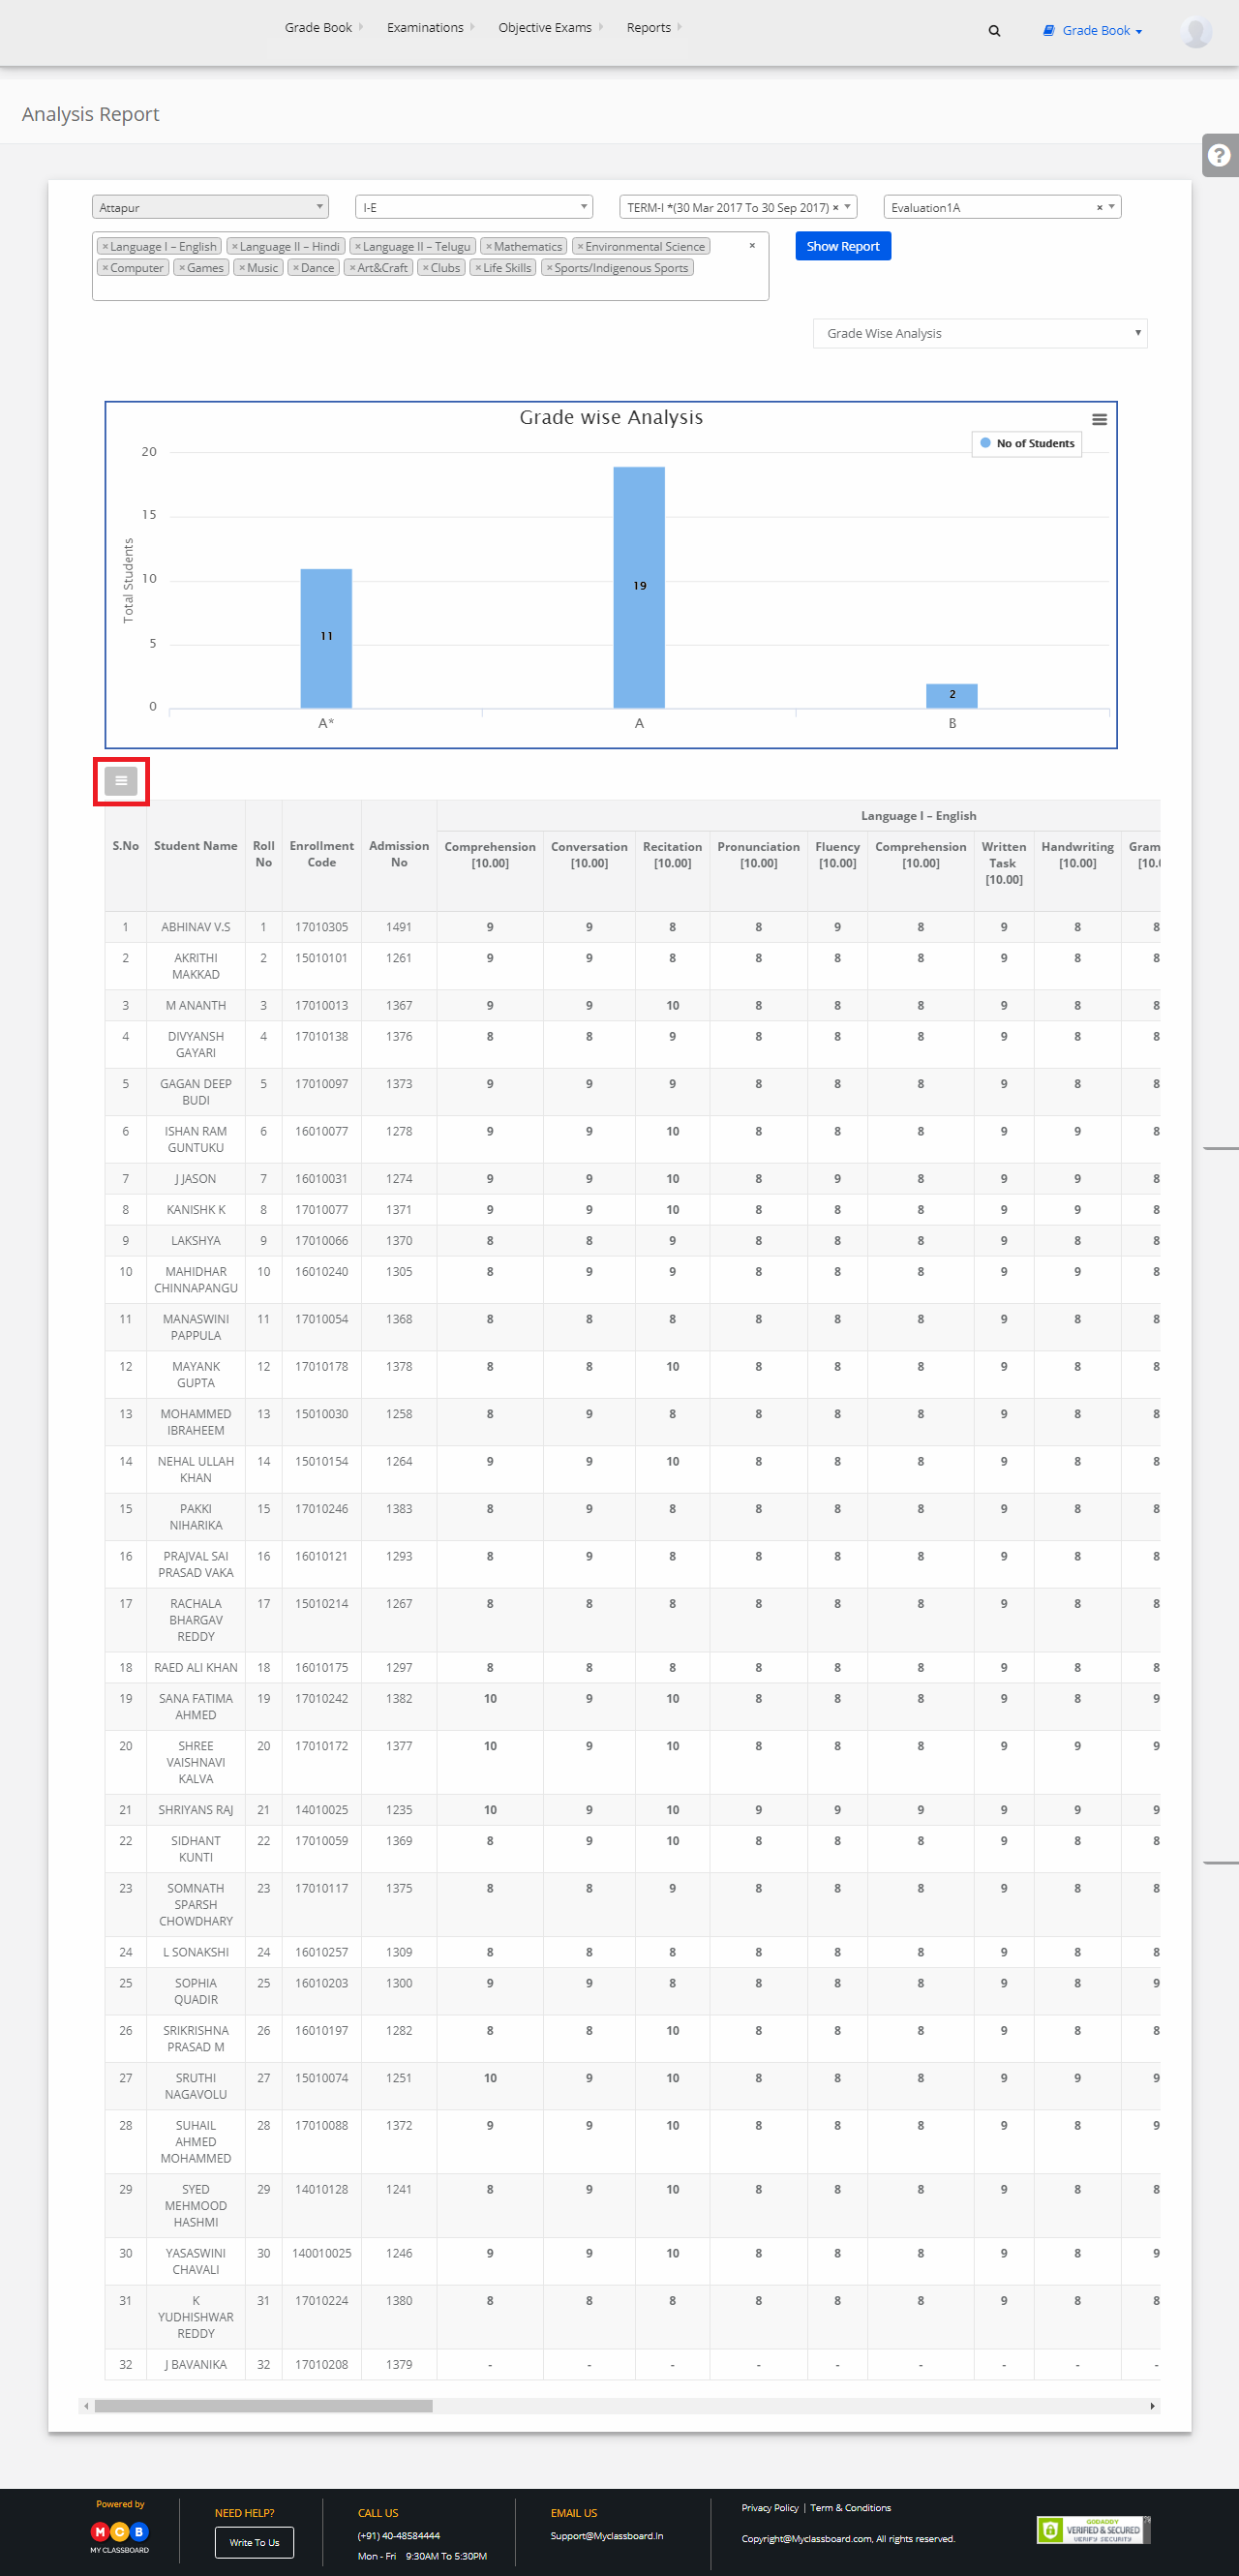
Evaluation Reports
Step 1: Click on “Reports” on the top bar and select “Evaluation Report”.
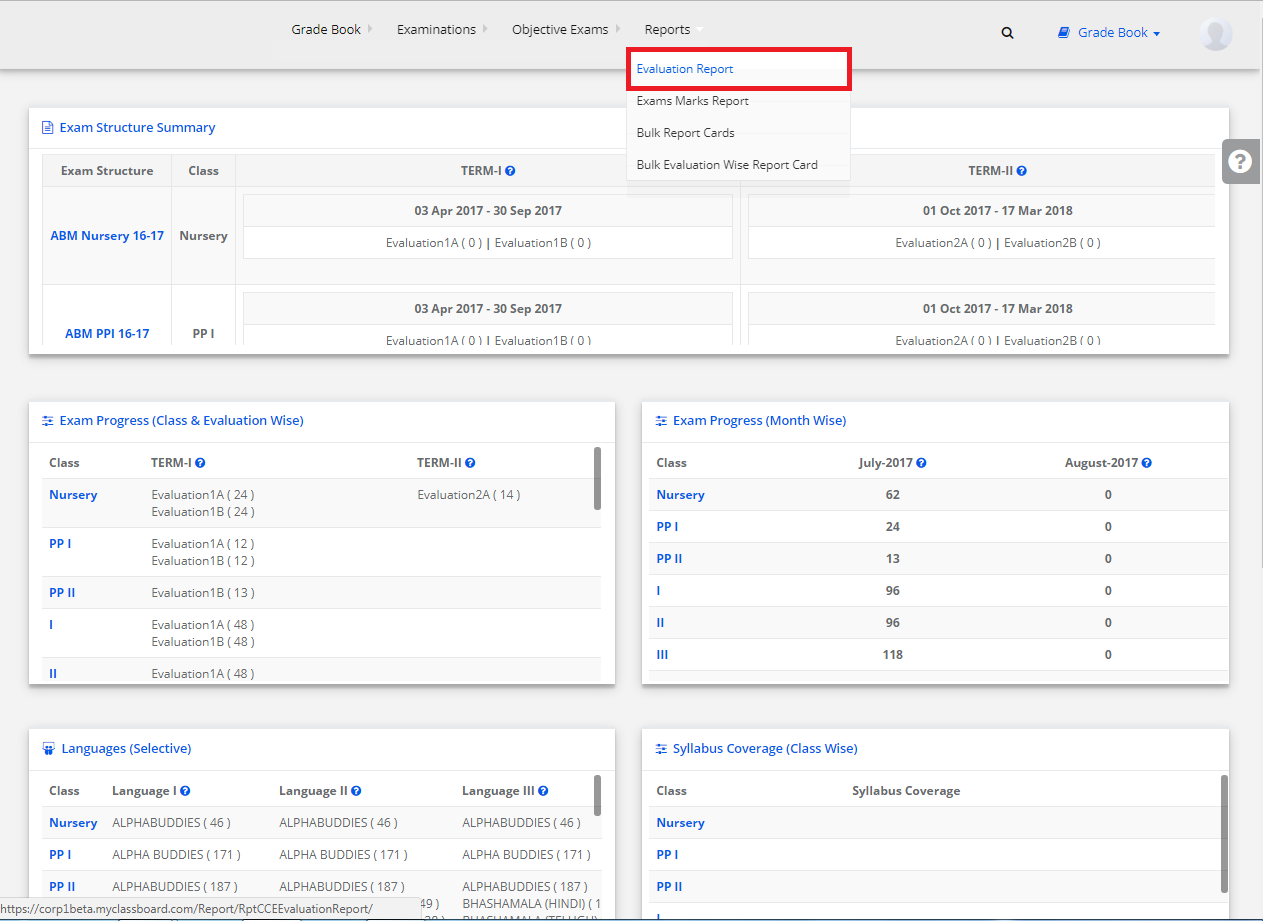
Step 2: Select the required options and click on “Show Report”. The reports are displayed.
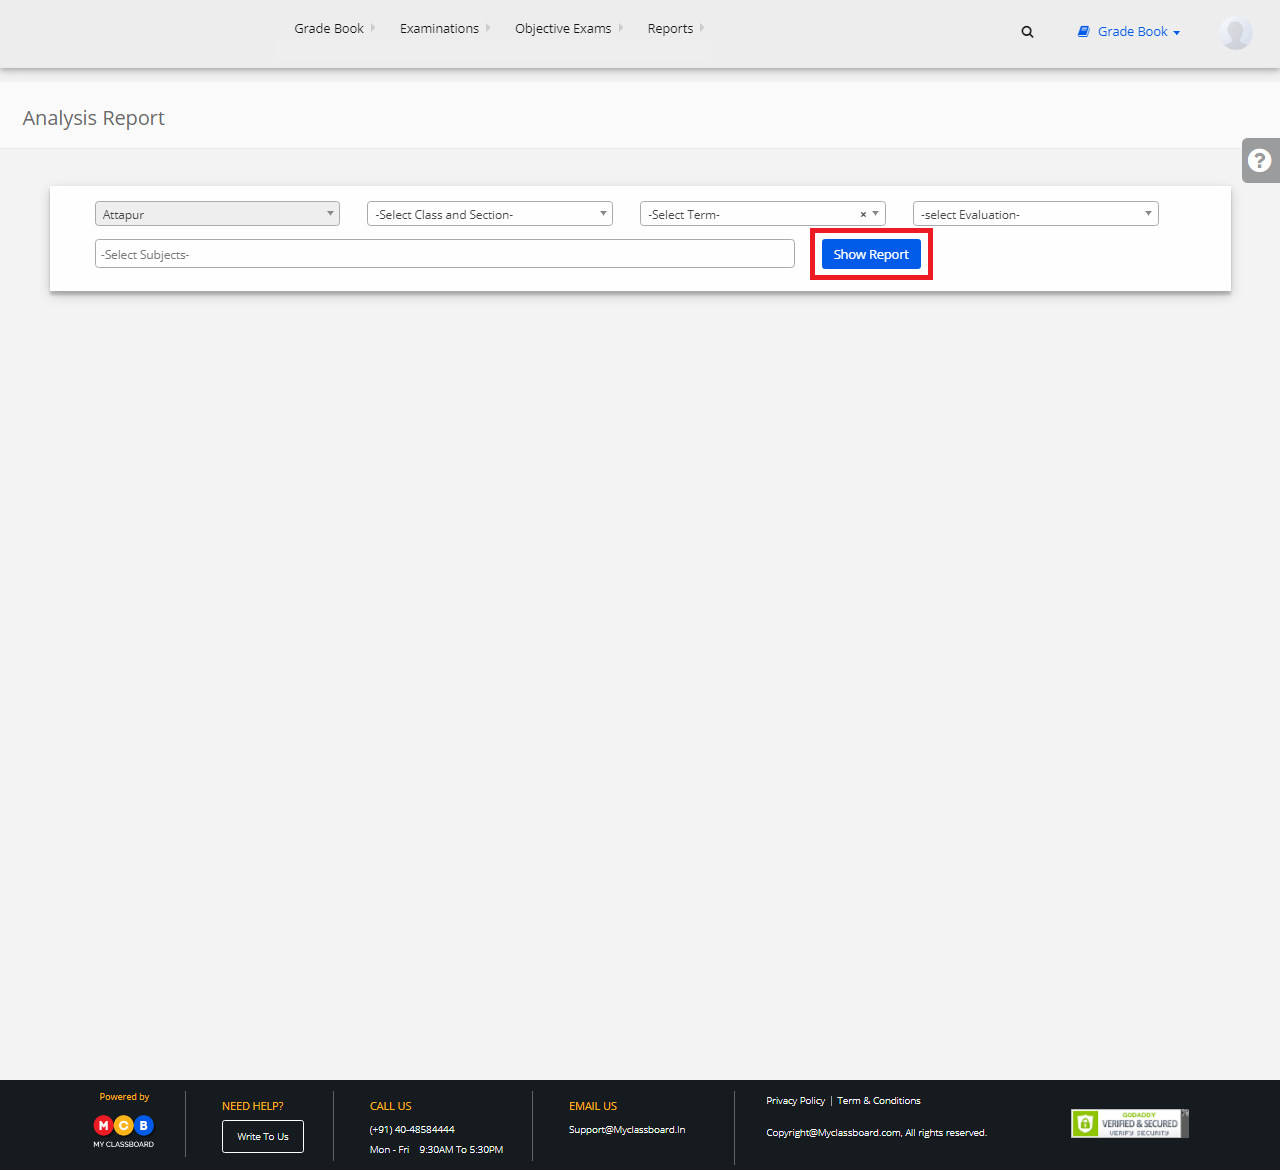
Step 3: You may export the same to excel by clicking the “Excel” option.
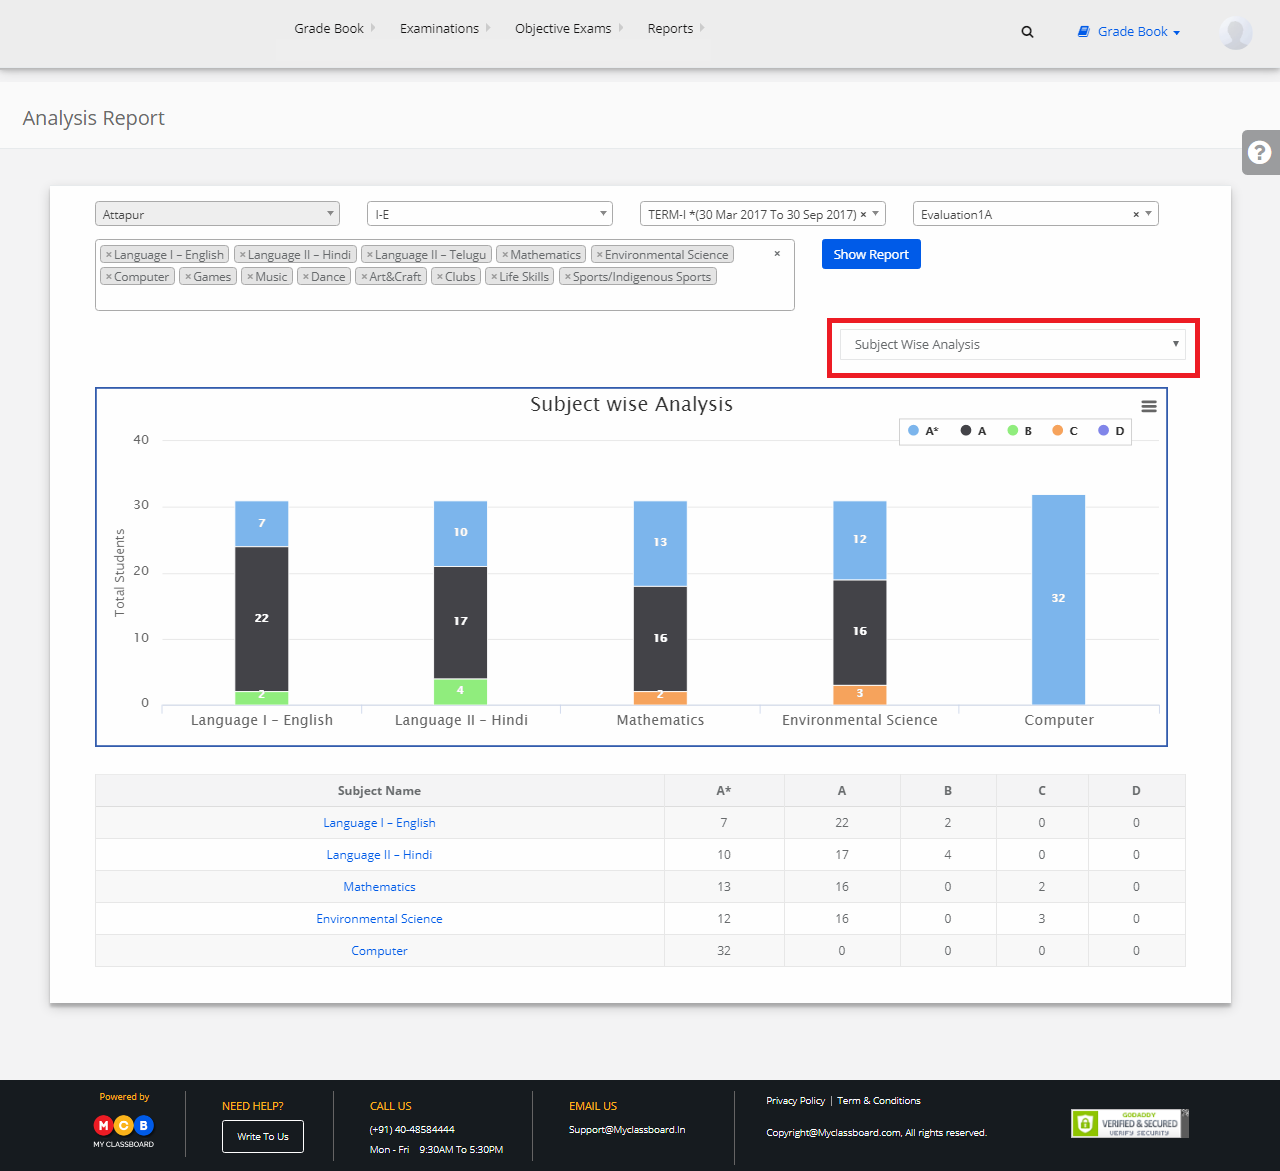
Step 4: To get a Subject wise Evaluation report, choose “Subject Wise Analysis” option from the drop-down.
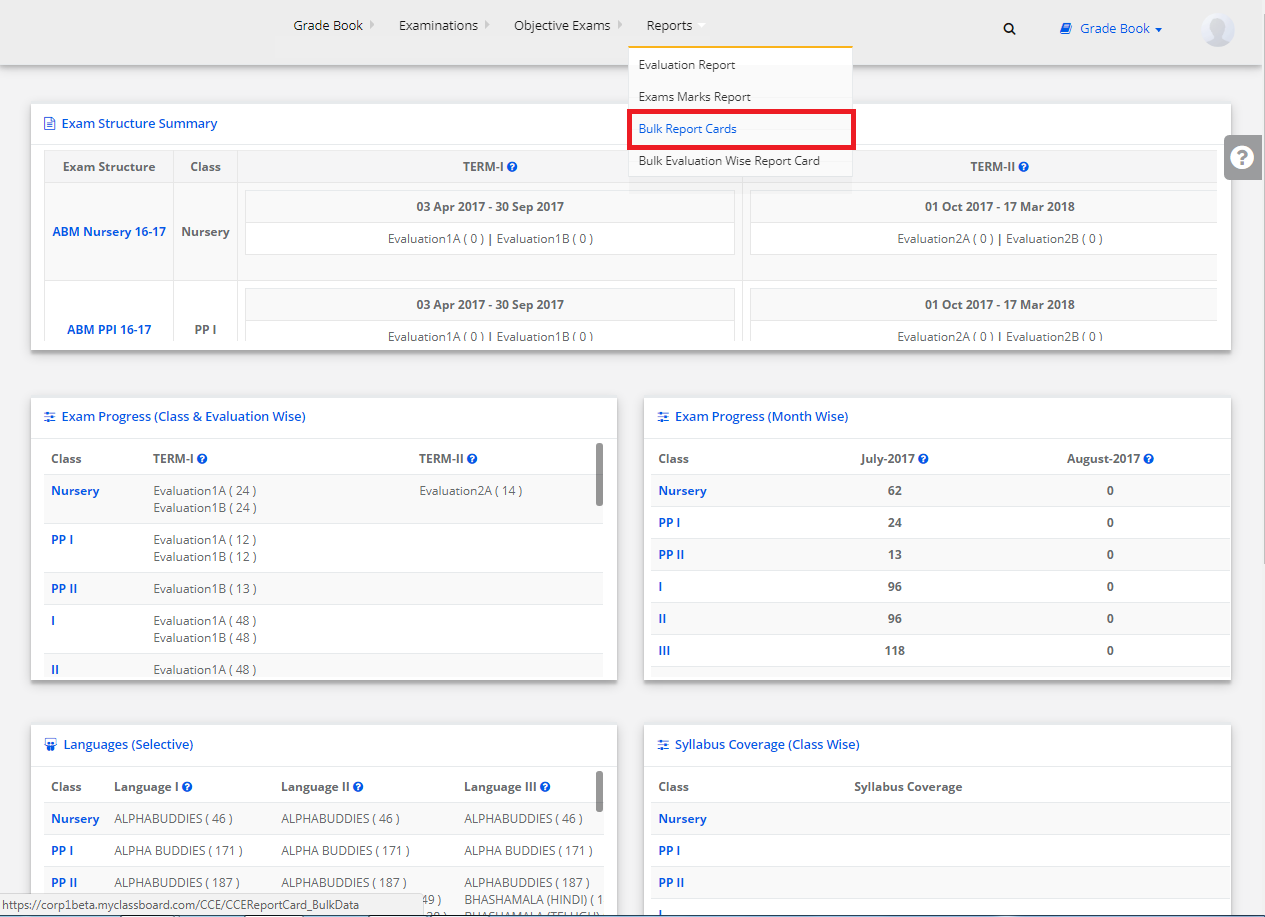
Bulk Report Cards
Step 1: Click on “Reports” on the top bar and select “Bulk Report Cards”.
Step 2: Select the required options and click on “Get Report Card”.
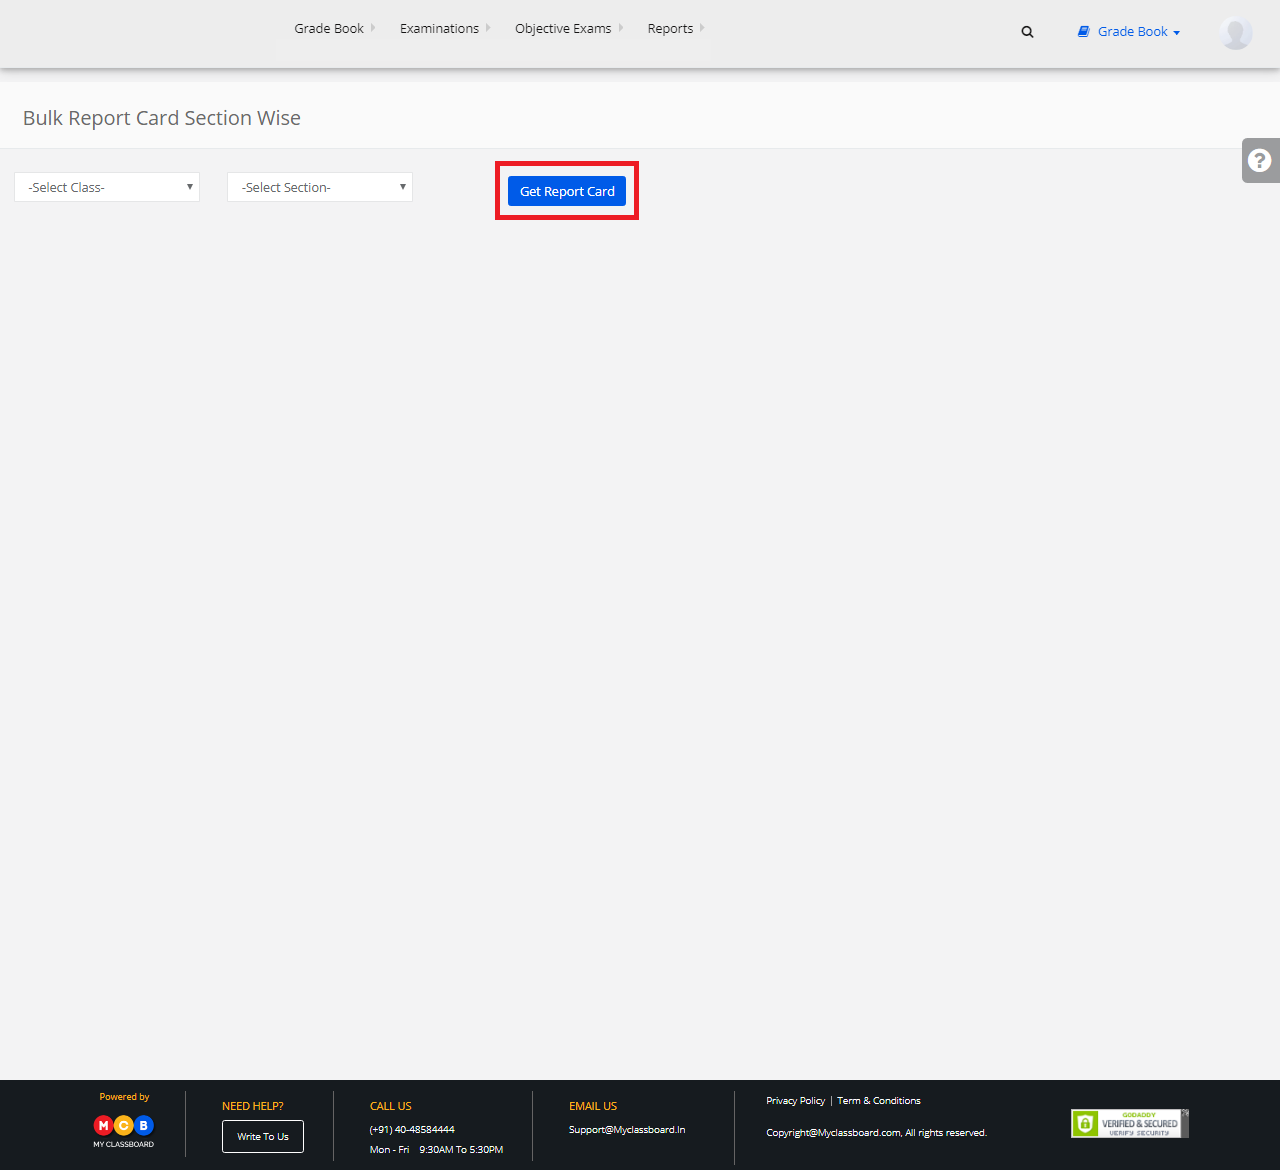
Step 3: Click on “Print Report Card” to print the report cards.
