Create Service Requests
Parent concern set up can be made only from system admin login.
Parent concern that is submitted by a parent is handled in 3 level escalation metric.
Level 1 – Class teacher and Owner at branch level – either of them can provide resolution to the concern and close it.
Level 2 – Principal – if a parent doesn’t satisfy with the resolution provided at level 1, he can escalate it. The first escalation comes to the principal. The principal needs to provide a resolution and close it.
Level 3 – Zonal head – if a parent doesn’t satisfy with the resolution provided by the principal too, then the parent can escalate it. The second escalation comes to a zonal head. Zonal head needs to provide the resolution and close it. At this point, the parent will not be able to escalate the ticket anymore.
Over and above, system admin has right to open the closed concerns. Then the concern will be open for everybody right from level 1.
Email Communication:
Raise a concern – Class teacher and owner at branch level receive an email with the concern details.
First escalation – Principal receives an email with the concern details along with the resolution provided by level-1.
Second escalation – Zonal head receives an email with the concern details along with the resolution provided by level-1 and level-2.
Parent: the parent will receive an email as and when there is a change in the status of the concern at any level.
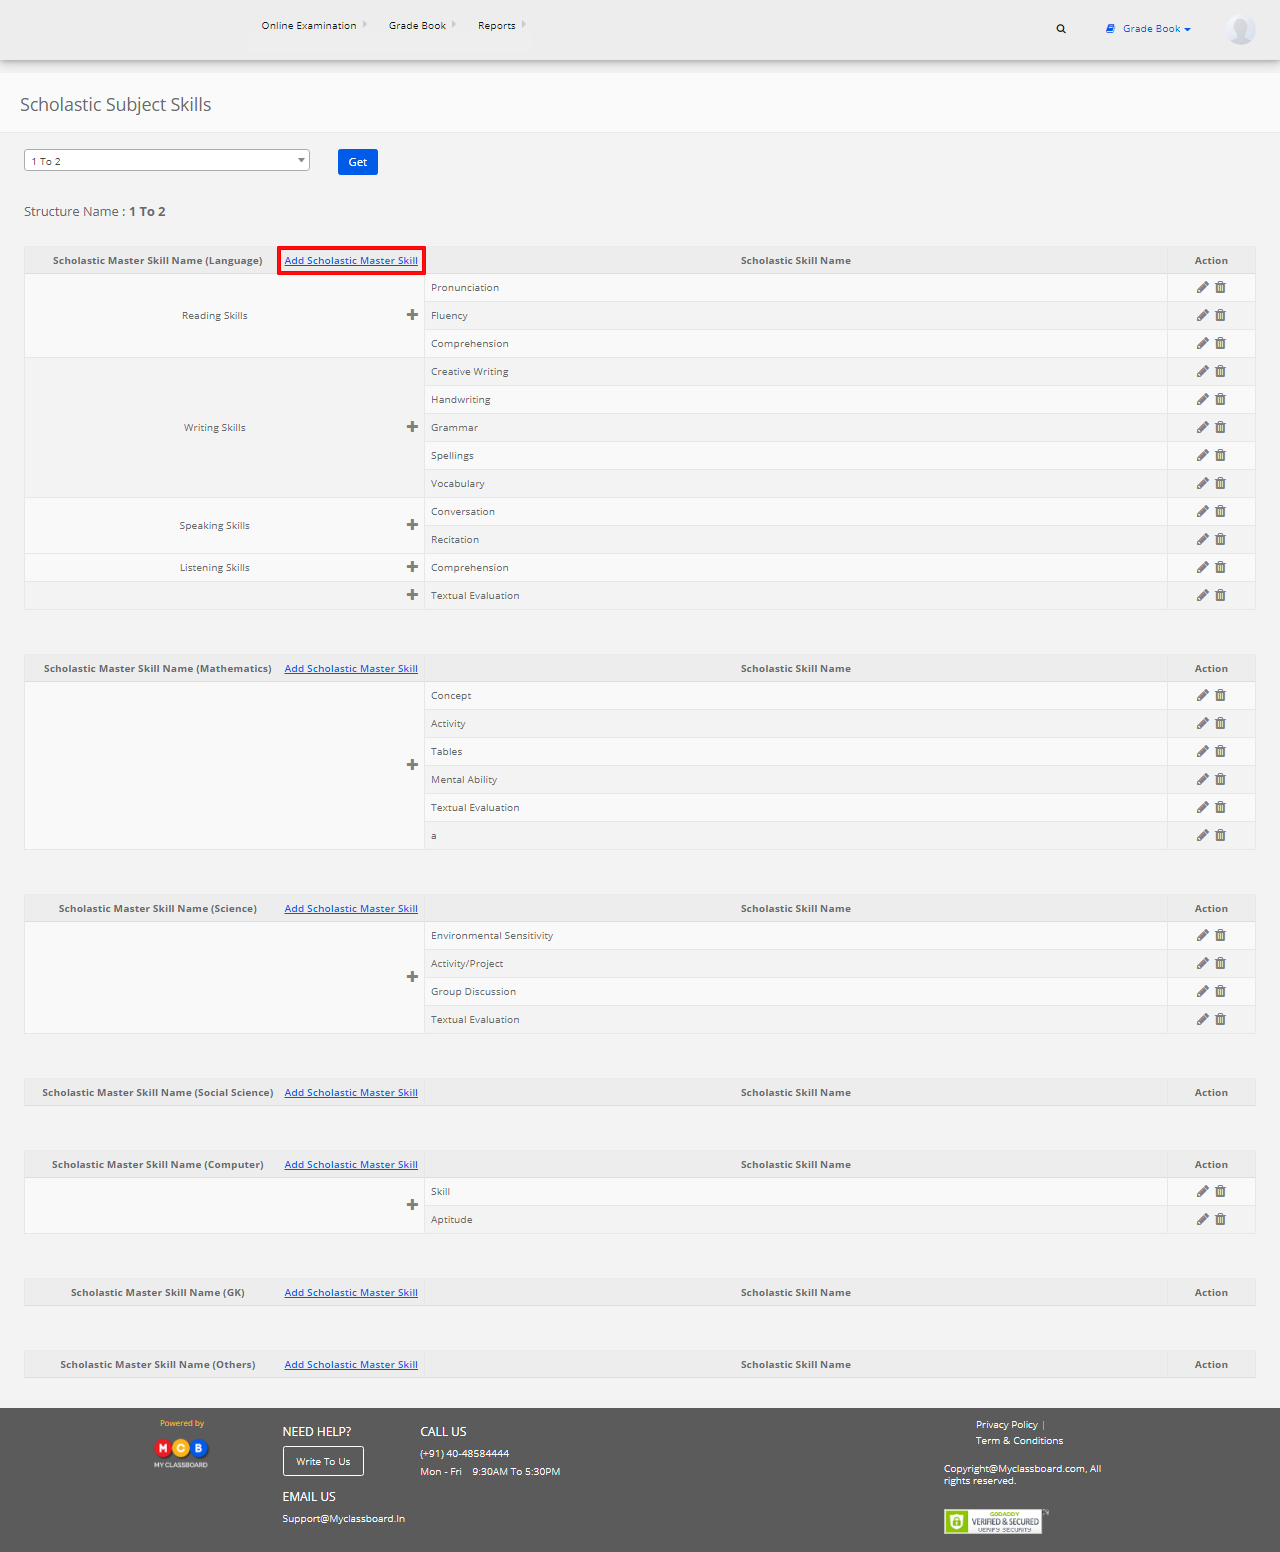
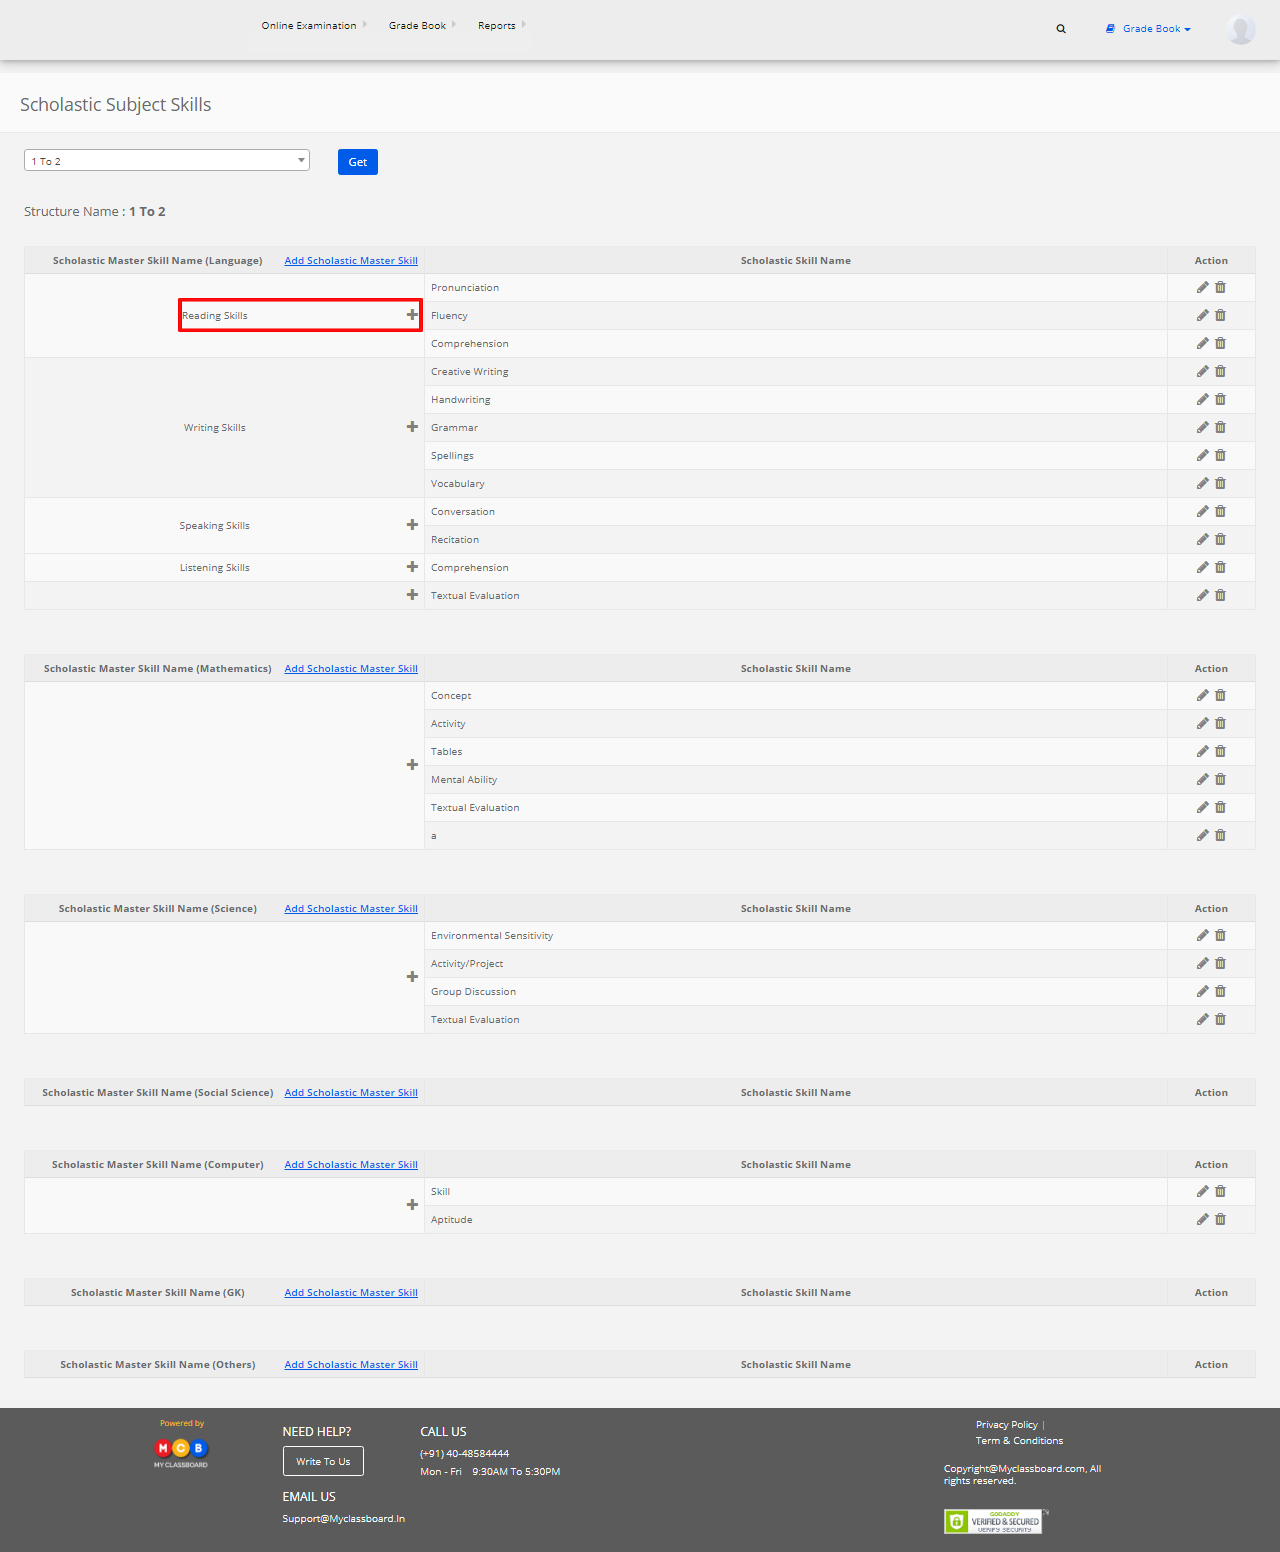
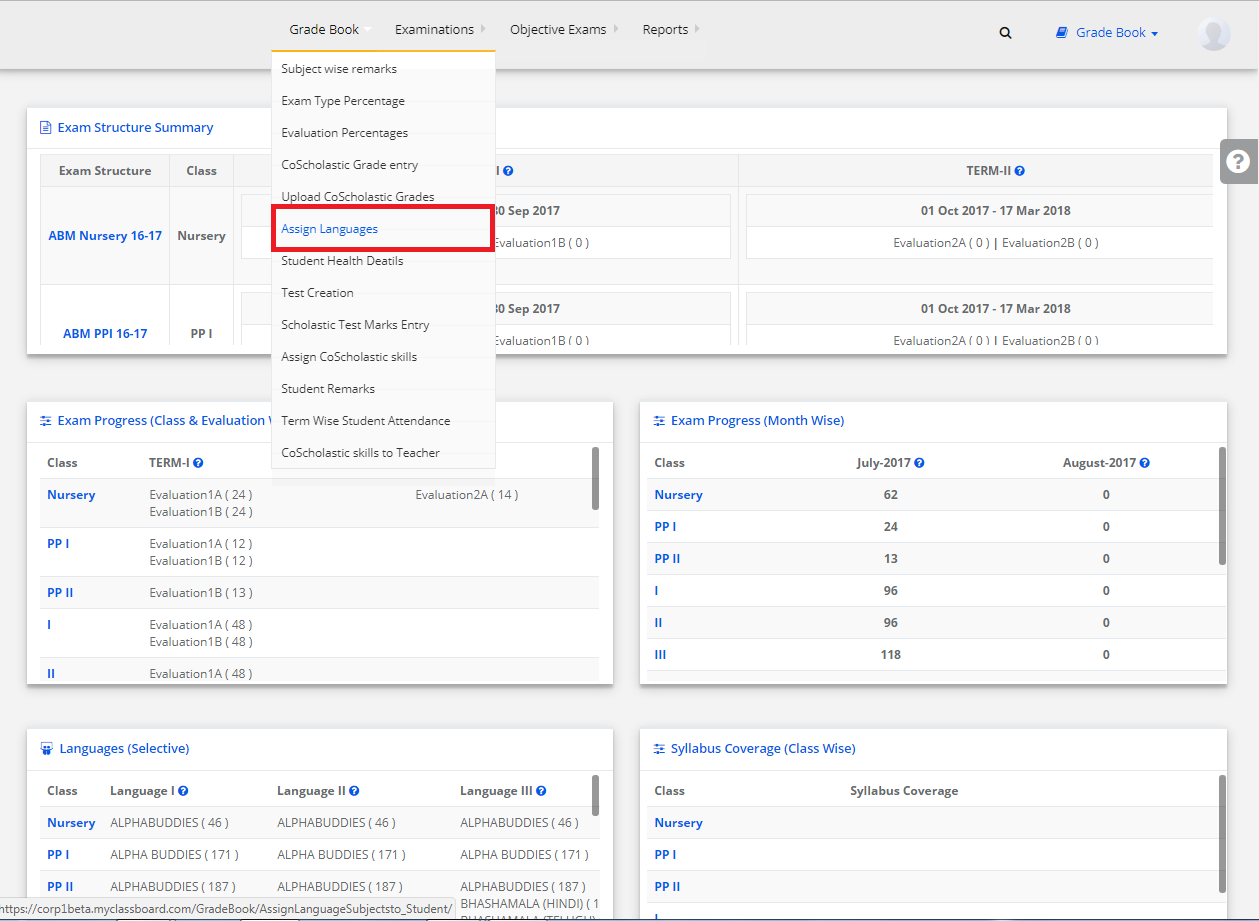
To create the categories and set the owners to the categories, pls follow the steps below.
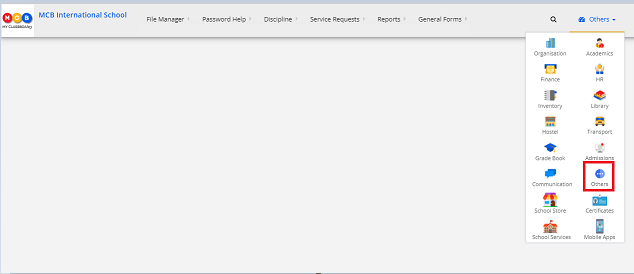
Step 1: Login and choose Others module
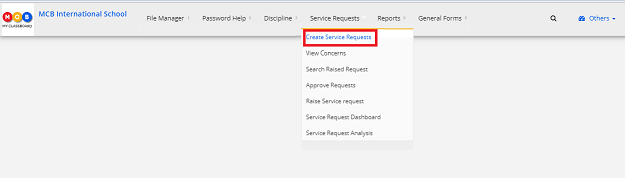
Step 2: Go to Service requests menu and choose to create service request option from the drop-down.
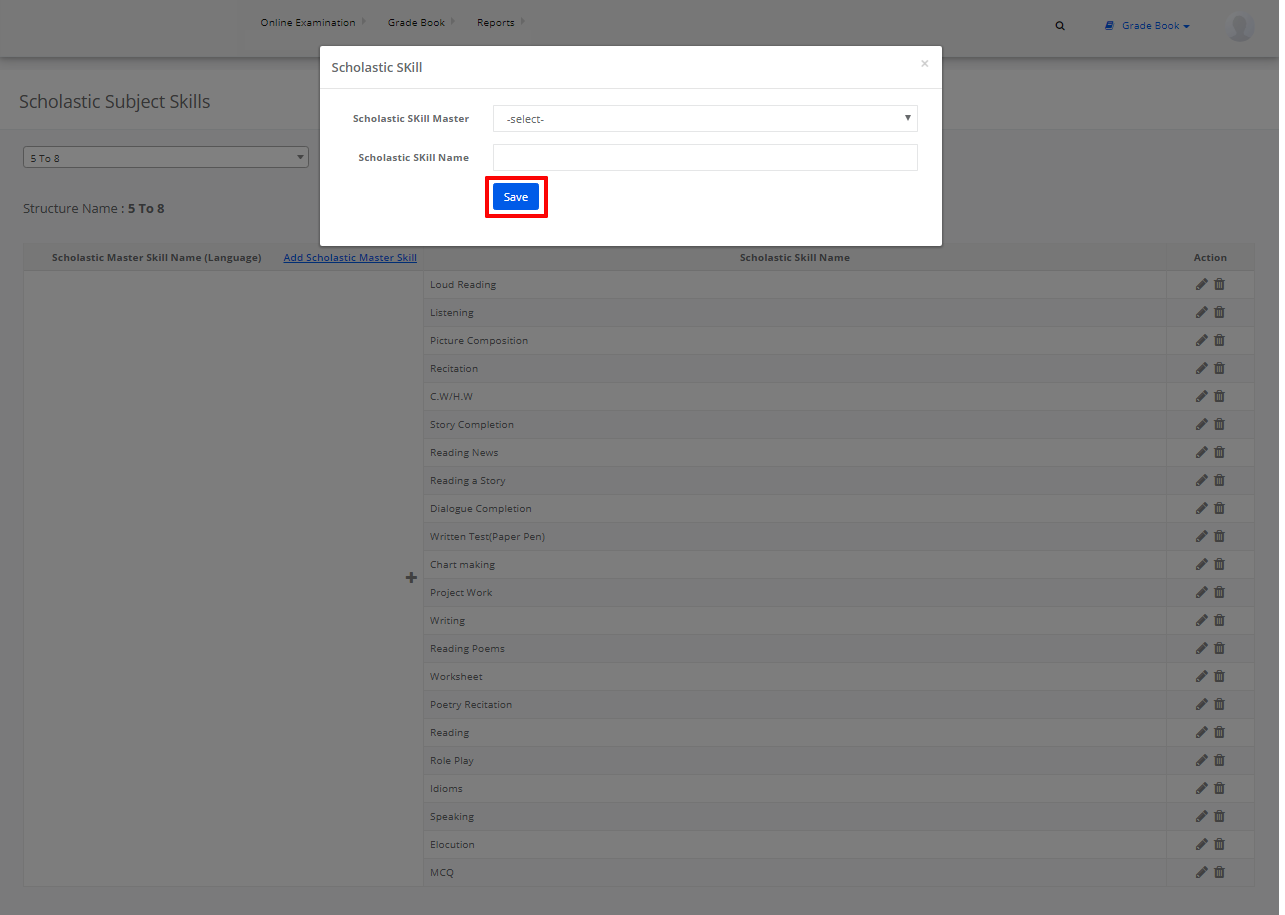
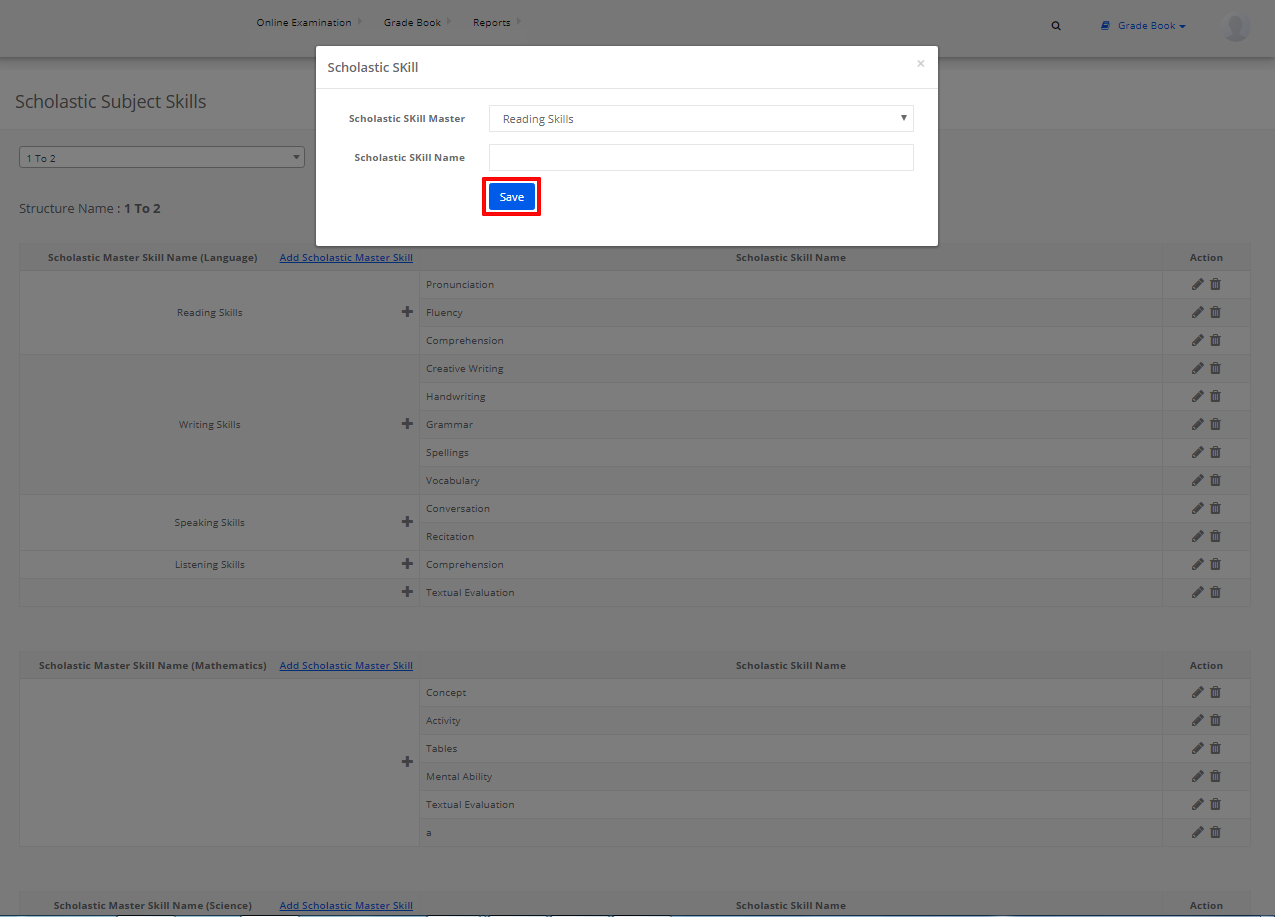
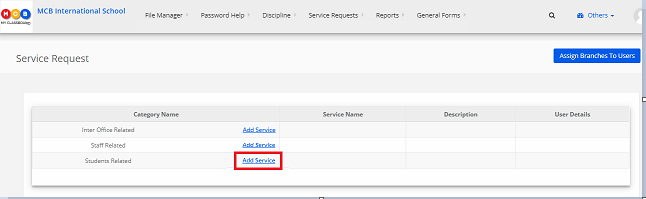
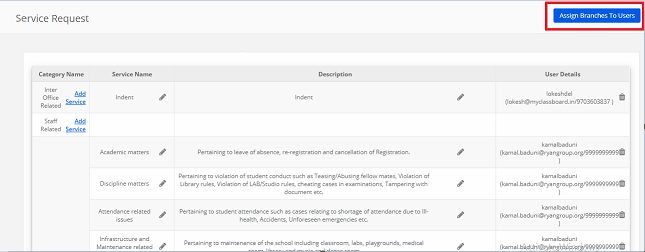
Step 3: To create category click on add service
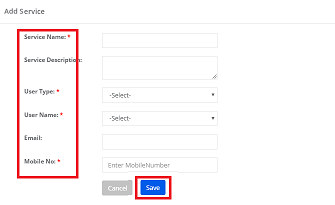
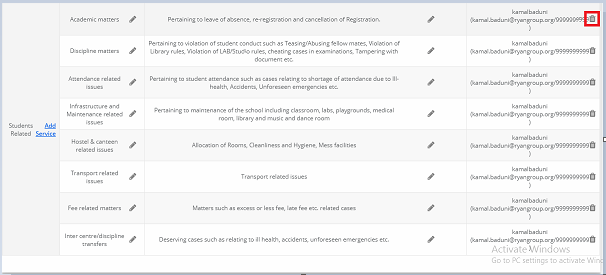
Step 4: Add service Name, description, choose user type and username to be held responsible at the organization level, email, mobile number and click on save. Repeat the same to create any number of categories.
Step 5: To delete the owner at the organization level, click on delete icon[highlighted below].
Step 6: Along with the class teacher if anyone else to be made responsible to close the concerns at the branch level, click on Assign Branches to users option.
Step 7: Choose branch, type as students related and click get to generate the list of categories and assign owners at the branch, click Assign button.
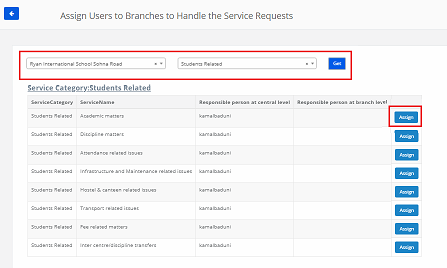
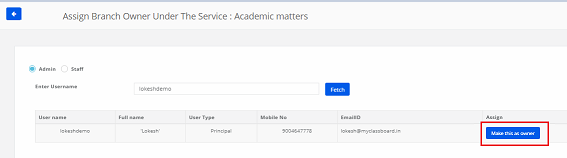
Step 8: You can assign the owner using user login or the staff login.
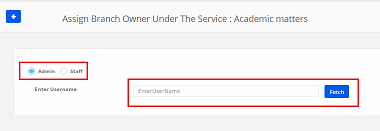
Step 9: If you are using user type, enter user type and click on fetch. It will display the details and option to assign the user as owner. Click on the option Make this as Owner.
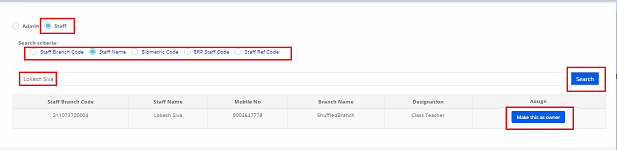
If you are using staff login to assign, choose staff option and criteria with which you would like to search the user, enter the details in the search box and click on search. It will display the details and option to assign the user as owner. Click on the option Make this as Owner.
With this, parent concern categories creation and setup of the owners are done. To put it to use, add parent concern form link to the parent login.
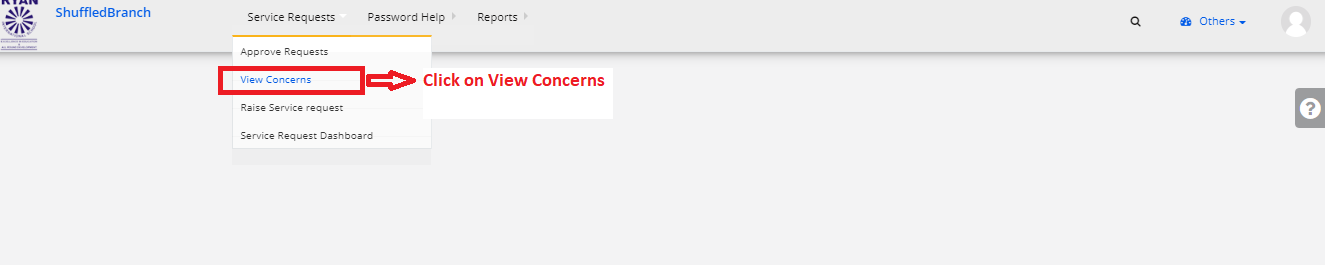
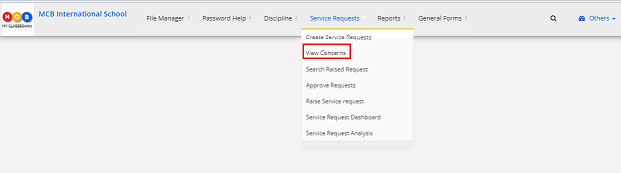
View Concerns
Parent Login:
Submitting the concern form from parent login, please follow the below steps
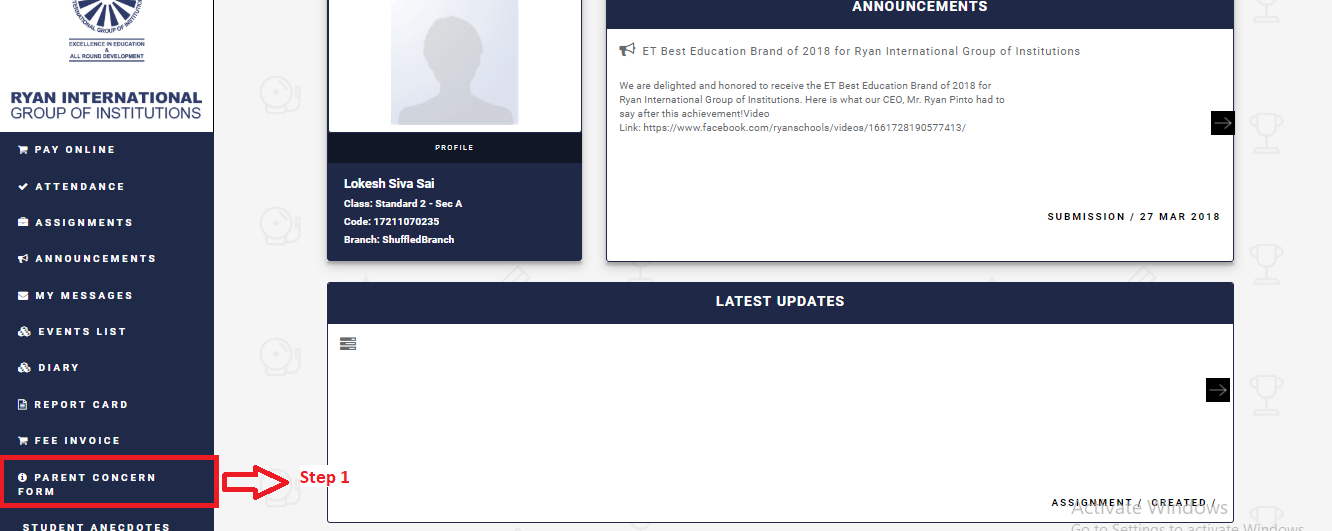
Step 1: Login and Click on Parent Concern Form tab
Step 2: Click on Submit A Concern buton

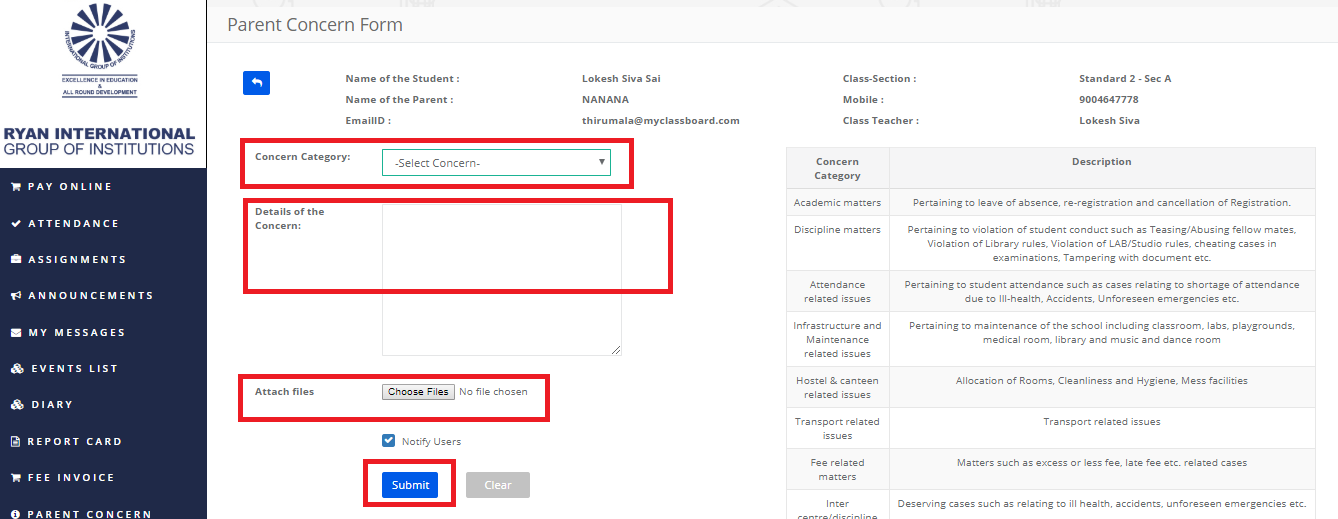
Step 3: Select Concern Category, Write the description in Details of the Concern, Attach files if any and click on Submit.
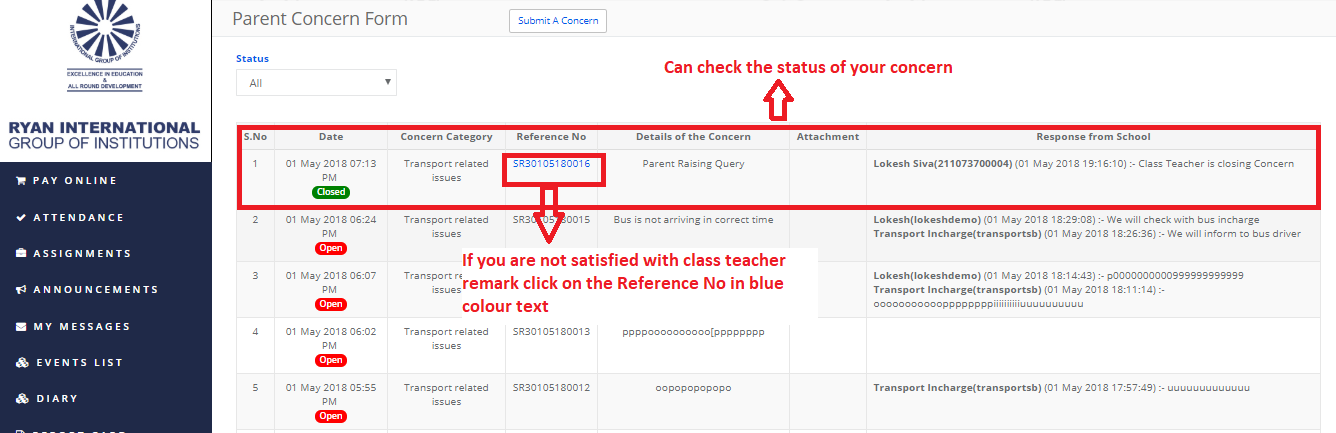
Step 4: Once the concern is submitted, the parent can view the status of the concern.
If the Parent is satisfied with the resolution provided by the school, he can close the concern permanently.
If the parent is not satisfied with the resolution given by the school, the concern can be escalated to the next level.
Please follow the steps below to close or escalate.
To close the concern:
a) Click on Reference No which is in the blue colour text.
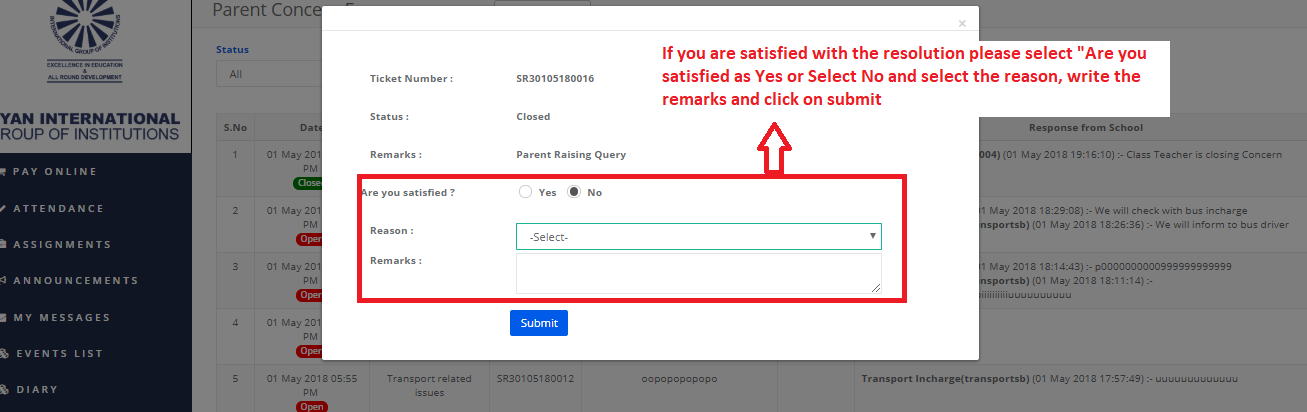
b) Click yes against the column “Are you satisfied” and submit to close the concern permanently.
Escalate the concern:
a) Click on Reference No which is in the blue colour text.
b) Click No against the column “Are you satisfied”, chose the reason and enter the reason in remarks column and click on Submit.
Note: Parent can escalate the concern in 2 cycles.
Cycle 1: Parent views the resolution provided by the Class teacher or the concerned person at school. If a parent doesn’t satisfy with the resolution, he can escalate the concern to the principal.
Cycle 2: If the parent doesn’t satisfy with the resolution provided by the principal, it can be escalated further to the zonal head.
Teacher Login:
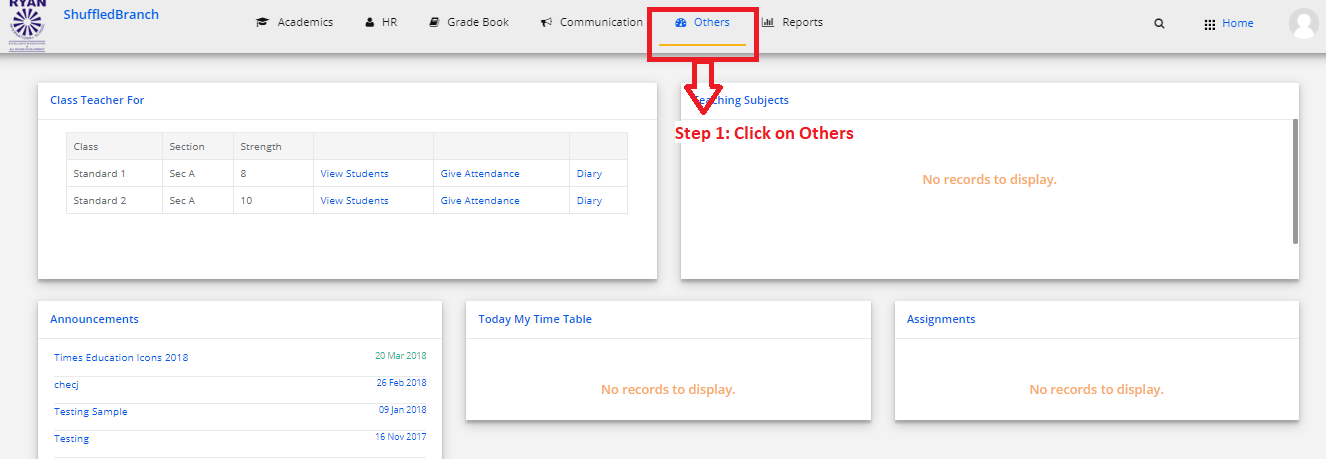
Step 1: Login and click on Others on the menu bar
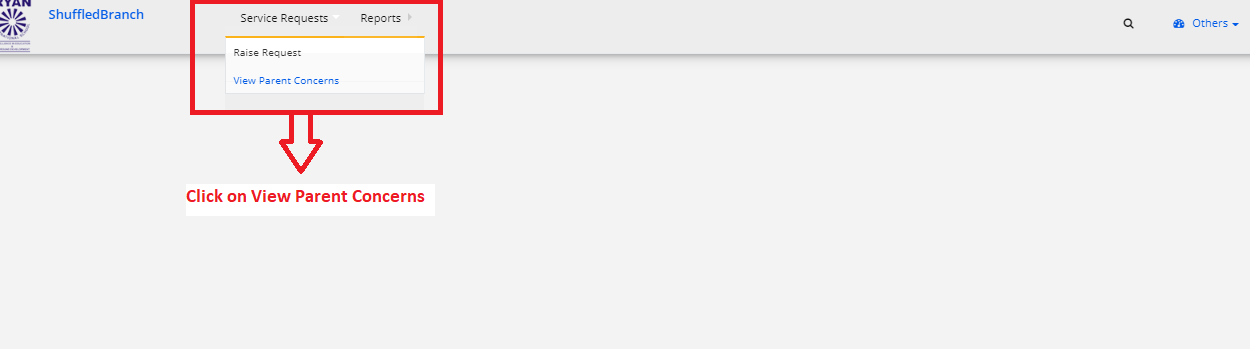
Step 2: Choose View Parent Concerns
Step 3: Select Class, section and click on get. Find two tabs named view and action. View tab shows a list of concerns to understand the progress. Action tab shows the list of concerns on which class teacher can act upon.
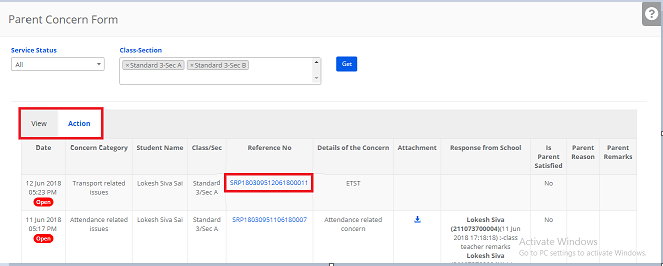
Step 4: To provide resolution and change the status of the concern, Click on Reference No which is in the Blue colour text.
Step 5: Change the status and fill the resolution against the Response from the school field. Click on submit.
Step 6: The teacher can view the status and concern details and resolution provided.
Note: Teacher can change the status of the concerns as follows
1. In process – This status doesn’t allow the parent to escalate the concern to the next level.
2. Close – This status allows the parent to escalate the concern to the next level with the detailed explanation. Once the ticket is changed to close, the teacher cannot act on the concern except viewing the progress.
3. Open – This status doesn’t allow the parent to escalate the concern to the next level.
Principal Login:
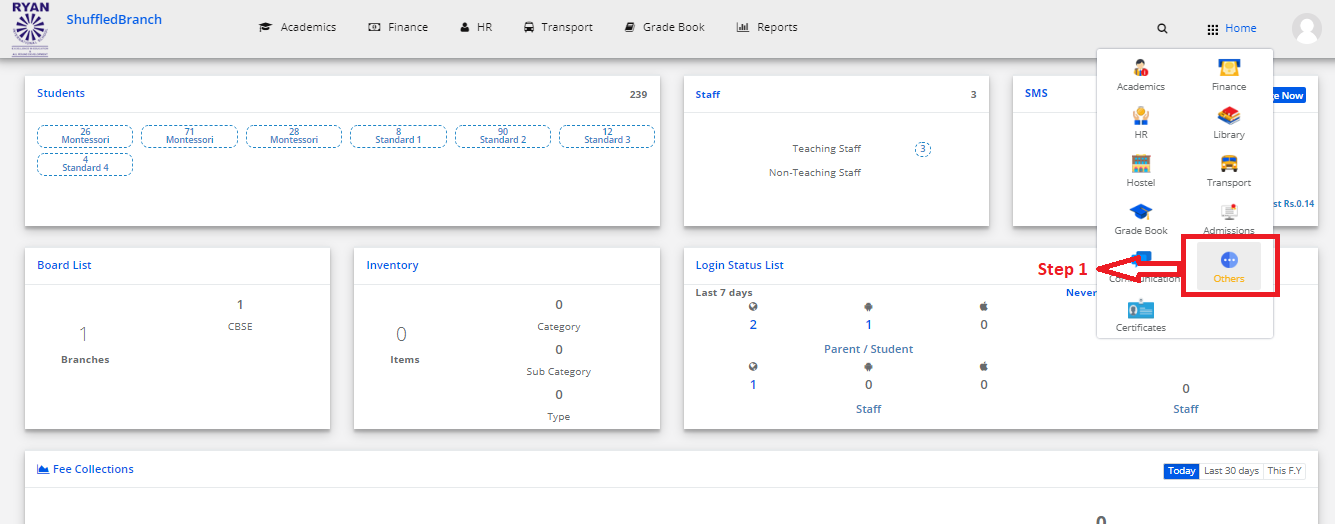
Step 1: Login and choose Others module

Step 2: Click on View Concerns on the menu bar
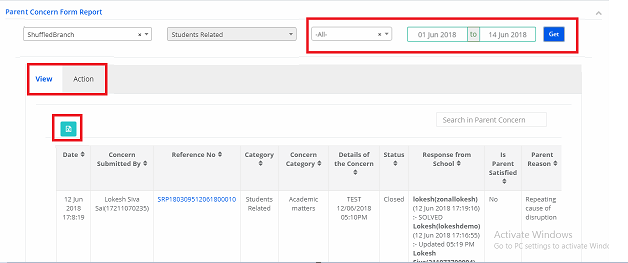
Step 3: Select status, dates and click on get to view the concerns. Find two tabs named view and action. View tab shows the list of concerns to understand the progress. Action tab shows the list of escalated concerns on which principal needs to act upon. Export the concerns details all at a time by clicking on the Excel icon which is placed [ Icon highlighted below ].

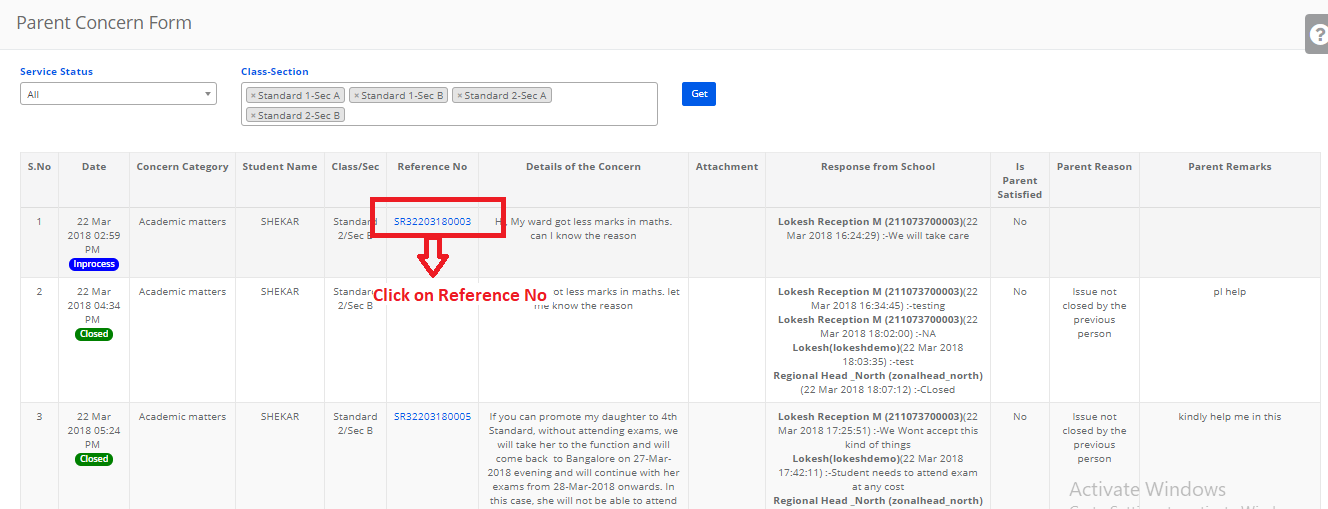
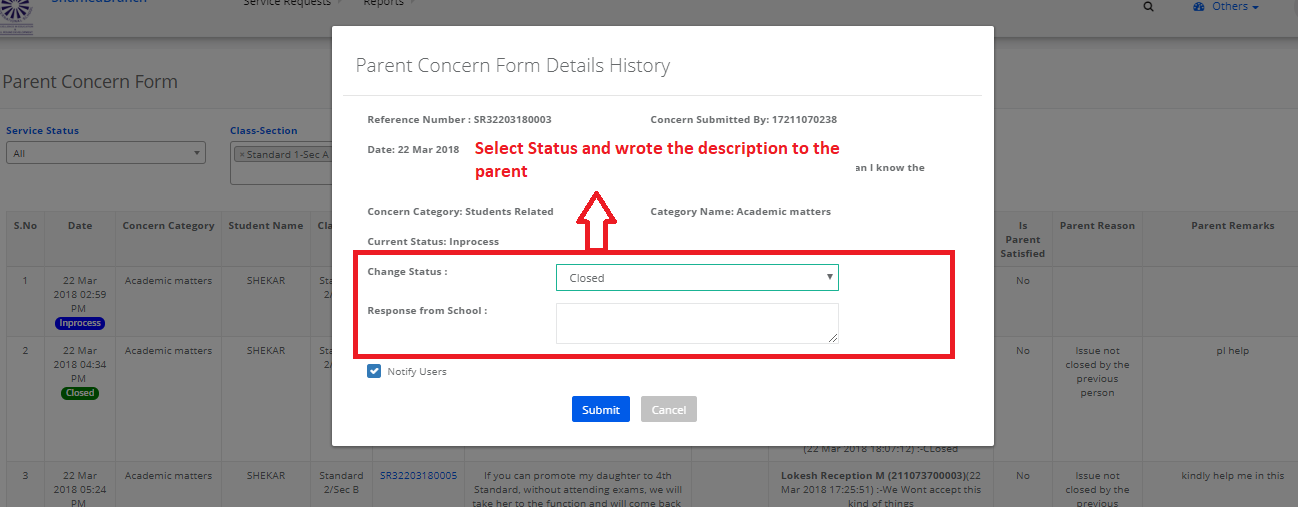
Step 4: To provide resolution for a concern, click on reference no which is in blue colour. A new window will get opened where you can give the remarks and change the status of the concern.

Note: The concerns which are closed by the principal with a resolution can be escalated to the next level [zonal head] by the parent. Once the concern is closed by principal cannot be opened.
Zonal Head Login:
Step 1: Login and choose Others module
Step 2: Click on View Concerns on the menu bar

Step 3: Select status, dates and click on get to view the concerns. Find two tabs named view and action. View tab shows a list of concerns to understand the progress. Action tab shows the list of escalated concerns on which zonal head needs to act upon. Export the concerns details all at a time by clicking on the Excel icon which is placed [ Icon highlighted below ].
Step 4: To provide resolution for a concern, click on reference no which is in blue color. A new window will get opened where you can give the remarks and change the status of the concern.


Note: The concerns which are closed by the zonal head with a resolution cannot be escalated to the next level further by a parent. Once the concern is closed by zonal head cannot be opened in his/her login.
Any closed ticket can be opened again from system admin login only.
System Admin Login:
To view the concerns and provide resolutions by the system administrator itself, pls follow the steps below.
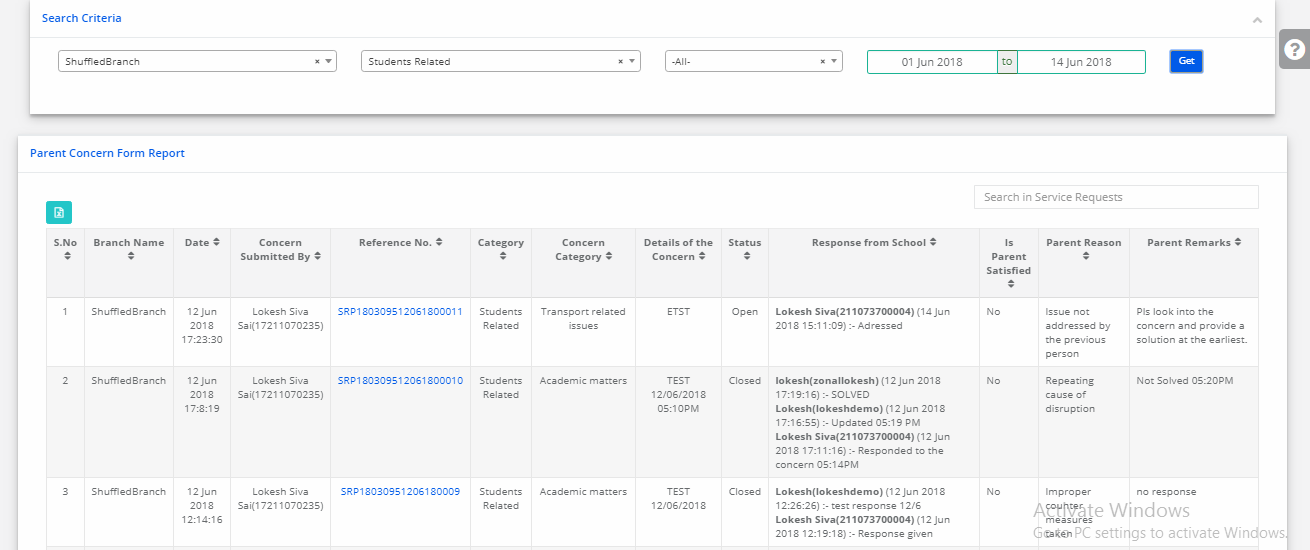
Step 1: Choose view concerns option under Service Requests menu
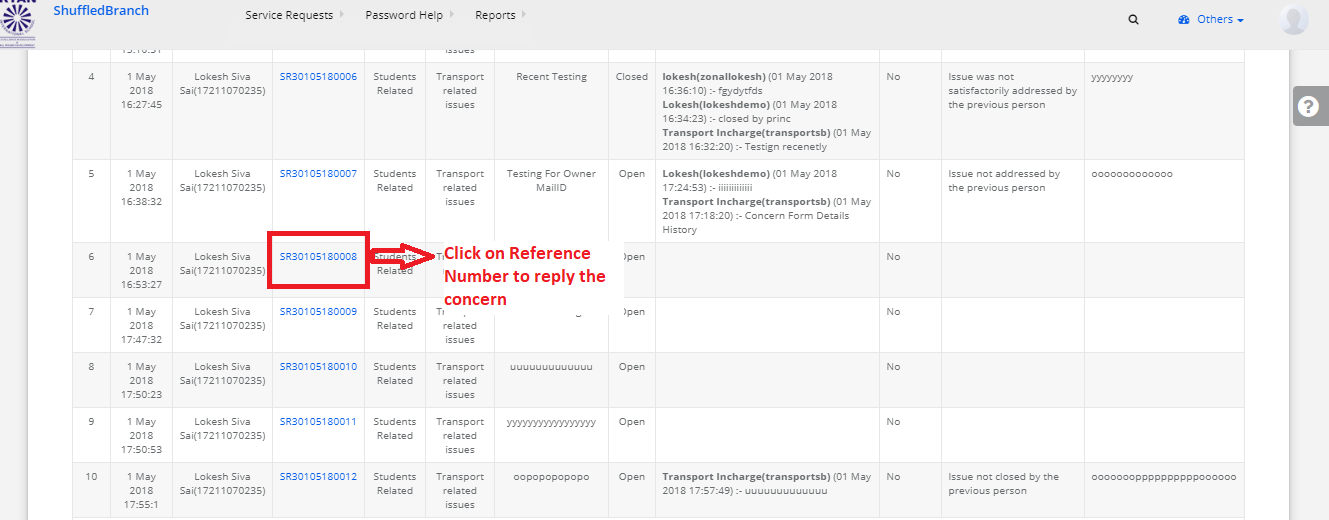
Step 2: Select branch, dates and click on get to view the concerns.

Step 3: To provide resolution for a concern, click on reference no which is in blue color. A new window will get opened where you can give the remarks and change the status of the concern.


Step 4: To view the status/history of the concerns, click on view concerns link, select the options. The report can be exported to excel.
Service Request Analysis?
The Service analysis gives you a comprehensive report on following areas in the selected dates range
1. No of tickets raised
2. No of tickets in “open”
3. No of tickets in “ In Process”
4. No of tickets “Closed”
5. No of tickets “reopened”
6. No of escalated tickets
7. Average days to resolve the concerns
To generate the report, pls follow the steps below
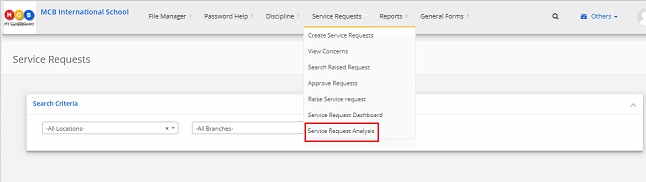
Step 1: Choose “Service Request Analysis” from the Service Request menu.
Step 2: Select Location, Branch, Concern categories, choose the dates range and click on Get.

Step 3: Report can be printed or exported to Excel by choosing the respective icon.