Using the MCB Concerns module, School can handle Parent concerns, Staff Concerns, and Inter-Office Concerns.
Staff Concerns:
School can create different concern types as per the requirement. Staff can submit the concern by choosing the concerned type. The concern submitted by the staff can be handled by the following roles from the web and mobile app.
Roles who can act on the concerns:
Branch Owner – Any user assigned at a branch level or Principal can act on the concerns.
Email Communication:
Email communication is enabled as when the concern is raised and attended by the concern people till is closed/resolved.
Raise a concern – Staff who raised the concern receives an email with the concern details. Branch owner and principal will also receive an email with the concern details.
Action on Concern – Staff who raised the concern receives an email with the concern details along with the resolution provided by the person who acted on the concern.
Create Staff Concerns:
Concern Types can be created only in system admin login. Please follow the steps mentioned below to complete the setup.
Step 1: Please login to MCB with system admin login credentials. Visit Concerns module by clicking on the Home link on the top right corner.
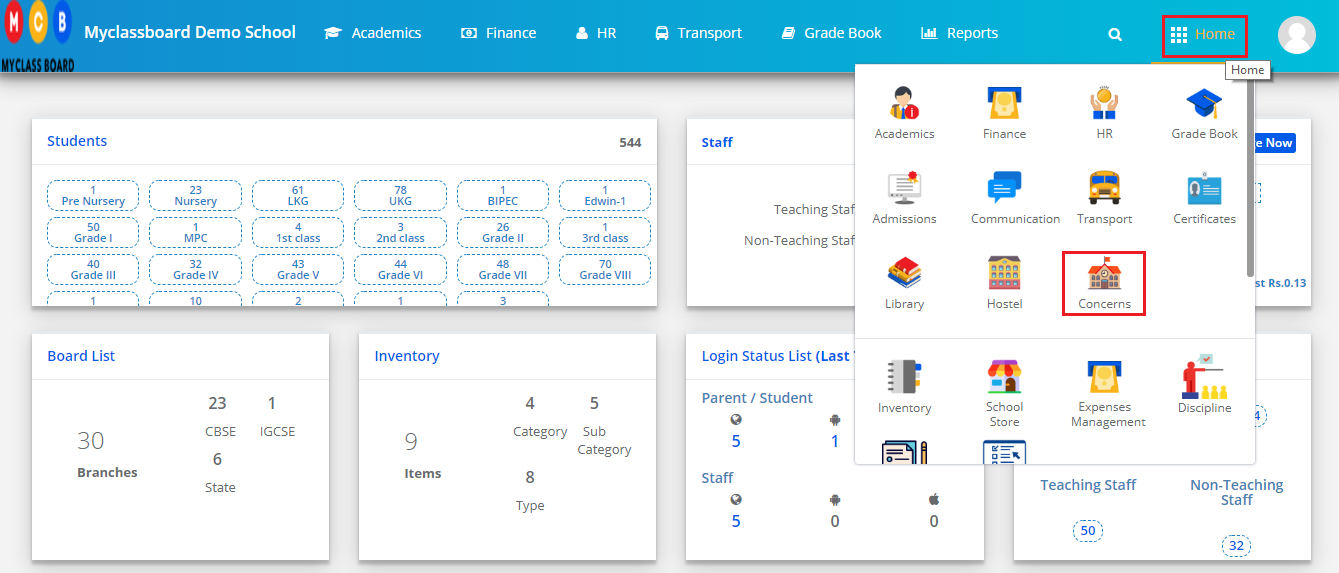
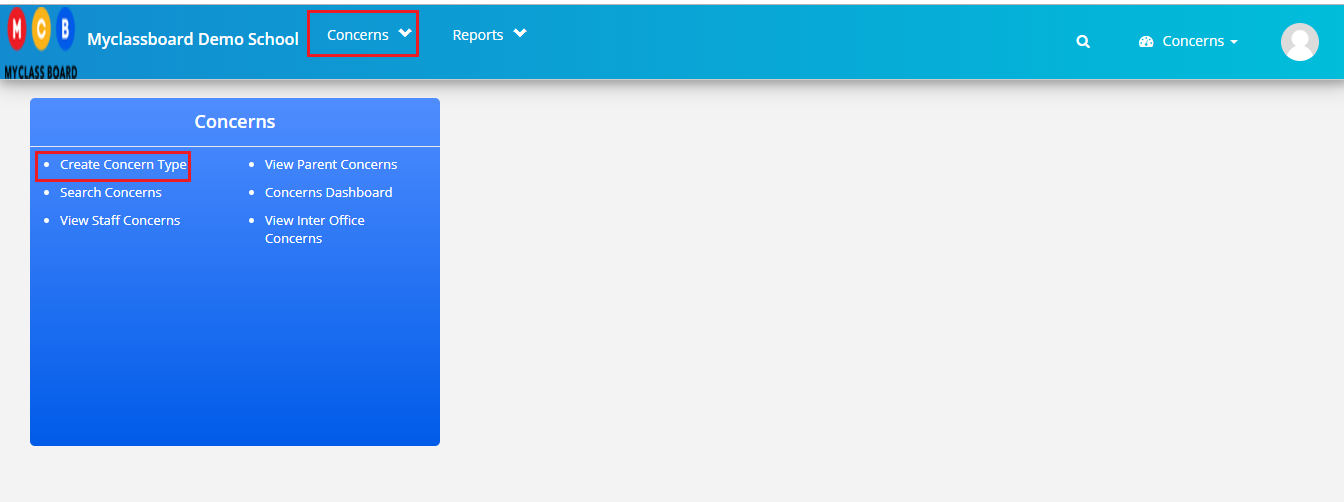
Step 2: Click on Create Concern Type option under Concerns module or on the dashboard.
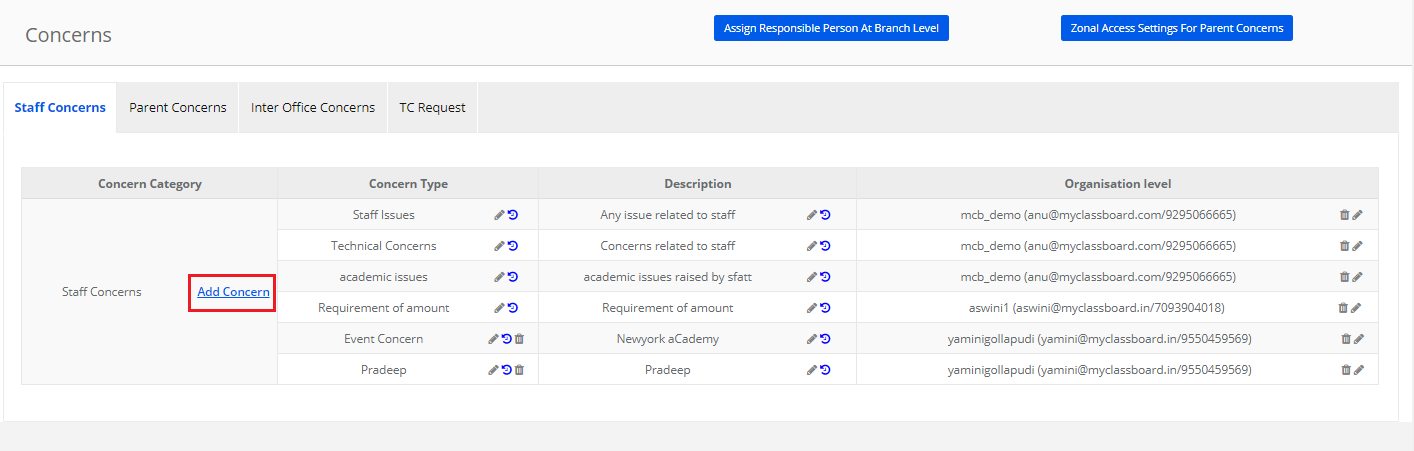
Step 3: Click on Staff Concerns tab to view or create concern type. As you click on staff concerns tab, it will list the existing concern types along with the description and user-assigned at the organization level.
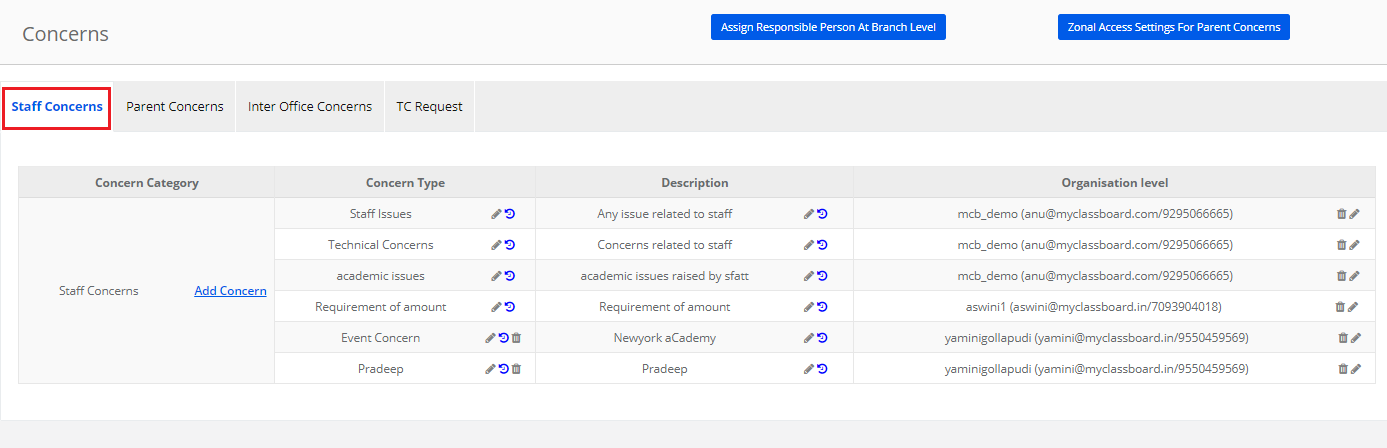
Step 4: To create new Concern Type, click on Add Concern option under Concern Category
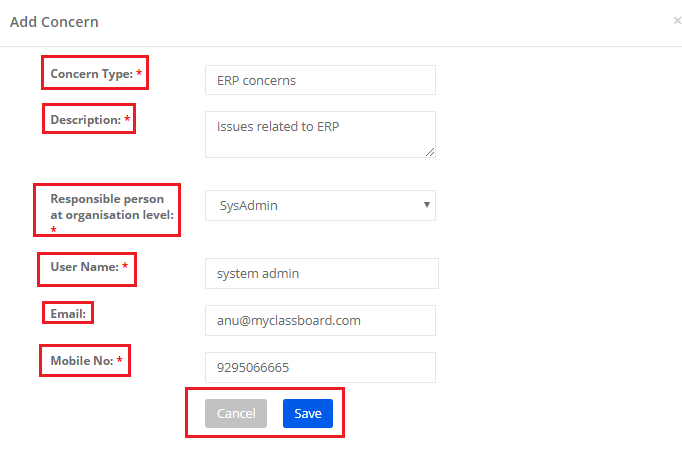
Step 5: Enter Concern Type, description
Choose a responsible person at the organization level. The user you choose here will receive an email as and when a concern is raised by the staff. For example, if a school’s director wants to be notified when a concern is raised, you can add him/her as a responsible person at an organization level. As you enter the user name, the system would show the email and mobile number automatically.
Click on Save to create the concerned type or Cancel to revert.
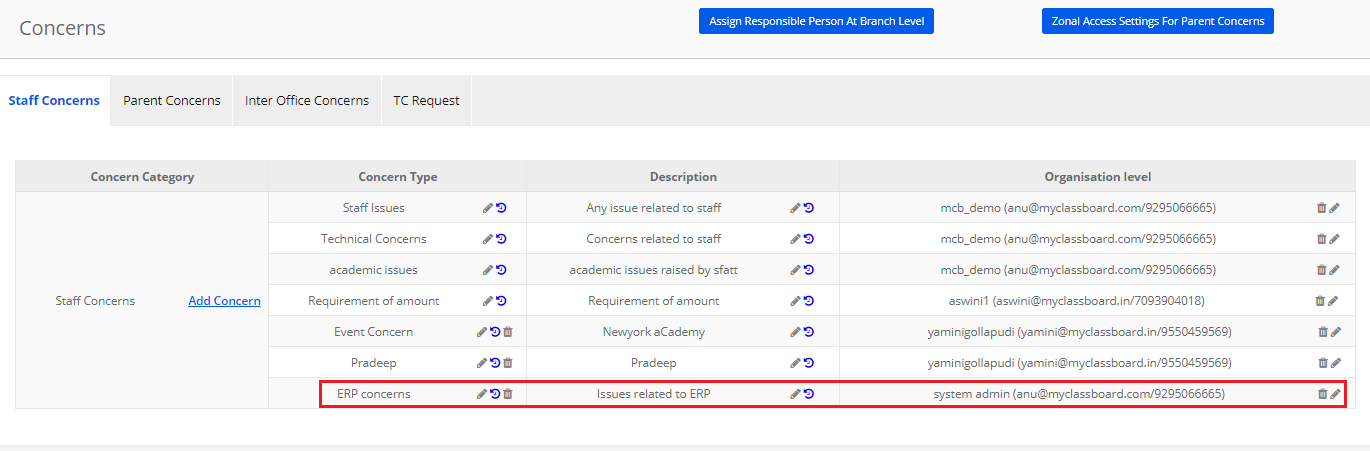
Please find the concern created along with the existing concern types as shown below.
Assign Branch owners to the Staff Concerns:
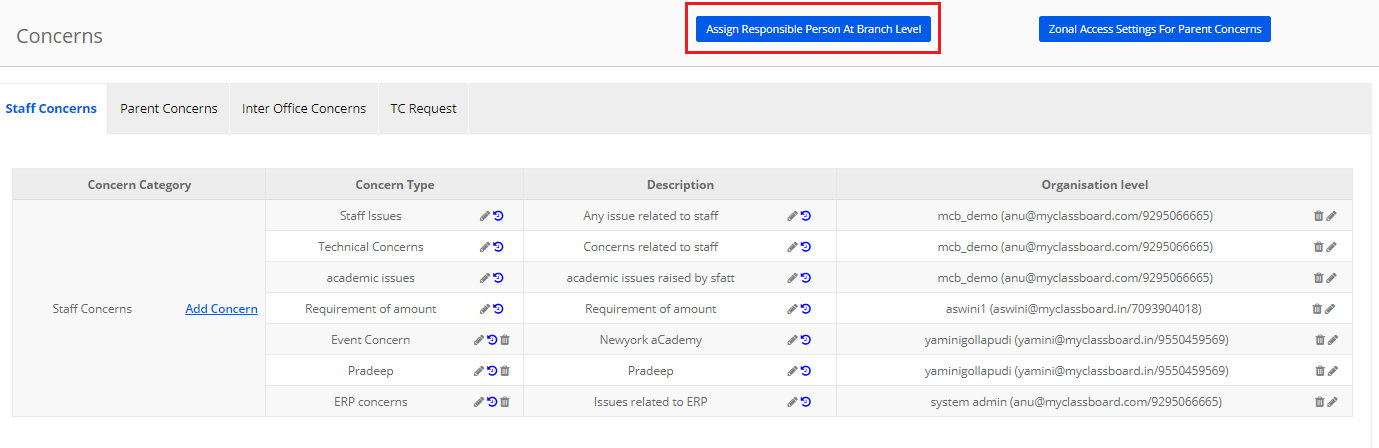
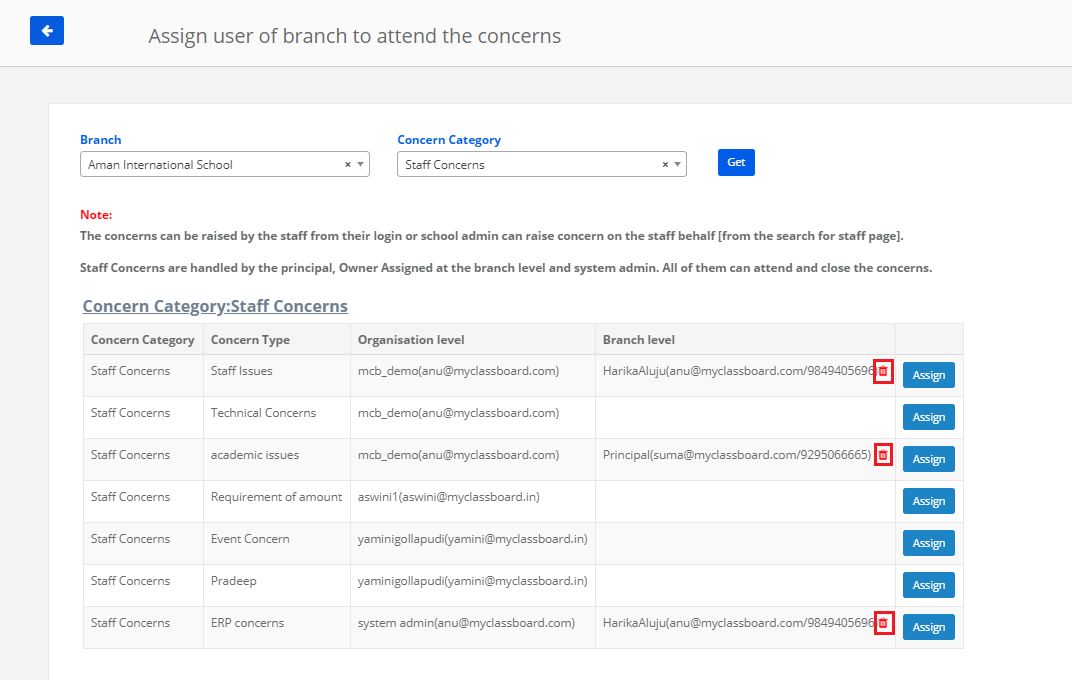
Step 6: Top assign branch owners to the concern types to define who has to handle the concerns, please click on Assign responsible person at branch level.
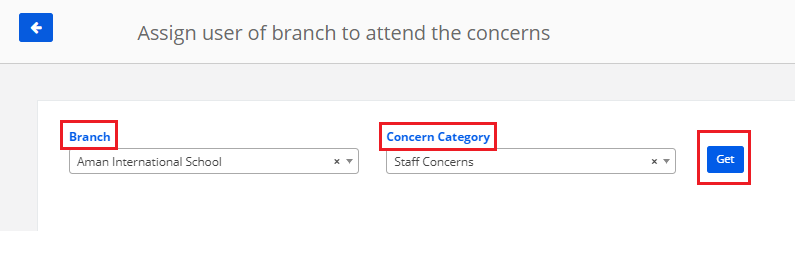
Step 7: Choose Branch and concern type as Staff concerns and click on Get.
Step 8: Go through the workflow defined for handling the concerns.
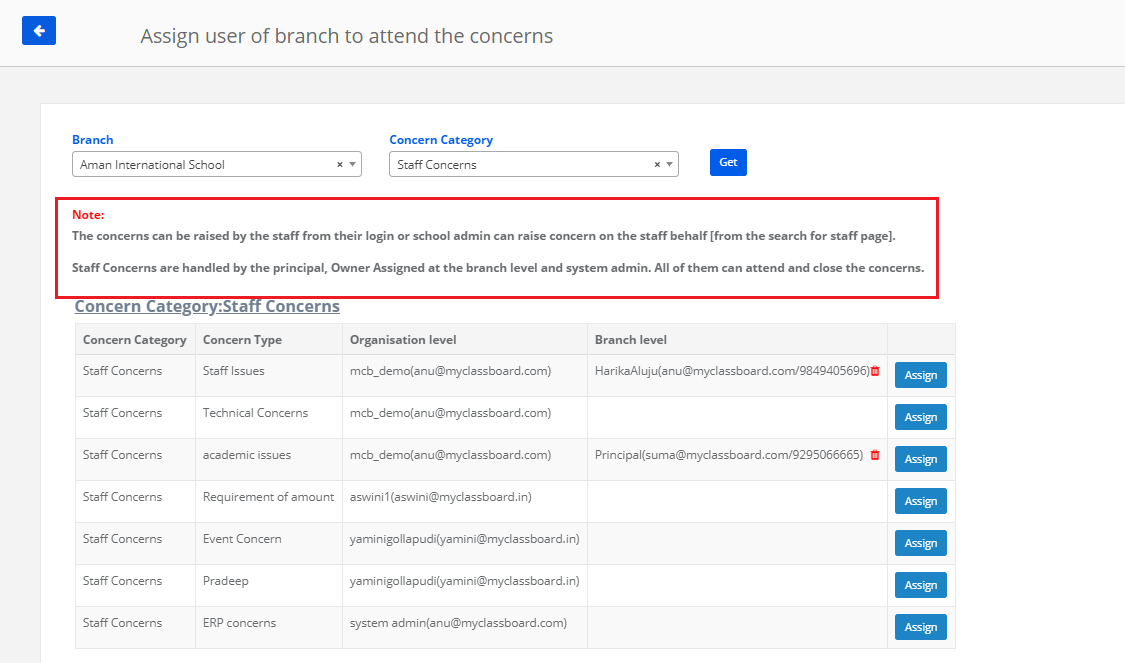
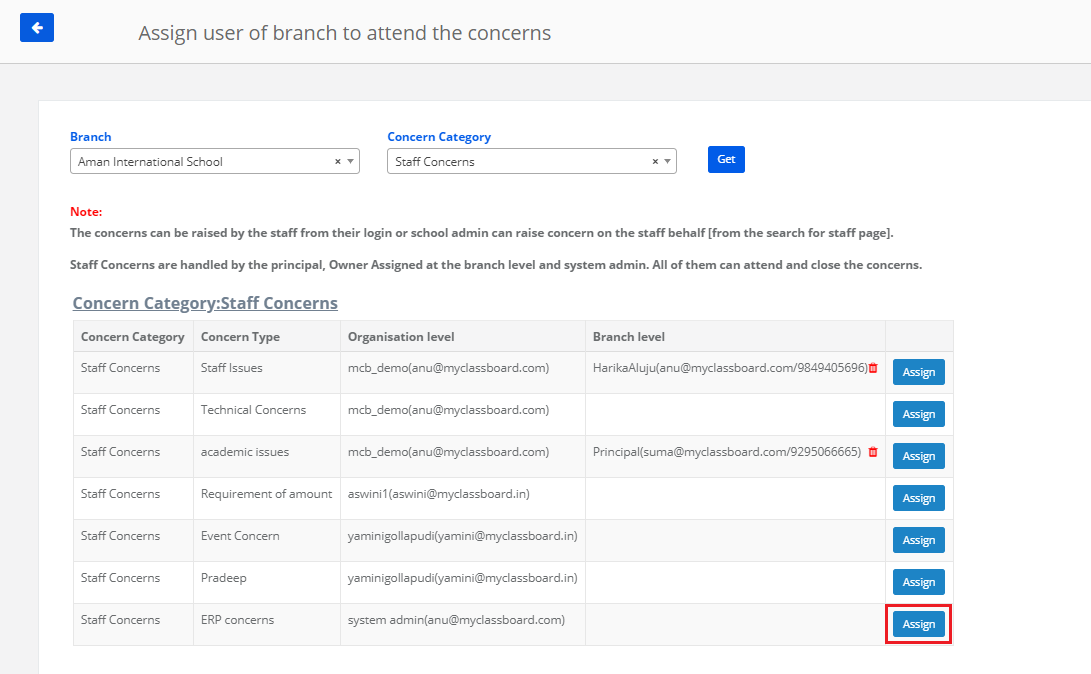
Step 9: To assign a branch owner to handle the specific concern at a branch level, click on the Assign button against the concerned type. Please note that you need to assign a branch owner to each concern types individually. Click on Assign button against the concern.
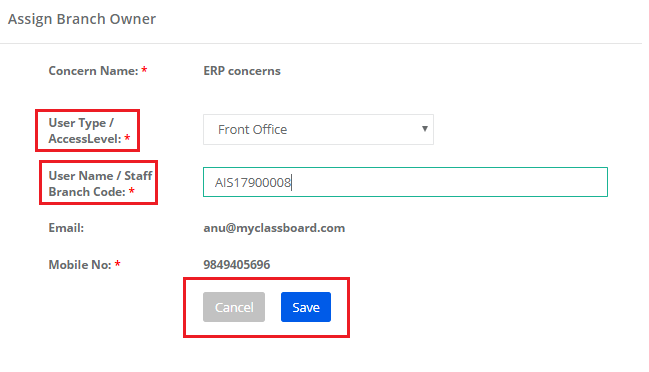
Step 10: You can assign a branch owner through an access level or User type. Choose User type, Access level from the options available in the drop-down.
Enter user name if it is through user type or Branch code if it is through branch access level.
Click on Save button to save the settings or Cancel to revert.
Step 11: To delete the branch owner, click on the delete icon.
How can a Staff raise concern from their login:
Step 12: Login with staff access level, Click on Concerns module.
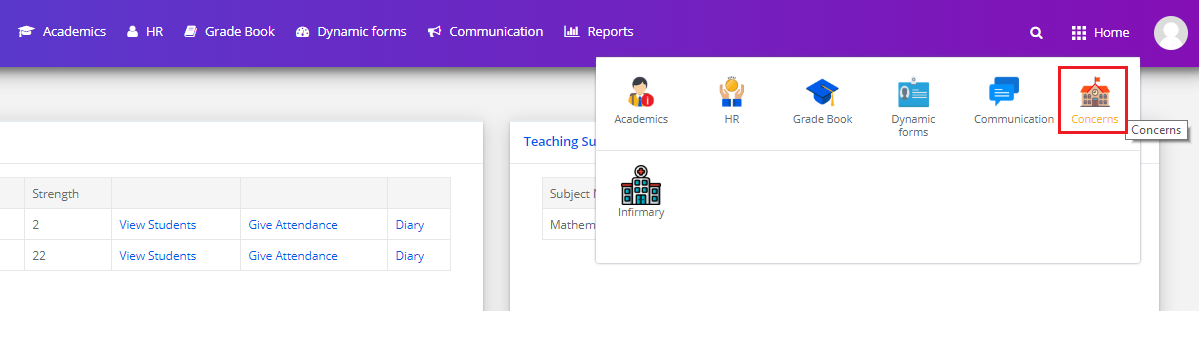
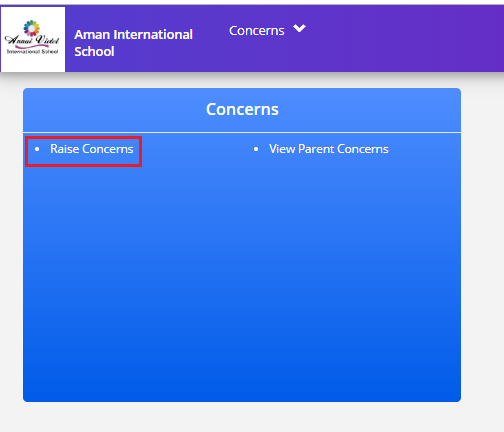
Step 13: Click on Raise concern option on the dashboard or from the concerns menu.
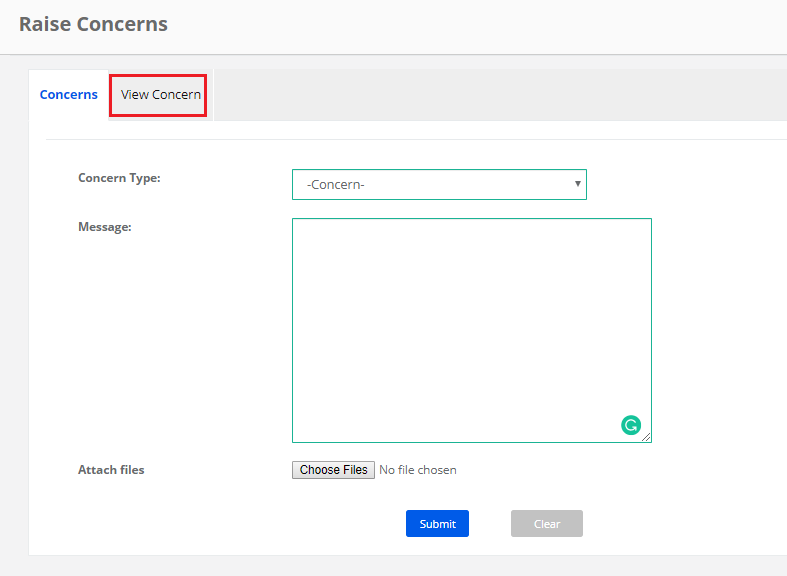
Step 14: Choose the concerned type, enter the concern details, attach files if any and click on Submit button to submit the concern or click on the clear button to cancel the submission.
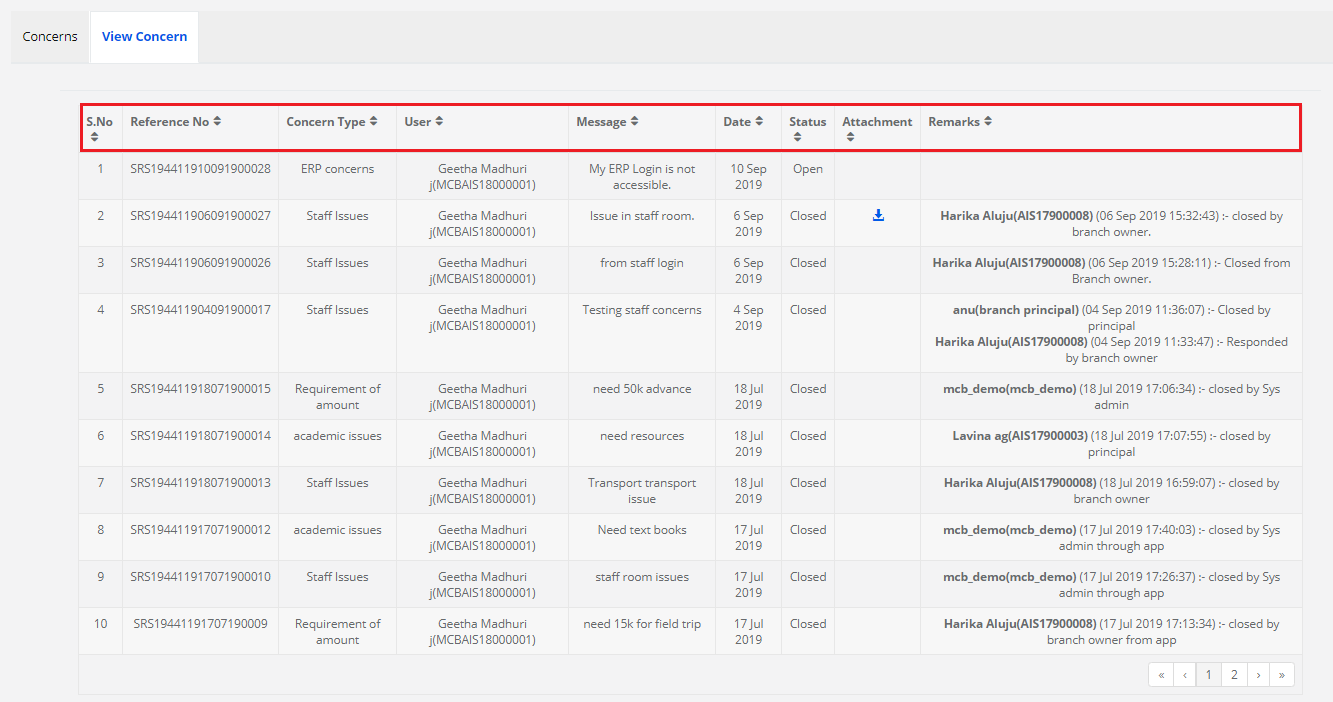
Step 15: To view the submitted concerns and their status, click on view concerns tab.

Step 16: You may note the concern details as shown below along with the response you have received, date and time of response from the concerned person.
How can a principal / assigned branch owner can attend a concern from their login:
Step 17: Login with principal or branch owner login credentials. Click on Concerns module.
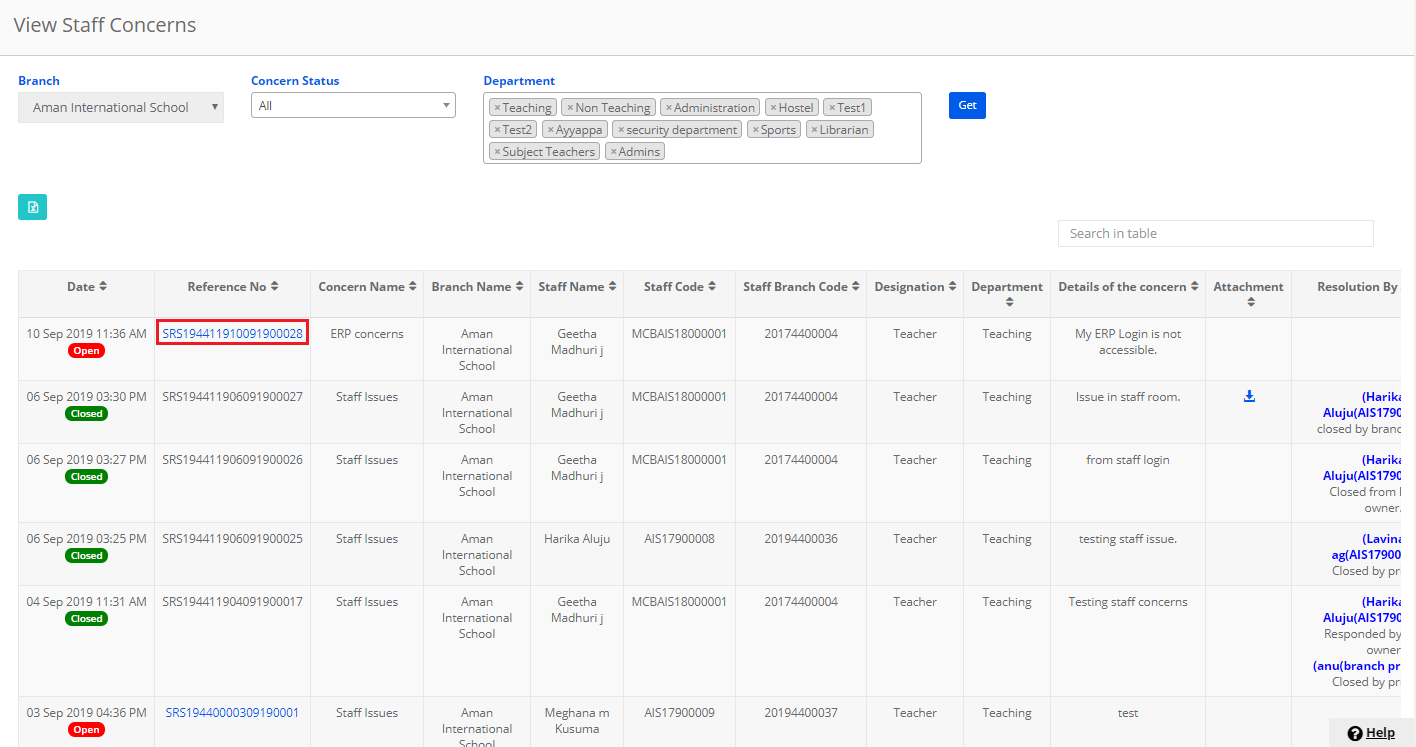
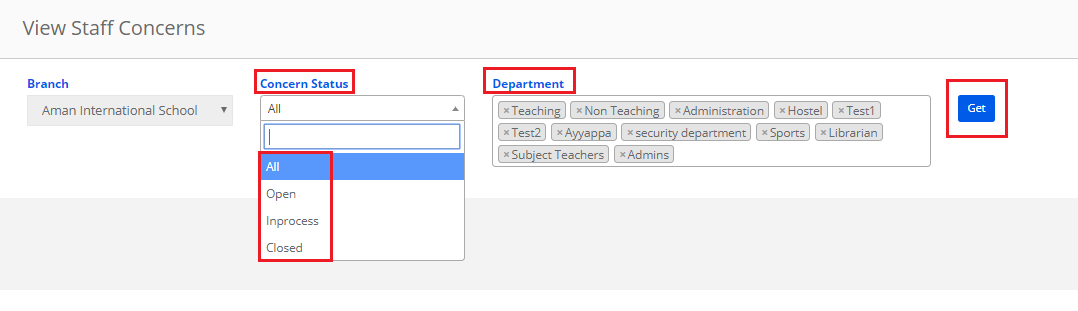
Step 18: Click on View Staff Concerns link to get the list of concerns submitted by the staff.

Step 19: Choose the concern status as ALL or a specific status, department as all or a specific department and click on Get button.

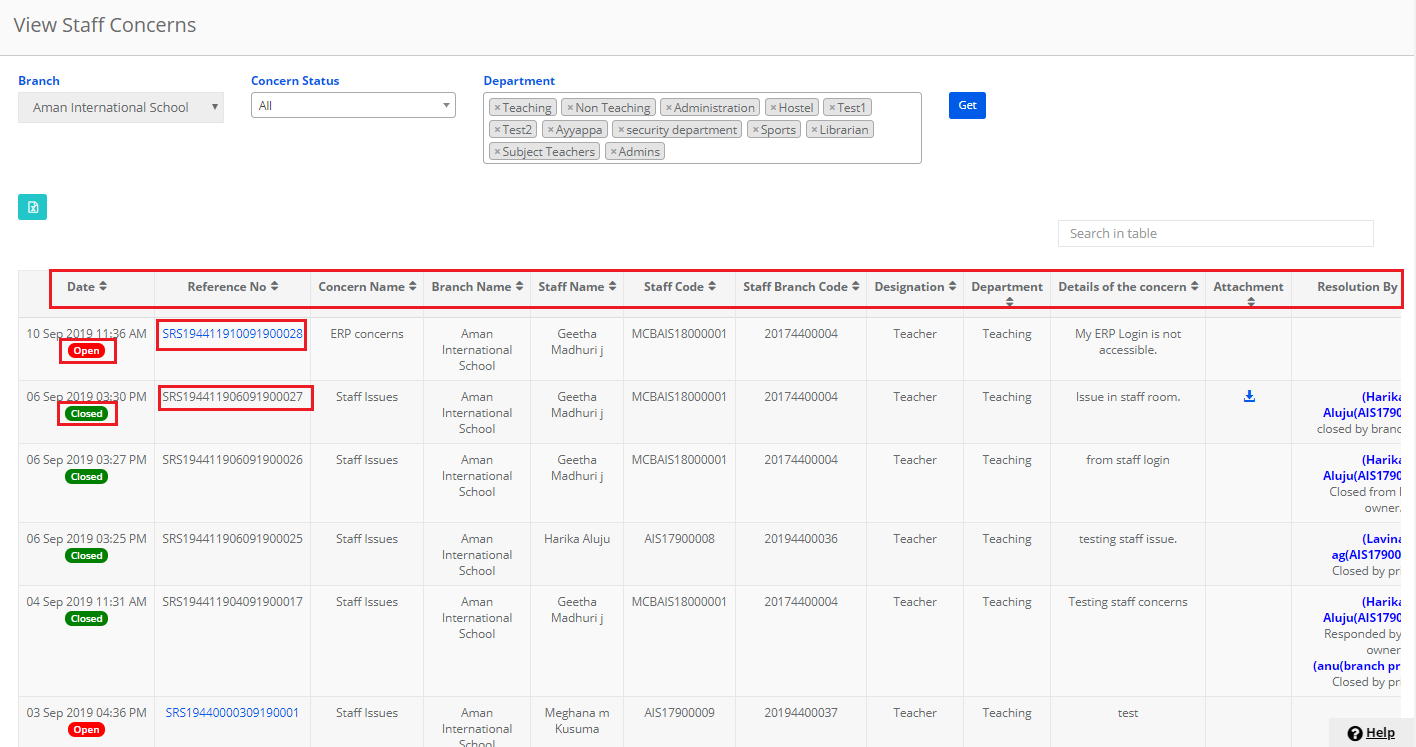
Step 20: You may note the concern details as displayed. Open concerns status is displayed in red, closed in green and in process in blue.
You can also export the details to excel by clicking on the Excel icon on the top left corner of the report.
Step 21: To act on the open concerns, click on the concern’s reference number. Please note that you can act on the concerns which are of open and in-process status.
Step 22: Go through the details of the concern, choose the status, enter the response and click on Submit button to save or Cancel button to revert. Please note that, once you close the concern, it cannot be opened.